What is Ironing and how does it work?
It is possible to use the Ironing tool starting from version 2.3.0 of Prusa Slicer. Ironing smooths flat top surfaces by running a special second infill phase at the same layer.
As the hot nozzle travels over the just printed top layer, it flattens any plastic that might have curled up. The nozzle also extrudes a small amount of filament to fill any holes in the top surface. The spacing between individual ironing passes is usually a fraction of the nozzle diameter. That means the nozzle will go over the same spot several times. Ironing is angled at a fixed 45 degrees compared to the first phase of normal top infill as this approach produces better results.
Downsides
The main downside is increased print time as the second phase of the top infill is performed with very small spacing between ironing lines. In the preview, it is possible to find how much print time will be spent on ironing.
If you're ironing a big surface area, on some machines you might experience heat creep and eventually, a clogged hotend because the extrusion is small and slow during ironing. This might be a problem mainly when printing with PLA, because of its low-temperature resistance. The risk is increased during summer heatwaves.
Another downside is that the edges will be a tiny bit fuzzy or less sharp. The ironing toolpath is planned for a small extrusion, but the nozzle is physically still the same size, so some plastic will bleed over the edge.
When to use ironing
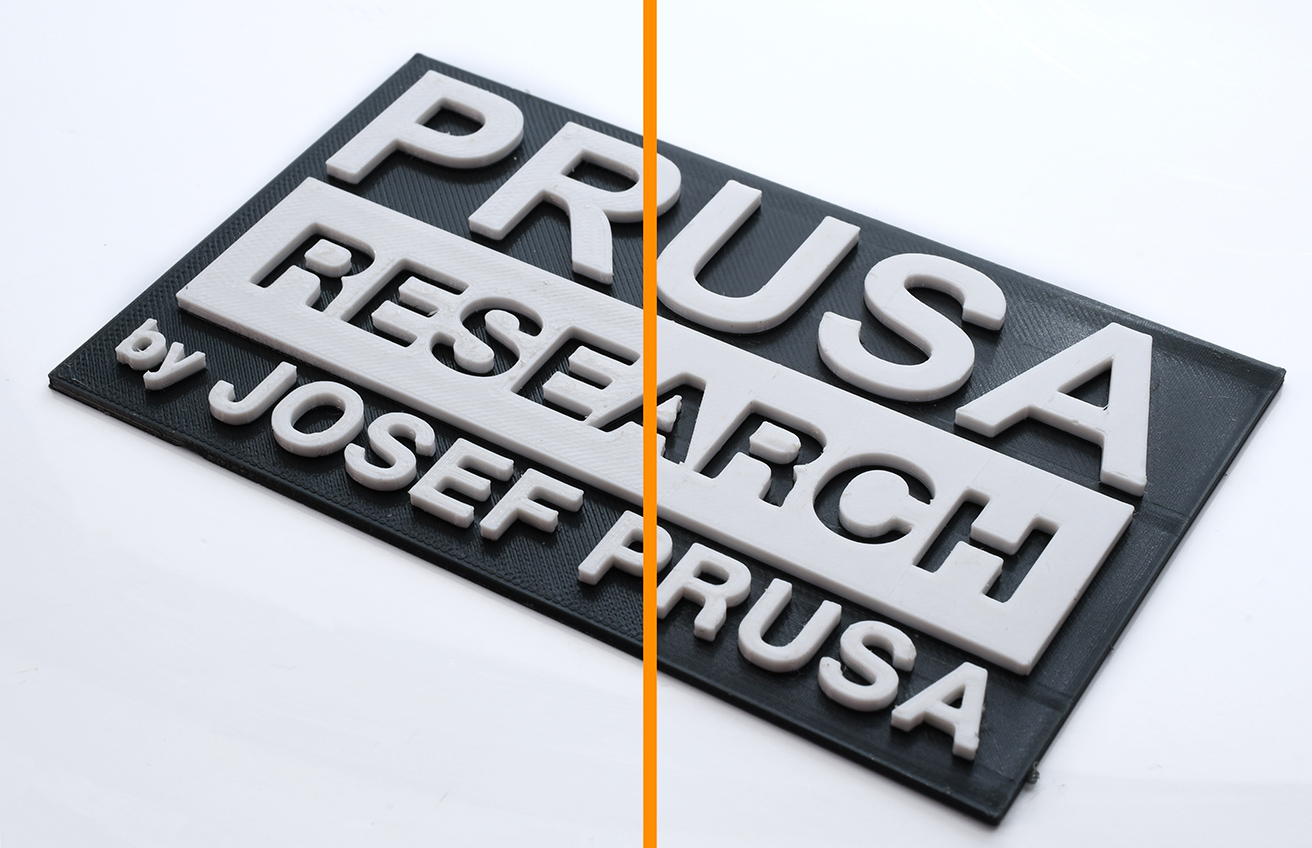
Ironing is useful for prints with flat top surfaces such as nameplates, logos, badges, boxes, lids, etc.
Ironing can also be useful when you want to glue two pieces together and need the surfaces to be as flat as possible so that the gap between them is minimized.

When not to use ironing
Ironing is not useful for round objects, figures, and organic shapes in general. It's also not useful for objects that do have flat areas, but these flat areas are not aligned parallel to the print bed. With that said, ironing will not have a significant negative impact when printing such models, it will just unnecessarily increase the print time.

Some models can be printed upside down. The bottom layer printed on the build plate will typically be even smoother than an ironed top layer. And you can imprint a texture into the print, depending on the print sheet that you use.
Monotonic infill is another feature, which improves the quality of top layers. Use it in combination with Ironing to get the best results. Original Prusa profiles have Monotonic infill already set as the default top layer pattern.
How to turn Ironing on
For all models
Ironing is not available in the Simple mode, so switch to Advanced or Expert mode. Then select Print settings -> Infill -> Ironing -> Enable Ironing.

For the selected model
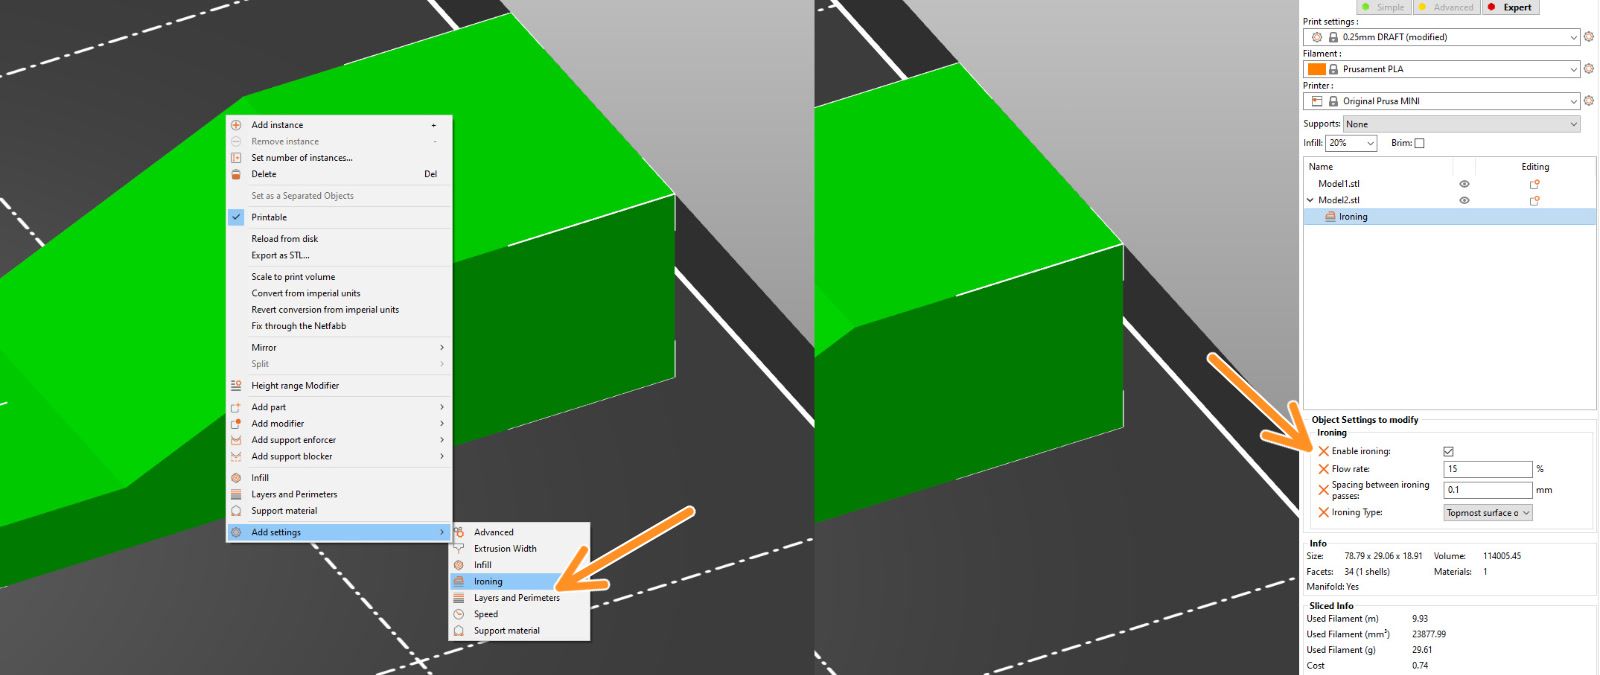
First, switch to the Expert mode, ironing for individual models is only enabled in this mode. Right-click on a model and select Add settings - Ironing from the context menu. Tick Enable ironing, optionally you can also select the rest of the ironing settings in order to customize them on a model-per-model basis. You can now change the ironing settings for this model using the right panel.
If you have several Instances of the same object on the build plate and you want to turn on Ironing just for one of them, you first have to right-click the model and pick Set as a separate object from the context menu. Otherwise, you'd turn it on for all instances, as they share all settings.
Modifiers
You can use Height range modifiers or Modifier meshes to turn on Ironing just for a part of a model (in the Expert mode).
Height range modifier
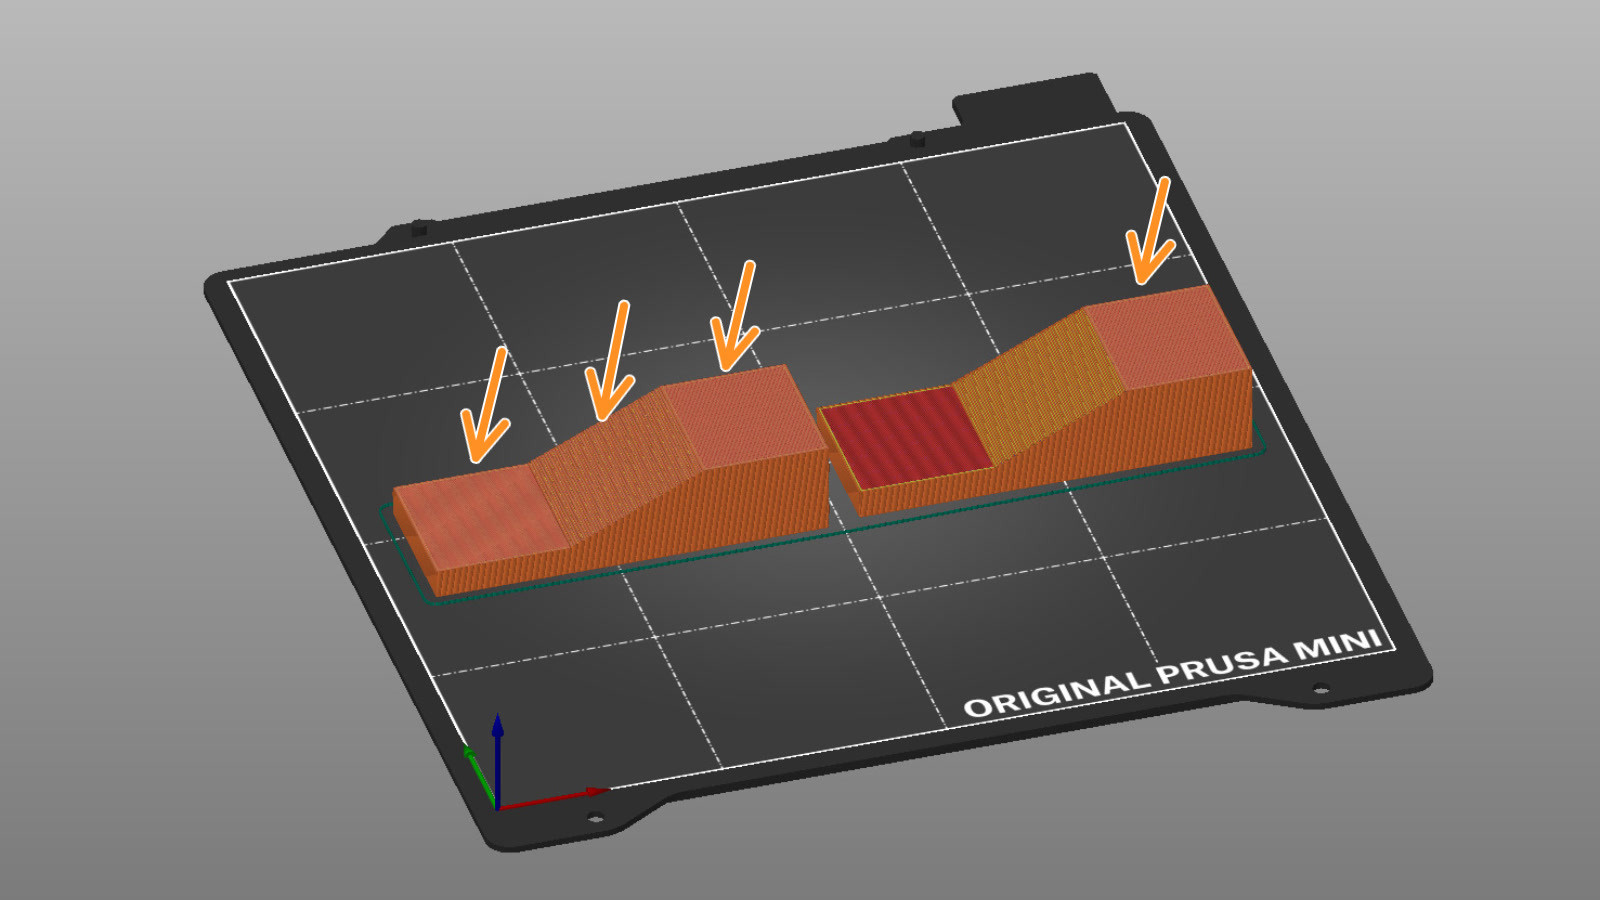
Because ironing works only on flat areas, it makes sense to use a height range modifier to specify a vertical interval, where ironing will be used.
- Right-click a model and select Height range modifier.
- Specify the Start height and Stop height in the right panel
- Right-click the cogwheel next to the height range modifier in the right panel
- Select Add settings - Ironing
- Tick Enable ironing, you can now toggle ironing on just for this part in the right panel
Modifier mesh
- Right-click a model and select Add modifier
- You can either use a basic shape (box, cylinder) or use Load... to import custom mesh as a modifier
- Position the modifier to overlap your desired part of a model
- Right-click the cogwheel next to the modifier in the right panel
- Select Add settings - Ironing
- Tick Enable ironing, you can now toggle ironing on just for this part in the right panel
Ironing type
All top surfaces
The nozzle will iron the top layer of each surface (the last layer of each flat area).
Topmost surface only
Only the very last layer of the object will be ironed. This means that in the case of an embossed text (oriented parallel to the print bed), only the top of the letters will be ironed, but not the space between the letters.
All solid surfaces
Every layer will get an ironing pass. This is an experimental feature meant to be used with 100% infill to create clearer transparent objects.
Flow rate
Percent of flow rate relative to the object's normal layer height.
Spacing between ironing passes
Distance between individual ironing lines. This value should be smaller than your nozzle diameter. Because of this, the nozzle will pass over the same spot several times.
Speed
This option is not grouped with the other Ironing settings. Instead, you'll find it in Print settings -> Speed -> Ironing. Feel free to experiment with this value, but generally, slower speeds work the best.
Calibration
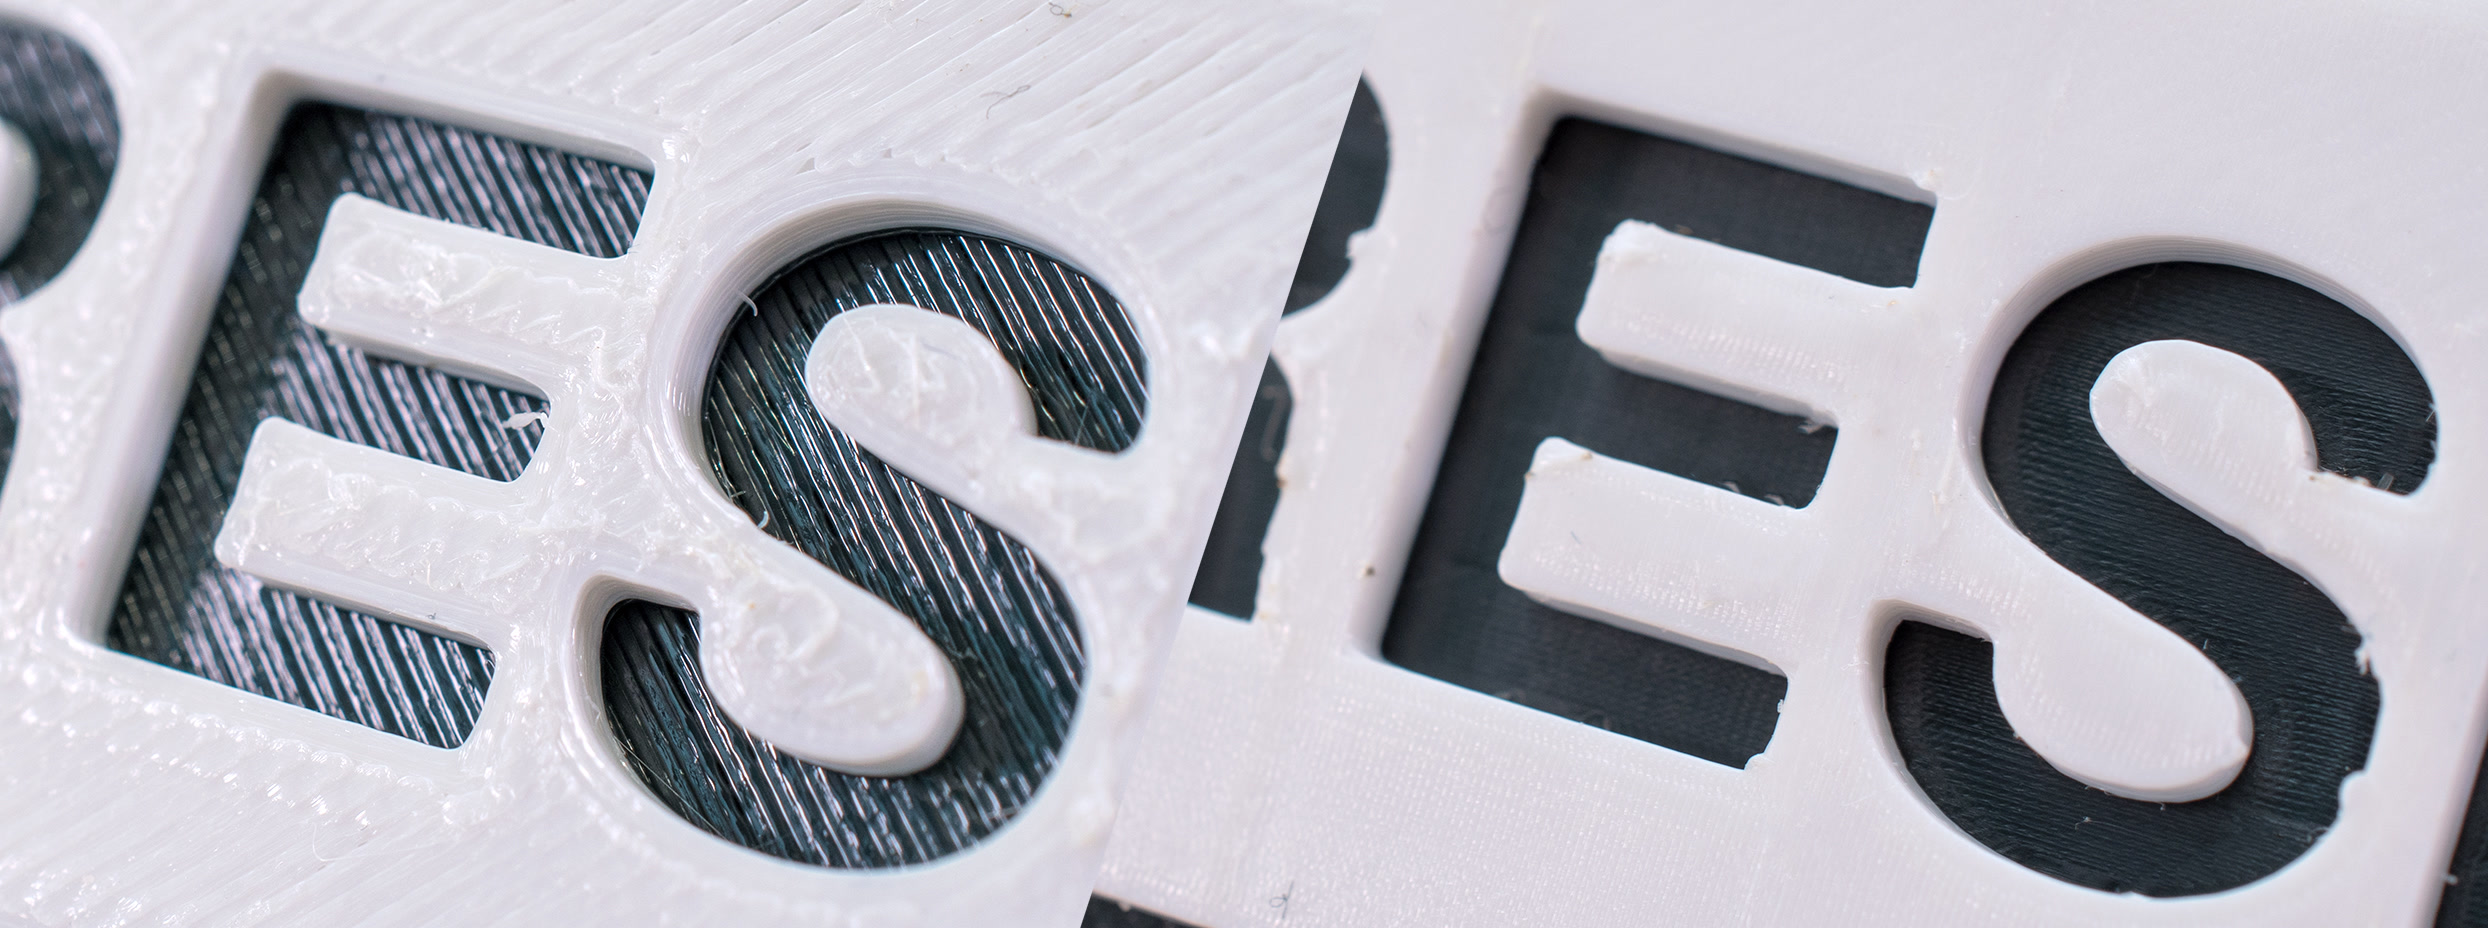
Ironing is very sensitive to accurate extruder calibration. Too little and shiny groves will be visible at the top layer, which will not be ironed. Too much and the excess plastic will be dragged by the nozzle to the edges of the top surface. So calibrating is a matter of trial and error. One may experiment with the ironing flow, speed, and spacing to achieve the best results.
Different materials
As far as settings go, they don't differentiate between various materials. However, ironing does perform slightly differently depending on the filament used.
PLA irons very nicely, however, it is most prone to heat creep (depending on your printer and ambient temperature).
PETG irons well, but there's an increased risk of extra filament sticking to the nozzle. This plastic might accumulate on the nozzle, get dark as it's overheated, and eventually attach to the print. The same goes for FLEX, but much more pronounced.
ASA irons incredibly well, producing super smooth top surfaces.
When we tried ironing wood-filled filaments, but we didn't achieve good results. But your experience may vary.
History
The Ironing idea was first proposed by the user "Neotko" on the Ultimaker community forum. Neotko prototyped "Neosanding" - a smoothing of top surfaces in Simplify3D by running a second infill phase at the same print height with zero or a tiny extrusion rate perpendicularly to the first infill run. The "Neosanding" was later integrated by Ultimaker into their Cura slicer. Kisslicer integrated Ironing with a small twist: The second phase is not perpendicular to the first phase, but at 45 degrees, which Jonathan, the author of Kisslicer validated to produce better results. PrusaSlicer implements Neotko's "Neosanding" at 45 degrees as in Kisslicer.
You can see the ironing pass on the right cube
12 comments
any advice to help with that issue ?
The test is fully parametric and customizable (in OpenSCAD, no design skills required), outputs the required modifiers, and as a bonus can also add a recycling symbol for the material used. There's a tutorial bundled on how to use the test, and some tips on things to look at based on my experience (and any input is welcome!)
Hi! When changing the PTFE tube on MINI, make sure the PTFE is pre-stressed by one full rotation of the fitting on top of the heatsink. Also, there should be a distance at least about 4.5mm between the top of the heaterblock and the heatsink.
Hi Pete, a larger flat area in the nozzle may result in other print artifacts such as leaving strings and blobs of filament by the sides of the perimeters.