Tisk s různými průměry trysek je experimentální pracovní postup, protože vyžaduje úpravu několika nastavení v profilech a některé kombinace trysek mohou být nekompatibilní, což může způsobit neúspěšné tisky. Rádi bychom však tuto možnost otevřeli zkušeným uživatelům a vývojářům. Těšíme se na sběr vašich připomínek, abychom mohli tuto funkci vylepšit a pokračovat v jejím vývoji.
Vzhledem k tomu, že se jedná o náročný proces, bude v tomto článku vysvětleno, jak tisknout s různými průměry trysek na příkladu krok za krokem. Použili jsme:
- Tiskárna: XL 5T – použití dvou nástrojů
- Trysky: Nástroj 1: 0,25 mm, Nástroj 2: 0,6 mm
- Použití: Tryska 0,25 mm pro perimetry a nosné konstrukce, tryska 0,6 mm pro výplň objektu
- Podpěry: organické
Než začneme
Výměnu trysek na tiskárně XL proveďte podle návodu k obsluze. Jak vyměnit trysku Prusa (XL multi-tool). Chcete-li dosáhnout úspěšného tisku, doporučujeme provést Kalibrace offsetu nástroje, kterou naleznete v nabídce tiskárny v Ovládání -> Kalibrace & Testy.
Manipulace s profily
Výběr správného profilu
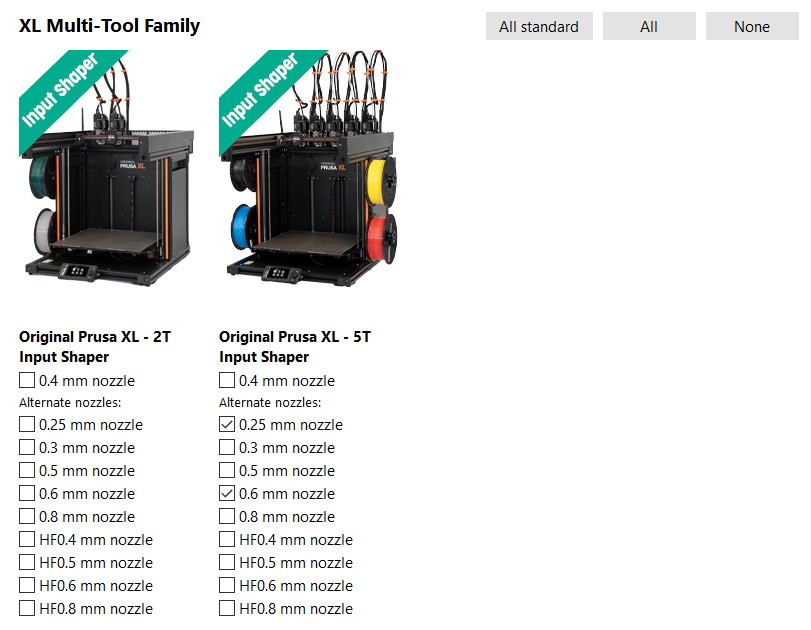
Přepínání mezi dostupnými profily proveďte přes Průvodce (Konfigurace -> Průvodce konfigurací -> Prusa Research) a vyberte tiskárny s tryskami, které chcete použít. Viz příklad níže, kde jsou vybrány použité trysky 0,25 mm a 0,6 mm.
Změny nastavení tisku
Kombinace výplní
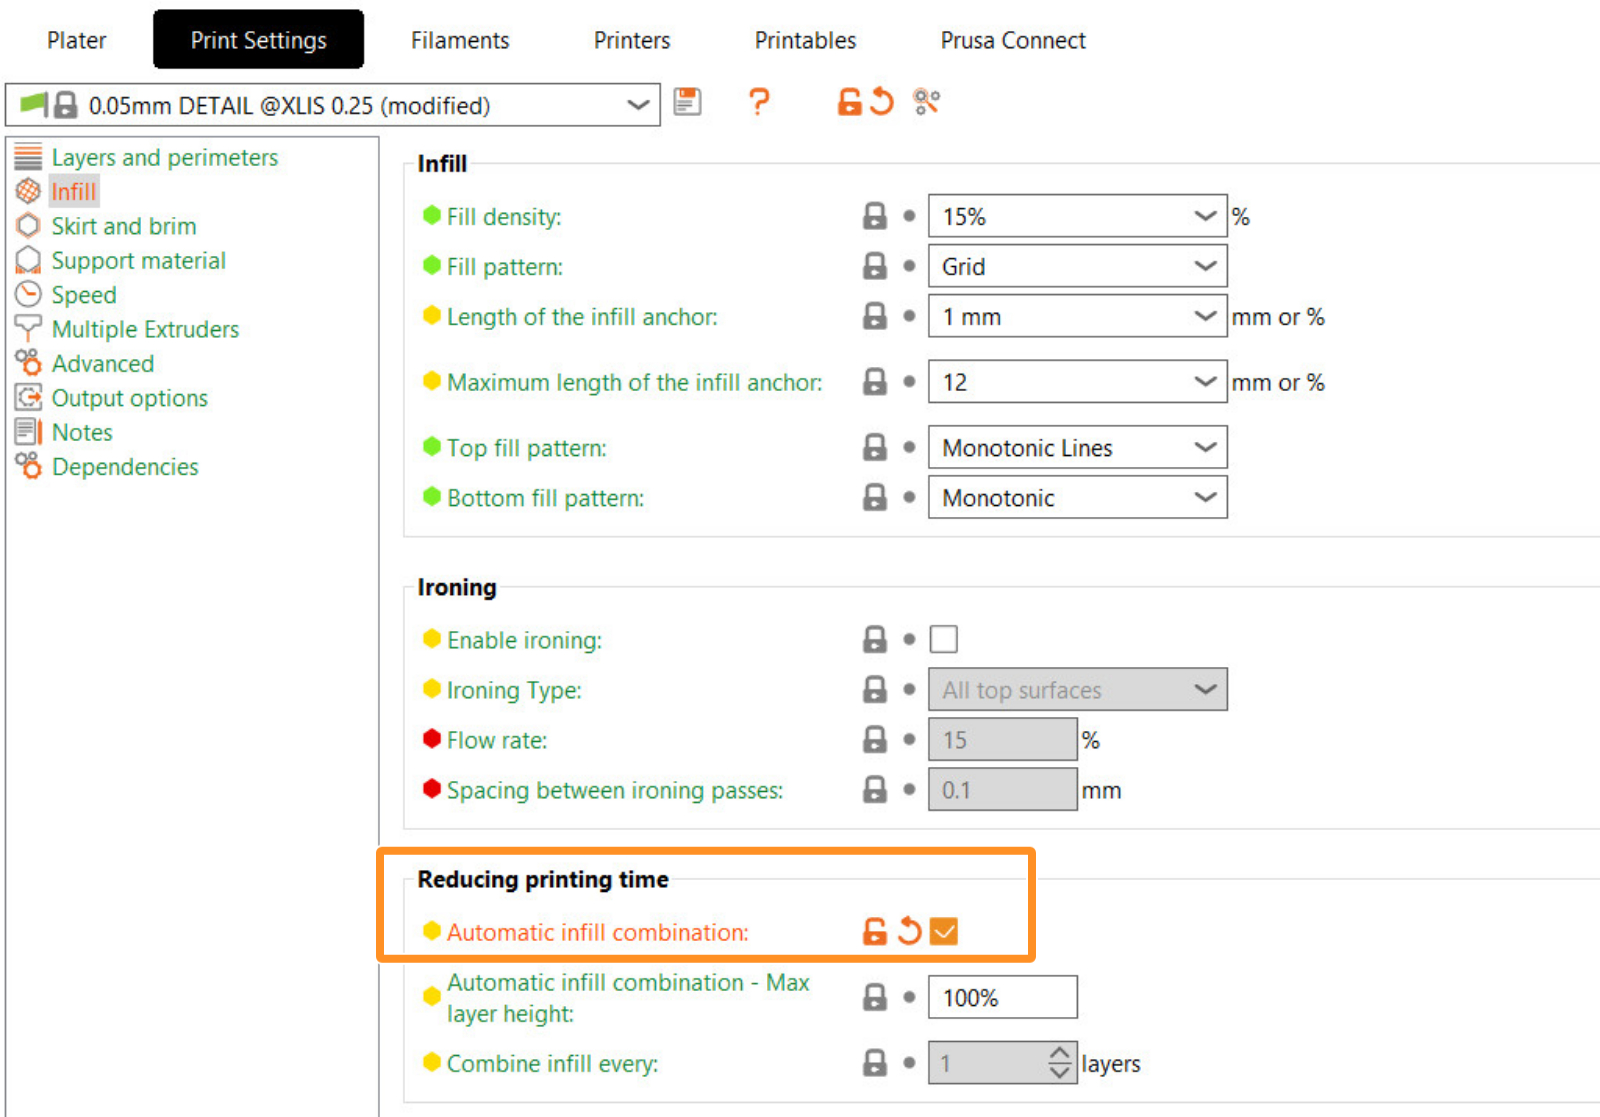
V některých případech použití může být při tisku s různými průměry trysek užitečné tisknout výplň každou n-tou vrstvu, typicky když se výplň tiskne s větší tryskou. Pro pokrytí těchto scénářů můžete nastavit ručně (infill_every_layers) nebo přepnout na automatické kombinování výplní (Nastavení tisku -> Výplň -> Automatické kombinování výplně).
Povolit podpěry
Povolte podpěty v Nastavení tisku -> Podpěry -> Generovat podpěry. V nabídce Styl vyberte Organické.
Při tisku s různými tryskami je rozhodující kompatibilita podpěr s čistící věží a možnost volby extruderu podpěr. Proto důrazně doporučujeme používat organické podpěry. Organické podpěry synchronizují vrstvy s objektem, což značně zjednodušuje práci. To umožňuje zvolit extruder podpůrného materiálu a zároveň mít aktivní čistící věž.

Přiřazení extruderů
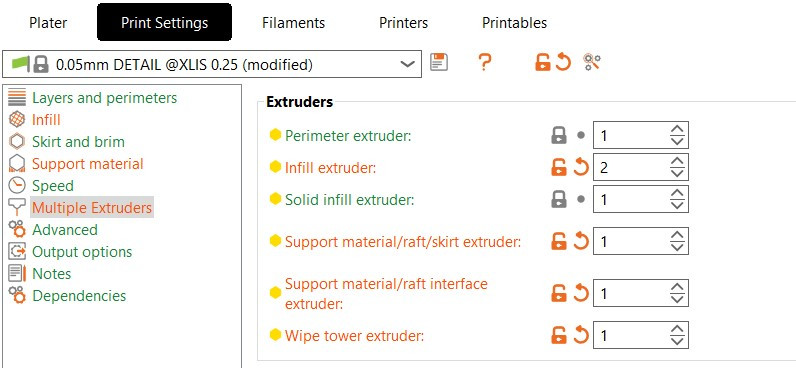
Chcete-li přiřadit extrudery konkrétním prvkům tištěného modelu v rámci celého projektu, přejděte na stránku Nastavení tisku -> Více Extruderů -> Extrudery, a přiřaďte čísla extruderů na základě případu použití. V našem příkladu používáme:
- Obvodový extruder je nastaven na Extruder 1, aby bylo dosaženo detailního povrchu modelu.
- Extrudér výplně je nastaven na Extruder 2, protože chceme, aby výplň byla hrubá.
- Extruder pro podpěry/raft/obrys je nastaven na Extruder 1.
- Kontaktní podpěry/raft extruder je nastaven na Extruder 1.
- Extruder čistící věže je nastaven na Extruder 1.
Toto nastavení zajišťuje, že se podpěry se tisknou pomocí jediného extrudéru. Konkrétně pro podpěry je zvolena jediná šířka extruze pro celou konstrukci a její šířka vychází z minimálního průměru trysky. Pokud ponecháte šířku extruze na nule, mohly by všechny extrudery tisknout na podpěry a mohlo by dojít k nedostatečné extruzi s většími tryskami.
Šířky extruze
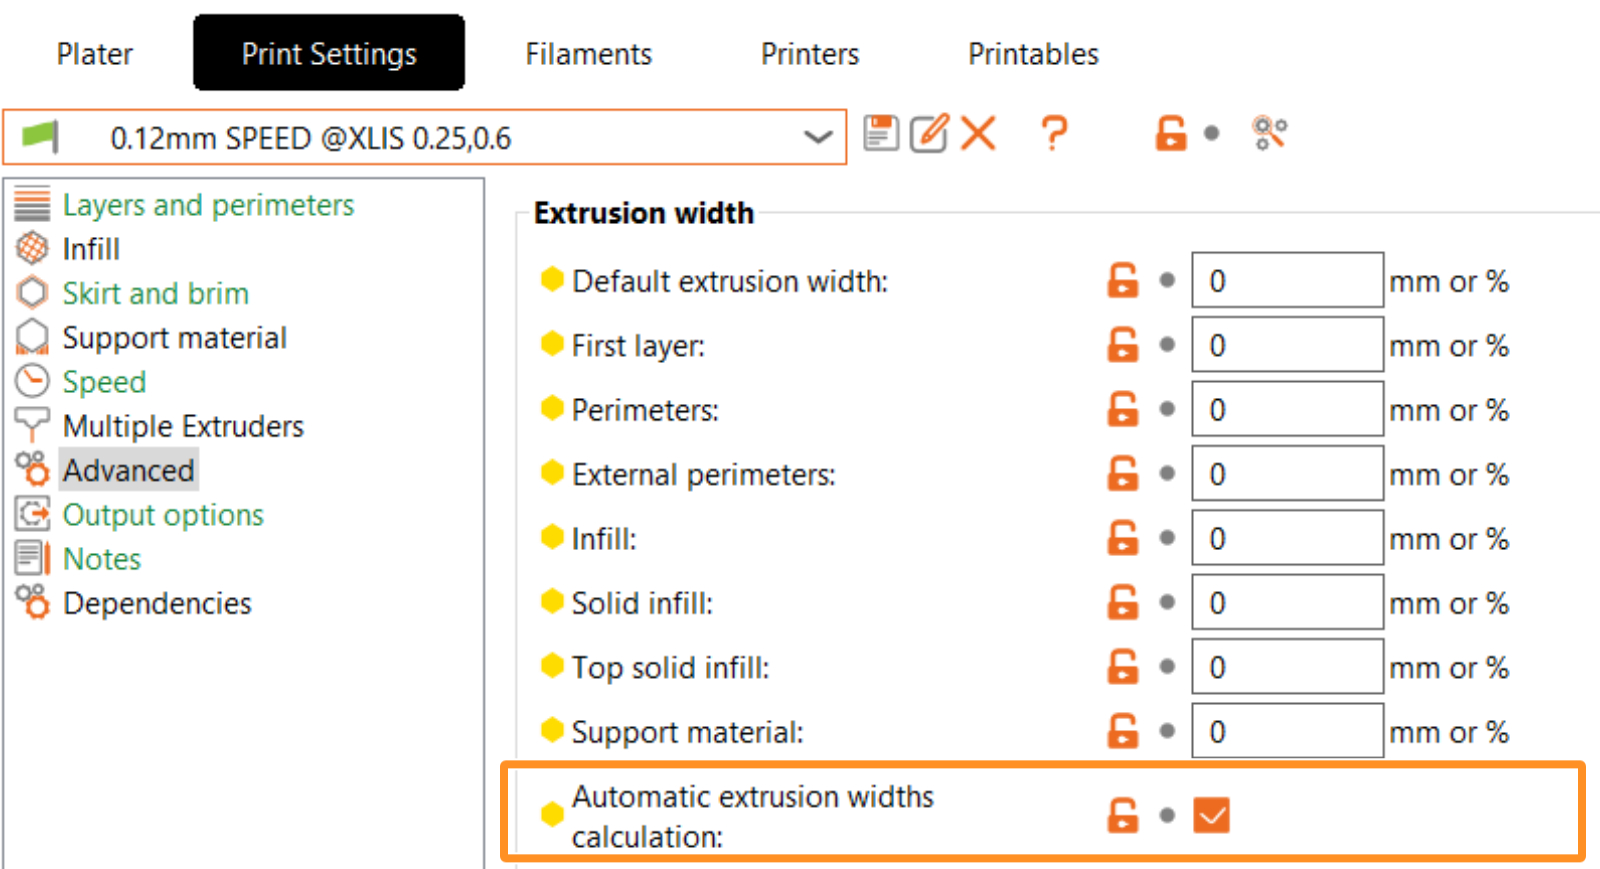
Pro dosažení správné šířky extruze při použití různých průměrů trysek pro konkrétní prvky modelu poskytujeme automatický výpočet šířky extruze. (Nastavení tisku -> Pokročilé -> Automatický výpočet šířek extruze). Pokud je tato možnost povolena, zobrazí se okno s upozorněním, že šířky extruze budou automaticky nastaveny na nulu a systém je vypočítá na základě aktuálně použitých průměrů trysek..
Správa stavu kompatibilních tiskáren
Tento krok je volitelný, ale je možné upravit podmínky tisku výchozího profilu pro flexibilnější zacházení s tiskovým profilem. To umožňuje sdílet nastavení se všemi tiskárnami XL (profily tiskáren). Za tímto účelem přejděte na stránku Nastavení tisku - Závislosti -> Stav kompatibilních tiskáren. Změnili jsme ho z "printer_notes=~/.*XLIS.*/ and nozzle_diameter[0]==0.25" na "printer_notes=~/.*XLIS.*/"
Všimněte si, že profily pro různé průměry trysek mohou mít různé parametry. Pokud chcete tento profil použít k jinému účelu, nezapomeňte zkontrolovat, zda se parametry vašeho vlastního profilu liší od výchozího profilu. Rozhodující mohou být například parametry jako rychlost a zrychlení, ale lišit se mohou i další nastavení.
Poté můžete uložit profil nastavení tisku. Zobrazí se jako uživatelská předvolba.
Poznámka k čistící věži
Na základě základních testů lze říci, že čistící věž zvládá tisk s různými průměry trysek, ale nemůžeme zaručit úspěšný tisk při všech možných kombinacích nastavení. Proto zůstává upozornění aktivní.

Změny nastavení tiskárny
Chcete-li nakonfigurovat vlastní nastavení hardwaru průměru trysky, přejděte na stránku Tiskárny - Extruder #. V odpovídajících extruderech nastavte průměr trysky. Důrazně také doporučujeme změnit minimální a maximální limity výšky vrstvy u příslušných extruderů. Tím se omezí rozsah kompatibilních tiskových profilů na základě hodnot minimální a maximální výšky vrstvy. Extruder 1 jsme ponechali se zvolenou tryskou 0,25 mm a u extruderu 2 jsme změnili hodnotu na 0,6 mm.
 |  |
Nekompatibilní profily filamentu
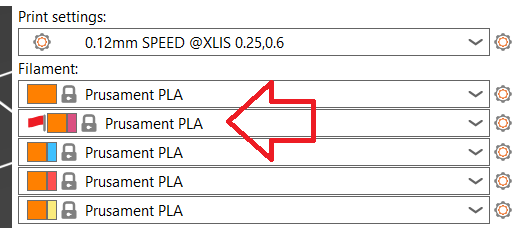
Při změnách profilů tiskárny, zejména v důsledku změny trysky, se nekompatibilní profily filamentu zobrazí s červenou vlaječkou. Pro zajištění správné funkčnosti je důležité vybrat profily bez červených vlaječek.
2 komentáře