DE
  • English
Login

First print i3 Plus LCD/SD

First print i3 Plus LCD/SD
Relevant für:
Zuletzt aktualisiert a year ago
First print i3 Plus LCD/SD
 Schwierigkeit
Mittel
 Schritte
7
 Verfügbare Sprachen
EN
Plug in the printer
Plug in the printer
Plug in the printer
Plug in the printer
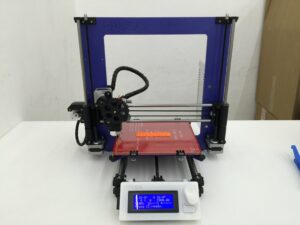
Plug-in the printer. If display is on, everything is fine ;-)
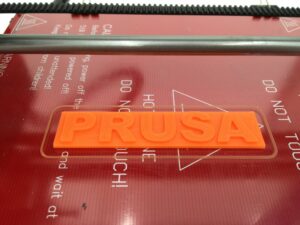
Notice the squished filament line around the PRUSA logo. This is the right amount of compression for the first layer.
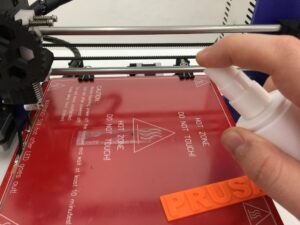
Prepare the printbed.
Spool holder
Spool holder
Spool holder
Snap the filament holder arms on the printer as seen on picture.
Put the filament spool in by spreading the arms a bit.
Filament must go towards you on the top side.
Check if the filament is not coming out of the sides of the spool, if so, snip it.
Preheat the printer
Preheat the printer
Preheat for ABS first as we test the printer with ABS. For later prints you can use preheat for PLA.
Wait for the printer to heat up.
Filament change
On heated printer, grab the filament poking out of the extruder and with your other had rotate the big gear counter-clockwise until it completely comes out.
Insert the end of the material into the hole and push while rotating the big gear clockwise until you see a little extrusion at the nozzle tip.
Always check if the filament has nice sharp edge on the end for smooth insertion.
This can be done with software, but by using your hand you can easily feel if the filament extrudes smoothly.
Clean the nozzle
Clean the nozzle before printing from any extrusion. I used the test logo print.
Check the first layer
Printer will make a thick line on the side. This equalises the flow of plastic.
Then printer will print so-called 'skirt' around. If it is nicely squished, you've done your calibration right!
First layer is cruical so always watch the printer if the first layer is printed correctly.
War diese Anleitung hilfreich?

Kommentare

Sie haben noch Fragen?

Sie haben noch Fragen?

Wenn Sie eine Frage zu etwas haben, das hier nicht behandelt wird, sehen Sie sich unsere zusätzlichen Ressourcen an.
Und wenn das nicht ausreicht, können Sie über die Schaltfläche unten oder an die [email protected] eine Anfrage senden.

Kontakt