プリンターのスイッチが切られており、電源ケーブルが差し込まれていないことを確認してください。
エクストルーダーを動かしている間は、X軸 モーターは発電機として働きます。これにより、少量ながら電気が作り出され、LCDが点滅することがあります。エクストルーダーはできる限りゆっくりと動かし、今回以降は必ずプリンターのコントロール機能を使用するようにしてください。
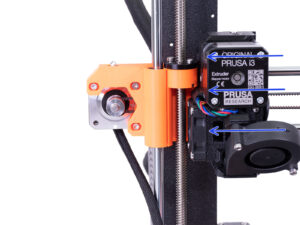
⬢エクストルーダーを、手で一番左まで動かします。
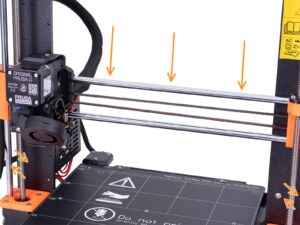
⬢Z軸の 両方 の台形ネジを同時に回転させて、ヒートベッドに当たるまでノズルを移動します。それぞれのロッドは均等に回してください!
Check again from a different angle that the nozzle is touching the heated slightly. Don't bend the heatbed!
Don't place the steel sheet onto the heatbed during the entire SuperPINDA sensor adjustment process. Wait for the XYZ calibration.