JA
  • English
  • Čeština
  • Español
  • Italiano
  • Deutsch
  • Polski
  • Français
Login

Wi-Fi と PrusaLink のセットアップ方法(MINI+)

Wi-Fi と PrusaLink のセットアップ方法(MINI+)

Wi-Fi と PrusaLink のセットアップ方法(MINI+)
Relevant for:
Last updated 2 months ago
Wi-Fi と PrusaLink のセットアップ方法(MINI+)
 Difficulty
Moderate
 Steps
26
 Available languages
ENCSPLDEESITFR

Step 1 はじめに

はじめに
はじめに
はじめに
このガイドでは、Original Prusa MINI/MINI+へのWi-Fiモジュールのインストールと設定方法について説明します。
Wi-Fi runs on firmware 4.4.0 or higher.
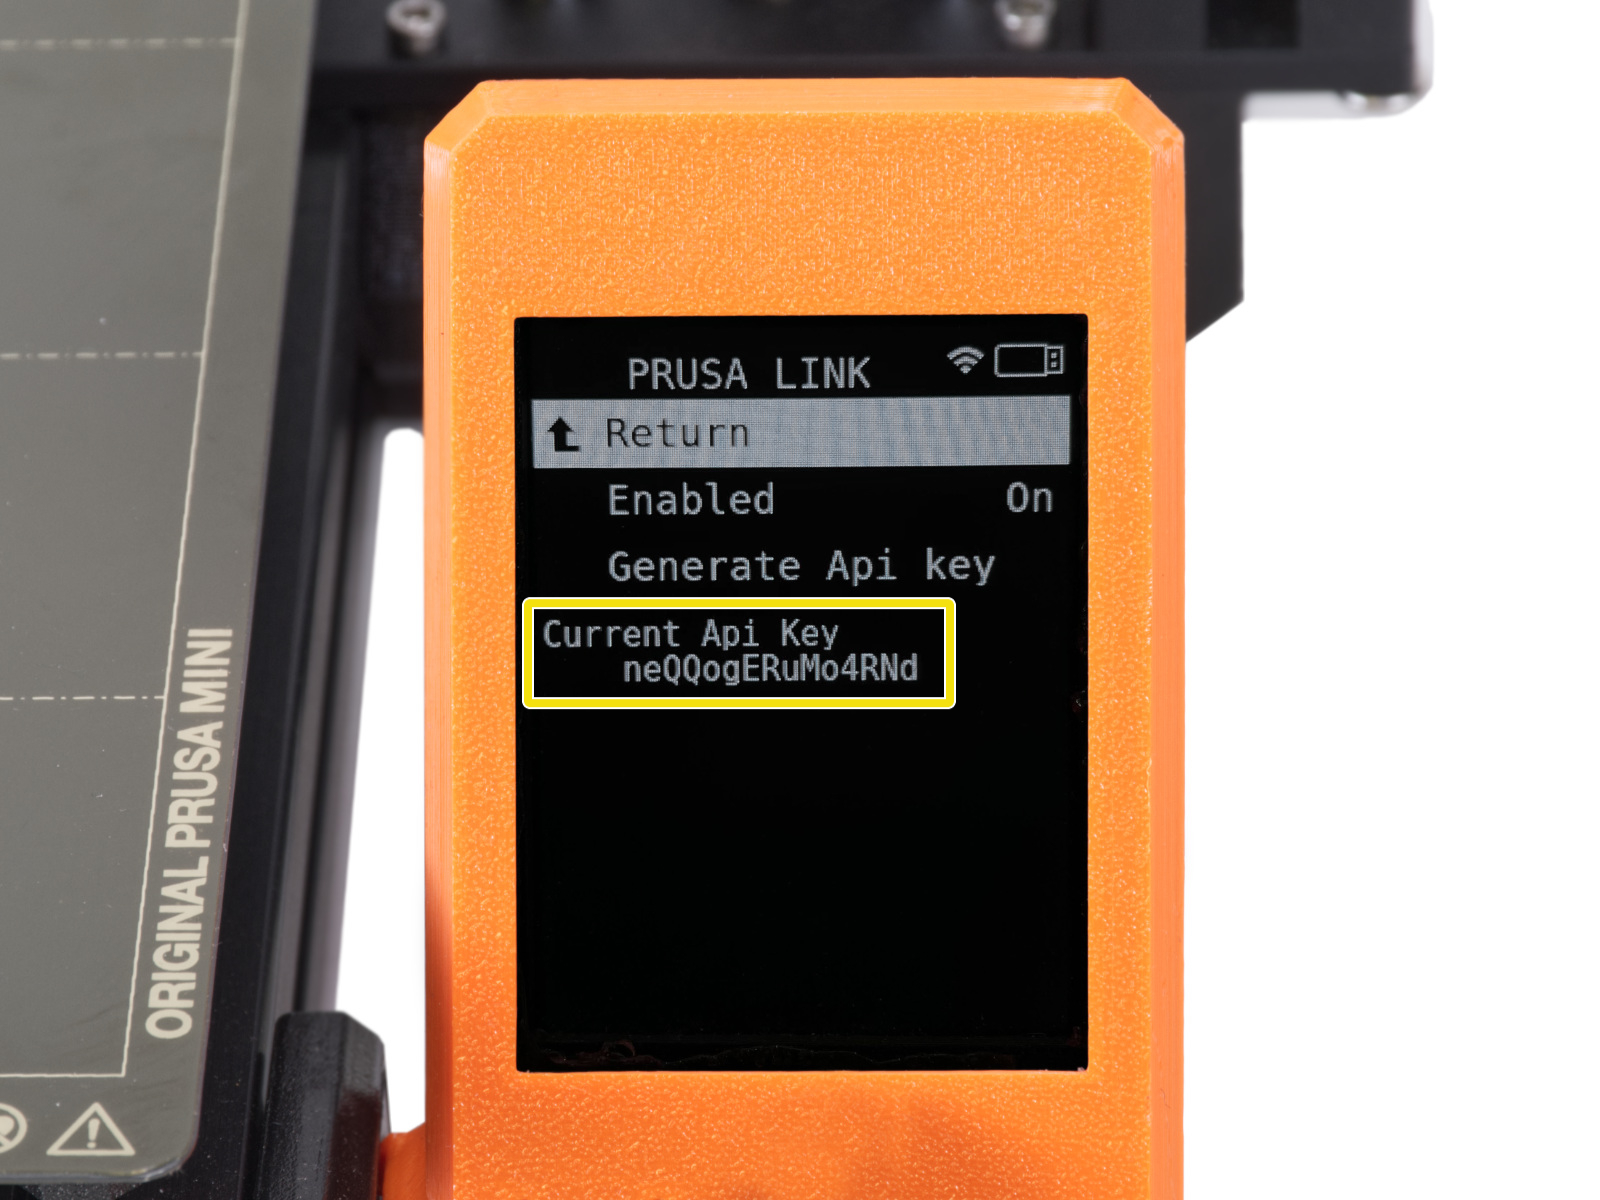
See the PrusaLink and Prusa Connect article for more information about these services.

Step 2 Wi-Fi(ESP)モジュールの入手

Wi-Fi(ESP)モジュールの入手
Wi-Fi(ESP)モジュールの入手
Wi-Fiを動作させるためには、ESP Wi-Fiモジュールを入手する必要があります。具体的には、ESP8266をベースにしたESP-01SまたはESP-01です。
フラッシュメモリー1MB以上のバージョンを購入することをお勧めします。
You can purchase the Wi-Fi module:
directly on the Prusa e-shop
Wi-Fiモジュールには複数の製造元があります。購入する前に、コミュニティが管理するこの表でレビューを確認することができます。

Step 4 電装ボックスを開けます。

電装ボックスを開けます。
電装ボックスを開けます。
電装ボックスを開けます。
プリンタが故障しないよう、電源プラグを抜いてください。
電装ボックス上のM3ネジを緩めて外します。
プリントされたケーブルカバーを取り外します。

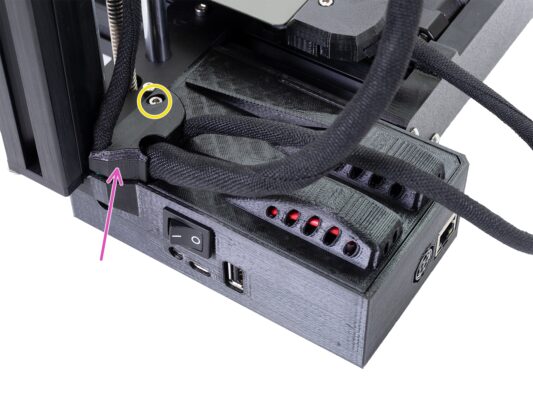
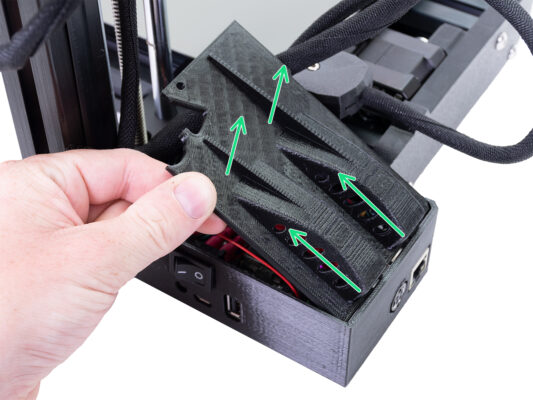
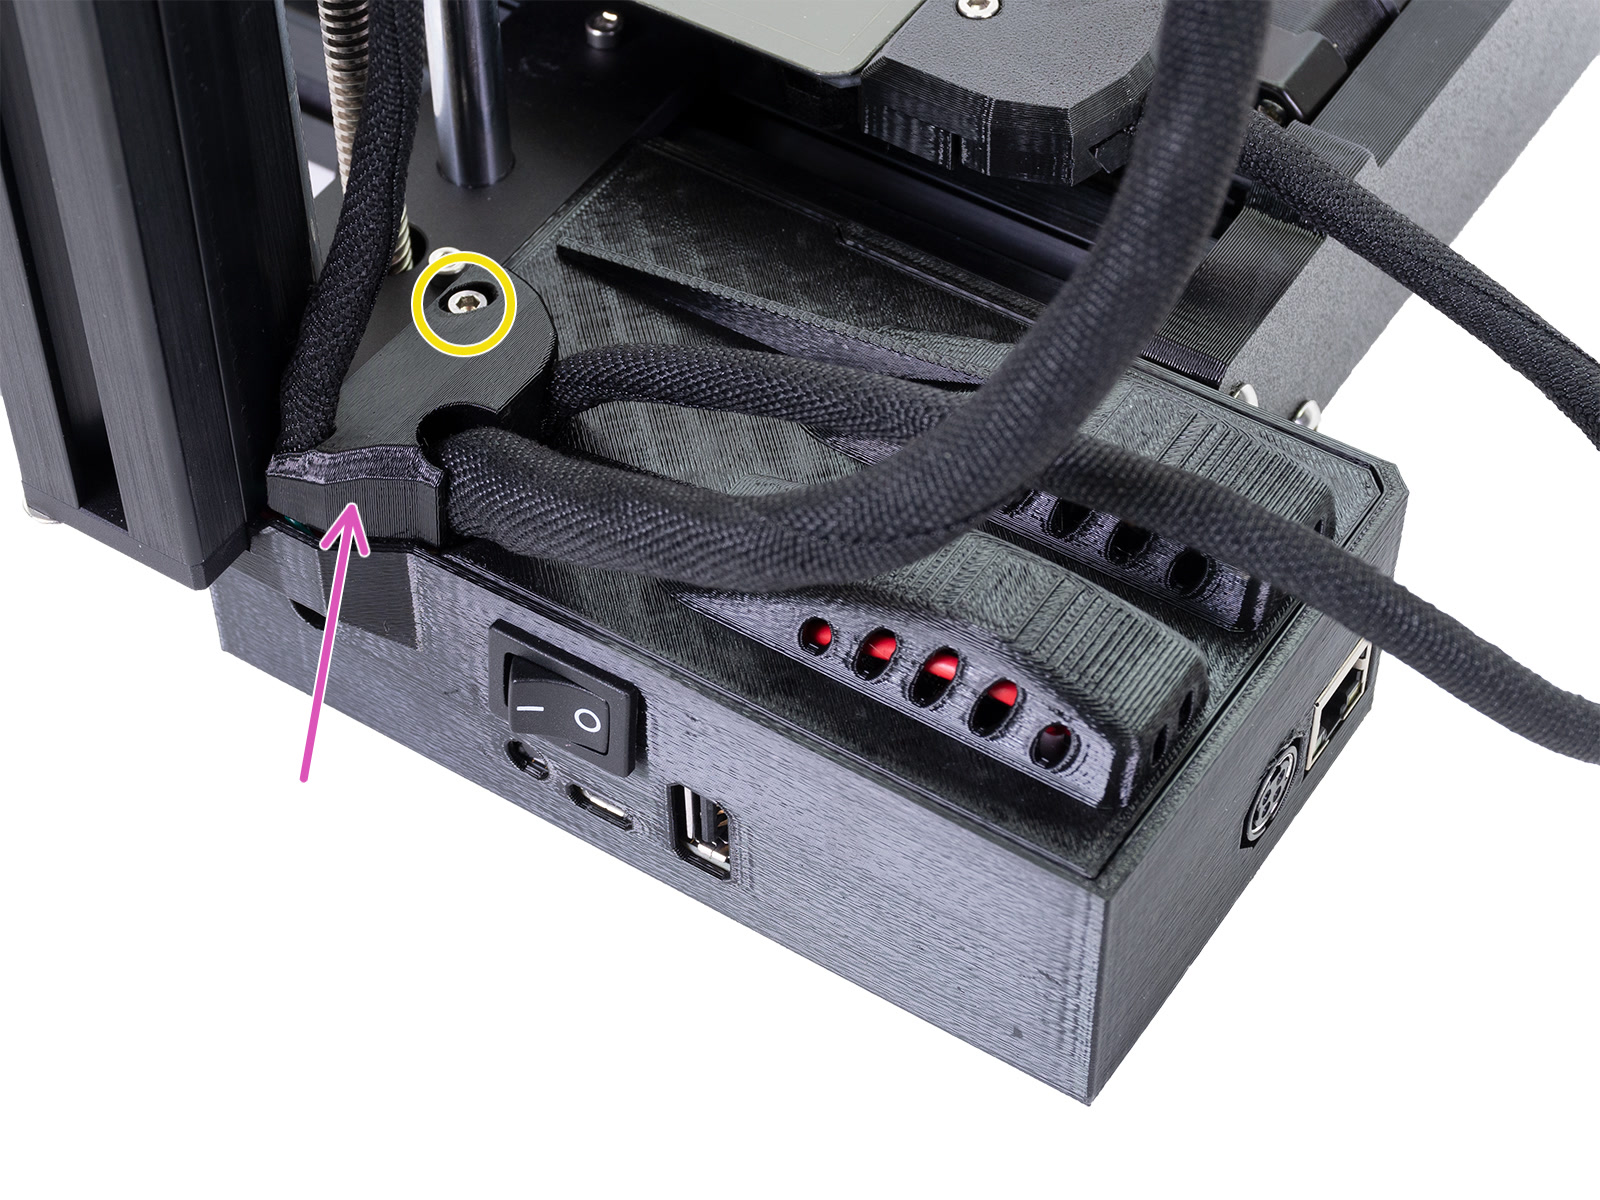
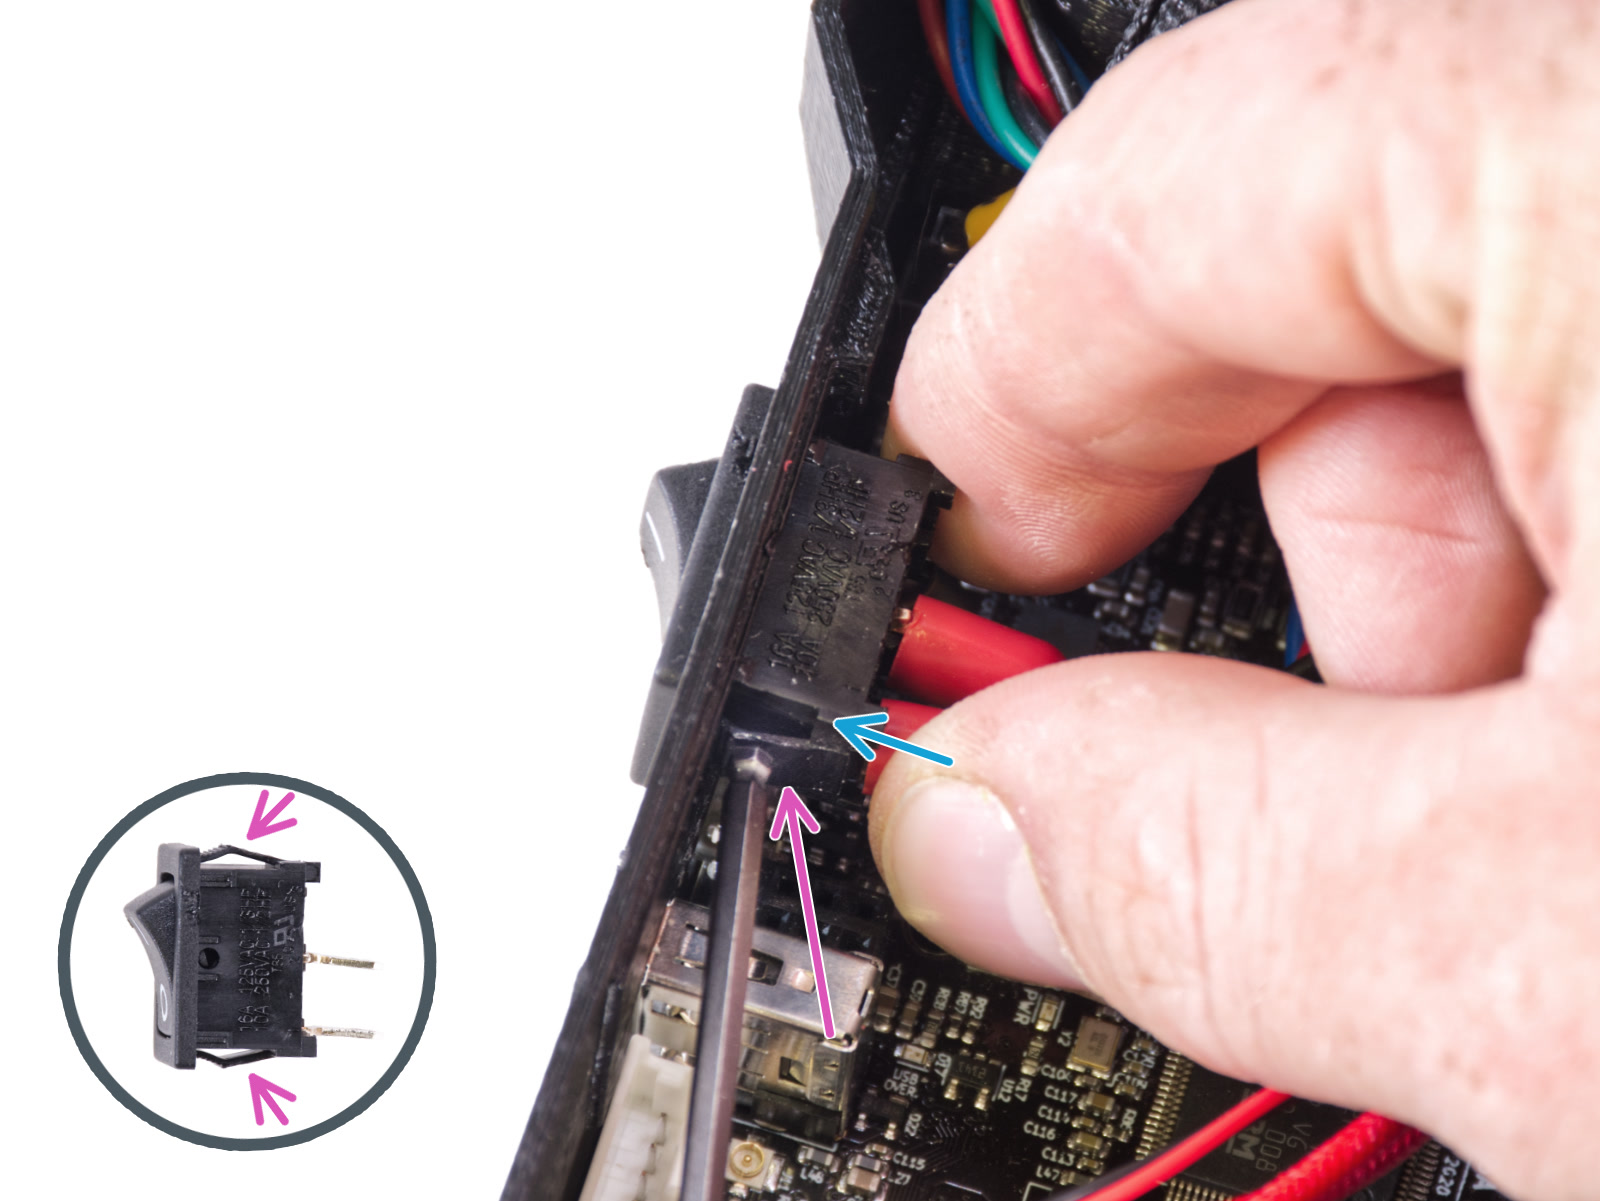
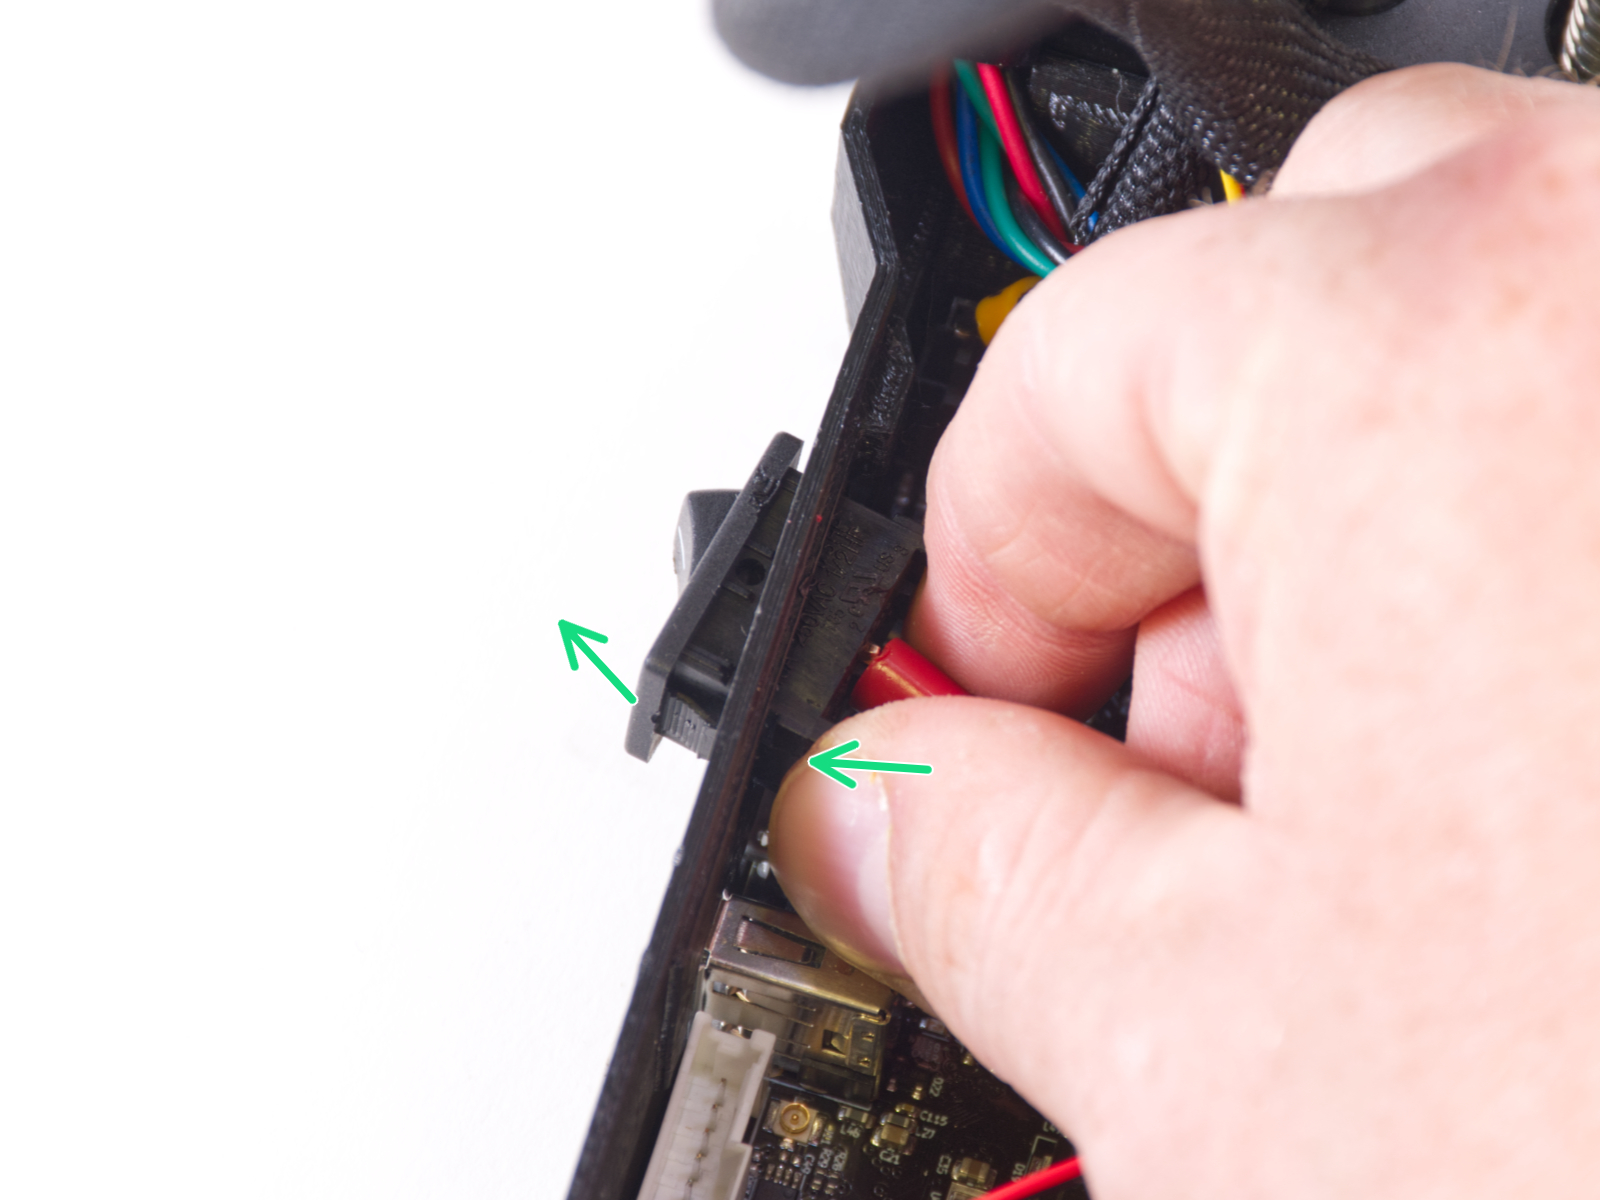
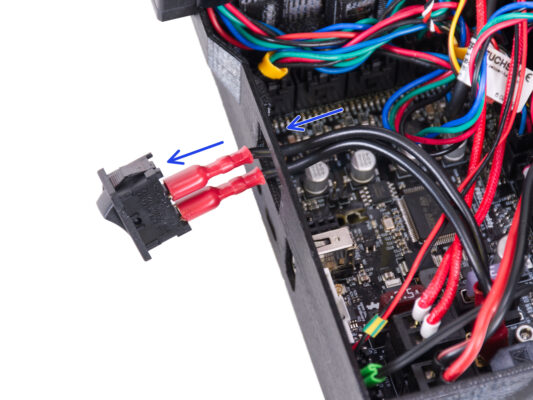
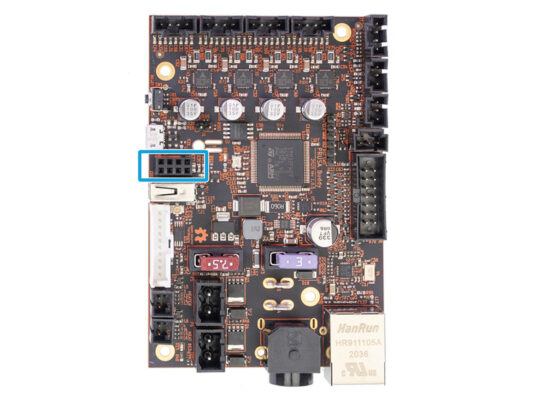
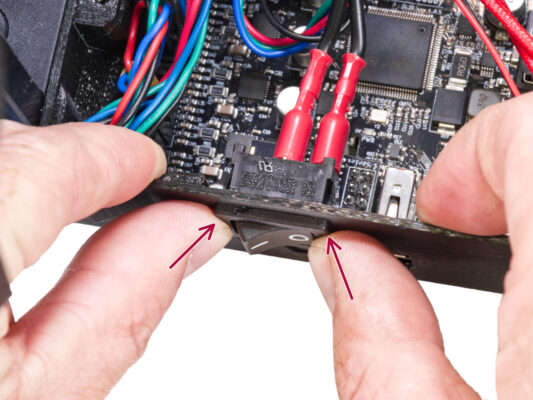
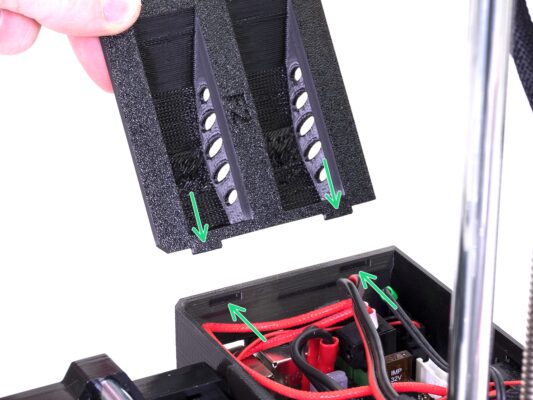
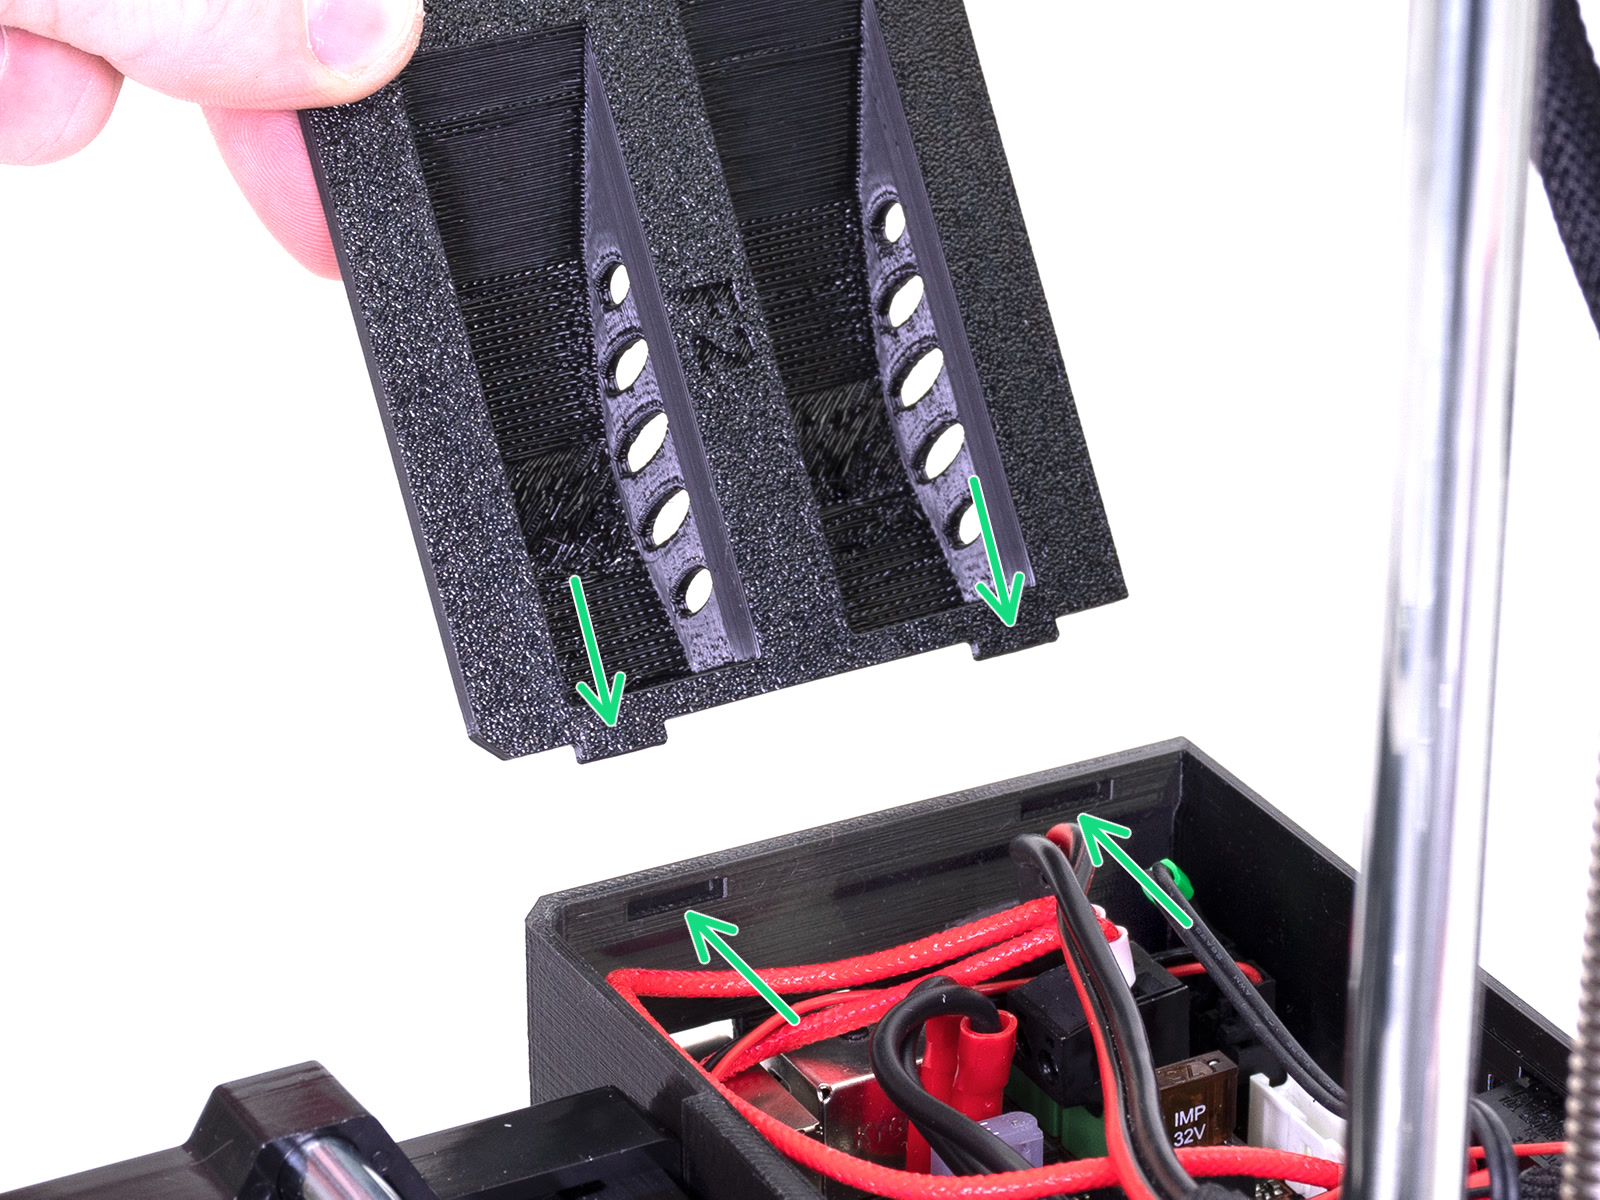
電子機器カバーを少し持ち上げてください。その後、手前に引いてプリンタから取り外してください。

Step 5 電子部品の確認

電子部品の確認
電子部品の確認
Wi-Fi機能は、Buddyコントロールボードのすべてのバージョンでサポートされています。ただし、バージョン番号を紙に書き留めておいてください。何か問題が発生した場合には、この詳細をお知らせください。
Buddyコントロールボードをよく見て、どのバージョンかを確認してください。

Step 6 電源スイッチを取り外す

電源スイッチを取り外す
電源スイッチを取り外す
電源スイッチを取り外す
電源スイッチを取り外す
注意:電源スイッチの取り外しは、プリントの公差が厳しいため、根気よく行う必要があるかもしれません。時間をかけて慎重に作業してください。防護ゴーグルをかけることをお勧めします。
電源スイッチの側面には、2つの安全ラッチがあります。六角レンチを使って、1つ目のラッチを「USB側」から押してください。
ラッチを押しながら、電源スイッチの「USB側」を箱から押し出します。
電源スイッチを押し、押されたラッチがある側を外に出すように傾けてください。
電源スイッチの反対側にある2つ目のラッチを押してください。
電装ボックスから電源スイッチを出します。
また、ラジオペンチでラッチを絞ることもできます。

Step 7 電源スイッチを取り外す

電源スイッチを取り外す
電源スイッチを取り外す
電源ケーブルを穴に通し、電装ボックスの外に押し出しますこれにより、取り付けの際にケーブルがESPモジュールに干渉するのを防ぐことができます。

Step 8 ESPモジュールの取り付け:部品の準備

ESPモジュールの取り付け:部品の準備
ESPモジュールの取り付け:部品の準備
ESPモジュールの取り付け:部品の準備
以下のステップに向けて、下記の部品を用意してください。
ESP Wi-Fi モジュール (1個)
ESD (Electrostatic discharge) 手袋の使用をお勧めします。ESPモジュールは必ず端を持ってください。
10MB以上の空き容量のあるUSBドライブ(1個)

Step 9 ESPモジュールの取り付け

ESPモジュールの取り付け
ESPモジュールの取り付け
ESPモジュールの取り付け
ESPモジュールの取り付け
Buddyボードの8ピンヘッダーコネクターの位置を確認します。
ESP モジュールを 8 ピンヘッダーに差し込みます。写真の正しい方向を参照してください。
Make sure that the ESP module is correctly and completely plugged into the connector.

Step 10 電源スイッチの接続

電源スイッチの接続
電源スイッチの接続
電源スイッチの接続
電源ケーブルを電装ボックスに押し込んでください。
OFFの "o"マークが右側にあることを確認してください。
縁を持ちながら、スイッチを箱の開口部に「カチッ」と音がするまで差し込みます。

Step 11 電装ボックスにカバーを付ける

電装ボックスにカバーを付ける
電装ボックスにカバーを付ける
電装ボックスにカバーを付ける
電装ボックスにカバーを付ける
電装ボックスのカバーを取り付ける前に、四角いナットがプリントパーツの所定の位置に入っていることを確認してください。ナットが抜け落ちていると作業が進みません。 また、電装品に致命的な損傷を与える可能性があります。
カバーを元に戻し、穴にきちんと収まっていることを確認します。
2枚目のカバーを上部に置き、ケーブルを配置します。
エクストルーダーケーブル、テキスタイルスリーブが部分的に入っていることを確認してください。また、プリンターから遠ざかるように傾けておく必要があります。
ヒートベッドケーブルの束は、 は、テキスタイルスリーブが巻かれた部分がボックスの中にあることを確認する。
フィラメントセンサーケーブル(オプション)、ケーブルに巻かれたケーブルスリーブが箱の中に一部入っていることを確認してください。
ここで、ケーブルカバーを締めます。ケーブルが挟まっていないことを確認してください。

Step 12 Downloading the firmware

Downloading the firmware
Wi-Fi runs on firmware 4.4.0 or higher.
USBドライブをPCに接続します。
On your PC, go to help.prusa3d.com.
From the list of products, select Original Prusa MINI+.
Download the latest firmware.
Extract the zip file and save the firmware file (.bbf extension) on the USB drive.
Select the corresponding firmware file supporting your language.

Step 13 新しいブートローダとファームウェアを書き込む

新しいブートローダとファームウェアを書き込む
USBドライブをプリンタに接続します。
プリンタのプラグを差し込み、電源を入れます。
画面上のFLASHボタンを選択し、更新を確認します。

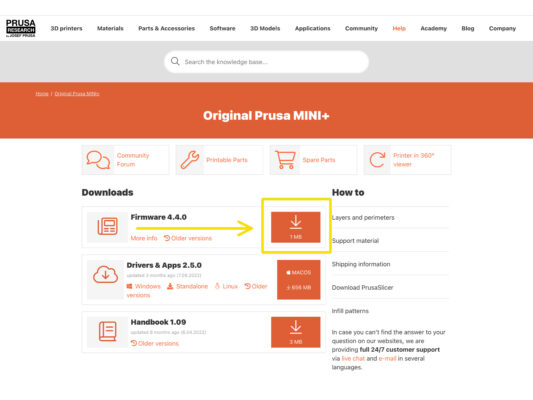
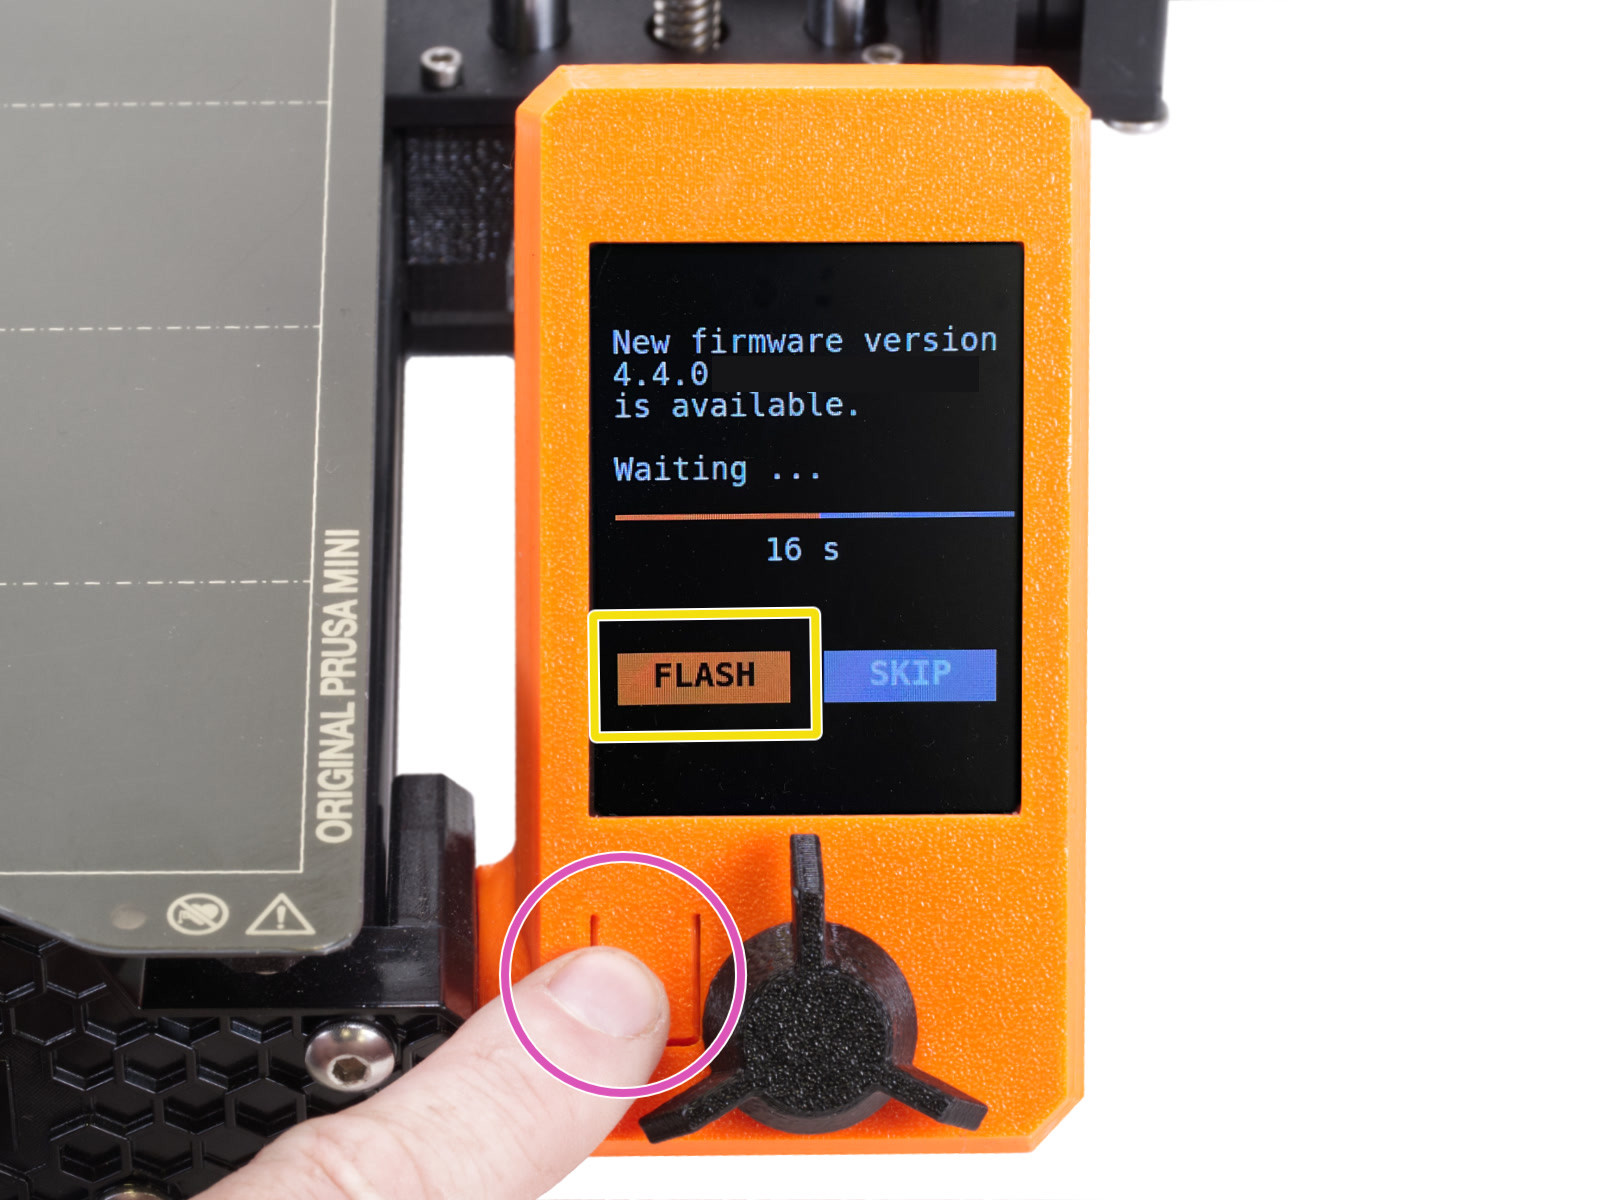
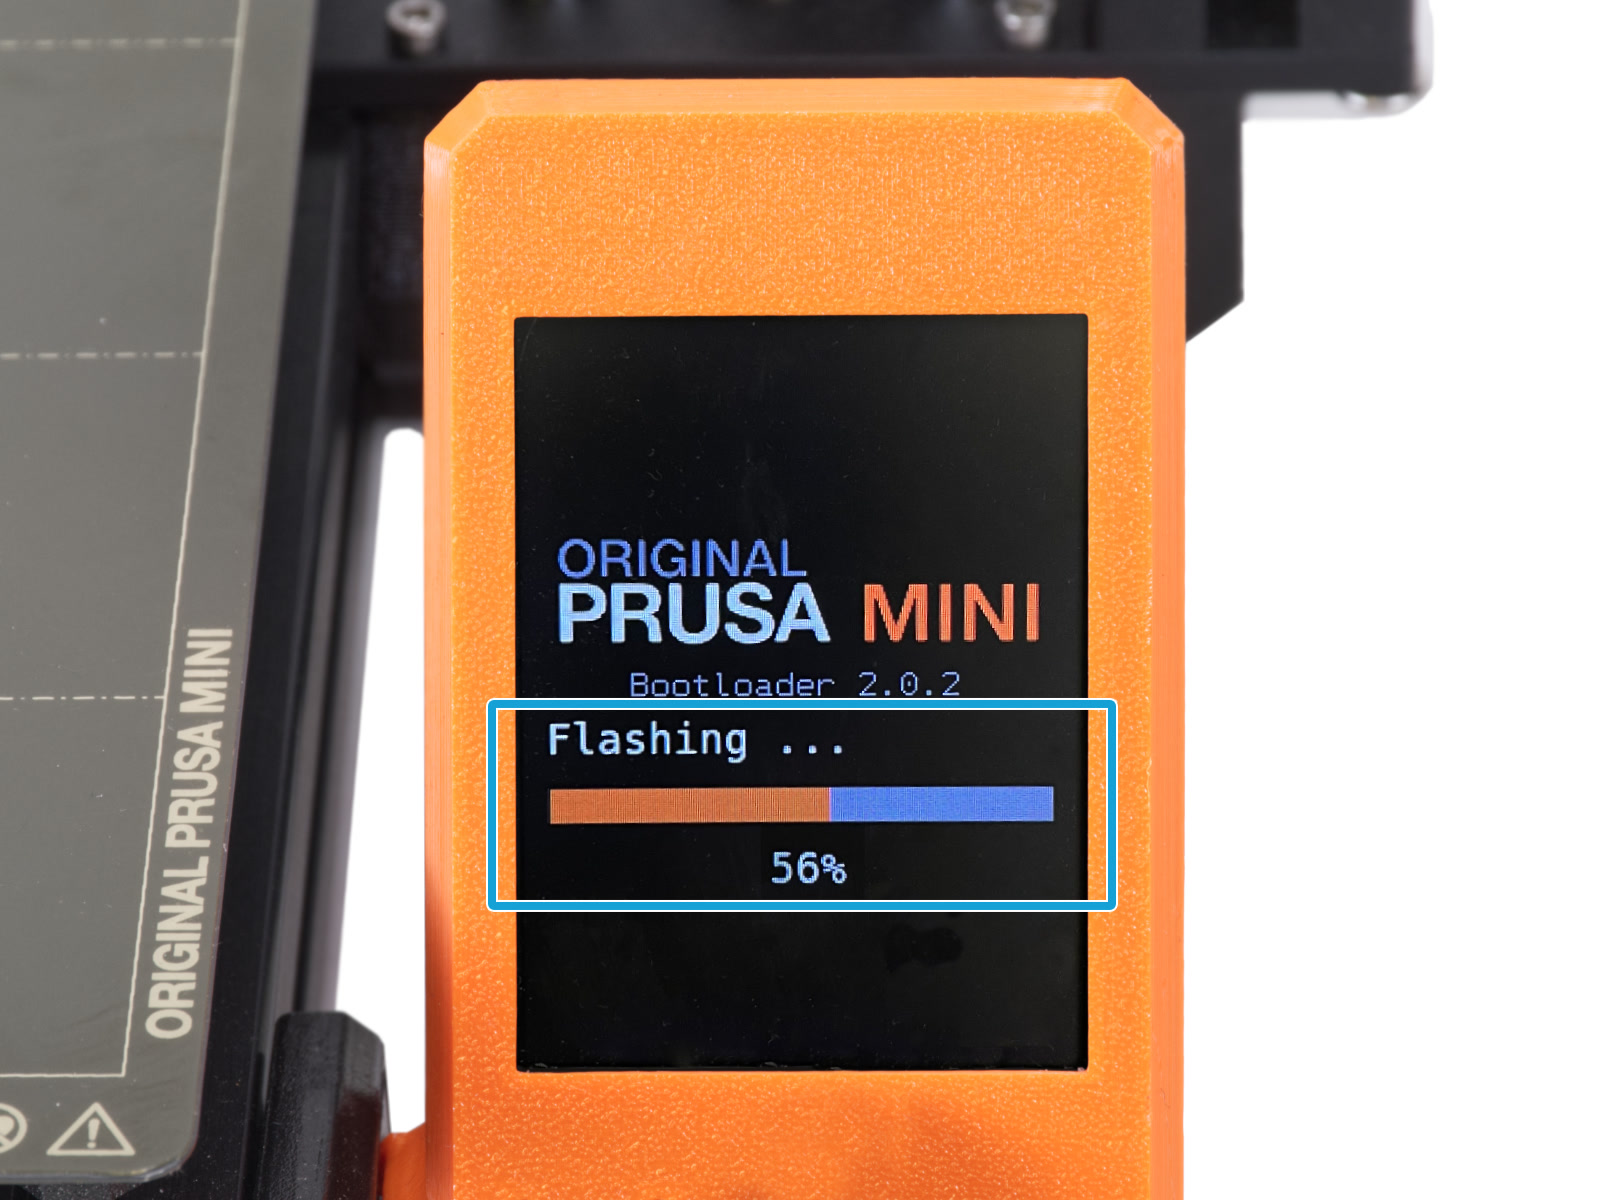
If you have trouble updating the firmware, check Firmware updating MINI article.

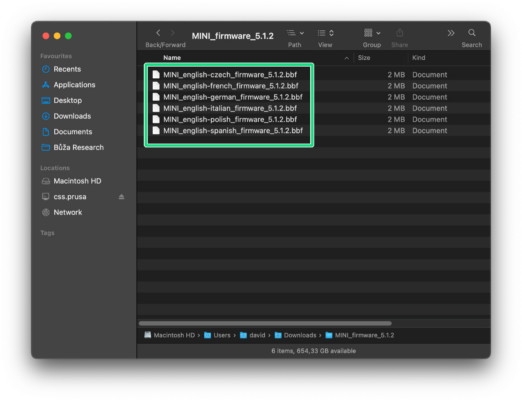
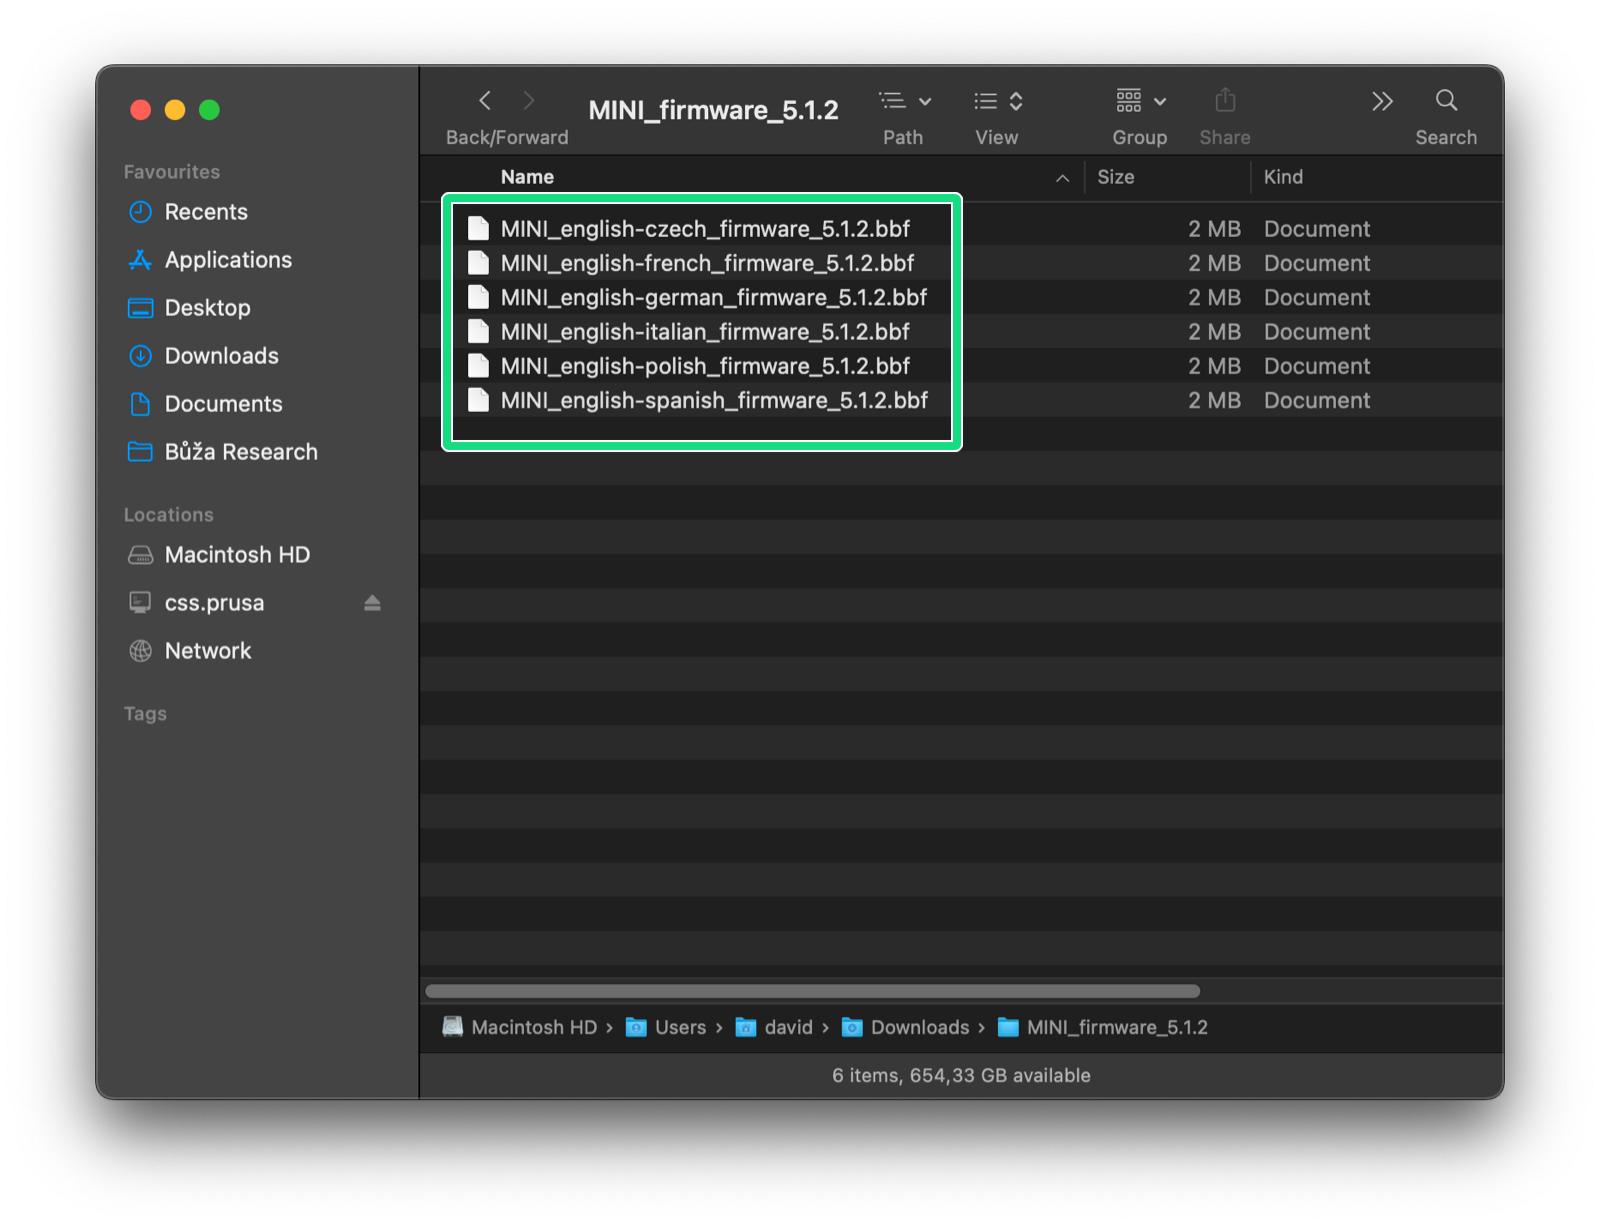
When updating from some very old firmware versions, you might need to update to version 4.4.1 first (this version included a new bootloader), and then to 5.1.0 or newer.

Note, that when flashing the version 4.4.1, you have to load BOTH .bbf files onto the USB drive.

Step 14 新しいブートローダとファームウェアを書き込む

新しいブートローダとファームウェアを書き込む
FLASHボタンを選択し、アップデートを確認します。ブートローダーとファームウェアの両方が自動的に書き込みされます。
プロセスが完了するまでお待ち下さい。複数回の書き込みが必要なため、数分、数回の再起動が必要です。
インストール中に USB フラッシュドライブを取り外さないでください。電子機器に致命的な損傷を与える可能性があります。
USBドライブをプリンタに接続します。
After flashing the firmware, you will be prompted to proceed with the setup Wizard. It is not necessary to proceed with the setup Wizard (all values from the previous version are saved without any changes) but recommended to check that all functions are working correctly.

Step 16 Wi-Fiモジュールのセットアップ

Wi-Fiモジュールのセットアップ
Wi-Fiモジュールのセットアップ
プロンプトが表示されるまで、USBドライブをプリンタから取り外さないでください。
ウィザードを実行すると、Wi-Fiウィザードが表示されます。
If not, on the LCD screen navigate to Home -> Settings -> Network -> Wi-Fi -> Setup Wi-Fi module.
このマニュアルへのQRコード付きリンクが画面に表示されます。「Continue」をクリックします。

Step 17 Wi-Fiモジュールのセットアップ

Wi-Fiモジュールのセットアップ
Wi-Fiモジュールのセットアップ
Wi-Fiモジュールのセットアップ
Wi-Fiモジュールのセットアップ
これで、プリンタがWi-Fiモジュールのファームウェアをアップデートします。
Wi-Fiモジュールを抜いたり、プリンタの電源を切ったりしないでください。
アップデートに数分かかる場合があります。完了するまでお待ちください。
アップデートに成功したら、「Continue」をクリックします。
On the next screen, click Continue. We will need to create your credentials first.

Step 18 Wi-Fiモジュールのセットアップ

Wi-Fiモジュールのセットアップ
Wi-Fiモジュールのセットアップ
Wi-Fiモジュールのセットアップ
Wi-Fiモジュールのセットアップ
このステップで、プリンタは必要な設定ファイルをUSBドライブに作成します。「Continue」をクリックします。
USBドライブにコンフィグファイルが作成されます。「Continue」をクリックし、USBドライブをプリンタから取り外す。

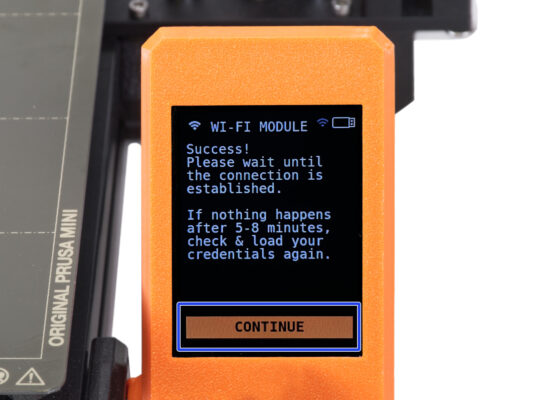
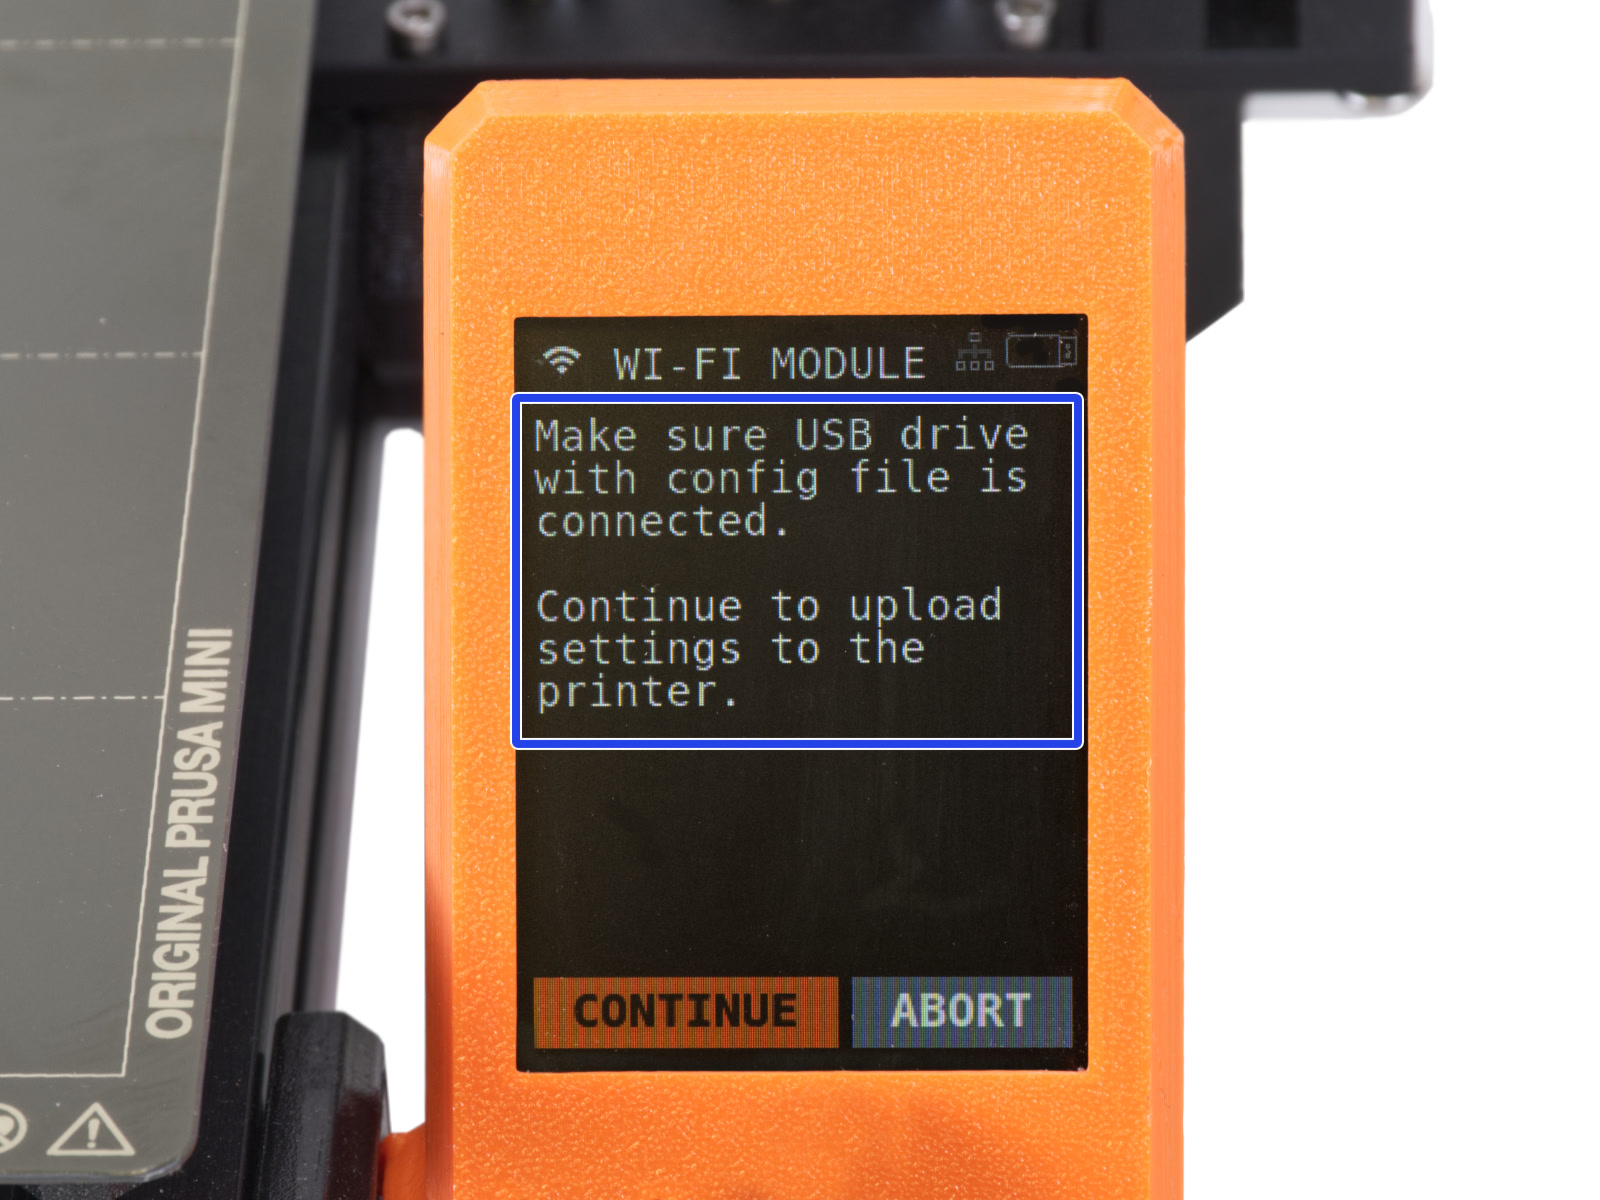
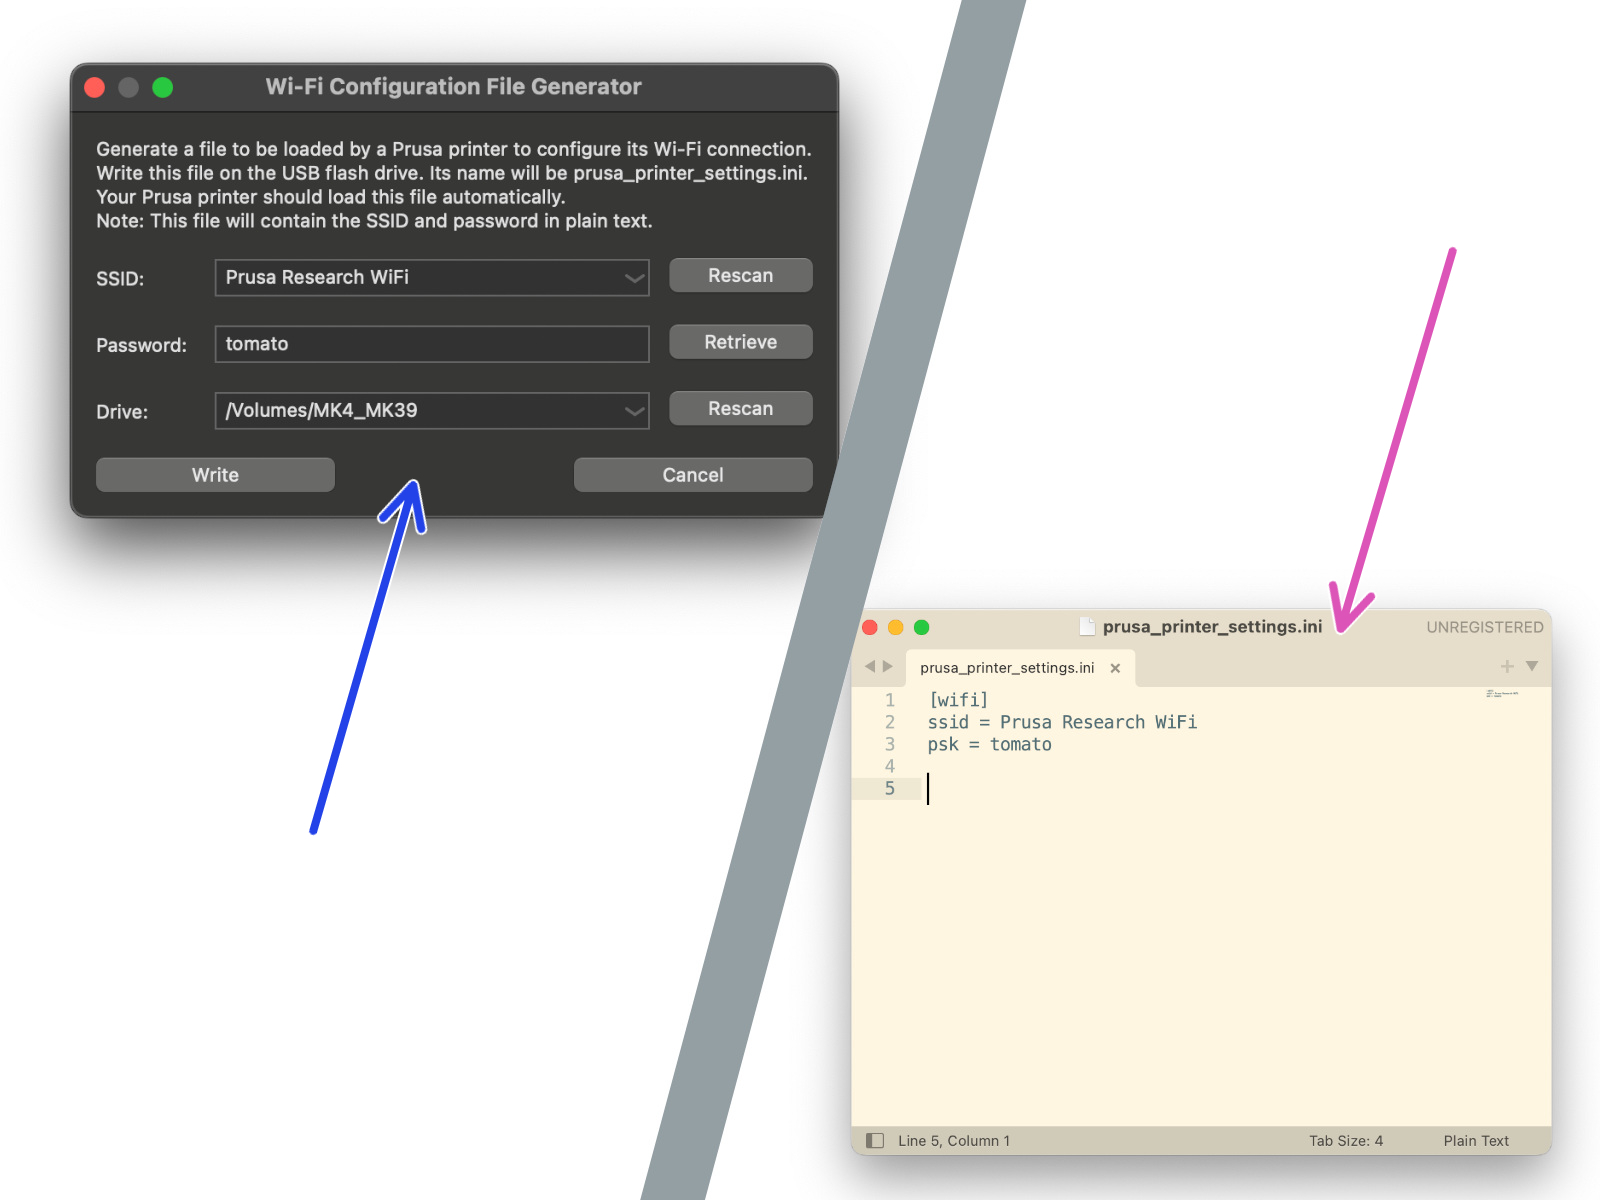
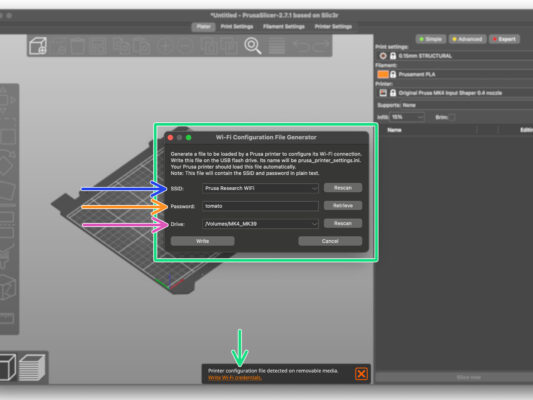
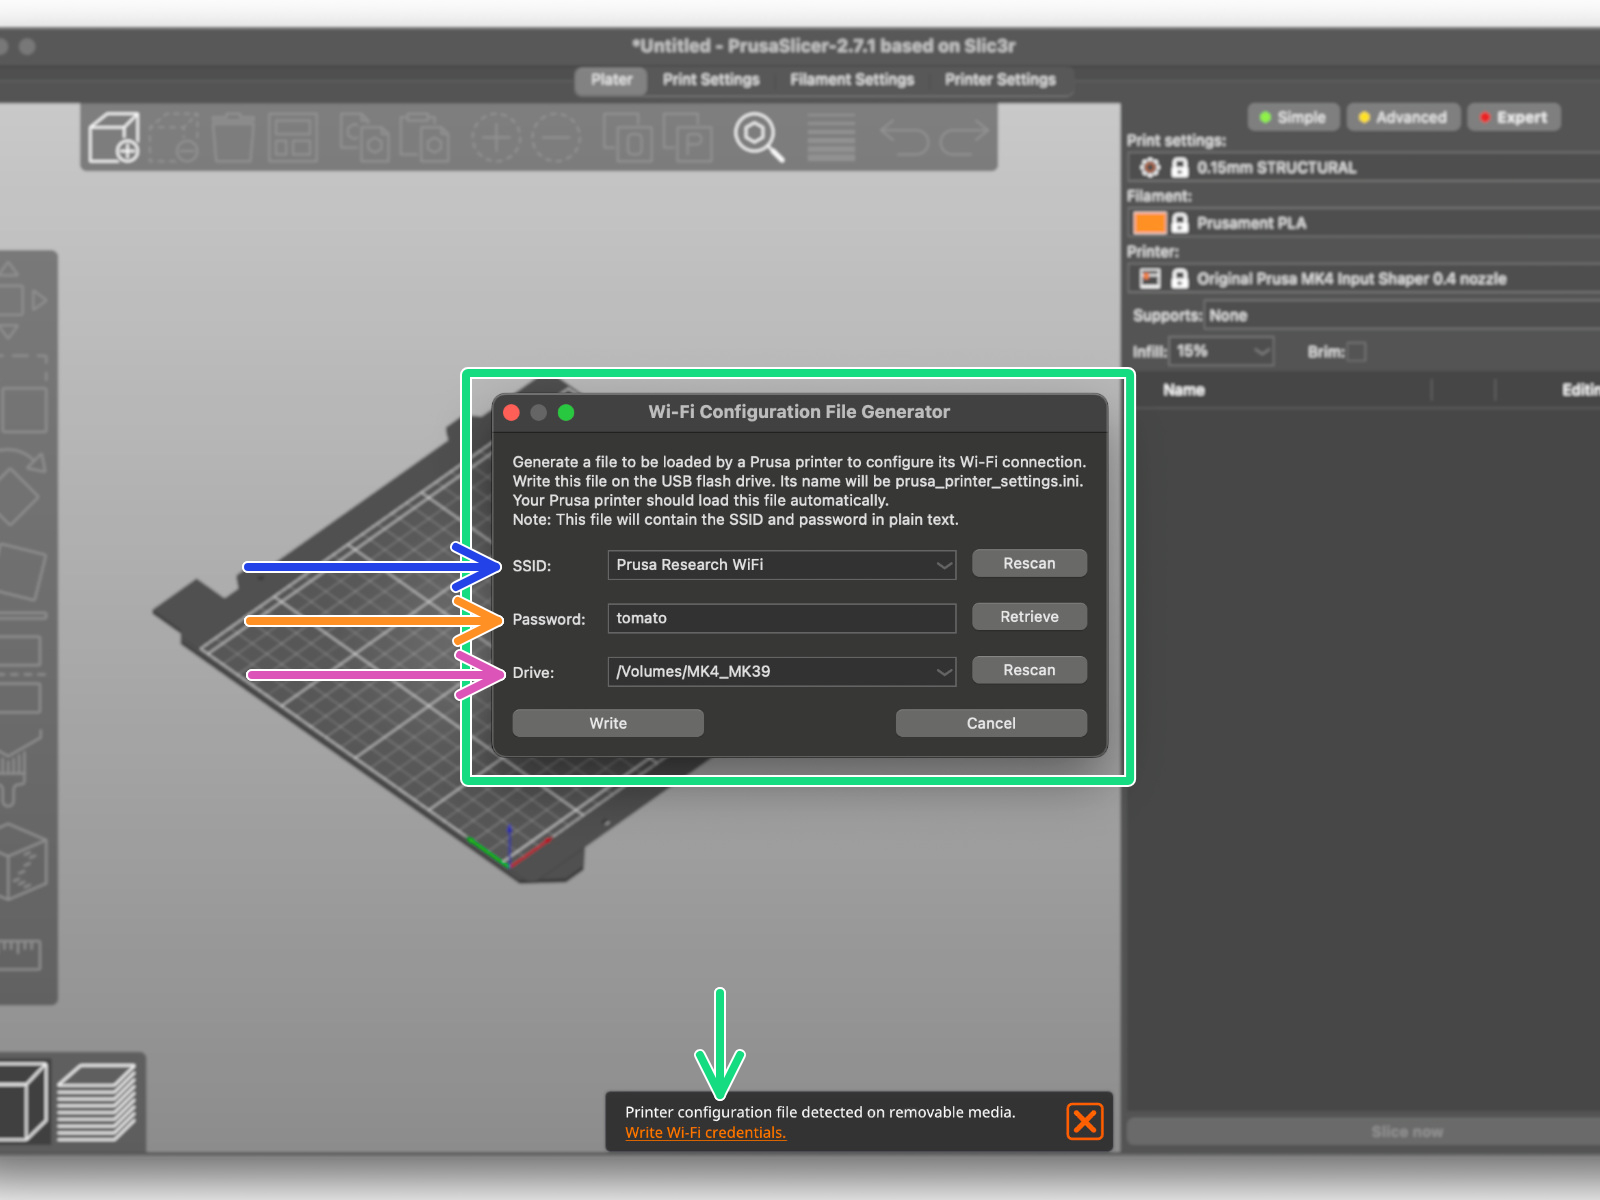
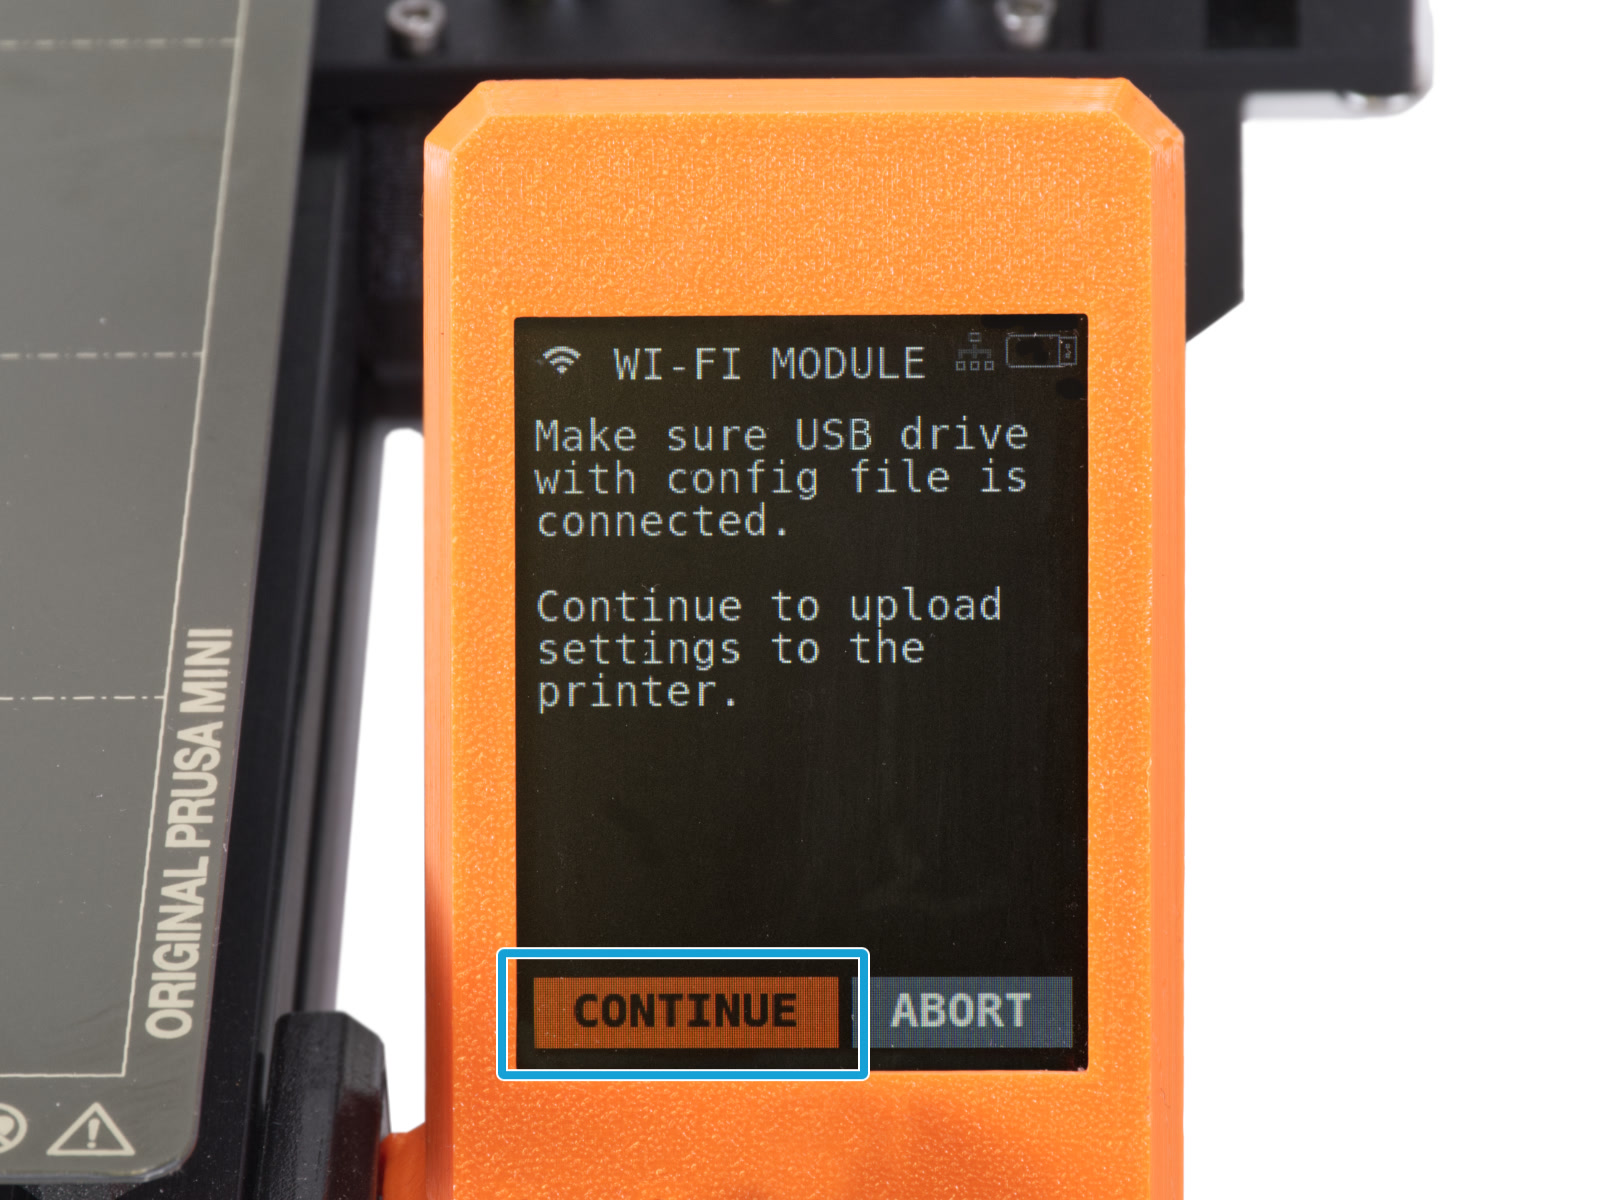
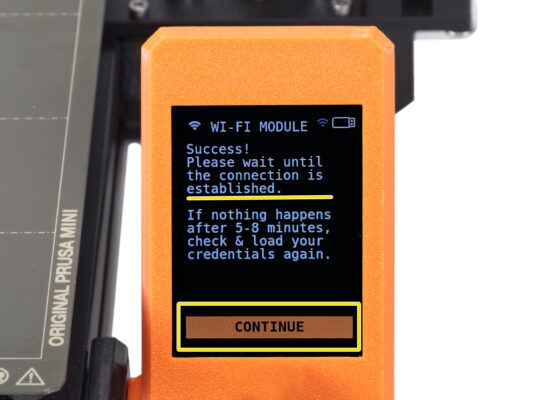
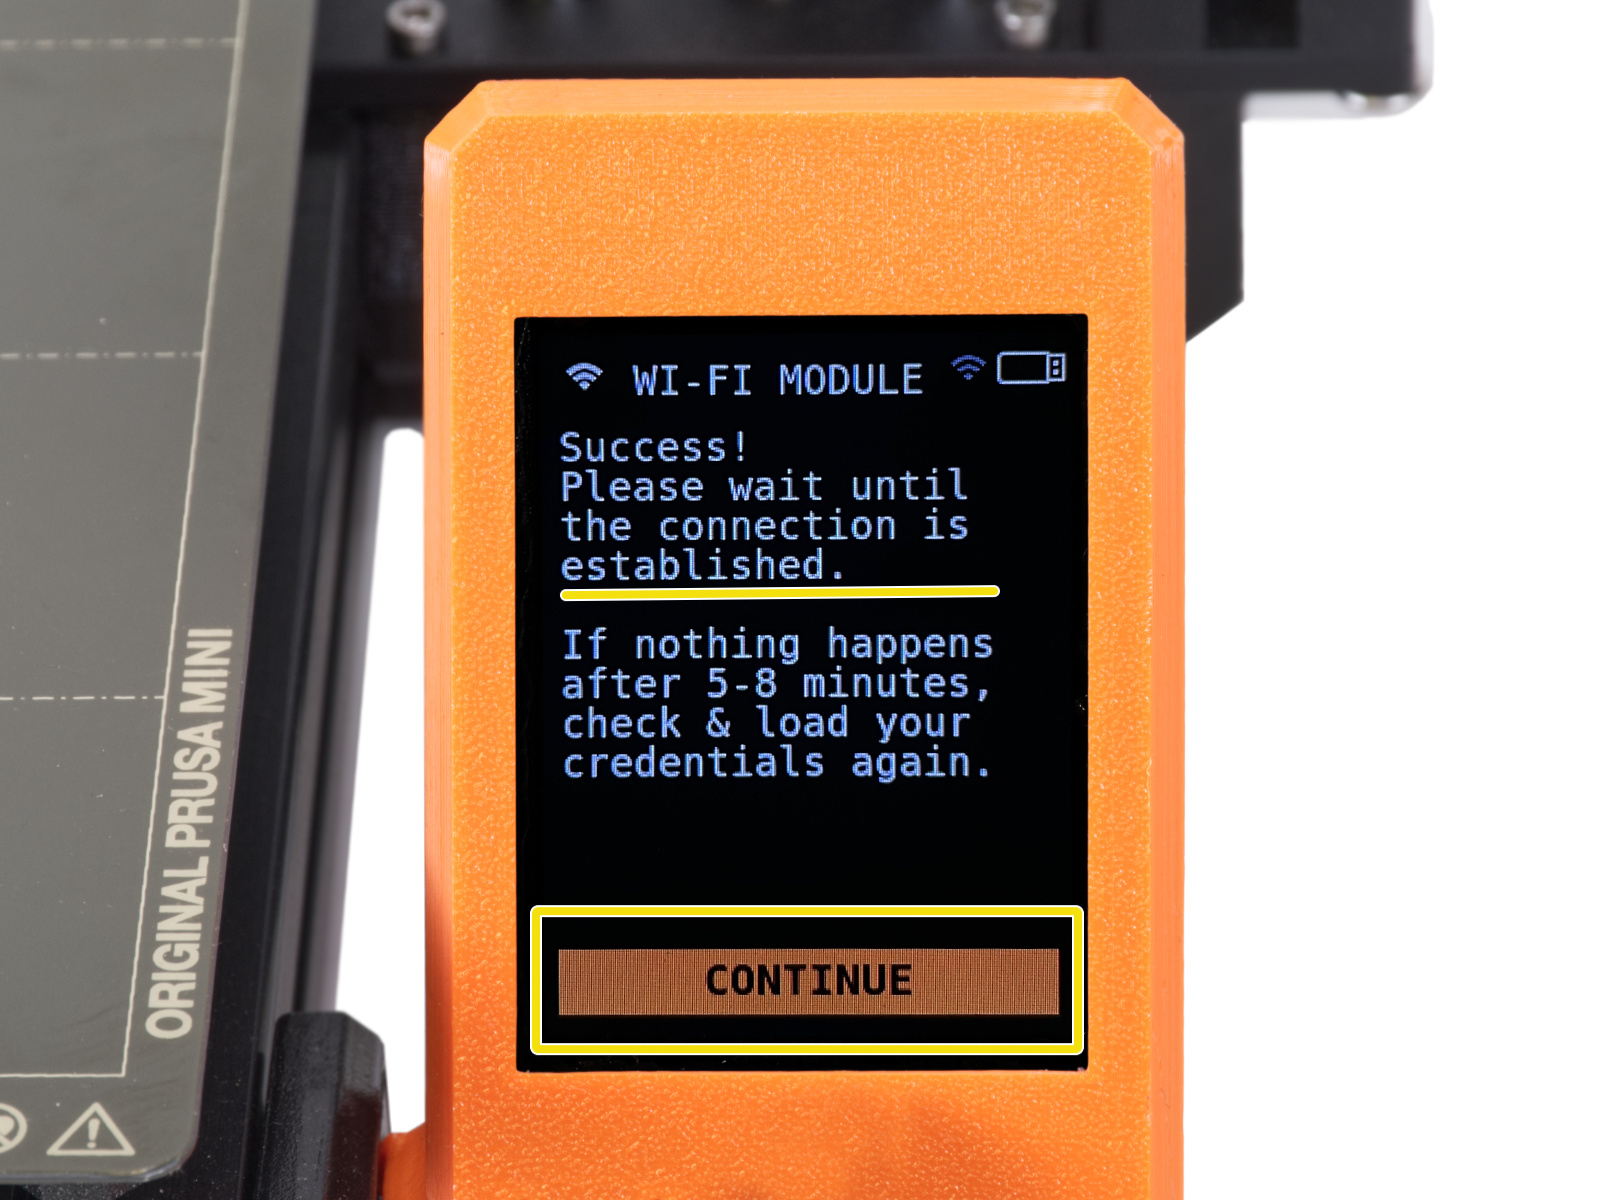
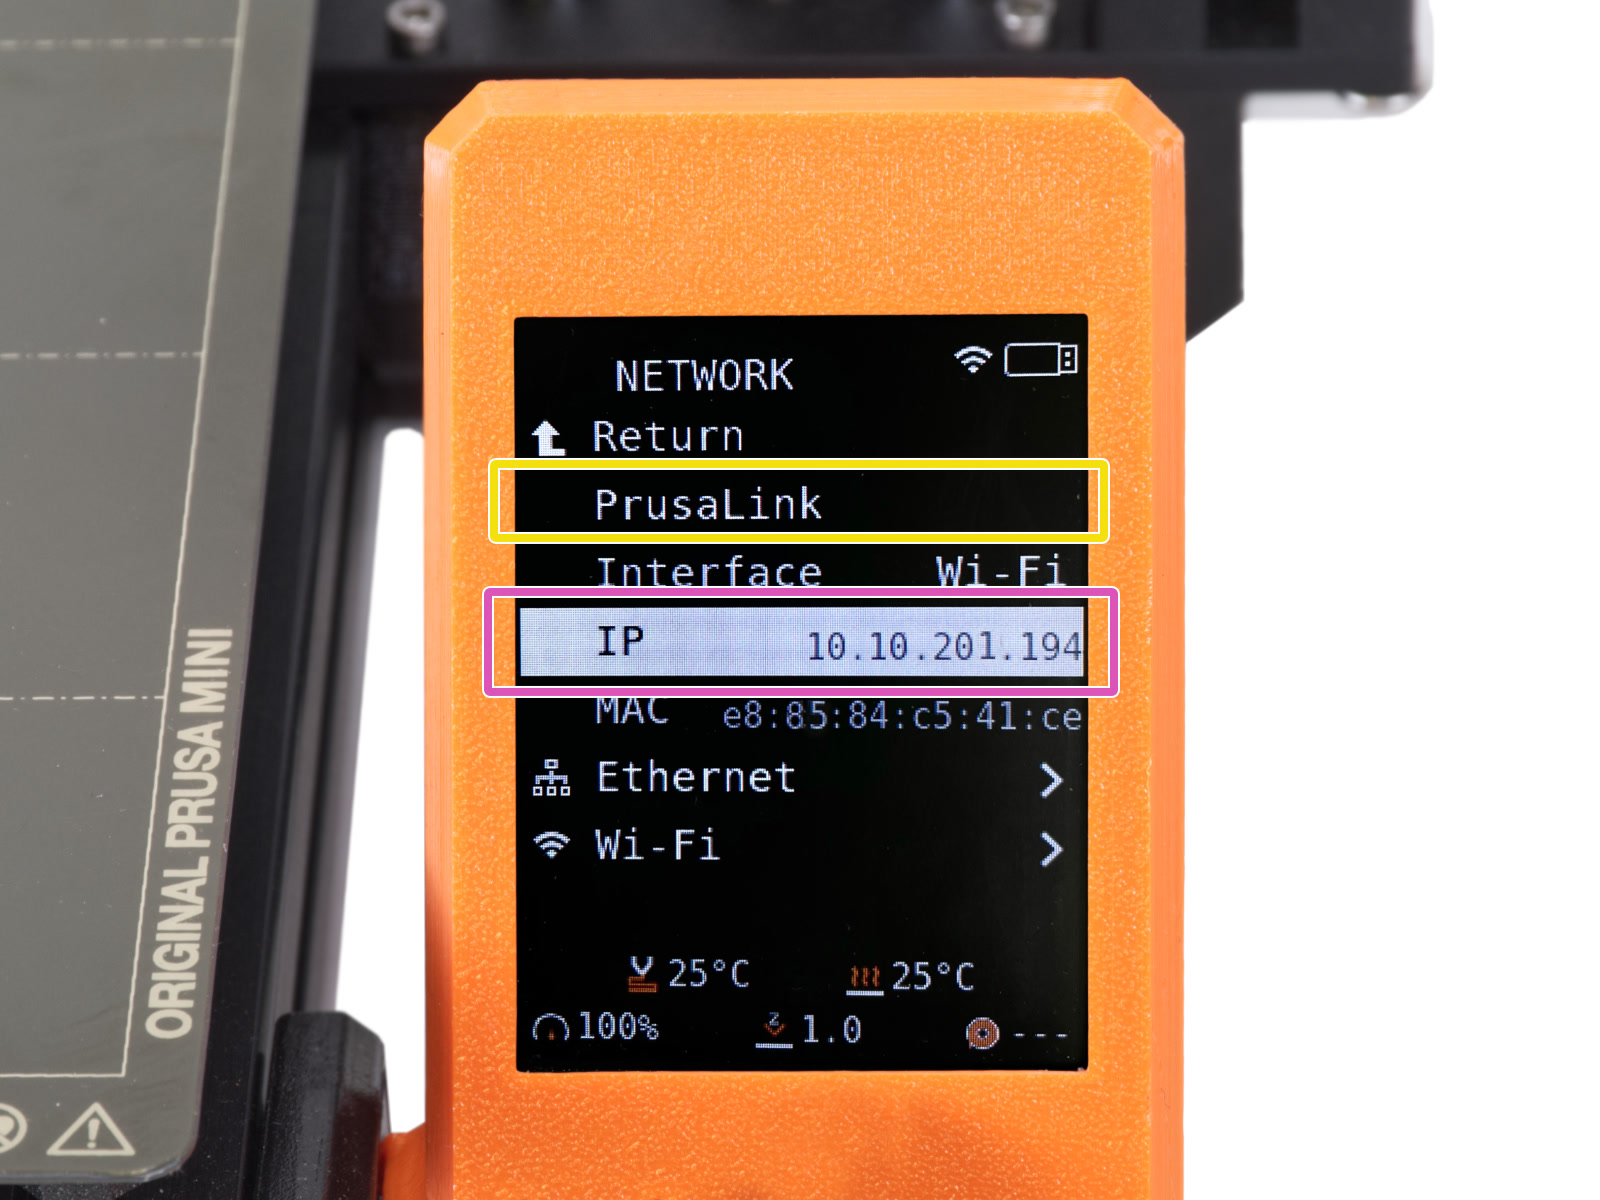
次の画面が表示されたら、とりあえずプリンタはそのままにしておきます。まずはコンフィグファイルの設定を行います。次のステップに進んでください。

Step 20 Editing the configuration file (PrusaSlicer)

Editing the configuration file (PrusaSlicer)
Run PrusaSlicer on your computer.
Make sure you have PrusaSlicer version 2.7.0 or later. Older versions do not support this feature. You can download the latest version of PrusaSlicer on prusaslicer.org
USBドライブをPCに接続します。
Once the USB is connected, the program will display a dialog box for you to fill in the credentials for your Wi-Fi. Alternatively, you can access the window by clicking on the message at the bottom. In which you fill in:
SSID: Select or write down the name of the Wi-Fi network you want to connect your printer to.
Password: Write down the Wi-Fi password. Make sure nobody is watching!
Drive: Keep the selected USB drive from your printer
Click the Write button to save the settings.

Step 21 コンフィギュレーションファイルの編集

コンフィギュレーションファイルの編集
コンフィギュレーションファイルの編集
コンフィギュレーションファイルの編集
This method of entering Wi-Fi credentials using a text editor is an alternative to using PrusaSlicer. If you have chosen the PrusaSlicer (previous) method, proceed to the next step.
USBドライブをPCに接続します。
プリンタで作成された、USBドライブ内にあるprusa_printer_settings.iniファイルを探します。テキストエディターでファイルを開きます。
2行目のssid=という行に進み、プリンタを接続したいWi-Fiネットワーク名を書き込んでください。
Note: The ESP Wi-Fi module (ESP-01S, ESP-01) has a built-in Wi-Fi interface that supports 802.11 b/g/n 2.4 GHz networking. Your 5Ghz network will not work. Enter your 2.4Ghz SSID.
Do not change the key_mgmt value. Keep the WPA as default.
4行目のpsk=という行に、Wi-Fiのパスワードを書き込んでください。誰も見ていないことを確認してください。
ファイルをUSBドライブに保存する。

Step 22 Wi-Fi設定を終了する

Wi-Fi設定を終了する
Wi-Fi設定を終了する
Wi-Fi設定を終了する
プリンタに戻ります。USBドライブを接続し「Continue」をクリックします。
USBドライブからプリンタへファイルがコピーされるまで待ちます。コピー中は、USBドライブを取り外さないでください。

Step 23 Wi-Fi部分は終了しました!

Wi-Fi部分は終了しました!
Wi-Fi部分は終了しました!
Wi-Fi部分は終了しました!
Wi-Fi部分は終了しました!
The installation of the Wi-Fi module has been successfully completed. The printer will now search for the Wi-Fi connections according to your credentials. It may take several minutes. Click on Continue.
Once the credentials are uploaded, it might take up to several minutes to connect the printer to the network. Especially with a weak signal or in crowded networks. Please be patient or move the printer closer to your Wi-Fi access point.
If nothing happens after 5 - 8 minutes, connect the USB drive to your PC and check again your credentials in the prusa_printer_setting.ini file. Connect the USB drive to the printer and on the LCD navigate to Settings -> Network -> Wi-Fi -> Load credentials and follow the instructions on the printer.
Wi-Fiが正常に接続されると、すぐにその旨が表示されます。「Continue」をクリックしてください。
設定に成功し、接続が確立されると、ディスプレイの上部ステータスバーに明るいWi-Fiアイコンが表示されます。
次の手順で、プリンタのIPアドレスとAPIキーを取得します。

Step 24 IP接続テストとAPI-keyの取得

IP接続テストとAPI-keyの取得
IP接続テストとAPI-keyの取得
IP接続テストとAPI-keyの取得
ご自身のプリンタから PrusaLink または PrusaSlicer にアクセスするには、プリンタのIPアドレスとAPIキーを知っている必要があります。
画面上の Home -> Settings -> Network, と進むと、プリンタのIPアドレスが表示されます。
ネットワークメニューから、 PrusaLink > Current API Key に移動します。(例:neQQogERuMo4RNd)
Note down both IP Address and the API Key.

Step 25 Printing using PrusaLink

Printing using PrusaLink
Open up a web browser on your computer. Insert the IP address into the address line and open it up as a webpage.
Type in the API Key when prompted.
To transfer a G-code to your printer, simply drag the file into the marked area of the web page.
プリンタがプリント可能な状態であることを確認してください。:
There must be a USB drive in the printer.
An empty and clean steel sheet must be attached on the heatbed.
The printer should be on the home screen. If there is any prompt on the LCD screen, the printer will reject any remote command.
After the file is uploaded, open up the file details in the Storage tab. From here, you can Start Print.
Start a Print.

Step 26 PrusaLink info

PrusaLink info
PrusaLink info
PrusaLink info
Good job! You have successfully installed the Wi-Fi module and connected your printer to PrusaLink.
Now, you can delete the configuration file from the USB drive for security reasons.
Did you know, you can also use PrusaLink over the wired network using the Ethernet connector on the back of the printer? Visit Settings > Network > Interface to select the preferred connectivity option.
If you plan to also use another printer type or just crave for more info, visit the Prusa Connect and PrusaLink explained article.
Was this guide helpful?

Comments

Still have questions?

Still have questions?

If you have a question about something that isn't covered here, check out our additional resources.
And if that doesn't do the trick, you can send an inquiry to [email protected] or through the button below.

Contact us