EN
  • Čeština
  • Español
  • Italiano
  • Deutsch
  • Polski
  • Français
  • 日本語
Login

PrusaLink and Prusa Connect setup (MK3/S/+)

PrusaLink and Prusa Connect setup (MK3/S/+)

PrusaLink and Prusa Connect setup (MK3/S/+)
Relevant for:
Last updated 3 months ago
PrusaLink and Prusa Connect setup (MK3/S/+)
 Difficulty
Difficult
 Steps
24
 Available languages
CSPLDEJAESITFR
Introduction
Introduction
Introduction
Introduction
Hi there! This guide will help you get started with using PrusaLink on your MK3/S/+ printer.
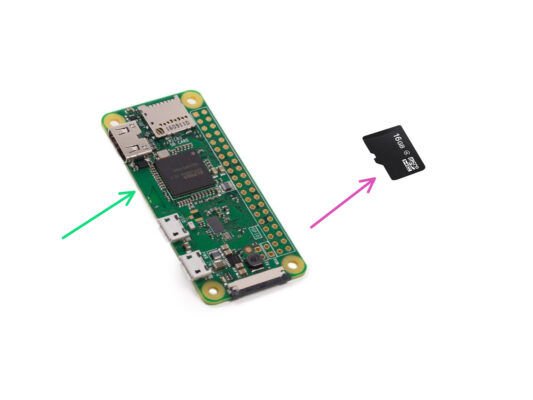
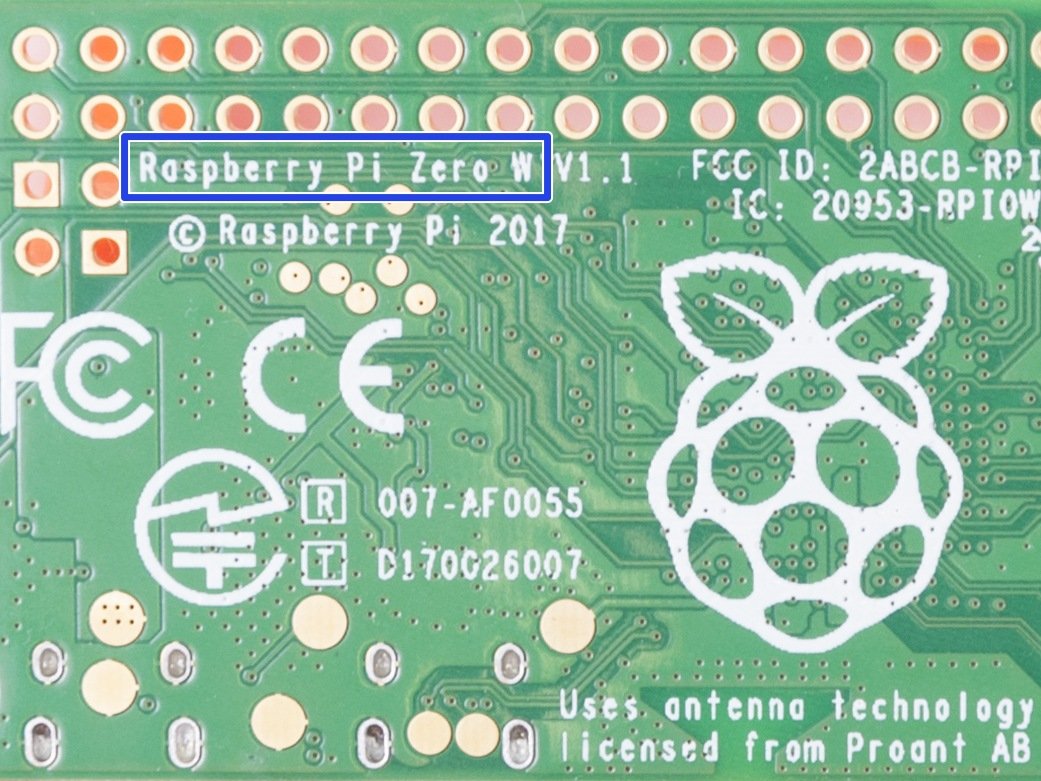
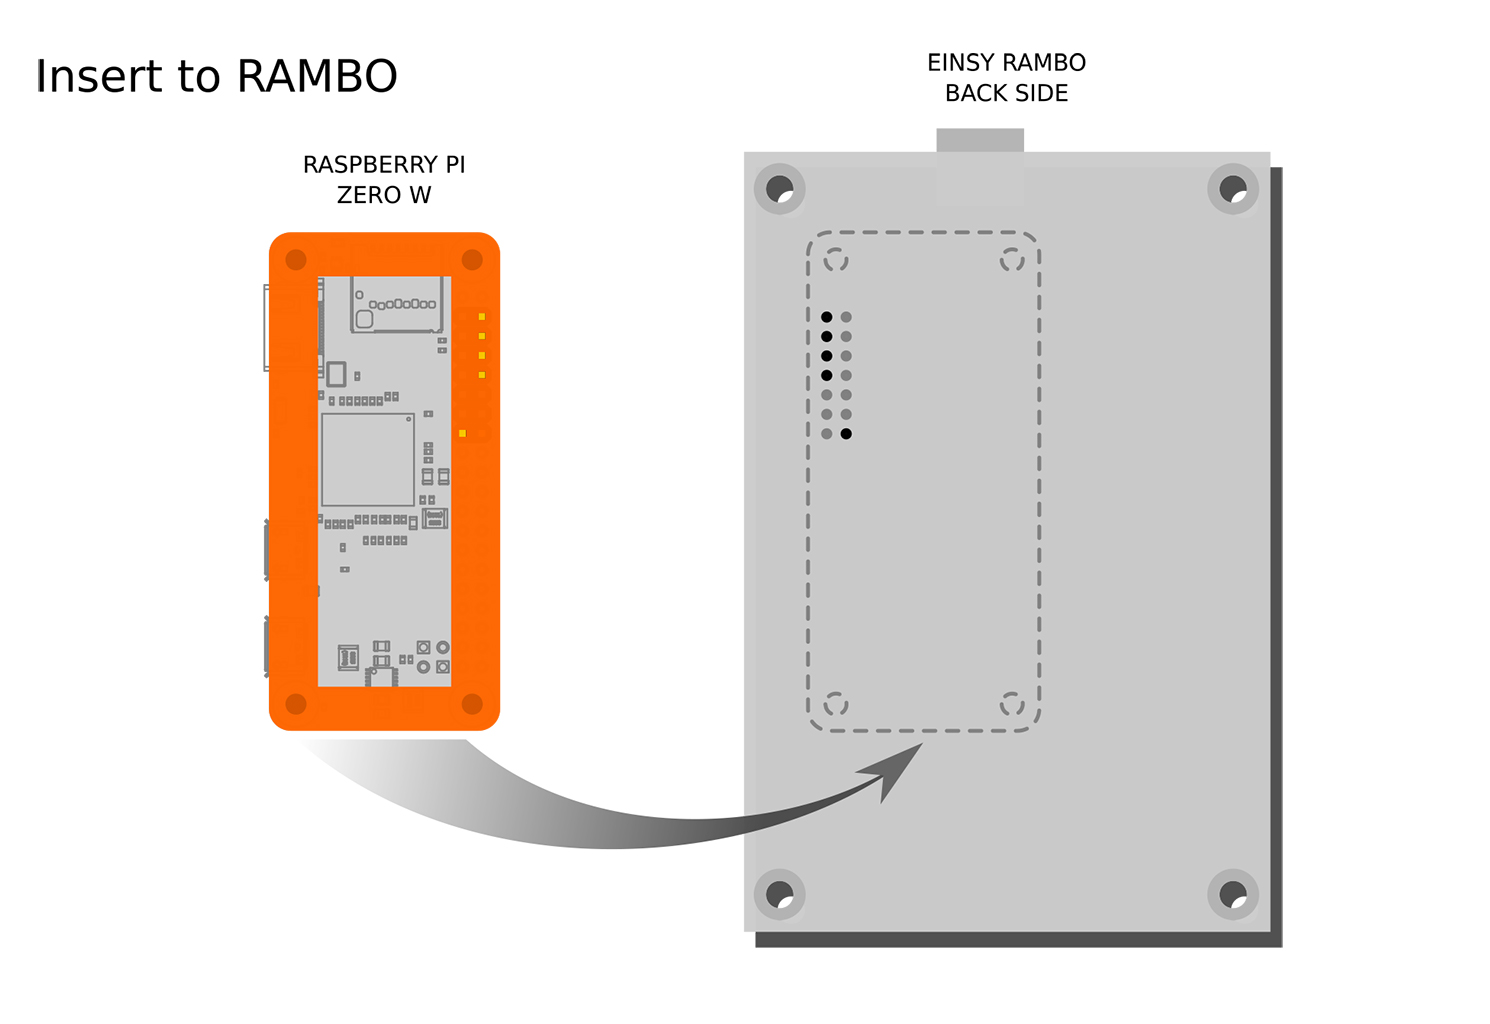
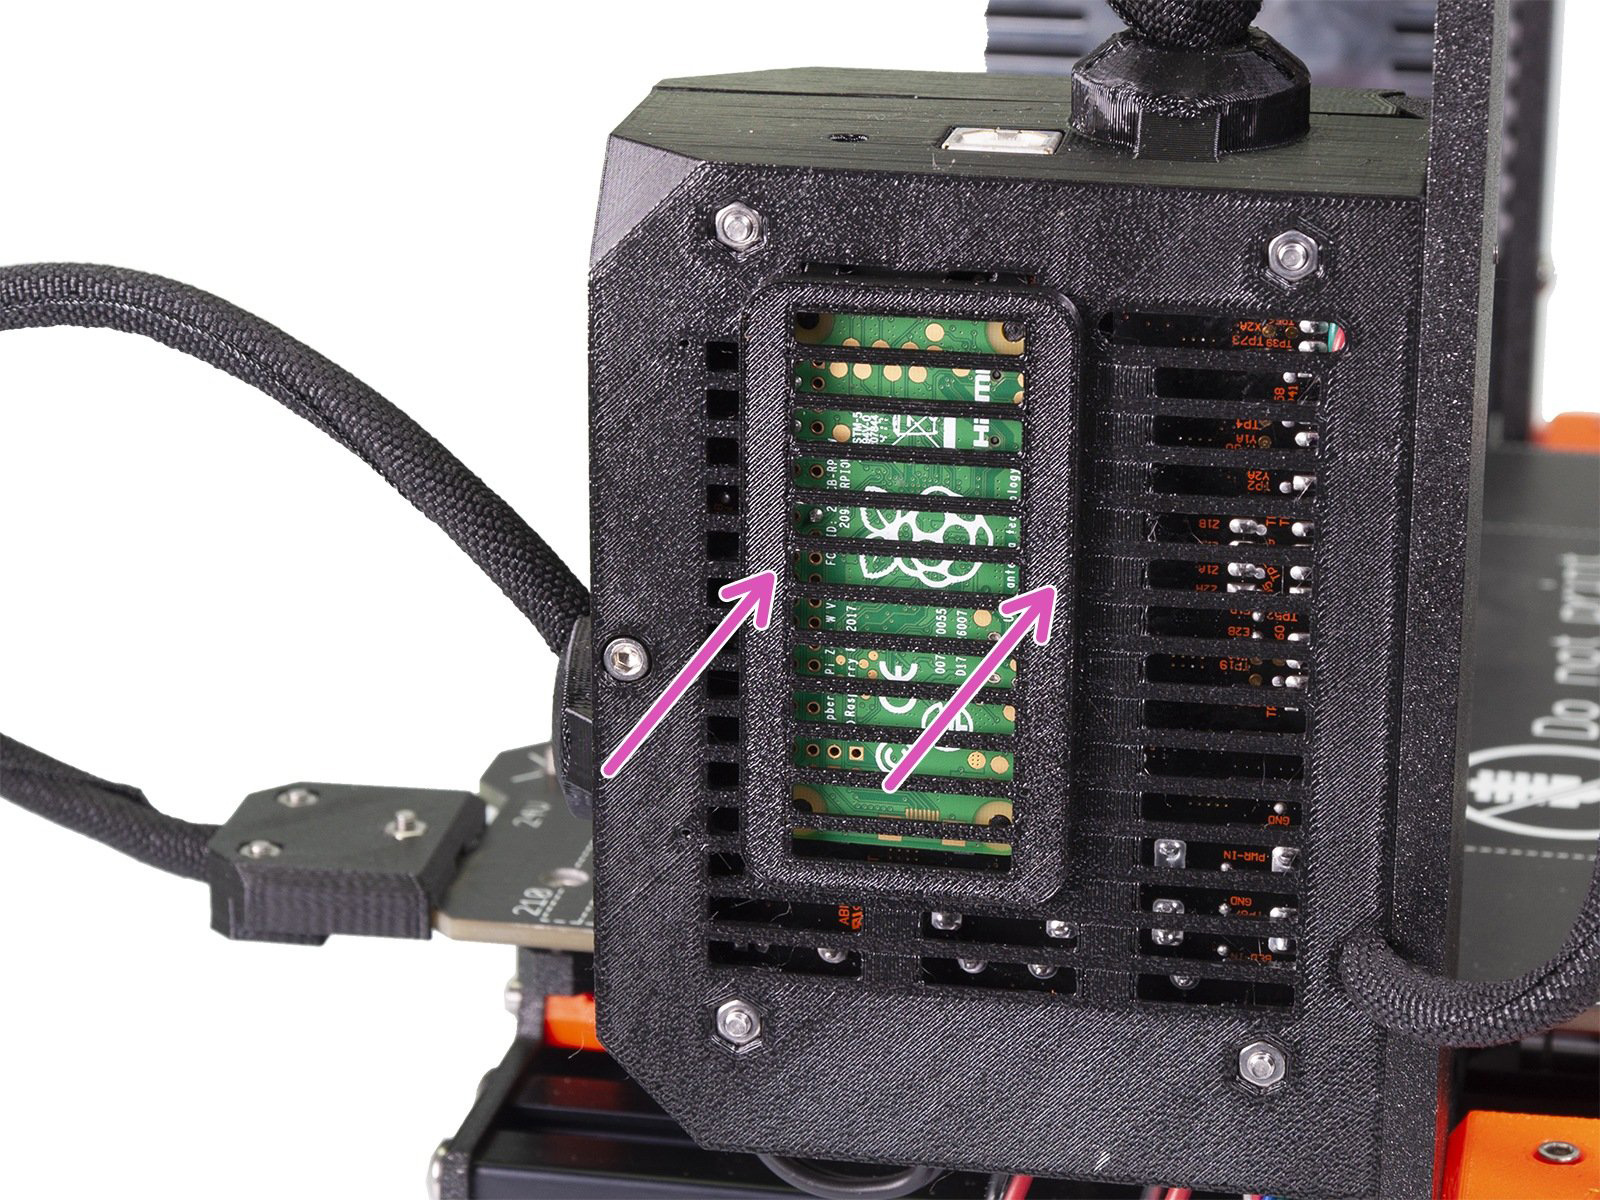
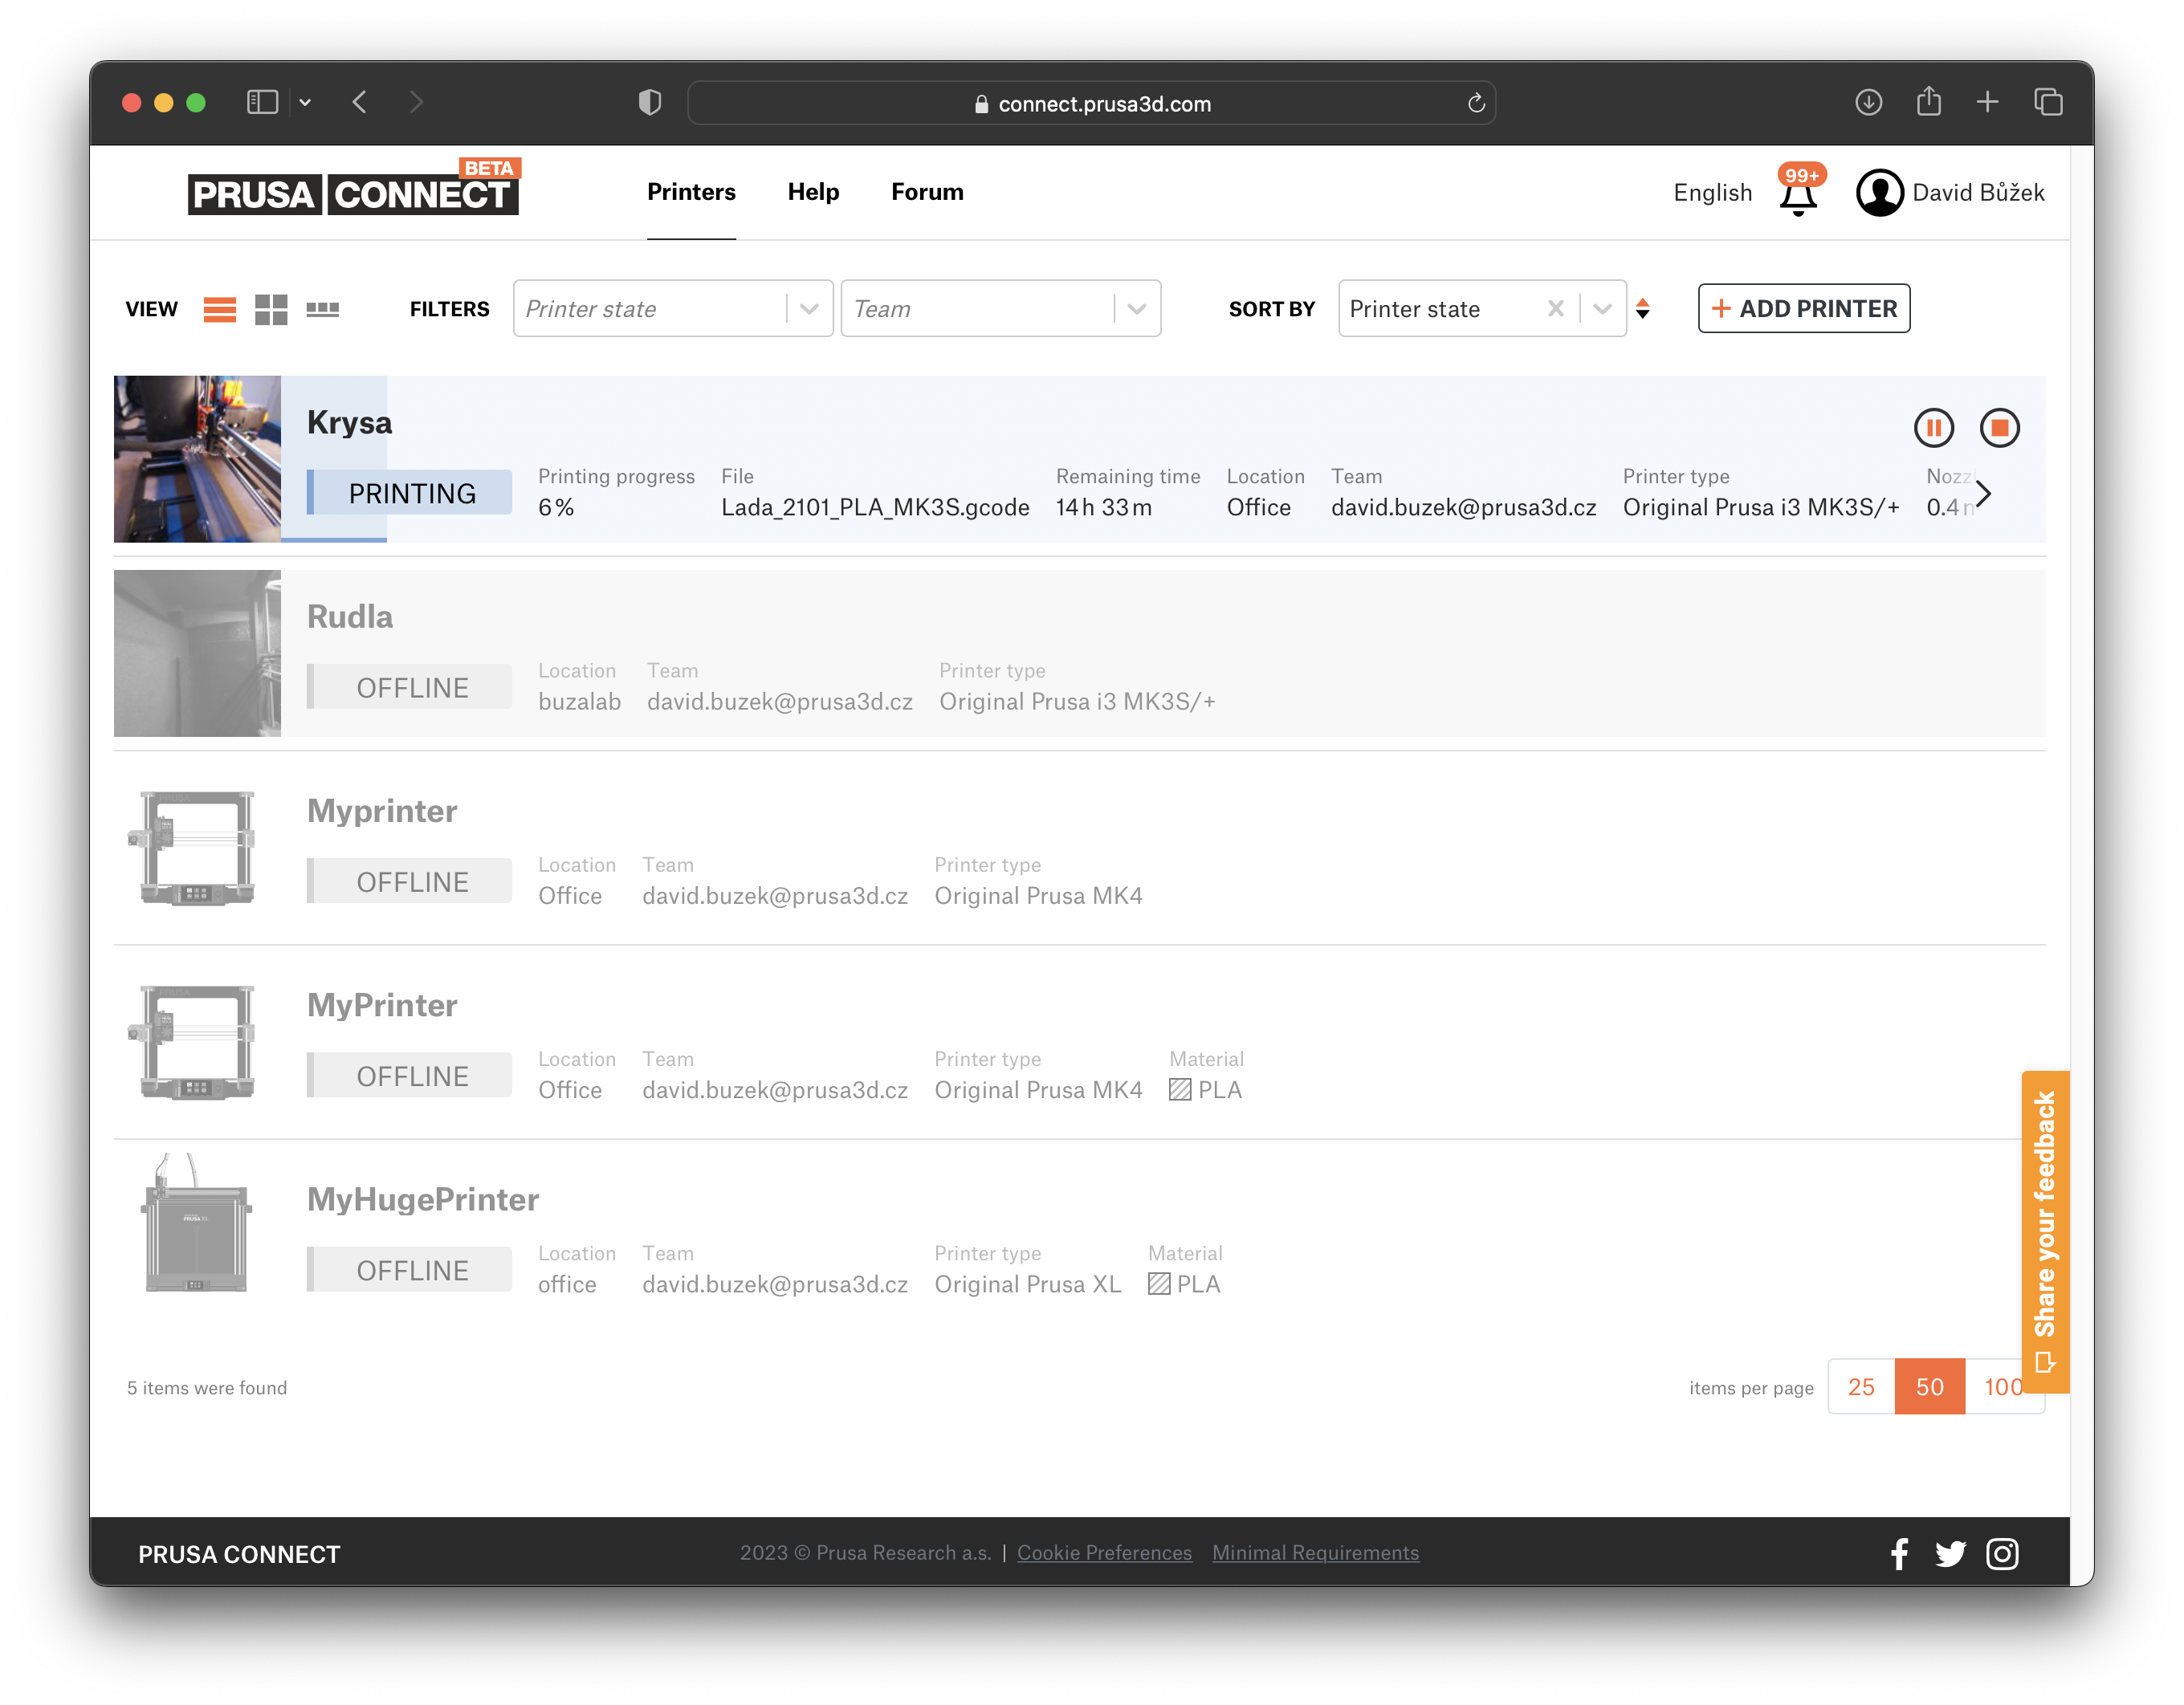
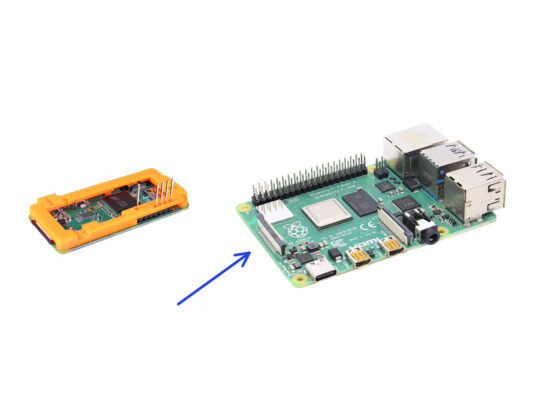
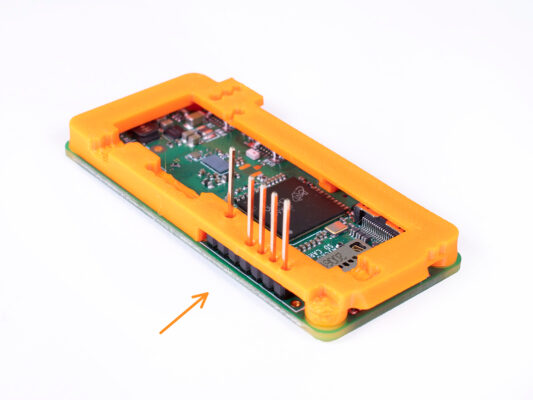
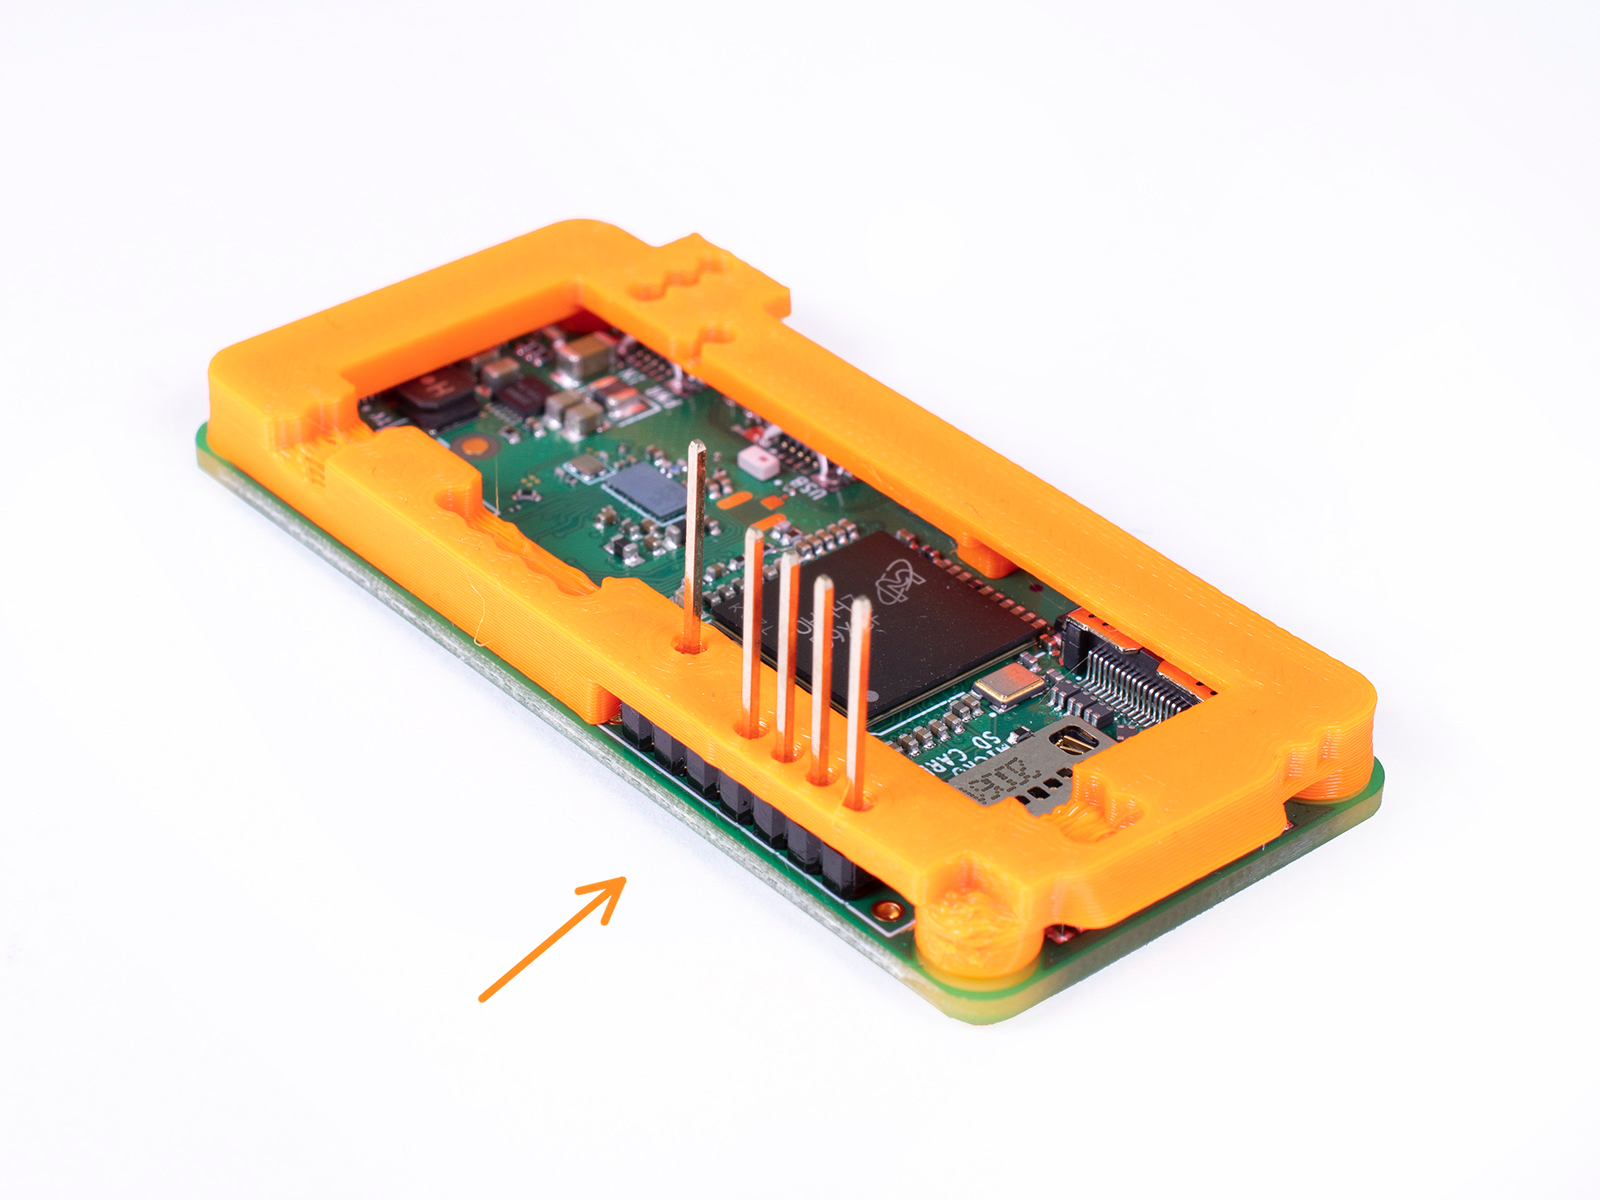
In this case, PrusaLink is our name for the Raspberry Pi Zero W / 2 hardware solution which enables your Original Prusa MK3/S/+ printer to be connected to your 2.4Ghz Wi-Fi network and be managed remotely via Prusa Connect.
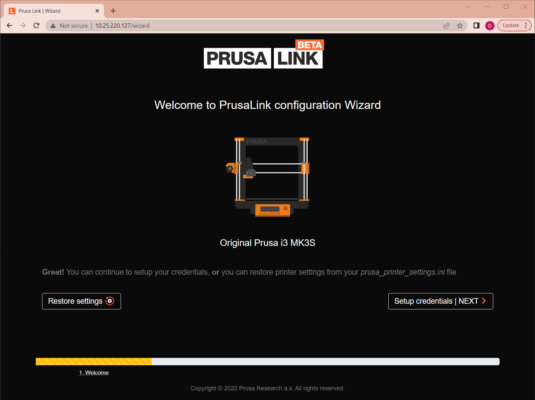
Make sure you are running the latest firmware (3.10.1 and up) on your printer.
If you want to use PrusaLink with the full-sized RPi 3 / 4 over USB, use another printer type, or just crave for more info, visit the Prusa Connect and PrusaLink explained article.
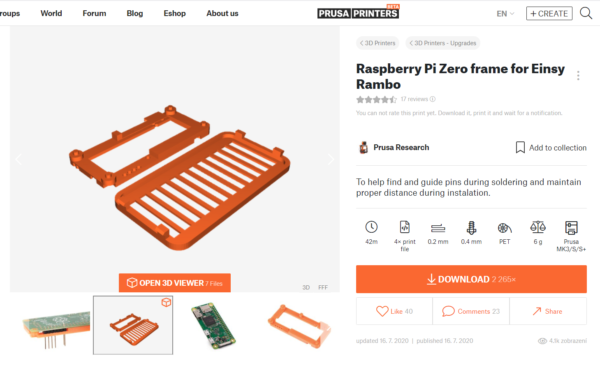
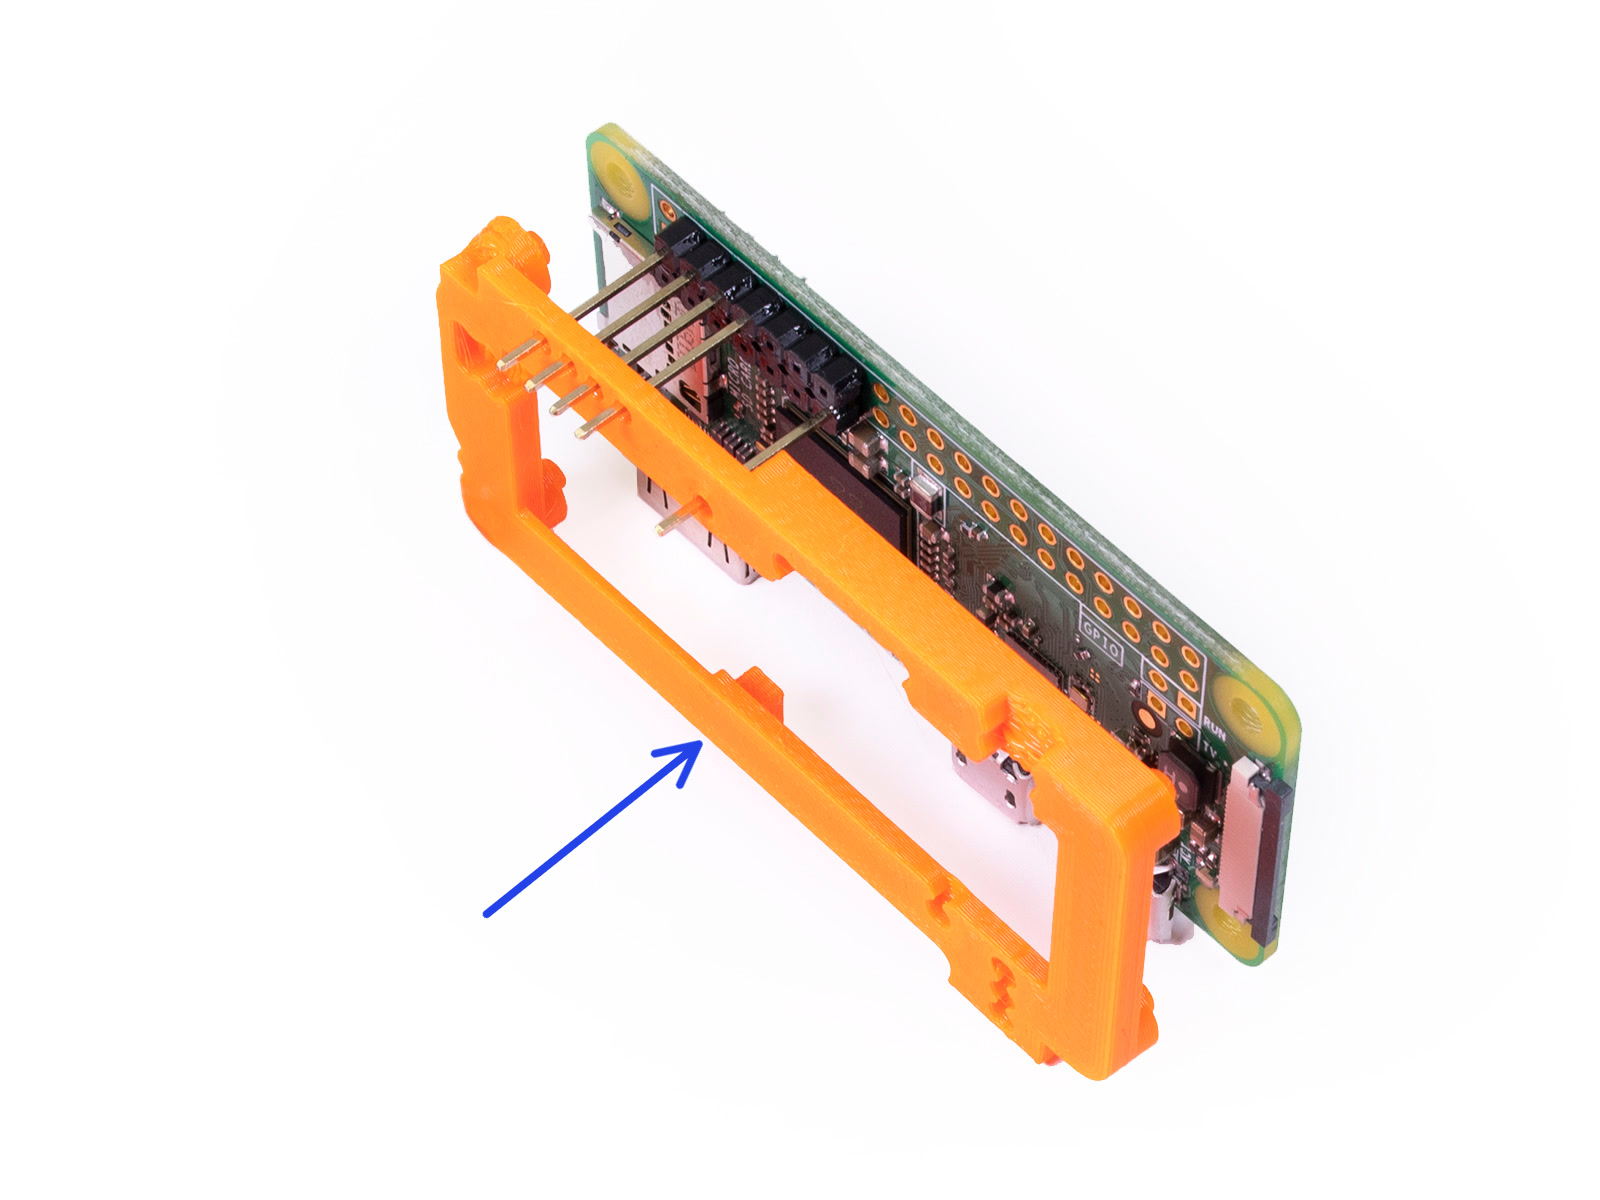
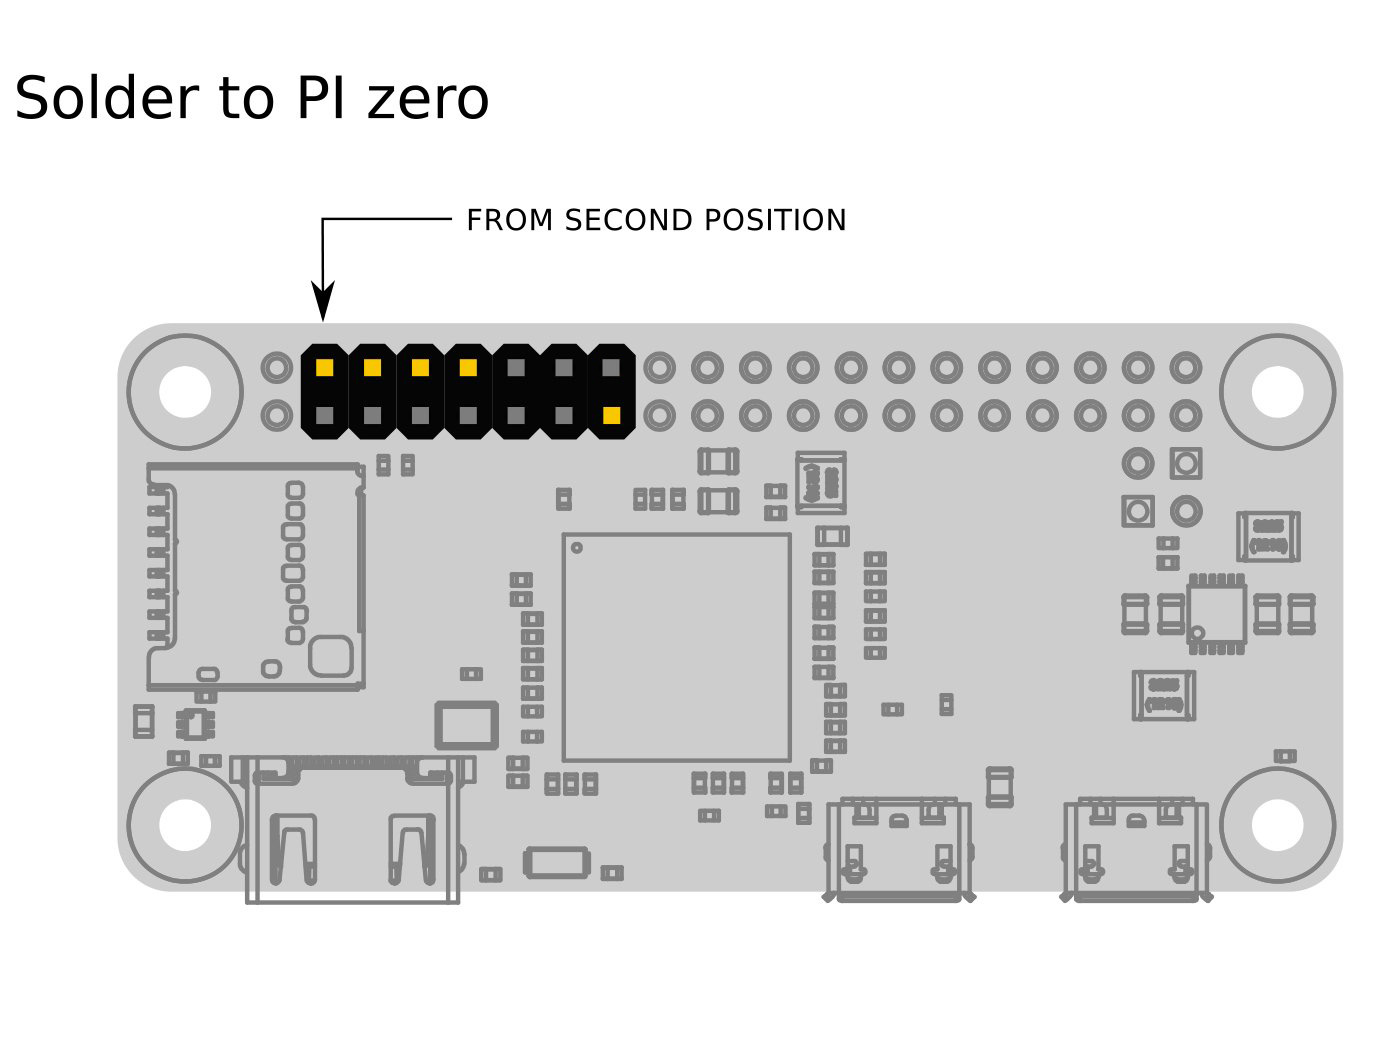
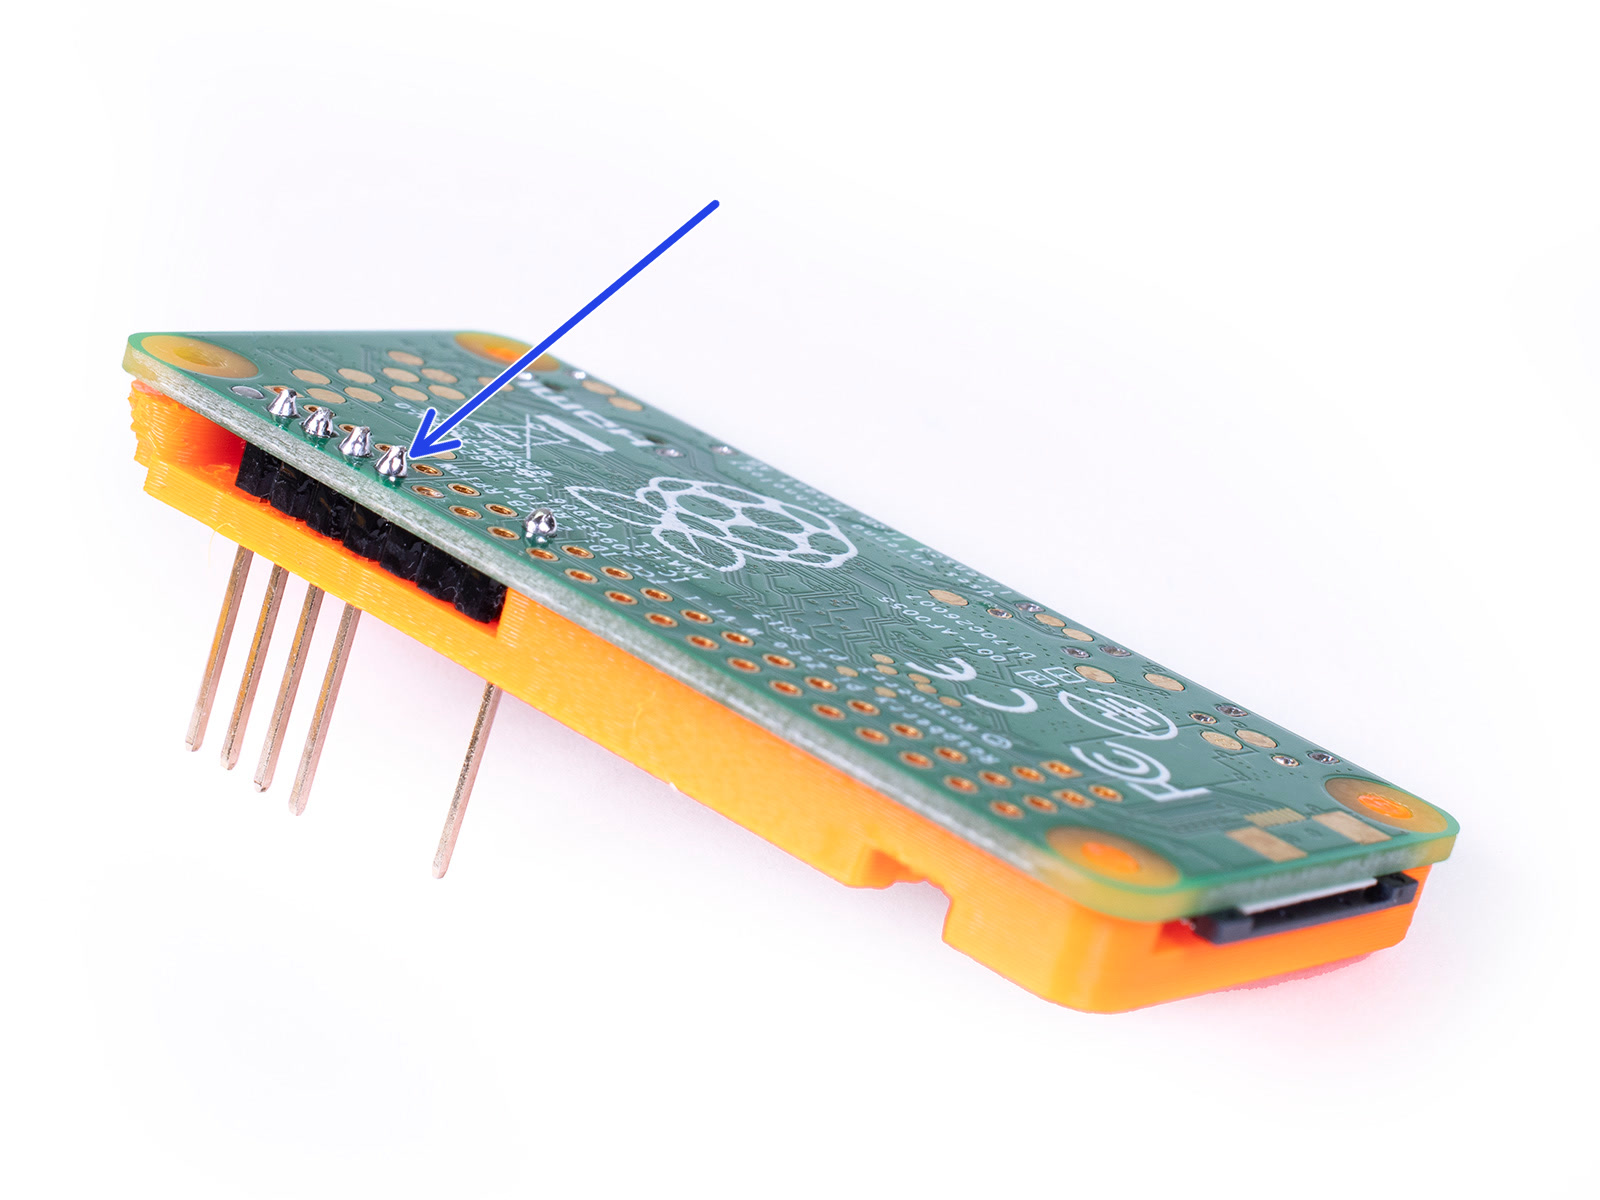
This guide is intended for experienced users, you may need some soldering tools and skills to finish the installation, see the upcoming steps first to prepare materials accordingly.
Parts preparation: Raspberry Pi Zero W

Get Raspberry Pi Zero W or Raspberry Pi Zero 2 W.

A ready-to-use RPi Zero W can be bought on our Eshop.

Both will work, but Raspberry Pi Zero 2 W is faster than its predecessor, the Pi Zero W.

Make sure you are buying the original Raspberry Pi Zero W. This guide isn't covering any other fruit alternatives like Banana Pi, Orange Pi, etc.
Make sure you're not buying the old Pi Zero without the Wi-Fi or the Pi Zero WH with the 40-pin GPIO header attached.
Get a MicroSD card (8GB or larger SDHC card, Class10, preferably a name brand one)
No need to buy an extra power supply or a power cable, your RPi Zero W will be powered directly from the printer. Do not connect any power source into the PWR IN microUSB connector! Do not do any modifications to the RPi Zero W.
Printing new parts
Printing new parts
Printing new parts
Printing new parts
To ensure correct positioning of pins and optimal distance, our developers created a printed part called RPi Zero Frame, which is placed between RPi Zero W and Einsy Rambo board.
Printing this part is mandatory. Without RPi Zero Frame, you will short-circuit contacts on the Rambo board. There is a risk of damage to your printer.
Download and print the following parts from printables.com
rpi-zero-frame.stl
raspberry-cover.stl
Optional, but useful is to print Prusa Link pliers, these may come in handy when removing the RPi Zero W from the printer.
Recommended print settings are 0.20mm Quality and PETG material. PLA might not resist higher temperatures inside the electronics box.
GPIO header preparation

If you bought Raspberry Pi Zero W from our eshop, it is ready to use and you may skip the GPIO header installation step.

However, if you bought it elsewhere, you may also need to purchase GPIO header and solder it to the RPi board in order to connect it to the printer.

For soldering the header you will need a soldering iron, solder, and soldering flux.
First, you need to buy break-away 2x20-pin Strip Dual Male Header. You need a version with 18mm pins.
However, the Dual Male Header pins are quite often shorter, so as a second item, you might need to purchase blanket header. Pins must be 18 mm long and you need at least 5 of them.
Preparing and checking the GPIO header
Take the dual male header and cut it to 7x2 pin size.
Remove all the short pins from the dual male header.
Instead, insert longer 18mm pins as shown in the picture. You need ONLY FIVE PINS!
Before soldering, make a quick check the pins protrude at least 1mm out of the board. Confirm the correct pin placement by aligning them with the printed rpi-zero-frame.
Soldering the GPIO header
Double check your work! Incorrect positioning of the pins can lead to damage both to RPi Zero W and Einsy Rambo board.

Solder the header to the RPi Zero W. Make sure you are soldering the header to the correct position and side.

A few quick tips on soldering: Use flux. Use flux some more :) Make sure to heat the soldering points enough so the solder flows into the joint naturally. Do not heat the soldering points too much as you may damage the RPi and the header may become distorted. 

After soldering is completed, flux residue can be removed with an IPA-soaked cotton swab.

Preparing necessary software

Download and install Raspberry Pi Imager from raspberrypi.org/software

Download the PrusaLink SD card image
the latest releases are available at github.com/prusa3d/Prusa-Link/releases
Look for the Assets under the latest release. The image file has a filename such as "prusalink-0.7.2.img.xz".
Insert an empty micro SD Card into your computer.

Open the Raspberry Pi Imager. Hit the CHOOSE OS, navigate to Use Custom and select the downloaded PrusaLink SD card image file.

Click CHOOSE STORAGE and select the micro SD card.
Don't hit the WRITE button yet! We must set up the Wi-Fi and other things first :)
Setting up the SD card in Pi Imager
Hit the cog icon or press Ctrl+Shift+X (or Cmd+shift+X) to open the Advanced options menu.

You can set a hostname. Preferably, use a unique hostname for the given printer, for example, gertruda.local  - Use just plain text with no special characters.

A hostname will allow you to access the printer more easily by typing just http://gertruda.local into your browser instead of the printer's IP address. If you leave the default PrusaLink.local hostname, there is a chance more printers are using the same hostname on one network. Remember the hostname now, you won't be able to change or view it easily later.

Depending on your local network settings, the hostname might not work and you might need to use the IP Address instead.

There is no need to set a device username and password in this dialog! SSH is for experienced users only.
Setting up the SD card in Pi Imager 2
There is no need to set a device username and password in this dialog! SSH is for experienced users only.
Scroll down to Configure wireless LAN ( Wi-Fi )
Set the SSID (the name of the local Wi-Fi network you are using) and Password.
Save the settings, hit WRITE and confirm formatting of the micro SD card.
Follow the instructions in the Pi Imager app only. Don't follow your operating system's notifications about the microSD Card and its formatting if there are any.
Setting up the printer
Make sure the printer is turned off and unplugged.
Prepare a utility knife with a sharp tip.
Carefully cut all the indicated plastic tabs from the Einsy-base and remove the rest of the cut-out part. During cutting the case, MAKE SURE you DON'T CUT the Einsy Rambo board!!!
Clean the surrounding area for any remaining bits of plastic.
Inserting the Raspberry Pi Zero W
Insert the micro SD card into the Raspberry Pi Zero W.
Stack the Raspberry Pi Zero W together with the printed rpi-zero-frame part.
Connect the Raspberry Pi Zero W with the frame into the Einsy Rambo board.
Use the raspberry-cover part to cover up the rPi Zero W.
Setting the printer up
Turn the printer on.

Go to the menu > Support, scroll down to check that you have firmware version 3.10.1 or newer. If not, please upgrade your firmware to the latest version (3.10.1 and up)

Go to the menu > Settings > RPi port and set it to ON

The first boot of the system might take a looong time. Please be patient and find something to do while you wait. :)

Don't worry. During the regular use, the booting won't be taking as long.

You might see "RPi Booting..." or "Starting Prusa Link" messages on your LCD before PrusaLink boots up.

Setting the printer up

After your PrusaLink boots up, you should see a number on the bottom of your LCD. This is the IP Address of your printer.

From now on, the IP Address can be also found in the Support menu of your printer.
This IP address is available on your local network only and might change over time according to your network setup.
If the LCD shows NO IP, it means you may have poor signal or other network issues. Try moving the printer closer to the Wi-Fi access point or consider using a MicroUSB ethernet dongle. PrusaLink will prefer the wired network then.
If the LCD indicates NO LAN ACCESS or another network error, re-visit step 9 to configure the Wi-Fi settings again.
Opening up PrusaLink Wizard
Write down the IP Address from your printer's LCD into the address field of your web browser.

Use just the four numbers separated by dots.
In case you have set up a hostname earlier, you might be able to access the printer as http://yourhostname.local
(if the local network allows you to.)

The PrusaLink Wizard site will open in your browser.  Click Setup credentials|NEXT.

PrusaLink verifies your printer's serial number with Prusa servers. 

If you have trouble configuring the PrusaLink because of an issue with your printer's serial number, please contact support.

PrusaLink Wizard - Credentials
Now you need to create a username and password to access the PrusaLink.
These credentials are printer-specific. Note, this is not your Prusa Account. We strongly suggest using unique credentials. In case you have multiple printers, you can use a password manager.
This username and password will later be used to access PrusaLink directly, to get to the printer's own website, without having to be logged into Prusa Connect.
Hit Printer Info | NEXT
PrusaLink Wizard - Recap

Check the entered information.

If everything is correct, hit
Save printer and link with Connect | NEXT
You will be redirected to the PrusaConnect site
If you plan to use PrusaLink over the local network only - without the Prusa Connect cloud service or an internet connectivity, you can select Save printer|NEXT instead.
Adding the printer into Prusa Connect
Now you are looking at the Prusa Connect site.
Hit + ADD PRINTER
From now on, there should be OK: sign and the IP address visible on the LCD of your printer - meaning PrusaLink is active and set up.
In Prusa Connect, go to printer detail page.
Printing a file from PrusaLink
From now on, to print a file over the local network using PrusaLink, simply open PrusaLink by typing the IP address into the web browser.
Log in using the credentials you have set in the Wizard.
Select or drop in a G-Code file.
Verify the printer is ready to print, click Start print and confirm the steel sheet is empty and clean.
Printing a file from Prusa Connect
To print a file using Prusa Connect, open up connect.prusa3d.com, navigate to printer details page.
Select or drop in a G-code file.
In the Latest file uploads section, select Copy to printer and print. Verify the printer is ready to print. Confirm the steel sheet is clean and empty. The file will be copied over from Prusa Connect cloud onto the printer (PrusaLink).
Once the file is copied over to the printer, it will start printing.
Prusa Connect file management
If you navigate to the Printer files section for the given printer, there are two tabs:
Prusa Connect storage shows the files stored on the cloud. These can be copied over and printed on any of the printers in Prusa Connect.
PrusaLink g-codes shows local files on the given printer (stored on the RPi microSD card). These can be printed immediately.
Was this guide helpful?

Comments

Still have questions?

Still have questions?

If you have a question about something that isn't covered here, check out our additional resources.
And if that doesn't do the trick, you can send an inquiry to [email protected] or through the button below.

Contact us