What happened?
The printer is showing the message "Fan 0 of the heated bed is operating outside of specification".
Error name: AC controller fault
Error code: #35335
How to fix it?
A visual check
Locate the fan on the bottom of the heatbed. If needed, raise the heatbed by navigating to the LCD Menu -> Control -> Autohome. Once the printer is moved to the needed position, do not manipulate it until it is fully cooled down and switched off.
Check the fan for any dust or debris, and clean the residue if needed.
Replace fan from AC heatbed
Printer preparation and switching off
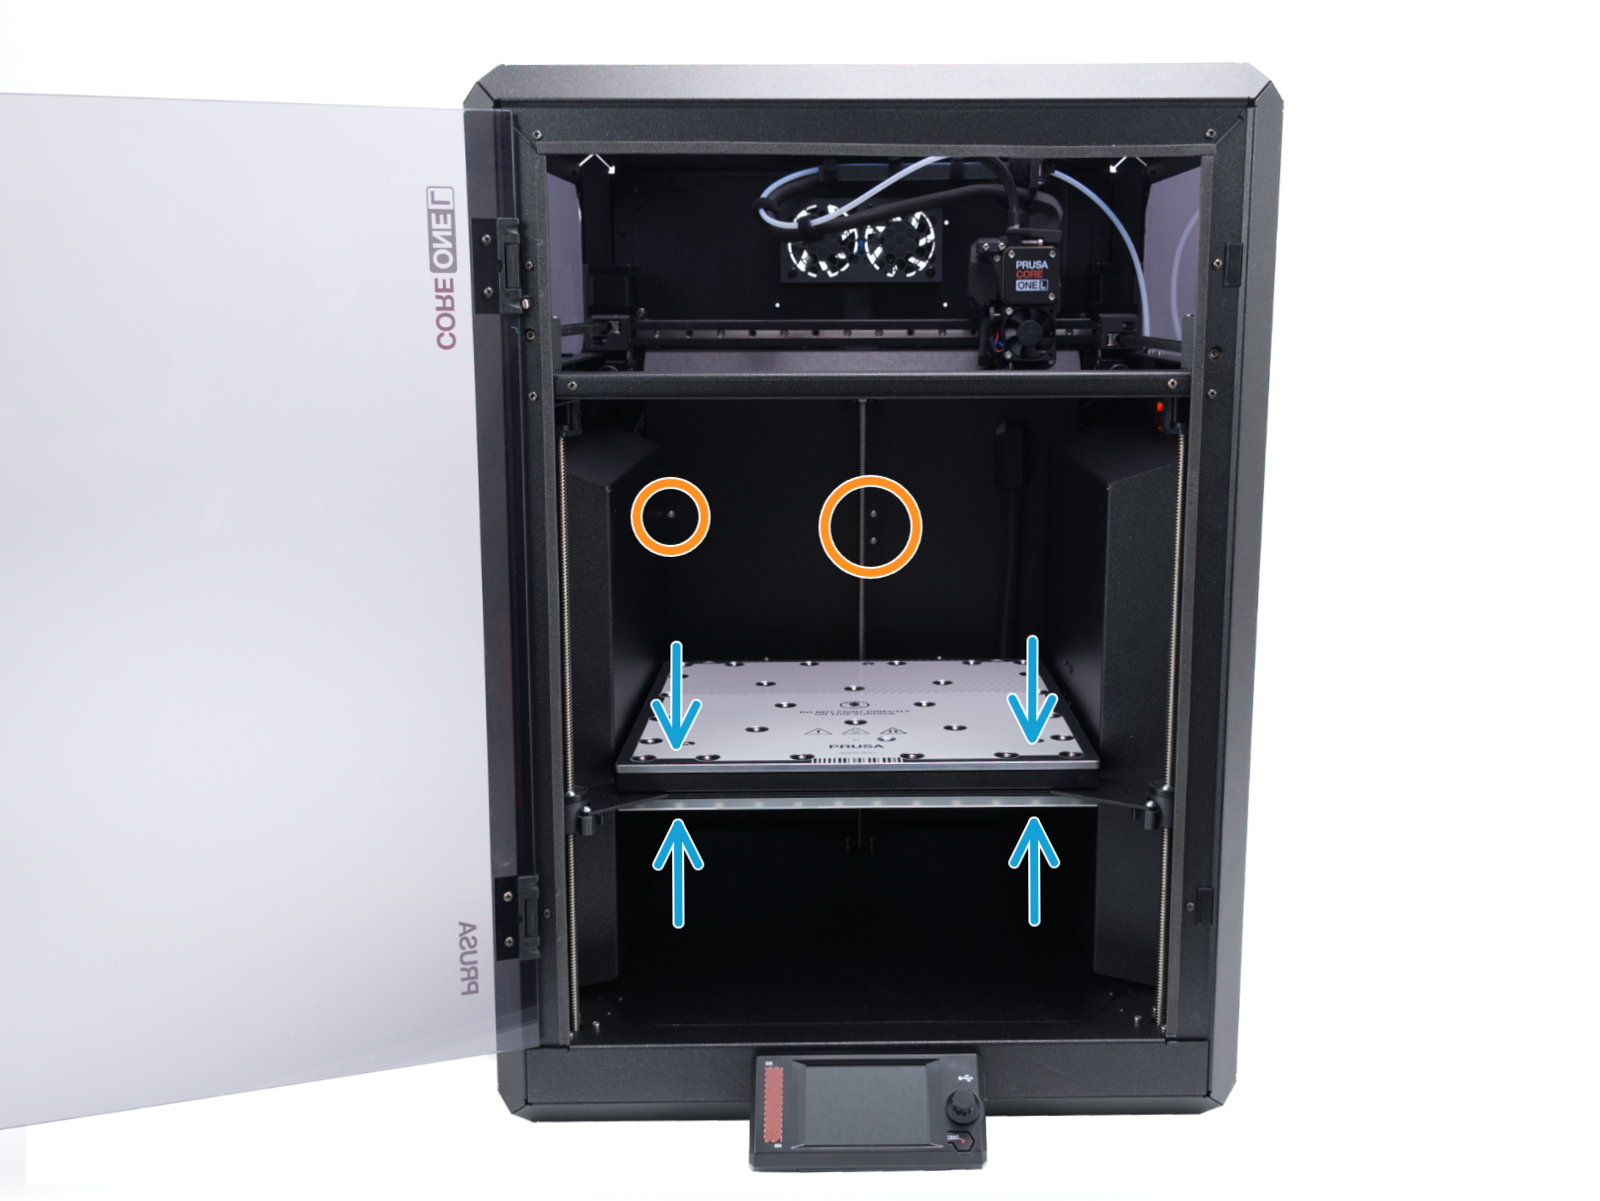
- Open the menu Control -> Move Axis -> Move Z to move the heatbed.
- Wait until the heatbed moves into approximately the same position as shown in the photo.
- The heatbed must be positioned slightly below the highlighted screws in the back panel of the printer.
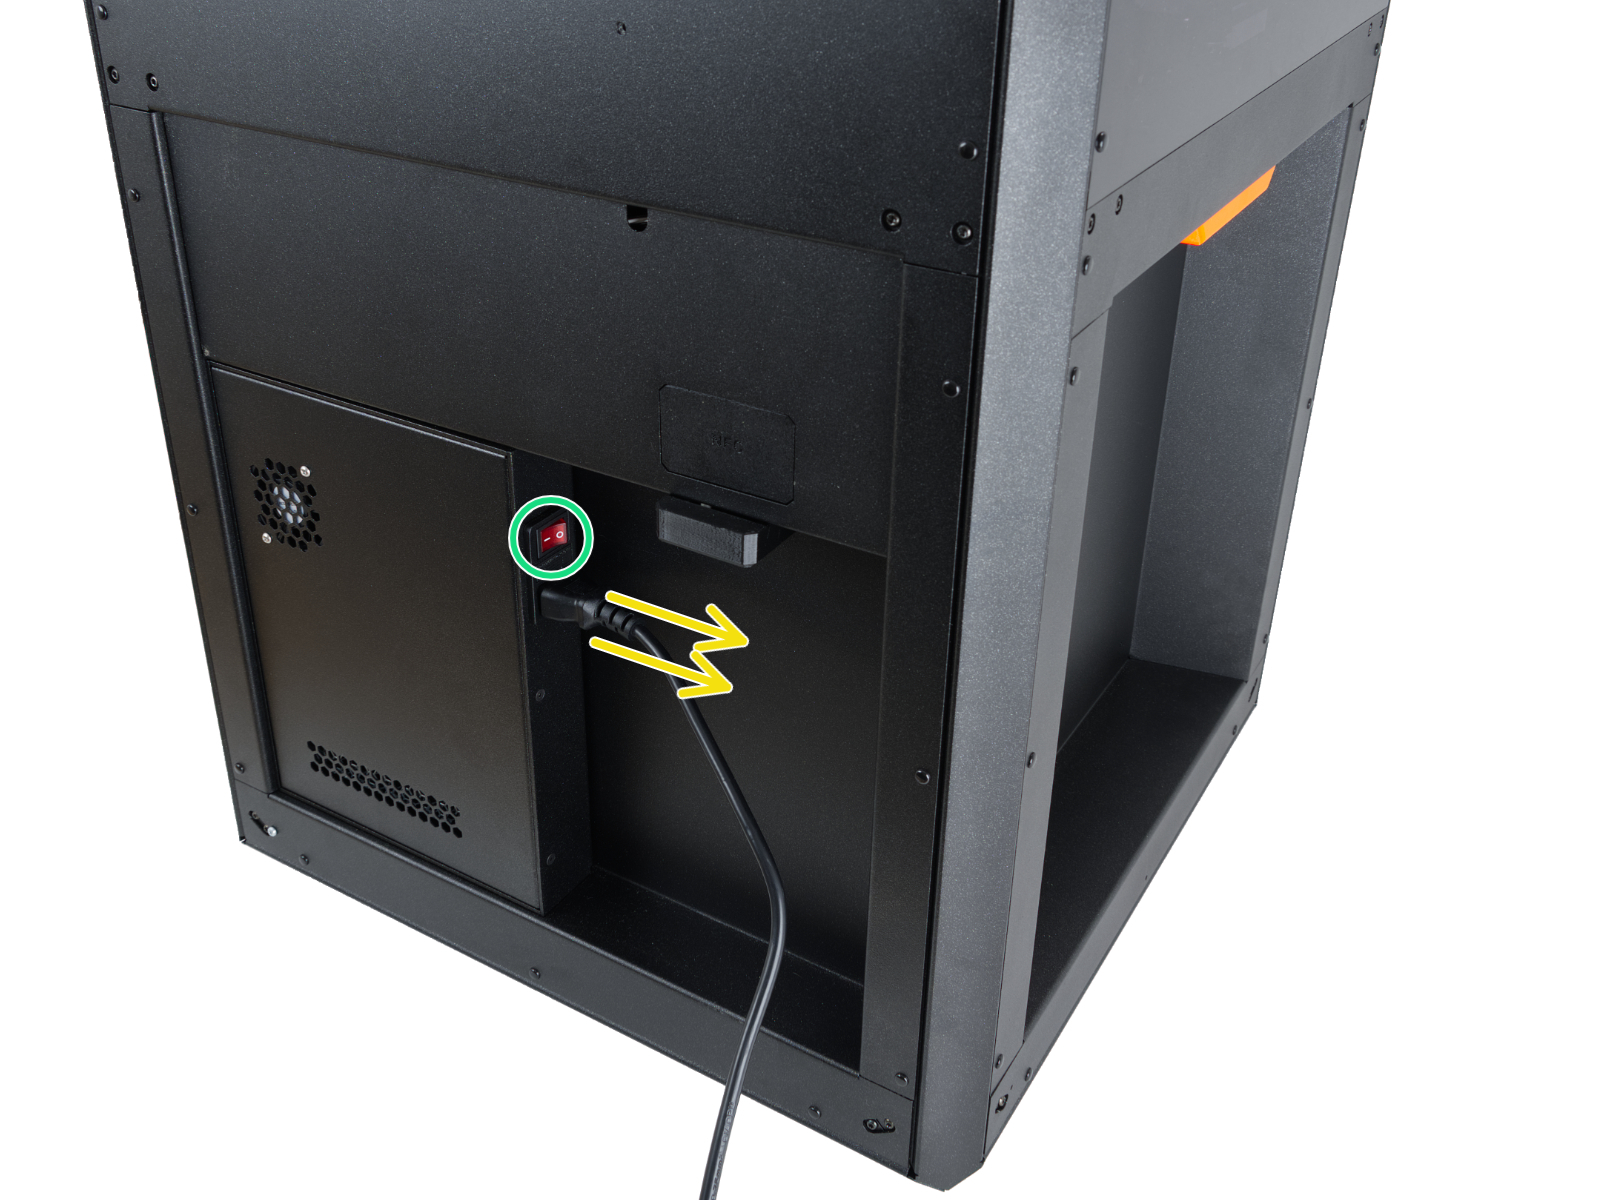
- On the rear side of the printer, flip the power switch OFF (symbol "O").
- Unplug the power cable.
- Once the power cable is unplugged, flip the power switch ON (symbol "I") to get rid of any electricity left over in the AC box circuits. After 3 seconds, flip the switch OFF again.
Disconnecting and replacing the heatbed fan
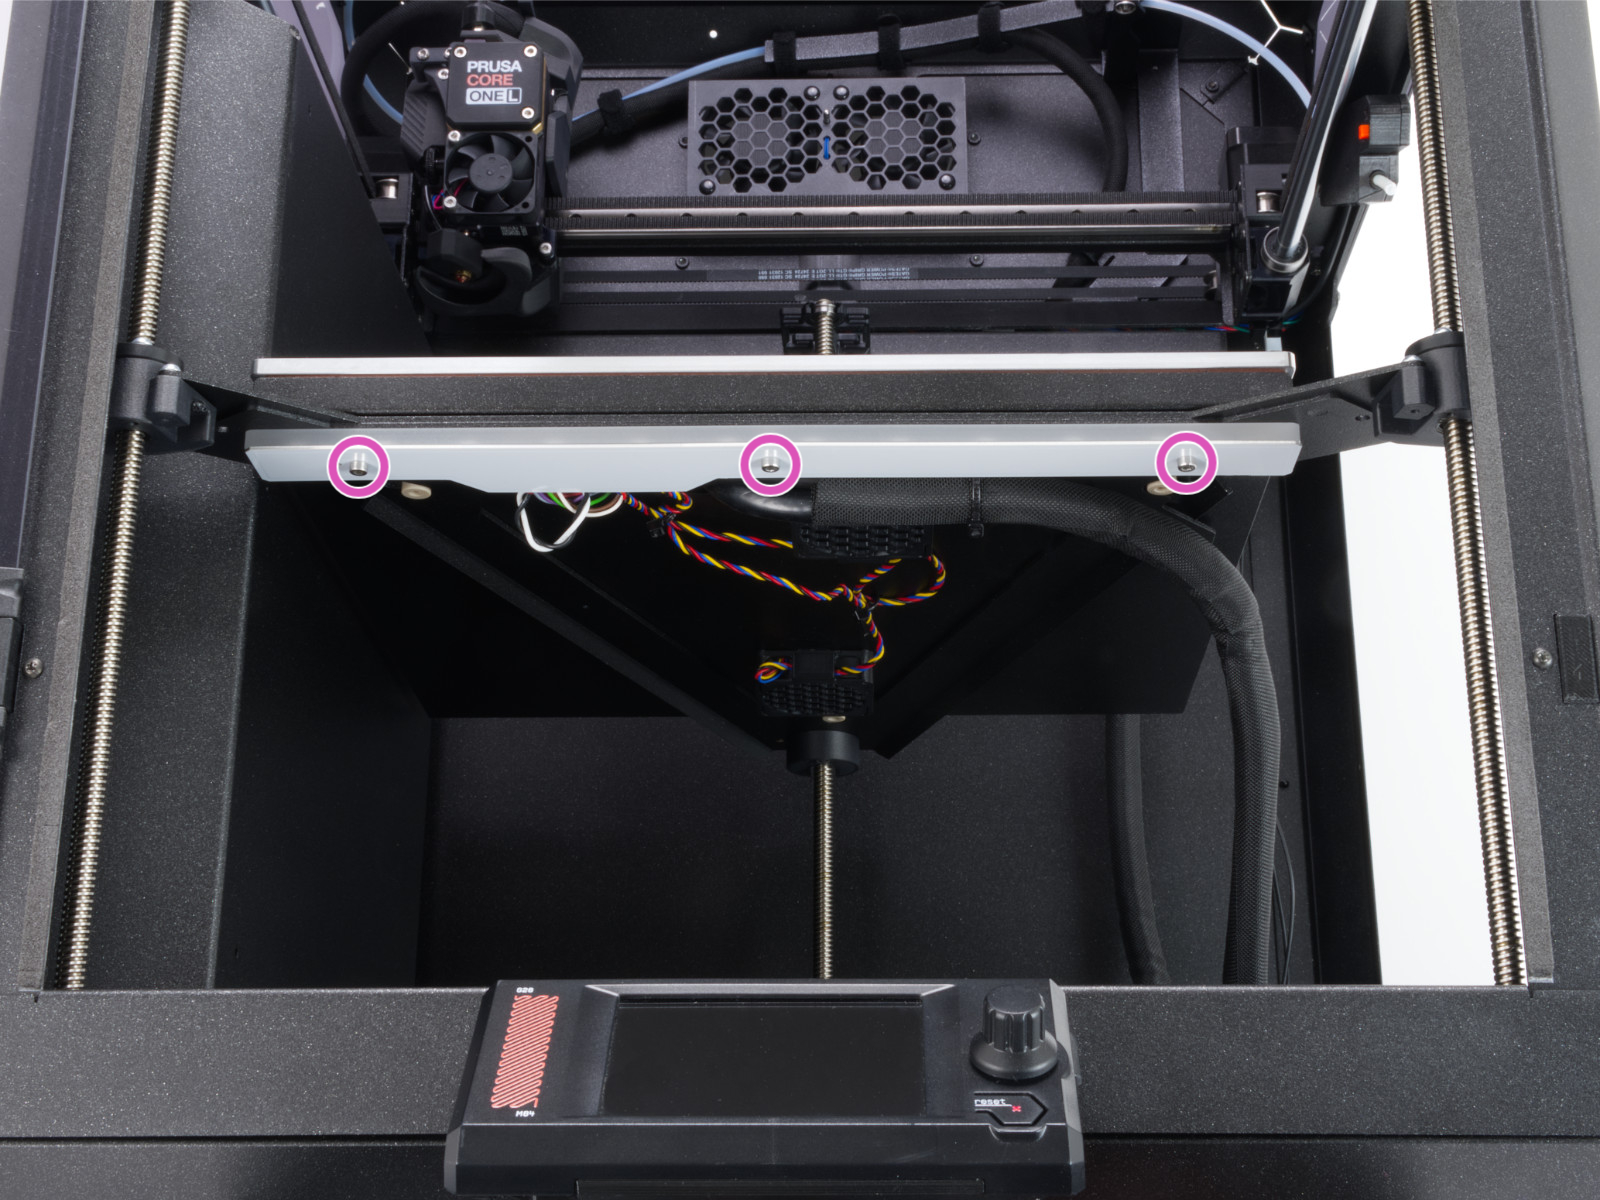
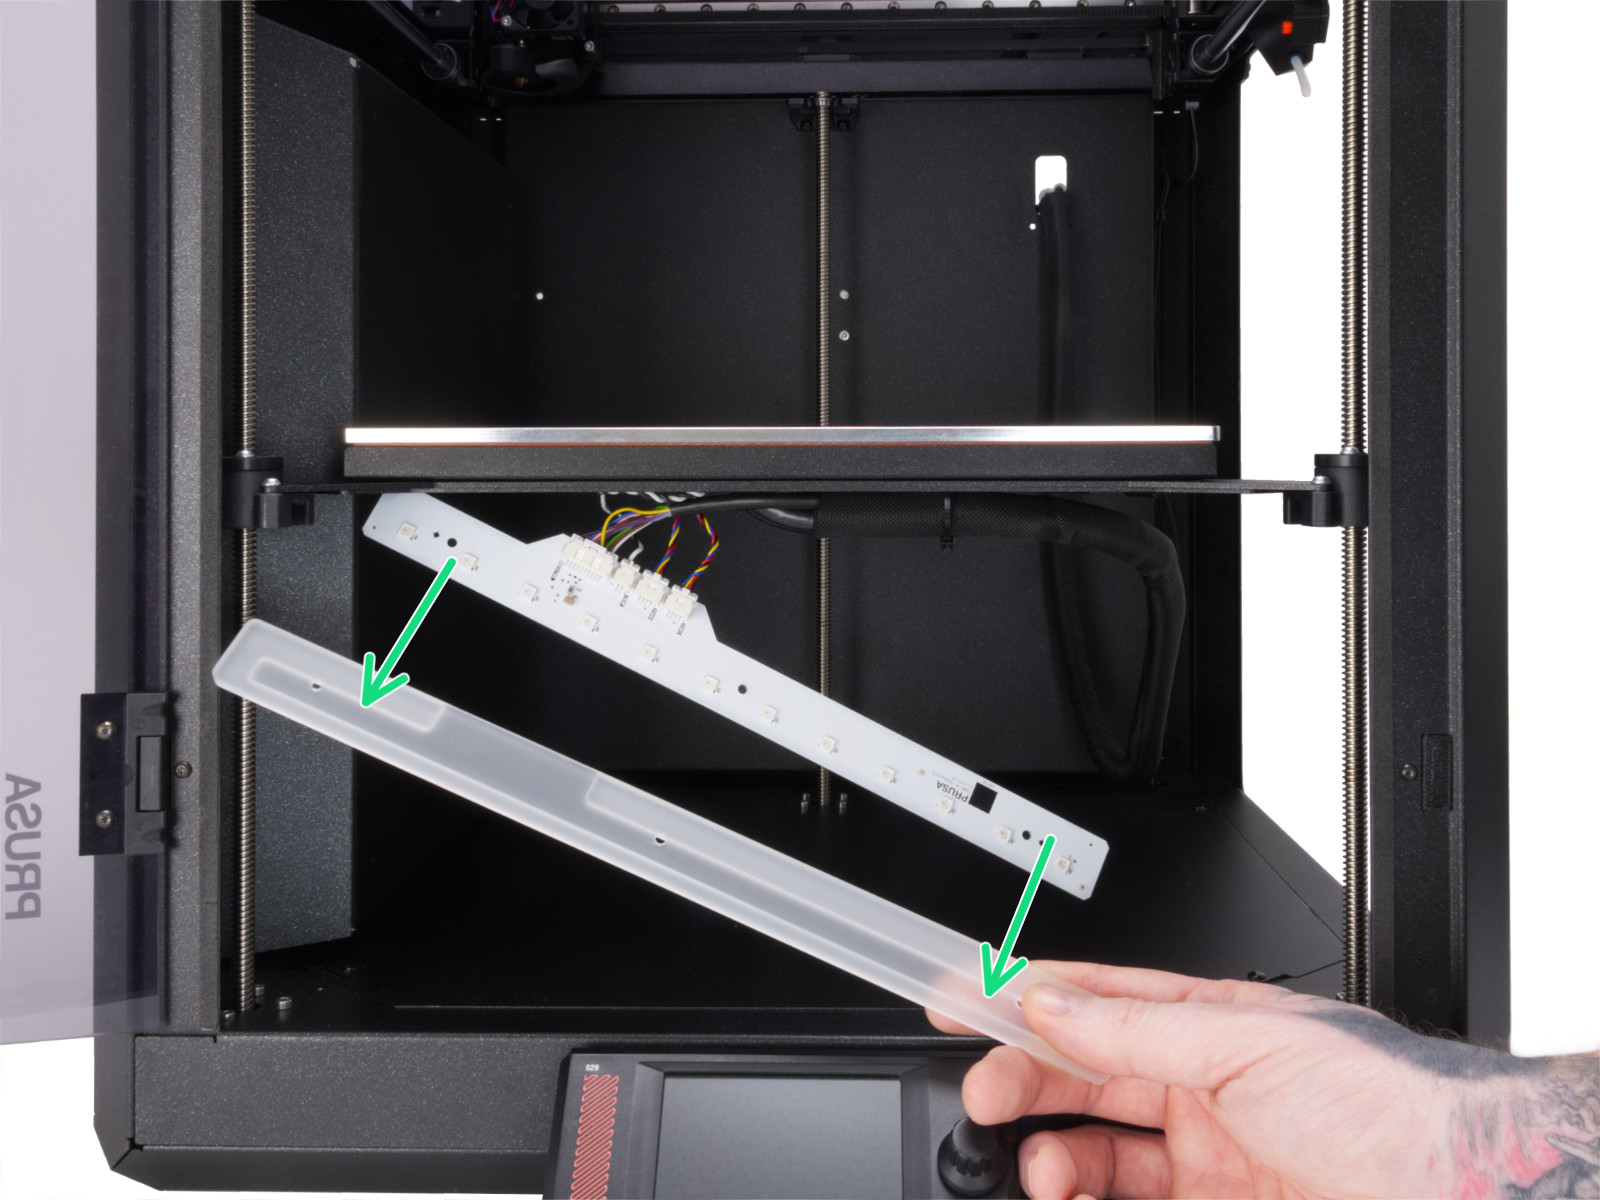
- Use the 2.5mm Allen key to remove the three M3x10 screw that hold the LED panel in place.
- Gently lower the LED panel. Note that the plastic cover is not fixed to the LED panel; hold it in place to prevent it from falling.
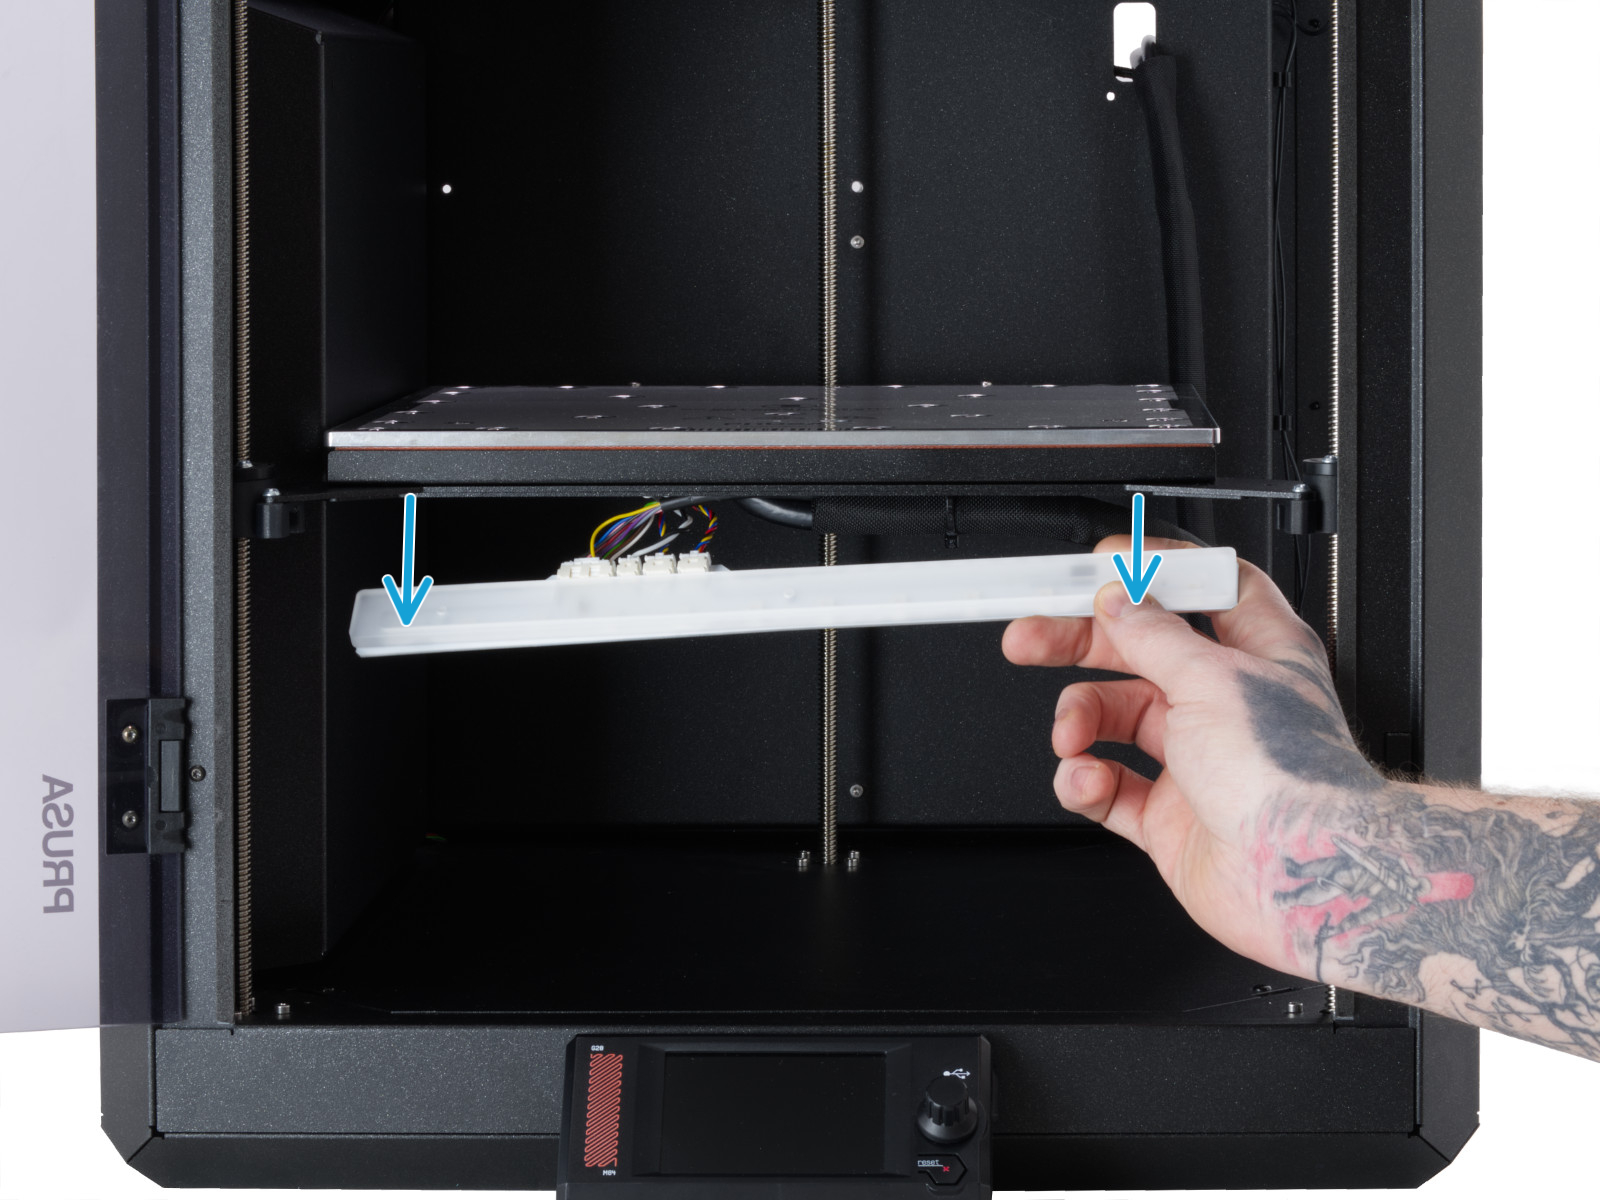
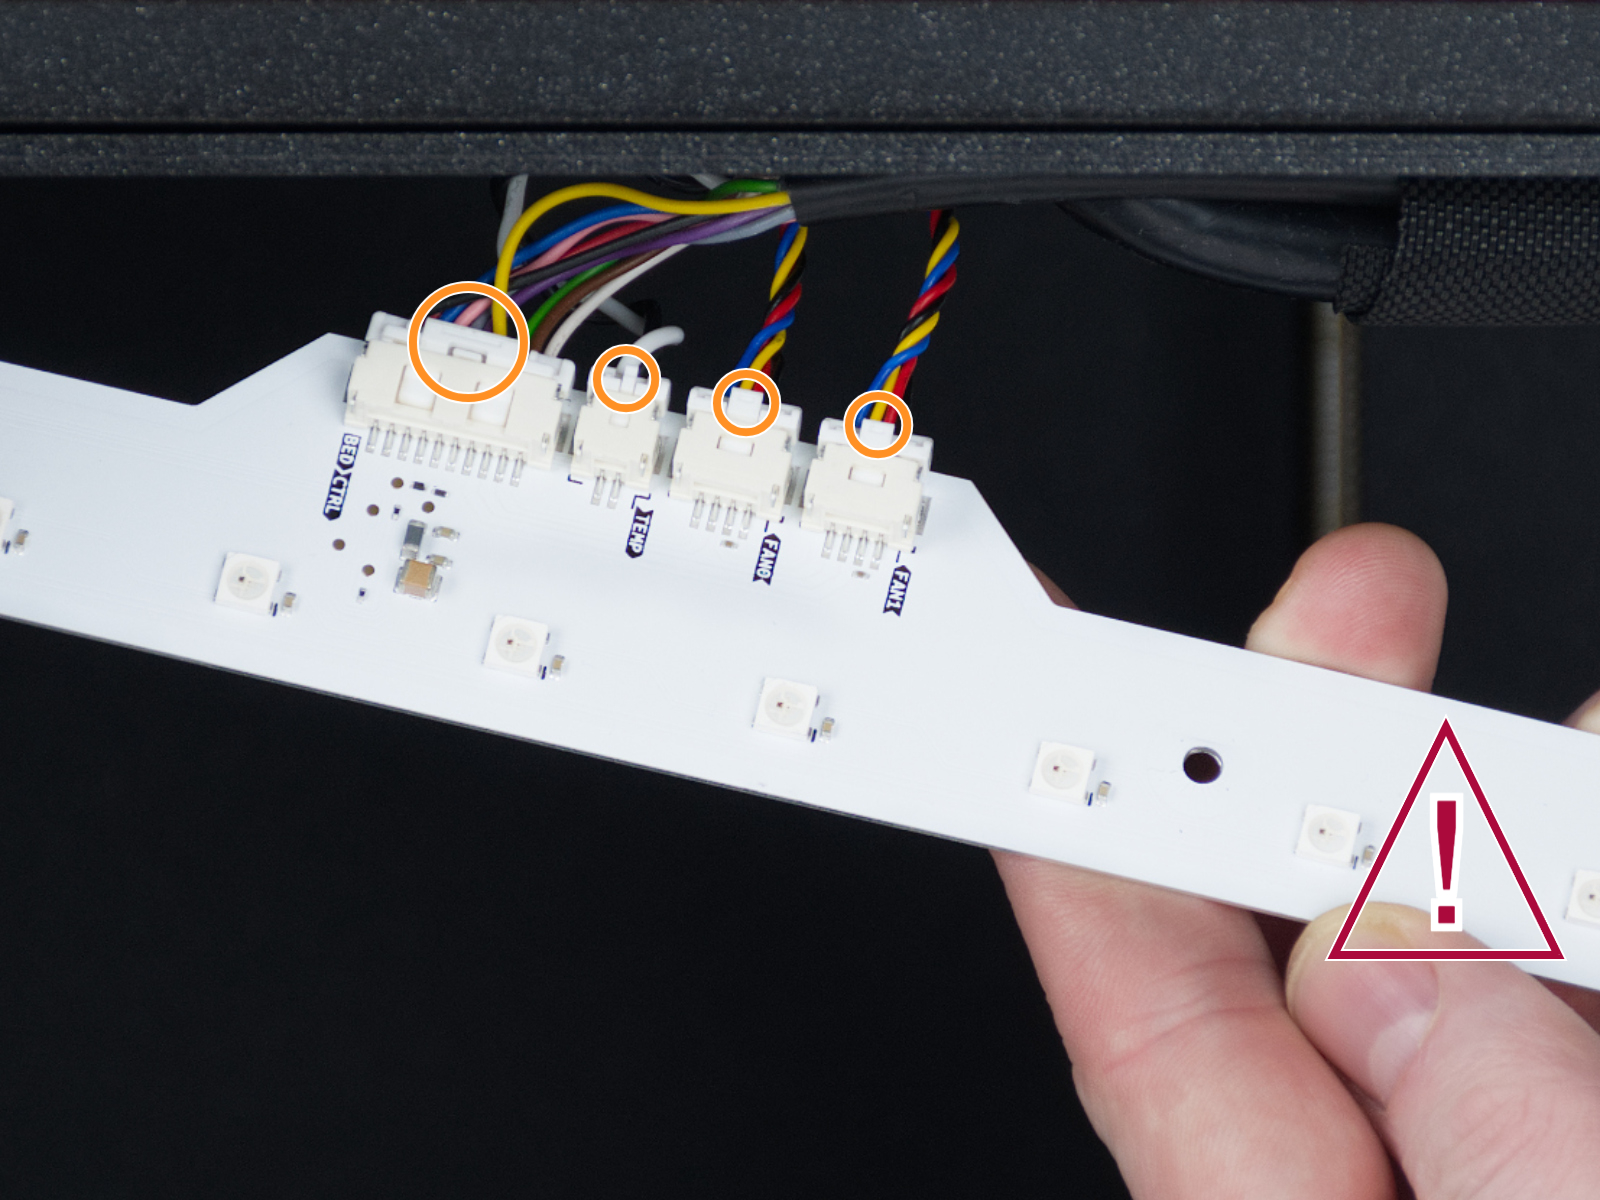
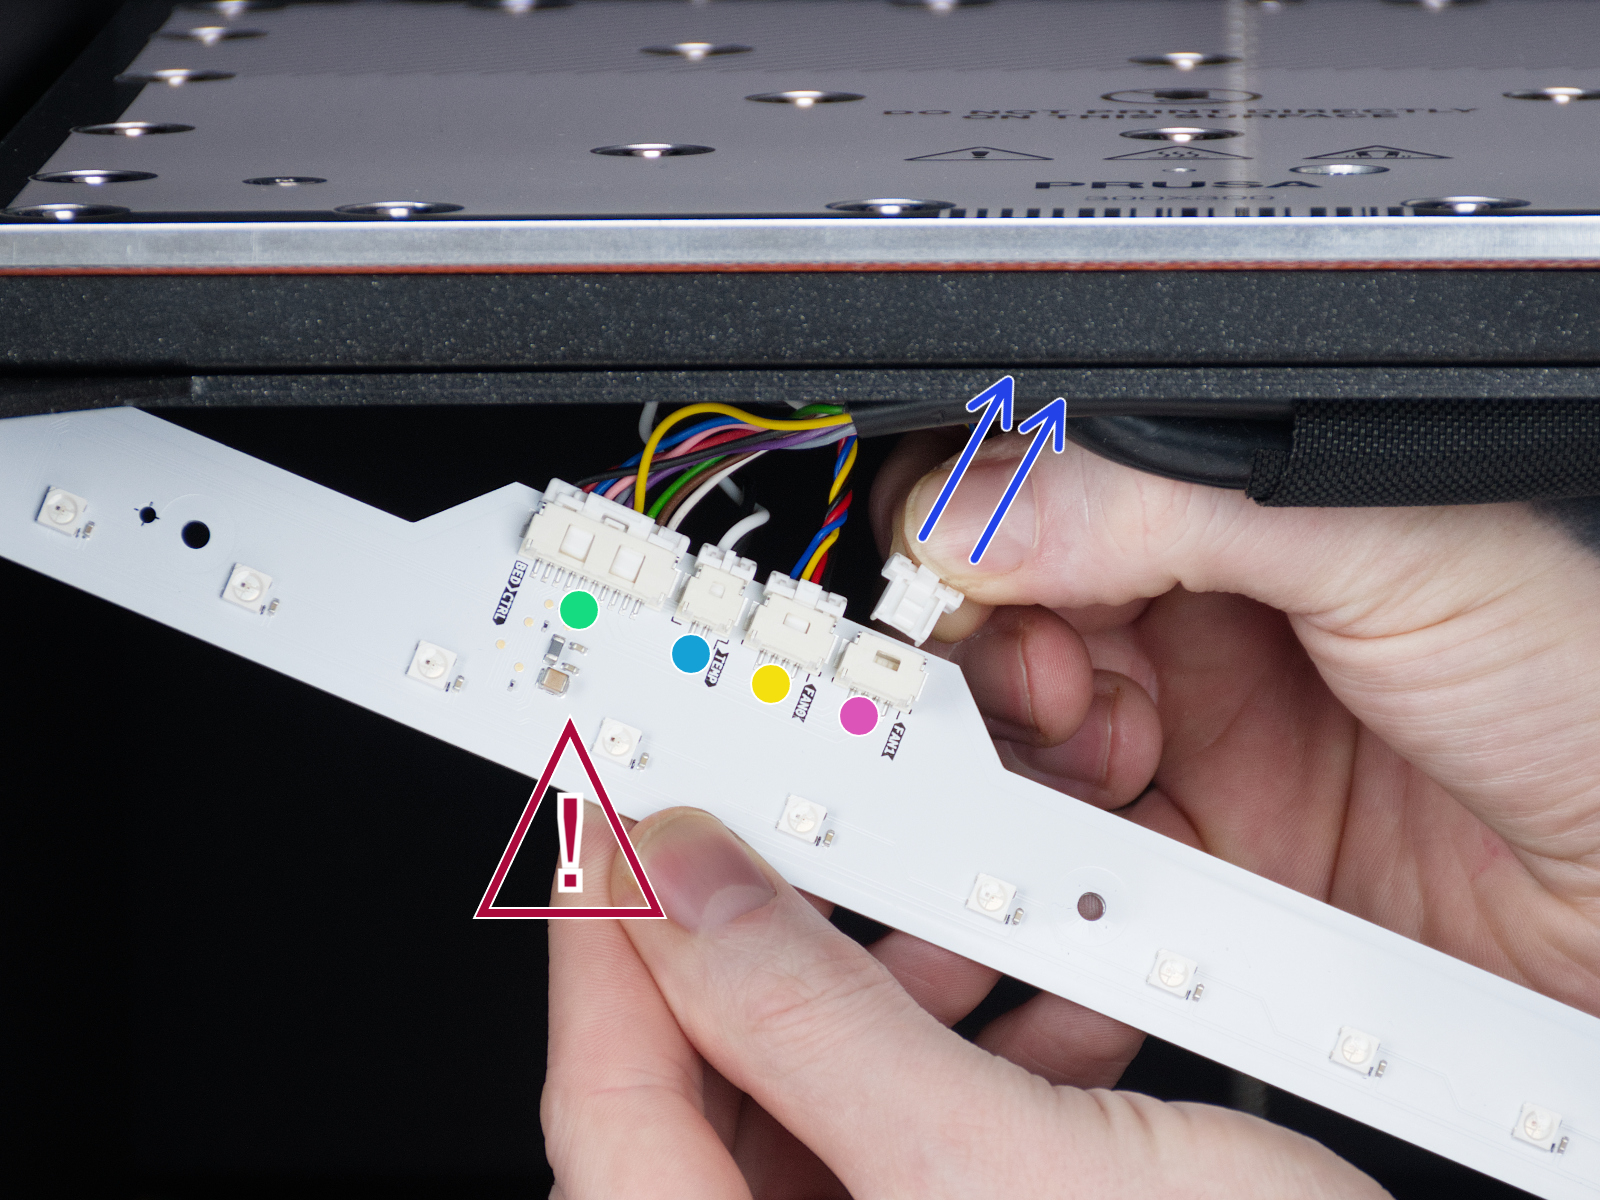
- Remove the cover from the LED panel. Do not touch LEDs and resistors on the LED panel!
- Note that each connector is secured in place with a safety latch. Press the latch to disconnect the cables.
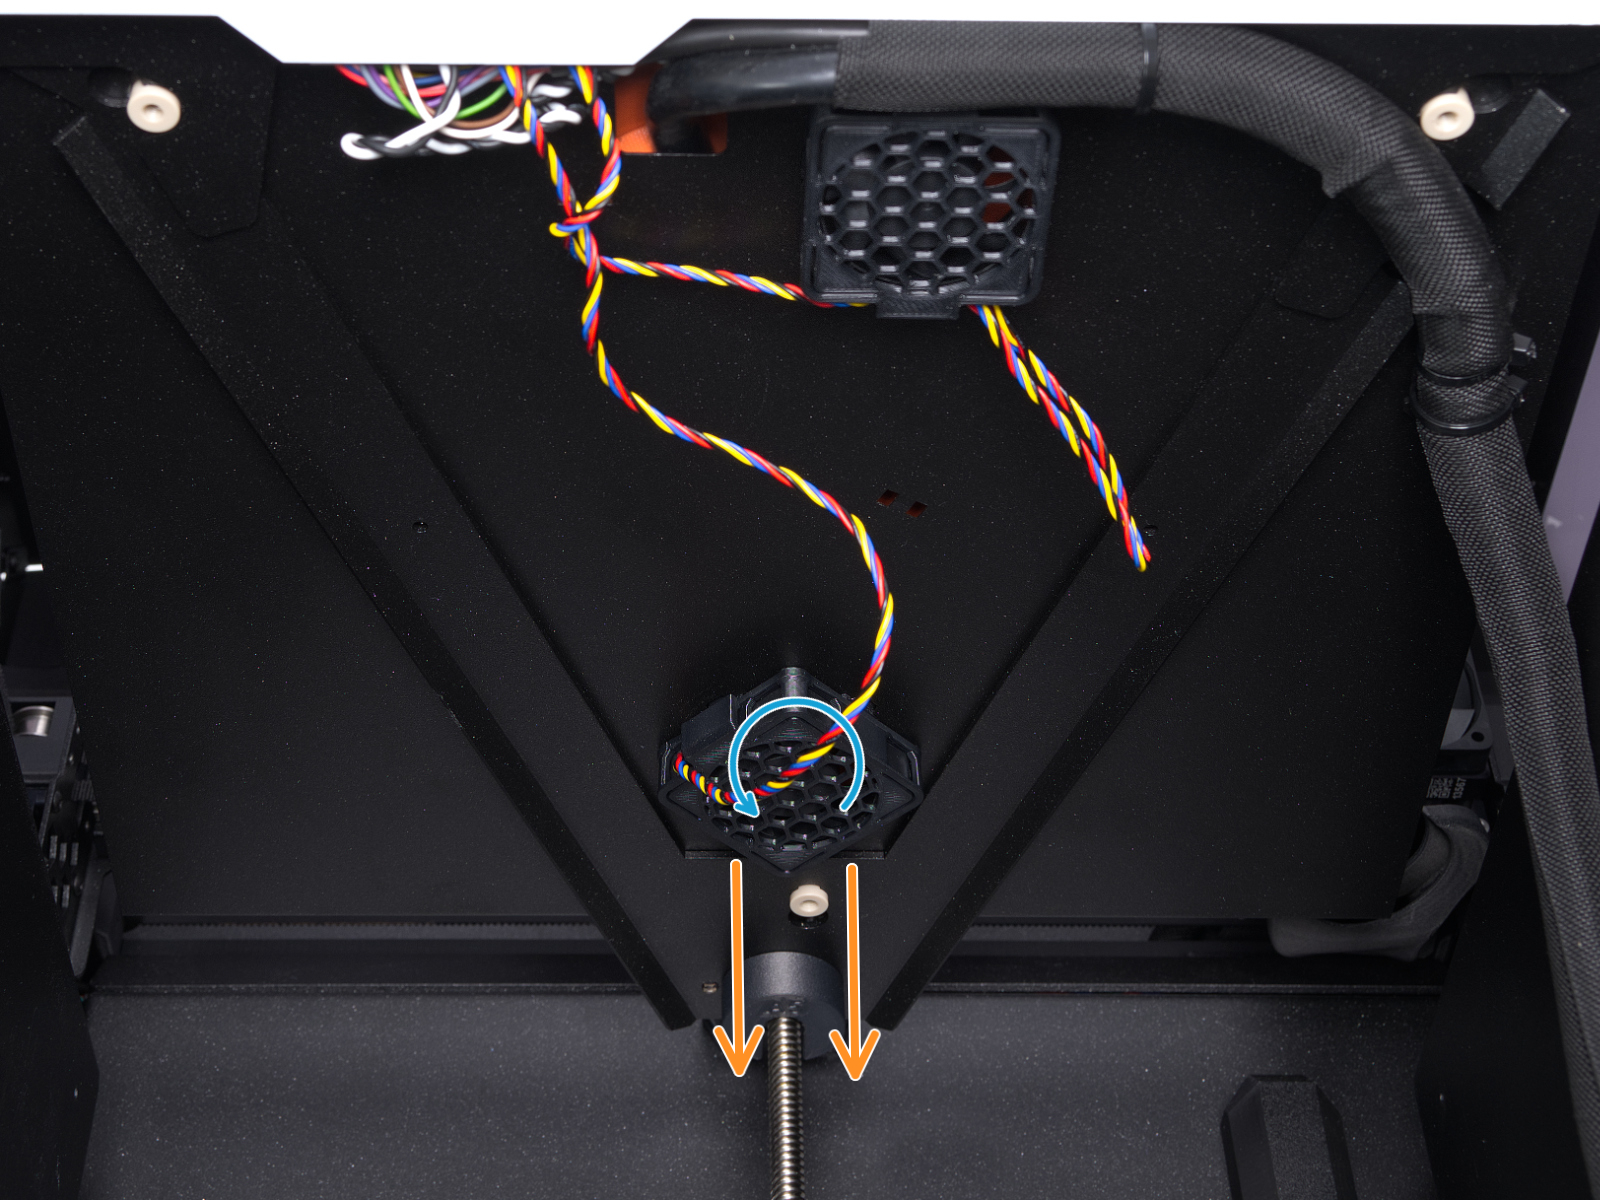
- Disconnect the fan from the plastic holder by twisting it counterclockwise. Then put the new fan in the plastic part and twist the other way around. Cut and replace zip ties as needed.
- Follow the steps in reverse to reassemble the components.
この記事は役に立ちましたか?
この操作は登録ユーザーのみが利用できます。ログインしてください。