Updating the firmware is recommended for all users as every new version brings new features and fixes. To flash the firmware onto your printer, you need:
- Computer running Windows, macOS, or Linux
- USB cable, preferably the original included with your printer
- PrusaSlicer and the printer's driver installed (download here)
For MK2.5/MK2.5S printers that have the SuperPINDA installed, you MUST use firmware version 3.9.3, or above!
To check which firmware version you already have on your printer, power it up and go to LCD menu -> Support. Scroll down and you will see the firmware version. The procedure for installing an older version of the firmware (downgrading) is exactly the same.
If you want to flash the firmware, the printer must be ON.
Preparations
- PrusaSlicer and the printer's driver must be installed. If you do not have this installed, it is found in the Drivers and Apps package available on the same page where you download the latest firmware.
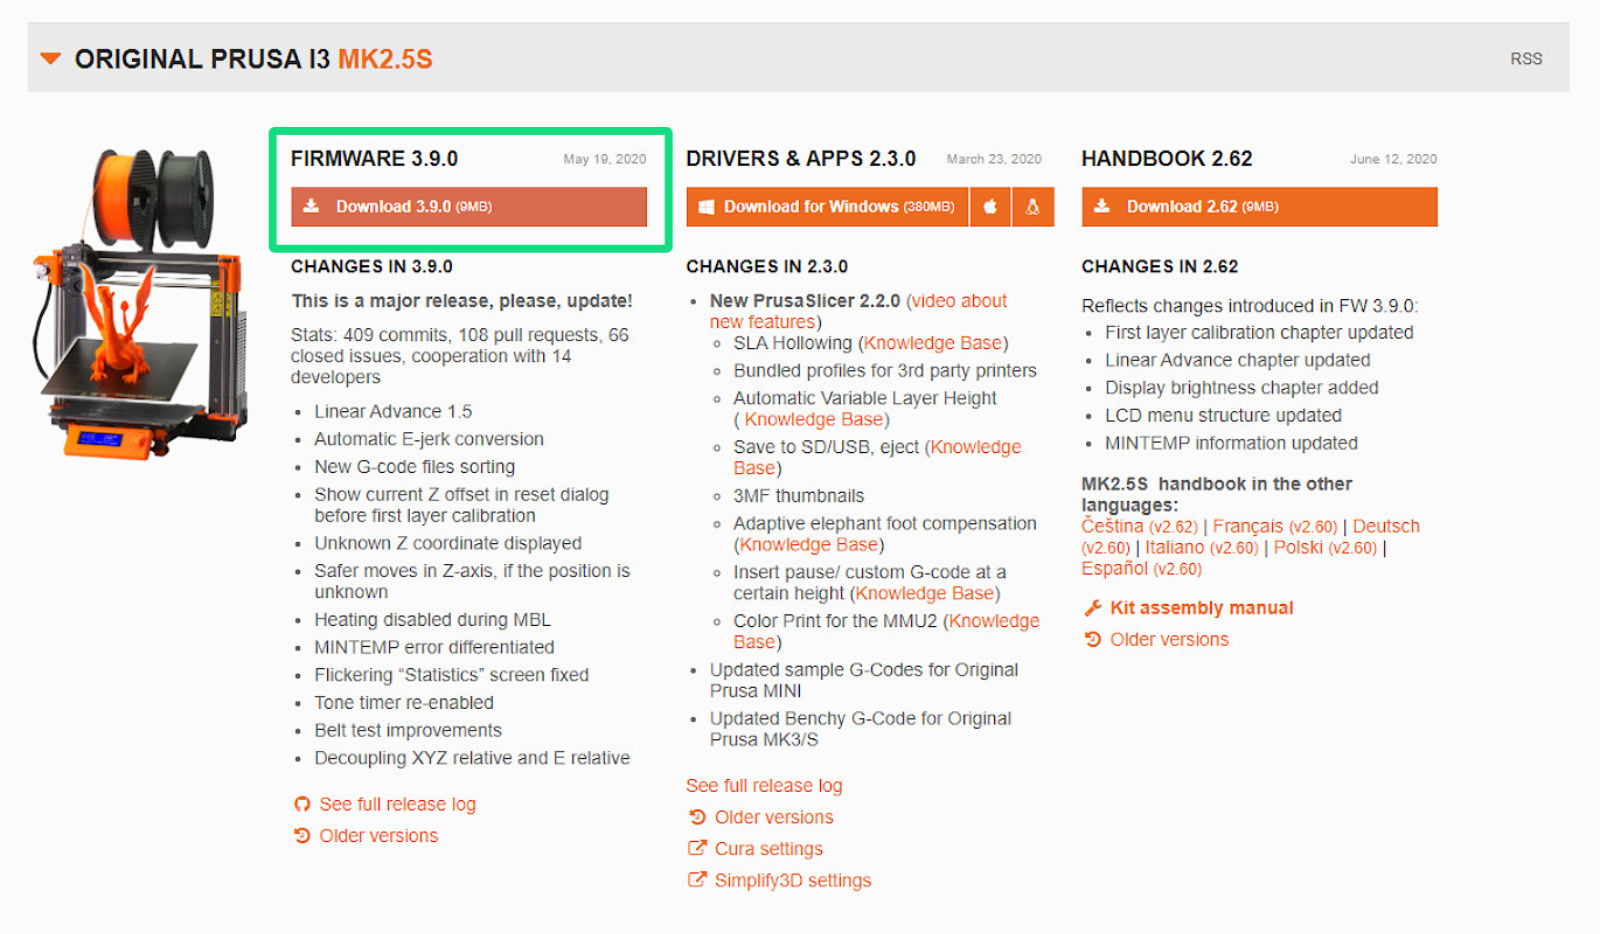
- Enter our our downloads section and download the firmware (green square). To find the correct firmware, see the name and picture of the printers/upgrades and compare it to your machine.
Flashing procedure MK2S/MK2.5S
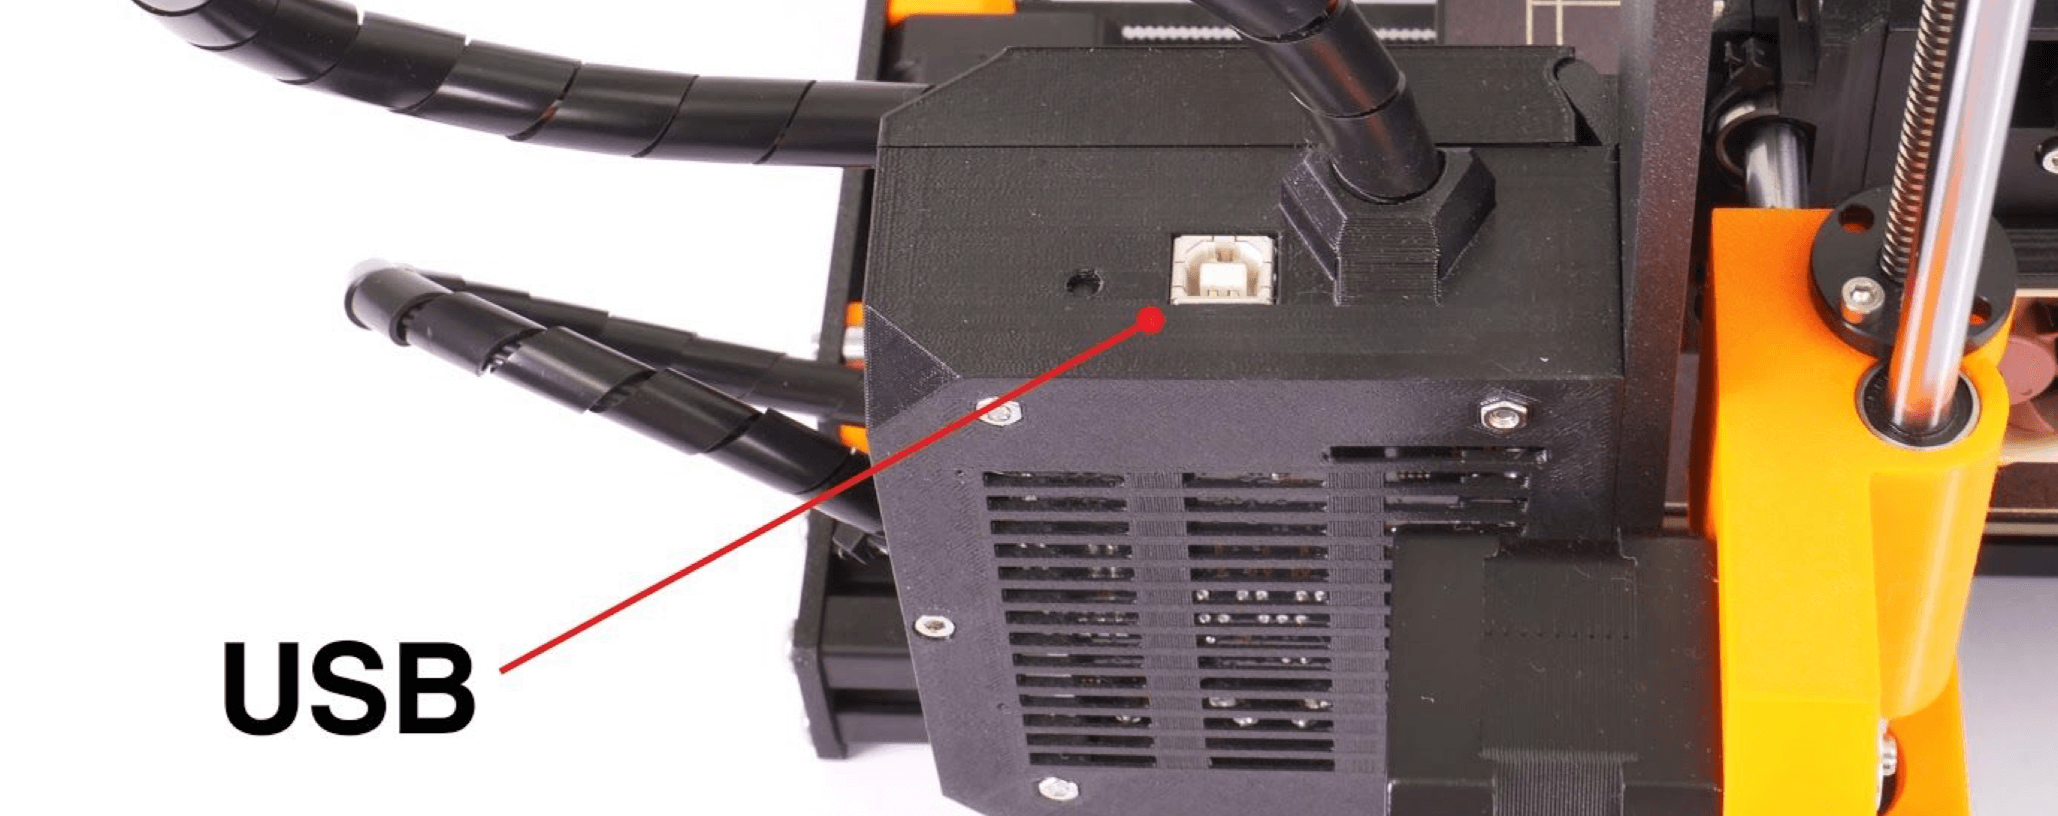
- To flash the firmware into your printer, connect the Mini-RAMBo board to your computer using the square-shaped USB-B 2.0 cable. The printer must be ON!
- Check which revision of the mini-RAMBo you have (Either 10a or 13a), by navigating the LCD menu -> Support, and scroll down 9 clicks. You will see either 'RAMBo10A' or 'RAMBo13A'.
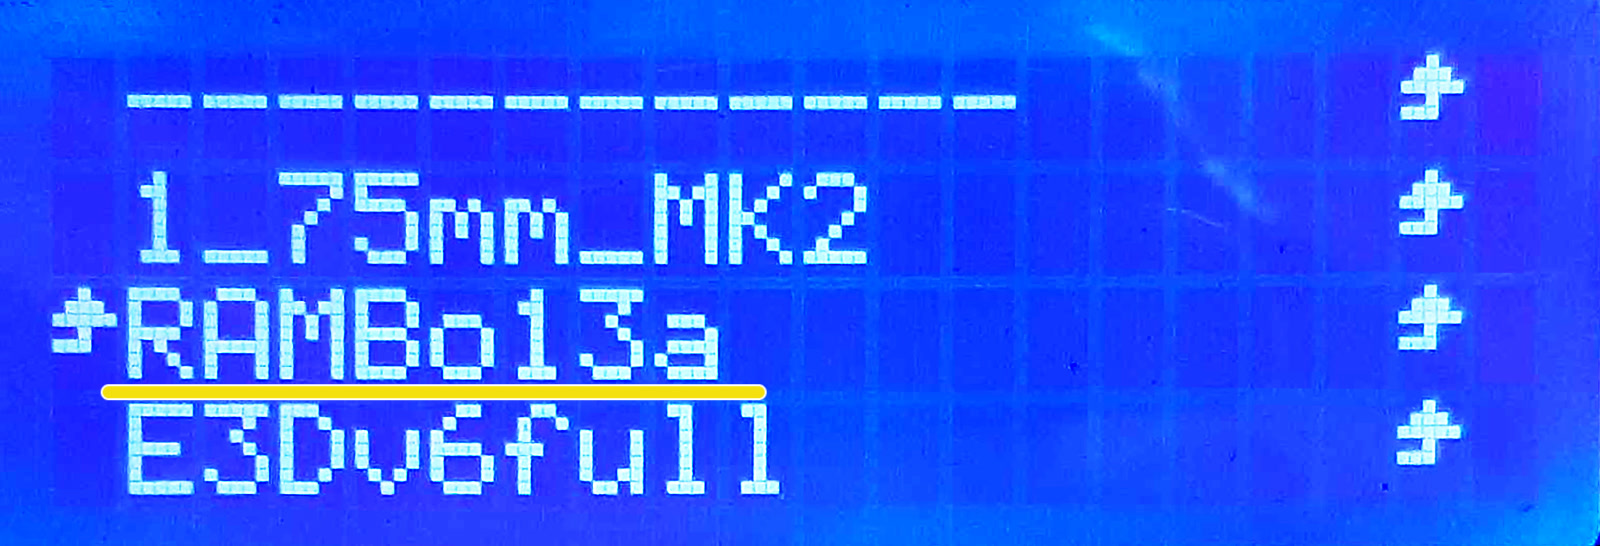
Your display will show either 'RAMBo10A' or 'RAMBo13A' (Ex. above).
If you can not navigate the menu, you can find the revision number printed onto the mini-RAMBo board itself.
- Unzip the .zip-file to a folder on your computer.
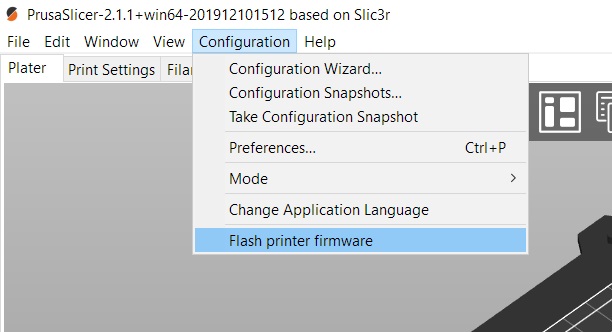
- Open PrusaSlicer, click on the 'Configuration' menu, and select 'Flash printer firmware' (left picture).
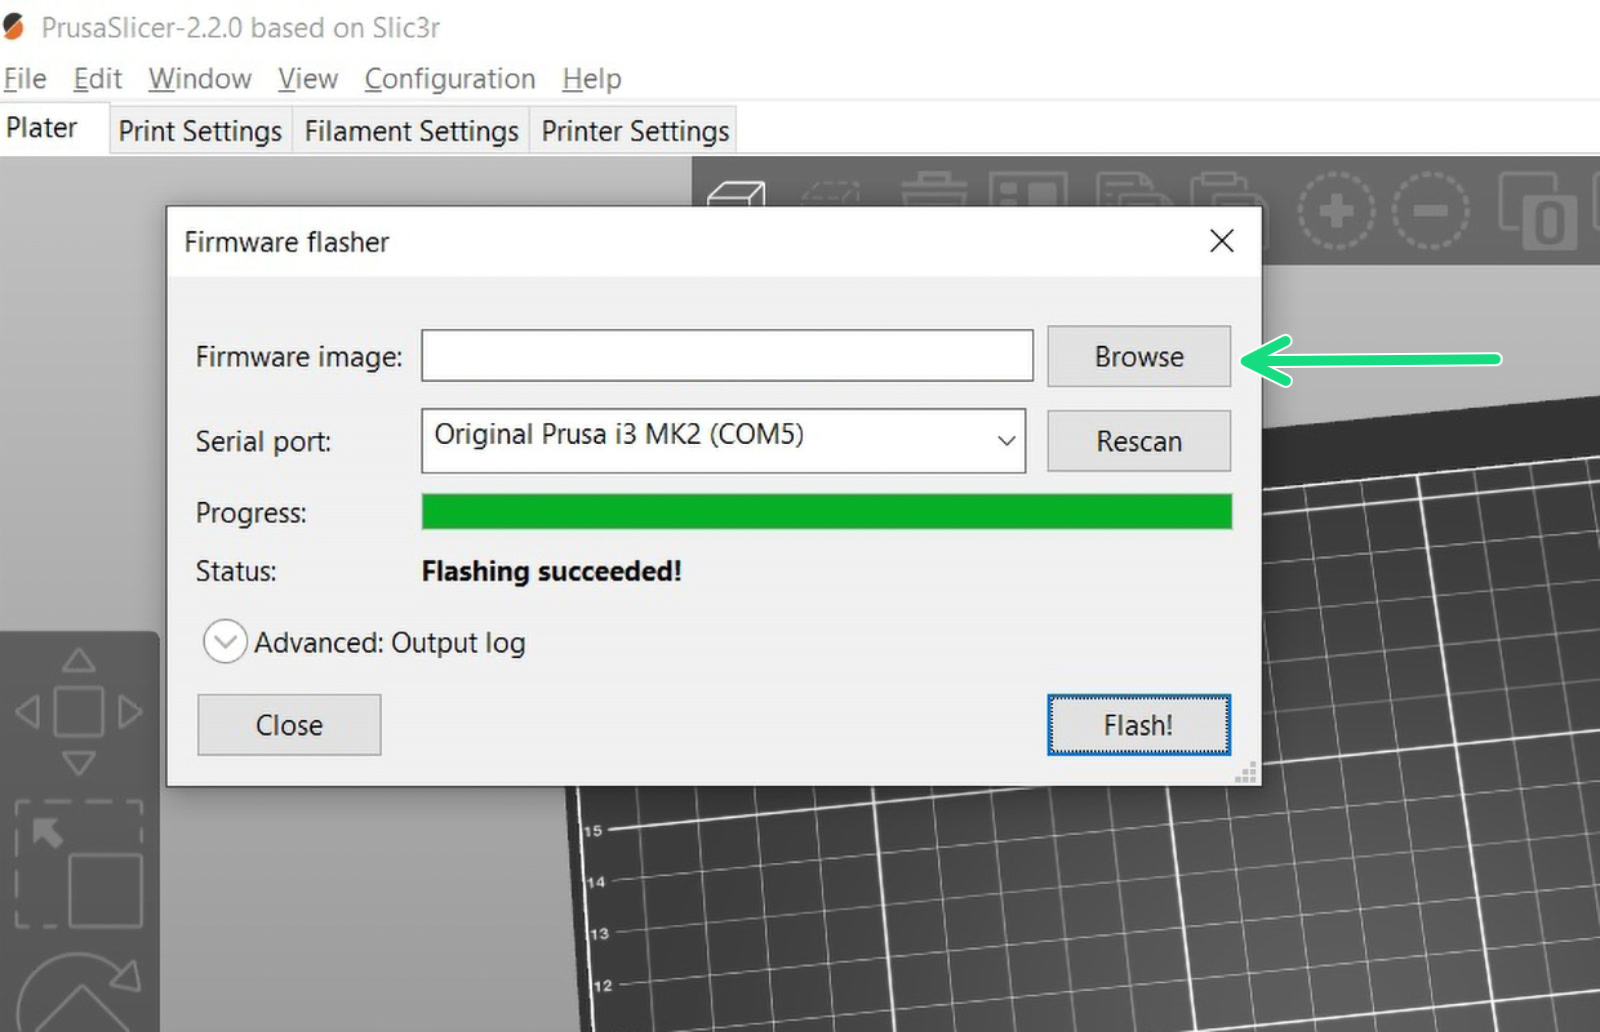
- Click on the Browse button (green arrow right picture) and choose the .hex file from the location where you have unzipped it.
|
|  |
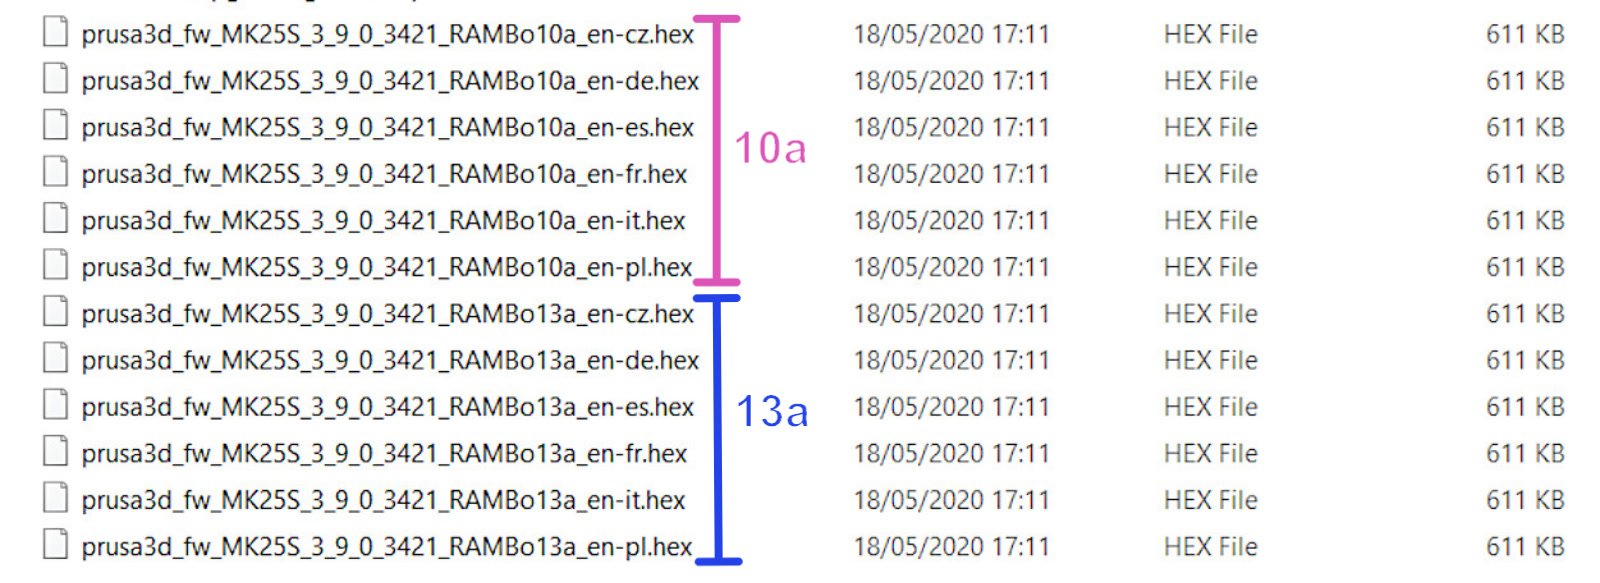
- Make sure you select the file named with your mini-RAMBo revision (10a or 13a) and your desired language, from the listed files. All files contain the English version of the firmware.
- Make sure the Serial Port field (right picture) displays your printer's name (ex. Original Prusa i3 MK2) and has a COM port assigned (ex. COM5). Click Flash! and let the procedure complete.
If the Serial port field display anything but the name of the printer (ex. usbmodemfa141 or /dev/tty.usbmodem) you should try another USB port on your computer, reinstall the driver or restart your computer.
Problems when flashing
If you encounter any firmware updating or flashing problems, check our article about the most common errors: ファームウェアのアップデート時の問題 (MK2.5S/MK3S+/MMU2S/MMU3).
この記事は役に立ちましたか?
この操作は登録ユーザーのみが利用できます。ログインしてください。