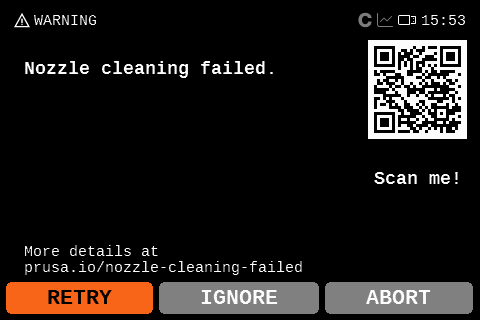
To achieve high-quality prints, the nozzle must make the correct amount of contact with the print surface. If this is not achieved, your printer will display the message "Nozzle cleaning failed."
Nozzle cleaning wizard
Once the message appears, you have the option to abort the print, ignore the nozzle cleaning and start the print, or retry the nozzle cleaning.
 |  | 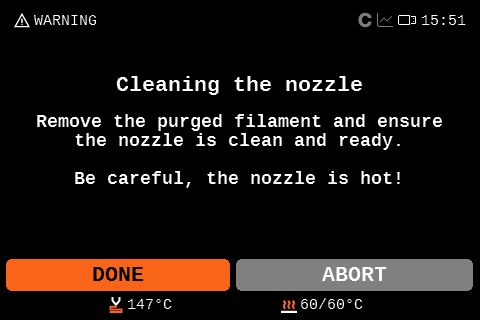 |
For redoing the nozzle cleaning, you can choose to purge filament to clean the nozzle of debris. This will purge the filament and retract it so it does not ooze. After that, the printer will redo the nozzle cleaning. If it does not solve the issue, try checking the items below.
Nozzle cleaning
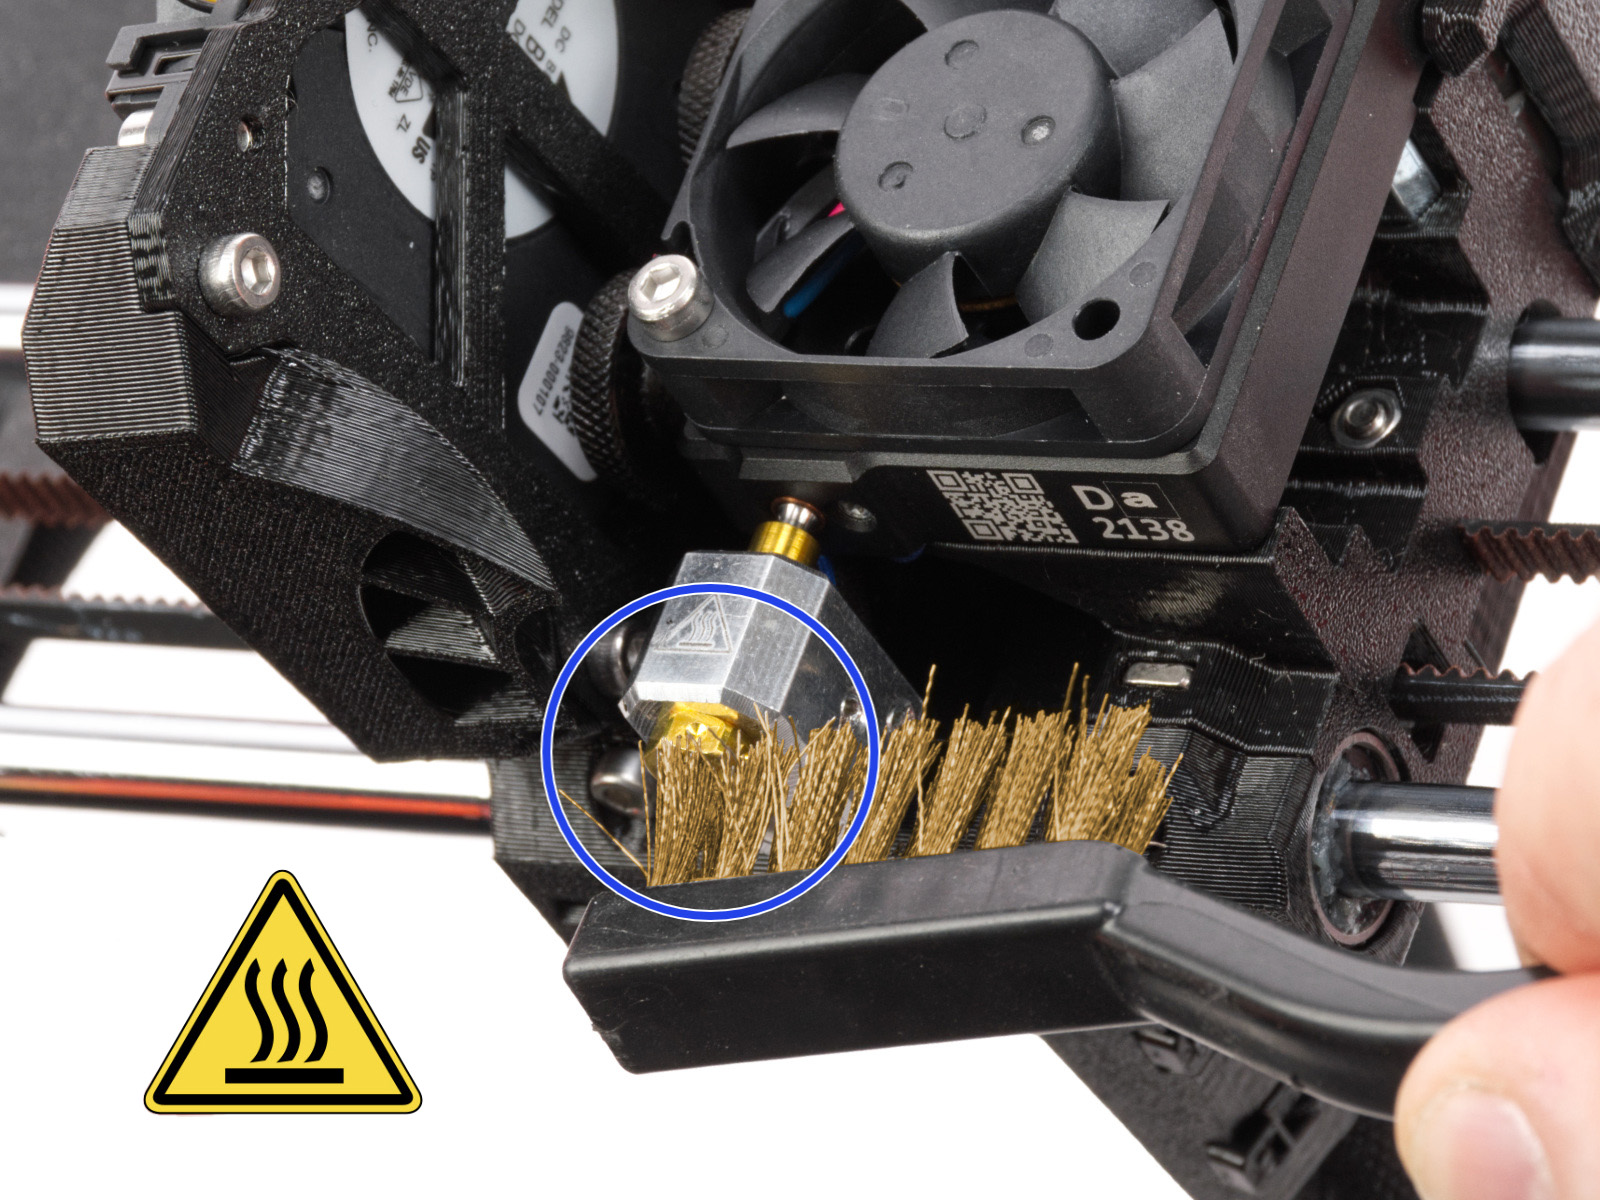
Check if the nozzle has residue. Debris on the nozzle or heater block can affect its thermal properties. To clean it, heat the nozzle for three to five minutes at 250 °C, as the remains of the filament must be melted slightly so they can be removed easily.
Use a small brass brush to remove any old plastic stuck on the nozzle and heaterblock.
Avoid contact of the brush with the hotend cables, as this could cause a short circuit.
Caution: the printer is still at a hot temperature! Wait until the hot parts are cooled down to ambient temperature. It takes approximately 10 minutes. Do not touch it! Always check the values on the display.
Steel sheet cleaning
Make sure that the steel sheet is clean of any residue. For the smooth, textured, or satin sheet, clean with 90% or higher isopropyl alcohol (IPA).
Also, make sure that there is nothing between the steel sheet and the heatbed.
Filament spool
If the extruder needs to make too much effort to pull the filament, the nozzle cleaning error can be triggered. If this error is being shown when you are using a spool heavier than 2 kg, try changing to a smaller one for testing. Also, if you have a custom setup for your filament path, make sure that the filament is not getting caught anywhere.
Check if the nozzle is not loose
The nozzle on the Nextruder must be at the correct height and securely tightened. Before proceeding to the next steps, ensure that the nozzle is cooled down.
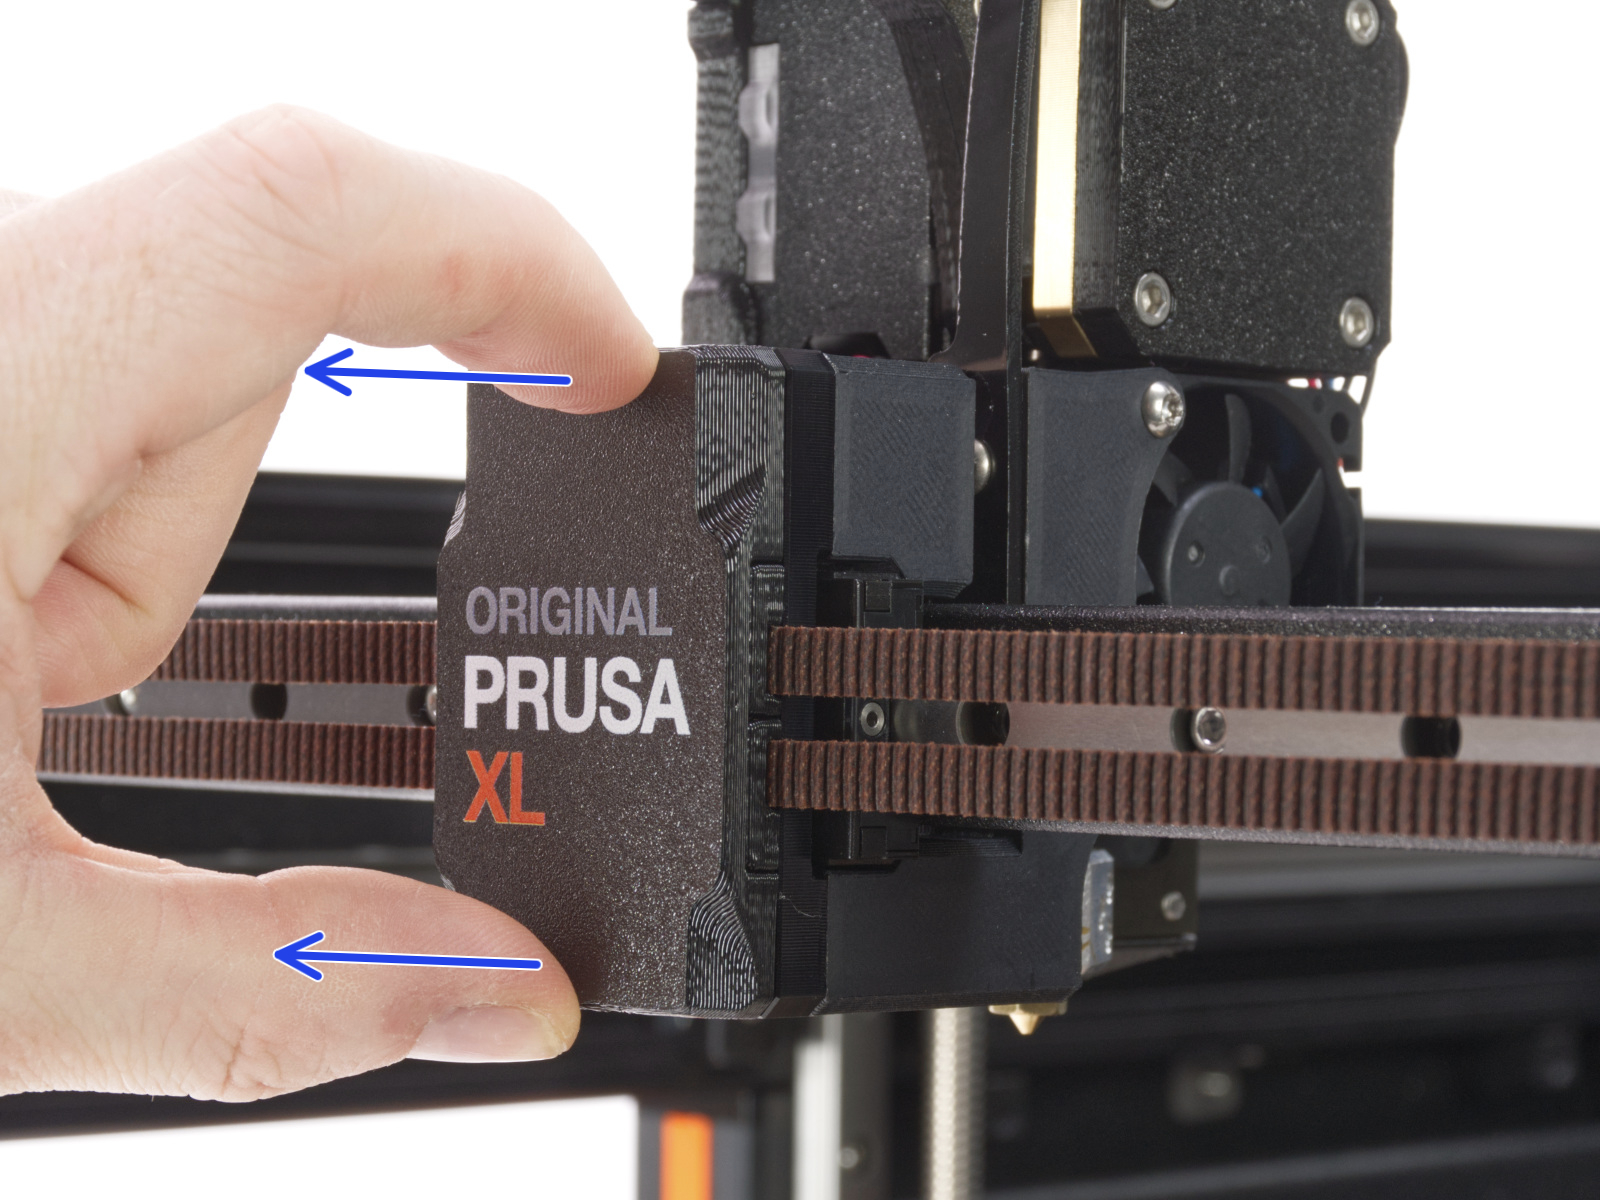
XL
On single-tool XL, after removing the x-carriage cover, hold the heater block (make sure that the nozzle is not heated!), and use the Torx TX8 key as shown in the picture to tighten the set screw. Do not use extra force while tightening, as it may damage the hotend tube. The nozzle must be approximately at a 35°-40° angle to avoid damaging the hotend cables.
 |  |
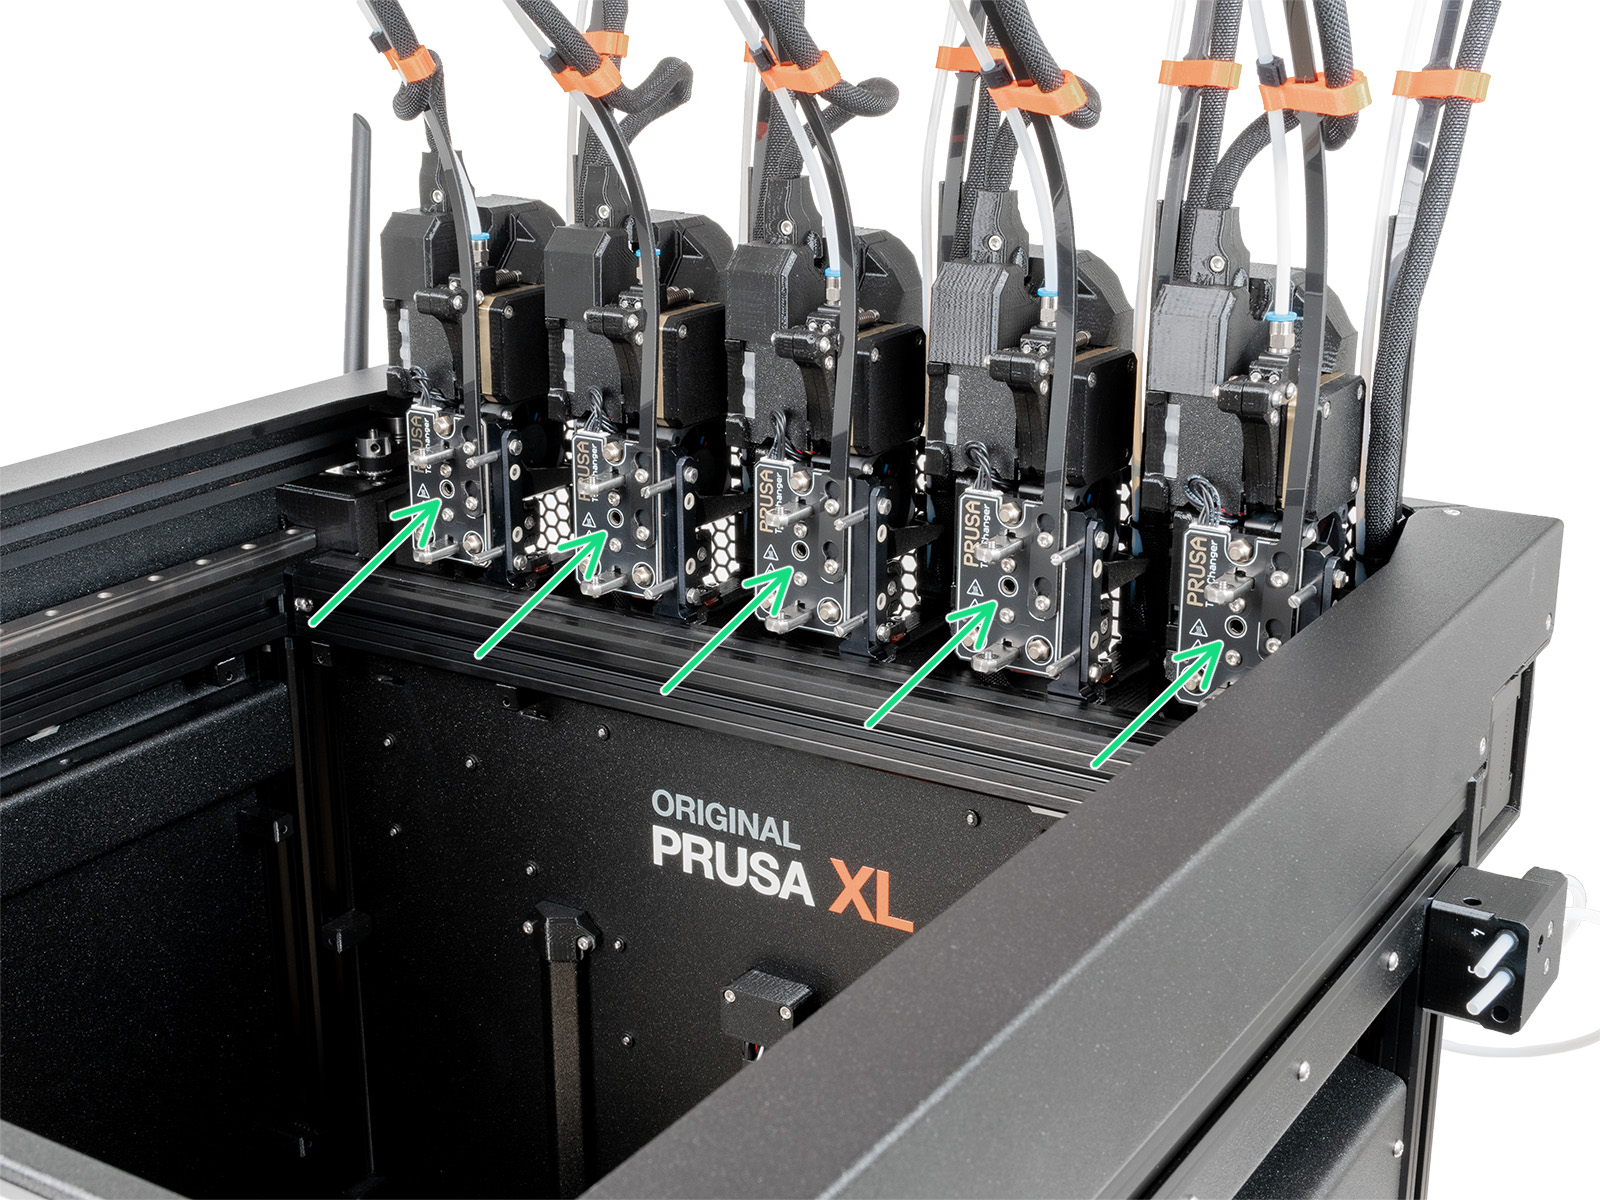
On the multi-tool XL, identify the tool that has the nozzle to be checked, and park it. Hold the heater block (make sure that the nozzle is not heated!), and use the Torx TX8 key in the part shown in the picture to tighten the set screw. Do not use extra force while tightening, as it may damage the hotend tube. The nozzle must be approximately at a 35°-40° angle to avoid damaging the hotend cables.
Once this is done, with the printer still cold and off, check whether the heater block has any rotational play. If the heater block can rotate:
- Check nozzle tightening from the previous steps once more.
- Check whether the nozzle and heater block have a loose joint. If needed, follow the nozzle replacement guide as a reference for temporarily extracting the hotend and retightening the nozzle.
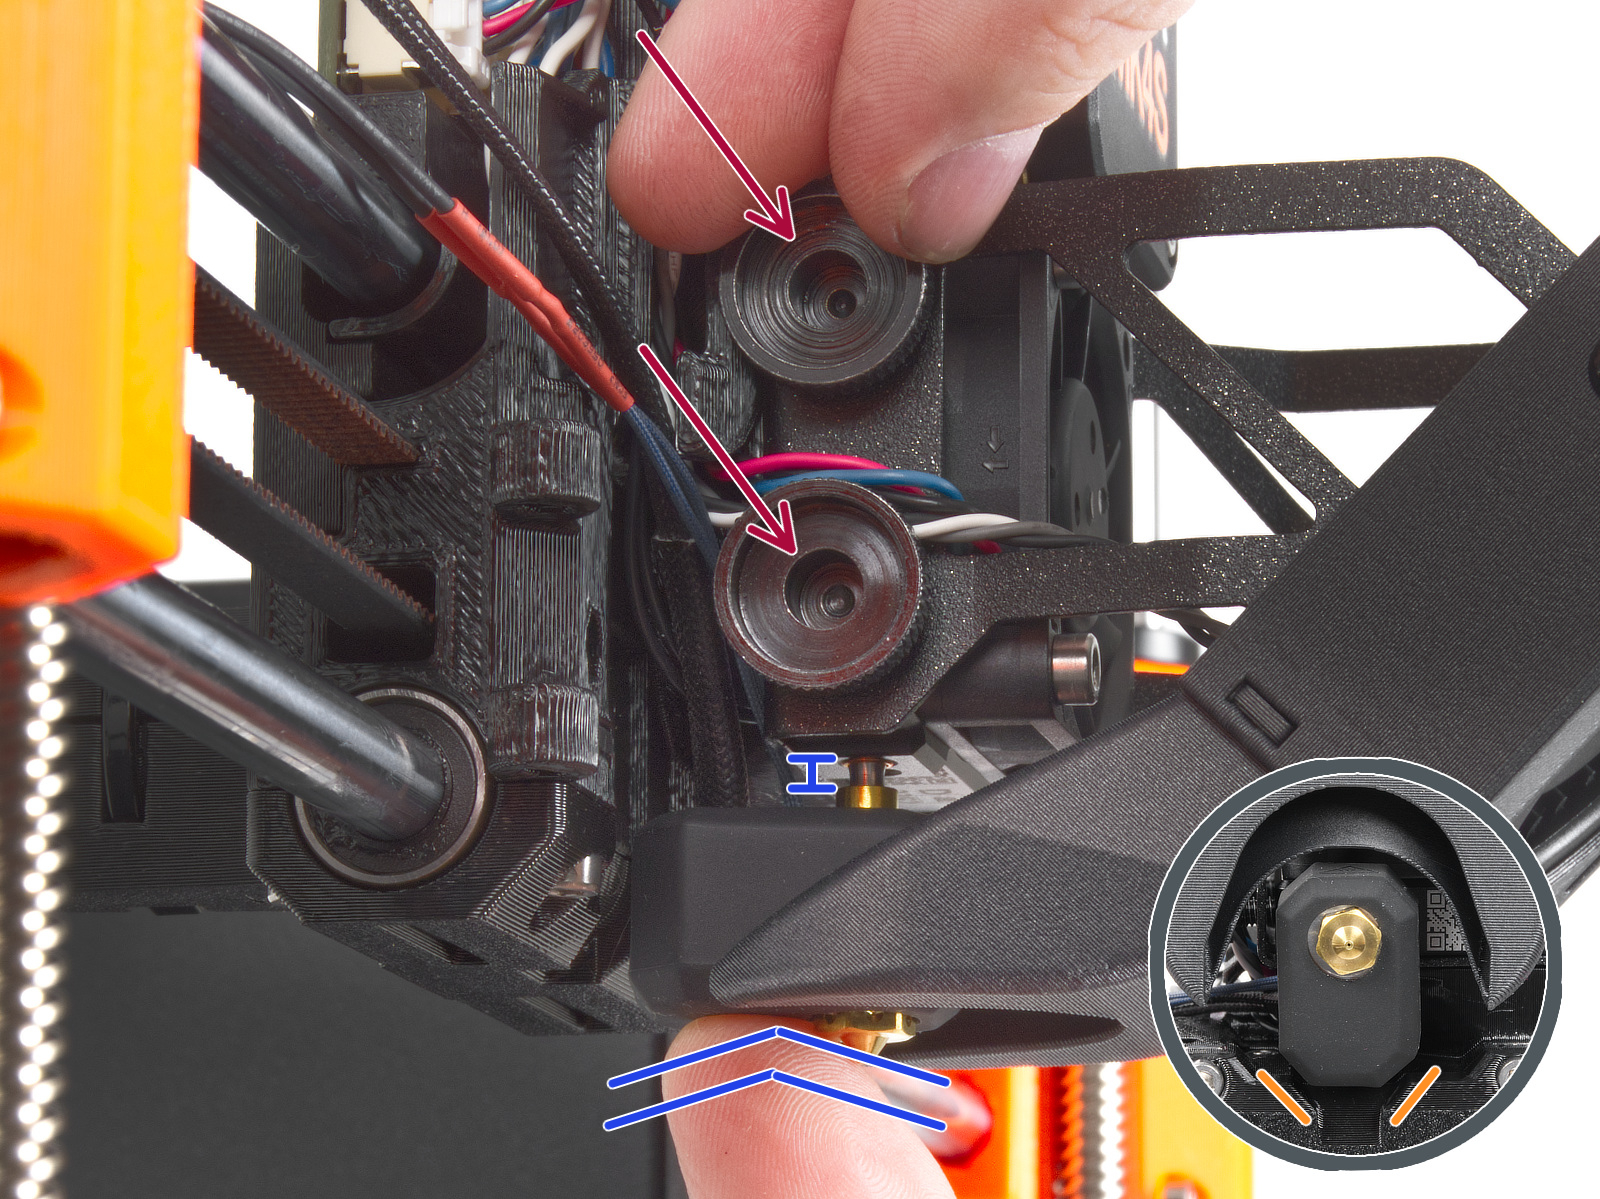
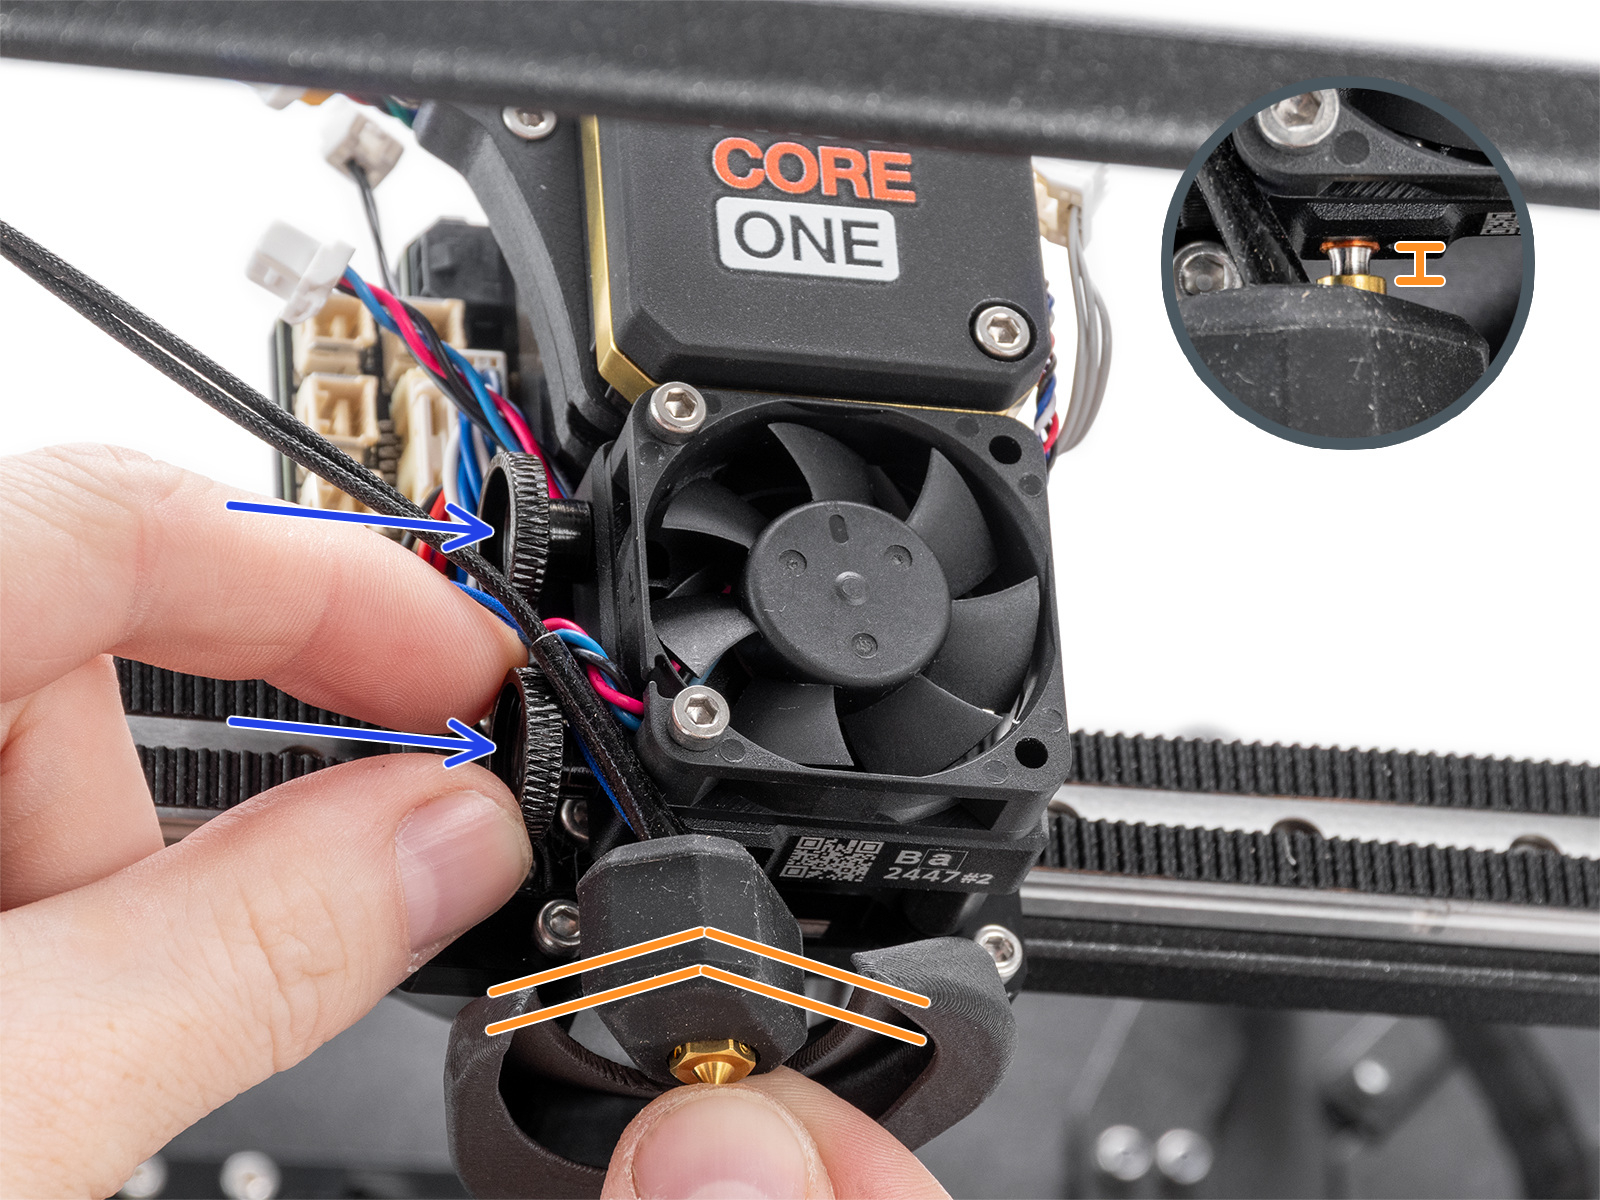
MK3.9/S, MK4/S, CORE One/+, CORE One L
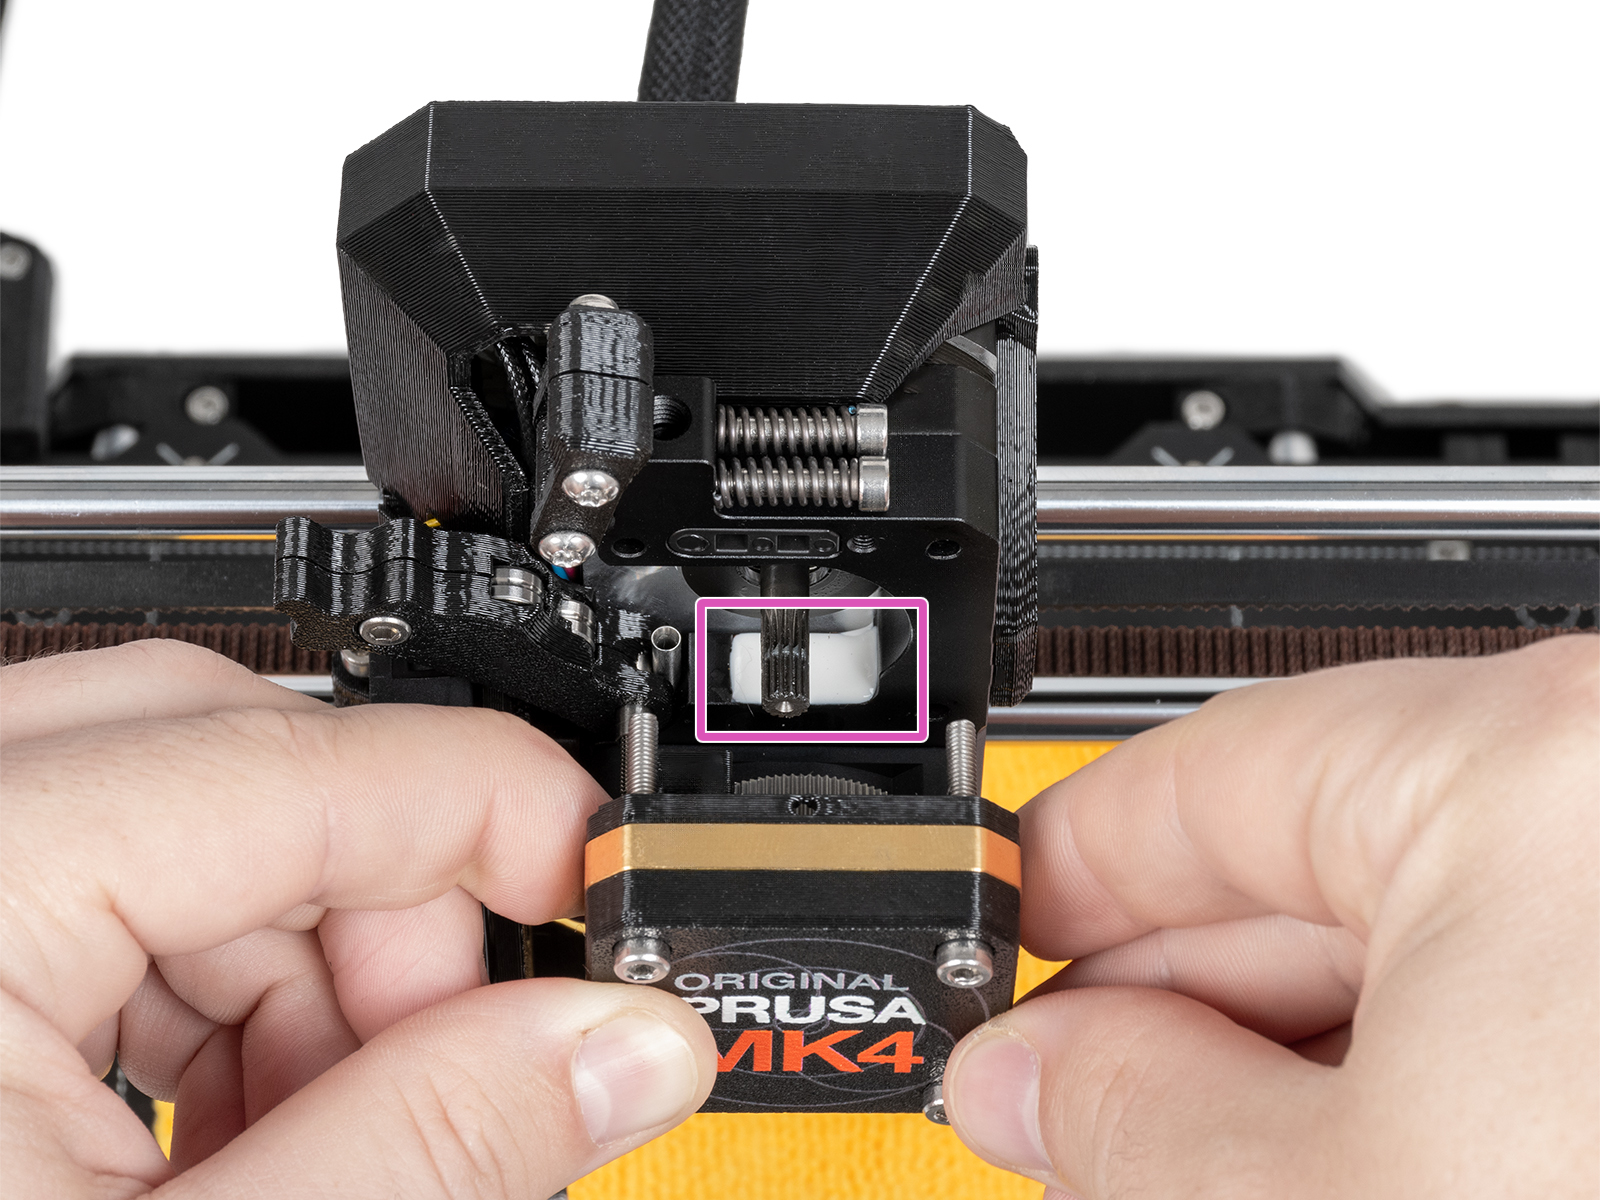
Then, loosen the thumb screws (do not completely remove the screws, a few turns are enough) on the side of the heatbreak, and push the nozzle up. Tighten the thumb screws just by hand, do not use any tools. After tightening the thumb screws, try moving the hotend to the sides and make sure it does not move.
If you have a Nozzle Adapter, check the installation again to make sure that the nozzle has not been lowered or loosened with the installation of the adapter.
 |  |
| MK4, MK3.9 | MK4S, MK3.9S |
 | |
| CORE One, CORE One L | |
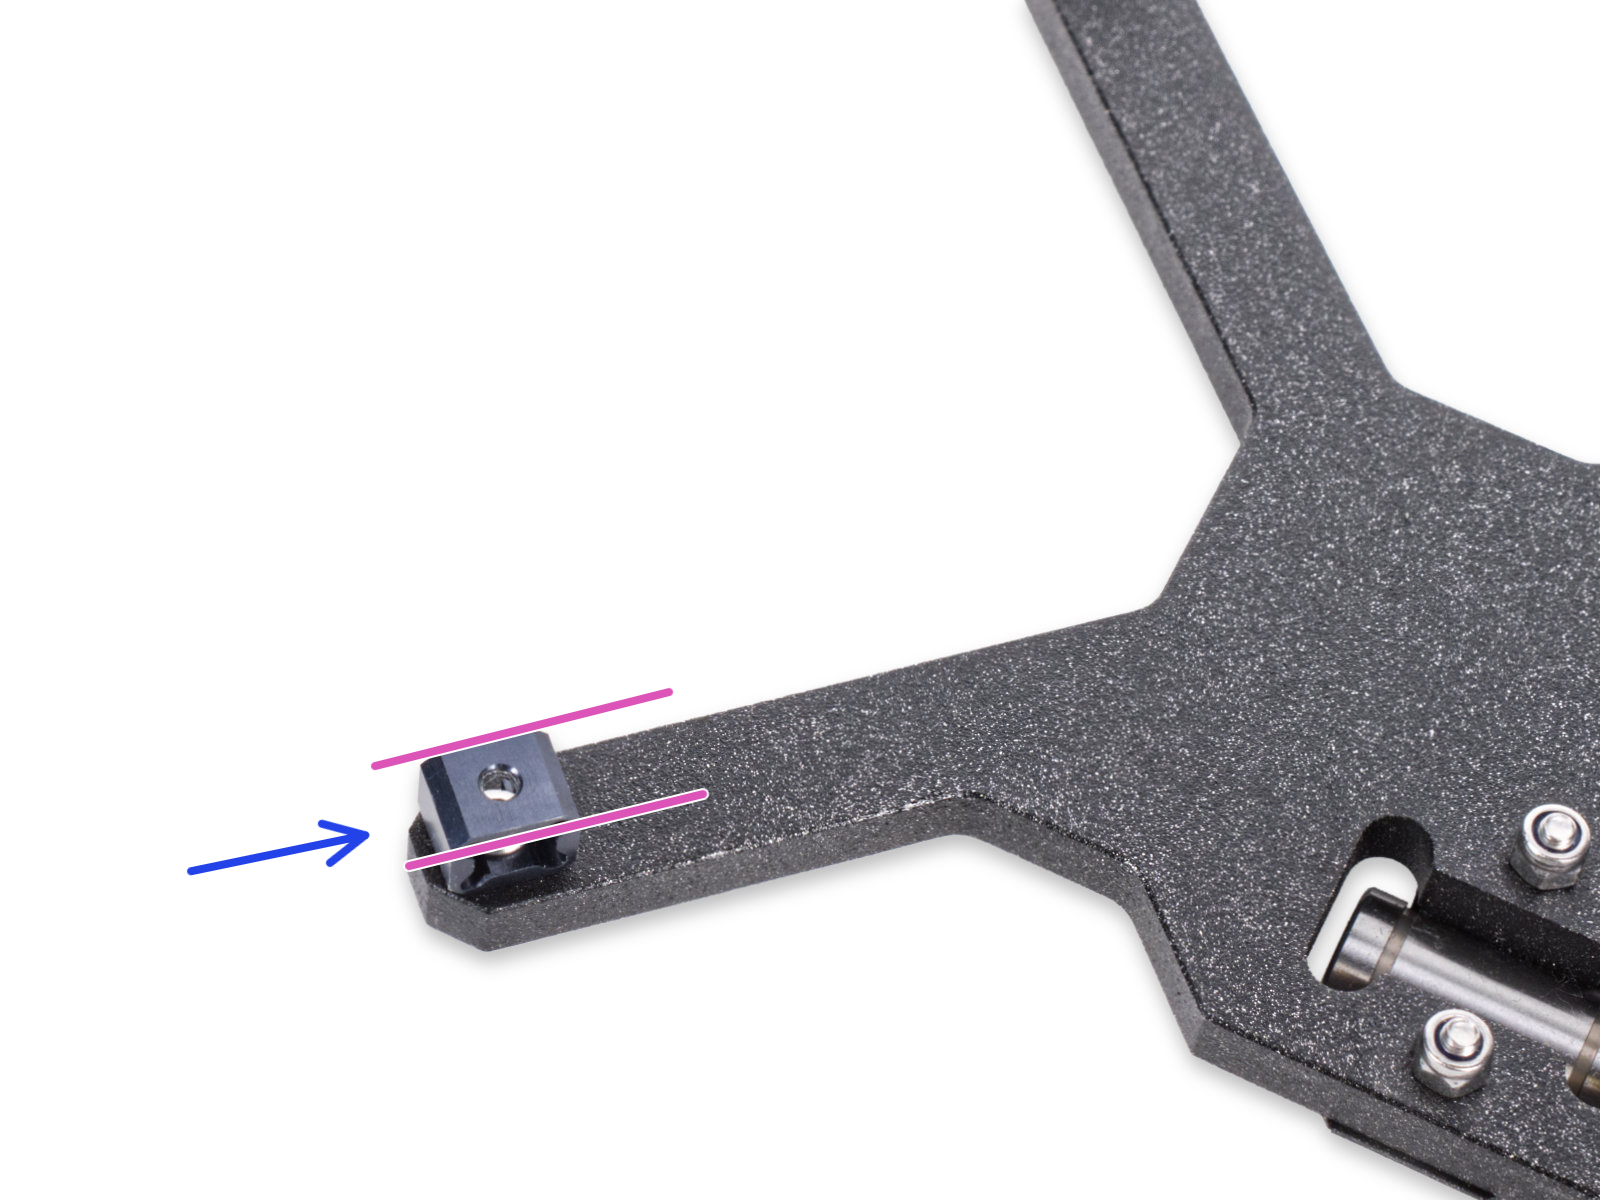
Check the Z-axis bearing housing (XL)
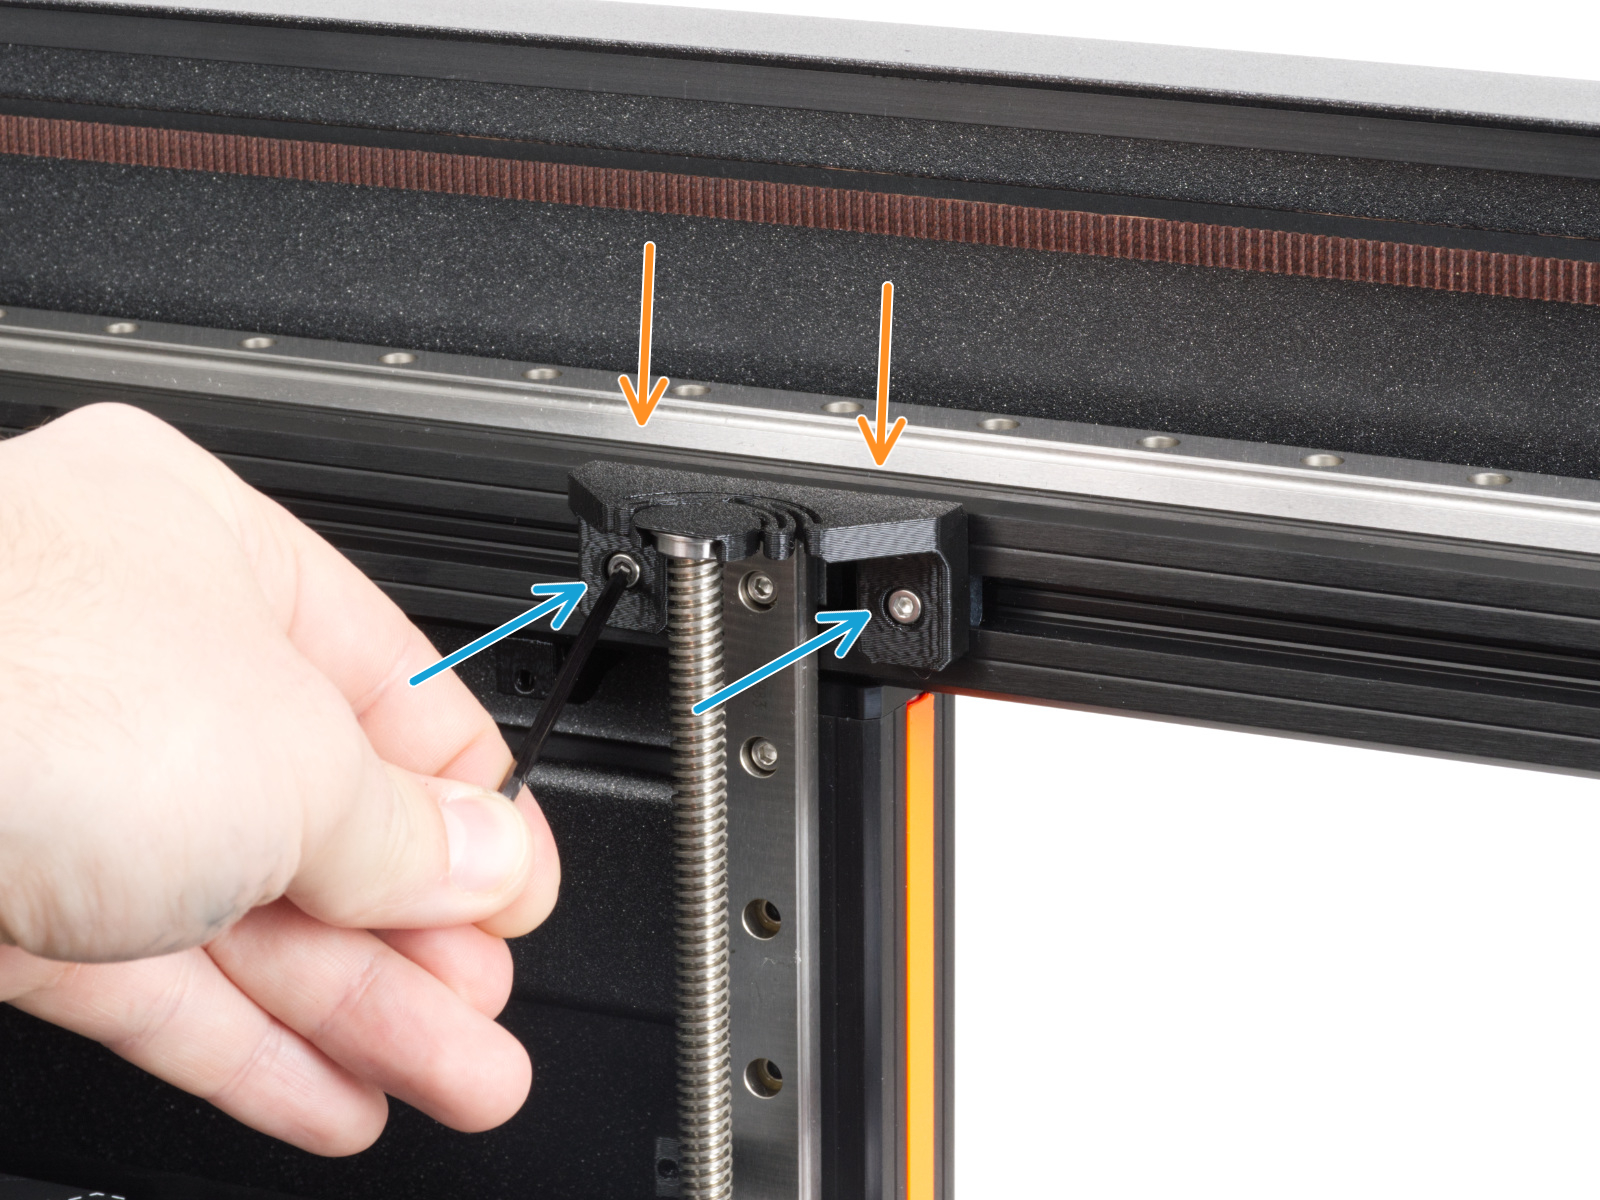
The Z-axis bearing housings are the end-stop for the Z-axis. It is essential to maintain a slight clearance between the Z-axis bearing housings and the heatbed frame when the printer is in its top position.
This way, during the mesh bed leveling and the autohome procedures, there can be an ideal amount of tiny contact between the nozzle and the print surface.
A clearance that is too small can cause the "Nozzle Cleaning Failed" warning message to appear. In this case, to achieve the ideal clearance, slightly loosen the bolts holding the bearing housings in place.
If the warning message still appears, slightly loosen the mentioned bolts once again, keeping in mind to still have the Z-axis bearing housings reasonably tight and held in place.
Once you find an ideal tightness for the bolts that works and holds the Z-axis bearing housings in place, keep the change permanent.
Check the bolts that interact with the loadcell (MK3.9/S, MK4/S, CORE One/+, CORE One L)
Some of the Nextruder bolts, if too tight, might generate extra forces that can be sensed by the loadcell, skewing its readings, hence potentially causing the issue. Check if slightly loosening the following bolts, while having the parts still tight and secured in place, can solve the issue.
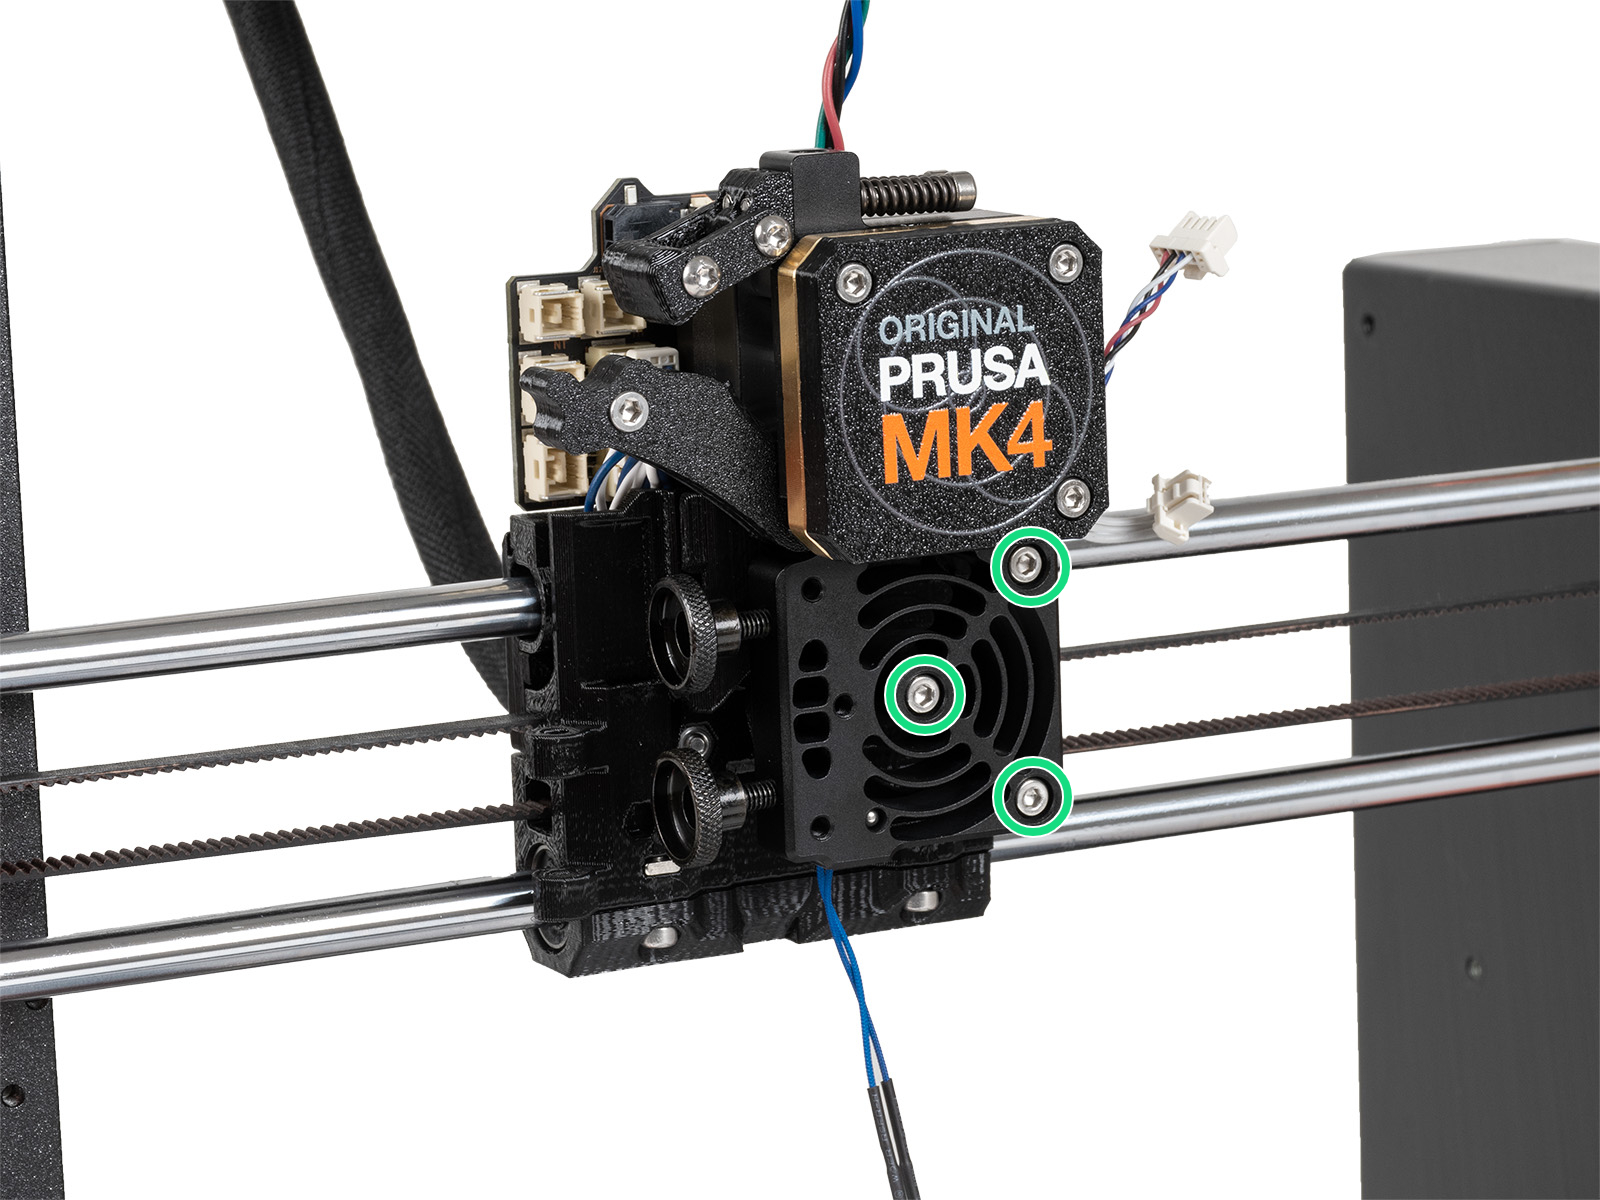
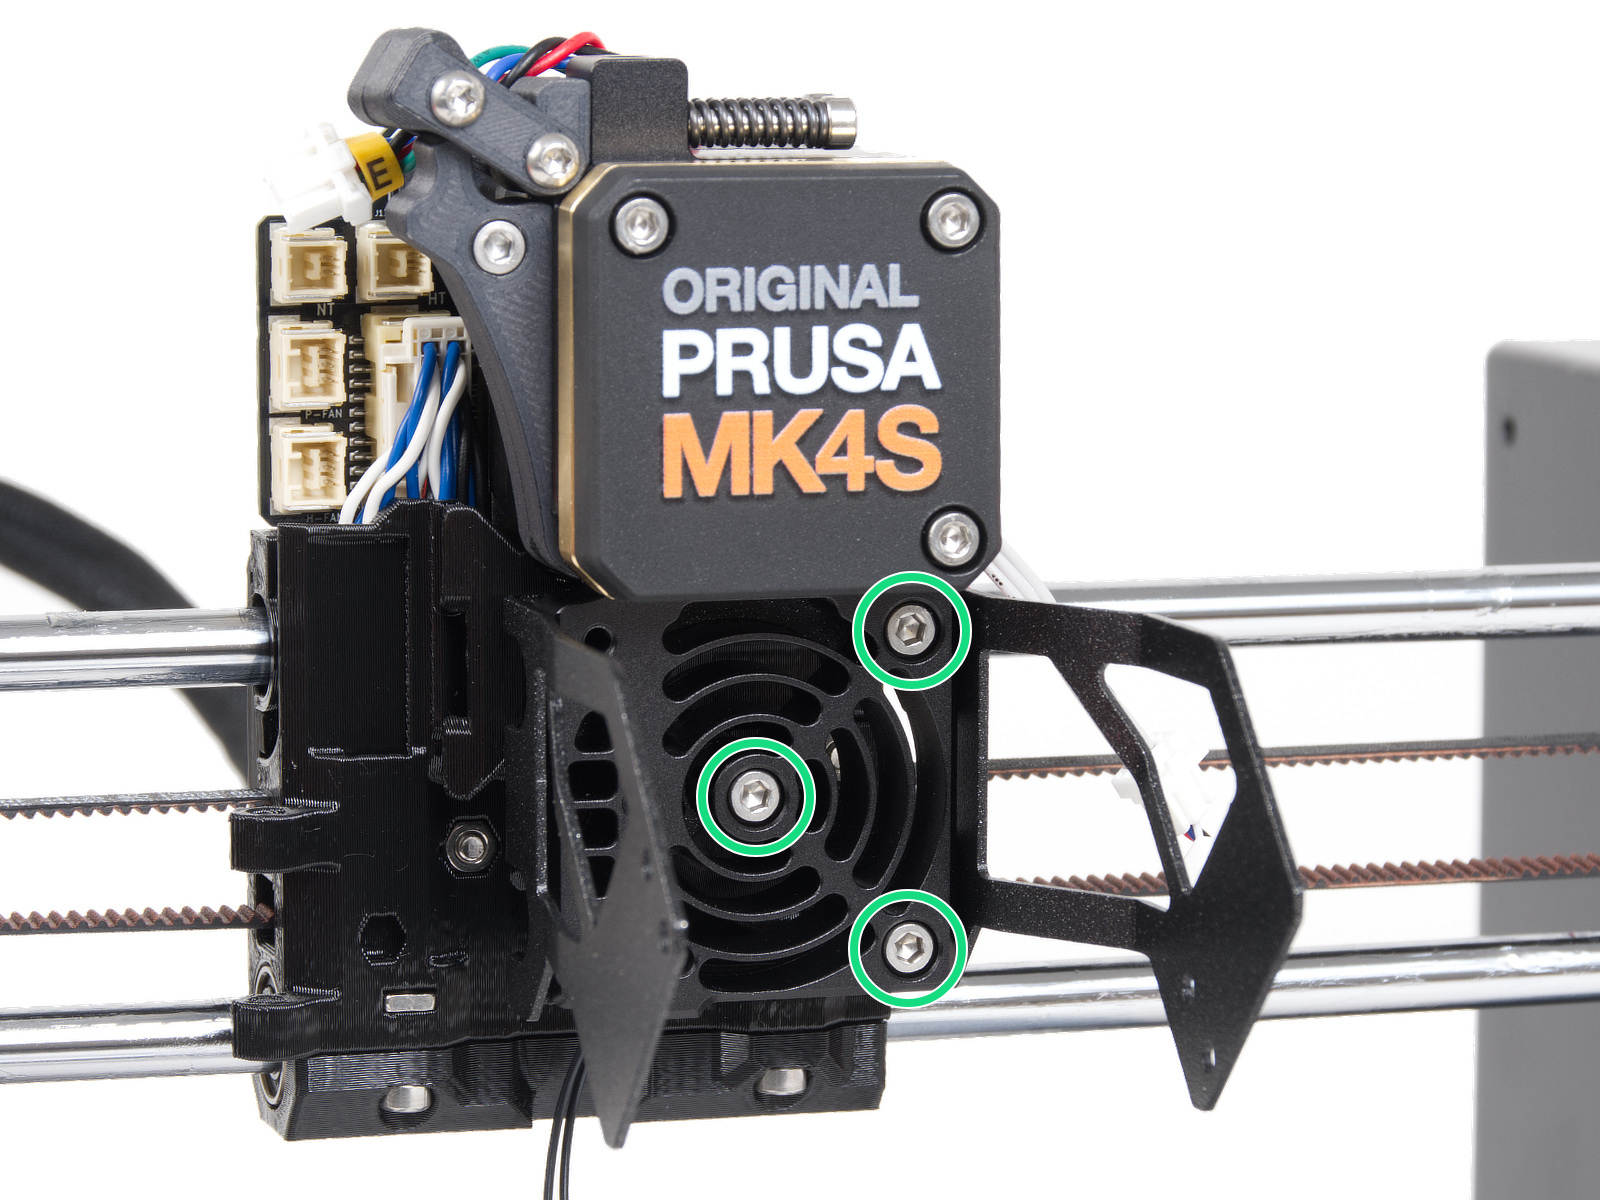
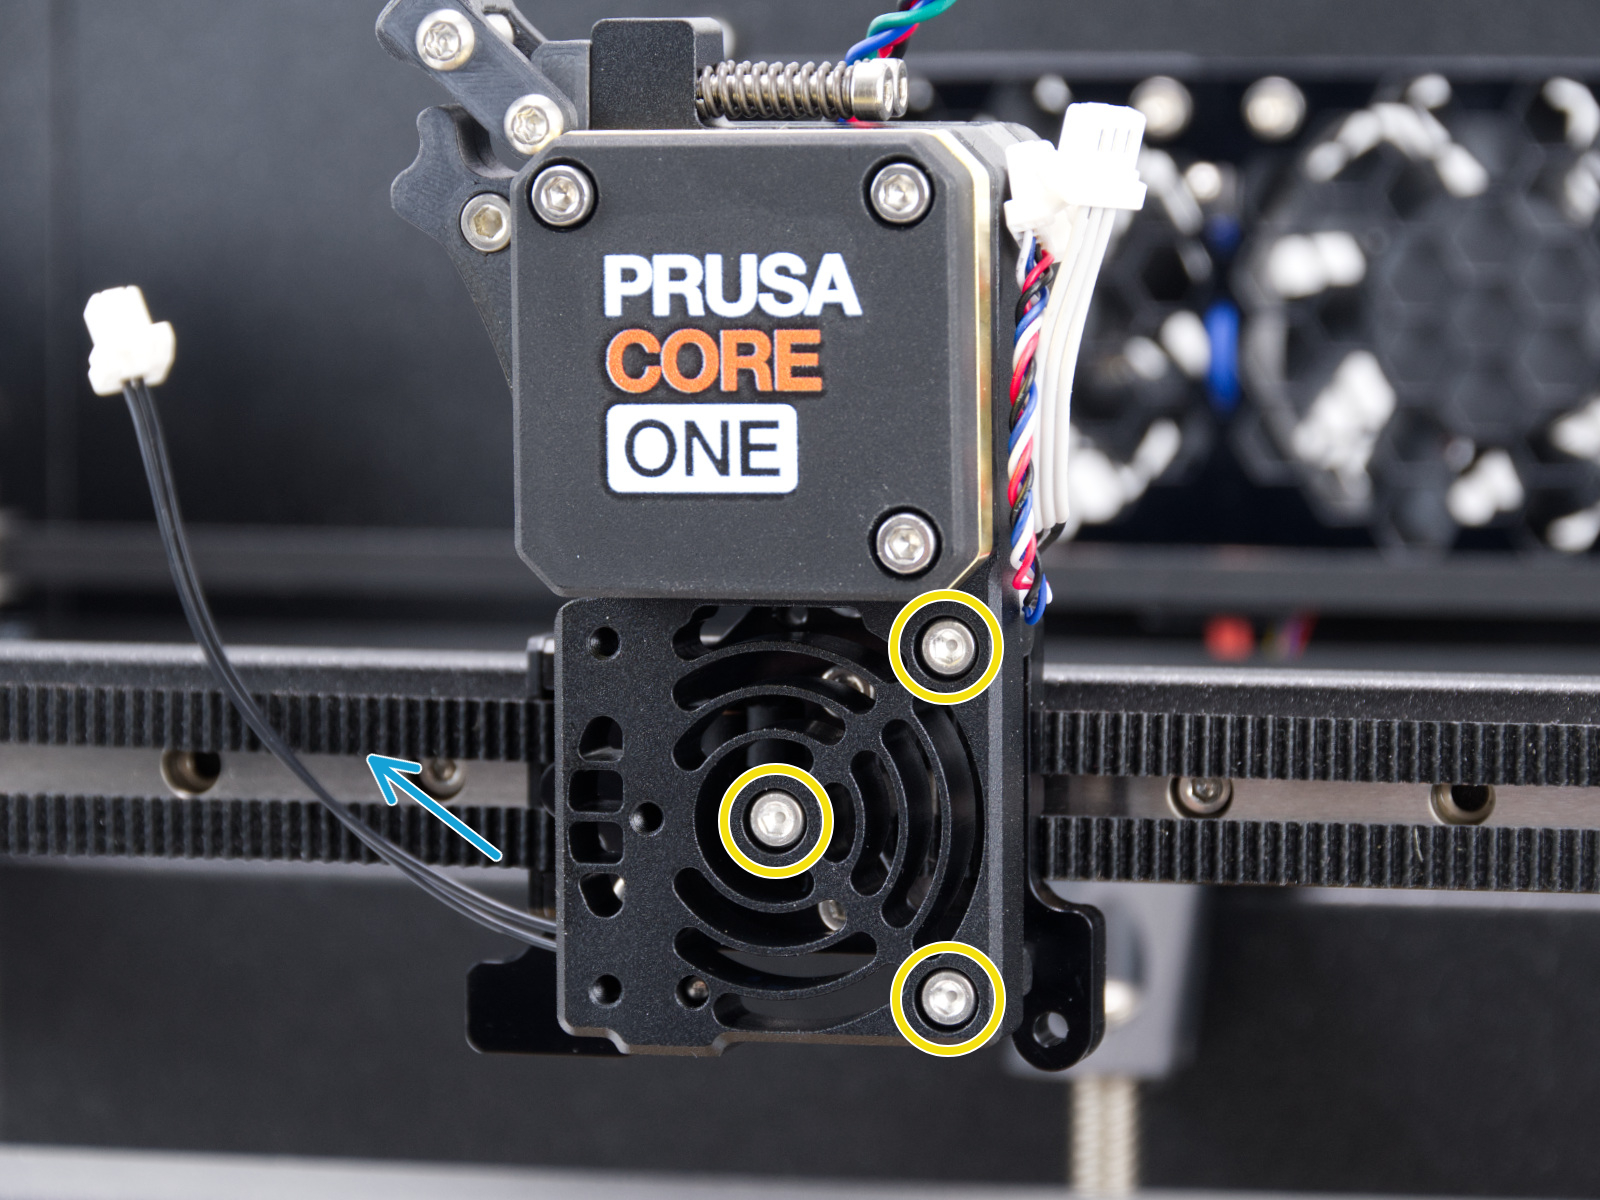
Hotend fan
Check if the hotend fan is not overtightened. You can loosen the screws by 1/2 a turn.
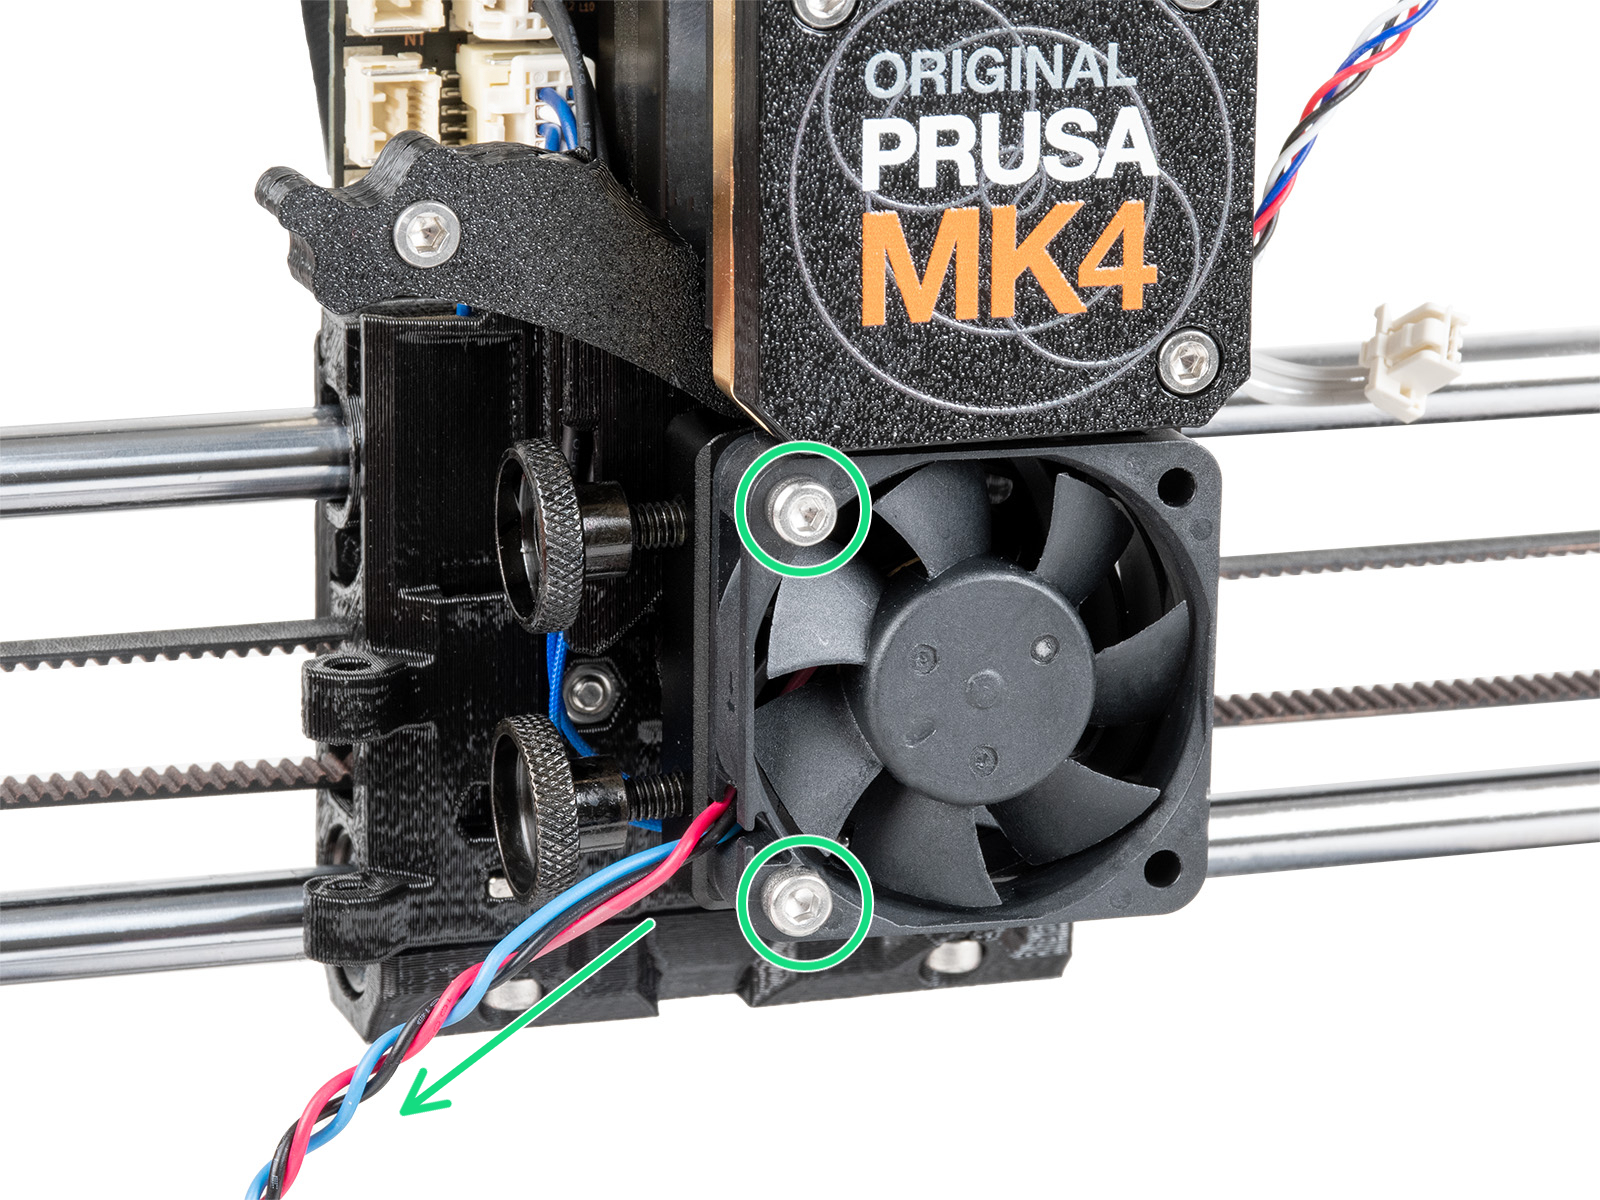 | 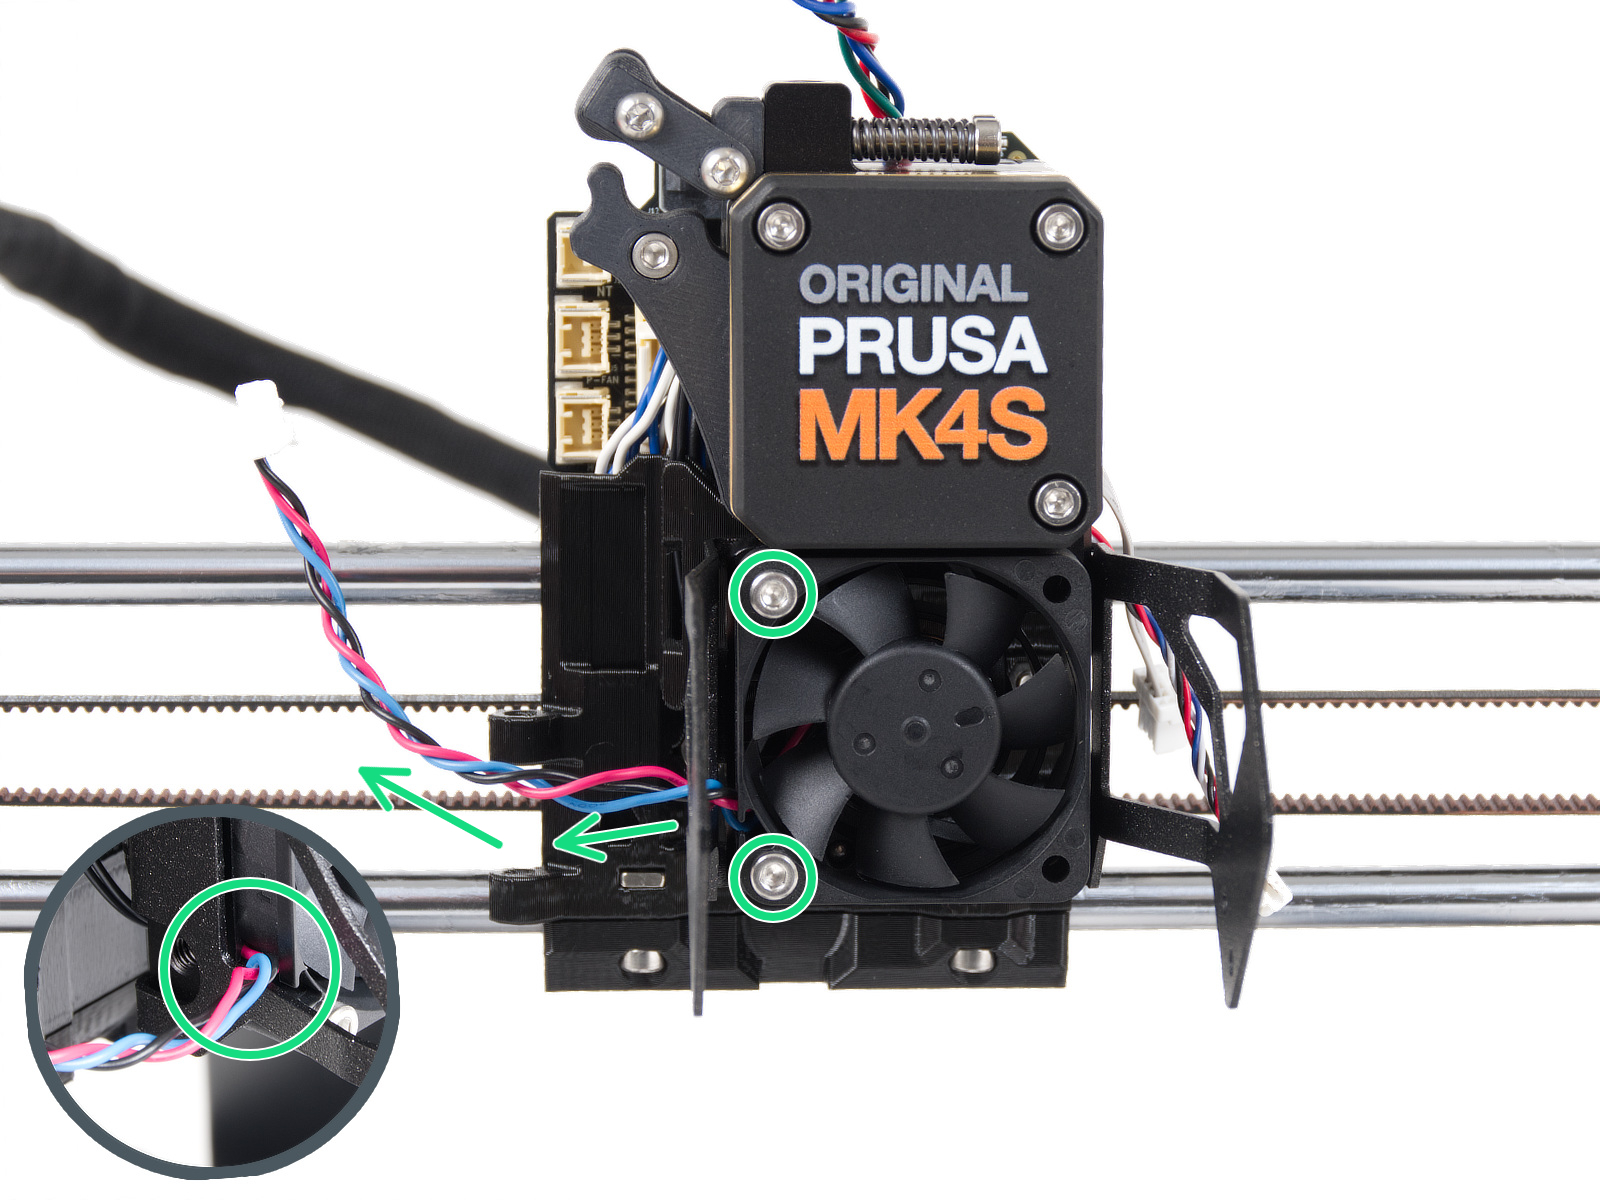 |
| MK4, MK3.9 | MK4S, MK3.9S |
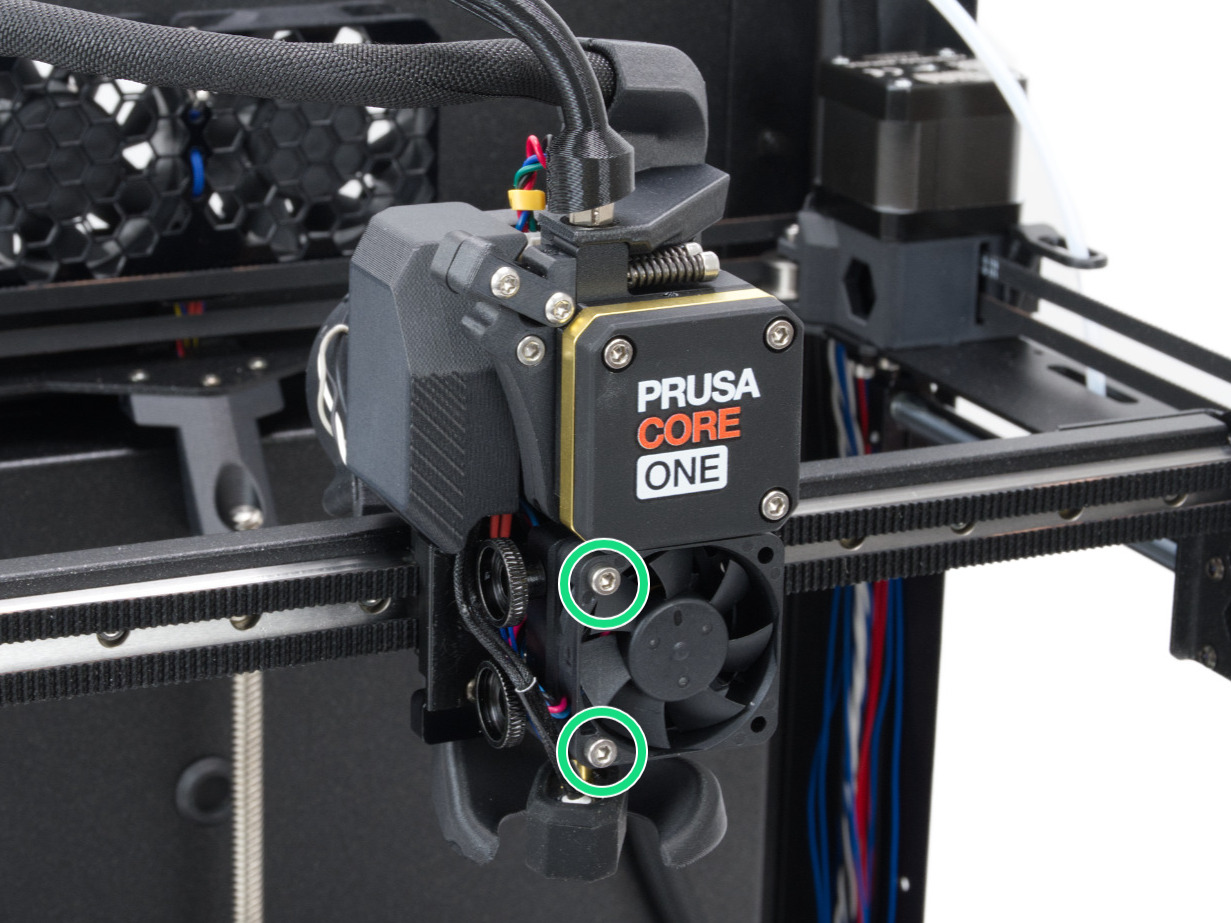 | |
| CORE One, CORE One L | |
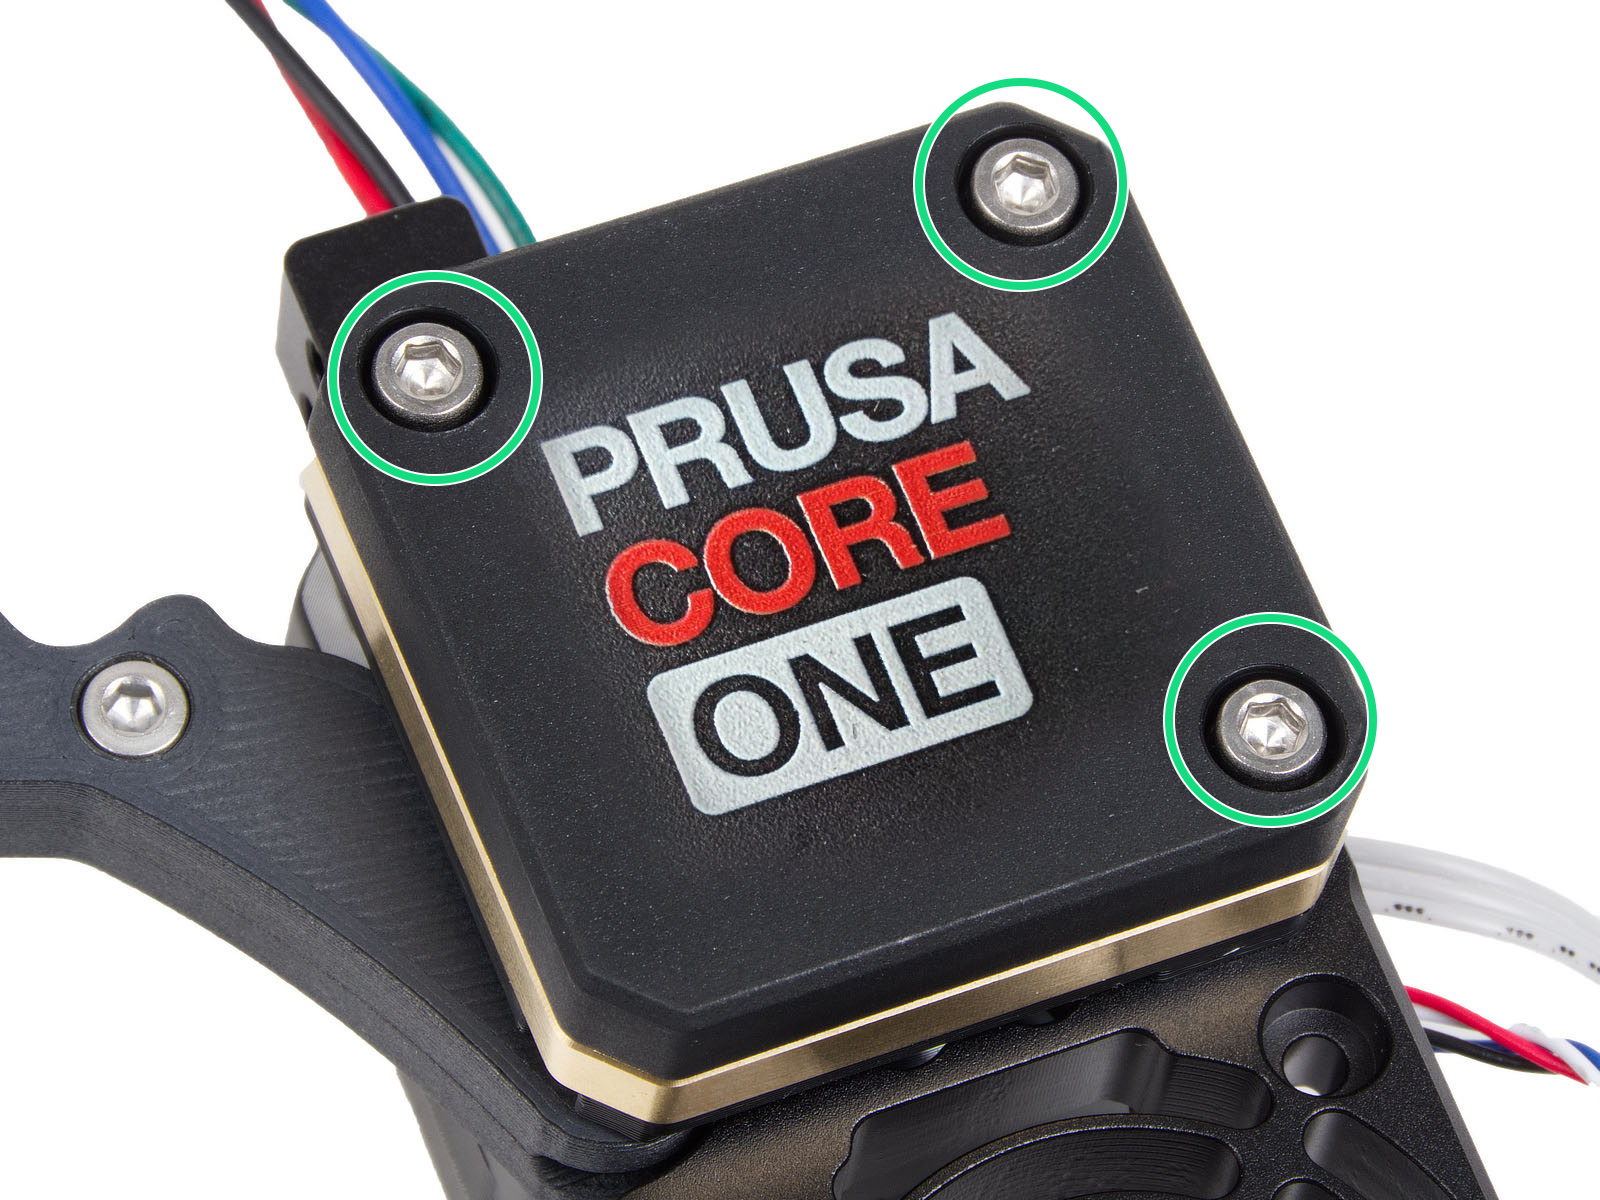
Heatsink
Temporarily remove the hotend fan by removing the previously adjusted bolts. This will expose the heatsink/loadcell. Then, loosen very slightly the three bolts that hold the heatsink/loadcell in place.
 |  |
| MK4, MK3.9 | MK4S, MK3.9S |
 | |
| CORE One, CORE One L | |
Loadcell seal
The loadcell wires are in the printer's heatsink. The wires and the seal that protect them may get damaged. To access the seal, open the four screws that hold the front case. Then remove the front case, together with the PG-ring, gearbox, and main plate in one piece. Note that the seal might be white or black.
 |  |
Expansion joints (CORE One/+, MK4/S, MK3.9/S)
Having the expansion joints in the wrong orientation can cause multiple errors, including the Nozzle cleaning failed. Make sure that all of them have the full side facing the center of the carriage.