If your Heatbed does not heat up, there are a couple of things you should check to identify the source of the issue.
Temperature measurements
Measuring the temperature with an IR thermometer is not the correct way to measure it. It measures an average of a circle that is much bigger than the laser point in its center, so it may show significantly lower temp at the side of the heatbed. Furthermore, it also has a parameter called emissivity, which is usually fixed for cheaper thermometers. To simplify emissivity, it measures different temperatures based on the surface.
The correct way to measure the temperature is a thermistor or contact temperature probe fixed to the sheet with a bit of thermal paste. This may still measure around 5°C lower than the actual temperature.
Initial checks
If you received an error, we recommend start checking the respective articles of that error, like:
- Visually check that your Heated bed is not badly damaged or does not have exposed traces. As long as the trace is not broken, as is shown in the right picture below, it can be fixed with a few layers of nail polish painted over it.
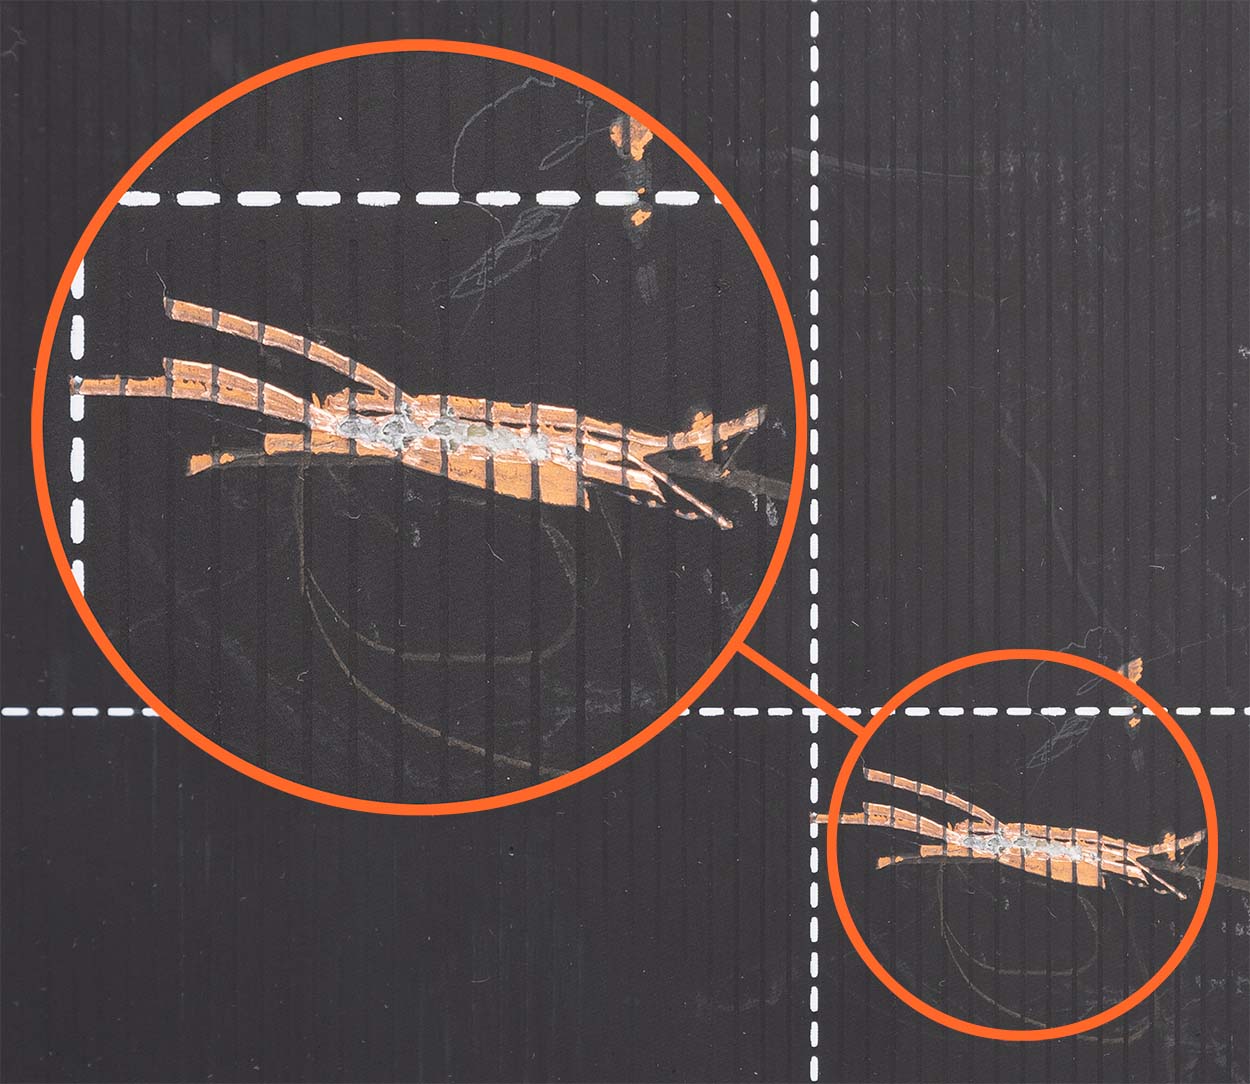 | 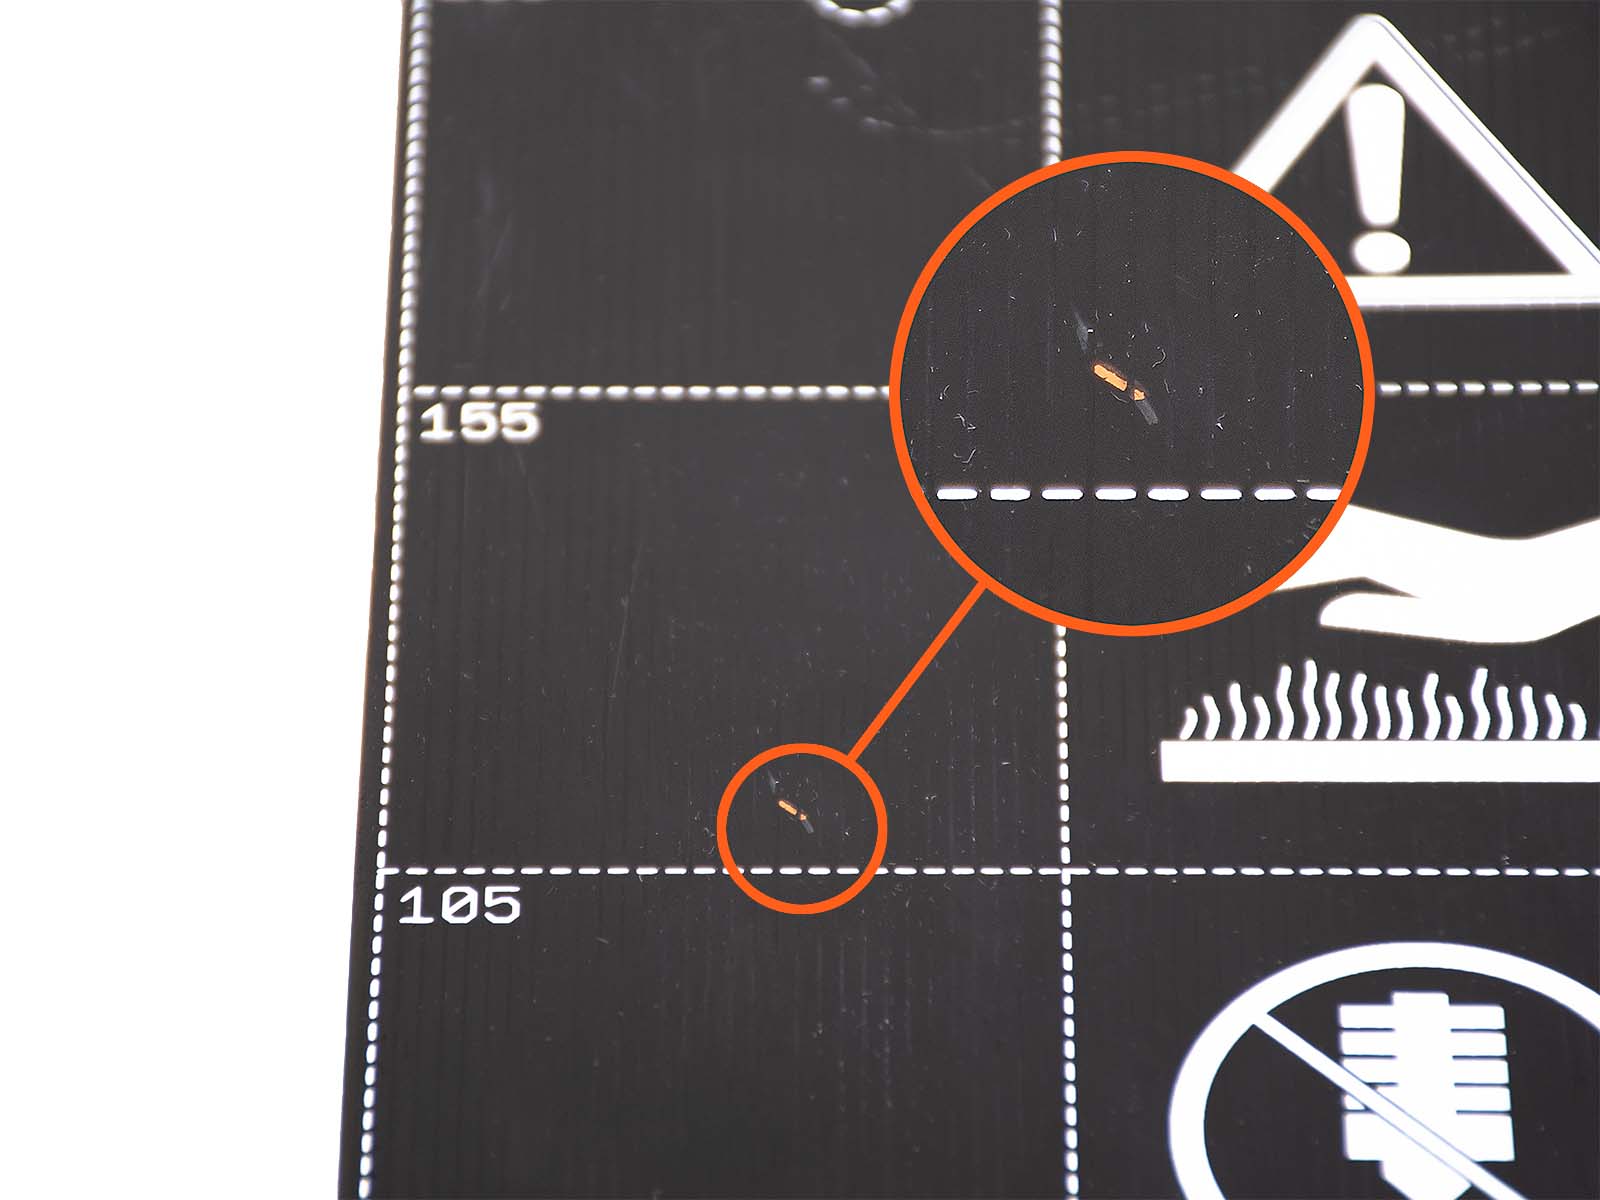 |
| Traces cut. Replacement required. | Superficial scratch. Can be mended. |
- Check that your Heated bed thermistor is properly attached under the golden Kapton tape. If you notice the thermistor is hanging freely, unattached to the bed, undo the 6-9 bolts holding the bed to the Y-carriage and re-secure the thermistor using Kapton tape.
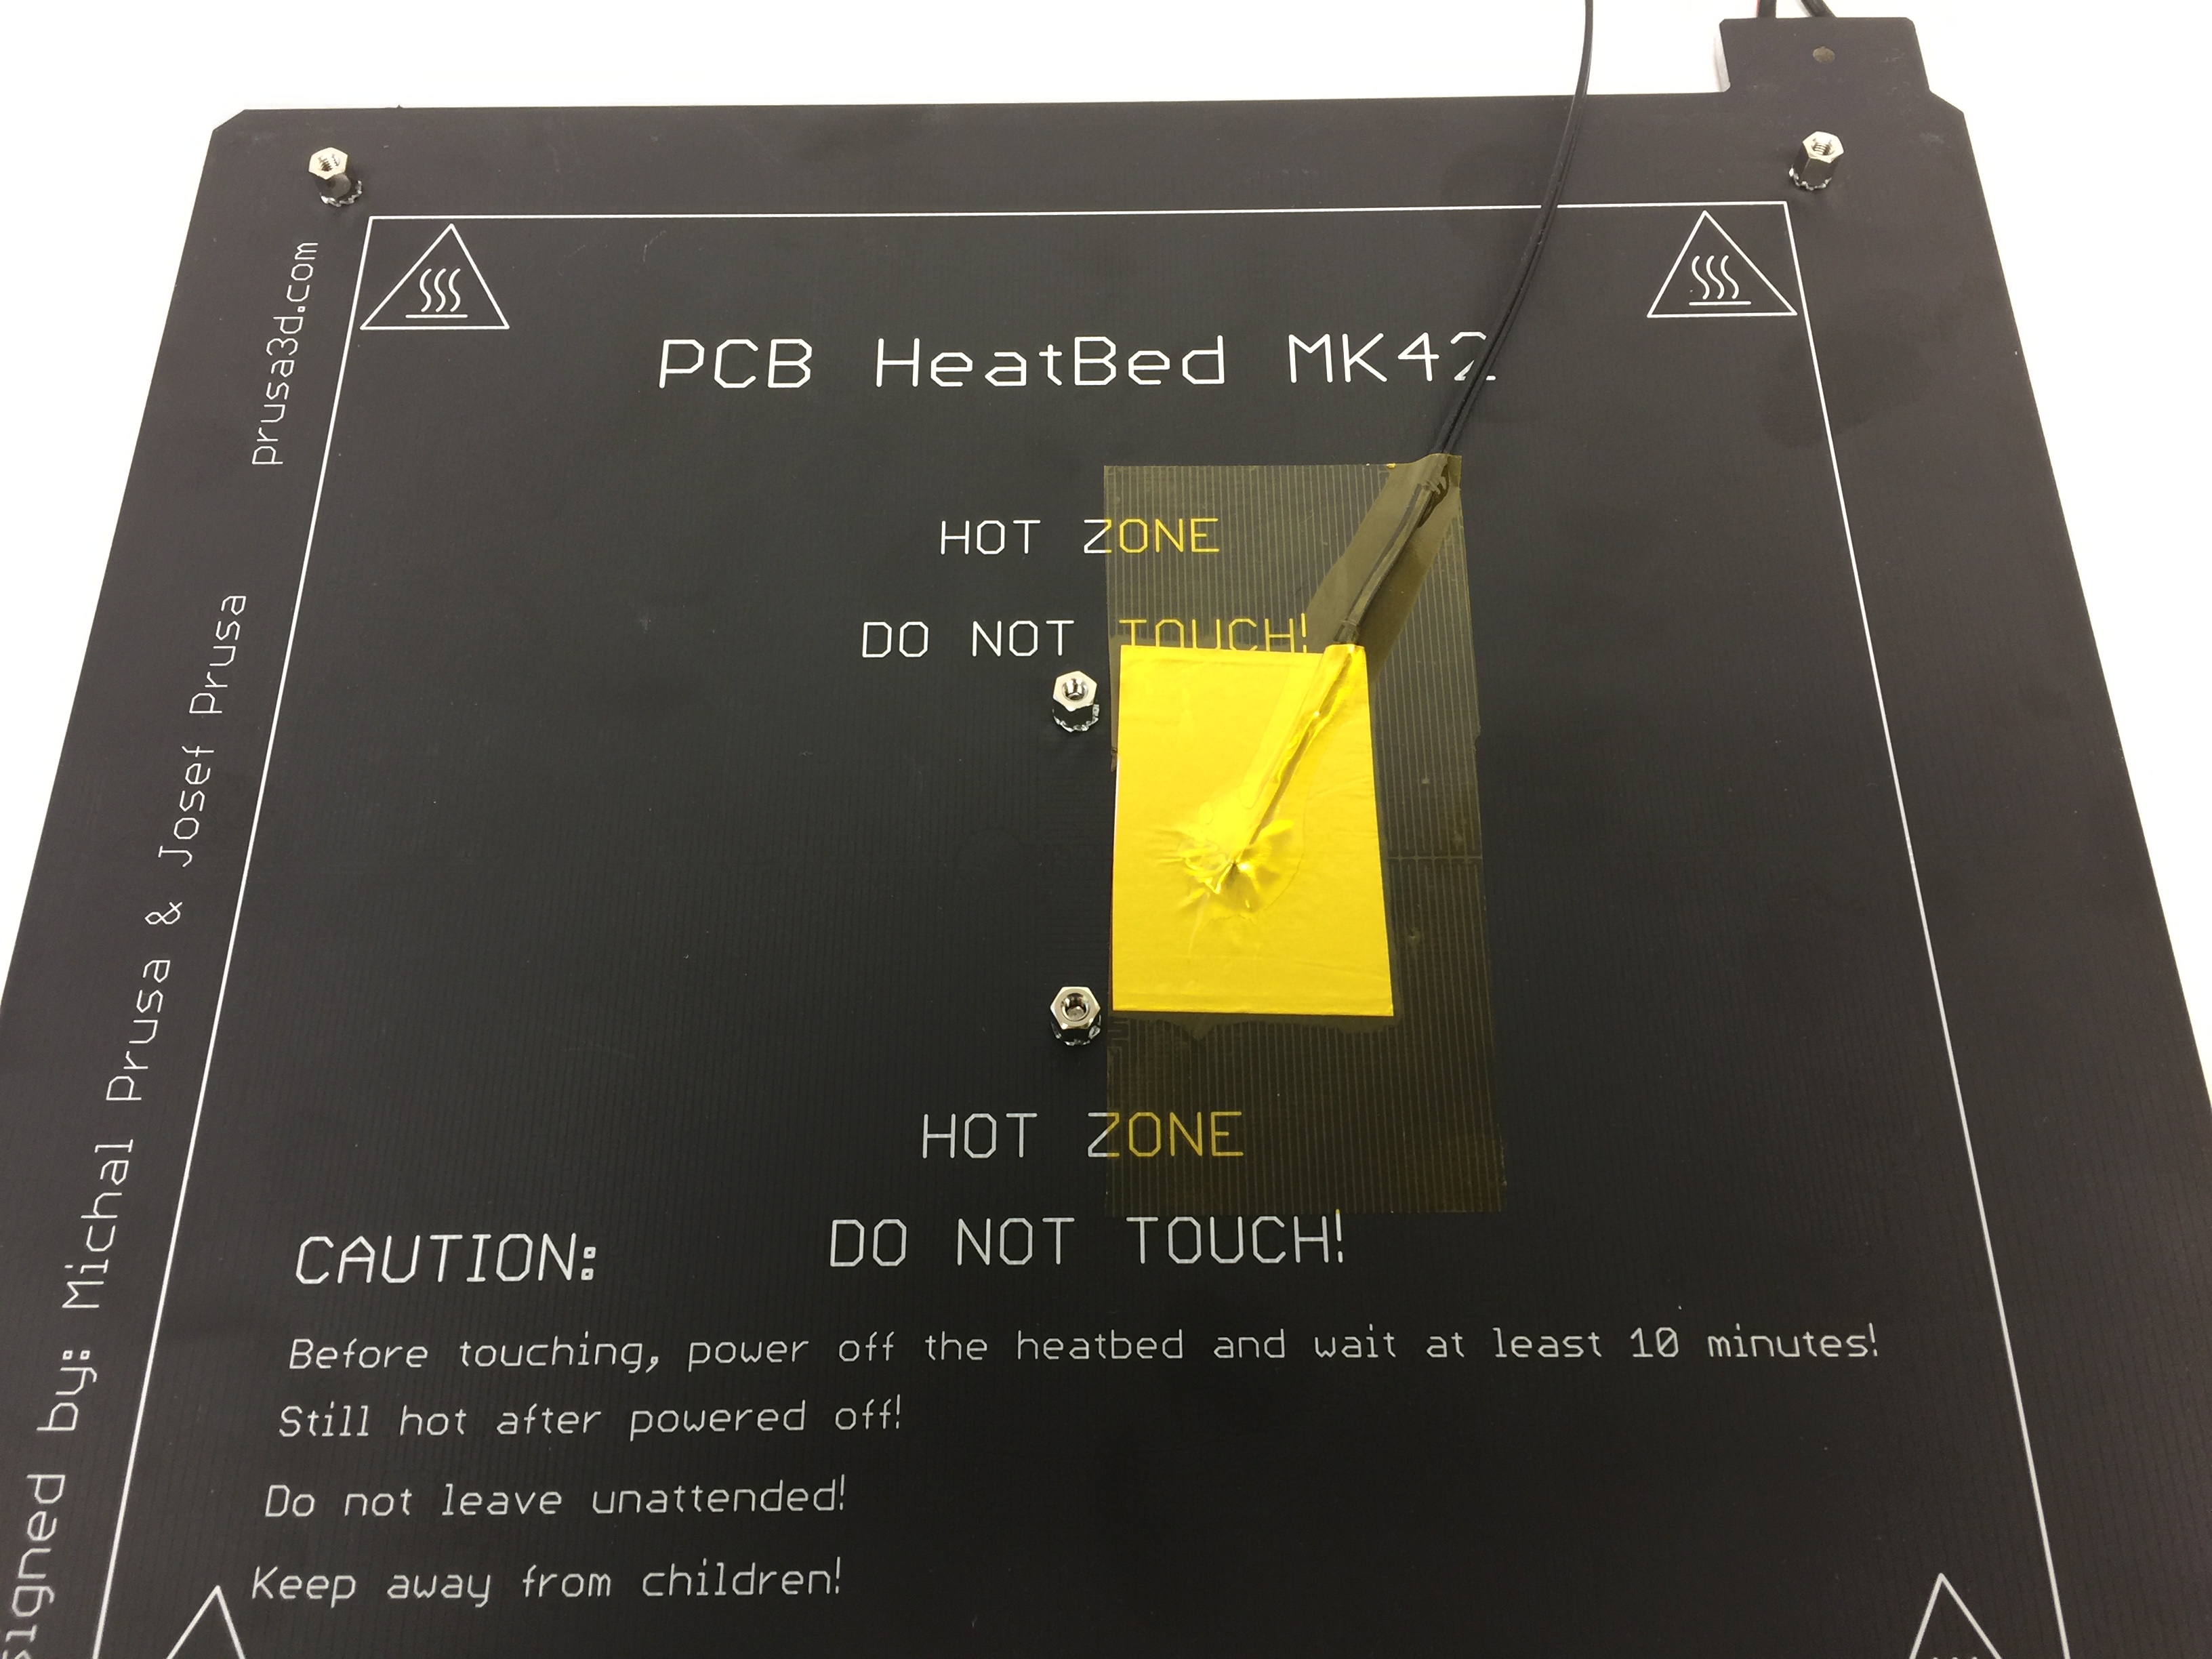 |  |
| Correctly secured thermistor | Loose thermistor. Will not work! |
- Check the power connection:
-
- MK2/s: Loosen Heated bed connectors in the miniRAMBO board. Simply open the miniRAMBO box and unplug and re-plug the connector. Please see Mini RAMBo electronics wiring (MK2S, MK2.5, MK2.5S) for more info.
- MK3/S: Open the EinsyRAMBO box and inspect the two far-right screwed power terminals, at the bottom of the board. Please see Einsy RAMBo electronics wiring (MK3/MK3S/MK3S+) for more info.
-
Thermistor test
Hairdryer
The best and easiest way is to take a hairdryer and blow hot air in below the Heatbed. During this process, check if there is any temperature change on the LCD. If there is a change it means your thermistor is working. If there is no change at all, your thermistor is defective.
Swapping connections
If the hairdryer test is inconclusive you can test whether the port on the mainboard is damaged. Swap the connection of the Hotend thermistor and heatbed thermistor.
IPA Test = uneven heating
To see whether the surface is heating evenly or at all, we suggest wiping down the heat bed surface with Isopropyl alcohol (IPA) cold and then heating the heatbed through the Preheat menu or LCD menu -> Temperatures -> Bed. The alcohol will evaporate when heated, exposing areas that are not heating at all.
Slow preheat process
Remove the printed cover at the back left of the heated bed and check the following.
- Damaged Heated bed cables at any spot.
- PSU cables are properly attached to the miniRAMBO/EinsyRAMBO board and not damaged at any spot.
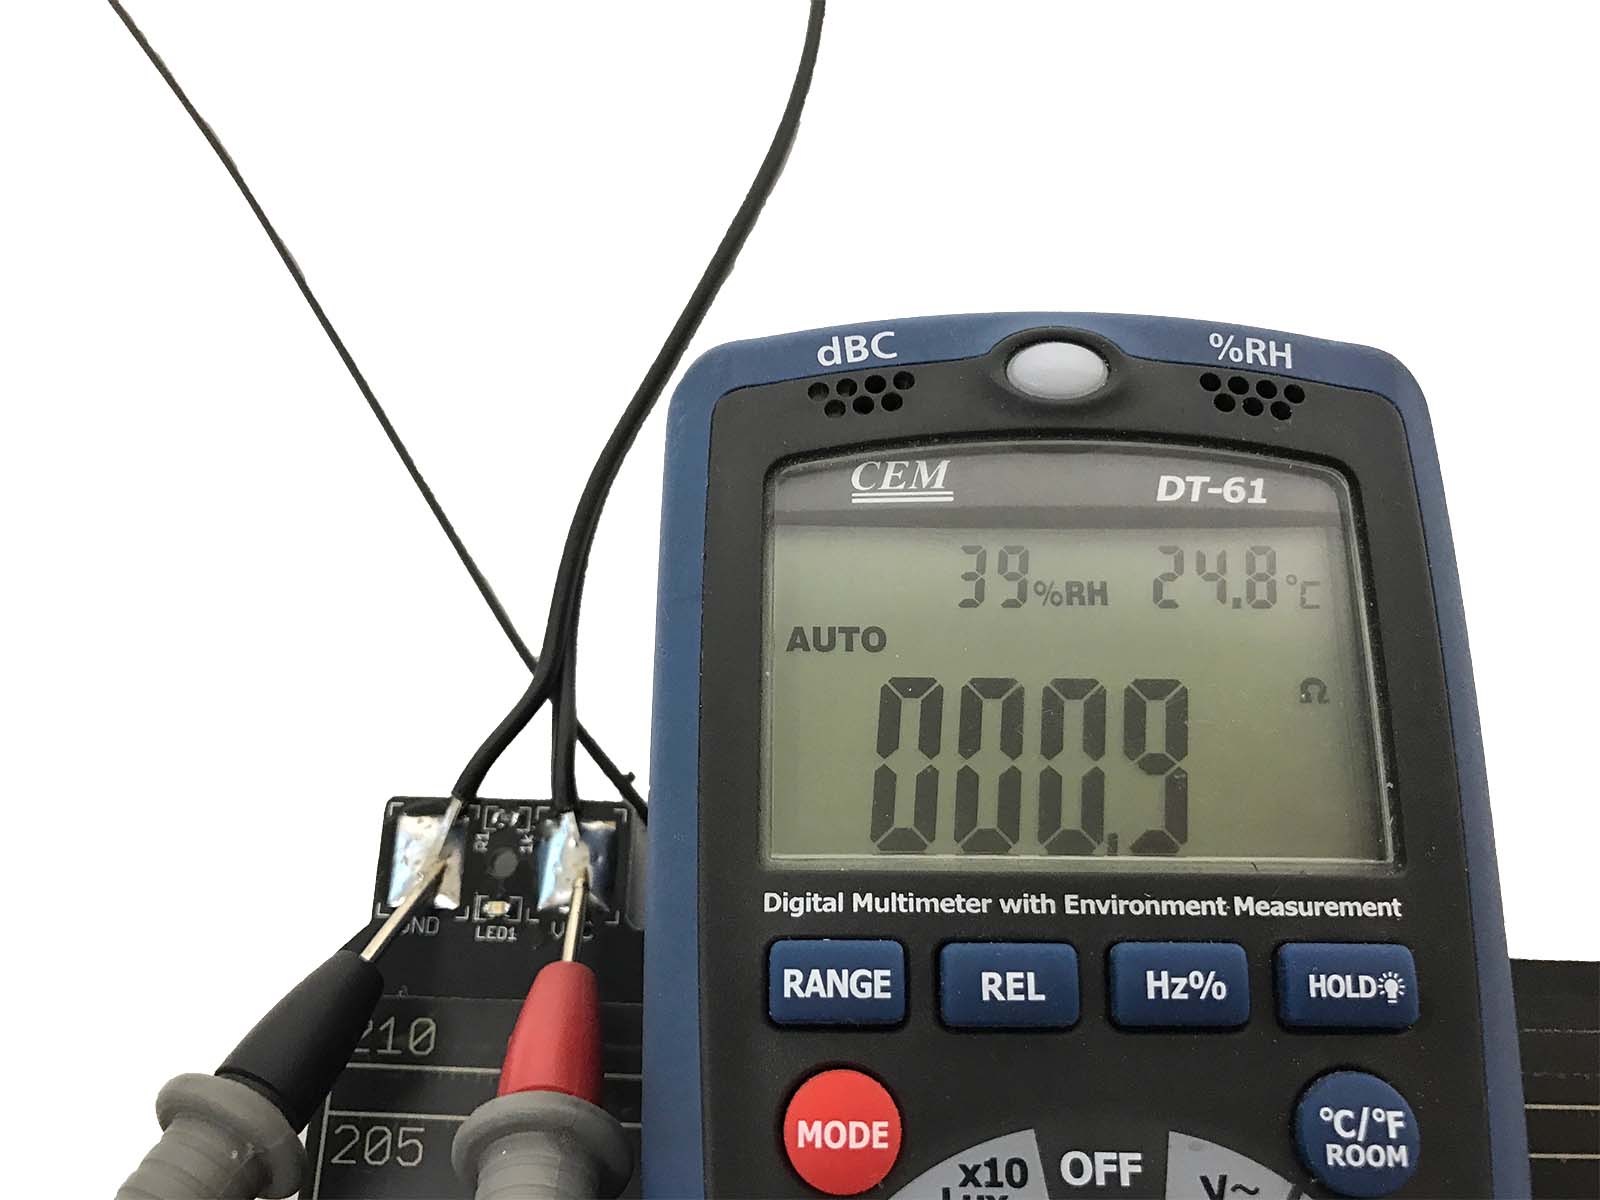
Measuring resistance/voltage
The resistance of the heated bed thermistor should be approximately 100K at room temperature (the same goes for the thermistor on the hot end if you are curious!)
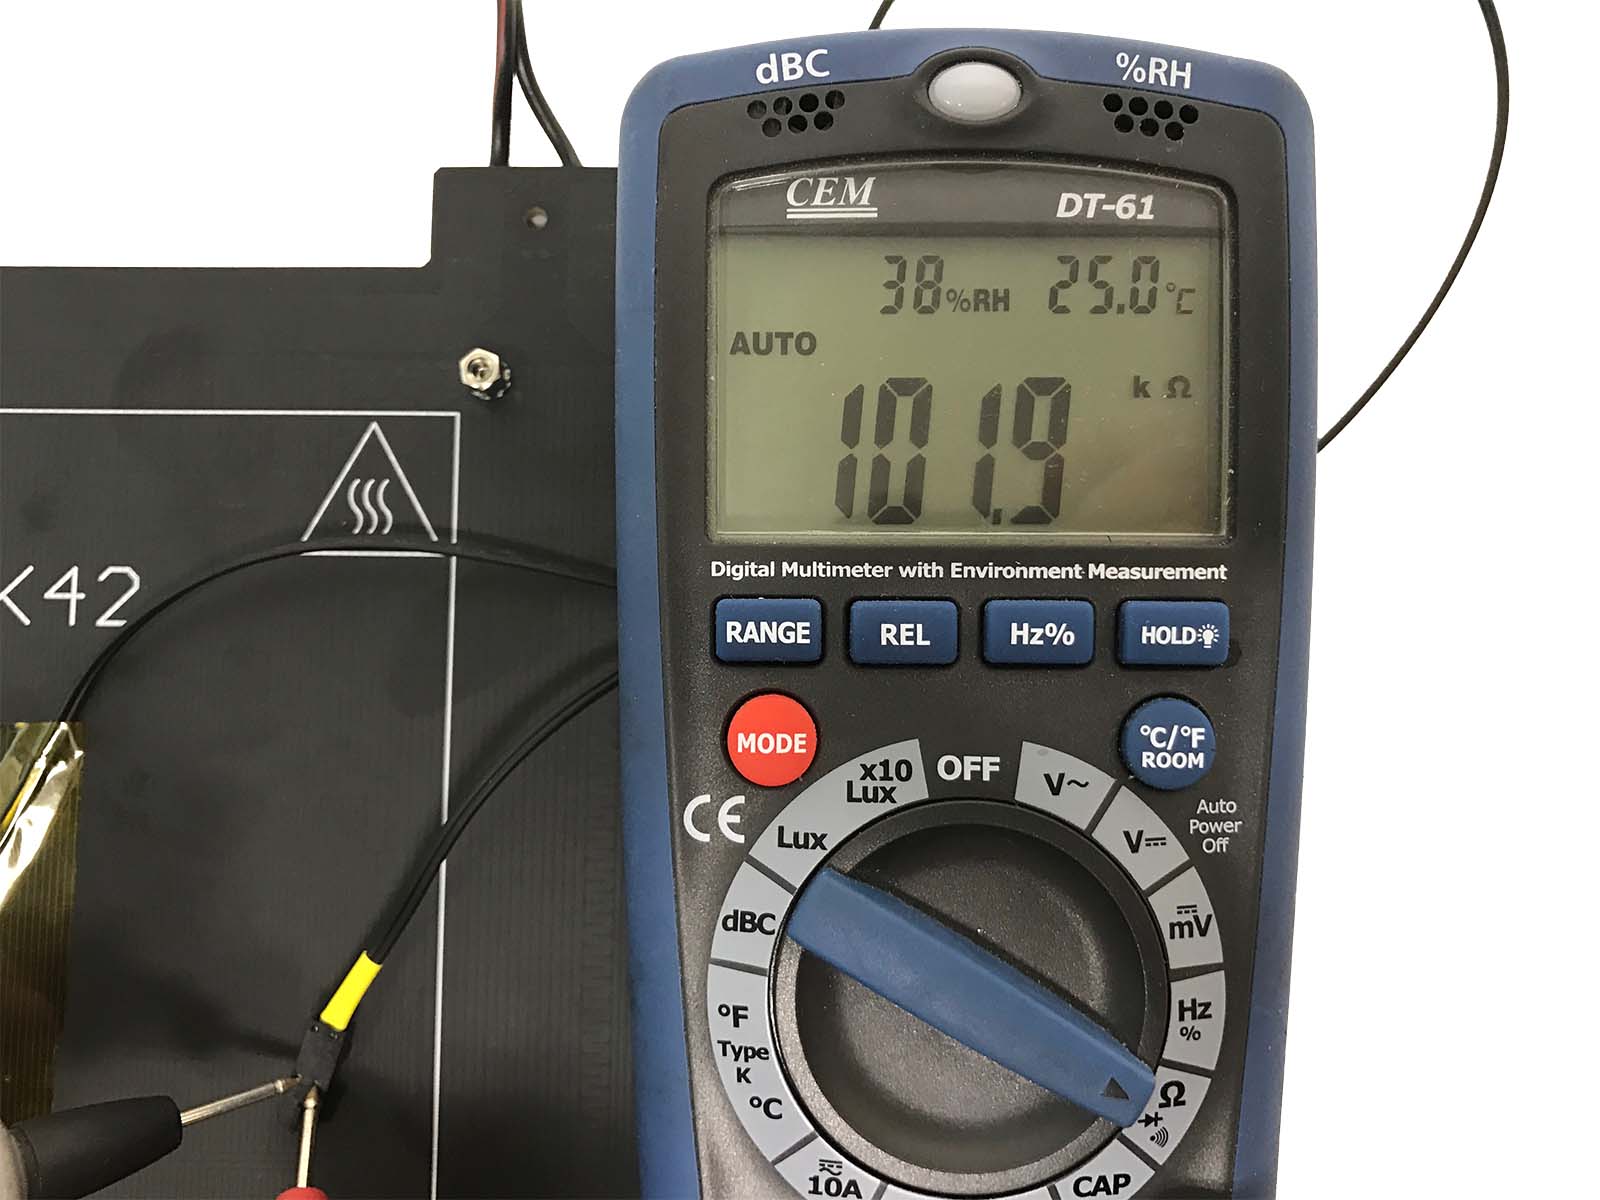
The resistance of the heated bed should be:
-
-
- 1 Ohm on MK2/S
- 3.4 Ohm on MK3/S
-
-
-
Don't worry if the resistance oscillates around the mentioned value.
-
Measuring voltages
Original Prusa MK2/S:
- The voltage going to the heated bed should be ~12V
- The voltage coming from the PSU to the miniRAMBO should be ~12V too
Original Prusa MK3/S:
- The voltage going to the heated bed should be ~24V
- The voltage coming from the PSU to the EinsyRAMBO should be ~24V too
Disconnect Power Panic
In some rare cases, the PowerPanic has interfered with the operation of MK3/S/+. If non of the steps outlined above resolves it, try to disconnect the PowerPanic cable from the EinsyRAMBo. Please see Einsy RAMBo electronics wiring (MK3/MK3S/MK3S+) for what to disconnect.
11 comments
D Towell
Hi! It is within the specs if your bed is at 55-60C temperature.
https://help.prusa3d.com/en/article/multimeter-usage_2117
The voltage was solid at 24.3v but the resistance was 7ohms, which is nearly double the specs. I ordered a new heated bed from Prusa, installed it and the problem is fixed. I used a thermal camera to take pictures of the malfunctioning bed, and of the new one. The pics show a big difference in the distribution of heat. I made a video of my experience here which includes the thermal camera images:
https://www.youtube.com/watch?v=iJB2P6fX6DQ
Hopefully this wil help anyone having the same issues, as I could not find much information on this particular problem
I haven't contacted Prusa support, but searching around only points me to the Pinda, and not to the bed.
I would contact support with some pictures/video of what is happening, the wiring to the board and info which printer it is. I am sure they will figure it out with your help:)