You can open the Preferences window by selecting Menu -> Configuration -> Preferences or pressing Ctrl + P.
The preferences are split into multiple tabs for easier discoverability.
General
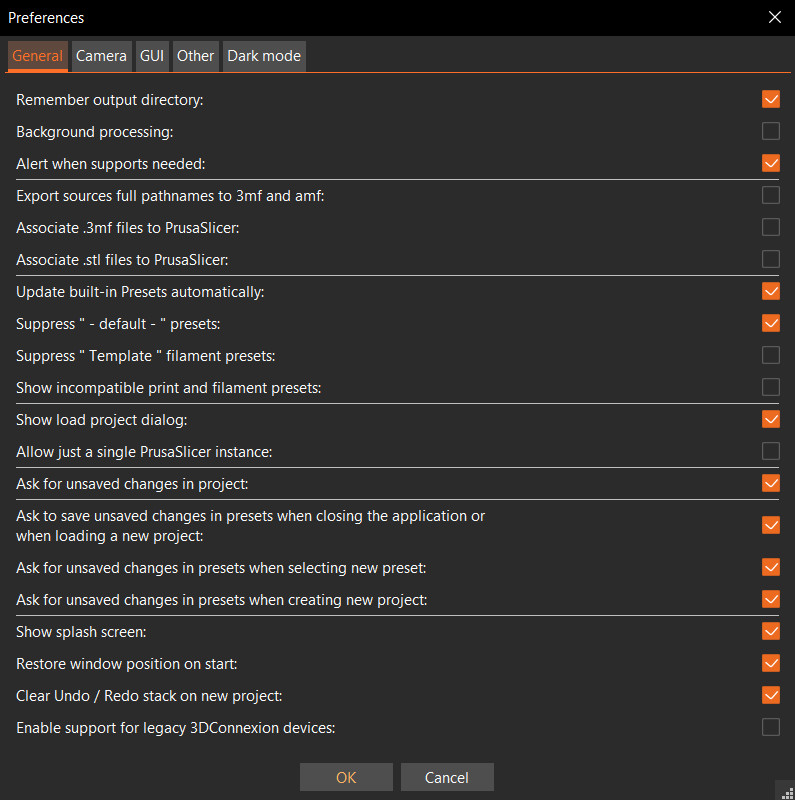
Remember output directory
On by default. When enabled, PrusaSlicer will prompt the last output directory instead of the one containing the input files.
Background processing
By default, G-code generation starts when the user clicks on the Slice Now button or immediately after switching to the Preview. When background processing is enabled, G-code is generated as soon as the models are loaded. As a result, the G-code preview, as well as print time estimate, can be, in most cases, displayed instantly after switching to the Preview.
Background processing is especially useful if you're going back and forth between settings and the G-code preview (e.g., when adjusting support settings).
Whenever a change is detected on the platter (e.g., moving a model, creating a copy of a model) the relevant part of the G-code starts updating in the background. Please note that, unlike some older versions of Slic3r PE, background processing is now smarter and doesn’t regenerate the entire G-code, which would be computationally expensive. Only those slicing steps that were invalidated by the user action are recalculated.
Alert when supports are needed
If this is enabled, PrusaSlicer will raise alerts when it detects issues in the sliced object that can be resolved with supports (and Brim). Examples of such issues are floating object parts, unsupported extrusions, and low bed adhesion.
Export sources full pathnames to 3MF and AMF
By default, 3MF project files are configured not to save the full path to the source models, as this can pose a (small) security risk when sharing such a file. Enabling it will make the Reload from disk work even in reopened 3MF files without prompting the user to locate the model in the file system. Learn more in the Reload from disk article.
Associate .3MF files to PrusaSlicer
When enabled, this will add the option for opening 3MF files by default with PrusaSlicer to your operating system. You will most likely get prompted by the operating system the next time you try to open a 3MF file.
Associate .STL files to PrusaSlicer
When enabled, this will add the option for opening STL files by default with PrusaSlicer to your operating system. You will most likely get prompted by the operating system the next time you try to open a STL file.
Update built-in presets automatically
When this option is enabled, PrusaSlicer downloads updates of built-in system presets (print, filament, and printer profiles) in the background. These updates are downloaded into a separate temporary location. When a new preset update becomes available, it is offered at application startup.
Snapshot location
Windows C: -> Users -> username -> AppData -> Roaming -> PrusaSlicer -> snapshots
Mac “HDD” ▸ Users ▸ username ▸ Library ▸ Application Support ▸ PrusaSlicer ▸ snapshots
Linux ~/.PrusaSlicer/snapshots
Developer builds (alphas and betas) use different sets of settings than stable releases. This lets you use developer builds without affecting the stable version in any way. You'll find these snapshots in a corresponding application data folder:PrusaSlicer, PrusaSlicer-alpha,
PrusaSlicer-beta
Suppress “-default-” presets
On by default. If any valid Print / Filament / Printer profile is available, the “default” empty profile is hidden from the drop-down menu.
Suppress "Template" filament presets
Suppress "Template" filament presets in the configuration wizard and sidebar visibility.
Show incompatible print and filament presets
When checked, the print and filament profiles are shown even if they're marked as incompatible with the currently selected printer.
Show drop project dialog
When you drag & drop a 3MF project file to PrusaSlicer, if enabled, you'll be asked if you want to load just the model or if you want to load and select the printer/material/print profiles as well.
Allow just a single PrusaSlicer instance
When enabled, only one instance of PrusaSlicer can run at a time. That means opening files associated with PrusaSlicer will simply add the model to the currently running PrusaSlicer instance. When disabled, you can run multiple instances of PS at once, completely independently. Running many instances at once may slow your PC down if it's not very powerful (cheaper laptops).
Ask for unsaved changes in the project
If selected, when closing the application or when loading a new project, you'll always be asked what action to take with unsaved changes and profiles. You can select "Remember my choice" the next time this happens to automatically repeat the selected action in the future.
Ask for unsaved changes in presets when closing the application or when loading a new project
If enabled, when switching a selected preset, you'll always be asked what action to take with unsaved changes. One of the options is to "Transfer" settings, which can be especially useful if you want to keep some of the currently selected settings (e.g., keep supports turned on). You can select "Remember my choice" the next time this happens to automatically repeat the selected action in the future.
Ask for unsaved changes in presets when selecting new preset
If enabled, when creating a new preset, you'll always be asked what action to take with unsaved changes.
Ask for unsaved changes in presets when selecting new project
If enabled, when creating a new project, you'll always be asked what action to take with unsaved changes.
Show splash-screen
Disabling the splash-screen will not make PrusaSlicer start any faster.
Restore window position on start
If enabled, PrusaSlicer will be opened at the position it was closed.
Clear Undo / Redo stack on new project
If enabled, loading new project will erase the undo/redo history.
Enable supports for legacy 3DConnexion devices
If enabled, the legacy 3DConnexion settings dialog is available by pressing Ctrl + M.
Camera
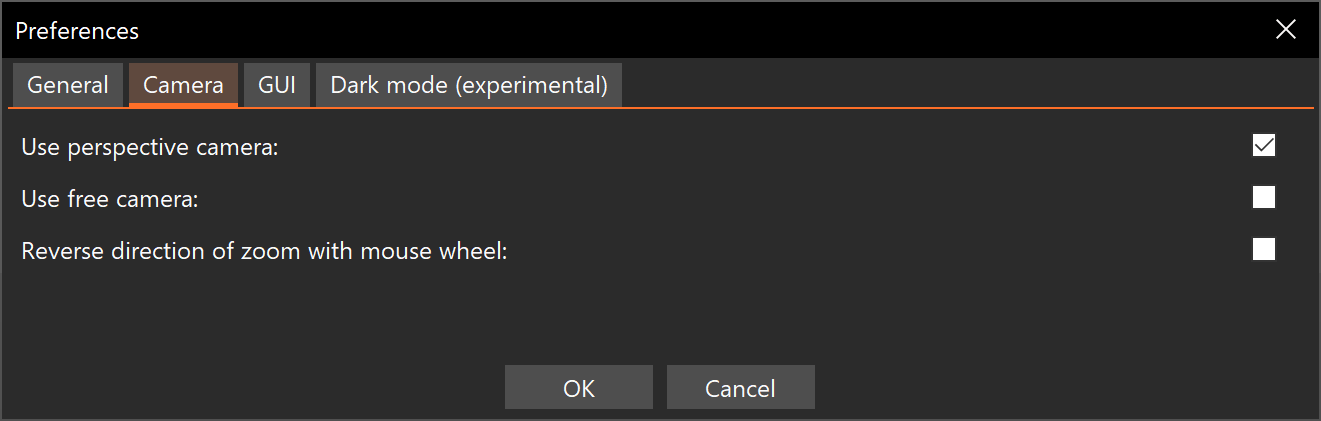
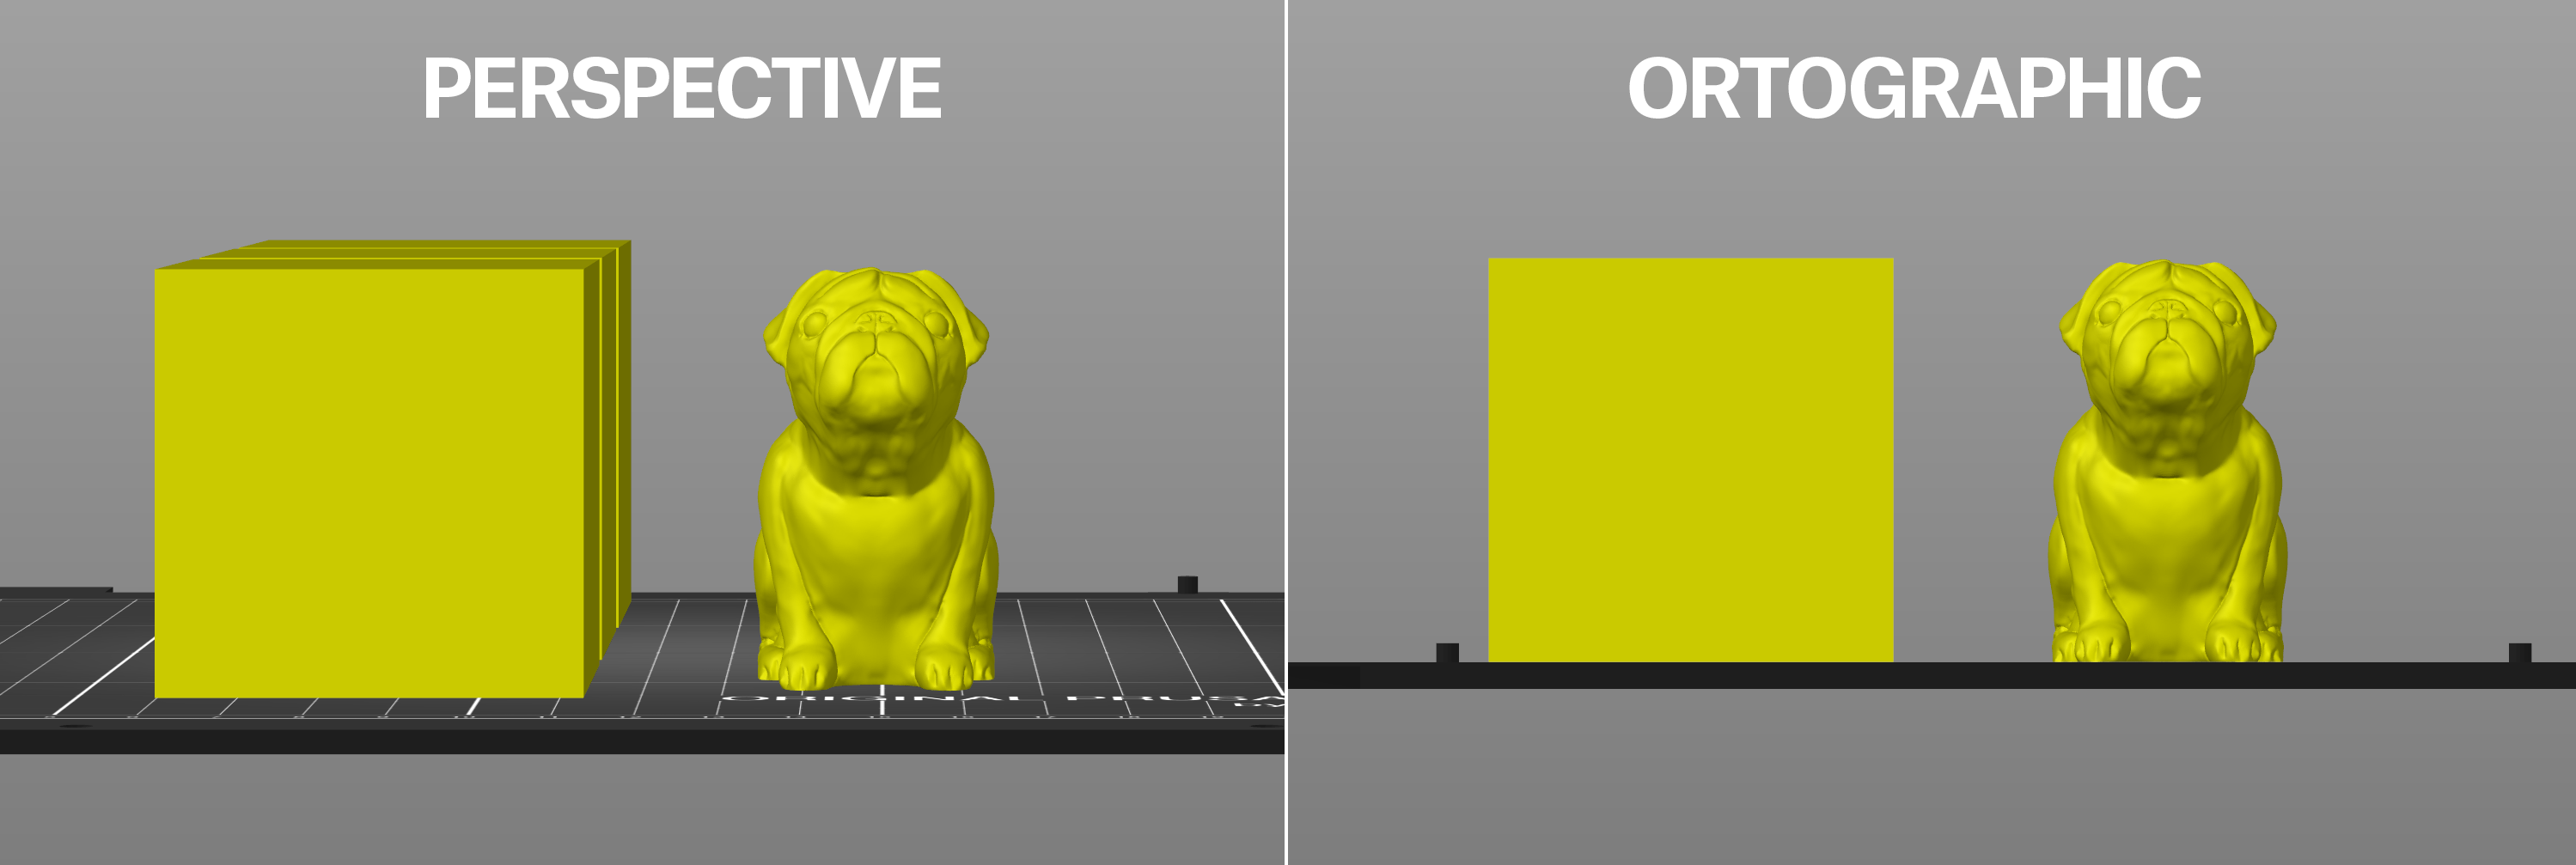
Perspective camera (default) - Use perspective camera ON
The perspective camera gives you more information about depth, objects which are far away are smaller than those nearby. A perspective view is as seen by human eyes in the real world.
Orthographic camera - Use perspective camera OFF
The orthographic camera is commonly used in engineering. All objects appear at the same scale, parallel lines remain parallel, and a unit of length will appear to have the same length everywhere on the drawing. This makes it easier to judge relative sizes and to align models.
Free camera - Use free camera ON
Enable this feature to use a free camera.
Constrained camera - Use free camera OFF
If the free camera option is not enabled, the default will be a constrained camera.
Reverse direction zoom with mouse wheel
If enabled, scrolling upwards will be zooming out, rather than zooming in and vice versa.
GUI
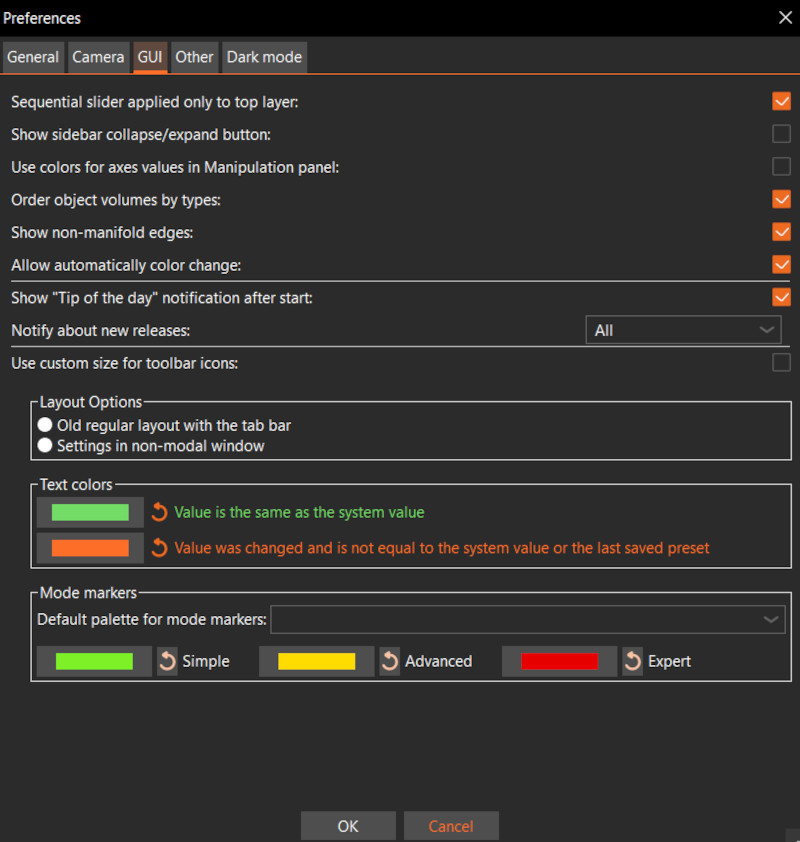
Sequential slicer applied only to top layer
When enabled, the horizontal slider on the bottom of the Preview will only affect the top visible layer. If disabled, the slider will progress through all currently visible print moves.
Show sidebar collapse/expand button
If enabled, the Collapse/expand sidebar button will be visible. However, you can always use the keyboard shortcut Shift+Tab even when the button is not visible. This feature is very useful on devices with a smaller screen or when taking full-size screenshots of the G-code preview.
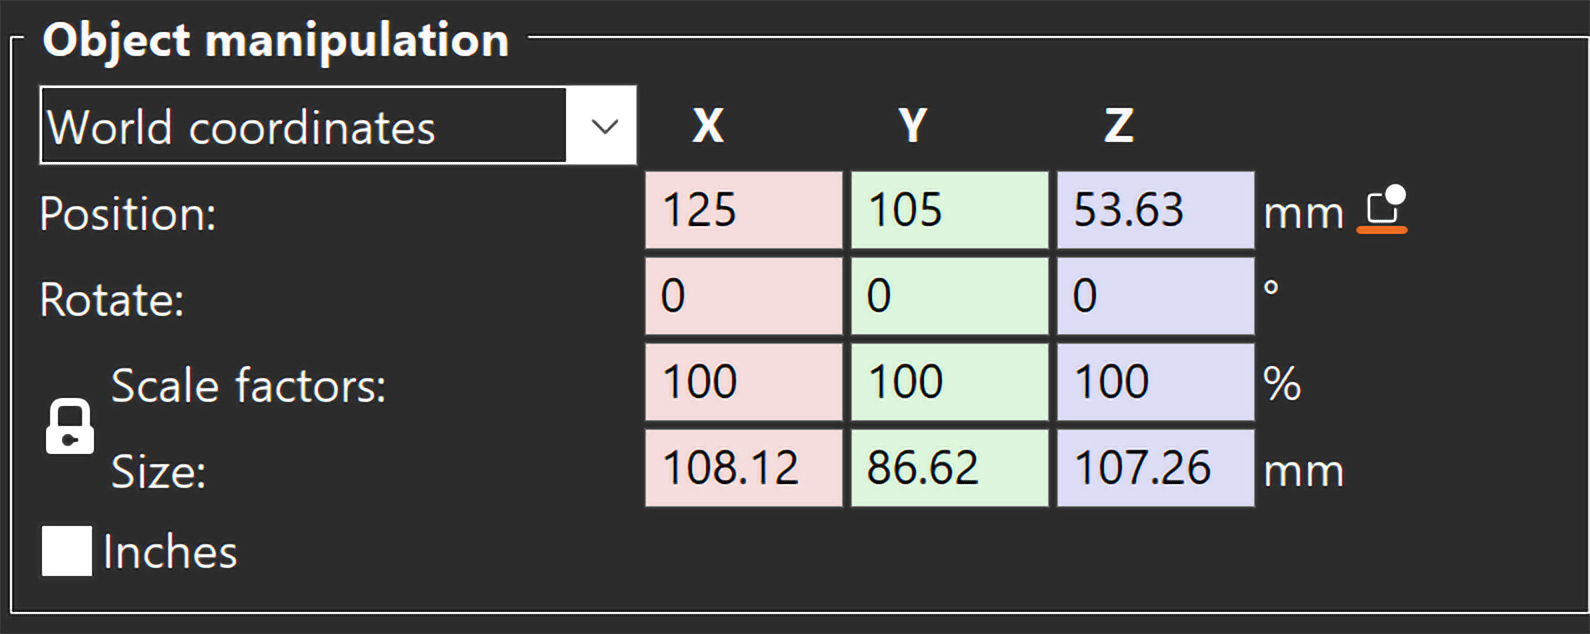
Use color for axes values in Manipulation panel
If enabled, the axes' names and values will be colorized according to the axes' colors. If disabled, the old UI will be used.
Order object volumes by types
If enabled, the order of objects in the object list will always be Model part, Negative volume, Modifier, Support blocker, Support enforcer. If disabled, you can re-order them freely. However, one of the model parts always needs to be in the first place.
Show non-manifold edges
If enabled, it shows any edge shared by more than two faces.
Allow automatically color change
Shows a notification when the object sliced looks like a logo or a sign.
Show tip of the day notifications
If enabled, one useful tip will be shown each time you start PrusaSlicer.
Notify about new releases
When enabled and a newer stable version of PrusaSlicer becomes available, a notification is displayed at the next startup (never during program usage). "Release only" will notify you only about stable final releases, the "All" option will notify you about all releases, including alpha, beta and release candidate versions.
This is currently only a notification mechanism; no automatic installation is done.
Use custom size for toolbar icons
Both the top and left toolbars automatically rescale based on the DPI reported by your operating system. You can manually override this scaling and set a different scale by using the slider.
Layout Options - Old regular layout with the tab bar
Settings are located in tabs at the top of the window.
Layout Options -New layout, access via settings button in the top menu
A new button will appear in the top toolbar to access the settings. This can save you some screen space on devices with a smaller screen.
Other
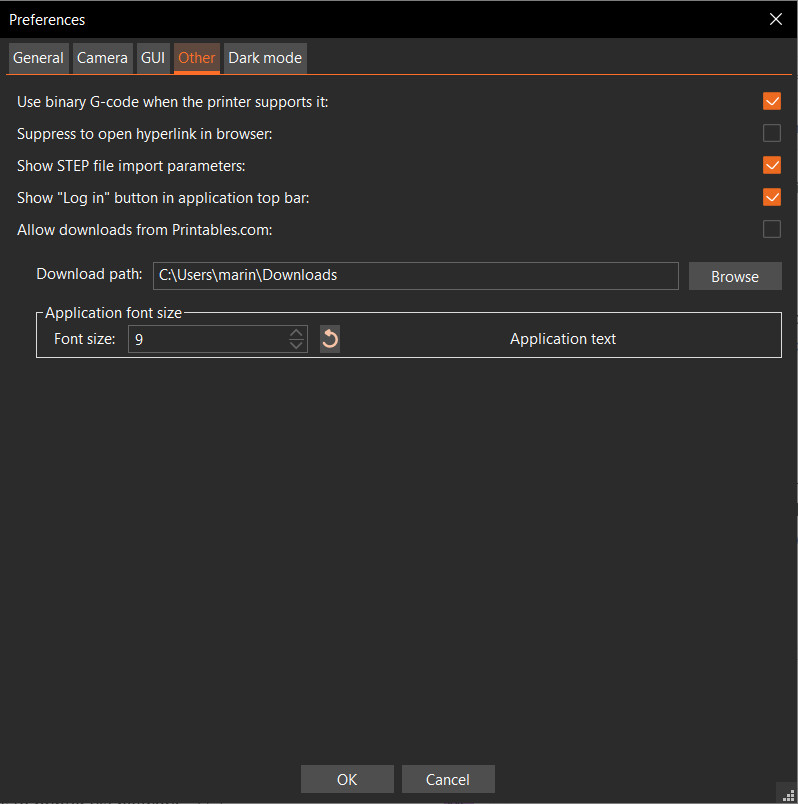
Use binary G-code when the printer supports it
If the option "Supports Binary G-code" option is enabled in Printers -> General, checking this option will result in the export of the G-code in the binary format.
Suppress to open hyperlink in browser
If checked, links clicked will not be opened in your browser.
Show "Log in" button in application top bar
This option is checked by default. If unchecked, the option to Log in will disappear from the top bar.
Allow downloads from Printables.com
If enabled, PrusaSlicer will be allowed to download from Printables.com
Dark mode (experimental)
Enable dark mode
Turns on the Dark mode.
Uses system menu for application
On Widows, the application will use standard system menu. If it looks ugly due to scaling, you can disable it to use older UI.
4 comments
Cura allows the user to do this, Prusa should as well.
Hi! You might want to check the [id=1698|anchor=raft-layers|title=raft option.]
Right, there could be a link to this guide:
https://help.prusa3d.com/en/article/firmware-updating-mk3-mk3s-mmu2s_2227