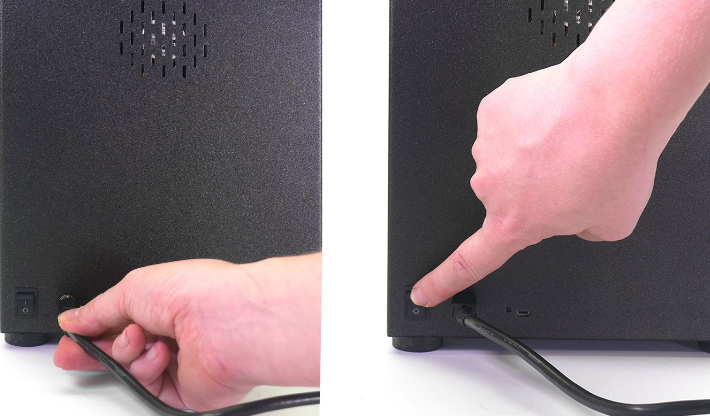
Connect the external power supply to the CW1 and plug it into the power source. To disconnect the cable, push the connector’s cover away from the CW1 to unlock the connector, then pull it out. Turn the device on by using the mechanical switch next to the power supply connector.
Once you turn the CW1 on, the display in the front will light up. The knob next to the display is the main control device. Rotate it left or right to select items on the screen and push it to confirm the selection/change options.
Preparing the liquid container
Before you start the washing process, you need to prepare the isopropyl alcohol bath.
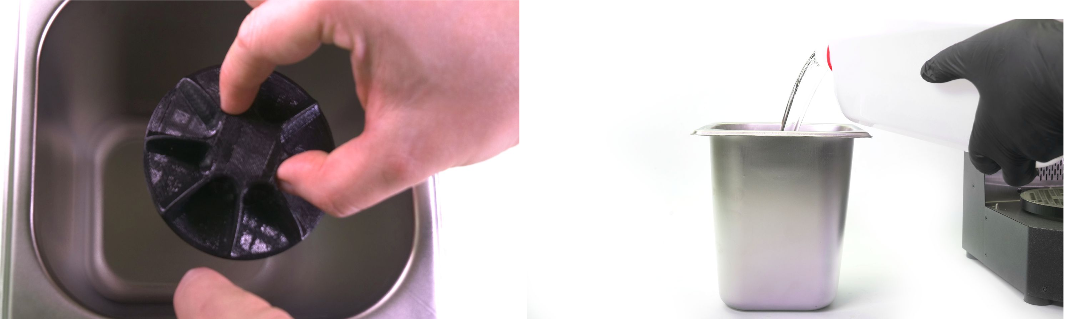
Prepare the stainless steel tank and the magnetic propeller. Place the magnetic propeller into the tank so it lays flat on the bottom. Blades must point upwards. Carefully pour isopropyl alcohol into the tank. The surface should be about 2-3 cm (about 1 in.) below the edge of the tank.
Washing
Place the liquid container with the propeller and isopropyl alcohol into the CW1 so it rests on the two guiding rails. There is a sensor in the back that can detect the presence of the tank. You can tell whether the tank has been correctly placed when the text on the display changes to Start washing. If the tank is not present, the text will change to Start Drying / Curing.
We recommend washing the printed object while it’s still attached to the printing platform. However, if you don’t have the Original Prusa SL1, or if the initial washing did not remove some resin (e.g. under dense supports), you can use the metal basket to wash the object by itself.
Washing an object attached to the SL1 printing platform
After a print finishes, open the acrylic lid of the SL1 and place a protective tray around the resin tank. Use a plastic spatula or paper towels to wipe resin from the top of the printing platform. Release the black knob and remove the printing platform - wear gloves!
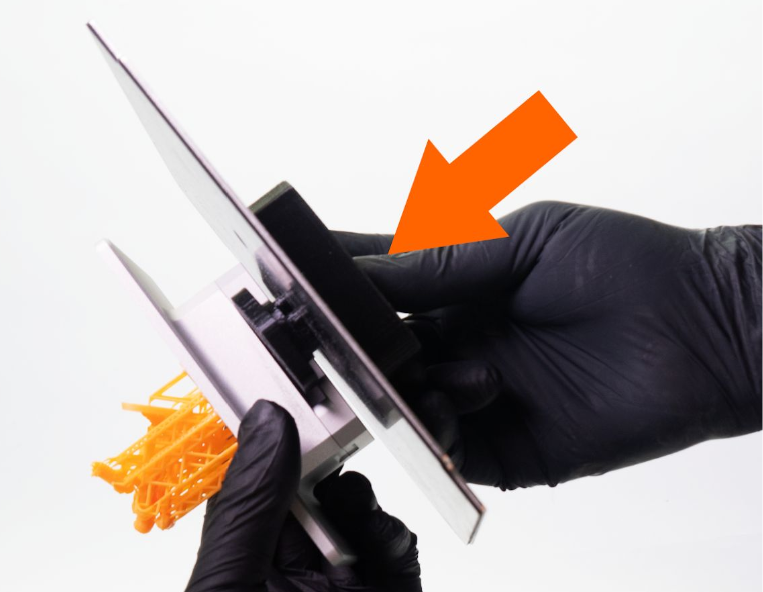
Carefully move the printing platform to the CW1. Take the metal lid with the attaching mechanism and push the button at the top with your thumb - this will unlock the mechanism. Slide the printing platform onto the hexagon-shaped adapter and release the button.
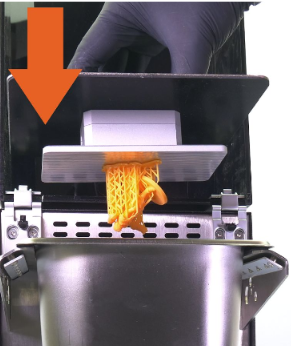
Now place the lid on top of the liquid container so the print is submerged in isopropyl alcohol. This is the recommended procedure because both the platform and the object are washed.
Select Start washing on the display and the machine will wash the object for 3 minutes (default value). You can change the washing time by either rotating the knob during the process or by selecting Run-time option before the print. We do not recommend washing objects in isopropyl alcohol for more than 10 minutes - tiny cracks may appear on the surface of printed objects (even after more than 24 hours), which is the result of long exposure to IPA.
Washing small objects / objects removed from the printing platform
After a print finishes, open the lid of the SL1 and place a protective tray around the resin tank. Use a plastic spatula or paper towels to clean the top of the printing platform. Release the black knob and remove the printing platform - wear gloves!
Use a metal spatula to remove the printed object from the printing platform. You can also consider removing the supports at this point
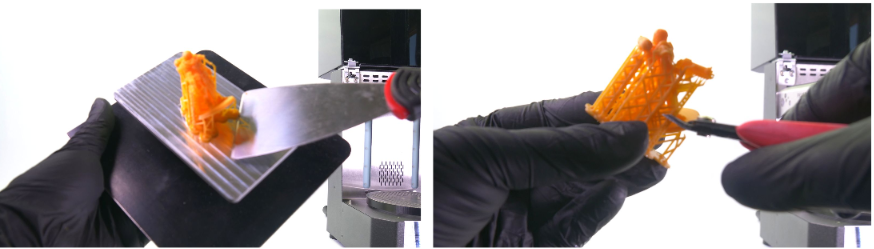
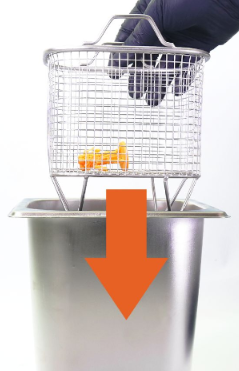
Place the object in the metal basket and insert it into the liquid container. Place the liquid container into the CW1 so it rests on the guiding rails.
Select Start washing on the display and the machine will wash the object for 3 minutes (default value). You can change the washing time by either rotating the knob during the process or by selecting Run-time option before the print. We do not recommend washing objects in isopropyl alcohol for more than 10 minutes - tiny cracks may appear on the surface of printed objects (even after more than 24 hours), which is the result of long exposure to IPA.
After washing
Wearing protective gloves, remove the object from the tank and remove the tank itself as well. You can now dry and cure the model.