ES
  • English
  • Čeština
  • Italiano
  • Deutsch
  • Polski
  • Français
Iniciar sesión

Embalaje de la impresora para devolución - Material de embalaje original (XL)

Menu

Embalaje de la impresora para devolución - Material de embalaje original (XL)

Embalaje de la impresora para devolución - Material de embalaje original (XL)
Relevante para :
Ultima actualización 3 months ago
Embalaje de la impresora para devolución - Material de embalaje original (XL)
 Dificultad
Moderada
 Pasos
30
 Idiomas disponibles
ENCSPLDEITFR
Introducción
Introducción
Introducción
This guide will outline how to prepare and pack down your Original Prusa XL for return or repair using the packing material we supply with assembled printers.
Contact our Customer support to receive the shipping label.
Be sure to read each step carefully! Colors on the Hexagon bullet points correspond to markers in the photos.
The package with the printer is heavy! Always ask another person for help with handling.
Tools necessary for this step
Para esta guía, prepara:
Llave Allen de 2.5mm
Llave Allen de 4mm
Llave Torx TX10
Black packing tape
Cinta de embalaje
Fragile stickers (4x) Can be downloaded here.
Accessories for return shipment (you received with the printer)
Necessary fixations for this guide
For this manual, please prepare the complete original packaging material in which the Original Prusa XL printer was sent to you.
For this guide, please prepare:
Top front cardboard fixation
Top rear cardboard fixation
Extruder box
La lista continúa en el siguiente paso...
Necessary fixations for this guide
Para esta guía, prepara:
Left and right bottom rear fixation
Left and right bottom front fixations
Left and right top rear fixations
Left and right top front fixations
Preparing the printer
If you have loaded the filament, unload it from the hotend. On the screen, navigate to Filament -> Unload Filament.
Remove the filament from the hotend. It is necessary to completely remove it from the printer.
Move the Z-axis down. On the screen, navigate to Control -> Move axis -> Move Z.
Enfría la impresora. Ve a Precalentar -> ENFRIAR.
Wait until the hot parts are cooled down to ambient temperature. It takes approximately 10 minutes.
Removing the Wi-Fi antenna
Make sure the printer is cooled down.
Turn the printer OFF and unplug the power cord.
Turn the printer with its back to you.
Unscrew and remove the Wi-Fi antenna from the printer.
Place the antenna into the bag with other accessories.
Disconnecting the extruder cable
Slightly loosen two screws on the cover. No need to remove them completely. Push the cover to the right and remove it from the printer.
Press the secure pin and release the extruder cable.
Fija la cubierta de los conectores a los tornillos. Empújala hacia la izquierda y aprieta los tornillos.
Removing the xl-dock-cable-router
Push the 2,5mm Allen key all the way through the hole in the rear metal sheet until you reach the screw in the xl-dock-cable-router and release the screw. Leave the screw in the xl-dock-cable-router.
Saca el xl-dock-cable-router.
Leave the extruder cable bundle with the PTFE tube freely over the printer to the rear side.
Removing the extruder
Remove the X-carriage-cover from the X-carriage.
Use the TX10 key to unscrew both lower M3x12b.
Removing the extruder
Hold the extruder with your hand to pretend the fall of the extruder while unscrewing.
Use the TX10 key to unscrew both upper M3x12b.
Take off the extruder.
Packing the extruder
Pack the extruder carefully into the box with the fixture provided.
First, close the bottom part of the box.
Second, close the upper part of the box.
Put the extruder packaging aside for now, we'll use it later.
Disassembling the LCD
Use 2,5mm Allen key to unscrew both M3x18 screws from the LCD supports.
Gently unplug the LCD cable.
Disassembling the LCD
Use the TX10 key to release the screw securing the PE cable.
Let the cables hang freely.
Pack the LCD into the bubble wrap to prevent damage while shipping.
Removing the spool holder
Use a 4mm Allen key to release the M5x85 screw and take off the spoolholder.
Leave the M5nEs in the frame.
Pack the spoolholder a into the bag with other accessories.
Put the printer aside for now, we'll use it later.
Preparing the bottom
The bottom part of the box has 4 pre-cut holes for shipping straps.
Use your finger to create holes in the cardboard.
Preparing the bottom
Do not twist the shipping straps.
Take the shipping straps.
Stretch the shipping strap between two holes as described in the picture.
Move the shipping strap to be the same length on both sides.
Stretch the shipping strap on the second side of the bottom part box.
Preparing the bottom
Insert the cardboard base into the bottom part of the box.
The front of the box shows cardboard cuts on the sides.
Put the fixation into the cardboard base as described in the picture.
Inserting the printer
Do not hold the printer by the top metal profiles!!! Otherwise, you may warp the printer and damage the LED lighting inside the profiles.
Manipula la impresora entre dos personas.
Use the side handles on both sides of the printer to handle.
Insert the printer into the cardboard base.
Be careful to orient the printer correctly to the front of the box base.
Keep the steel sheet on the printer. No need to pack it separately.
Installing the fixations
The extruder box will "lock" the printer in its place.
Lay out the box cutouts so that the box can be pushed through them.
Lock the cardboard pins into the extruder box.
Preparing the top
Preparing the top
Preparing the top
Use a knife to cut the tape and open the box.
Put the top part on a prepared cardboard base.
Preparing the top
Preparing the top
Preparing the top
Preparing the top
Locate the pre-cuts on the top part.
Use your finger to create holes.
The holes are for the shipping straps. We will use them later.
Installing the top
Installing the top
Installing the top
Installing the top
Front and back white fixations are not the same.
Put four white fixations on top of the printer.
Prepare top cardboard fixations, we'll use them in the next steps.
Installing the top fixation
Put the larger cardboard fixation between the box and the white fixture.
Turn the cardboard cutout around the X-carriage to fix it in position.
Rotate the package.
Use a tape to secure the cutout.
Installing the top fixation
Put the smaller cardboard fixation between the box and the white fixture.
Rotate the package.
Use the space in the fixation to store accessories that you received with the printer.
If you have a Prusament box, you can fill it with accessories and use the free space in a larger cardboard fixture.
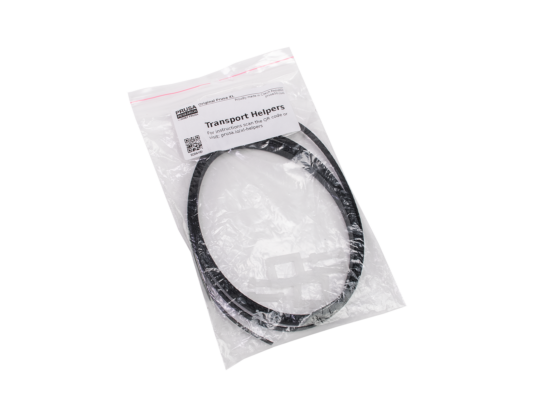
Preparing the shipping straps
The shipping strap must be flattened, not twisted.
Push the strap through the prepared hole in the top part box.
Do this step for all straps on both sides.
Wraping the package
Wraping the package
Wraping the package
Use wrapping tape to tape all places as described in the pictures.
Make at least a minimum of 3 lines of wrapping tape on yellow spots.
Cover the shipping straps with wrapping tape.
Use packing tape or food wrap (transparent) for wrapping the whole package. You'll protect your package from unnecessary damage.
Labelling the package
Place the "Fragile" stickers at least on four sides of the box. Do not place them on the top or bottom side.
You get the shipping label from our Customer support.
Place the shipping label on the side with the fragile sticker.
¿Fue útil esta guía?

Comentarios

¿Todavía tienes preguntas?

¿Todavía tienes preguntas?

Si tienes alguna pregunta sobre algo que no se ha tratado aquí, comprueba nuestros recursos adicionales.
Y si eso no lo soluciona, puedes enviar una petición a [email protected] o mediante el botón que hay más abajo.

Contacta con nosotros