English
Login

Adjusting belt tension (XL)

Relevant for

XL
66 comments
Article is also available in following languages
English
Čeština
Polski
Deutsch
Français
Español
Italiano
日本語

On the Original Prusa XL, adjusting the belt to the optimal tension is crucial to achieving good quality on the prints. A loose belt can cause Layer shifting, Ghosting, or other print abnormalities, like getting an irregular shape instead of a perfect circle. An over-tightened belt can cause an irregular movement in the X and Y axes.

The Original Prusa XL geometry is CoreXY: it has two belts for the XY-axes. 

Alignment

It is crucial to have perfect alignment between the right and left sides. The X-axis should reach both sides of the front printed parts at the same time. 

Tightening the right Y-axis rail reduces the space between the CoreXY Front Left and the X-axis on the right side but creates space on the left side, and vice versa. 

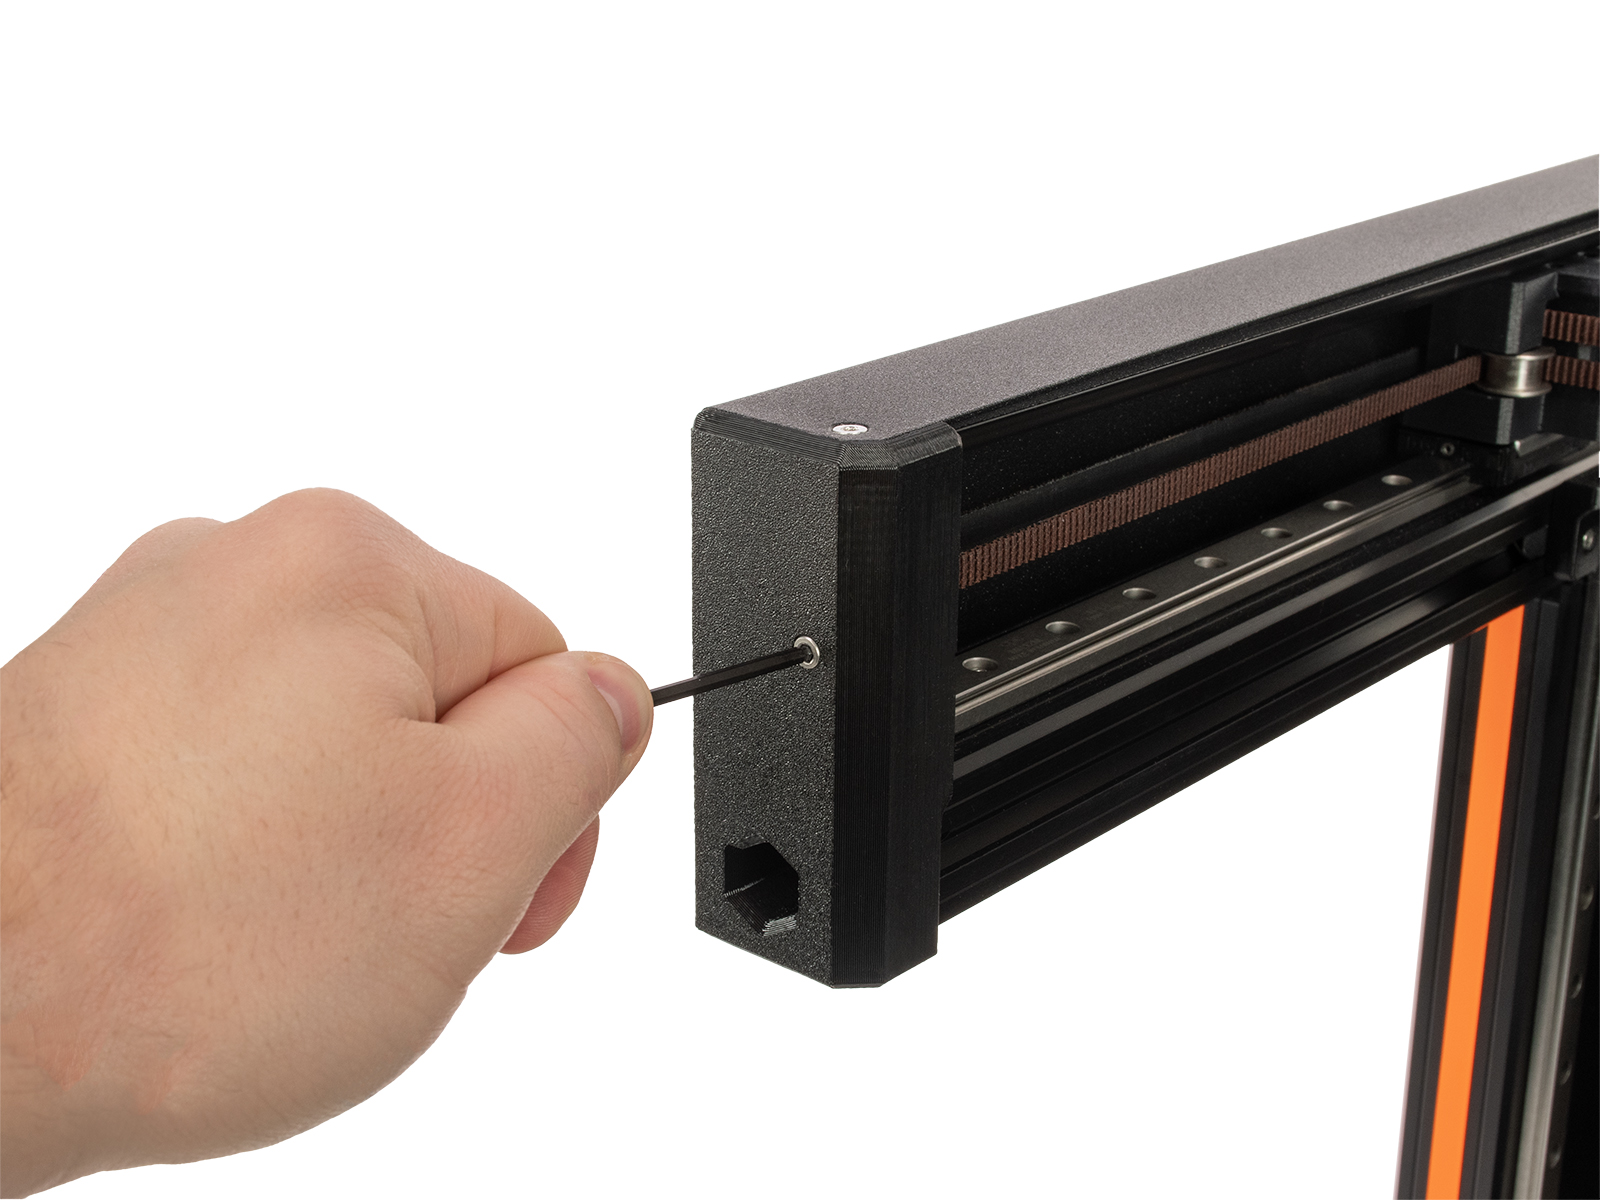
For the procedure, ensure the stepper motors are disabled. This can be done by switching the printer off, or through the LCD Menu -> Control -> Disable Motors

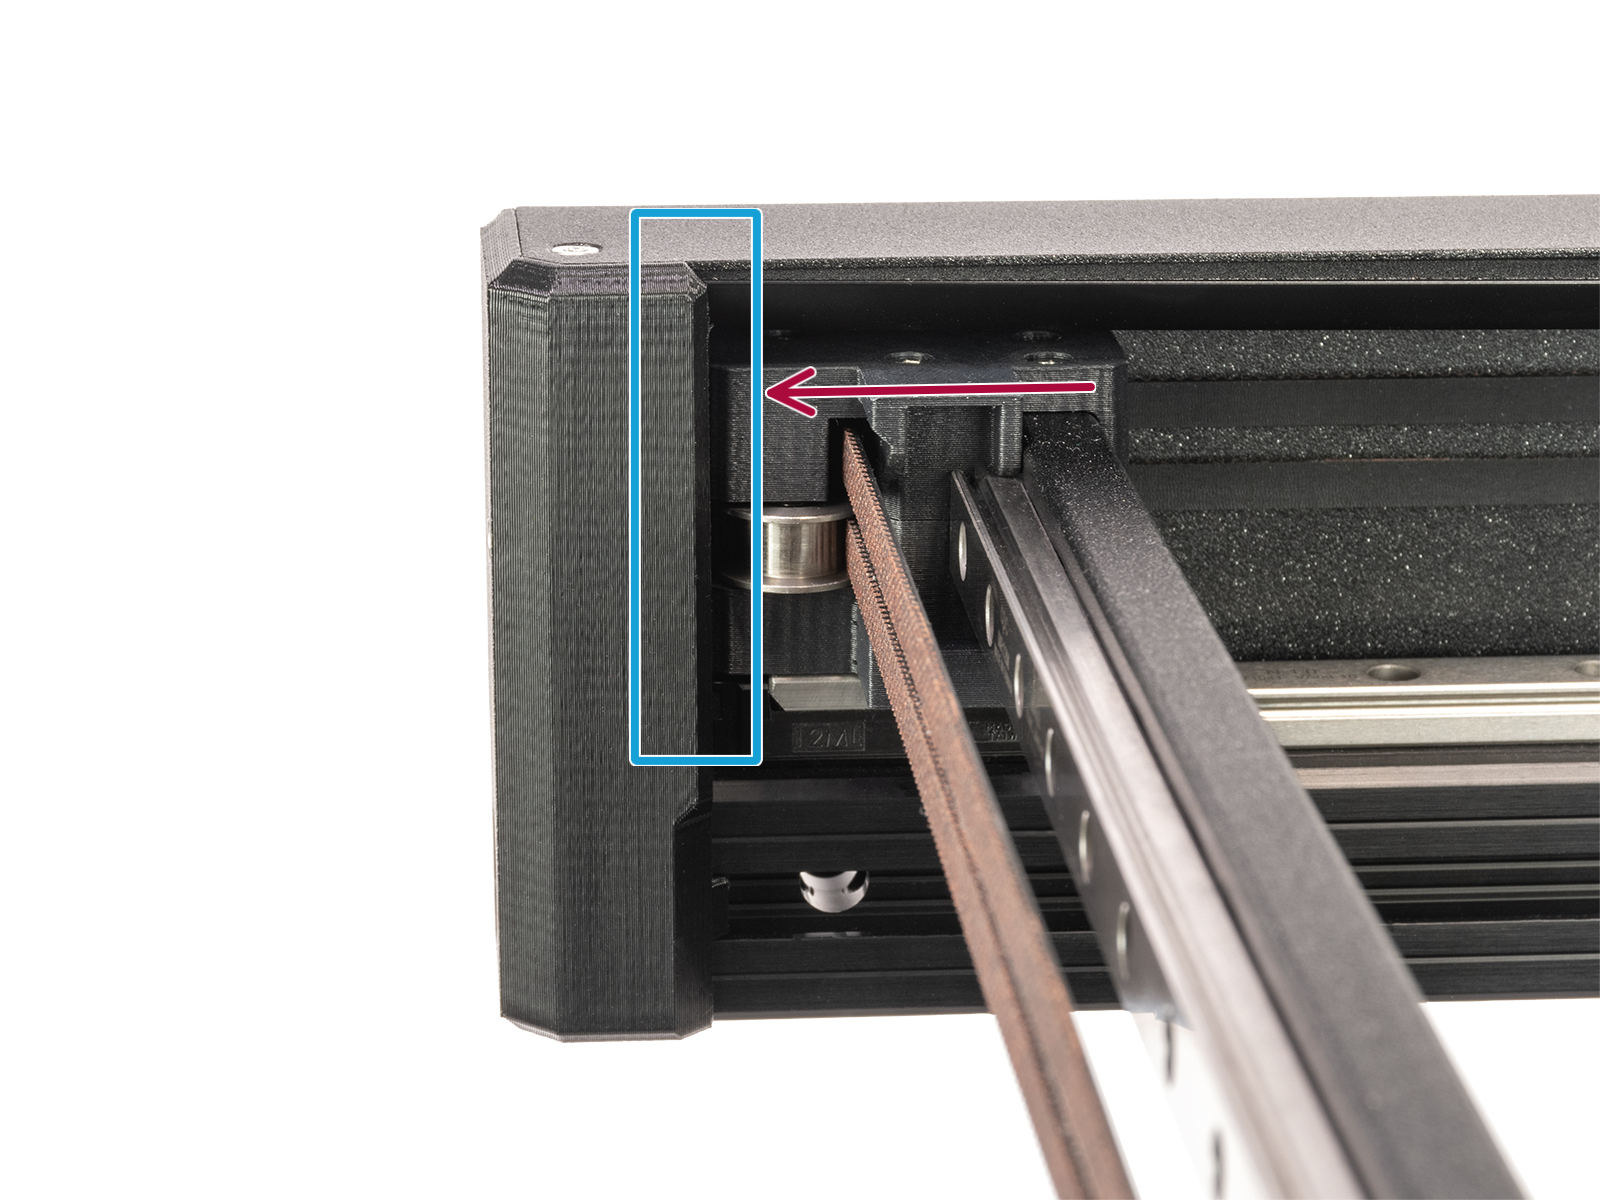
By hand, move the toolchanger or Nextruder to the frontmost Y-axis position, and to the center of the X-axis. 

Test the alignment by squeezing the CoreXY gantry and the corner printed part, first on one side and then on the other. There should be no play between the parts. With perfect alignment, the squeezing test on both sides feels like pressing two solid objects together. 

If there is misalignment, then the squeezing test reveals play in the front corner. In that case, loosen the belt on both sides slightly until the gantry is aligned. Loosen the tensioning screw of the corner with more play less than the other. 

Repeat the procedure and squeezing tests until perfect alignment is achieved. 

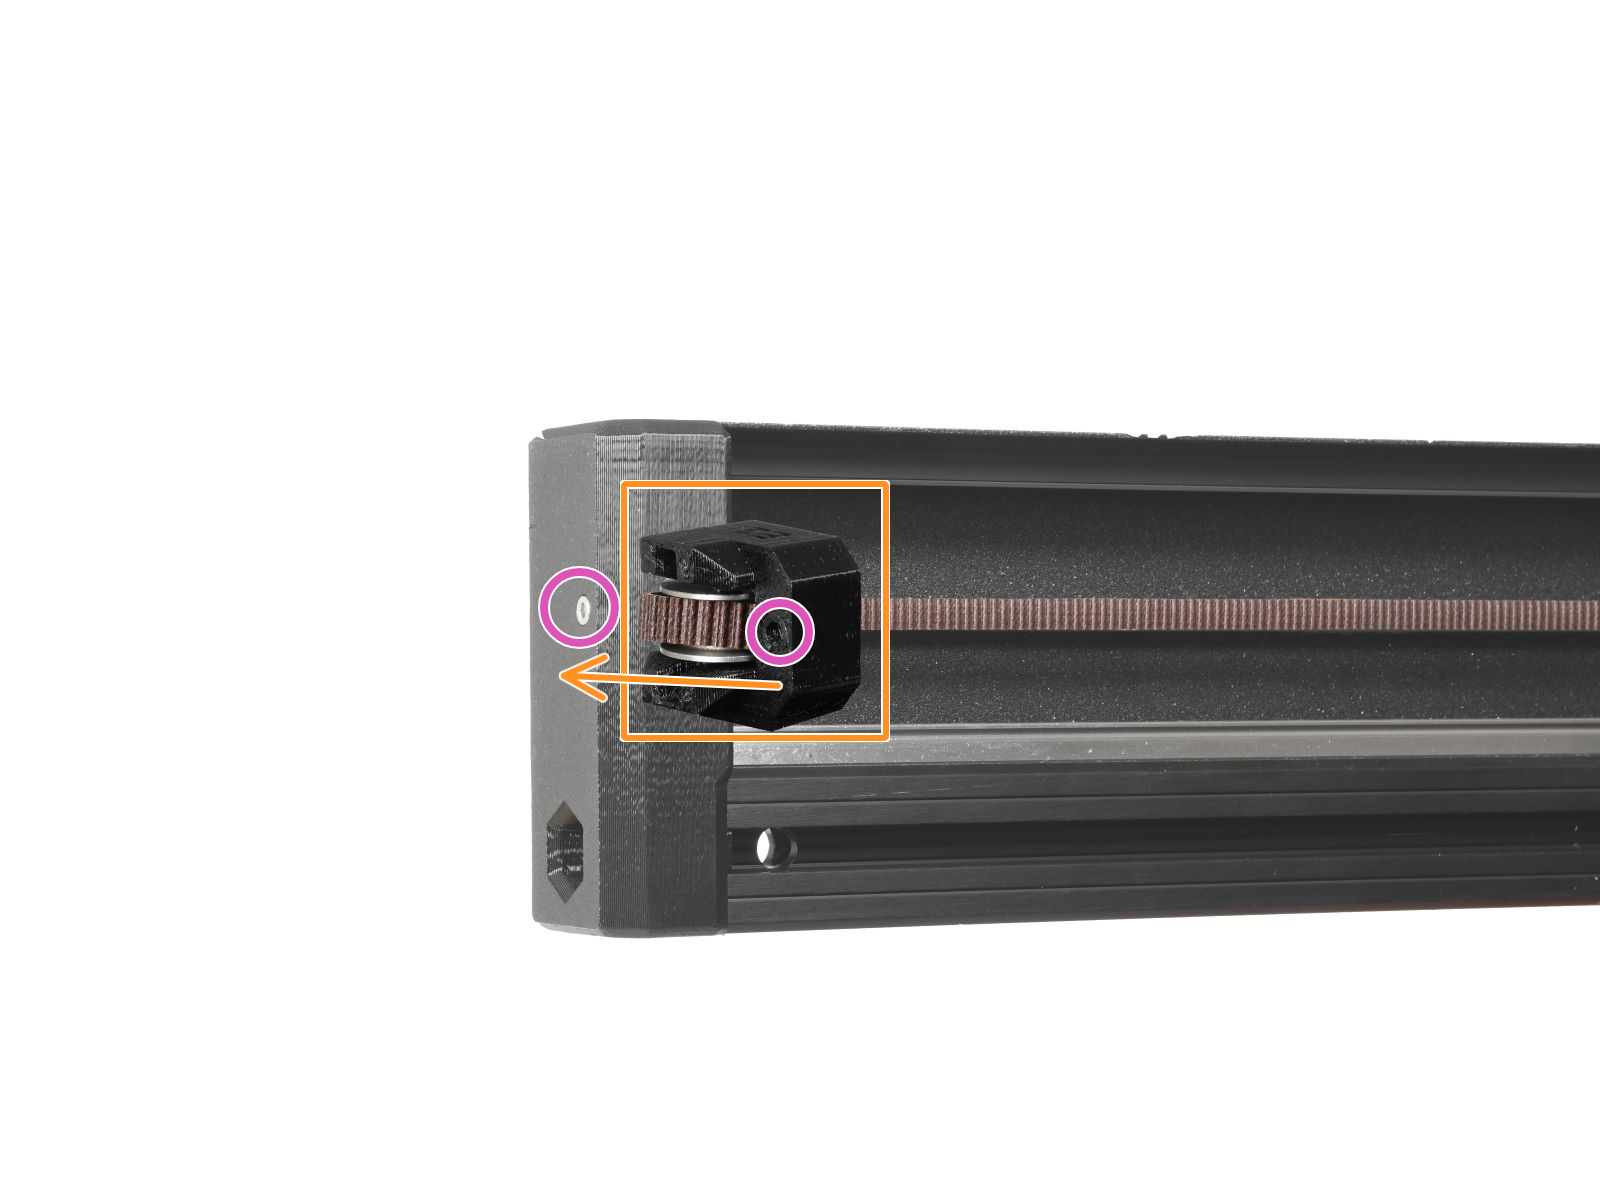
The right side image shows the mechanism behind the tensioning screw. Tightening the screw pulls the tensioner towards the front, resulting in a more tensioned belt on that side. 

Belt tuner

We have our own belt tuner. The application determines the belt tension by measuring the frequency of the vibration generated by strumming it. Follow the instructions in the video below to adjust the belt. 

Homing tower

We prepared a specific homing tower, to visualize possible issues with the belt tension and have the possibility to correct them on the spot. 

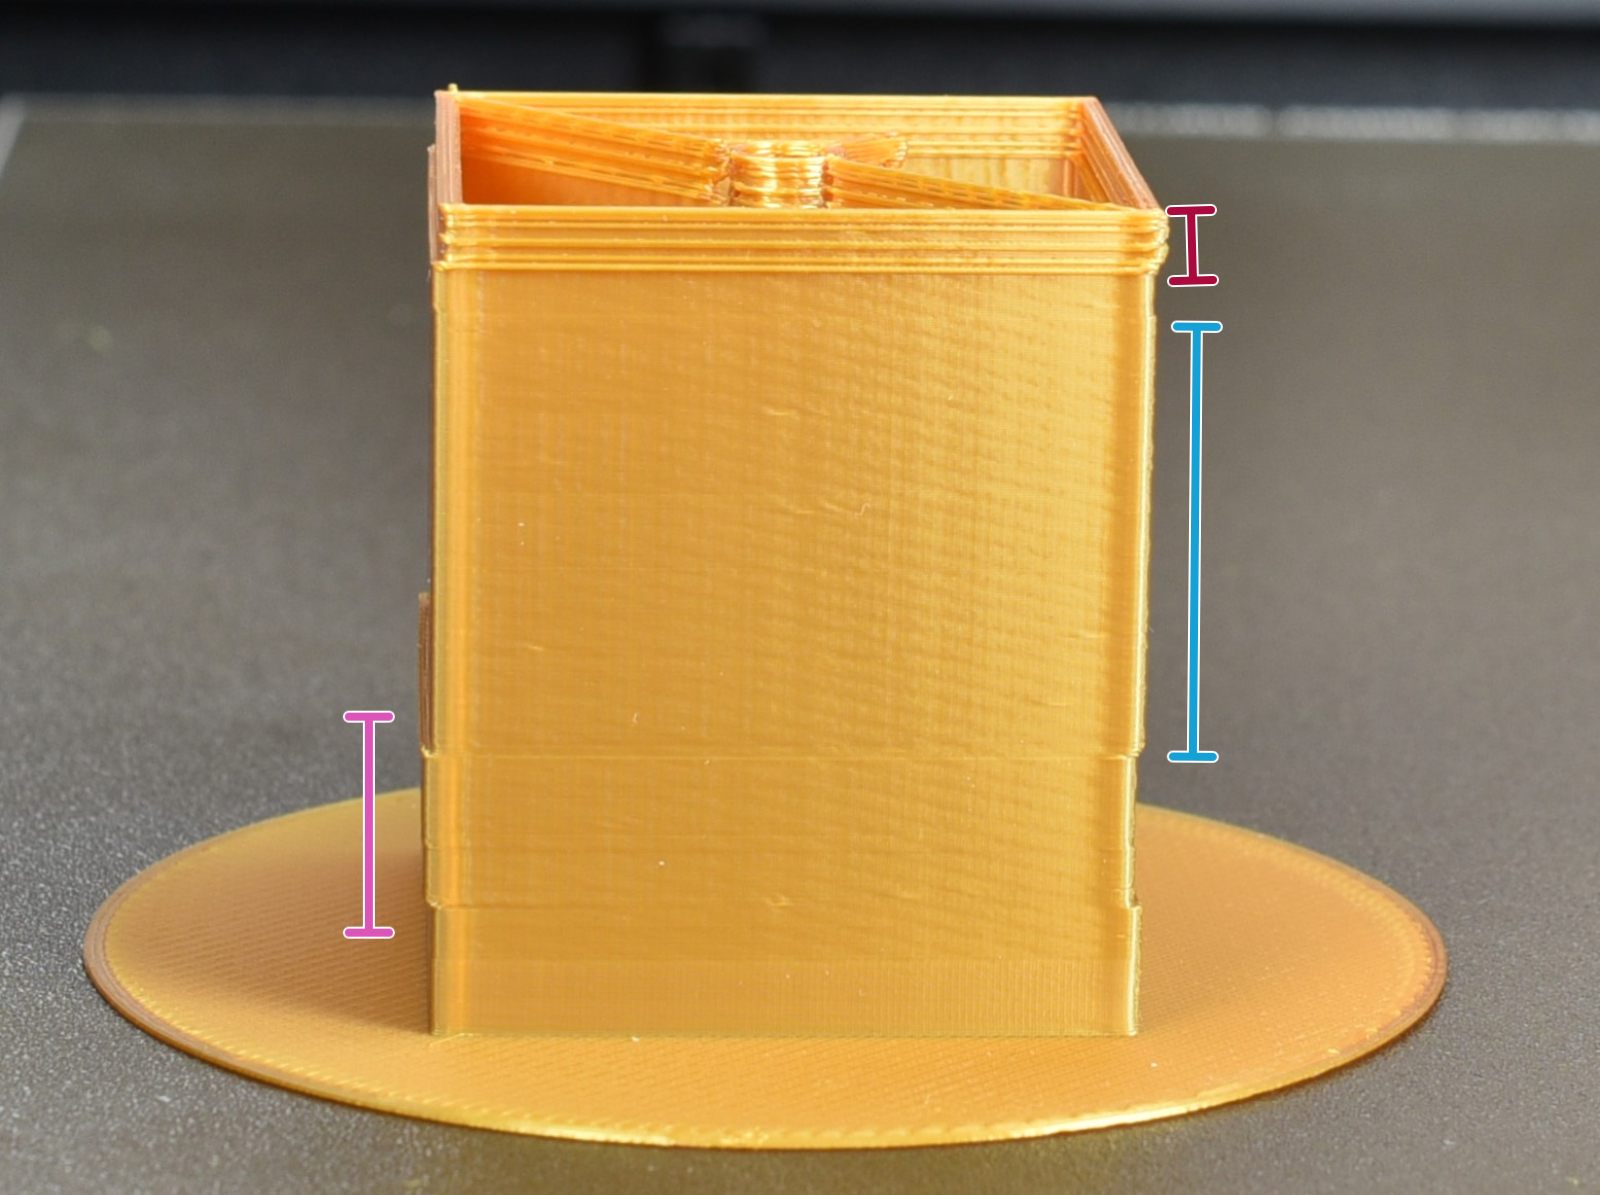
In case the belt is loose, the tower will have an inconsistent finish, with scattered material on the walls instead of a smooth finish. Without interrupting the print, tighten the screws on both Y-axis rails by half turn. 

If the print finish does not fully improve, repeat the procedure once again, until the homing tower has a smooth, consistent finish

An over-tightened belt can result in layer shifting.

Once the tower has a smooth finish, loosen the same screws very slightly, and observe if this further improves the tower. Repeat the procedure until the tower has an ideal finish. 


31 comments

Log in  to post a comment
DADintheGarage
The explanation for this calibration was tough for me to understand, but I think I finally got it to make sense of it. I will not comment on which is the most reliable way to measure the belt tension. I used the Prusa app on my phone, I have seen the "Belter" mentioned by some. I also considered purchasing a microphone to connect it to my computer to run the app from there. I have not done so, yet. So below is my understanding on how to have the same tension (as demonstrated by similar belt strum frequency) on both sides without any play between the gantry and the front of the Y axis pulley. Like most of you, I could have either or; similar tension on both sides, with play on one side. I just figured out both.


- I see in the video, the tool changer is attached to the carriage. But the demo printer is a one tool model. I have the 5TH, so I didn't have the tool changer on the gantry. Does that make a difference? I don't know. I am currently printing a homing tower as I type my experience. We'll see how it comes out.

- So first, follow the steps with the carriage all the way to the left side. The video is unclear on where exactly you should have the XY carriage stationed. I stationed right behind the 12th screw, which as per the video, the XY carriage aligned with the very back of the Z axis bearing housing.

- Strum on to get about 80 Hz on the right belt, then repeat the process on the left to get similar tension

- Now, move the XY gantry to the front, and move the carriage as much to the middle of the XY gantry and try and be as precise as possible. Now, check for play between the two. REMEMBER, you're trying to BALANCE out the tension between the belts, which run the whole length of the core XY. So loosen the tension screw on the side with no play and make the SAME tightening of the screw on the side with play. For example, if you loosen 1/2 turn on one side, tighten 1/2 turn on the other.

- It helped me to do little by little. I didn't go more than 1/2 turn at a time.

- Then repeat the process of the strumming while trying to keep the location of the gantry and location of strumming as consistent as possible.


Just keep going back and forth until they are both balanced and there is no give. It took me repeating the process 4 times before I got both equal tension via strumming using the PRUSA app, and no play in the front tensioner.

I hope this helps you guys. I'm very interested to hear how it goes with you all. Good luck!

Edit: Someone made a comment below to remove the spools off the holder, since it can vibrate. So true, especially if filament is loosely wound.
pw
Please make some simple actual gauge tool to check tightness. Application is useless. Tested on three modern Android phones and none could show any reasonable results, mostly not showing anything and when getting result, it would be at least +10Hz different on all phones = Absolutely useless idea. I think modern phones have some form of build in software to cancel background noices and it interferes with this idea.
sam_nadjian
the correct tension value is 80 hz 85+ is too high 75- is too low. download an app like spectrid which shows all the frequency values in a graph and you can see the peak when you strum it WAY better than in the prusa app.
Kurt Gluck
where did the video go?
Metal_Militia26
I was just wondering the same thing.
Giuliano - Official Prusa CS
Hello. We are still in the process to implement all the functions in this new version of the Knowledgebase. Videos will be back soon.
bin101
https://www.youtube.com/watch?v=lqC6rVrFLuY
Metal_Militia26
You the Goat sir, thank you very much!
3D Troy
As any musician knows, the length of a string being plucked changes the frequency. So the position of the gantry matters a great deal to this method. As far as I can tell from looking at the video, it appears the front edge of the gantry aligns with the back edge of the z axis holder. But it also looks like it could be an optical illusion and it could align with the center instead. Which is it, can we be more precise in the instructions please. 
Also, my phone doesn't hear the frequency at all. I had to put the bottom edge of the phone onto the printer arm above the belt, blocking the microphone, but enabling the microphone to physically "feel" with the vibration. It's still not consistent but does occasionally give a reading. 
Finally, I bought the Belter tool to have a more reasonable way to measure the belt tension in the future. The wierd thing is if I set both belts to the same tension it pulls the gantry out of alignment. If I use frequency to get them the same and aligned, the Belter gives different readings per belt. Very strange and not intuitive. For anyone curious and wanting to compare readings, my belts are at 78-80Hz, gantry is aligned, and Belter reads 7-7.05 on the left belt and 7.2-7.25 on the right belt. This is with the printed end piece on the Belter. 
Jim Nangano
I just got my belter today and will using it on my XL.
Interesting on the readings between the left and right. I will try to share my settings when done.
Wurstwasser
Where did you buy that belter tool? I can't find anything about it.
Wurstwasser
Found and bought the BIQU belter.
I have -6.25 on the left at 82Hz and -6.24 on the right at 81Hz
dave2007
I'm so pleased I spent £3.5k on this printer, trying to get it to work by strumming the xy belts and reading the frequency on my phone ........ Really? This is what you came up with.
Carbon by default
To be fair i've seen industrial 30K printers use the same method