English
Login

Changing/replacing the nozzle (MINI)

Relevant for

MINI
MINI+
48 comments
Article is also available in following languages
English
Čeština
Polski
Deutsch
Français
Español
Italiano
日本語

This article will guide you through the replacement of the nozzle on your Original Prusa MINI printer. Note that this requires you to have some tools available and also be careful while changing the nozzle as you might damage the printer or burn yourself.

Why change the nozzle?

There might be two reasons, why you need to replace the nozzle:

  • The nozzle is worn out and needs a replacement.
  • You want to print using a different nozzle diameter.
Unless you print abrasive materials with a brass nozzle, the stock nozzle will last you many hundreds of printing hours. Changing a relatively new nozzle to resolve a clog is not the solution!
The stock 0.4mm Nozzle installed on the Original Prusa MINI can be found in the eshop. The printer is also compatible with E3D V6 nozzles.

Preparation

  • Get hold of a 16mm spanner, or an adjustable wrench to secure the heater block, plus a pair of pliers or a 7mm socket to unscrew the nozzle. A very large spanner or an adjustable wrench can quickly drain heat from the heater block and may cause a Thermal runaway error, depending on how it grips the block.
  • Get a non-flammable surface to place the used hot nozzle on (i.e. plate or aluminum foil).
  • Unload the filament. Optionally, do a coldpull.

Procedure

  1. Preheat the nozzle to 280 °C. Navigate to LCD Menu -> Control -> Temperature -> Nozzle. If your printer firmware version is up to 4.4.1, navigate to LCD Menu -> Settings -> Temperature -> Nozzle. Heating the nozzle is essential for this process! 
  2. Gain better access to the nozzle by moving the extruder axis as high as possible. Navigate to LCD Menu -> Control -> Move Axis -> Move Z. If your printer firmware version is up to 4.4.1, navigate to LCD Menu -> Settings -> Temperature -> Nozzle.
Turn off the printer before the next step!
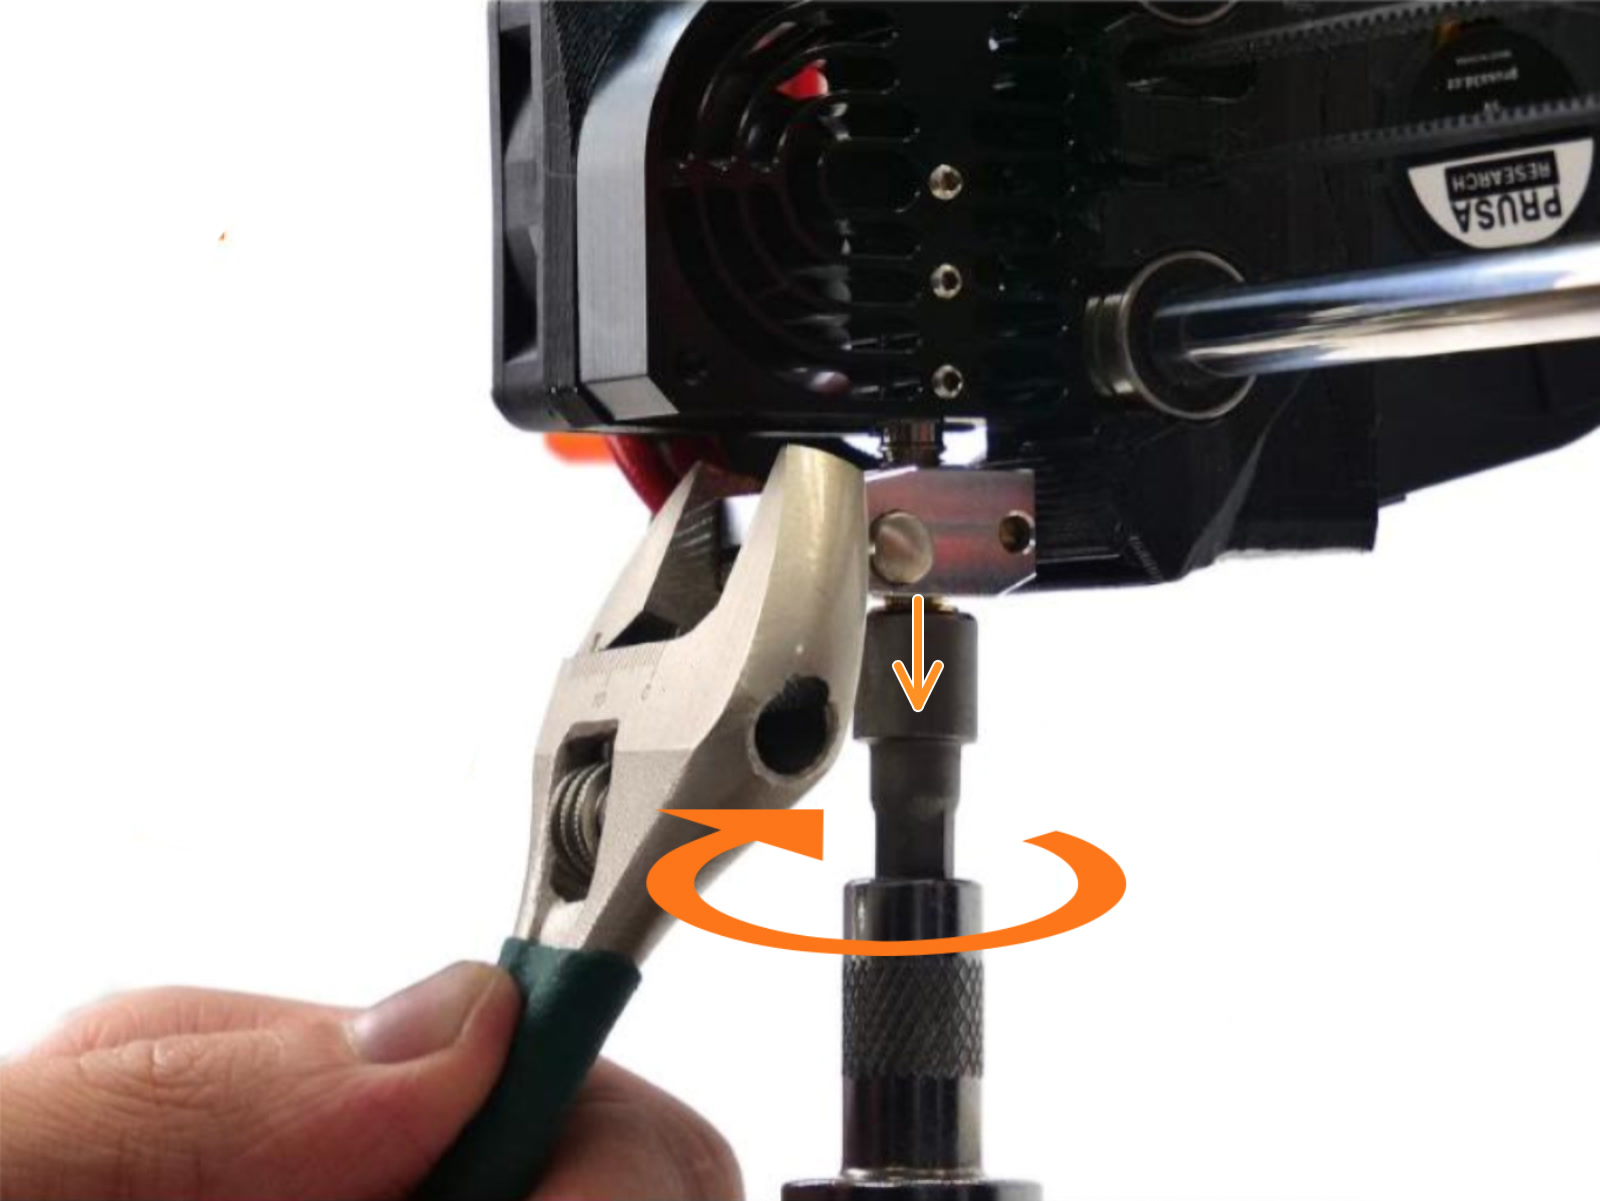
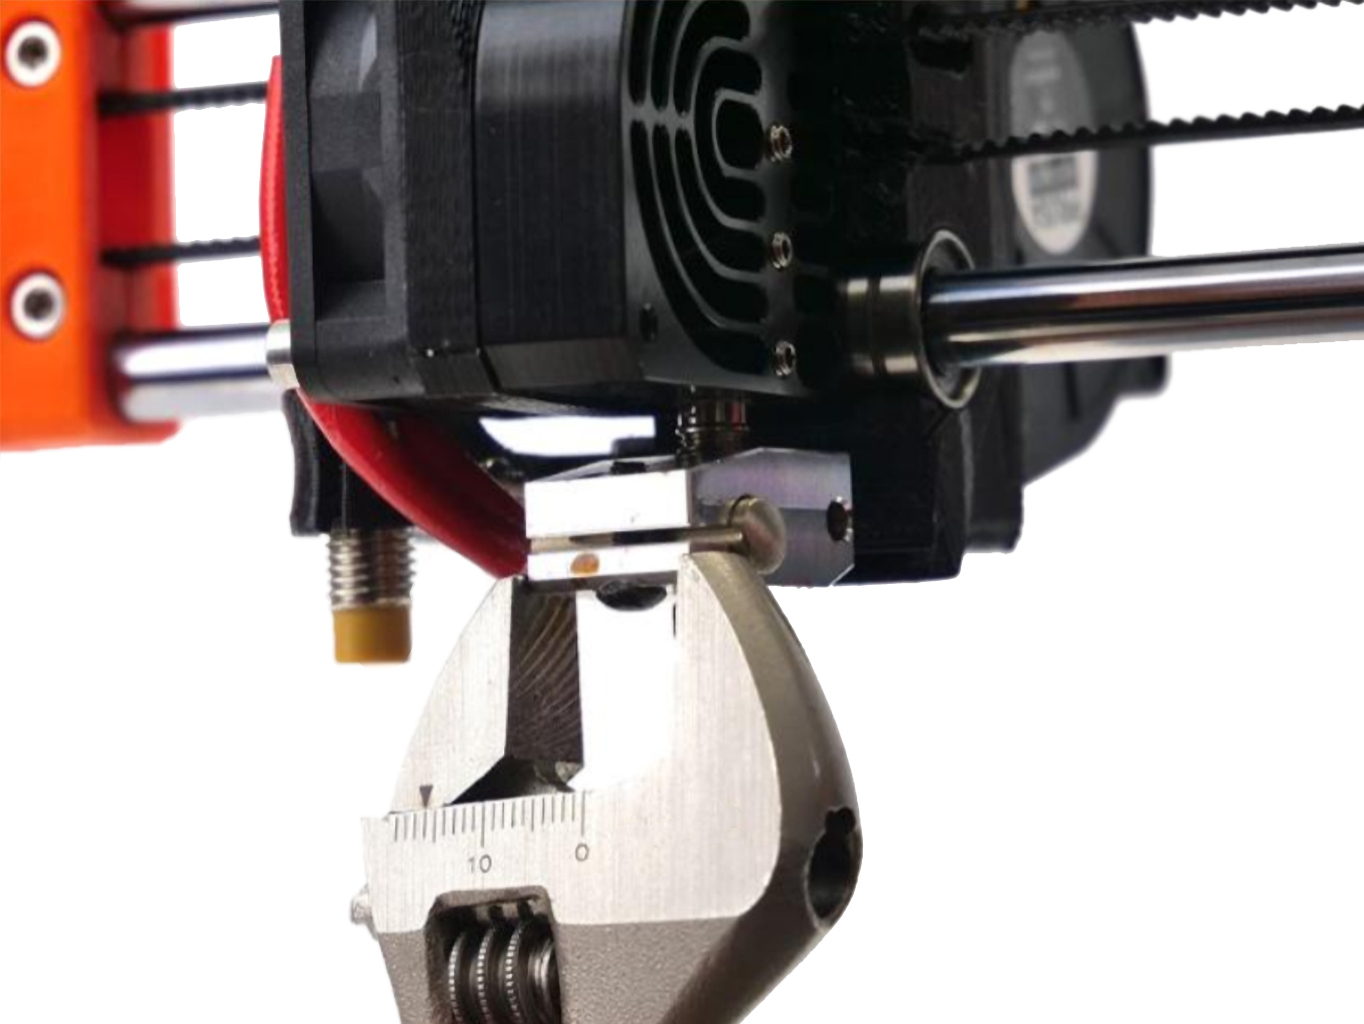
  1. Hold the heater block with a 16mm spanner (or an adjustable wrench). 
  2. Use pliers, or preferably a 7mm socket, to unscrew the nozzle. Be careful, the nozzle is still hot!
  3. Place the extracted hot nozzle on your non-flammable surface and put it out the way so you don't accidentally touch or lean on it.
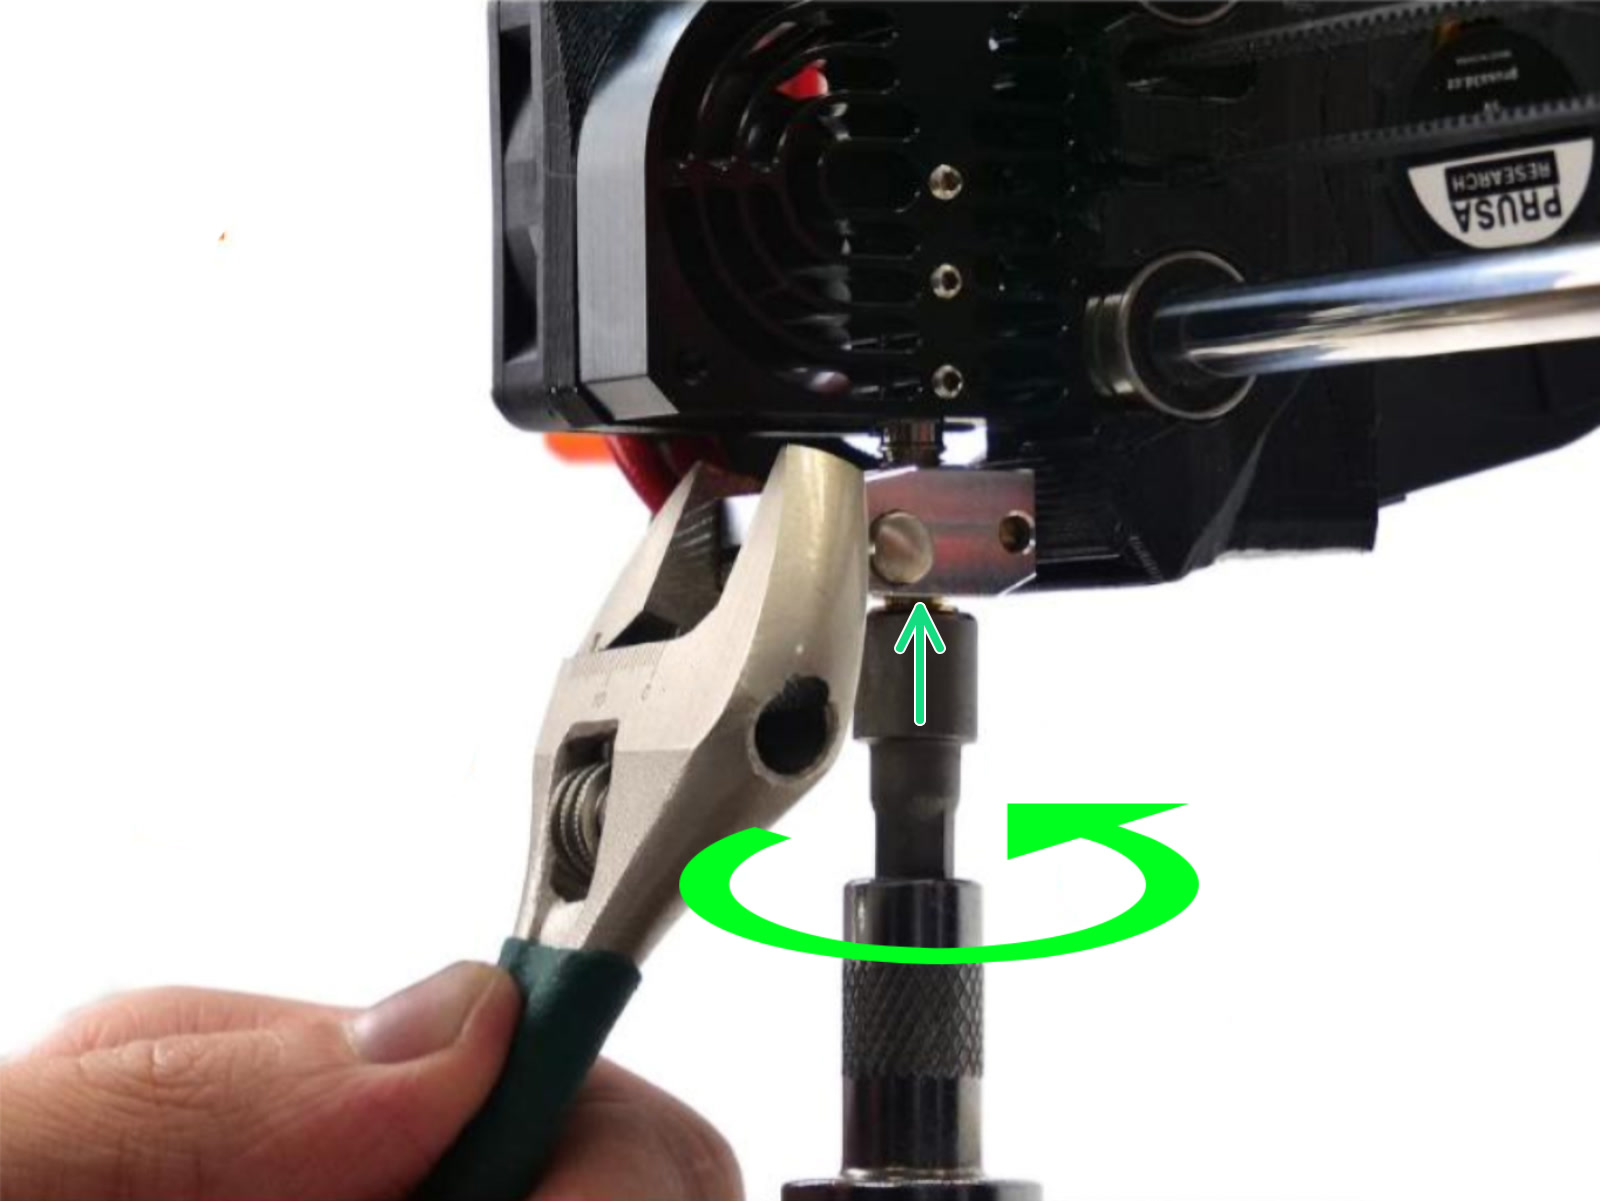
Turn left to loosen the nozzle (orange arrow). Turn right to tighten it (green arrow).
  1. While the print head is still heated and holding the heater block in place with the spanner, insert the new nozzle and tighten it gently, but firmly. Do not use excessive force!
  2. As soon as you can't screw the nozzle in anymore, check if there is a slight gap between the nozzle and the heater block (blue marker). More details are explained below.
After changing the nozzle you should redo the First Layer Calibration (MINI/MINI+)!

Final inspection

There must always be a gap (~0.5 mm) between the nozzle and the heater block (blue marker/Green arrow). This is important to make sure the nozzle is 'locked' against the heatbreak, creating a seal. If there is no visible gap between the nozzle and the heater block, it can indicate that the nozzle didn't reach the heatbreak, which can lead to leaks and clogs (red arrows).
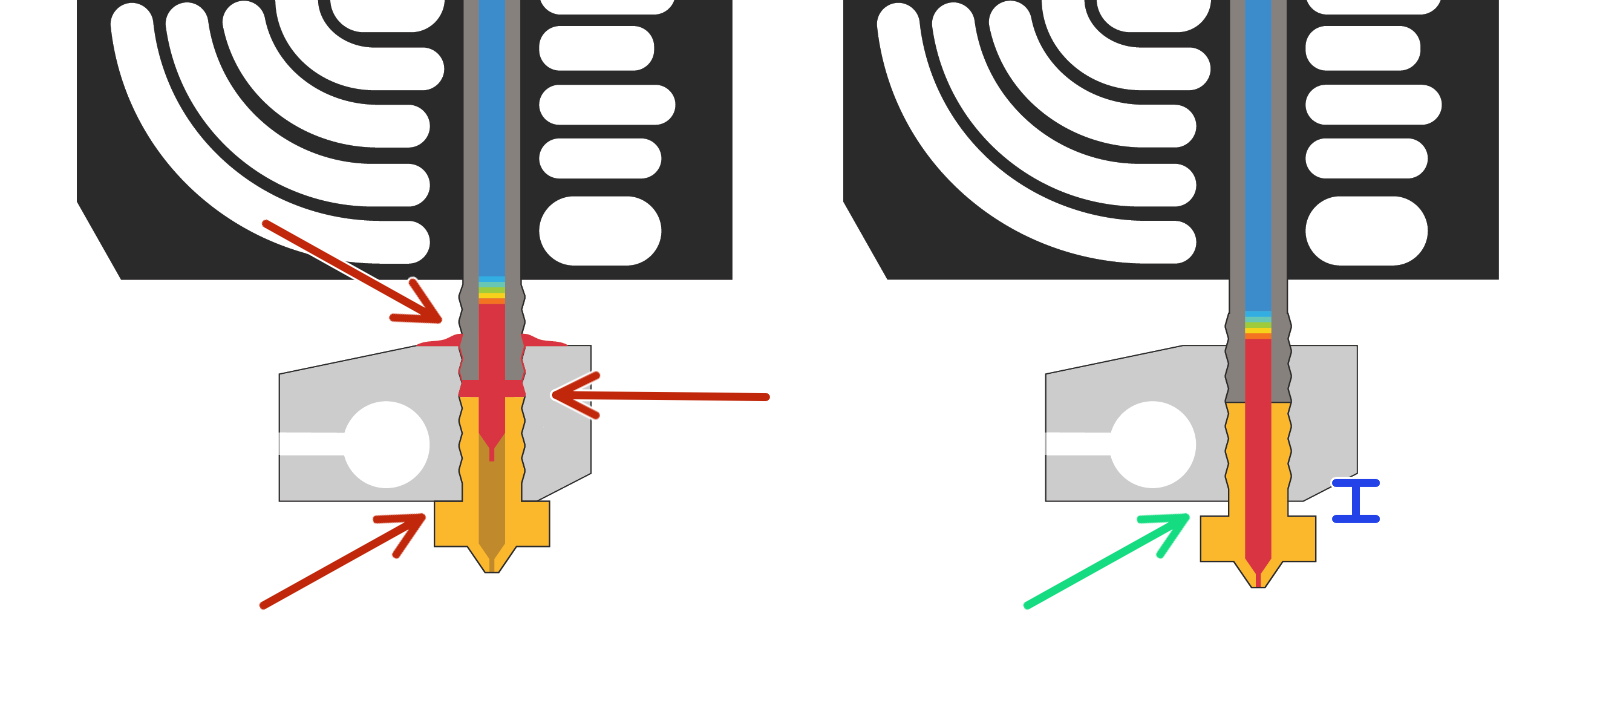
Oppositely, if the outside gap is too large (several millimeters), it can change the thermal properties of the hotend, and the printer will struggle to reach and hold the set temperature.

It is necessary to redo the First Layer Calibration (MINI/MINI+) after replacing the nozzle. If you installed a nozzle with a diameter other than 0.4 mm (0.25, 0.6, 0.8 mm), please see Different nozzle types.
 

24 comments

Log in  to post a comment
C172pilot
I found it nerve racking during the process to not damage the heater wires. Everytime I touched it, a thermal alarm would sound. Holding the heater block from moving without damage to the wires was even more frustrating. I did get it to work, but IMHO, it's a bad design. Its fine when the printer is new, but after hundreds of prints, it becomes hard to tell what to not touch. I did a test print and it came out fine.
rixvet
Should the instruction "Our service and assembly teams use a torque wrench rated for 1 - 5 N m, and tighten the nozzle with a force of 2.5 N m (Newton Meter)." (as seen on nozzle change for MK3 on https://help.prusa3d.com/article/changing-or-replacing-the-nozzle-mk2-5s-mk3s-mk3s_2069) also apply for the MINI or are different ranges used?
Marina Curzi - Official Prusa CS

The same ranges are used for the MK3 can be applied for the MINI+

mrog
Should I be concerned about deforming the hotend PTFE tube by heating the nozzle to 280?  Even printing at normal PLA temperatures, I have to replace that tube all the time because it shrinks enough to cause clogs.
Giuliano - Official Prusa CS
Hello. The PTFE tube is relatively distant from the heater, so it won't be affected when preheating to 280°C.
ralphbacon
A warning for others, maybe. As soon as I changed the 0.4 nozzle to a 0.6 one, the printer rebooted and immediately gave me a beeping error screen, warning of "possible damage to the thermistor wiring", which I had not been near (I was very gently and the nozzle was very easy to remove, barely more than hand tight).
It required a switch off and restart before I could do the 1st Layer Calibration.
I suspect (can anyone confirm?) that the sudden drop in temperature from 280C to whatever the new nozzle reduced it to, made the software panic.
Jwidess
I've had the same issue, but for me, it was due to my wrench holding the heat block soaking up so much heat from the heater the software assumed there was a thermal runaway.
pedrodude
Can I ask if you could please clarify the procedure?  In the preparation section, the article mentions that the wrench may trigger a possible thermal runaway error.  But after step 2 in the procedure there is a warning to turn off the printer before the next step... i.e. making it impossible to trigger that sort of error.
 
I assume that the most important factor is to maintain a consistent heater block temperature during the procedure, and therefore that warning [to turn off the printer] should not be there but just thought I'd check I wasn't doing something dangerous.
 
Edit: Just noticed this appears to only be in some languages.  I was referring to the EN article, but CZ does not appear to have this ambiguous warning.
Giuliano - Official Prusa CS
Hello. You can also reset the printer instead of turning it off completely. This way no current would go through the thermistor, so there's no risk of short circuit.