A clogged nozzle or hotend is a common issue for the FFF/FDM printers. If there are no issues, the filament is pushed in the hotend, melted, and then extruded through the nozzle. However, if the PTFE tube is damaged (scarred, distorted) or there are impurities in the filament it might get stuck in the hotend, clogging the printer.
How to spot clogged nozzle/hotend?
Visual check
- Is the filament reaching the nozzle? Check the long Bowden PTFE tube.
- Is the filament coming out of the nozzle? Pay attention when loading filament.
- Partial clog - gaps and missing layers
- Partial clog - filament curling up and sticking to the nozzle
Soundcheck
- Clicking noise from the extruder
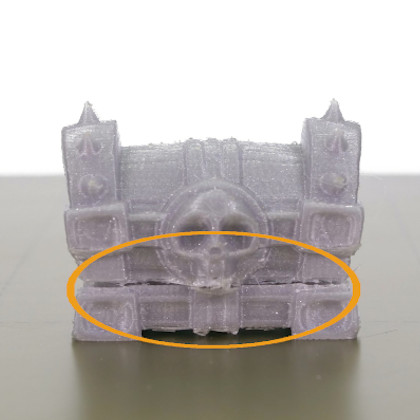
Missing layers can be a sign of a partially clogged nozzle
Partial clog
Sometimes the clog is partial, meaning that the printer is able to push some filament through, but it is not enough to print the object properly, leading to visible gaps and missing layers. An early sign of a clogged nozzle is that the filament is not extruded consistently, curls up, and sticks to the nozzle.
Extruder clicking
The hotend or the nozzle is partially or fully clogged and the internal resistance against the flow of the filament is greater than what the gears are able to push. As a result, the gears are skipping leading to the “clicking” noise and in most scenarios also to grinding of the filament.
It is important to note, that the clogs can happen in multiple places across the filament path and each requires a slightly different approach. For example, changing the nozzle, while the clogs are happening due to the damaged PTFE tube, won’t solve the issue.
How to fix the clogged printer?
Choosing the right method depends on whether you are able to at least partially load/unload the filament or the printer is fully jammed and refusing the move the filament even a little.
Before you start fixing the printer, try unloading the filament and removing it completely. If you are unable to do it, it might indicate a more serious problem, but we will deal with this one as well.
Also, move the print head up from LCD Menu - Settings - Move Axis - Z-axis or by long-pressing the control knob, this way you will get better access to the parts, which are clogged.
Extruder idler screw
 |  |
The idler screw should be about flush with the plastic part, when the filament is NOT loaded.
Cold pull (load/unload possible)
If you are able to load and unload the filament, yet still experiencing partial clogs, try this technique first, which uses a partly melted filament to pick up the debris inside the hotend and pull it out. We have prepared a detailed article about Cold pull (MINI).
Once you finish, head to the point in this article to learn how to check for a dirty Extruder pulley.
Forcing the clog out (load impossible)
Sometimes the gears are not able to push the filament through, but it doesn’t mean that you need to immediately start with the disassembly. By raising the temperature further above the melting point, you might be able to remove the clog together with the debris.
Try the following:
- Go to LCD Menu - Settings - Temperature - Nozzle and raise the temperature about 40-50 °C above the normal print temperature (for PLA use 260 °C, for PETG use 280 °C).
- After the nozzle reaches the required temperature, wait for about 2-3 minutes - the filament should fully melt and start dripping out.
- Use the bundled acupuncture needle (0.3 mm) and push it in the nozzle from below. Push it in and out several times, in multiple directions. Then remove it and try loading the filament again.
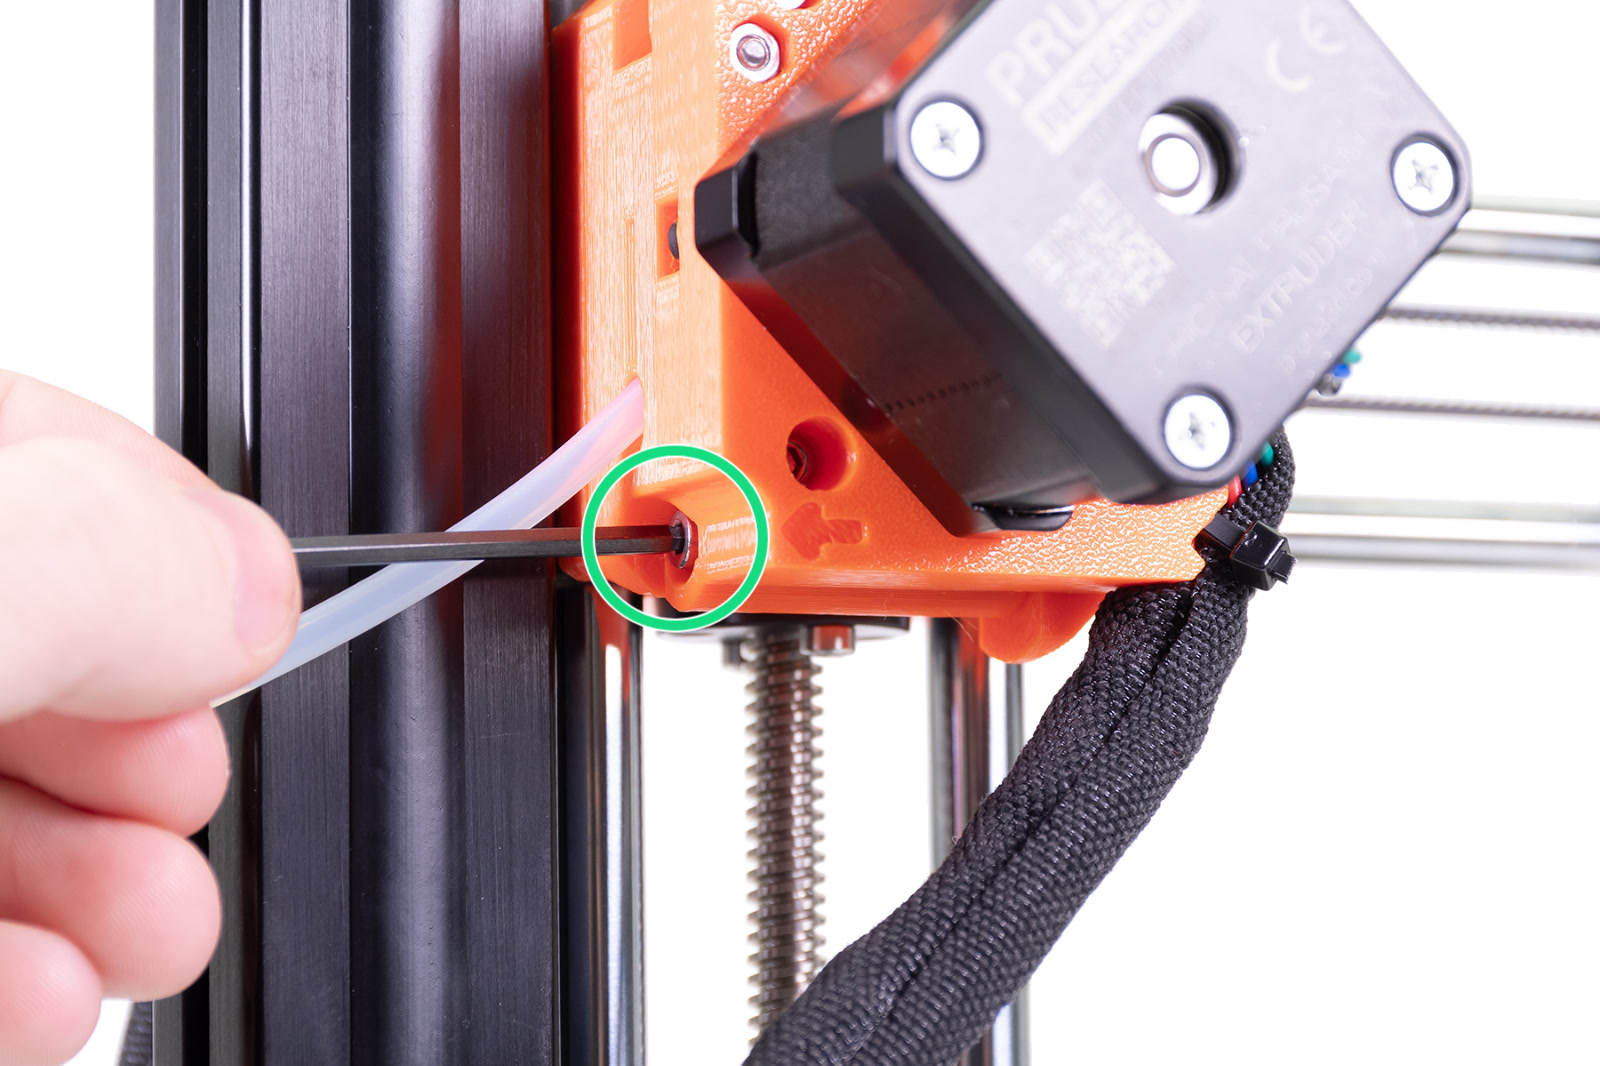
- If the needle didn’t help, remove the Bowden PTFE from the print head and push the filament in manually. Don’t forget to hold the end of the X-axis with the other hand, or you might skew the axis.
- If the filament clog happened with PLA, you can try loading a material that melts at a higher temperature, such as ASA, ABS, PC.
- The last resort is a rigid metal wire (1.5 mm diameter, 100 mm length). Insert it from the top instead of the filament. Push it down, through the hotend, but be careful and gentle. You might accidentally scratch the PTFE tube.
- Once ready with the clog, head to the last chapter, check for dirty Extruder pulley
- If you are unable to push the filament nor the wire through, you have to disassemble the hotend and find the place, where the filament is stuck. See the next method.
Disassembling the hotend
(load/unload impossible)
Some clogs can’t be removed easily and require you to partially disassemble the hotend. The filament is either stuck in the PTFE tube or in the nozzle. The filament can also be stuck due to a damaged or worn-out PTFE tube. If this is your case, we recommend replacing the PTFE tube for a new one. For disassembly and an inspection, we have outlined the procedure below.
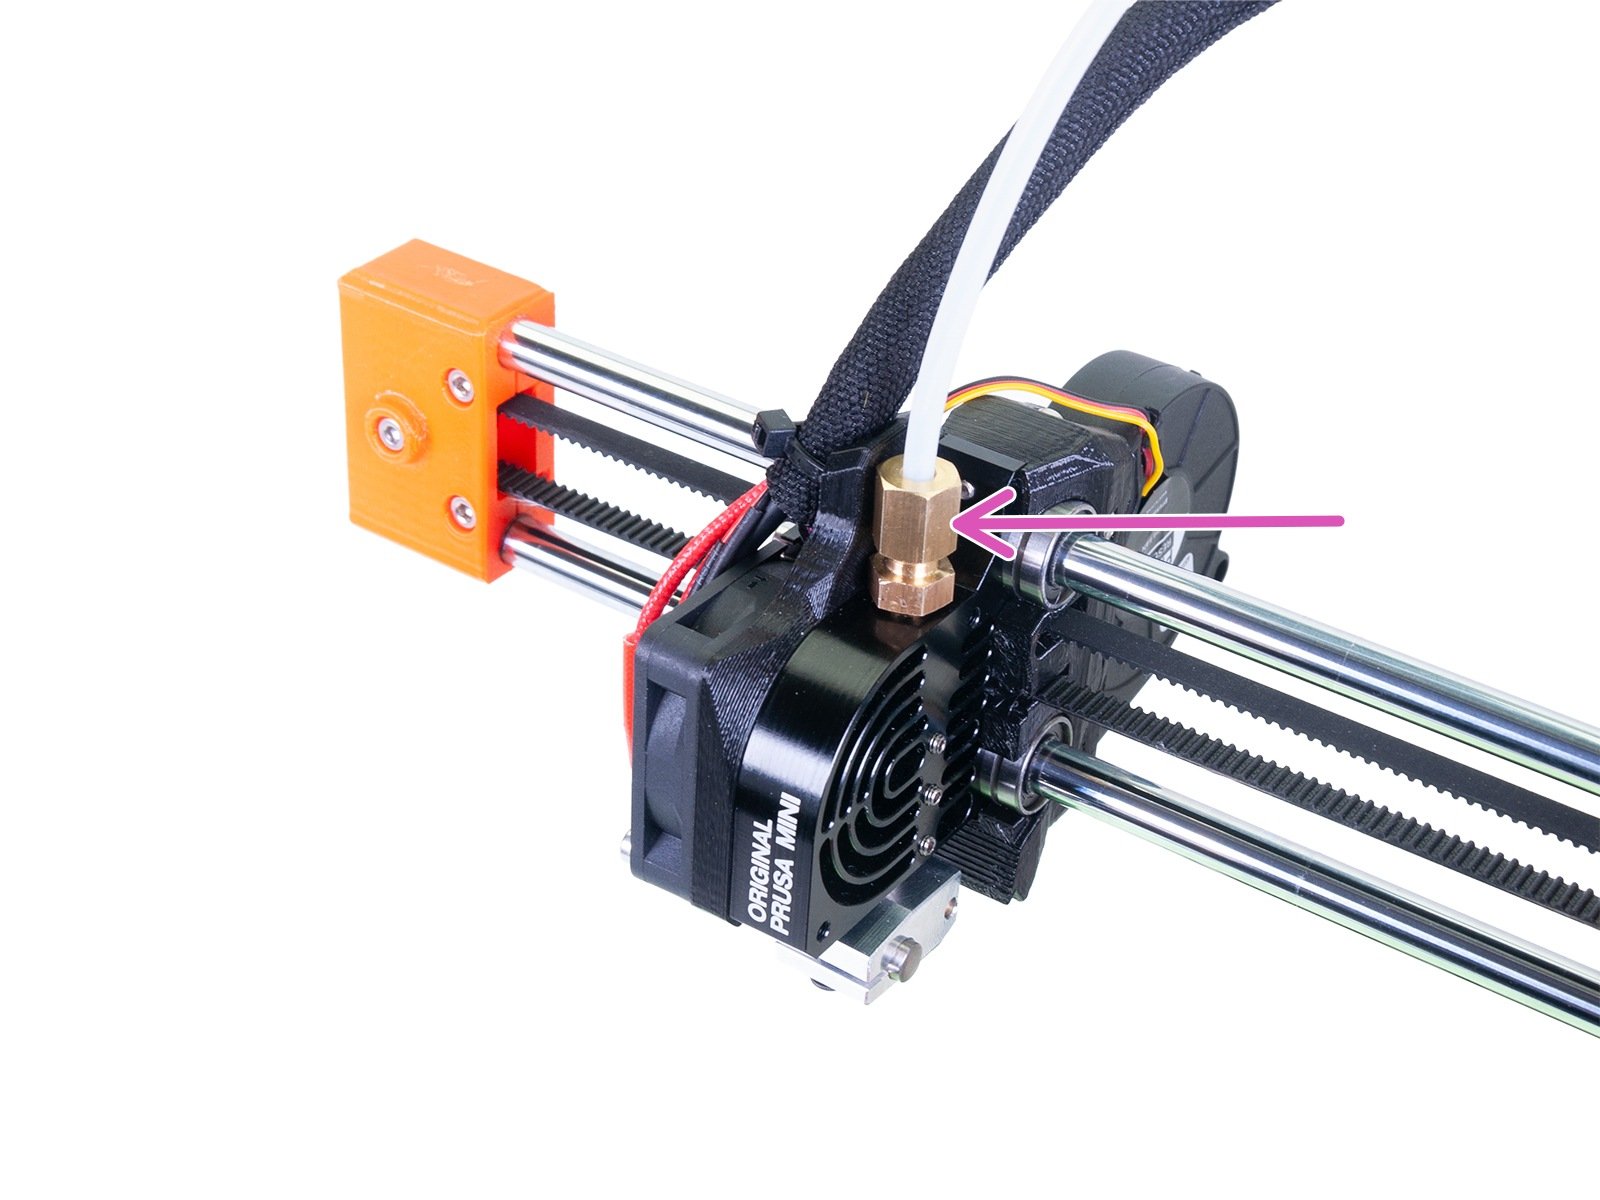
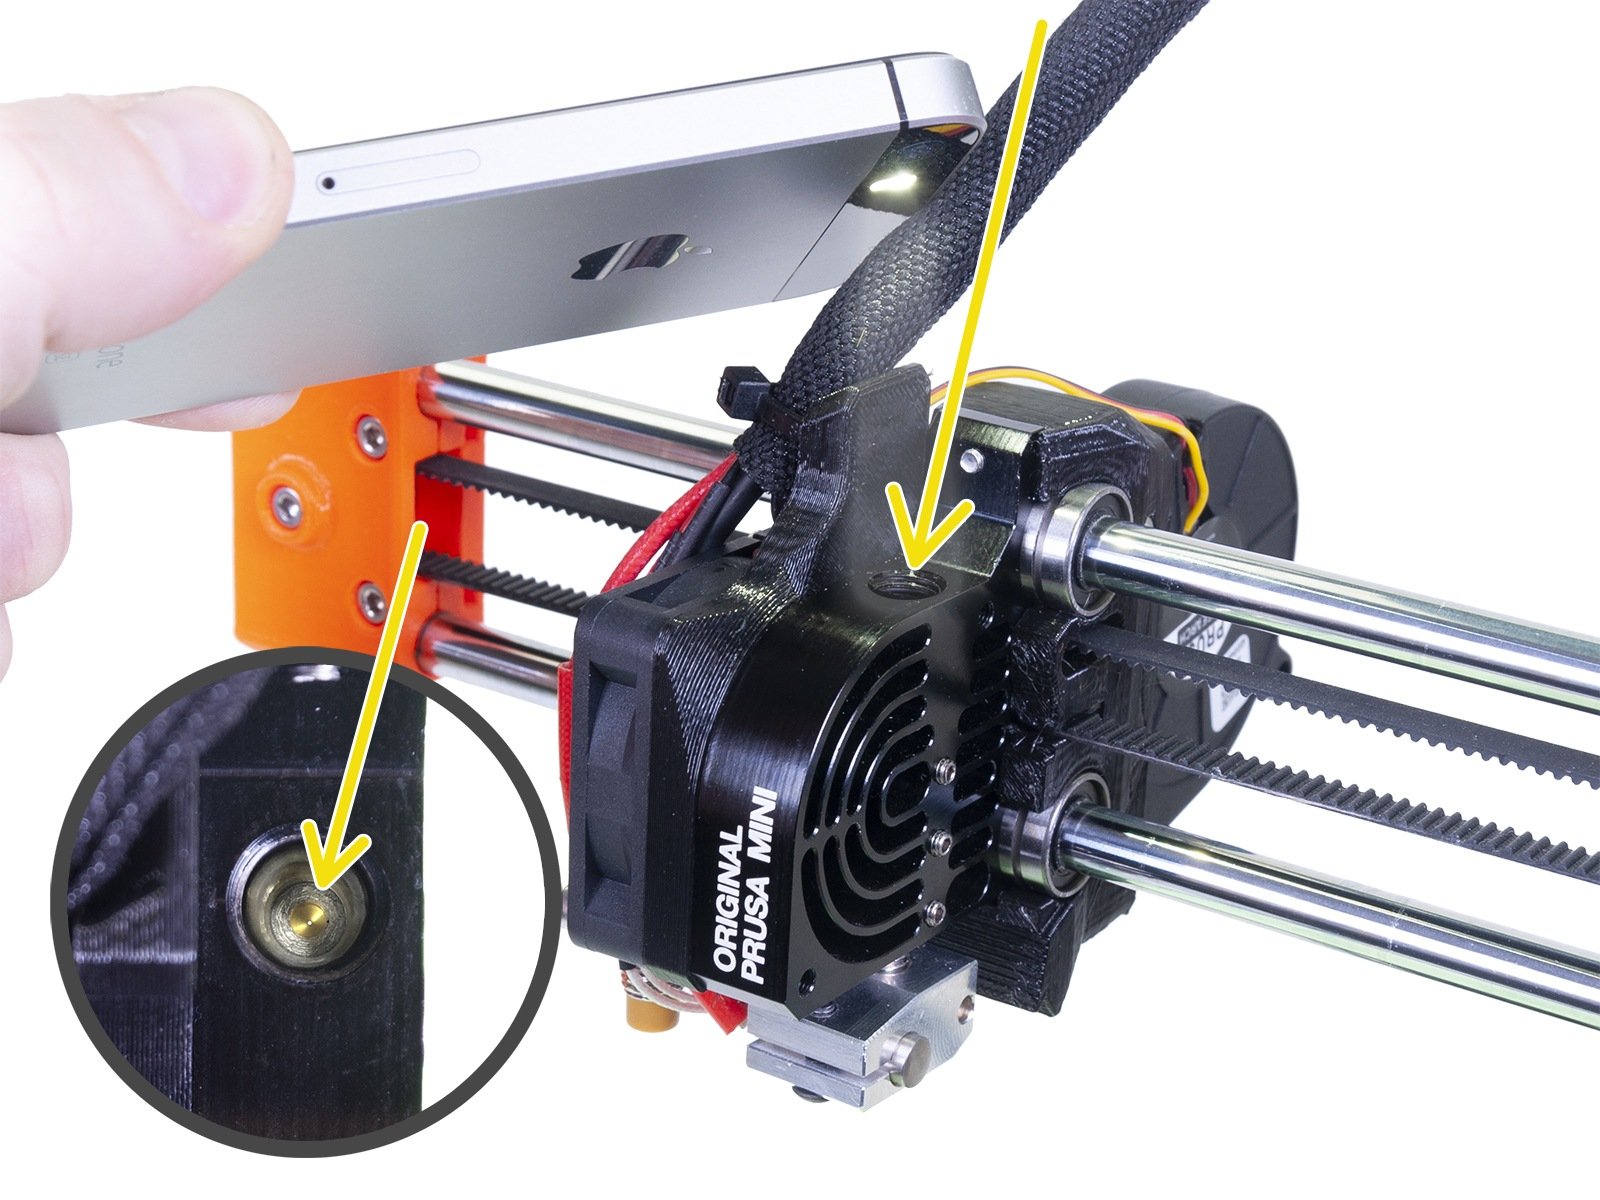
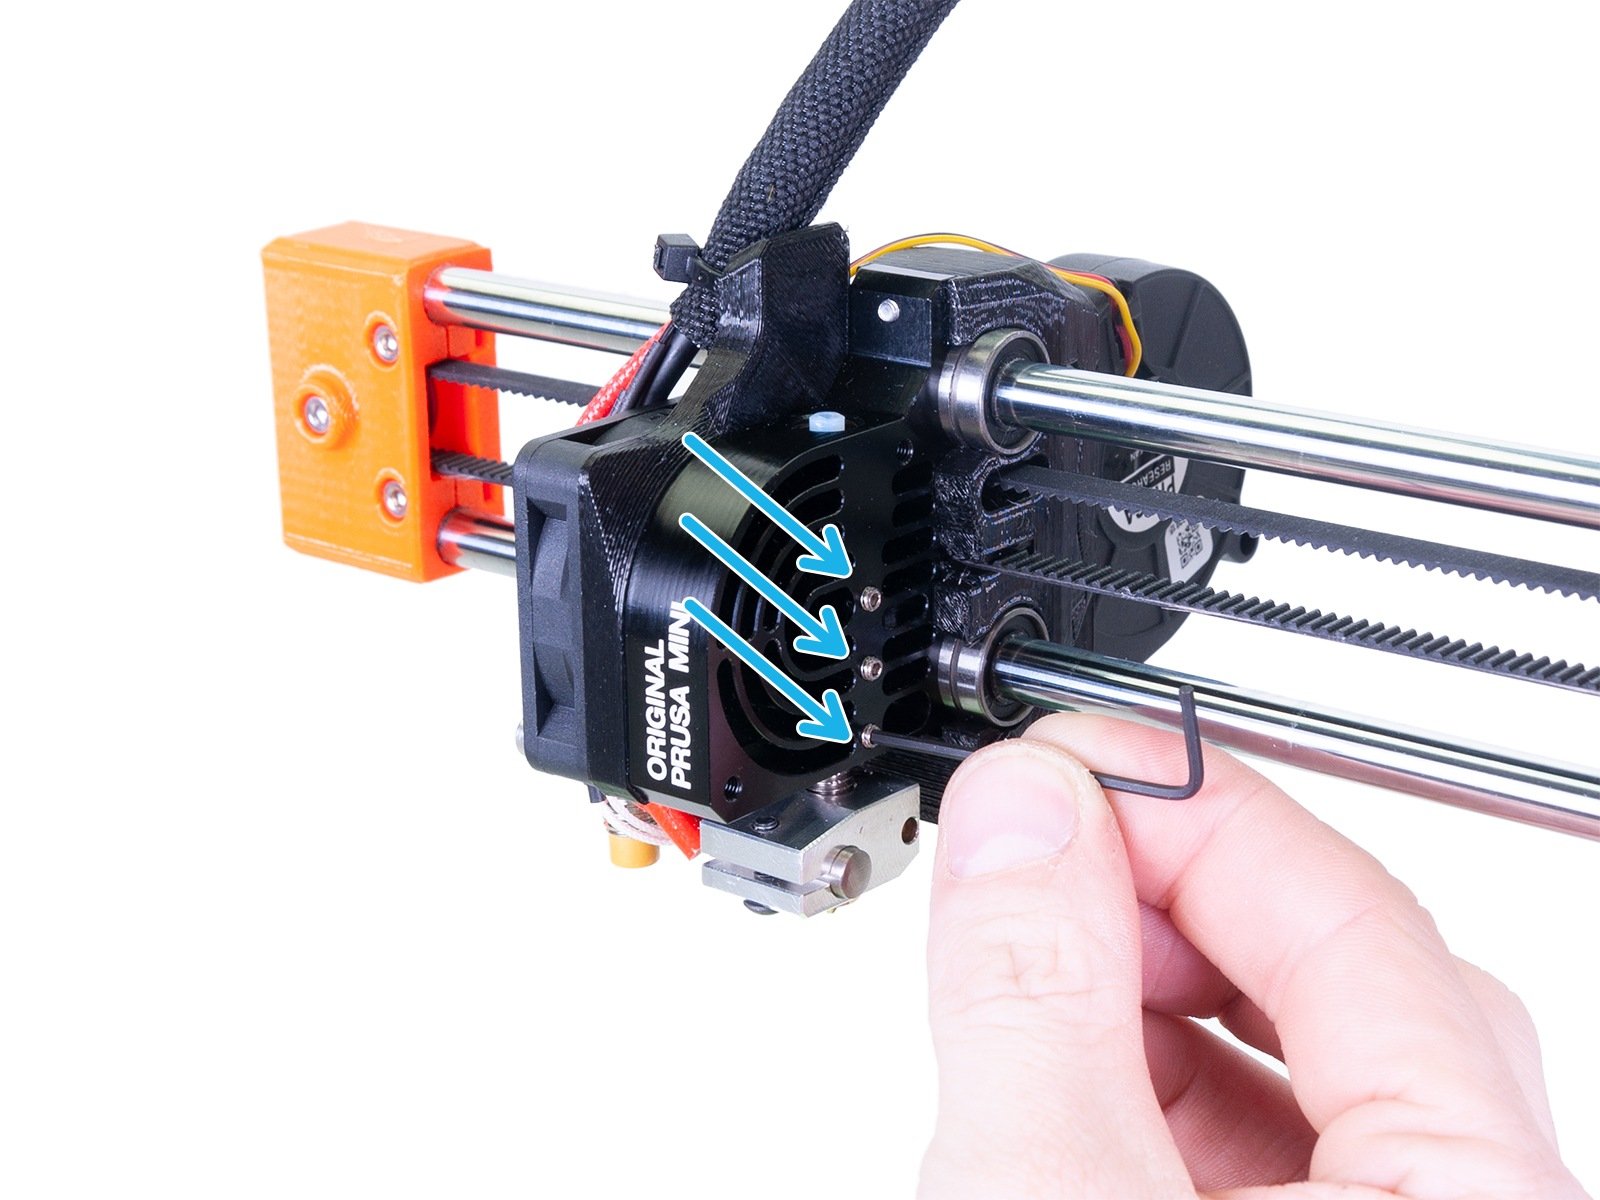
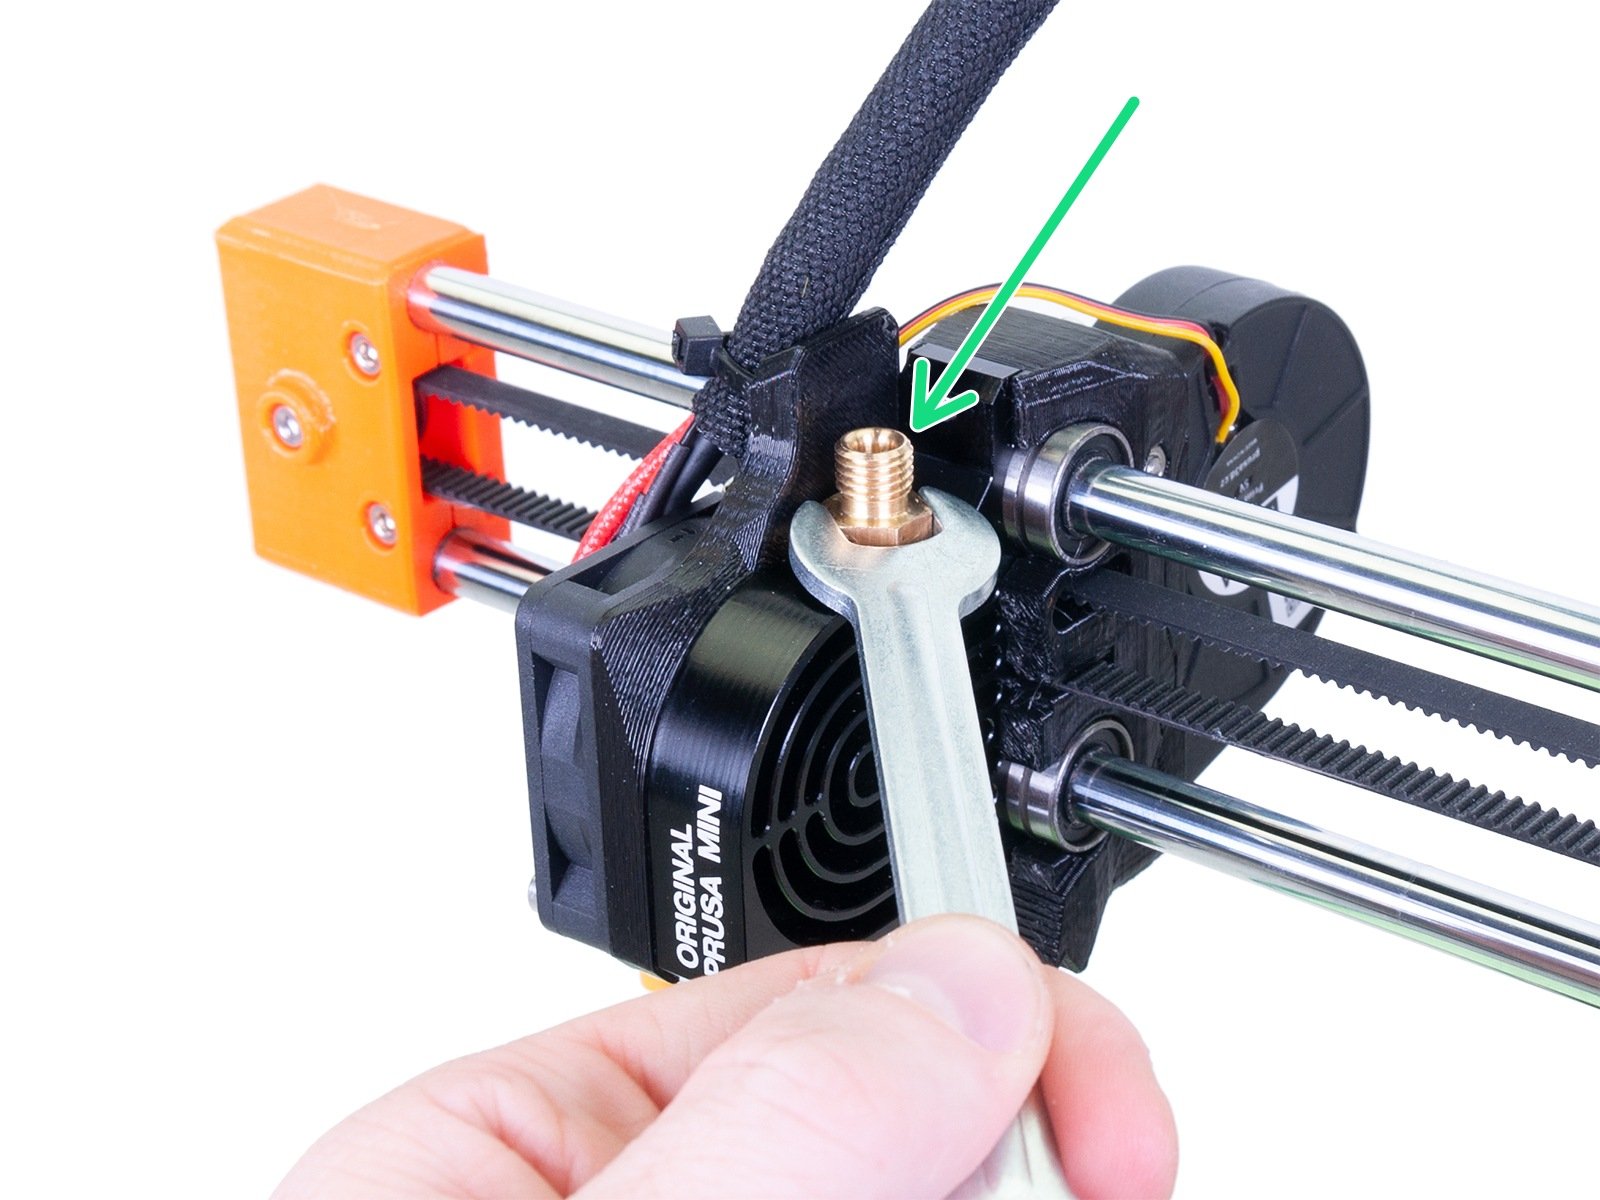
- Remove the Bowden tube coming from the extruder and the brass fitting securing the PTFE tube using your 10 mm wrench. If the nozzle is heated up you will now be able to pull out any filament together with the Bowden tube.
 |  |
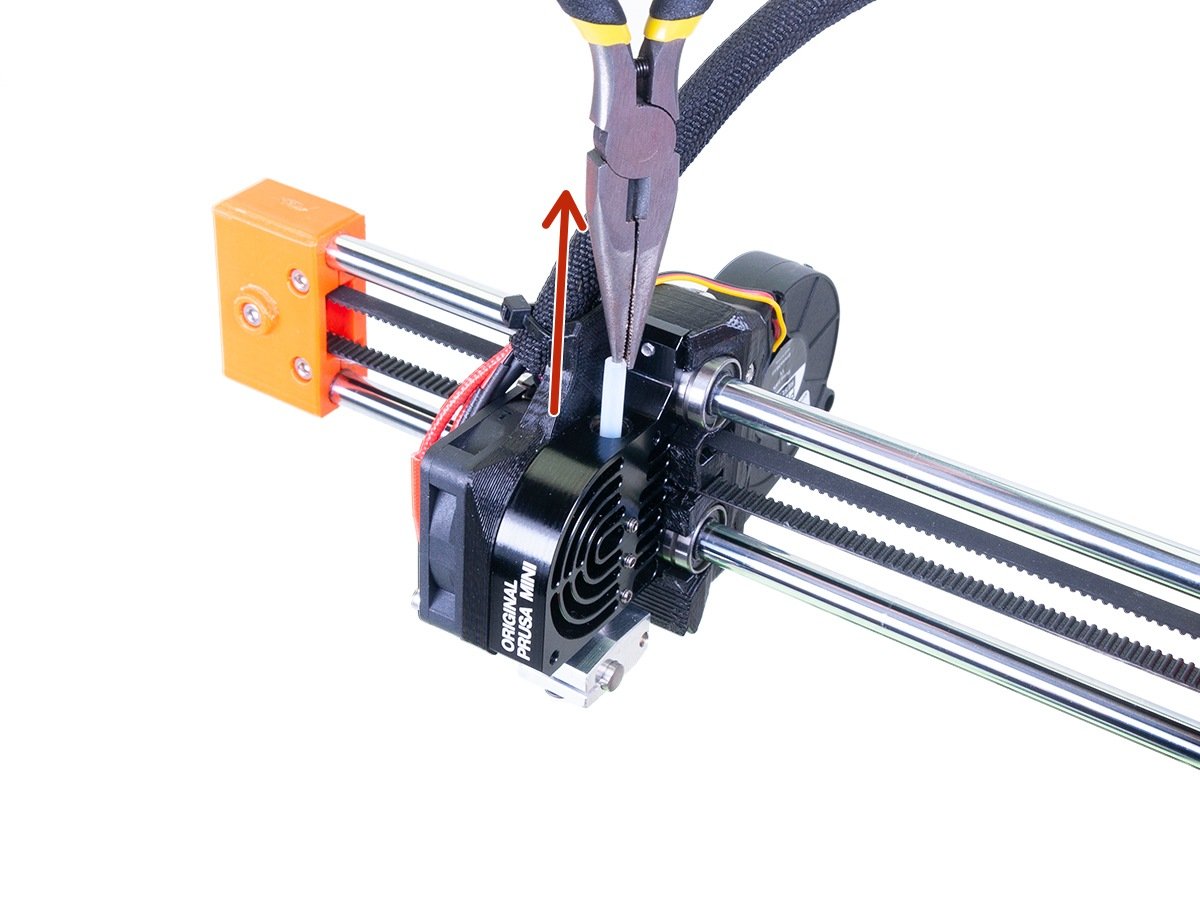
- Carefully pull out the old PTFE tube from the heatsink using pliers or tweezers.
 | 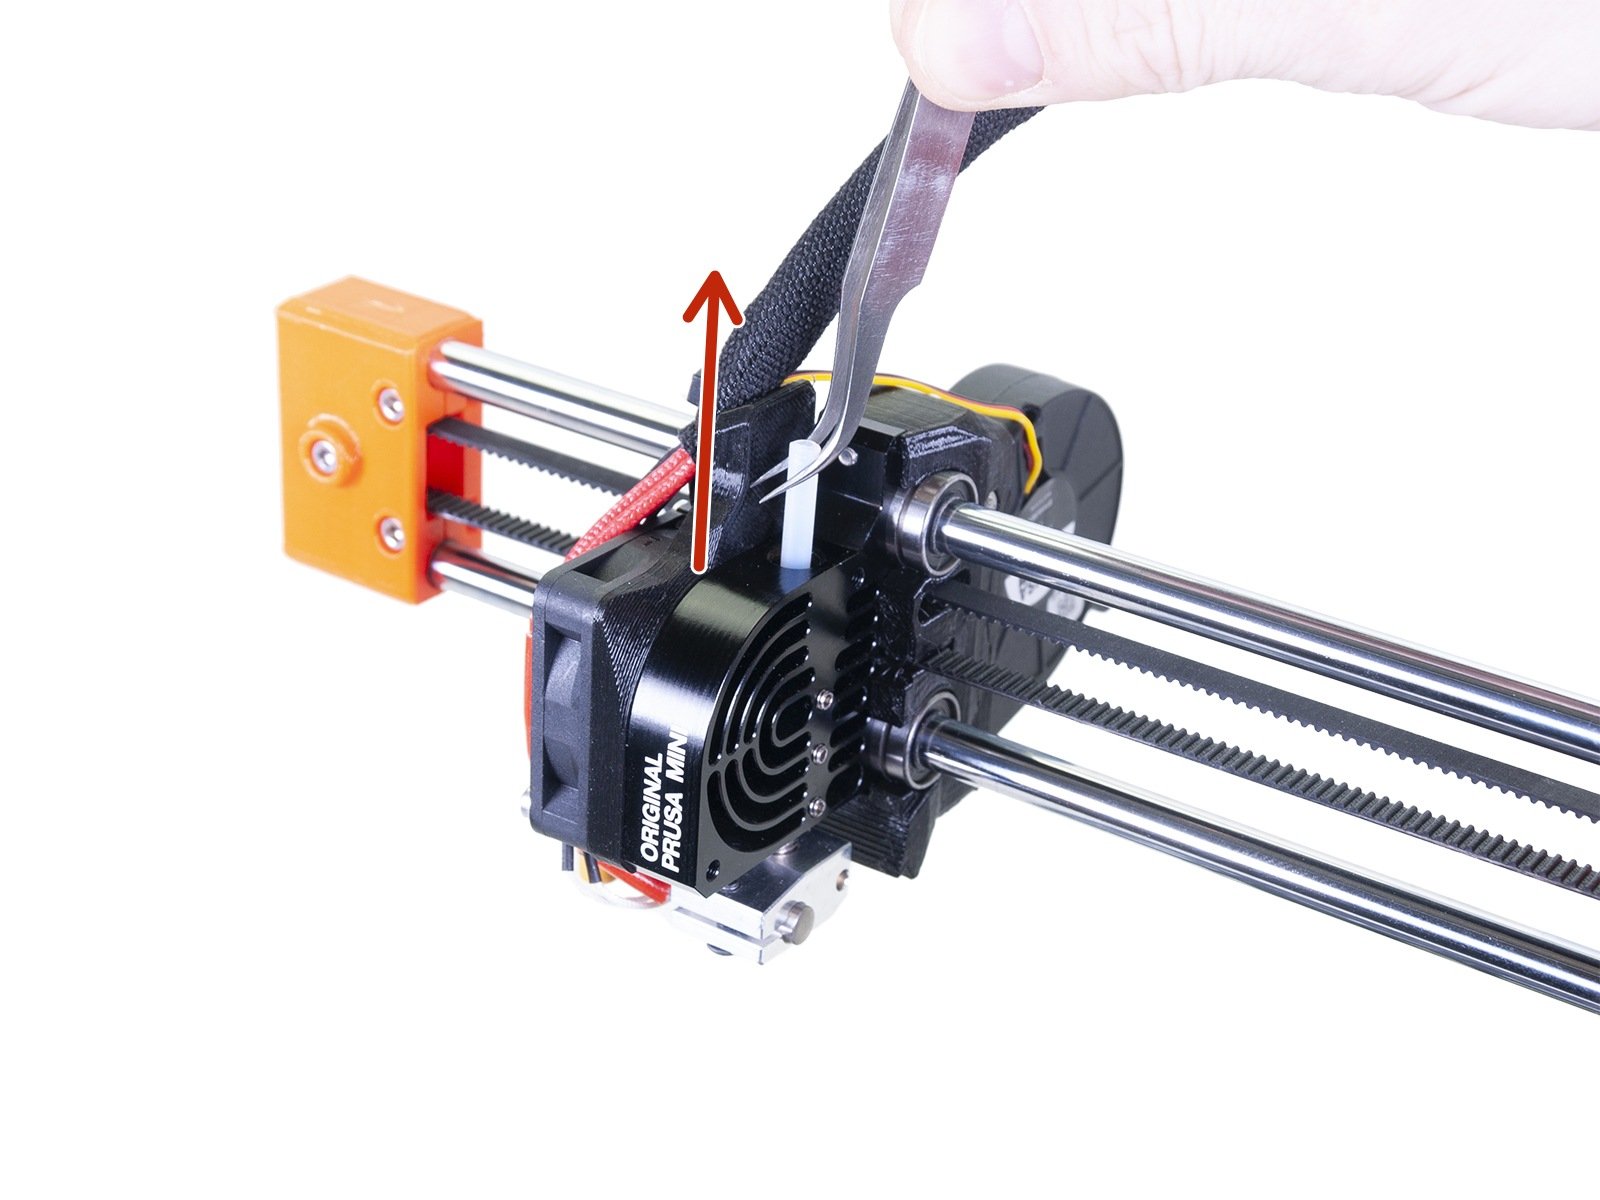 |
- Investigate the PTFE tube. Check the PTFE tube for possible damage, and if needed, replace it for a new one. A spare PTFE is included with the printer.
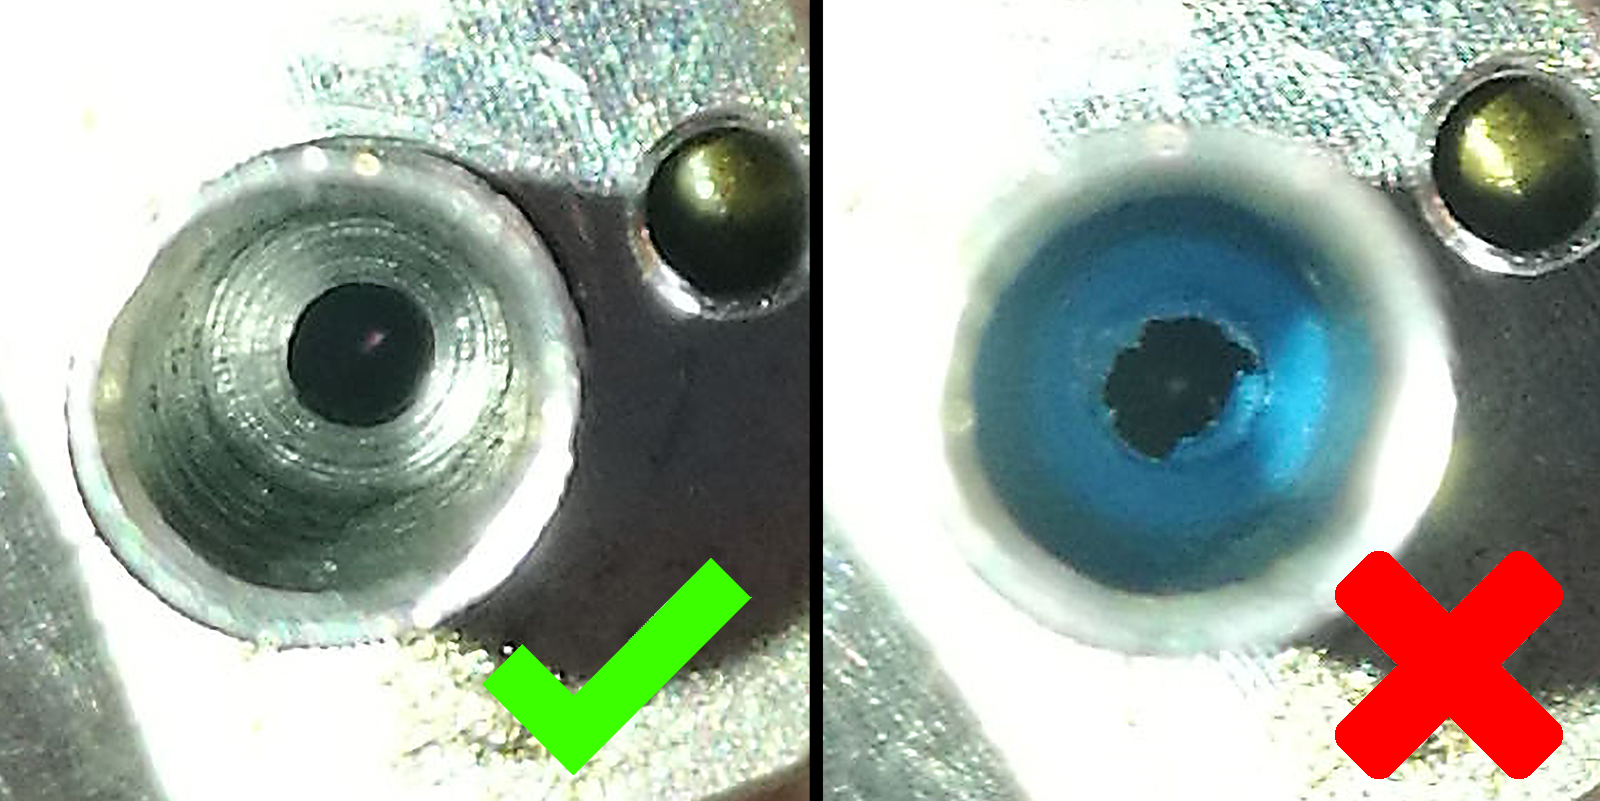
- Clean any remains of filament from the hotend. The bottom of the heat break should be clean and shiny. You can remove any filament by doing a cold pull without the PTFE tube installed.
 |  |
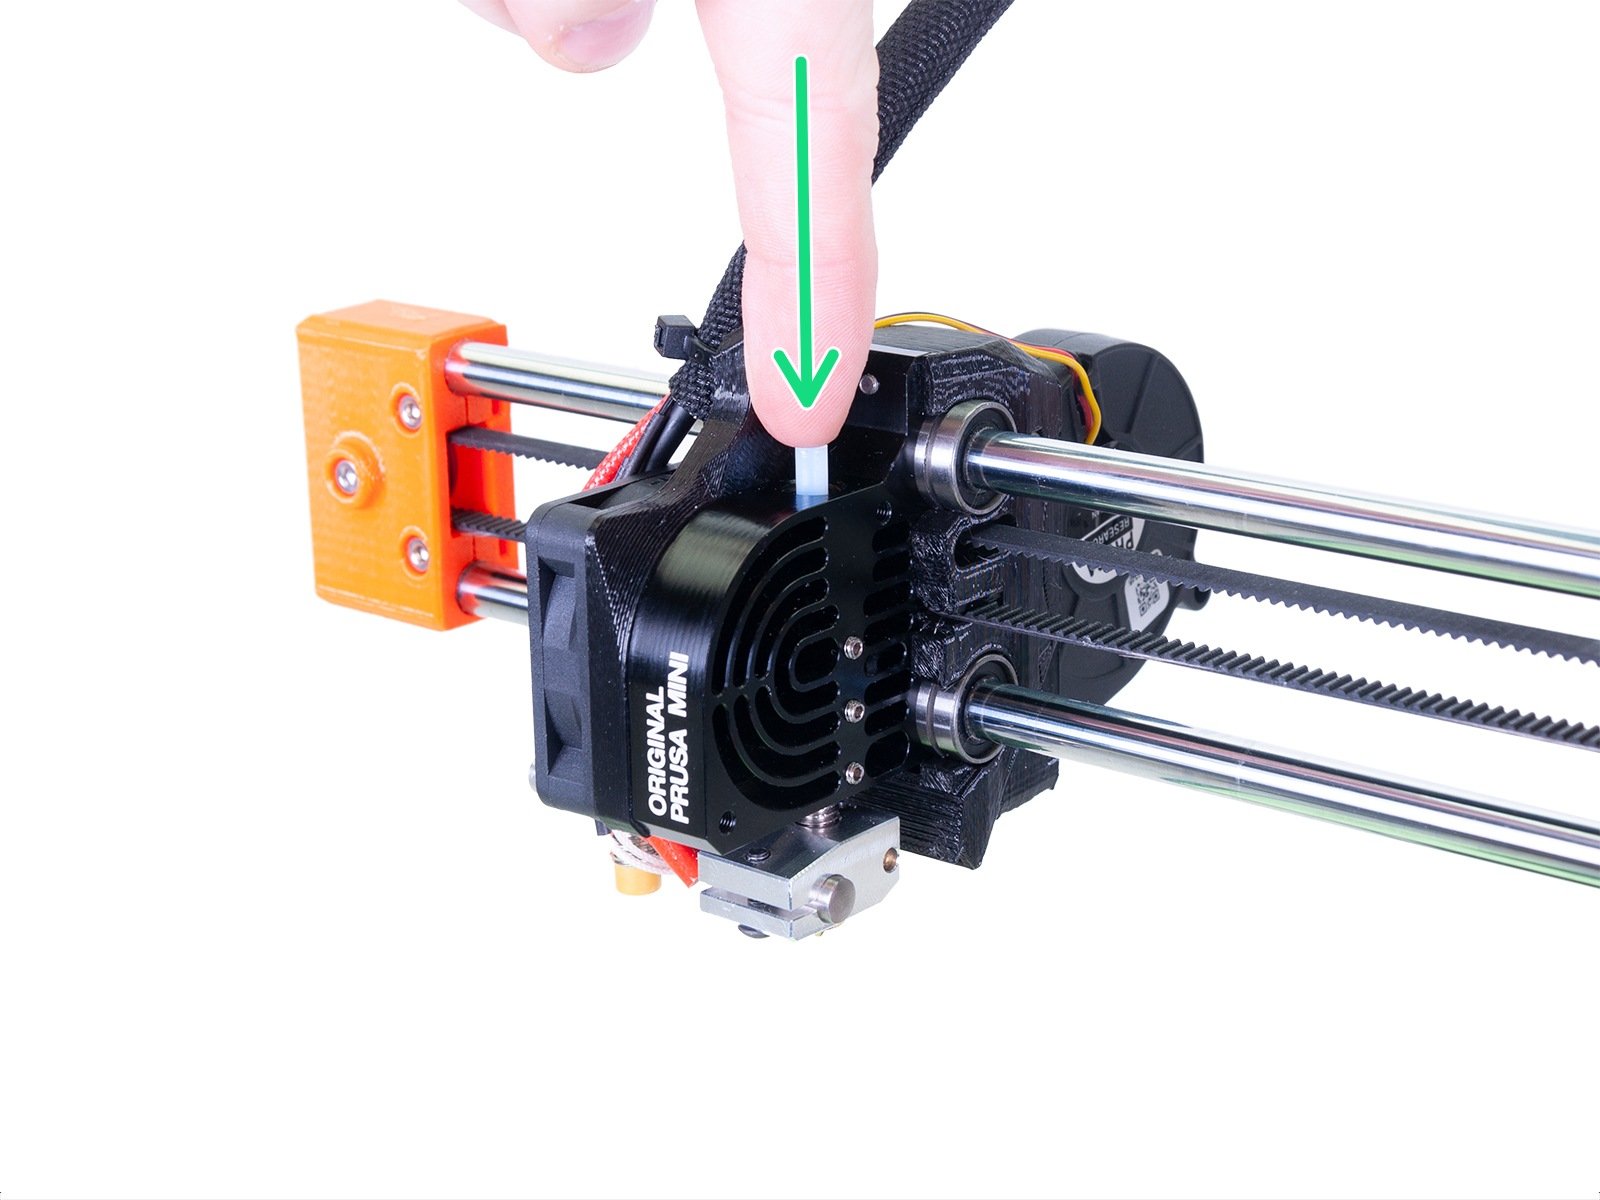
- Insert the PTFE tube back into the heatbreak again. Loosen the three set screws on the side of the heatsink with a 1.5 mm Allen key.
 |  |
- Screw the brass fitting into the top of the heatsink all the way in, then loosen it by a full turn (360 °). The side with the fewest threads goes into the heatsink (purple arrows and lines). We will compress the PTFE tube in the next step to ensure proper operation. If you have done this already with the same PTFE tube before, you might need to replace the PTFE tube with a new one.
In some scenarios, it might be enough to clean up the hotend, reseat the PTFE, and tighten the fitting properly to fix clogs.
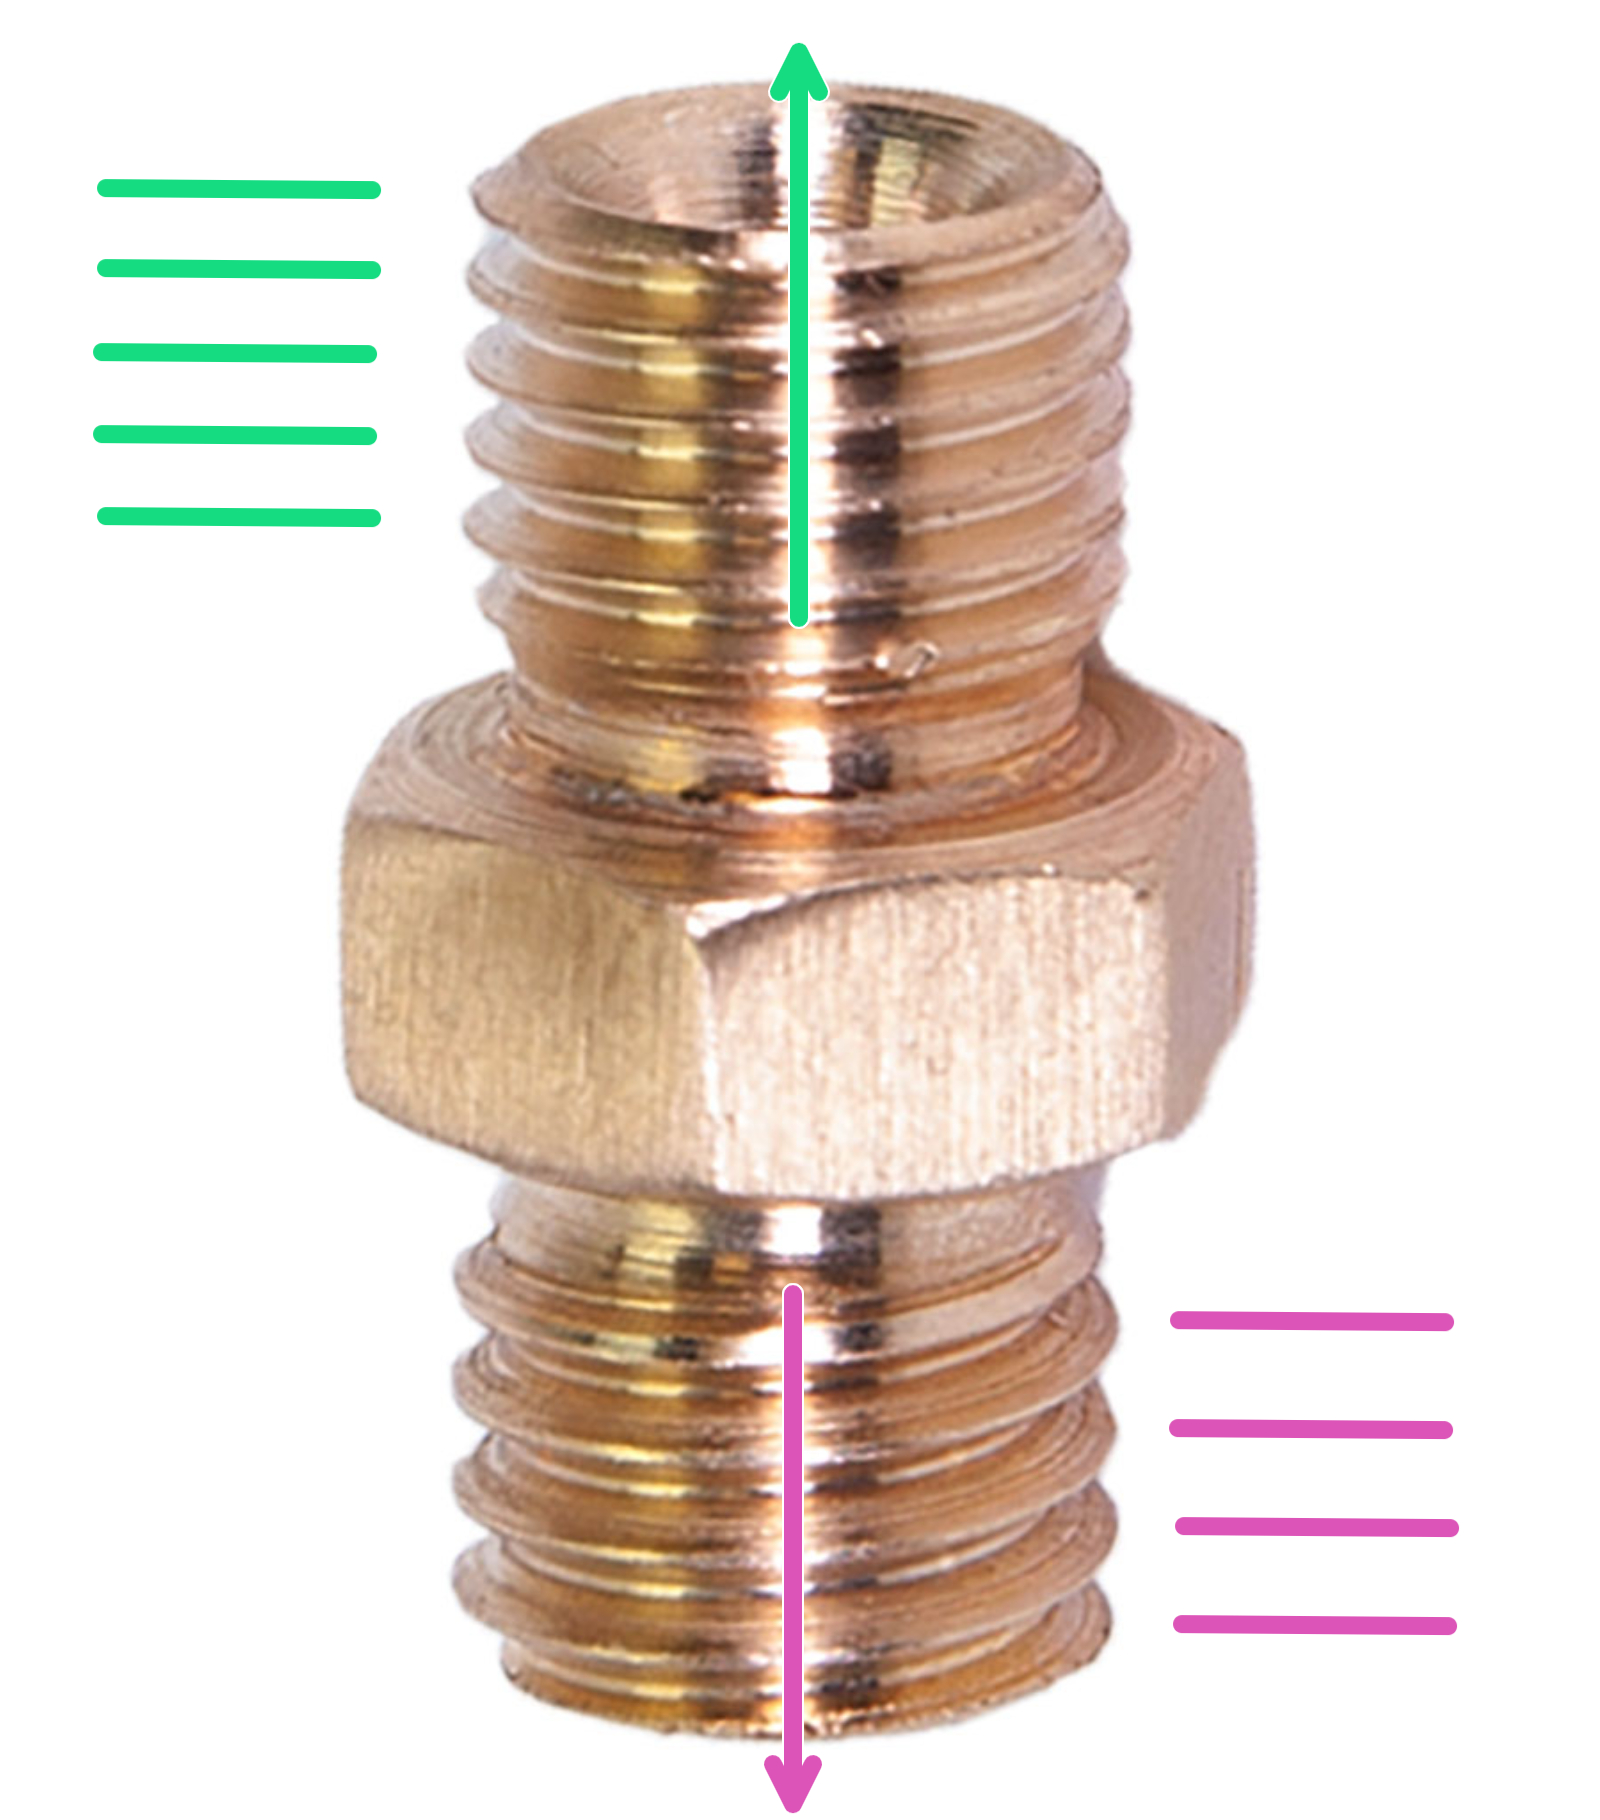 |  |
| Orientation of brass fittings. | The end with the least threads into the heatsink. |
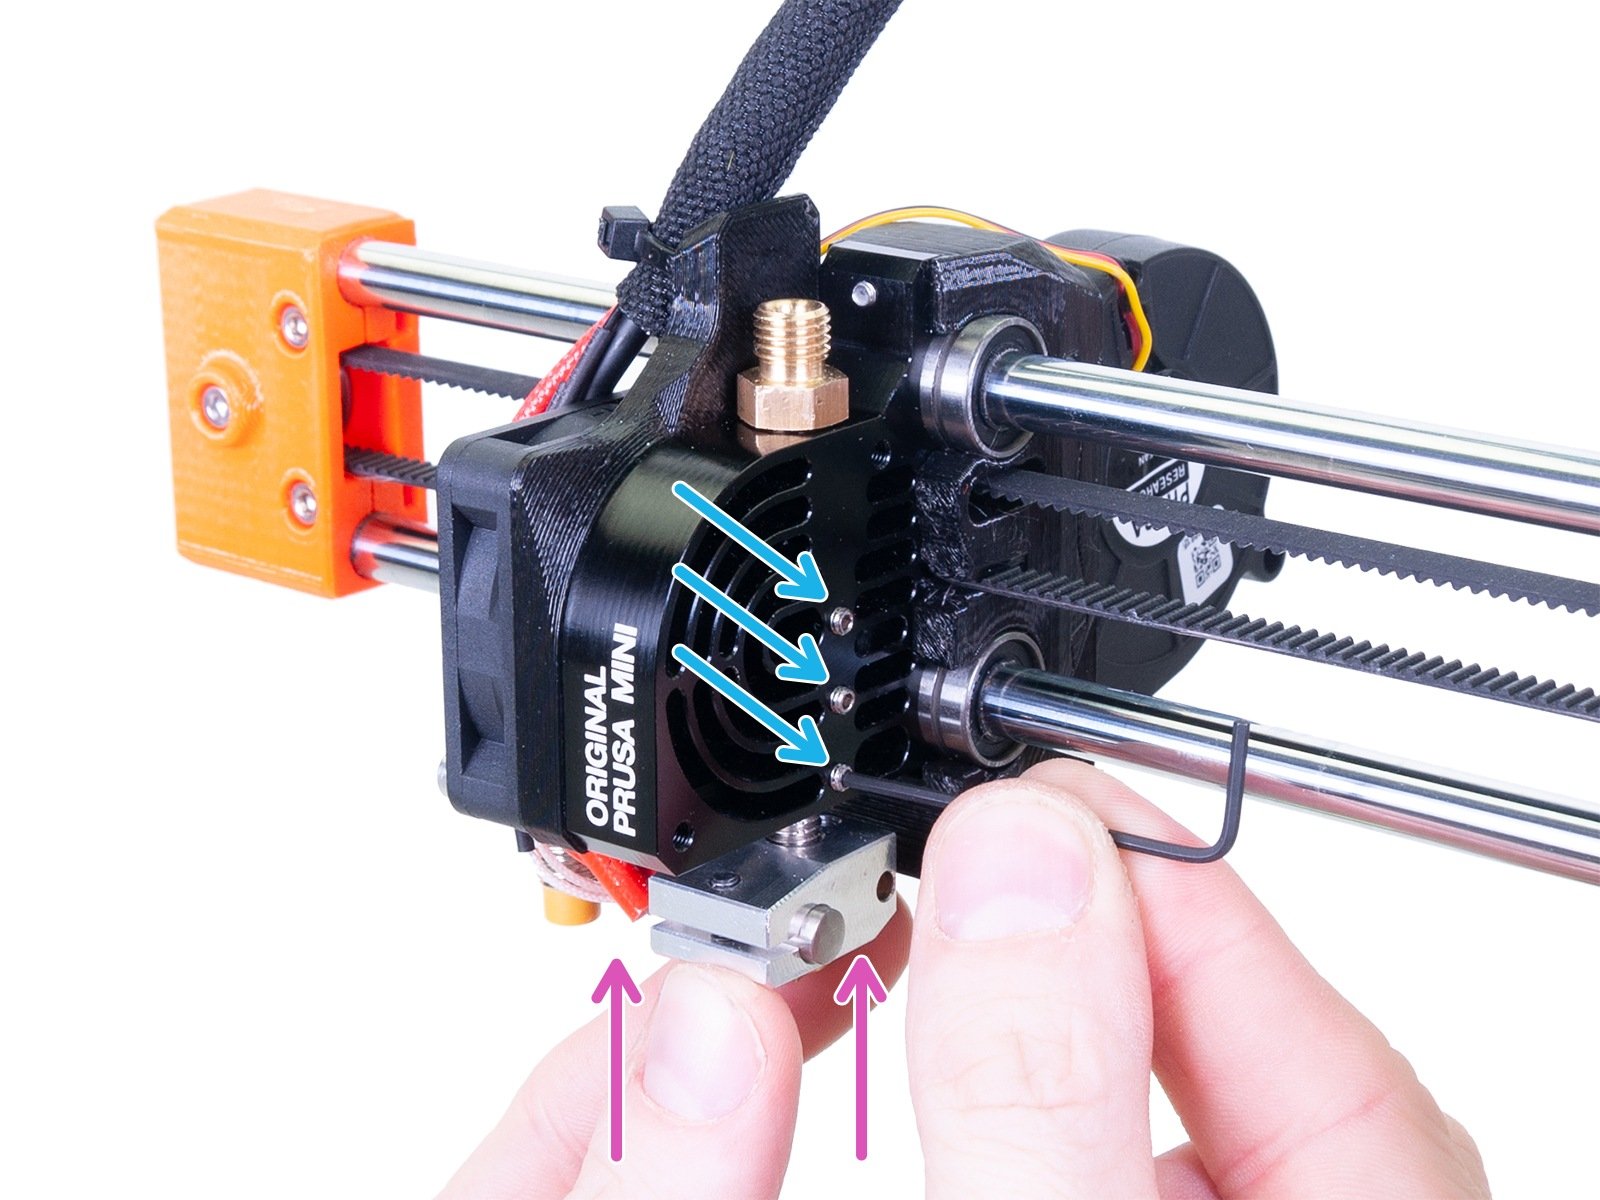
- Press the heater block upwards with a reasonable force. While maintaining the slight upwards pressure on it, tighten up the three set screws on the side of the heatsink.
- Then tighten the fitting on top of the heat sink completely (a full turn), which will compress the hotend PTFE tube.
You can now reattach the Bowden tube that leads to the extruder. Before testing the printer we recommend checking the last two points below.
After fixing the clog
First layer calibration
After doing maintenance on the print head we recommend doing a new First layer calibration, as hardware can slightly shift during the procedure. For more info, please see First Layer Calibration (i3).
Cleaning the extruder pulley
All the issues mentioned above can participate in the filament being ground between the pulley and the bearing. Once the teeth on the pulley get full of filament debris, the extruder won’t be able to load the filament properly.
You can either use the inspection door (see the picture below) to check whether the pulley is clean. Use compressed air to get rid of the dust, for a more thorough cleaning, follow this guide How to access and clean the extruder-pulley (MINI/MINI+).
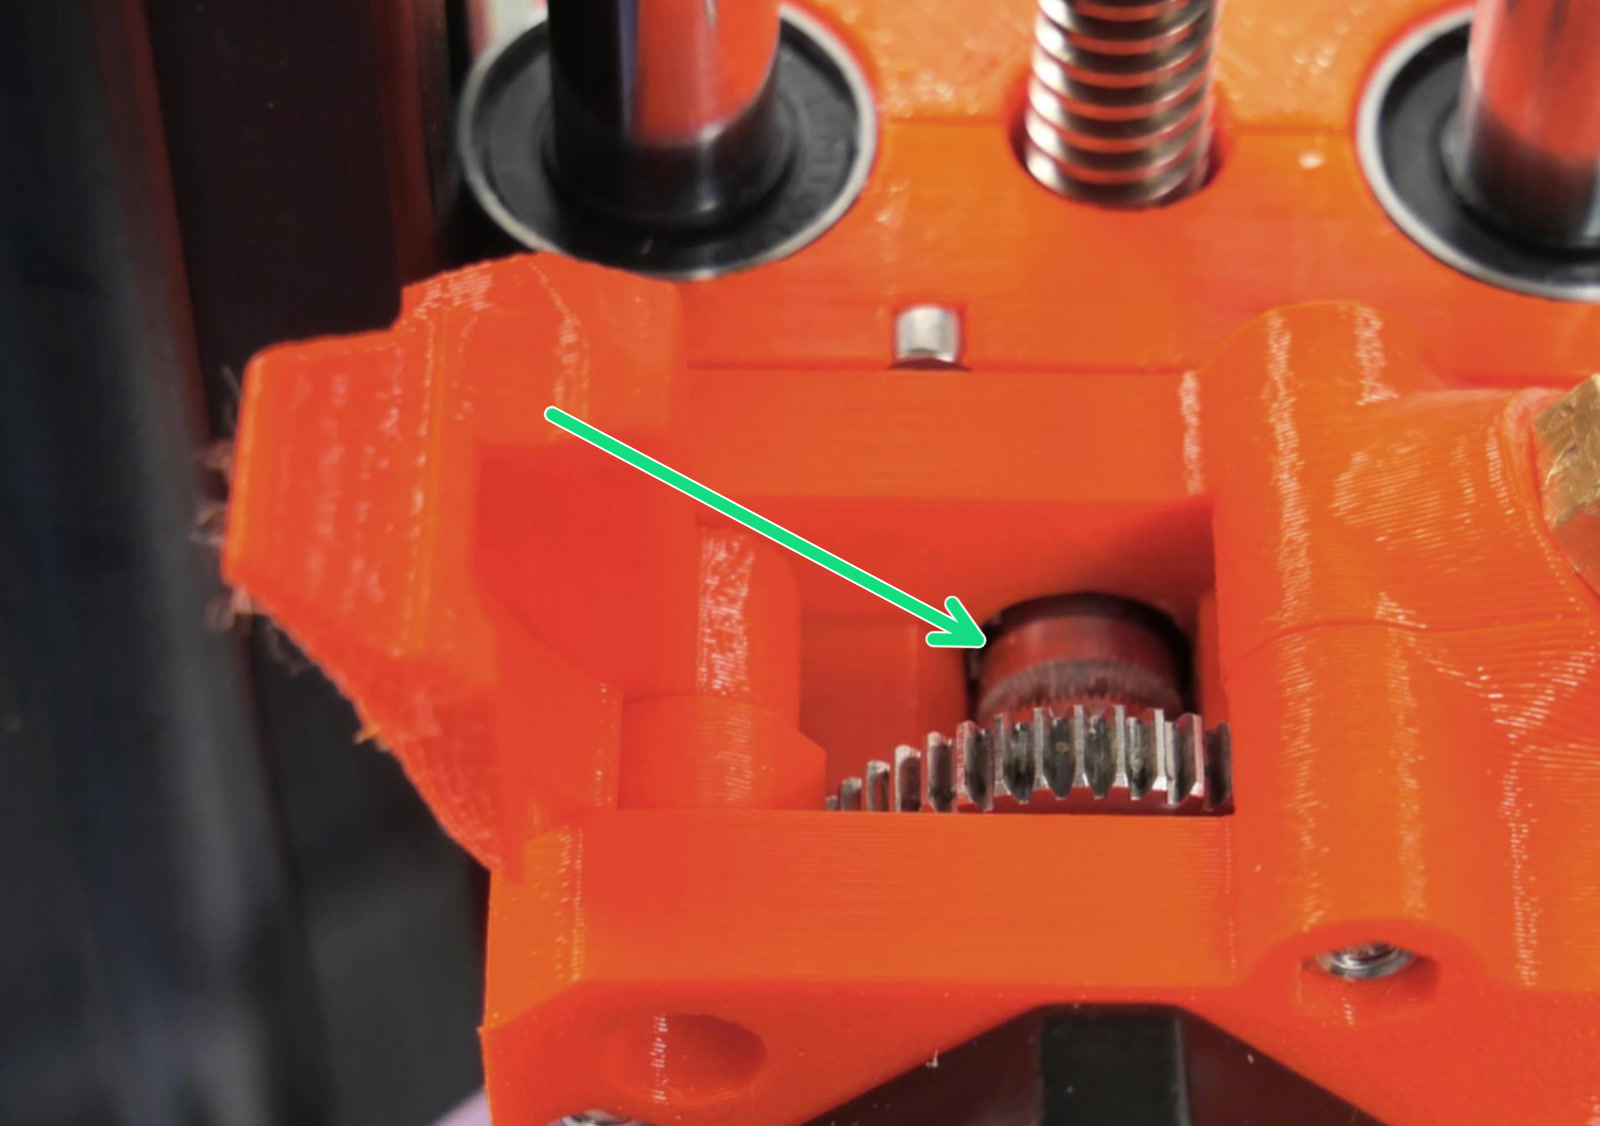
Use the inspection door to check the pulley
45 comments
I tried this as mine looks far lower than most videos I have seen and stripped 2/3 of them. I'm starting to believe this "user friendly" and "beginners" printer is absolutely more involved than is led to believe.
I'm not even sure I have the energy to ask for help anymore. I've owned this printer for 9 months, spent at least 6 of my days off from work reading through threads and watching videos. its never printed anything nice for me. I got the base layer to look good. That is it.
Things I've attempted to adjust to make the printer work prior to stripping the 1.5mm Allen keys on the heat sink:
-extended ptfe tubing approximately 1.5mm at the nozzle to prevent over pour
-lowered the nozzle sensor as instructed from a you tube video
-printed 2 half whistles by manually increasing the z-axis during the print
-discovered
-leveled bed numerous times
-first print layer perfected
-wash with iso and microfiber cloth pre print every time
-updted latest firmware twice
* I did notice I do not have the prusa wizard option though
Any suggestions would be entertained and appreciated, though I'm under the impression i broke the smallest component and now the unit can't be fine tuned as needed.
Why doesn't it show up functional?
I can't help much with the overall problems you have, but I do want to say that I thought I stripped those little screws as well, but t turns out that the Allen keys from prusa are really bad and that was what was rounded off. So I recommed getting a proper allen key and trying it with that. Hopefully that helps a lill.
Without knowing which firmware version you have, I woudl suggest to make sure you have the most current, updated firmware and try again.
The second part of step 1, removing the nut from the hot end assembly to remove the internal short PTFE tube is wrong. You first need to remove the screw holding in the cable holder. Otherwise you can't spin the brass fitting.
I believe this is only the case for the MINI+.