English
Login

Elephant foot compensation

Relevant for

MMU family
MINI family
MK3 family
OLD PRODUCTS
SOFTWARE
18 comments
Article is also available in following languages
English
Čeština
Polski
Deutsch
Français
Español
Italiano
日本語
This option is not available when PrusaSlicer is in Simple mode.

When printing the first layer is squished against the heated print bed and as a result, it’s usually a bit wider than it should be.

For many applications, this might not be an issue. But if you have something that really needs to have precise dimensions or fit together with very tight tolerances, it can be a problem. 

Without the Elephant foot compensation, the first layer may be wider than expected

Adaptive elephant foot compensation

Instead of having to sand this slight edge off, this setting will scale/shrink the first layer.

You'll find it under Print settings - Advanced - Elephant foot compensation. To access this setting, PrusaSlicer must be in Advanced or Expert mode. 

Values around 0.2 mm usually work well for the default 0.4 mm nozzle.
PrusaSlicer automatically detects thin lines in the first layer and makes sure not to over shrink them. This detection is present in PrusaSlicer 2.2 and newer.
Official Prusa profiles have this setting turned on by default.

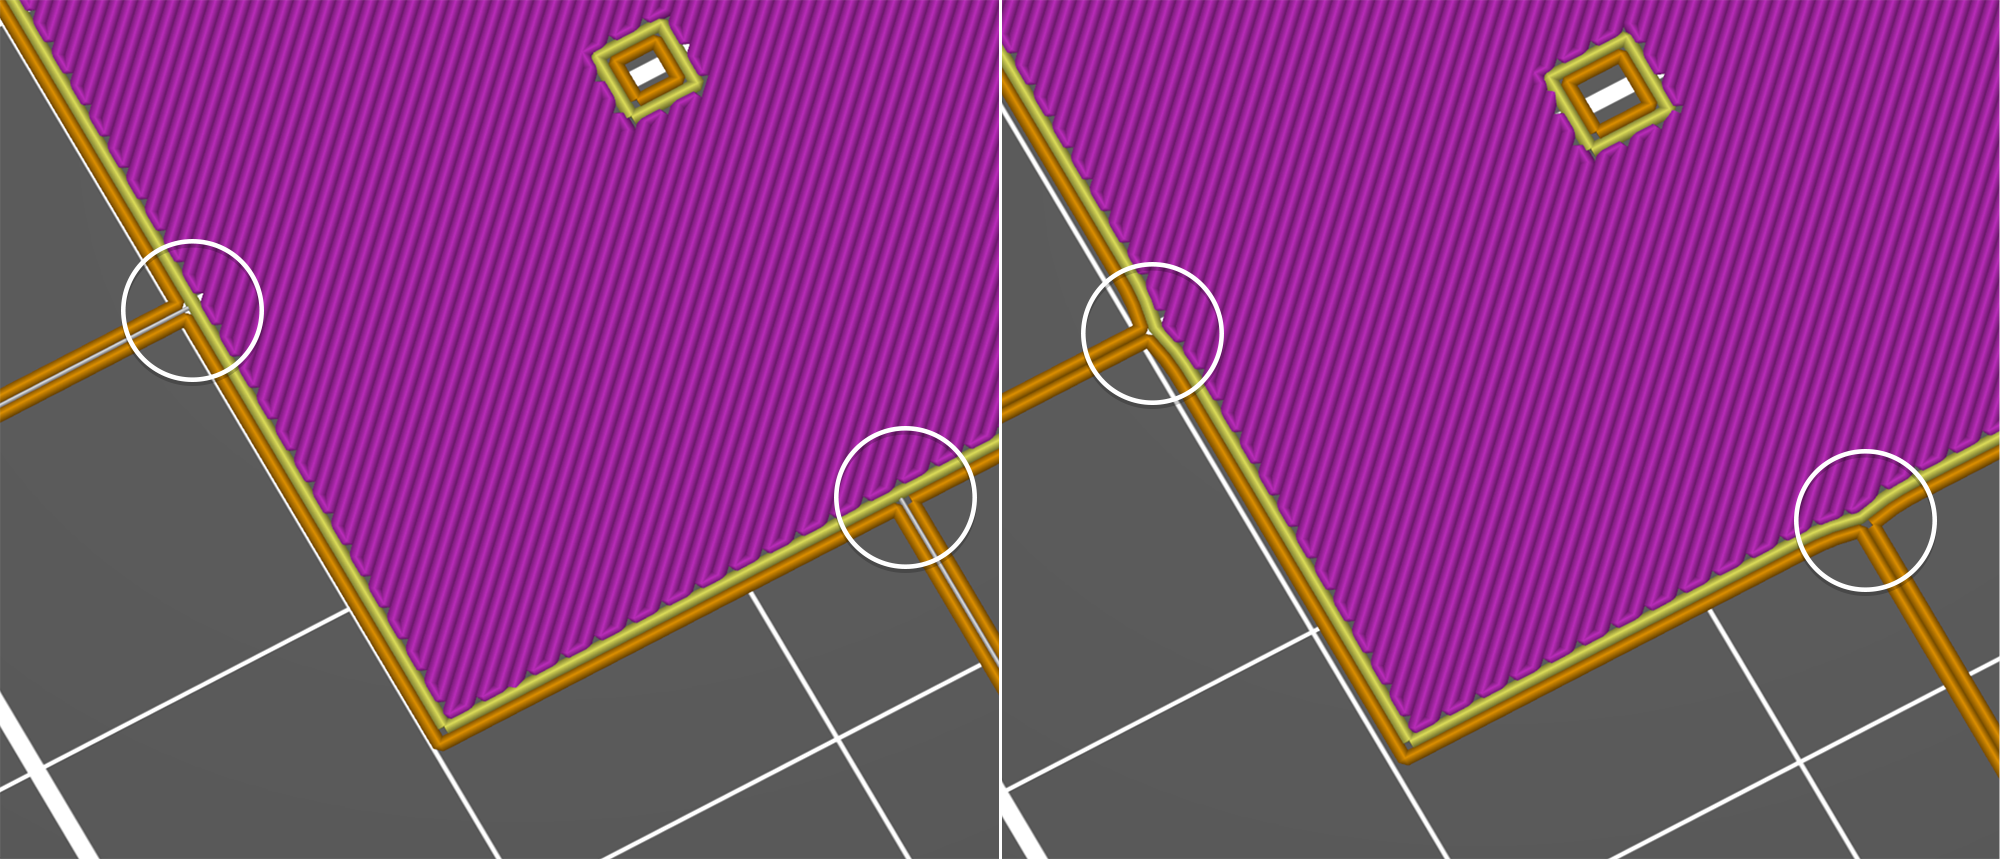
Brim doesn't connect to the model with Elephant foot compensation turned on

This is on purpose. The elephant foot compensation compensates for the squish, which is not visualized in the preview. In reality, the gap will be filled in by the squished-out material. Though it is true, that the brim will have a weaker connection to the model with the elephant foot compensation turned on.

If the brim doesn't connect to the part when printed, you likely have Elephant foot compensation set too high.

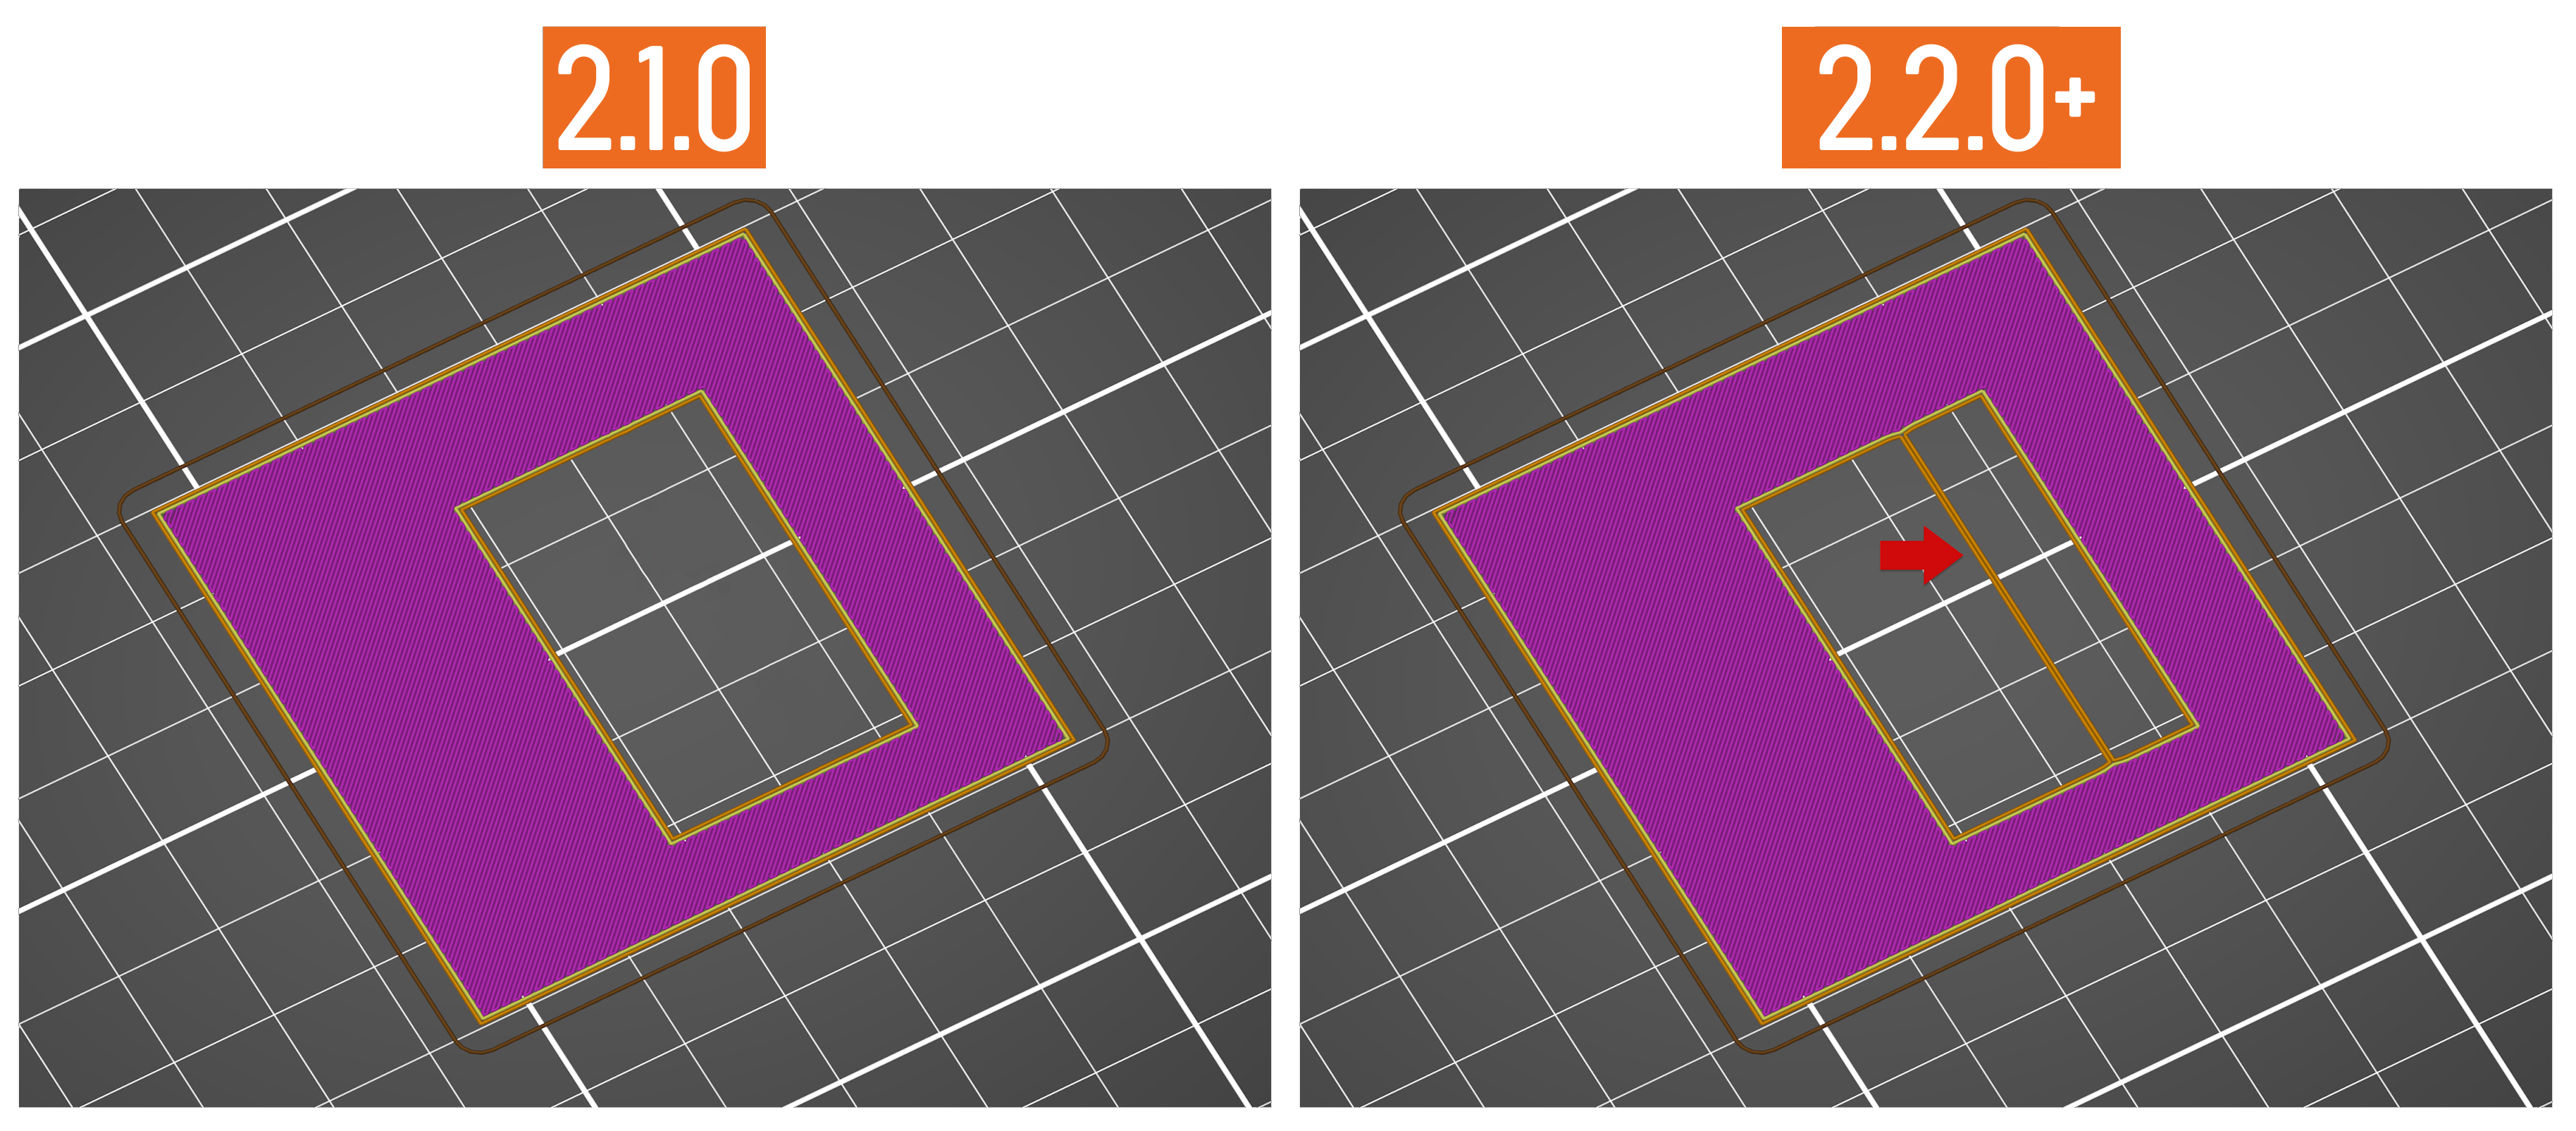
The first layer seems deformed in the preview

A side effect of the Adaptive elephant foot compensation is a possible distortion in spots where thin features connect to bigger parts of the model. This distortion is mainly pronounced in the preview (in reality, the squish of the first layer will fill more area than shown) and only affects the first layer. Still, if this is an issue for you, turn the Elephant compensation off (turn it to 0).


10 comments

Log in  to post a comment
hermes_actual
I'm using PLA with PETG supports. I have the bed set at PLA 65C for the first layer and 70C for subsequent layers. PETG is 85C for all layers of support. I'm getting elephants foot. Should I increase Elephant Foot Compensation (currently 0.2) to 0.3 - 0.4 for a 0.6 nozzle? Or, would it be better to decrease the PETG temp?
aNewVariable
I experienced first layer issues with a thin walled PETG part on the Satin sheet. Therefore I wanted to turn the elephant food compensation off, by setting it to zero, but it seemed to have no effect. After loong investigation I found that the .stl file itself already had a chamfer. So double check this if you want to turn the function of, but nothing happens.
Jeremy
Is there a maximum value where the software disregards the elephant foot compensation number?I was running a test print and kept increasing the number and even with a 0.6 and a 0.4mm nozzle was still getting a lip on my first layer.
Mikolas Zuza

Theoretically, there is no limit. If you print a cube and set the elephant cube compensation to 10mm, the cube's first layer will shrink by 10mm from each edge.

But realistically, with a 0.4mm nozzle, you shouldn't need to set it higher than about half of your first layer extrusion width. I would look for an issue elsewhere.

Antheus_S
Since I am not oversquishing the first layer, the elephant foot compensation caused my brim to never touch the print. As I was not aware of this feature, it took me a little to realize that this was causing the problem. Setting it to 0 when using a brim fixed my issue.
 
Update 16-3-2021:
Now that I have completed a couple of prints using PLA with the elephant foot compensation set to 0, I noticed that it has fixed many of my first layer adhesion issues. Now I no longer need to clean the bed with soap and water or acetone as often as before to prevent the first layer from curling at sharp edges. Before, I was only able to print a raft with an extremely clean bed and even with such a clean bed, it only worked one third of the time. It also explains why changing the first layer width did not work as well as I had hoped before I disabled this feature.
 
I highly advise people to try setting this to 0 if they are experiencing first layer adhesion issues.
sammy3
I can confirm turning this off fixed my issues. The outer perimiters were under extruding with this option on (it looks like it reduces the flow on the outer perimiters to create the 0.1mm xy shrink).
This in turn increases the chance of warping. I would recommend turning this off is you're using a smooth bed surface.
Tim Gorringe
It has been recommended to be to reduce this setting when printing PETG. What should I change it to?
Giuliano - Official Prusa CS
Hi. With a 0.4 mm nozzle you can leave it at 0.2 mm for PETG.
draildiagnostics
What about a .6 nozzle for PETG?
Giuliano - Official Prusa CS
Hello. 0.2 mm compensation works also with a 0.6 mm nozzle.