The size of the extruder and the length of travel of the Z-axis is coded into the firmware. Therefore, if the assembly of the extruder, or the firmware for your extruder, is not correct, the calibration will most likely fail.
Extruder assembly
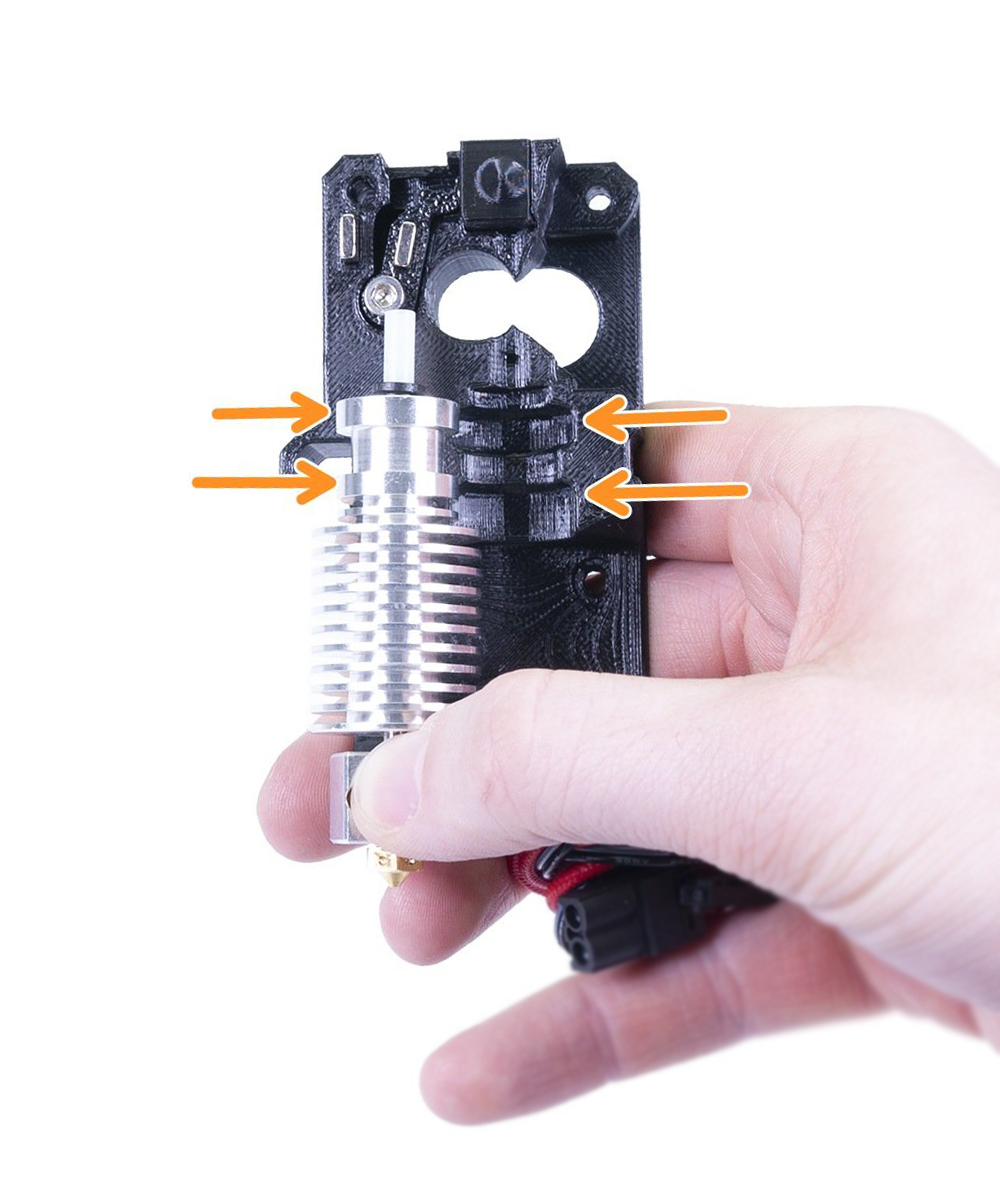
On top, the E3D heatsink has protrusions from its profile and running around the whole heatsink. These fit into the extruder body printed part, which has two corresponding notches for these (orange arrows).
The heatsink will fit if placed into both notches, but also when only covering the bottom notch. This will not inhibit the rest of the assembly procedure, but the nozzle will be about 1 cm lower and Z-axis will have a shorter travel-distance than what is expected by the firmware.
 |  |
| MK3S/MK2.5S extruder body | MK3/MK2.5 extruder body |
How to check
If you have installed the heatsink too low you will see the heater block protruding down from below the fan shroud. With the correct assembly, only the tip of the nozzle should be visible.
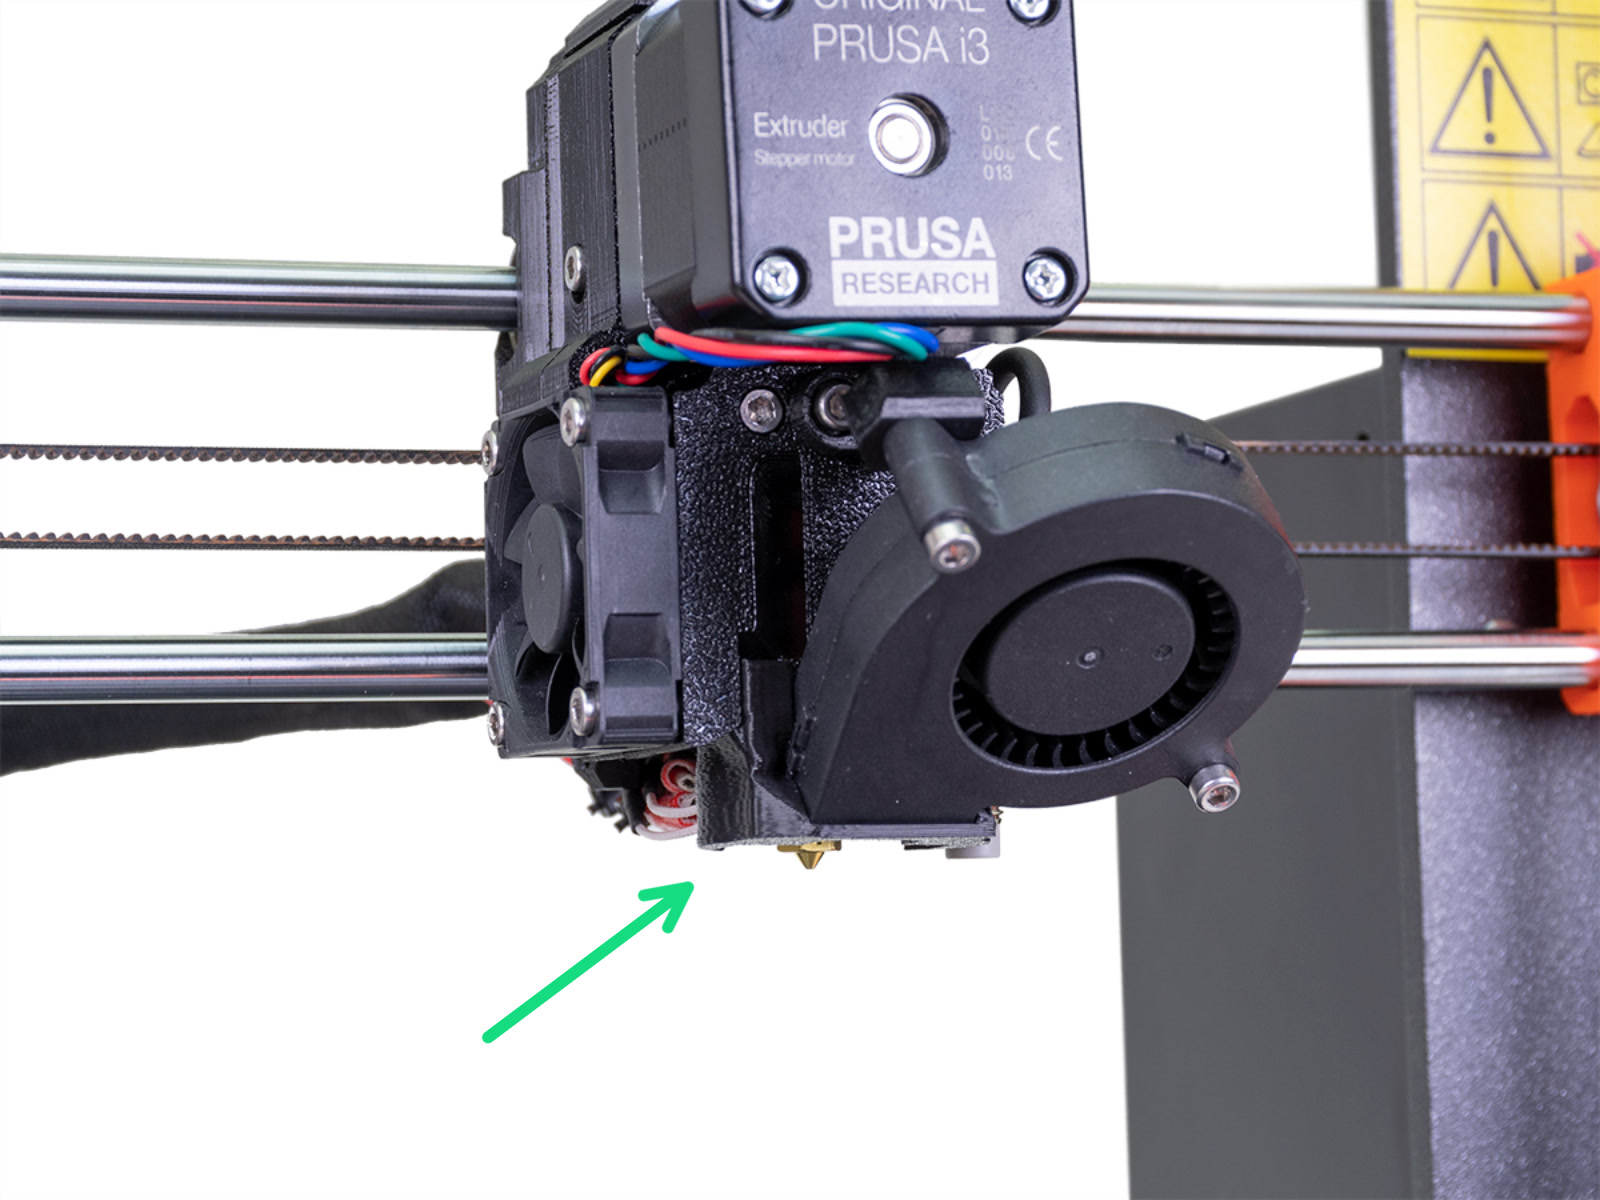 | 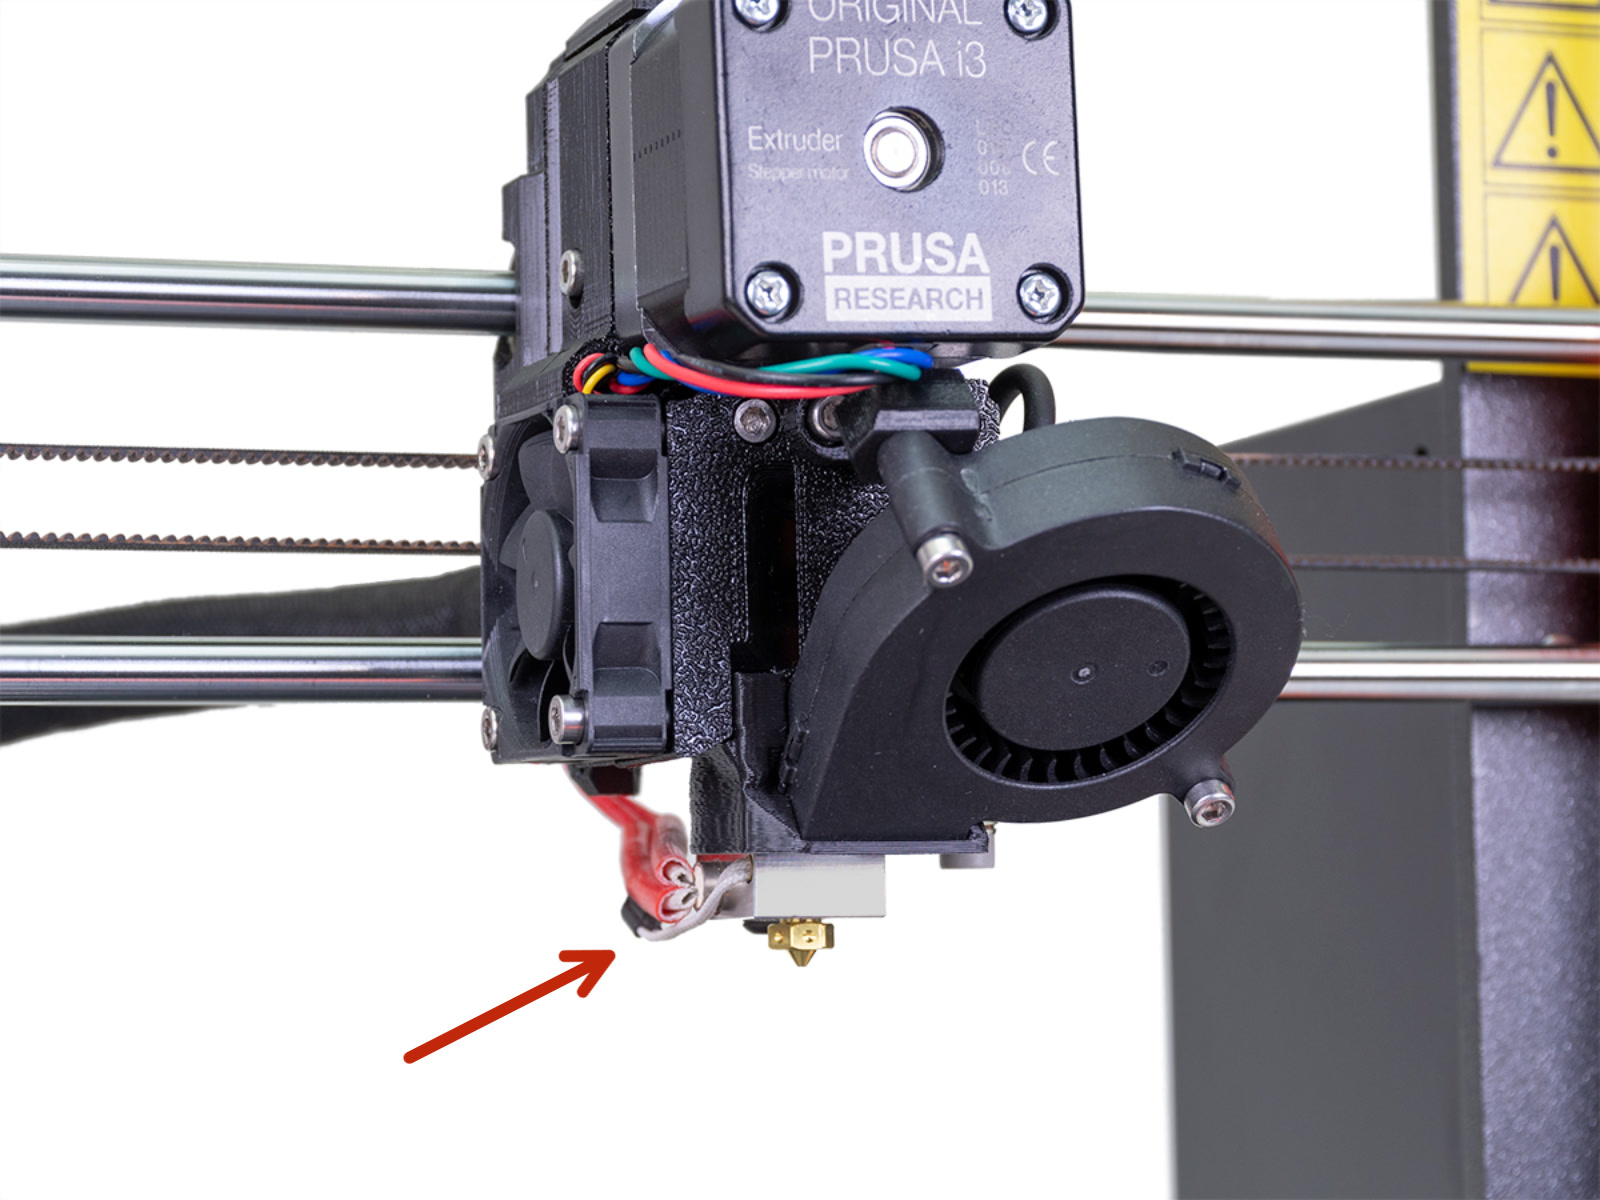 |
| Hotend installed correctly - Only nozzle visible | Hotend installed incorrectly - Hotend protruding |
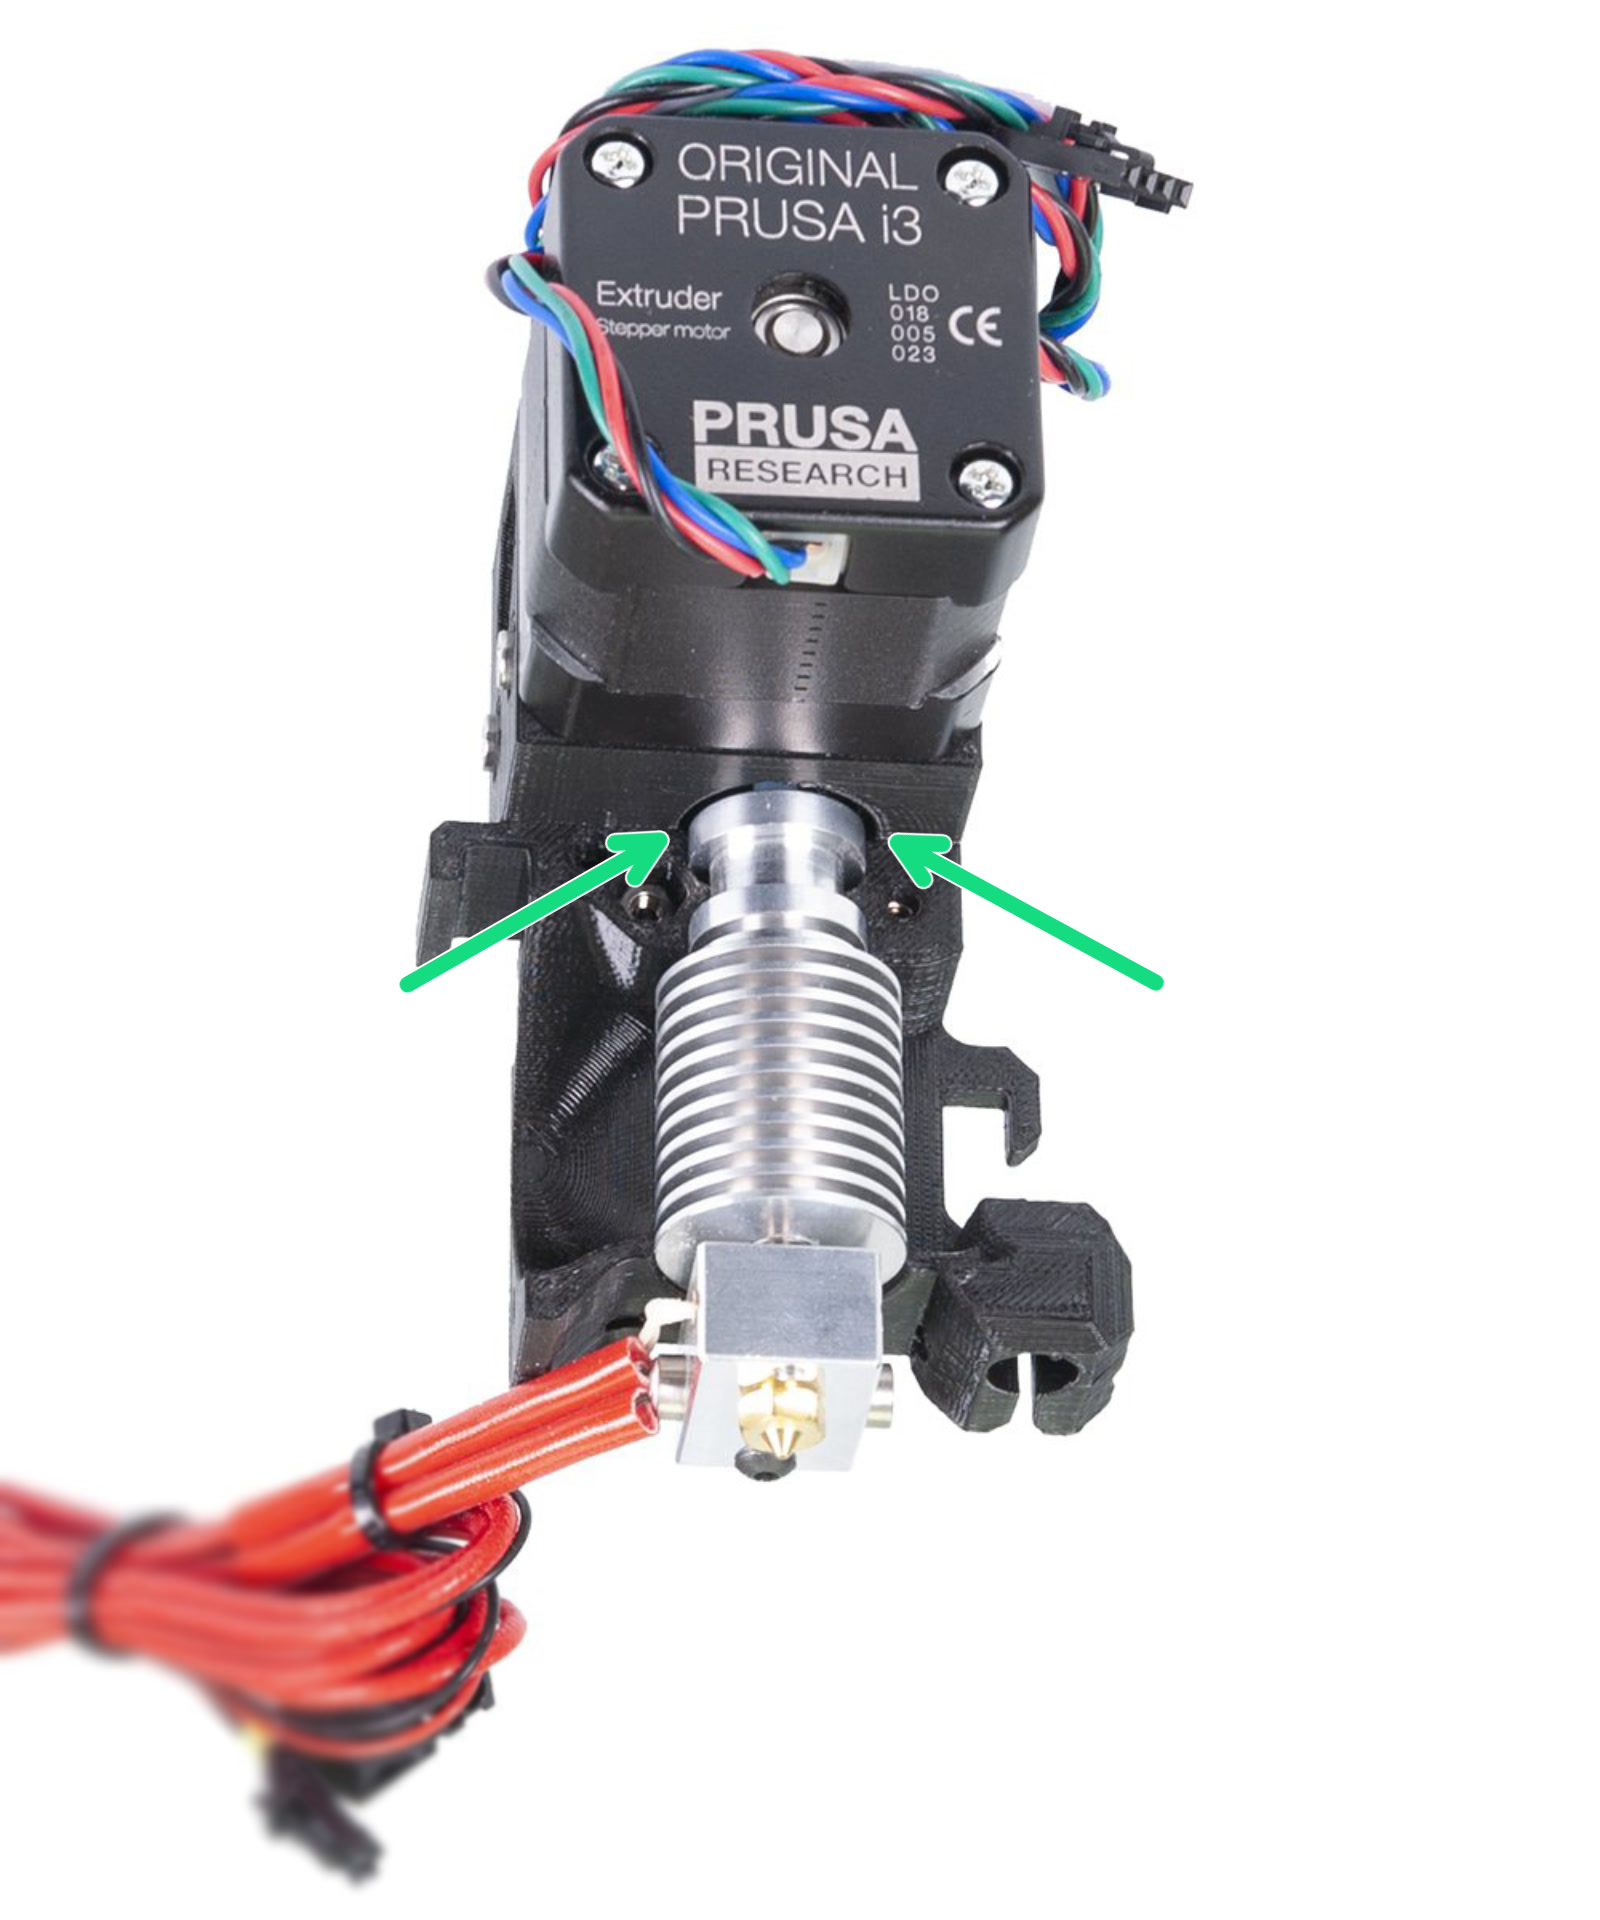
Correct assembly
The top lip of the heatsink is seated in the top notch of the plastic part (green arrows) and both notches of the plastic part are filled. If this needs to be corrected, follow this guide for the MK3S or this guide for the MK3, to access the hotend after assembly. Note, that the removal of the PTFE tube shown in the linked guide is not necessary to reseat the hotend.
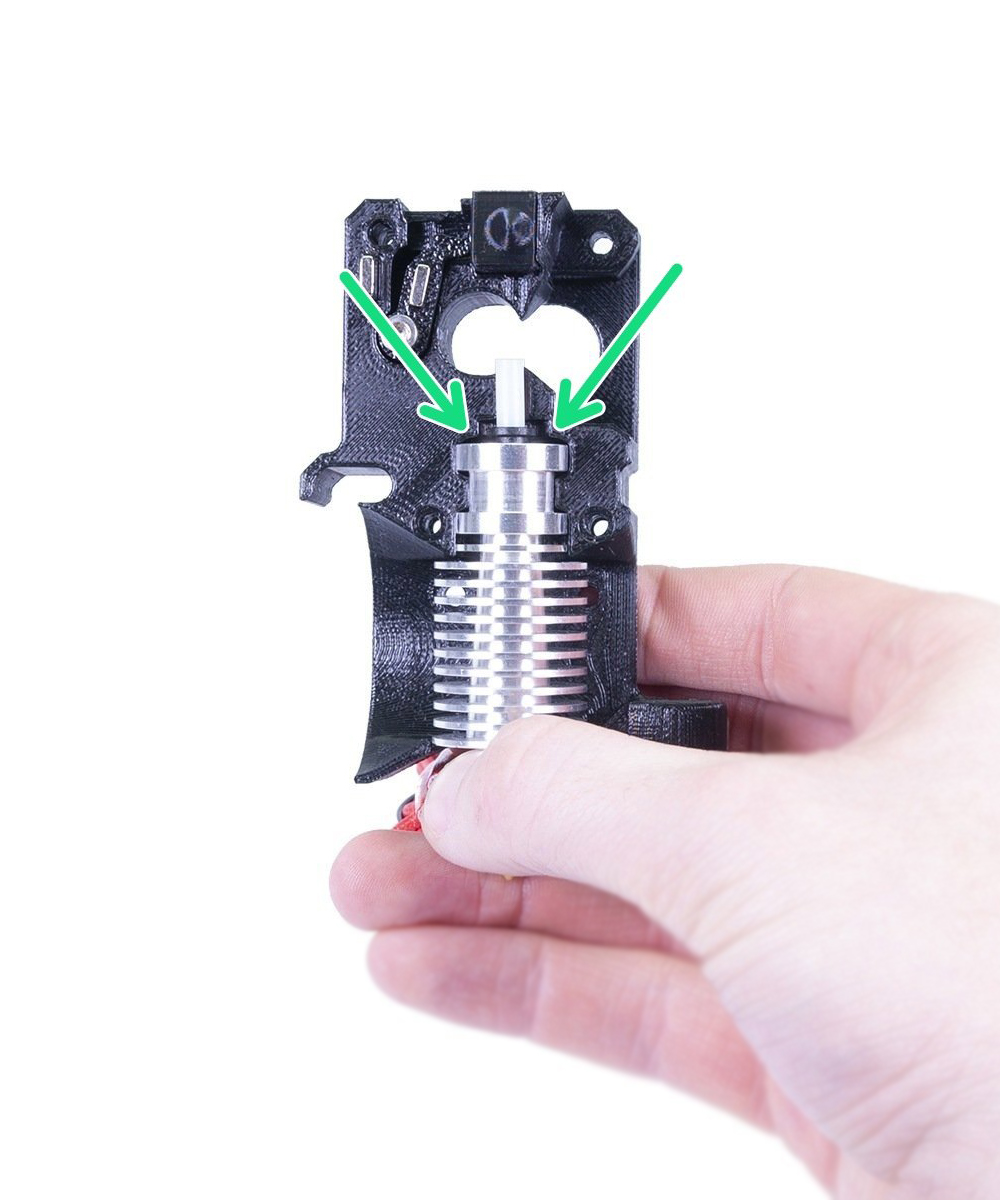 |  |
| Hotend installed correctly MK3S<em>/MK2.5S | Hotend installed correctly MK3/MK2.5 |
Assembly is correct, calibration keeps failing
As mentioned, the travel distance of each axis is programmed to the firmware. If you load the MK3S<em>/MK2.5S firmware in the MK3/MK2.5 (non S) machine, the calibration will keep on failing, because the length of the Z-axis coded in both firmware differs. Therefore, it is crucial to use the correct firmware when updating. MK3S and MK3S<strong>+ uses the same firmware.
The easiest way to see which version you have is to check the extruder. The MK3S/MK2.5S & MK3S+ has one idler tension screw and the MK3/MK2.5 has two (pictures below).
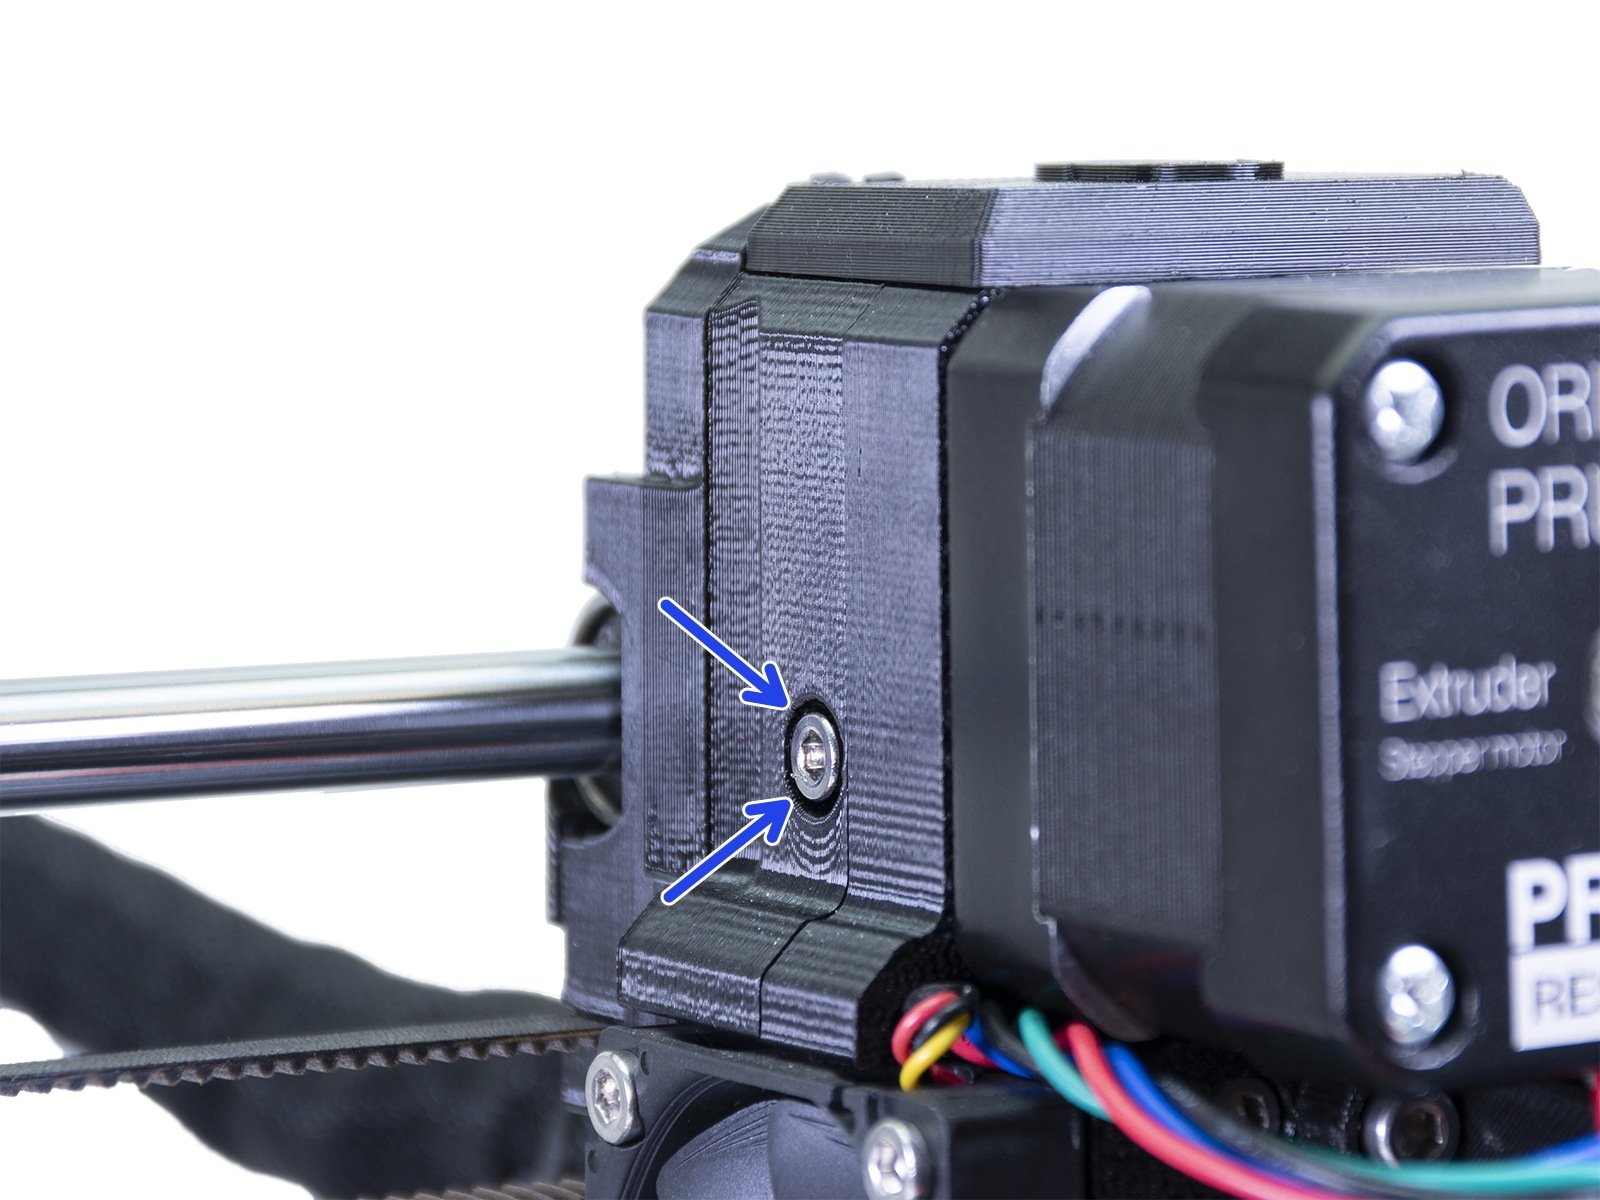 | 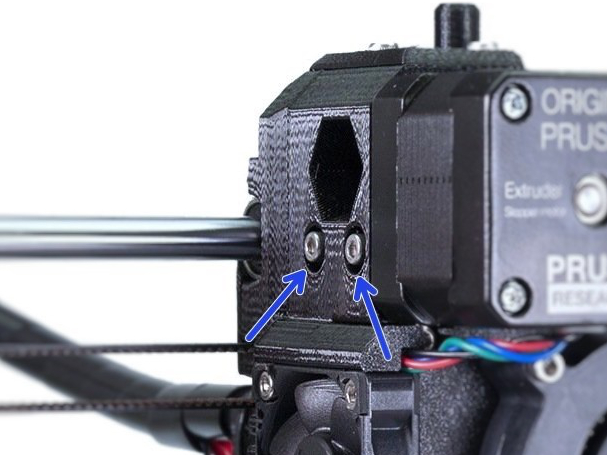 |
| Original Prusa MK3S/MK2.5S & MK3S+ | Original Prusa MK3/MK2.5 |
5 comments
Złożyłam ostatnio drukarkę PRUSA MK3S+ i mam problem z kalibracją osi Z. Zmieniałam już wysokość czujnika, sprawdziłam montaż ekstrudera oraz podłączenie przewodów. Wszystko wydaje się być w porządku. Czy ma ktoś jakiś pomysł, gdzie jeszcze może tkwić problem?
Ola
Uprzejmie prosimy o skontaktowanie się z naszym wsparciem przez LiveChat dostępny na naszej stronie lub mailowo na [email protected] w celu rozwiązania problemu.
Pozdrawiam serdecznie
It smashed into the heatbed so hard it bent downwards. And refused to come back up until I went to live Z adjust.
The sensor is/was working perfectly but I was shocked at how hard it came down and had no idea it was bending the heatbed about 3mm downwards.
Shouldn't it stop?
Sounds like you did not follow the steps in the Pre-flight check and set the distance of the PINDA;) There is not the same crash detection on the Z-axis, but the printer is not damaged by it. You can simply turn it off and turn the z-rods manually.
When in doubt, contact support with pictures of your assembly and a video of the calibration failing. When it fails can be very telling.
It is not an option in the LCD-menu. That is why we provide two different pre compiled versions of the fw. We can unfortunately not advise on how to edit and compile firmware source code.