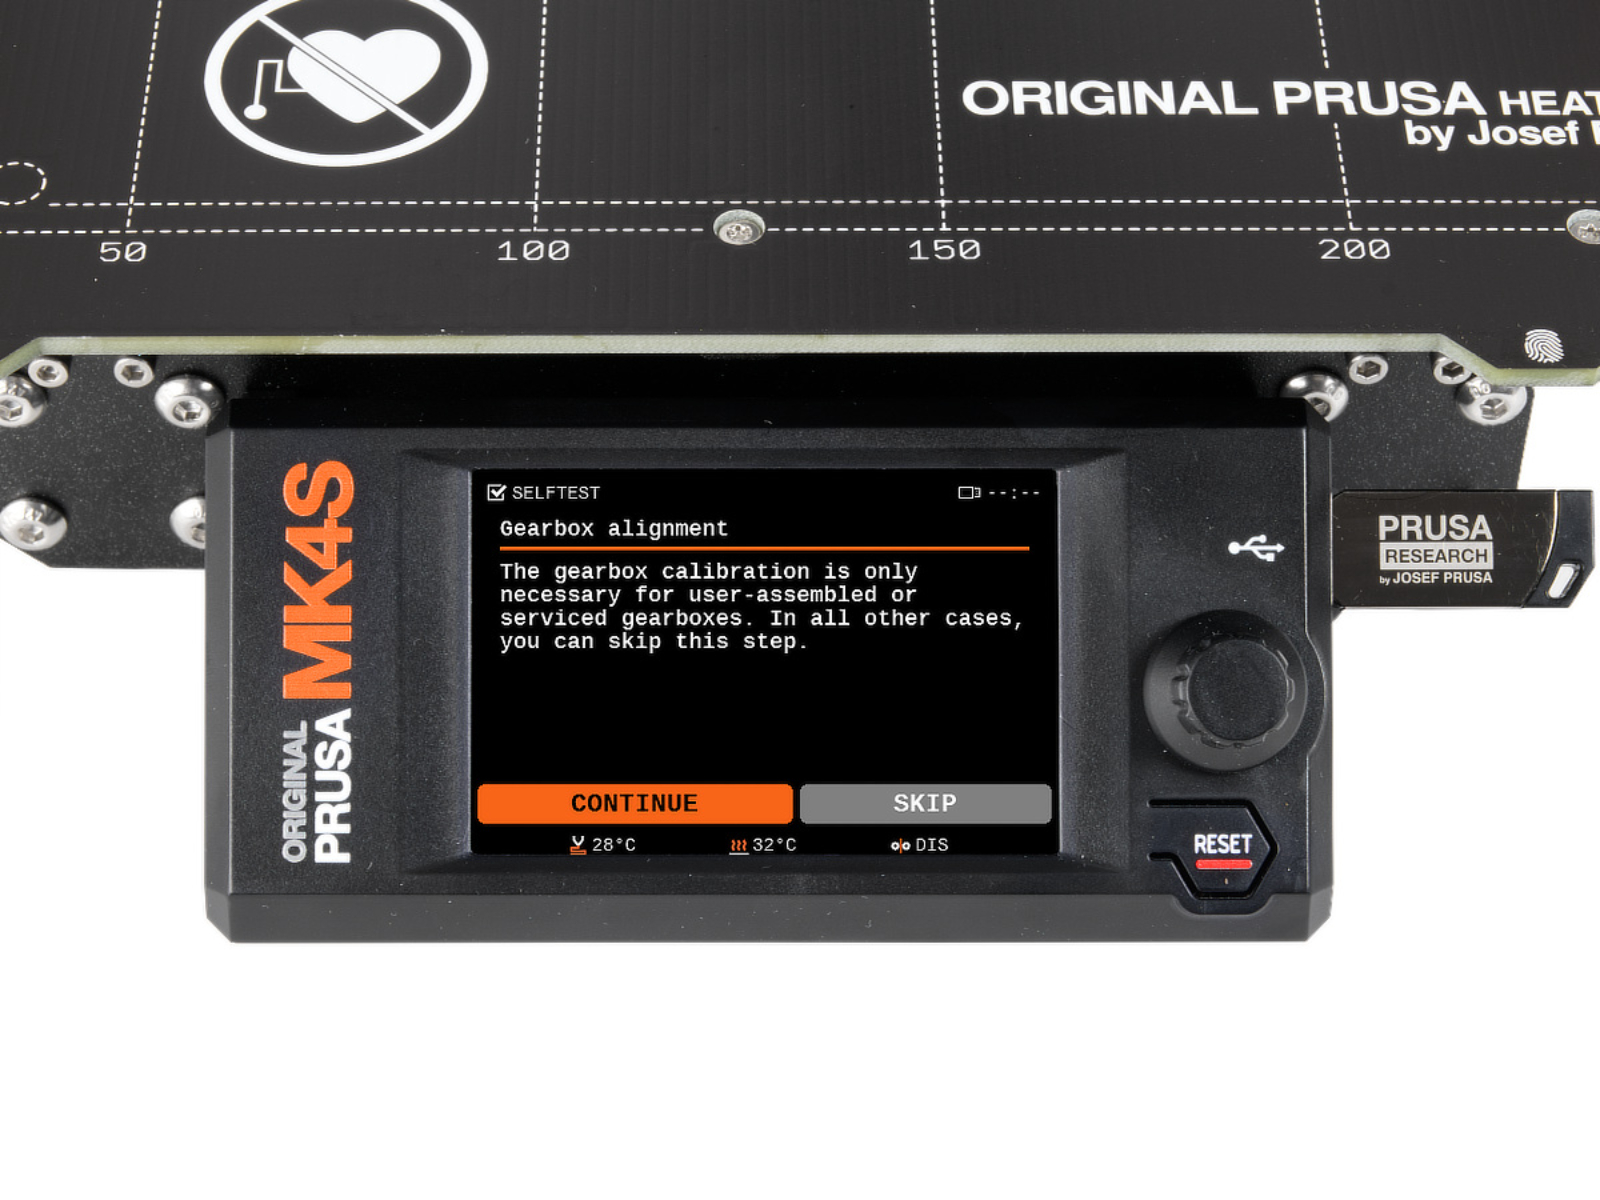
On the Prusa CORE One L, CORE One, Original Prusa MK4/S, MK3.9/S, and XL, a gearbox alignment is necessary for user-assembled or serviced gearboxes. This procedure is part of the Selftest or can be initiated from LCD menu -> Control -> Calibrations & tests -> Gears Calibration.
Once the procedure is initiated, the printer will prompt for the calibration to start. Press "Continue".
The CORE One L and XL do not need to go through the gear calibration on arrival, as it is pre-assembled, only if the extruder is disassembled and reassembled. The process is the same as for the CORE One and MK4/S, MK3.9/S pictured below.
 |  |
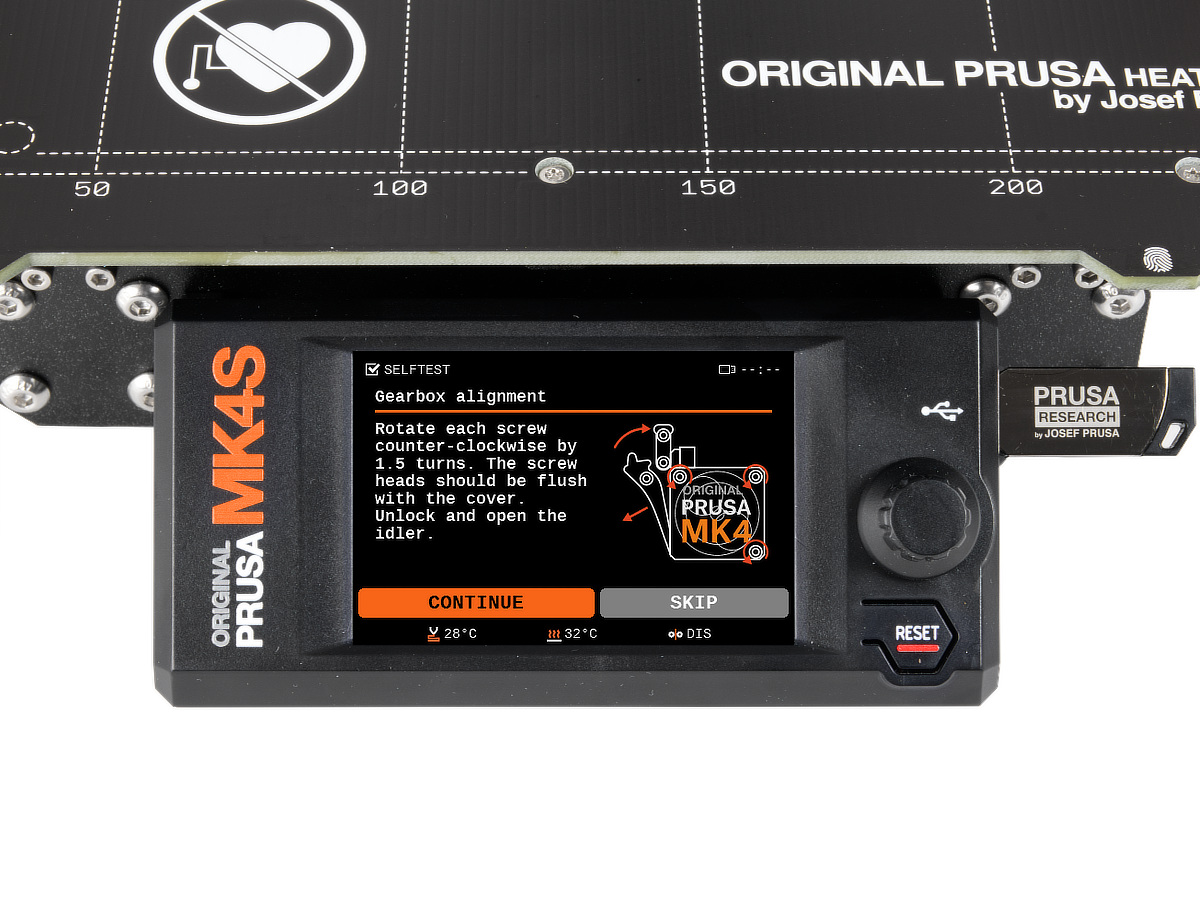
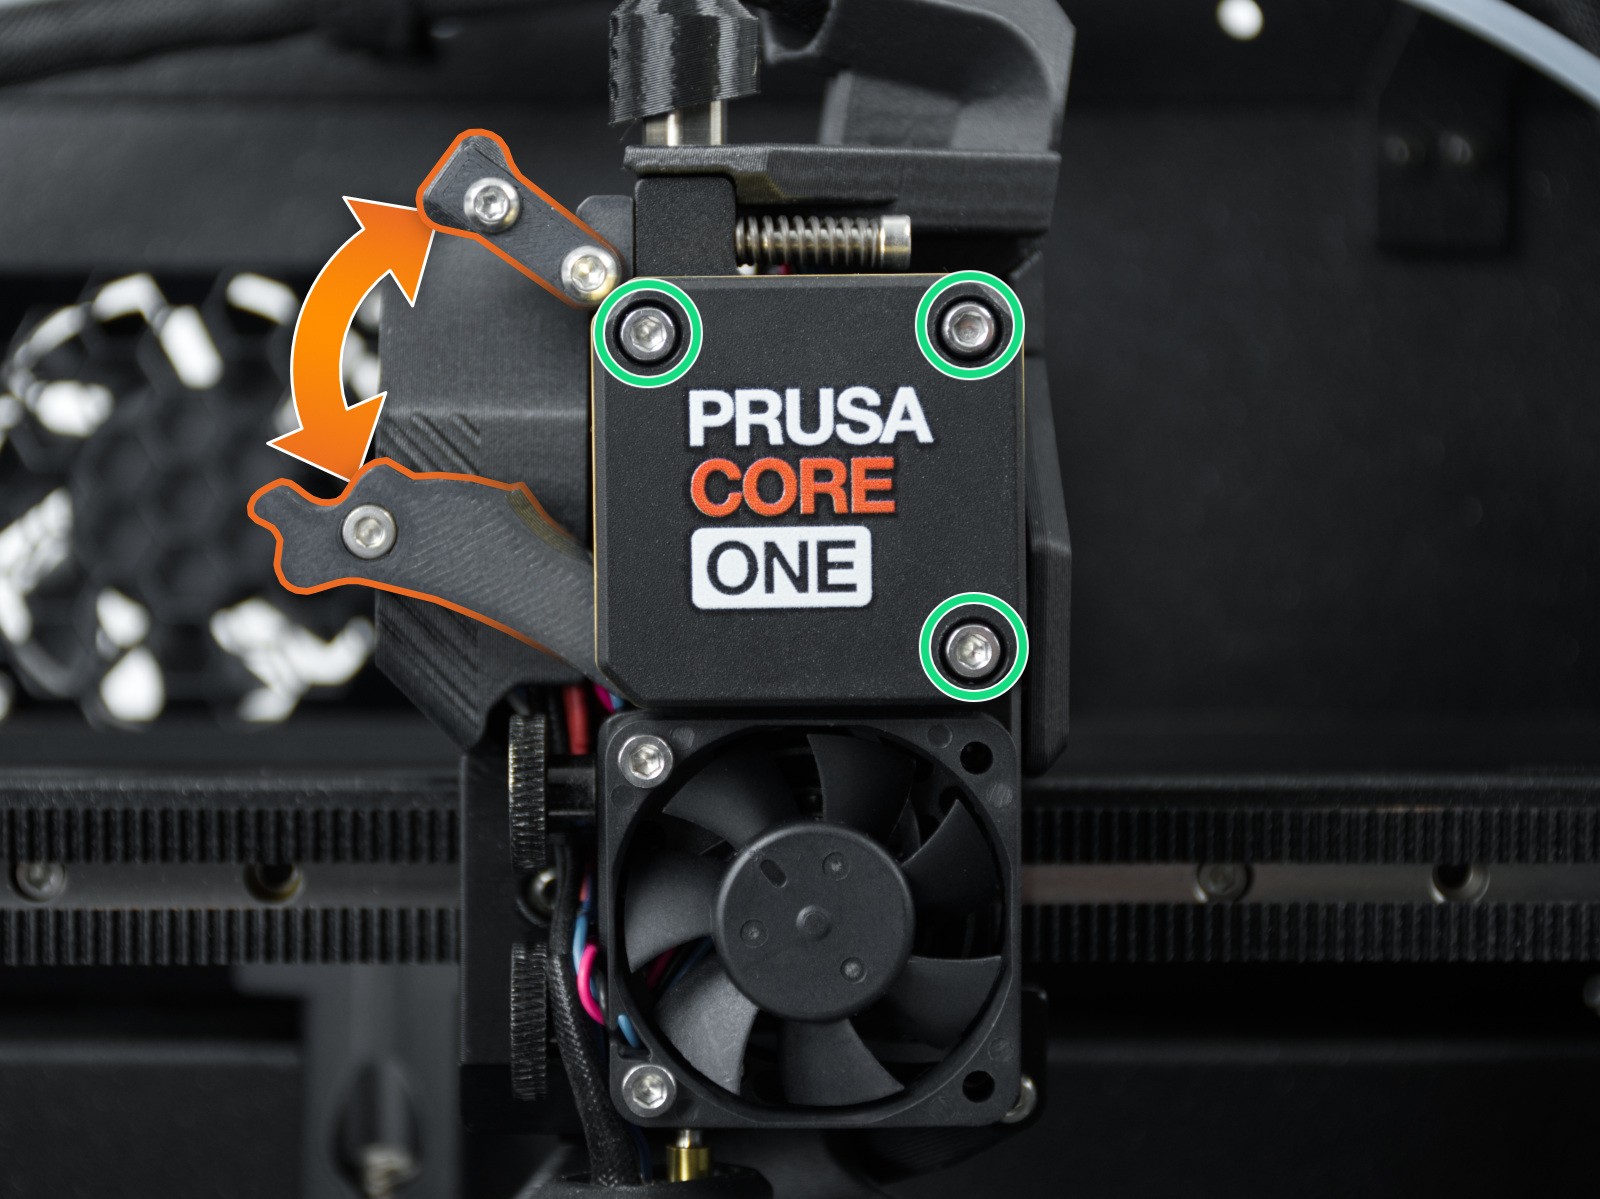
Slightly loosen the three bolts on the gearbox cover, by one turn and a half, then unlock and open the idler. When done, press "Continue".
 |  |
 | 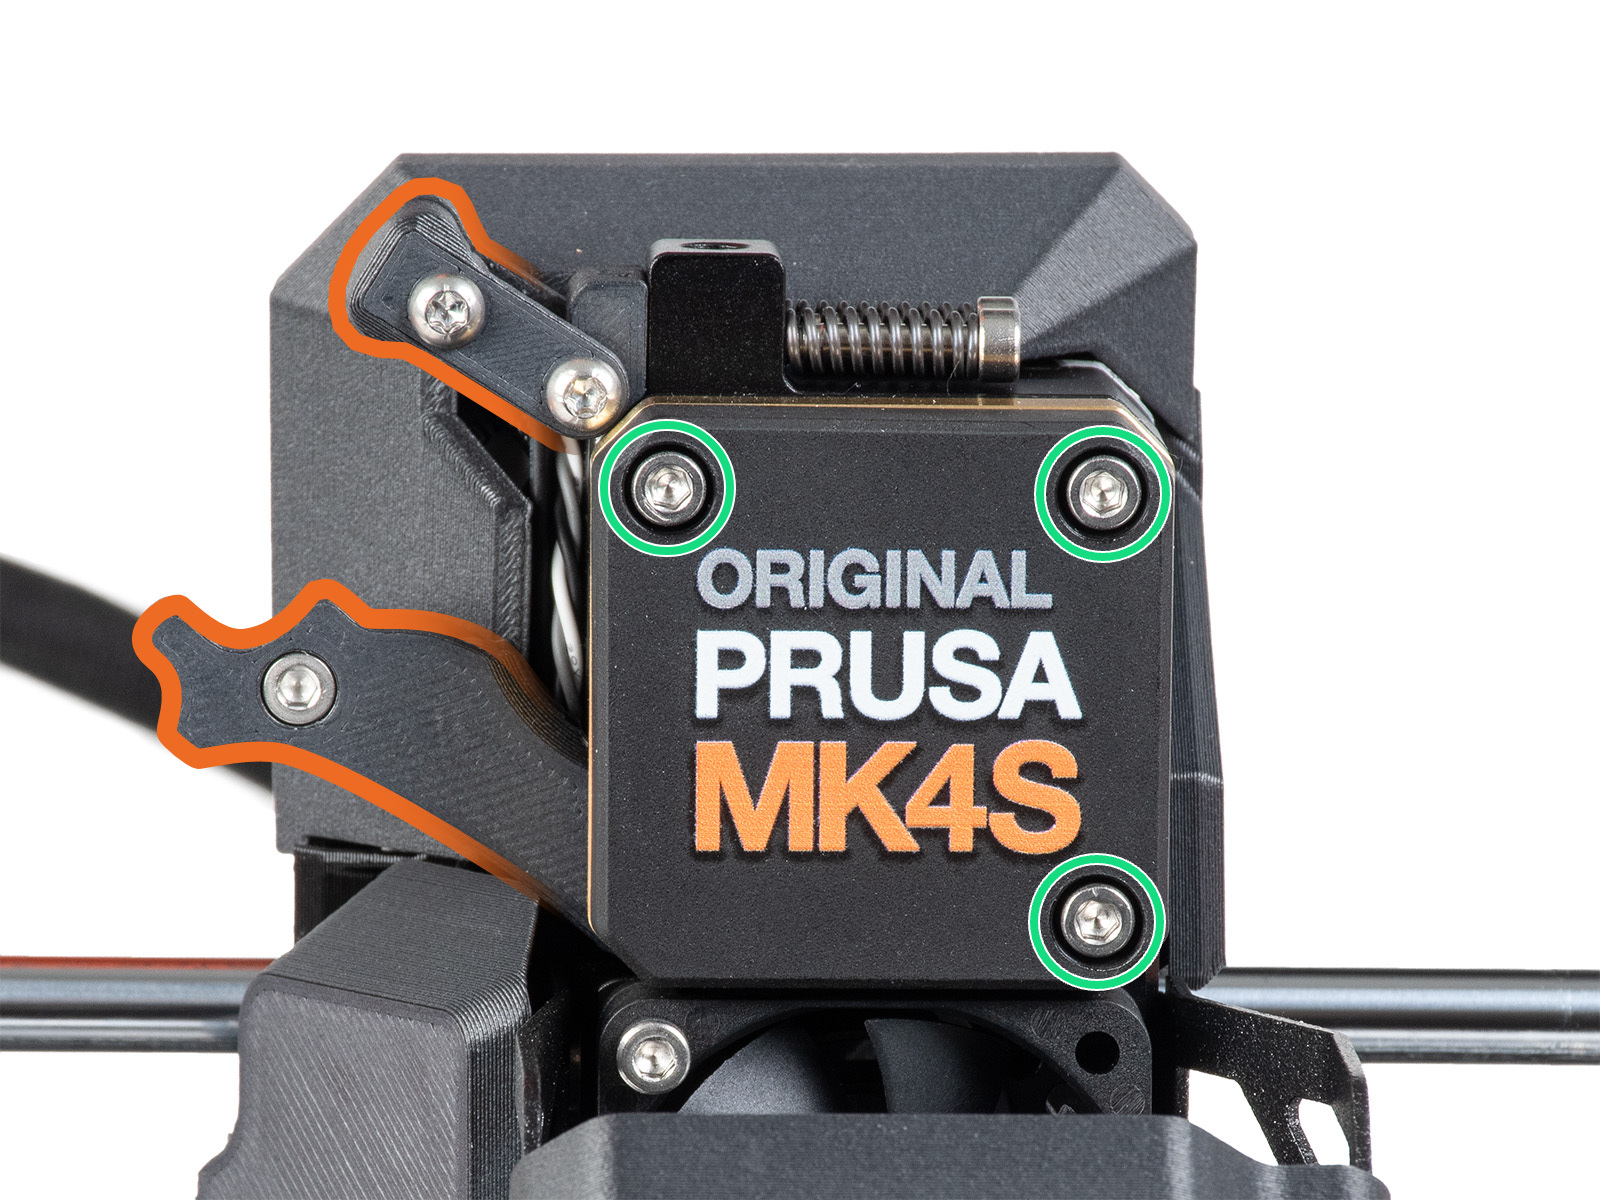 |
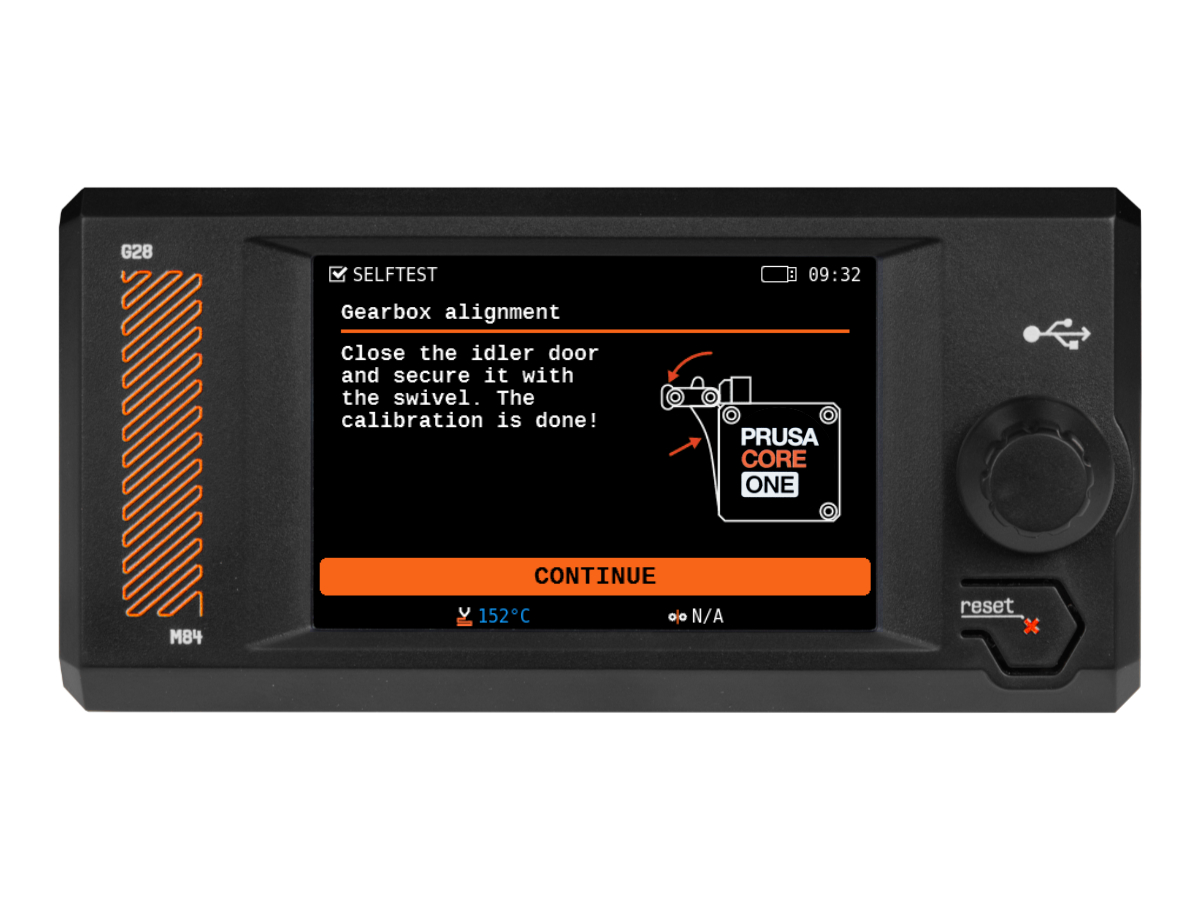
The printer will go through the automatic gearbox alignment. This process can’t be seen from the outside. Once prompted, tighten the three screws in the pattern indicated on the screen, and close the idler.
6 comments
There is no gearbox alignment option for XL at the moment.
One thing that isn't immediately obvious is that these screws are the only thing that fix the E-motor and gearbox assembly in space, relative to the extruder carriage and nozzle, so if there is any play in it, it could put uneven pressure on the filament, giving small variations in the extrusion.
I agree with the others about the directions on screen being contradictory when loosening them as well. Does it mean the top of the screw head should be flush with the cover plate, or the bottom? If it's the top, that's not possible, since unscrewing them 1.5 turns makes it poke out more than that (about half a millimeter, maybe). And making the bottom of the head flush would require significantly more turns. What I did was to follow the "1.5 turns" instruction and trust that. Maybe they mean you should pull out the (now loose) cover to make it flush with the screw heads?
In any case, after tightening them down again, the top of the screw heads are slightly below the surface of the cover. Not much, but half a millimeter at most.