English
Login

Homing error X

#26304 (MK4S) #13304 (MK4) #21304 (MK3.9) #23304 (MK3.5)

Relevant for

MK4
MK3.9
MK3.5
MK4S
17 comments
Article is also available in following languages
English
Čeština
Polski
Deutsch
Français
Español
Italiano
日本語

What happened?

The Original Prusa MK4S/MK4/MK3.9/MK3.5 displays the message: "Failed to home the extruder in X-axis, make sure there is no obstacle on X-axis".

Error name: Homing error X

Error code: #26304 (MK4S) #13304 (MK4) #21304 (MK3.9) #23304 (MK3.5)

The error is most likely caused by a bad movement of the print head along the X-axis. 

How to fix it? 

X-axis movement

Make sure there are no obstructions in the path of the X-axis. For example, there might be a piece of filament stuck around the belt, or on a smooth rod, from a previous print.

X-axis belt tension

Check the X-axis belt tension and adjust it, following our dedicated article on belt adjustment.

X-axis motor pulley

The X-axis motor pulley is attached to the X-axis motor shaft. The motor shaft has one flat side. The pulley has two set screws: ensure that one of the two set screws is aligned with the flat part of the motor shaft. Make sure the other set screw is also tightened, not excessively, and that there is a small space between the pulley and the motor. 

X-carriage assembly

An over-tightened or loose X-carriage and X-carriage-clip assembly might cause the error. If none of the previous steps resolved the issue, refer to our assembly manual to see the assembly of the X-carriage and X-carriage-clip.
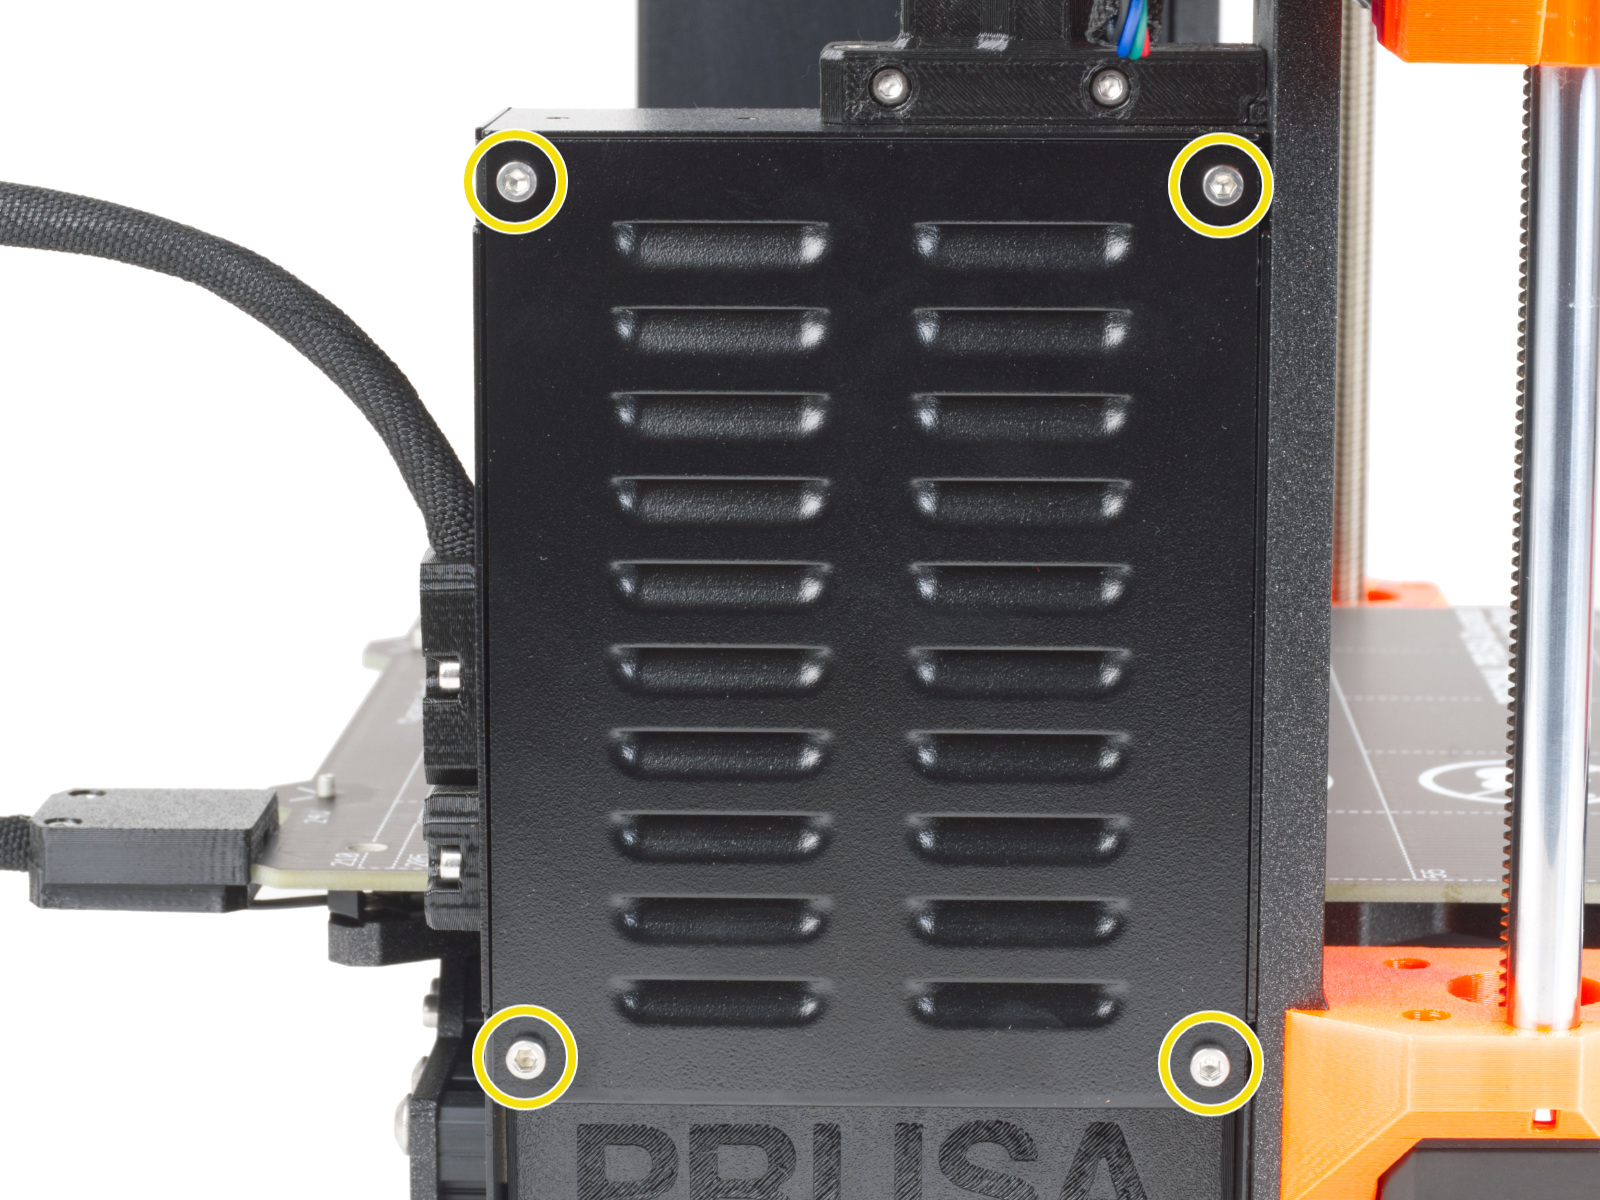
xBuddy connection

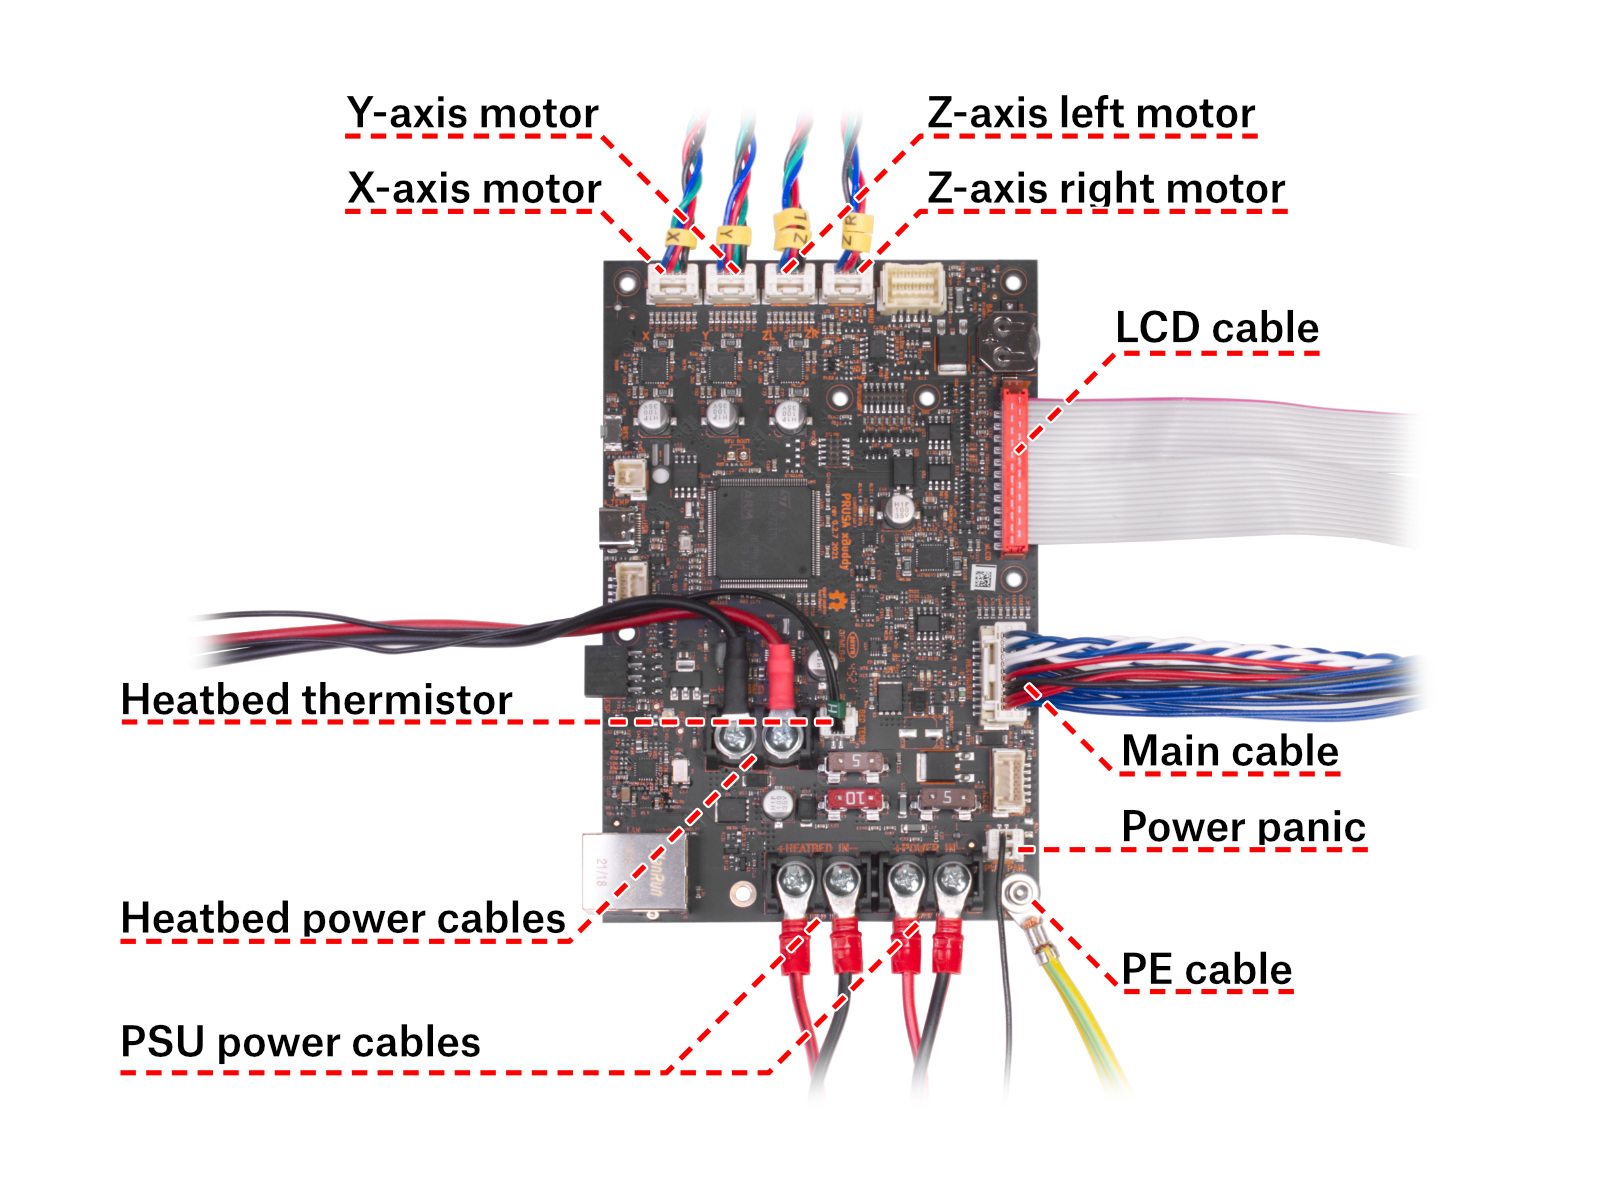
Check the motor connections on the board. For that, open the four screws that hold the xBuddy box cover. Make sure that the motor connector is not loose, and that the X-axis motor connector has not been accidentally switched with the Y-axis motor or any other motor.


4 comments

Log in  to post a comment
GregoryHuey
I am having a problem with calibration in the XY direction.Starting from powered-off state, I turn on the printer, and it tells me I need to complete a "Calibration & Tests" before I do any prints (this is expected due to prior calibration fails). I acknowledge and then go to Control --> Calibration & Tests --> 2 XY Axis Test. It does a Z-axis calibration, which seems to be successful. It then tries (and eventually fails) the X-axis calibration. In the X-axis calibration, it first repeatedly bumps the print head against the left side of its range (around 0mm X). Then it begins to move the head a bit to the right (a few cm from the left side of its range). Then it move the print head all the way to the right end of its range, and the displayed X-value increases to around 212mm, but then it suddenly changes back to near-zero as the print head is on the right. So, then the head is on the right side of its X range, but the X-value is reading close to 0mm. It proceeds to bump the head against the right-hand side for a while, then apparently decides that it has failed the X calibration test. It then conducts and passes the Y calibration test.What is going on? Initially the system displays a reasonably large and positive X-value as it moves the head to the right. But, then it just abruptly changes to near-zero. So, the head is all the way to the right - repeatedly bumping against the right-hand side of its range - and the display shows an X-value close to zero - as if the head were on the other side. What causes this? The printer is almost new. I purchased it a few weeks ago, but have not been using it until the day before yesterday. That is, I took it out of the box and set it up Saturday. The calibration went fine then. Over Saturday and Sunday I did several prints (maybe 4 or 5). Then, Sunday night, it produced an error as it prepared for another print, so I power-cycled and did this calibration test. There does not appear to be any debris on the belt or rail, and the belt tension seems fine. Today is Monday.I recorded a video that shows this entire test - from the power-on until the test reports a fail. I will post it here if there is a way to do so.
GregoryHuey
Here is a google-drive link to the video of the calibration test that keeps failing.https://drive.google.com/file/d/1wQDtCR9nZWcYA1l2GpQXB-GnfyHCUwUL/view?usp=drive_web
Jan Kratochvíl

Hello. There might be a bad installation on the Loveboard side cover, which could cause the printer to have the wrong range. But please contact our support team for help.

GregoryHuey
Hello,I sent email to info@prusa3d.com with all of the above info, including a link to the video of the calibration test failing, several days ago. However, I have not heard back from them. I should add that this is a factory-assembled printer (not a kit), and it did pass the calibration test only a day prior with no issues. I opened the box containing the primary electronics board and verified that the X-axis motor cable was connected correctly.When you say "Loveboard side cover", do you mean the cover of the box that houses the primary electronics board? I did already remove that to check the cable connection, and replaced it - I did not see anything that appeared to be an issue.It seems to me that the system is somehow detecting as if it was bumping against the left-hand side of the printer X-axis range when it is not - even when it is on the righthand side. So, how does the printer electronics detect when it bumps against the left-hand side of the X-range ?
Jan Kratochvíl

Try to contact our support team via live chat on our website, as this is a better way to get help. My first thought was for something on the sides that could change the expected range of the X-axis.

midnight00
Unsure if this is even close to the "official way" of solving this problem, but here is how I got it solved, maybe works for you as well.Using "moving axis" dialog, set the X to go to 0 and Y to 0 as well (for now disregard where they physically are; important is to have the set values to zero); then "Disable Motors" and manually push the printing-head all the way to the left; push as well the printing-bed all the way back. Then perform a "XY calibration" and/or "Auto home".
It shall solve the issue... 
jshank
This worked for me. Thanks!
Stoyan Haralampiev
same here,thanks m8!
Wolfgang Keller
-
lmzor
first issue got out of the box, looks like bad experience, but seems to be gone after firmware upgrade from 5.0.1 to 5.1.2, first print started, now wait & see.
Phil Stenger
I went through all these steps and am still getting this error. The XCarriage goes all the way to right and repeatedly hits the side for about 5 seconds then the software crashes and reopens to this error. Any additional ideas would be greatly appreciated. It's as though it is not recognizing the x carriage is all the way to the right even though it is.
Stridsbror
I have the exact same problem. On move axis it says -1mm as it should when it's all the way to the left, but the problem is that it's on the opposite end.
Stridsbror
I lubed the rods with some weapons oil, now it works smooth 👌 I use vesconite bearings btw
Shane, Prusa Product department

For cases like this it would be best to contact support by pressing the Chat Now button in the lower right corner or via email at info@prusa3d.com so that way you can share photos and see exactly what you are seeing 

Shane, Prusa Product department

For cases like this it would be best to contact support by pressing the Chat Now button in the lower right corner or via email at info@prusa3d.com so that way you can share photos and see exactly what you are seeing 

yeoldebrian
I'm having the same problem. Did you find a solution yet? 
Rob wood
Afternoon, did you find a solution to this?