What happened?
The printer is showing the message "Hotend preheat error: Check the print head heater and thermistor wiring for potential damage"
Error name: Hotend preheat error
Error code: #31202 (CORE One) #35202 (CORE One L) #26202 (MK4S) #13202 (MK4) #27202 (MK3.9S) #21202 (MK3.9)
This error is shown when the printer can't heat the nozzle more than 2 ºC for 20 seconds. The printer starts a safety feature that instantly stops the heating process and displays the message on the screen. The printer then waits for the user to inspect all parts and if needed fix the issue.
How to fix it?
Make sure that the ambient temperature where the printer is is stable, and above 18 ºC.
This error can be caused by any damage to the hotend heater or the hotend thermistor.
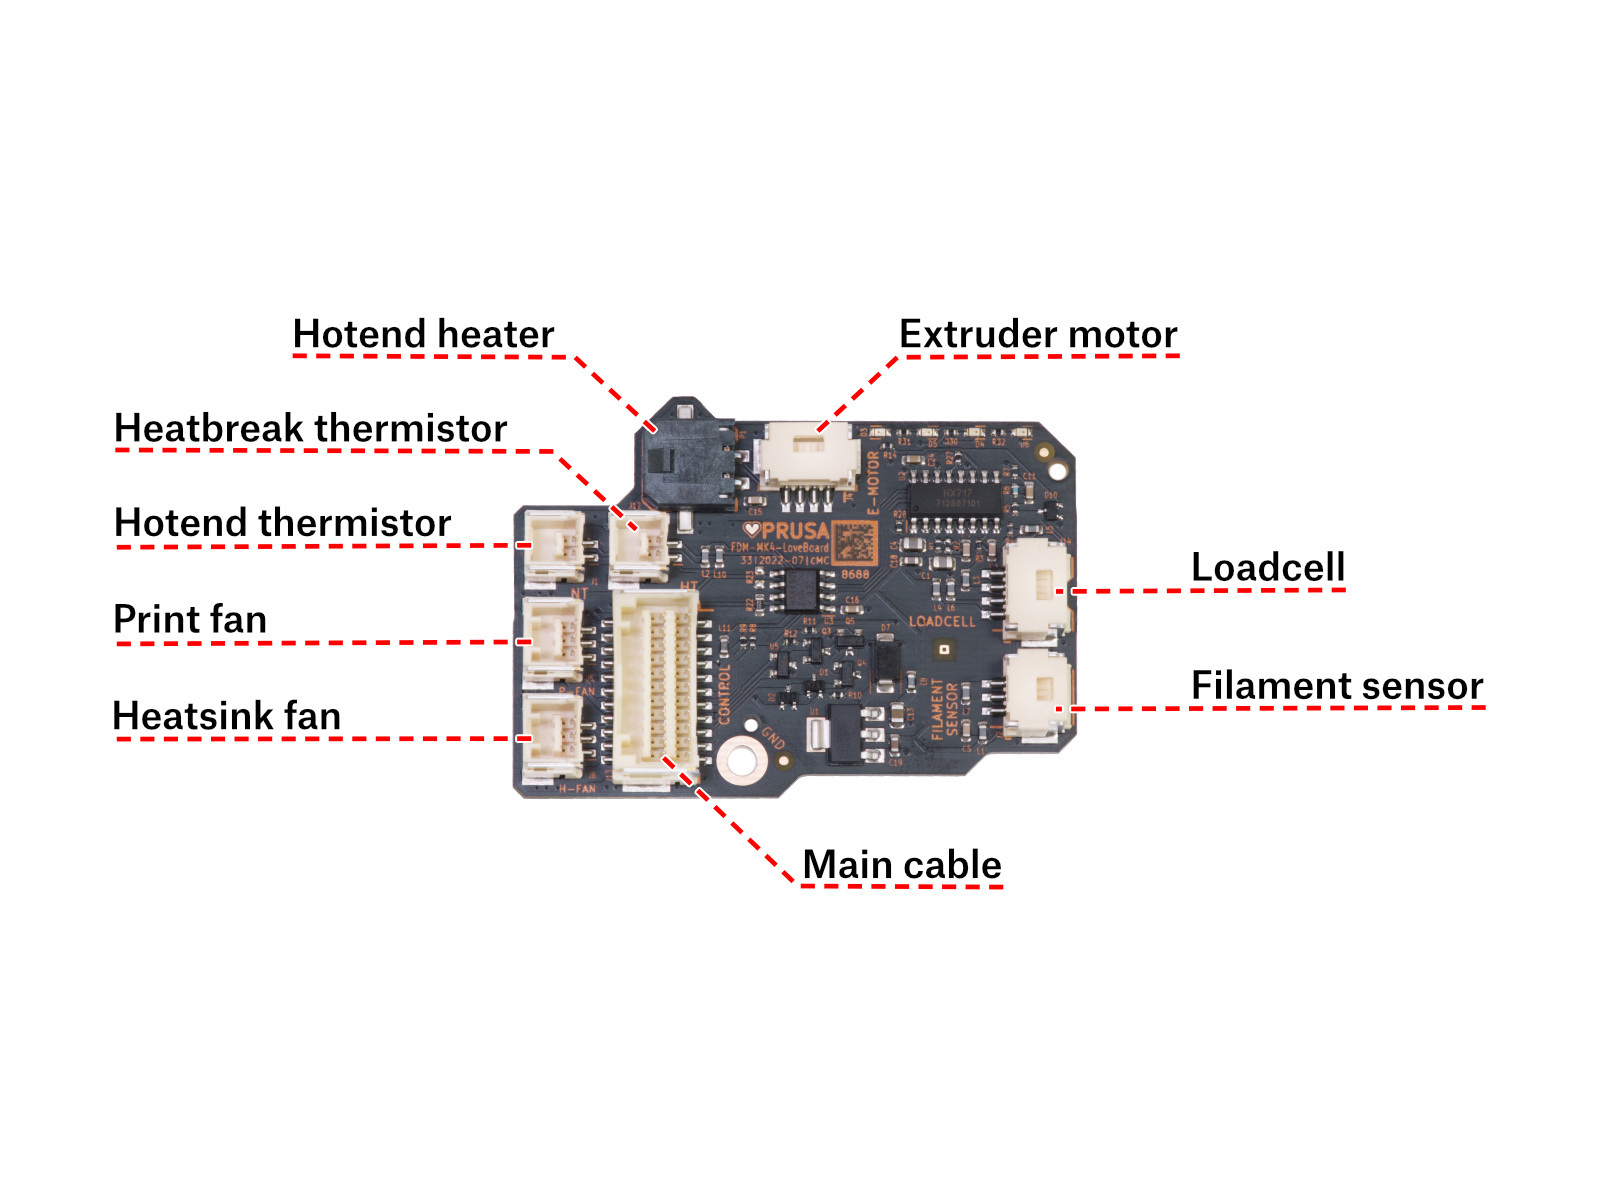
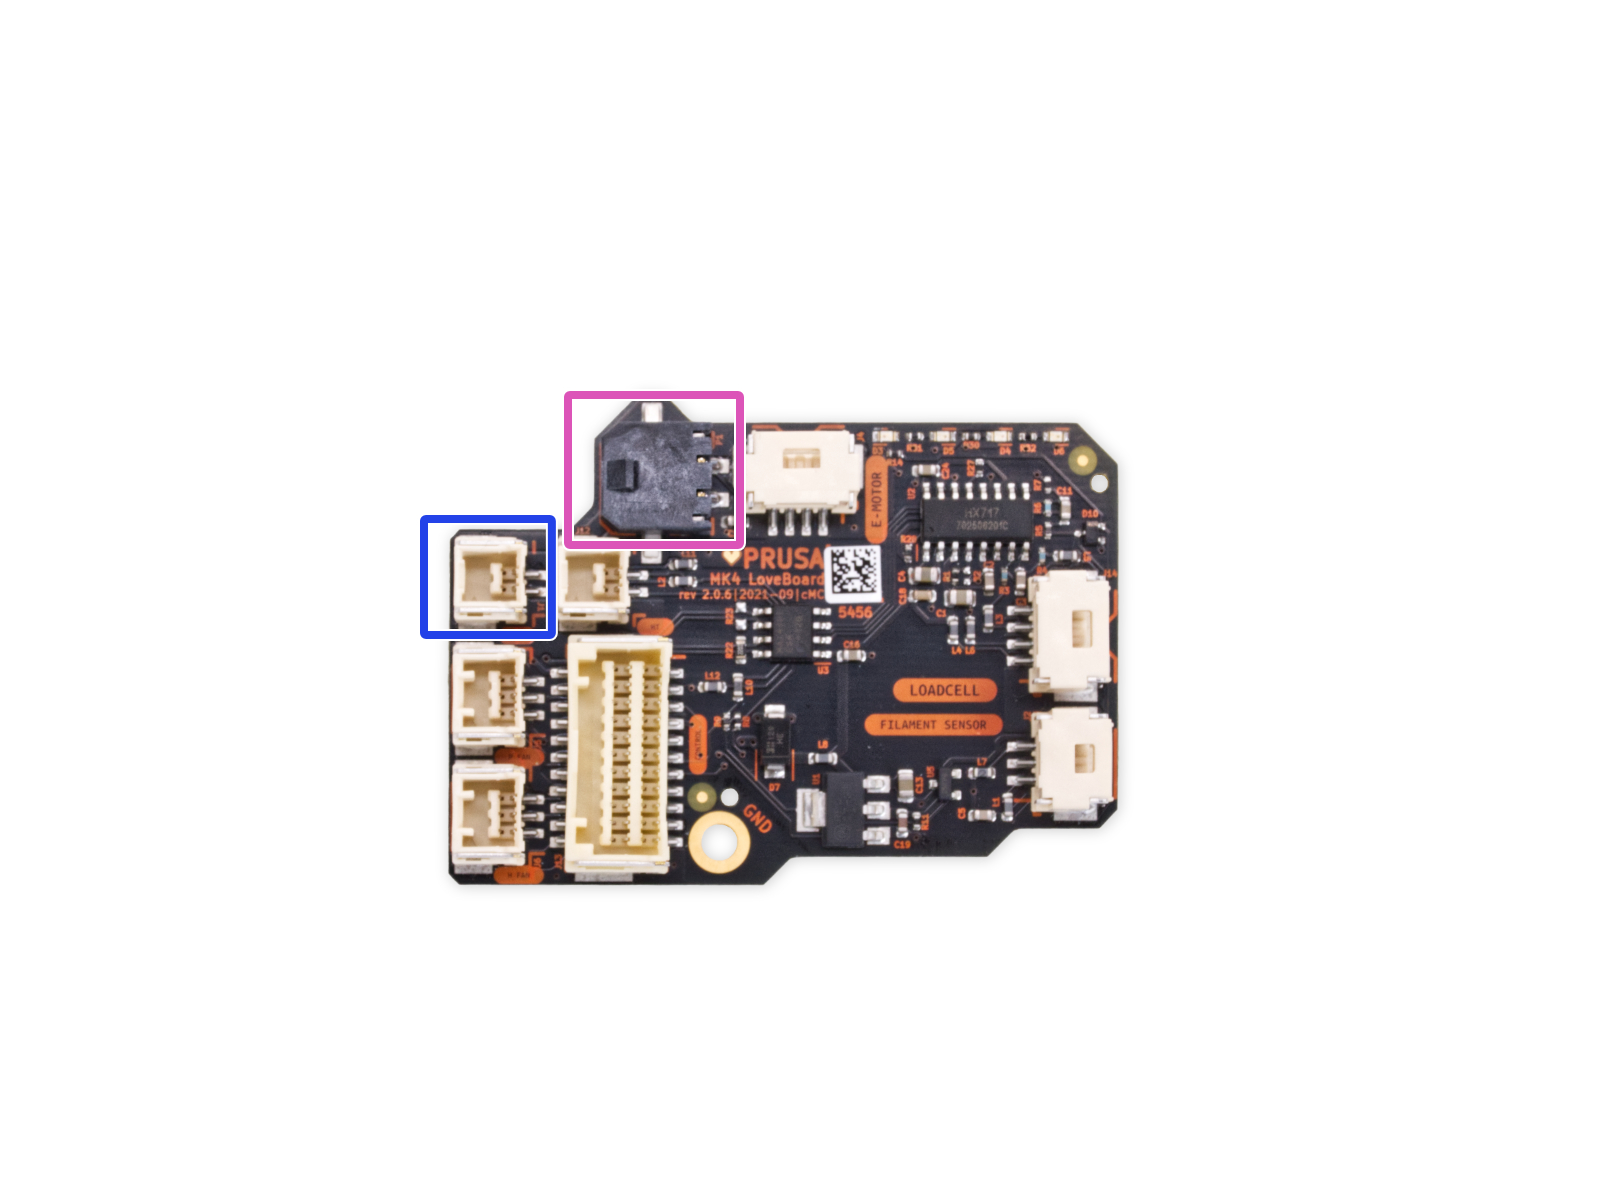
Access the LoveBoard and check the heater and thermistor cables. Make sure that they are connected correctly and that there is no damage along their length.
 |  |
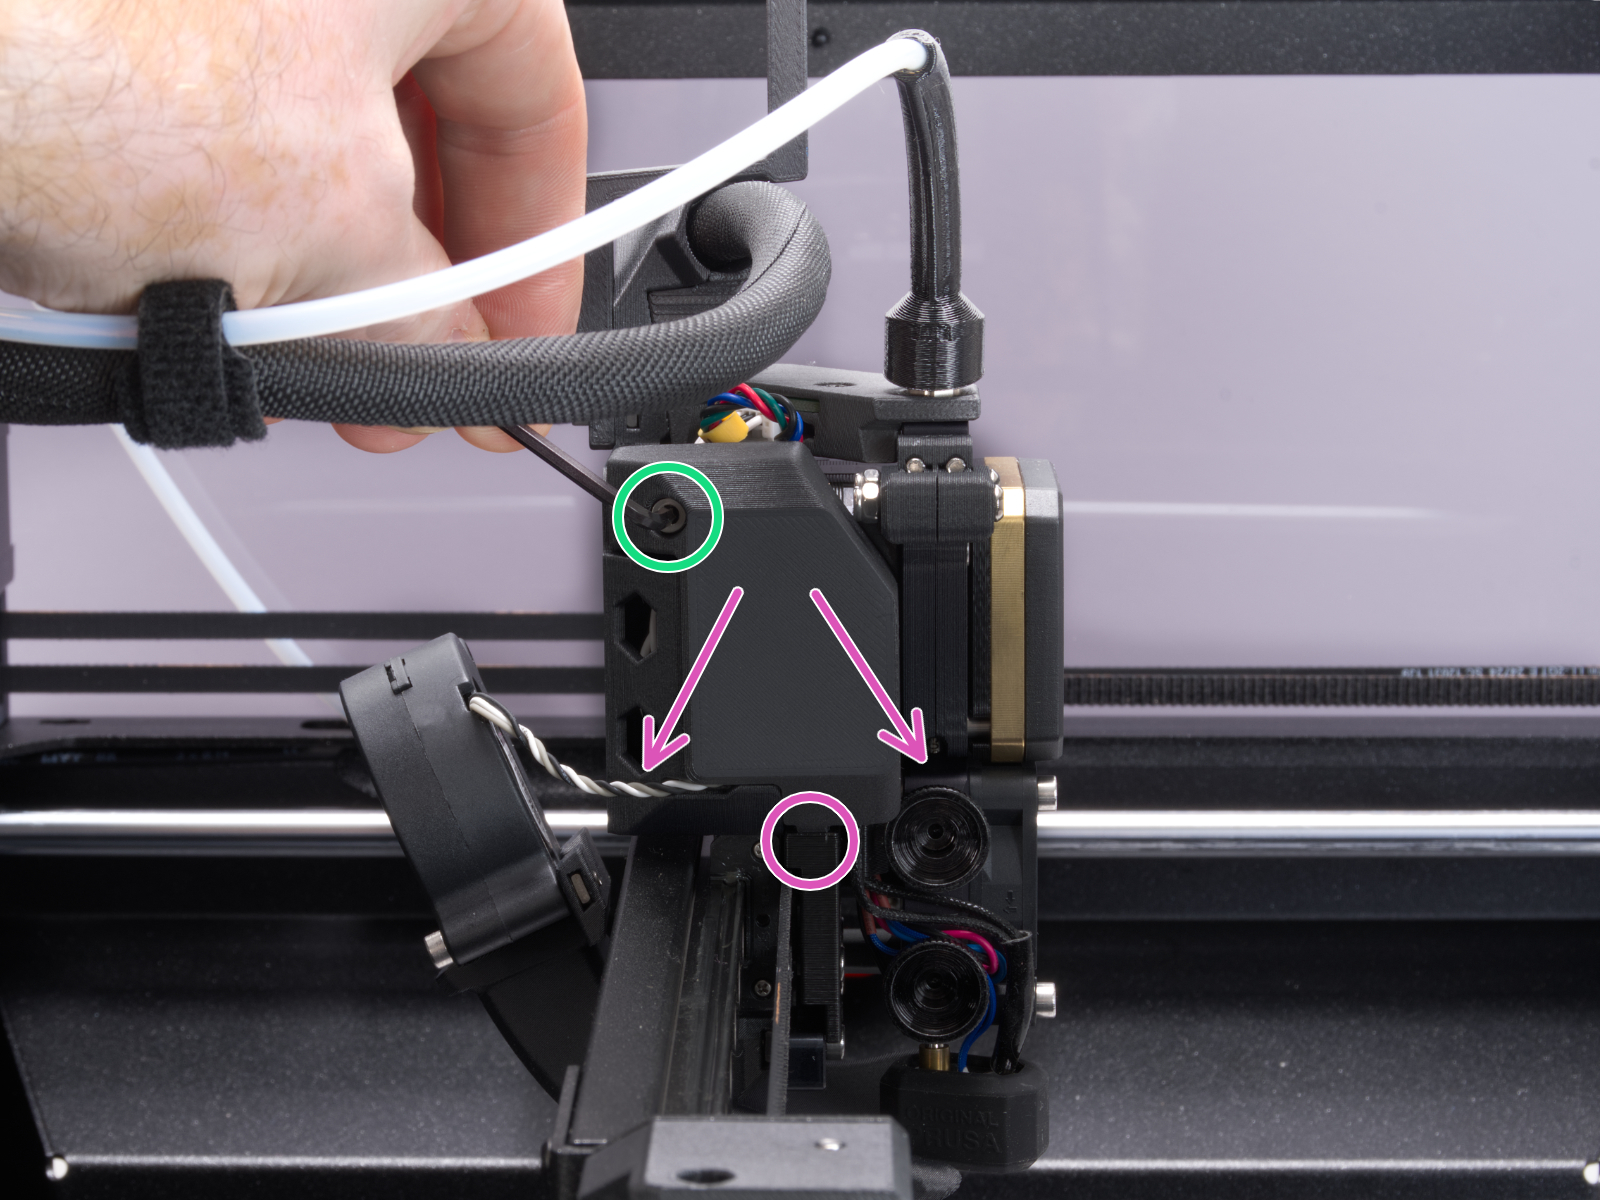
How to access the LoveBoard left side - CORE One
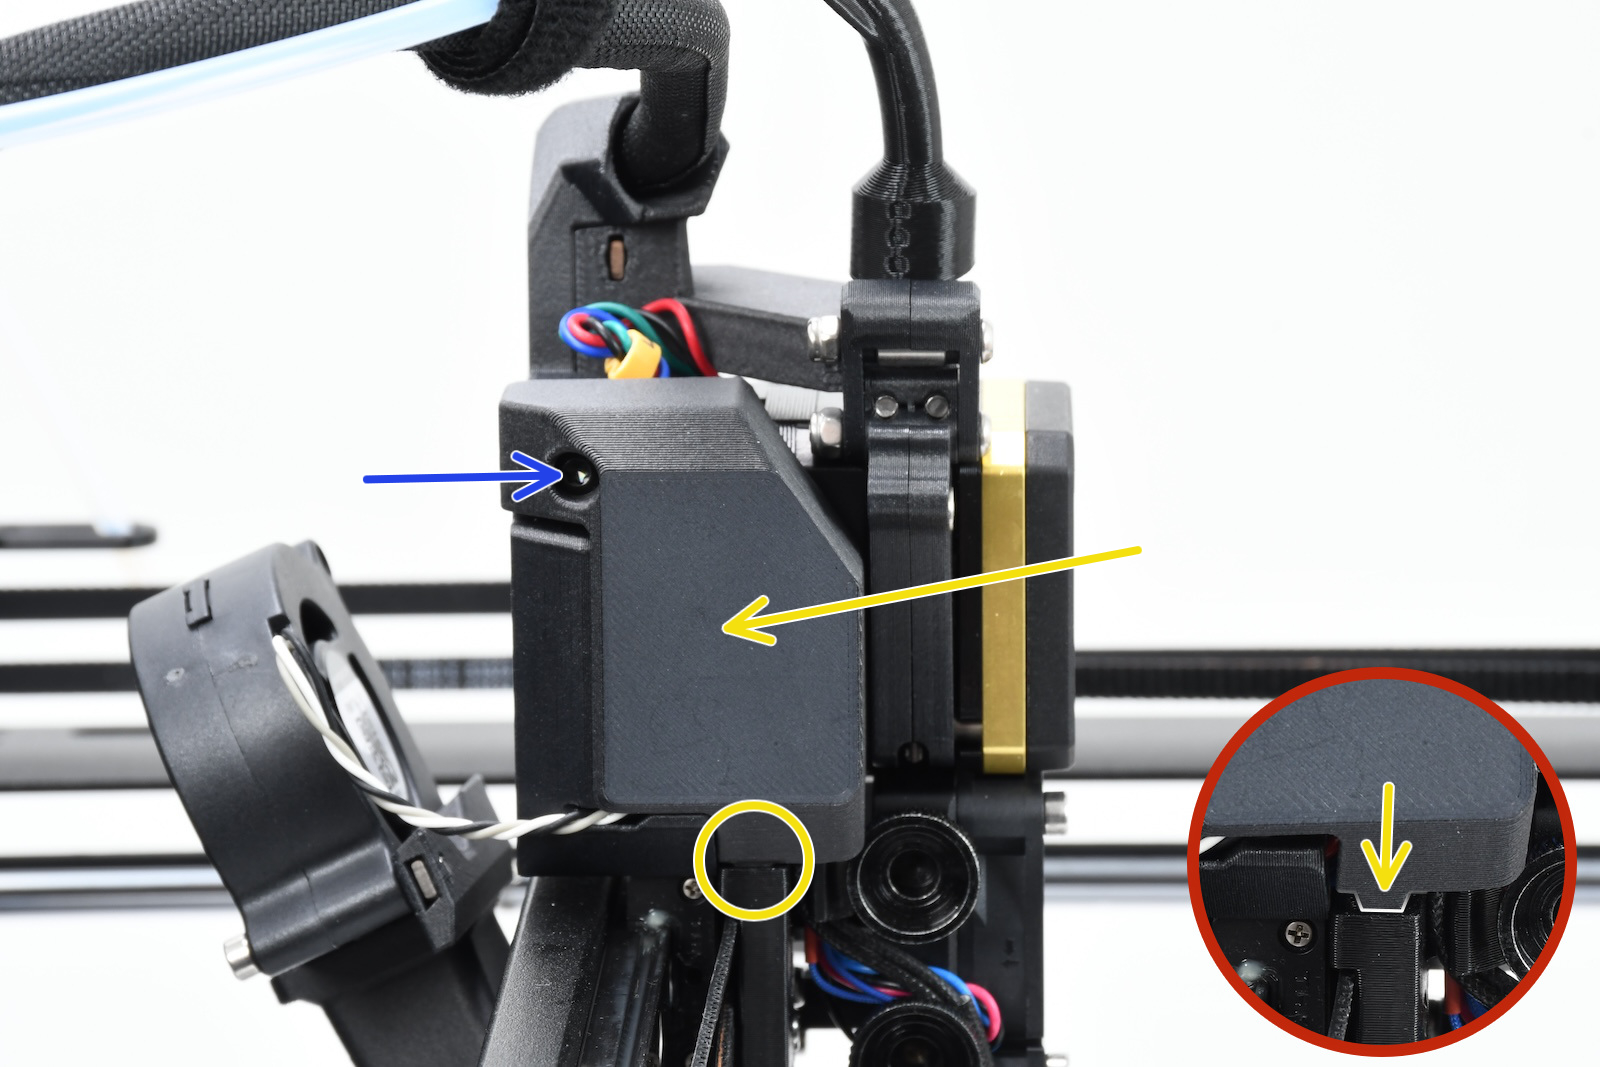
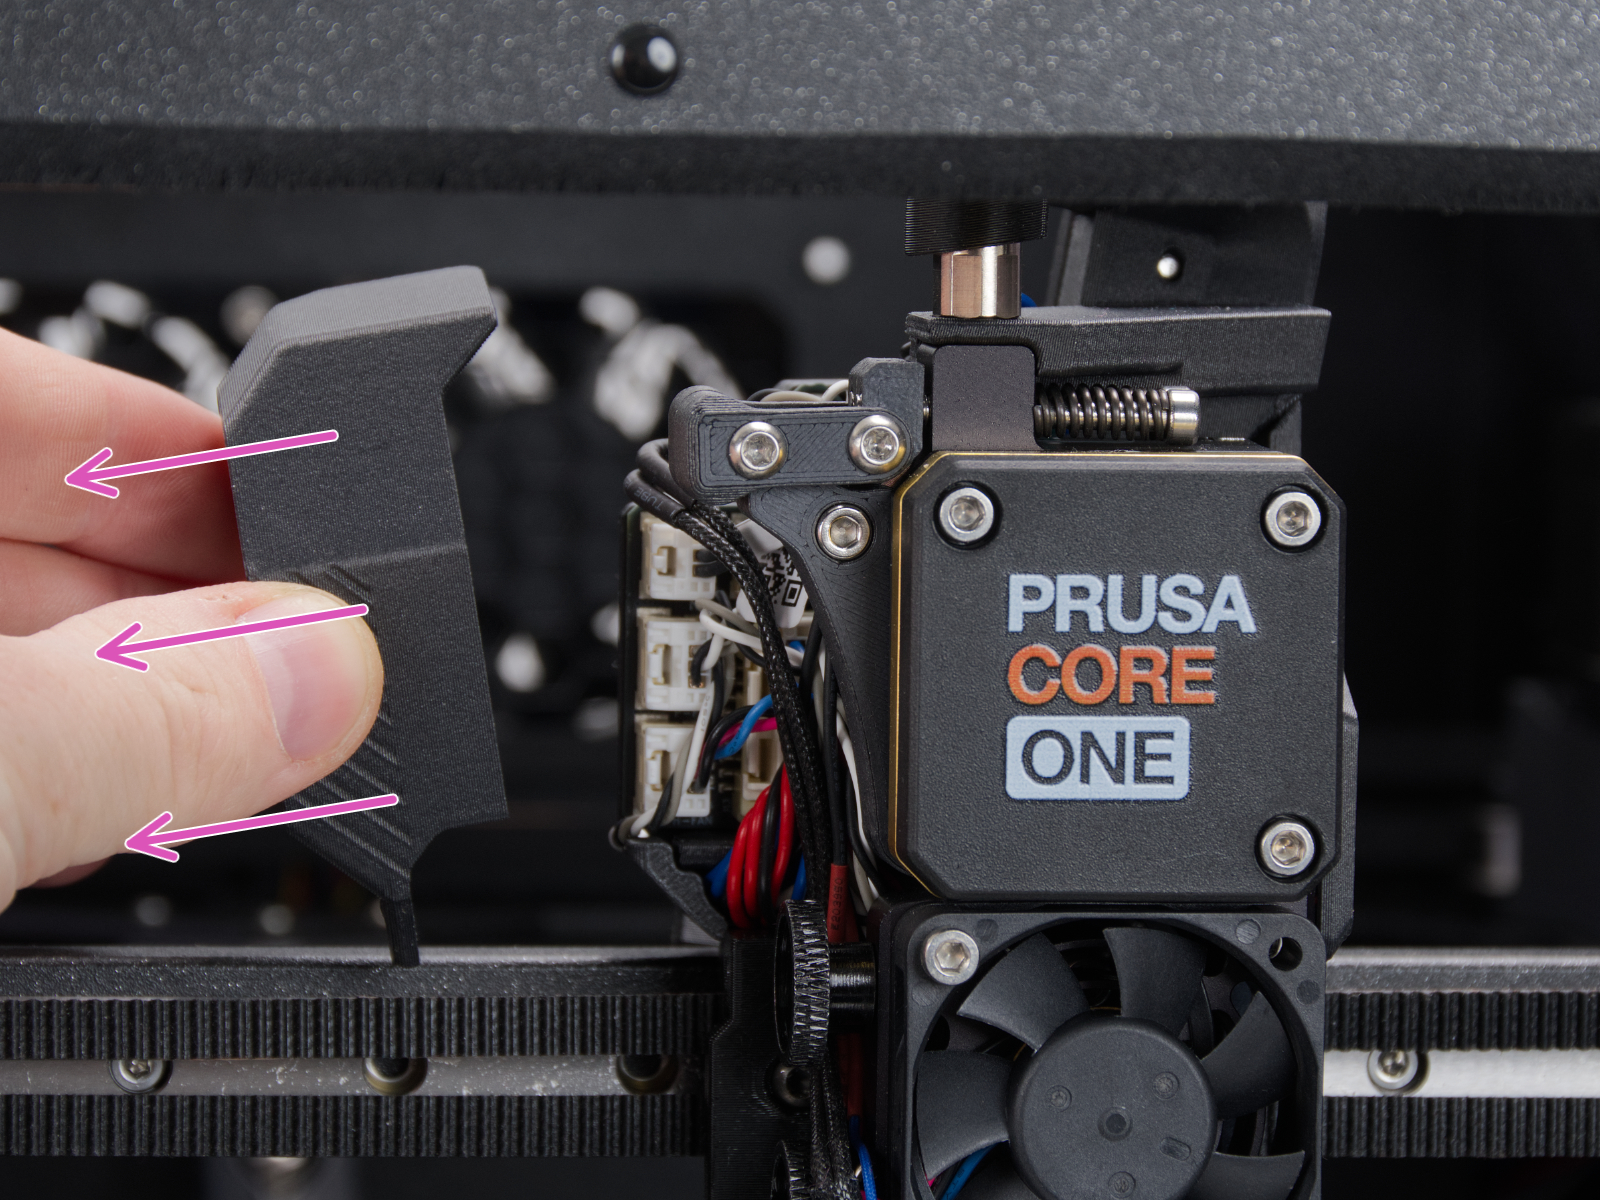
Using a T10 Torx key, loosen and remove one M3x6rT bolt. Then, release the side cover.
 |  |
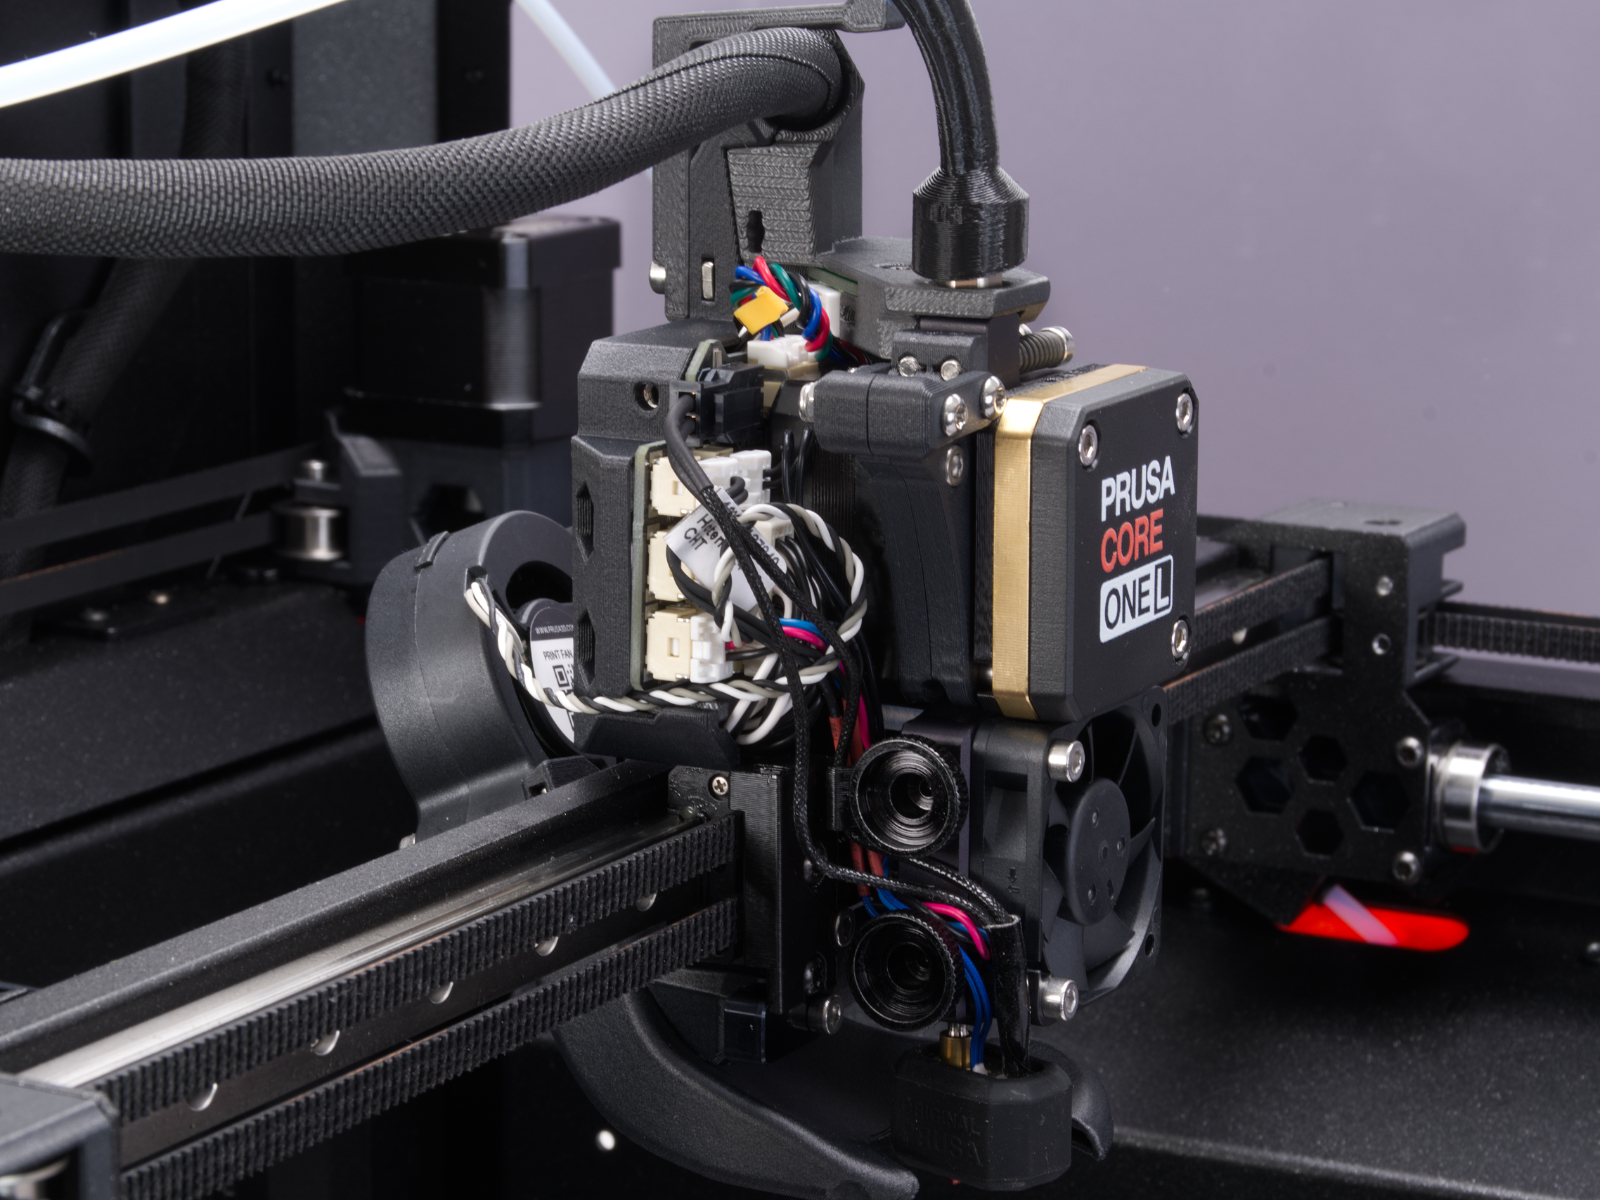
How to access the LoveBoard left side - CORE One L
Using a 2.5mm Allen key, remove the M3x10 screw on top of the cover to release it.
 |  |
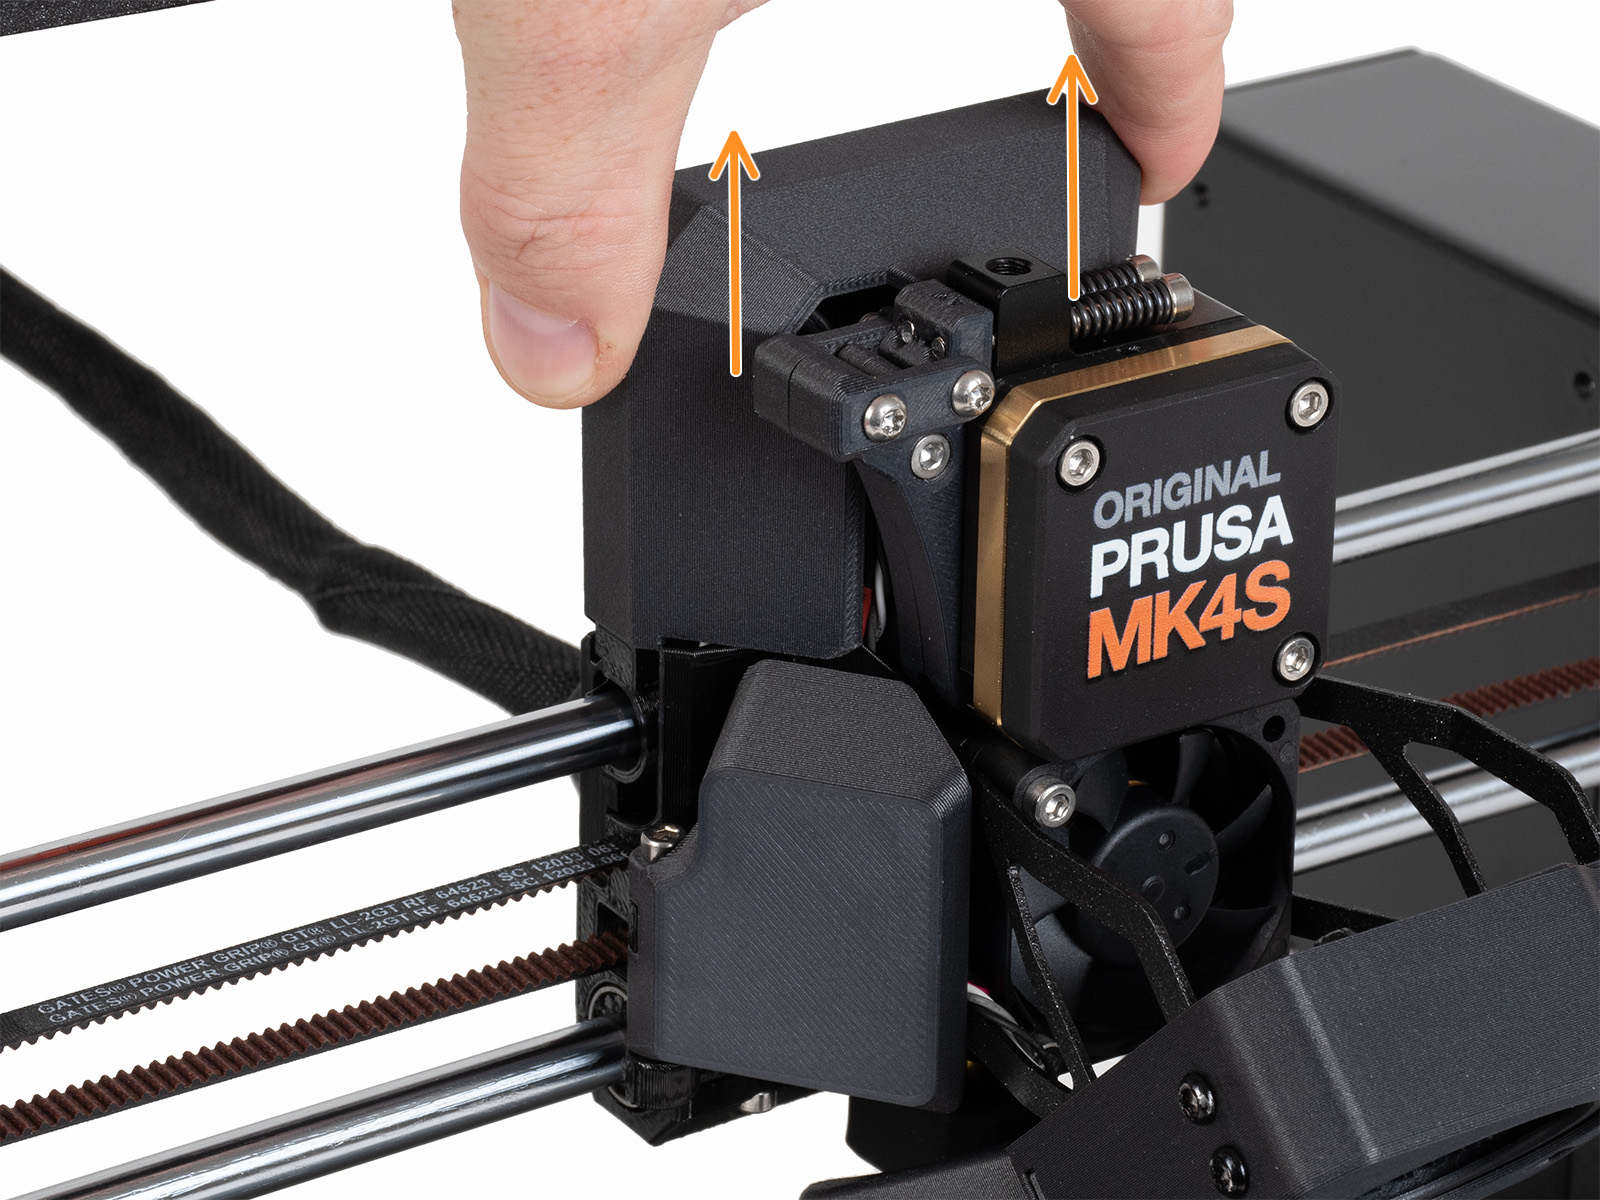
How to access the LoveBoard left side - MK4/S, MK3.9/S
Slide the LoveBoard cover upward to remove it from the Nextruder
On the xBuddy board, check if the fuse that protects the extruder is not damaged.
Make sure that the Loveboard main cable is correctly connected to the xBuddy board, and not pinched.
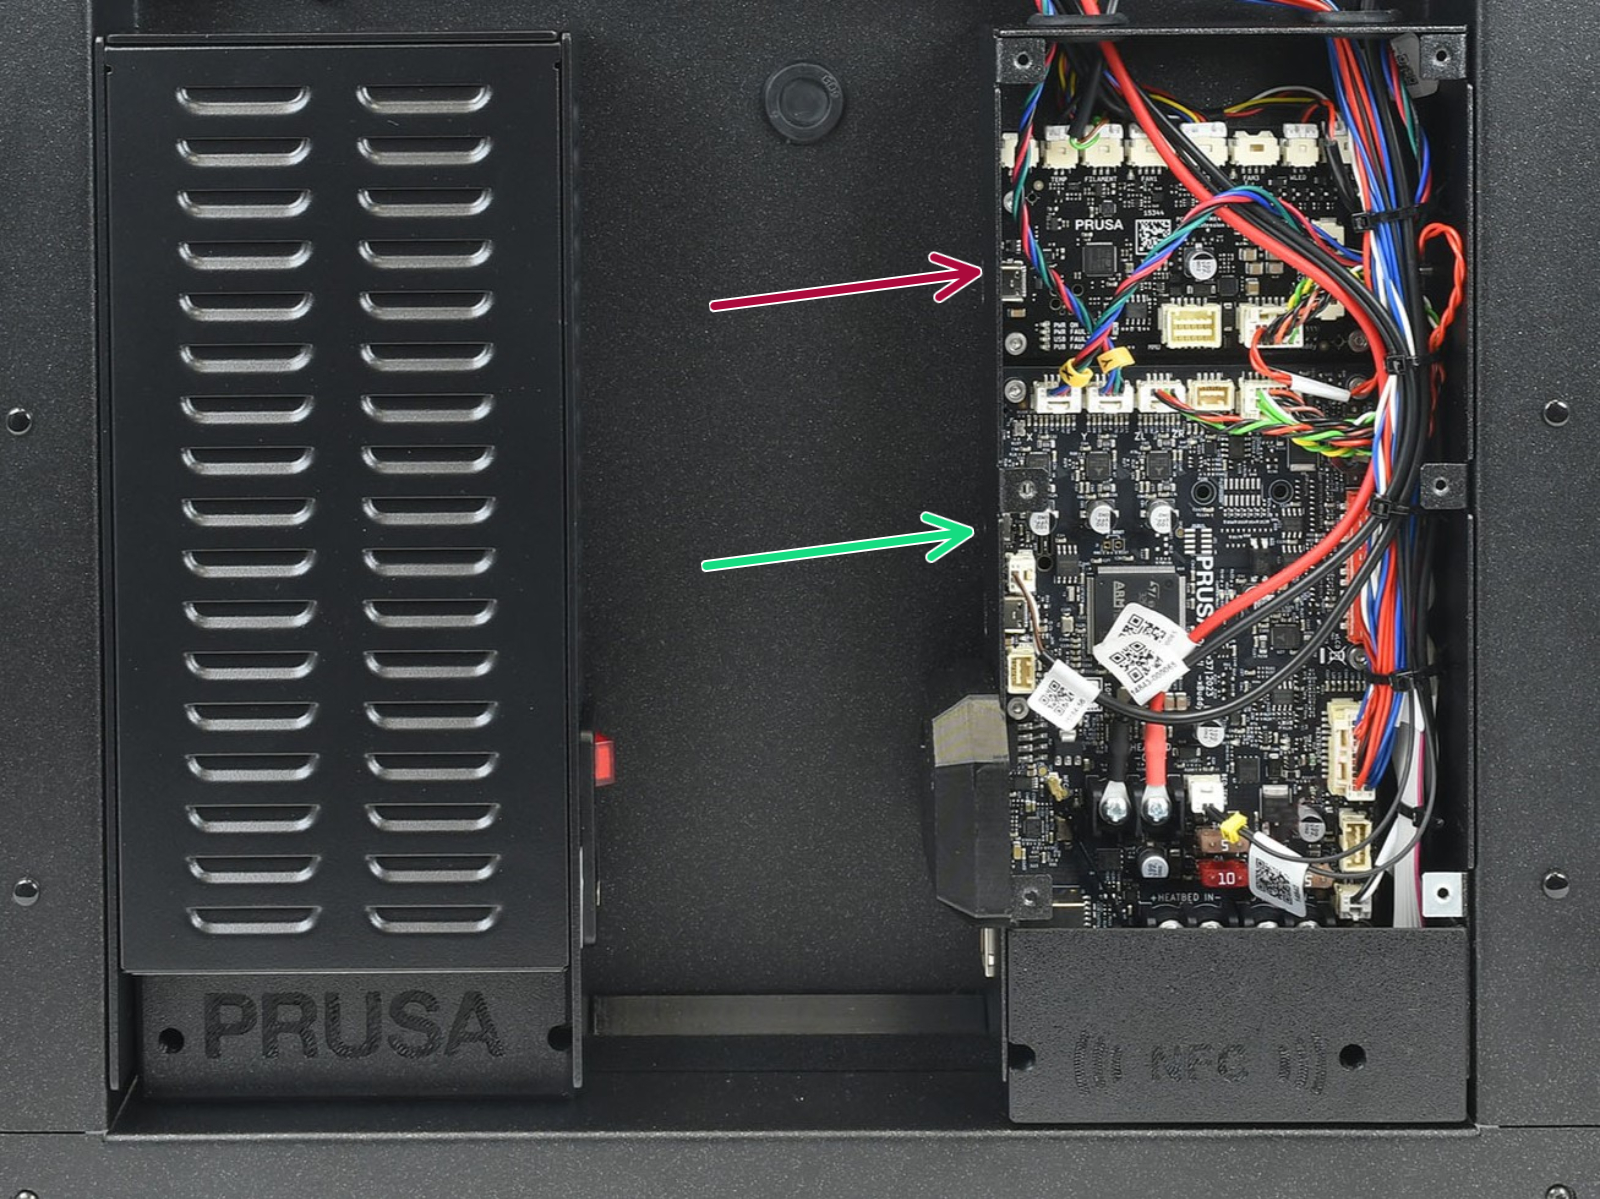
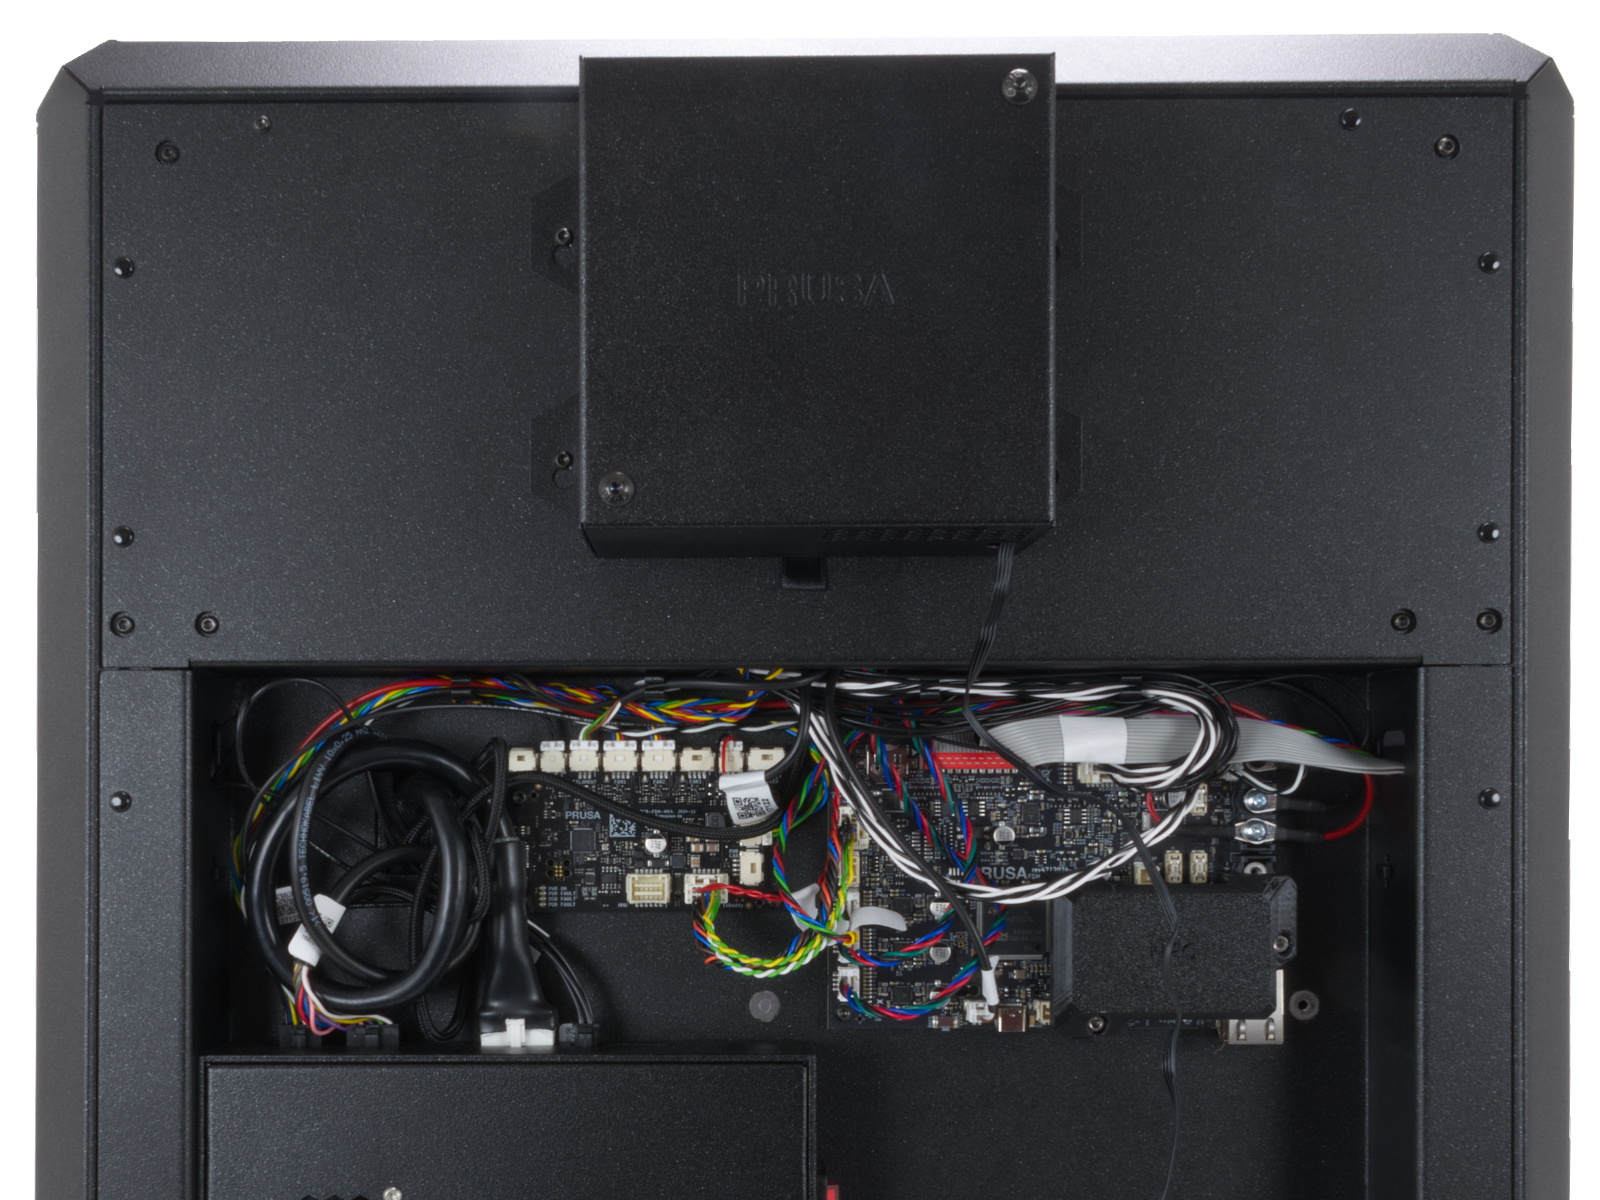
How to access the xBuddy board - CORE One
Locate the xBuddy board case. Looking at the printer from its rear, it is the rightmost case.
Using a T10 Torx key, remove six M3x4bT bolts to release the xBuddy box cover.
The bottom larger board is the xBuddy board, while the top smaller board is the xBuddy extension board.
 |  |
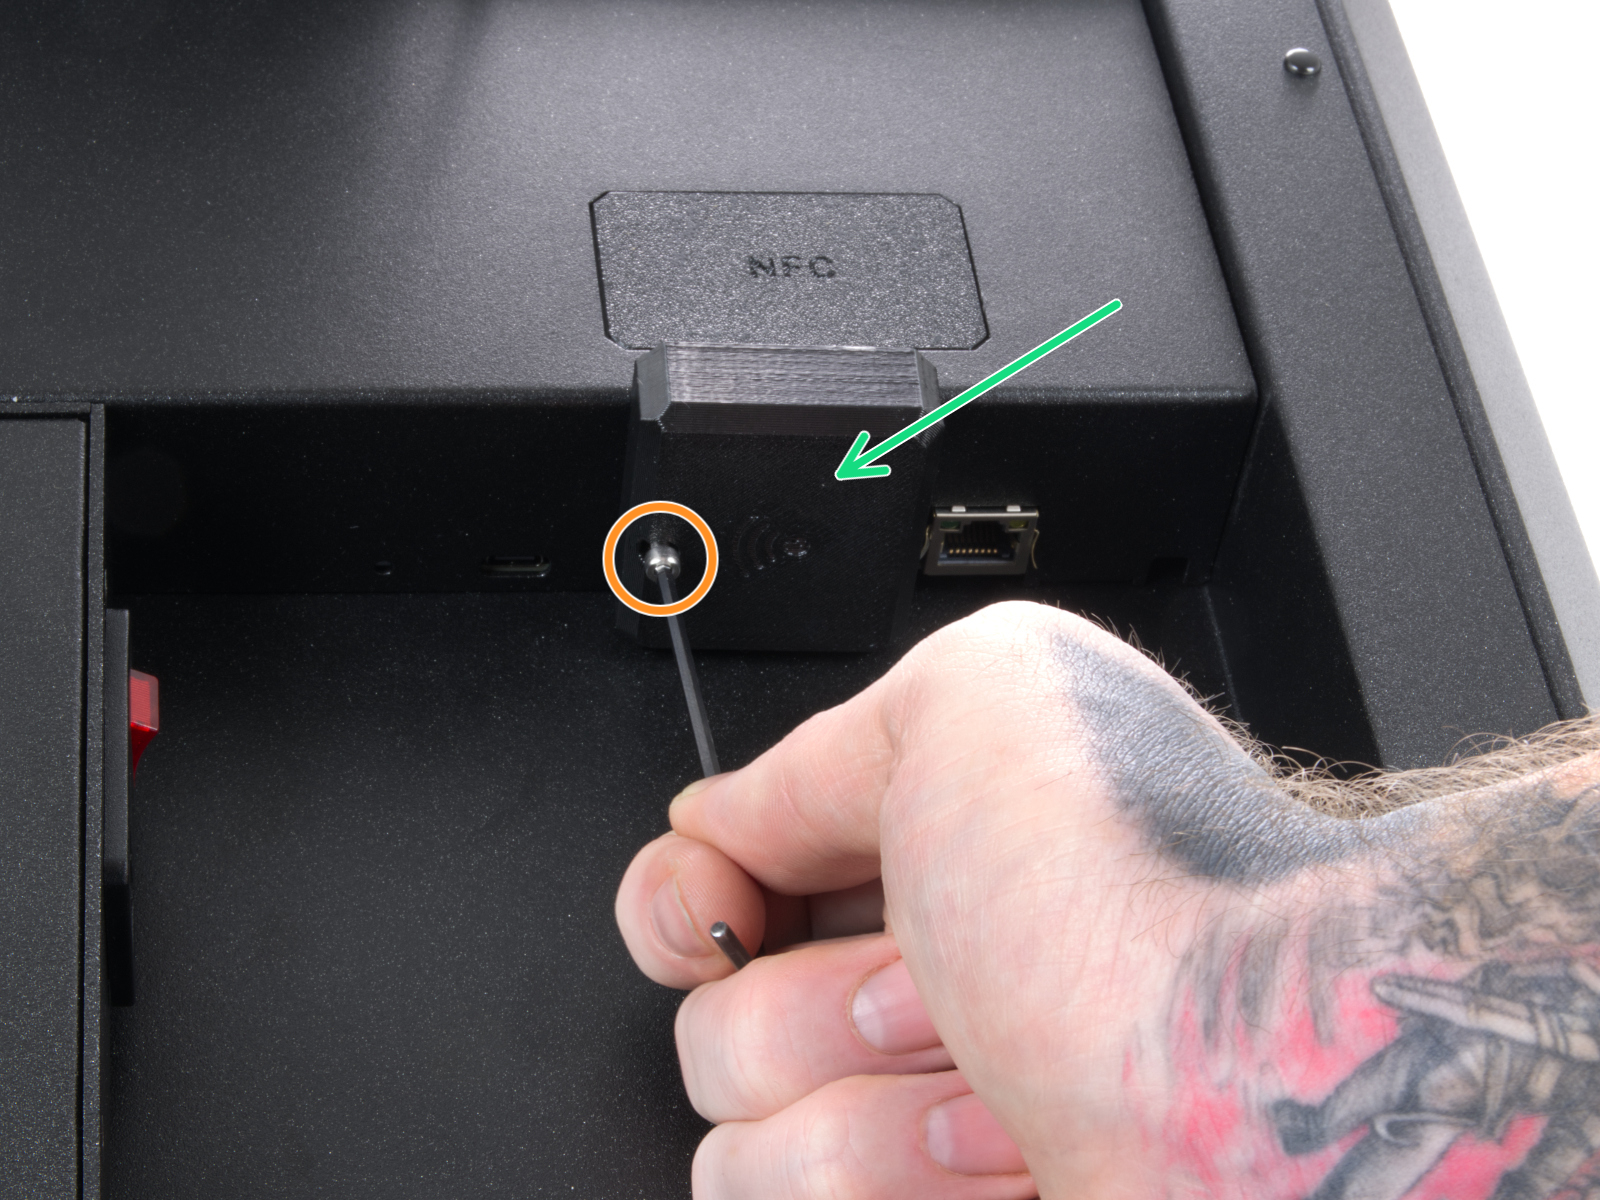
How to access the xBuddy board - CORE One L
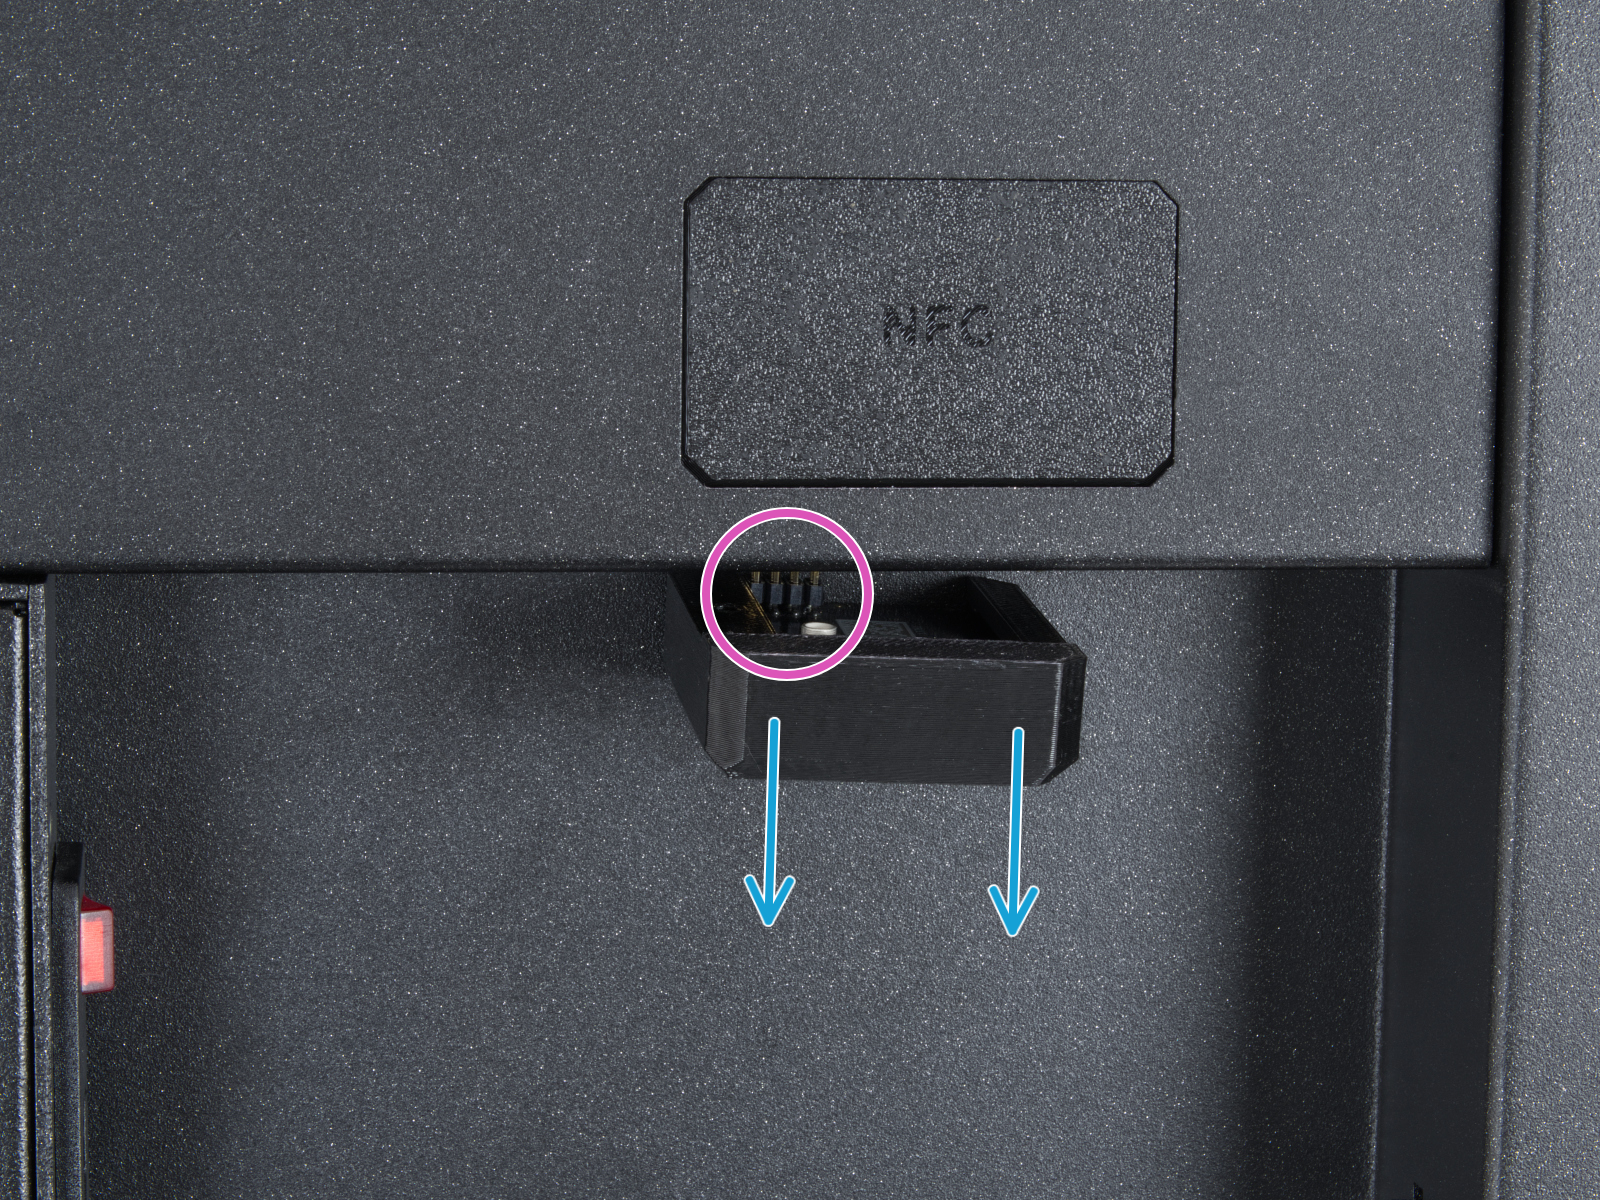
Locate the Wi-Fi module on the rear panel of the printer. Using a 2.5 mm Allen key, remove the M3x14 screw. Gently pull the Wi-Fi module straight downward to remove it from the printer.
 |  |
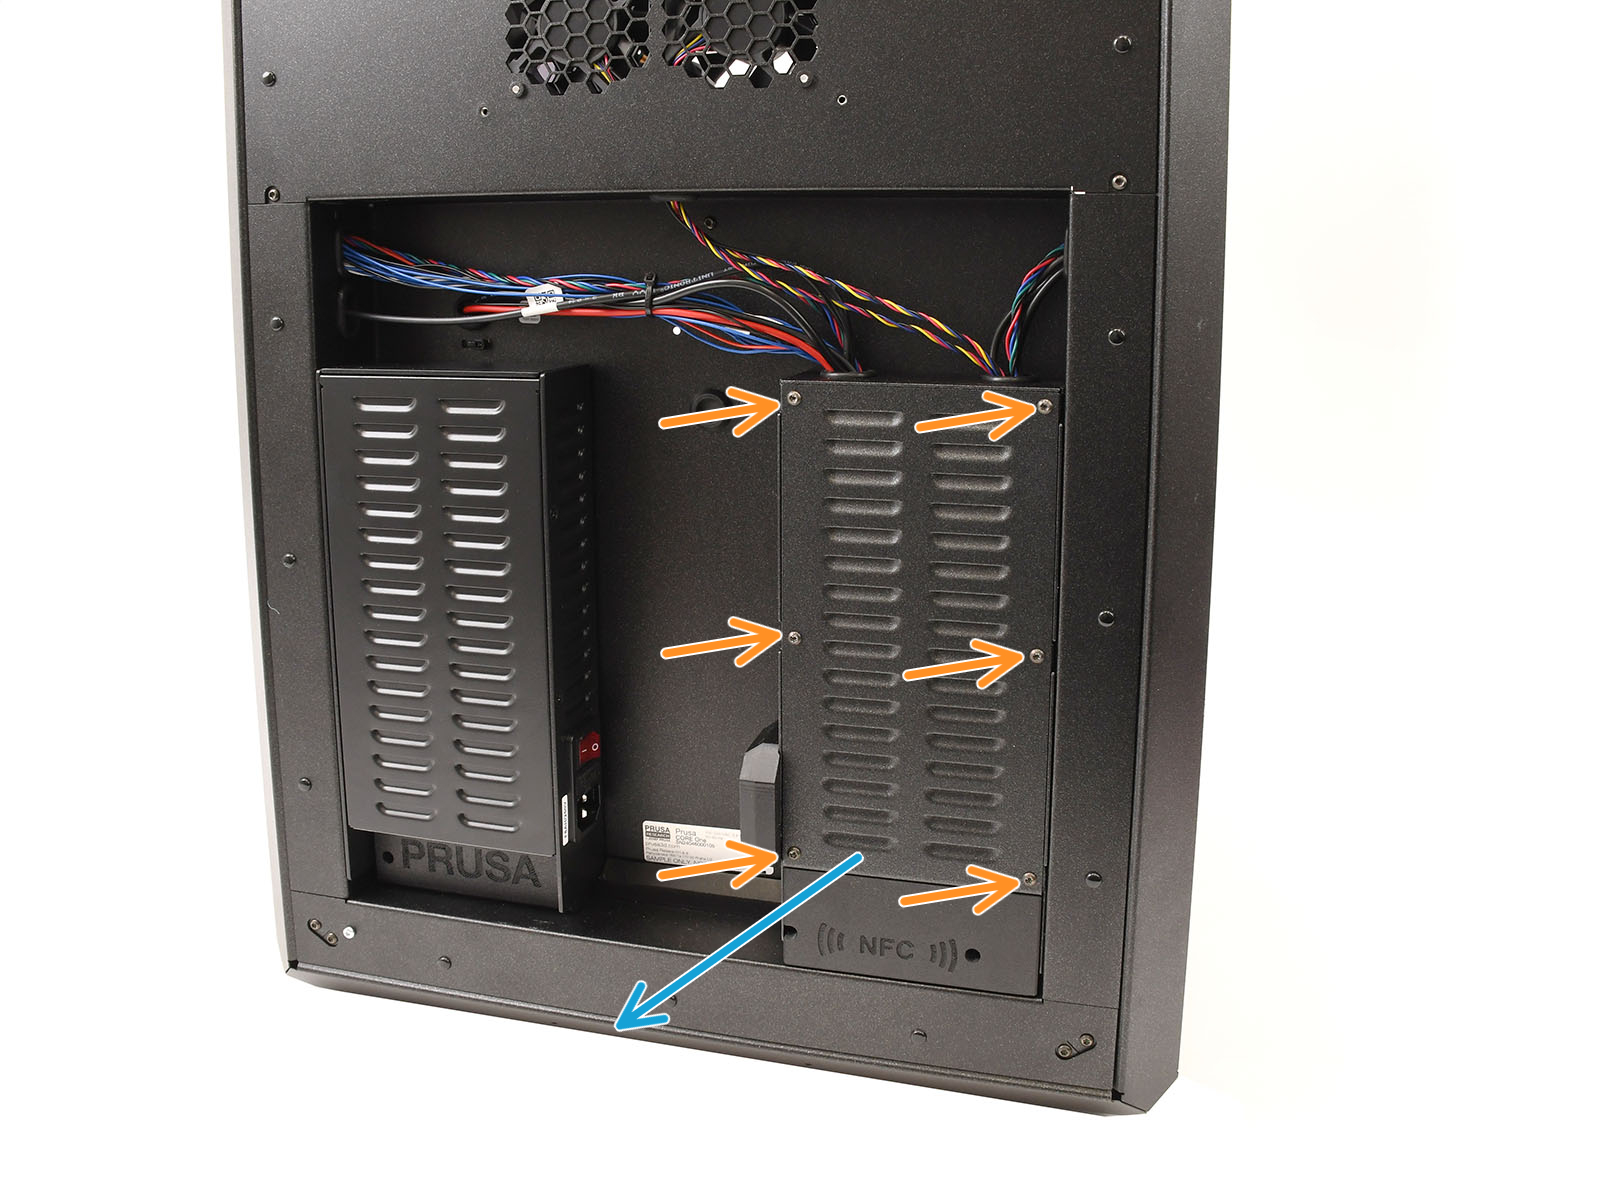
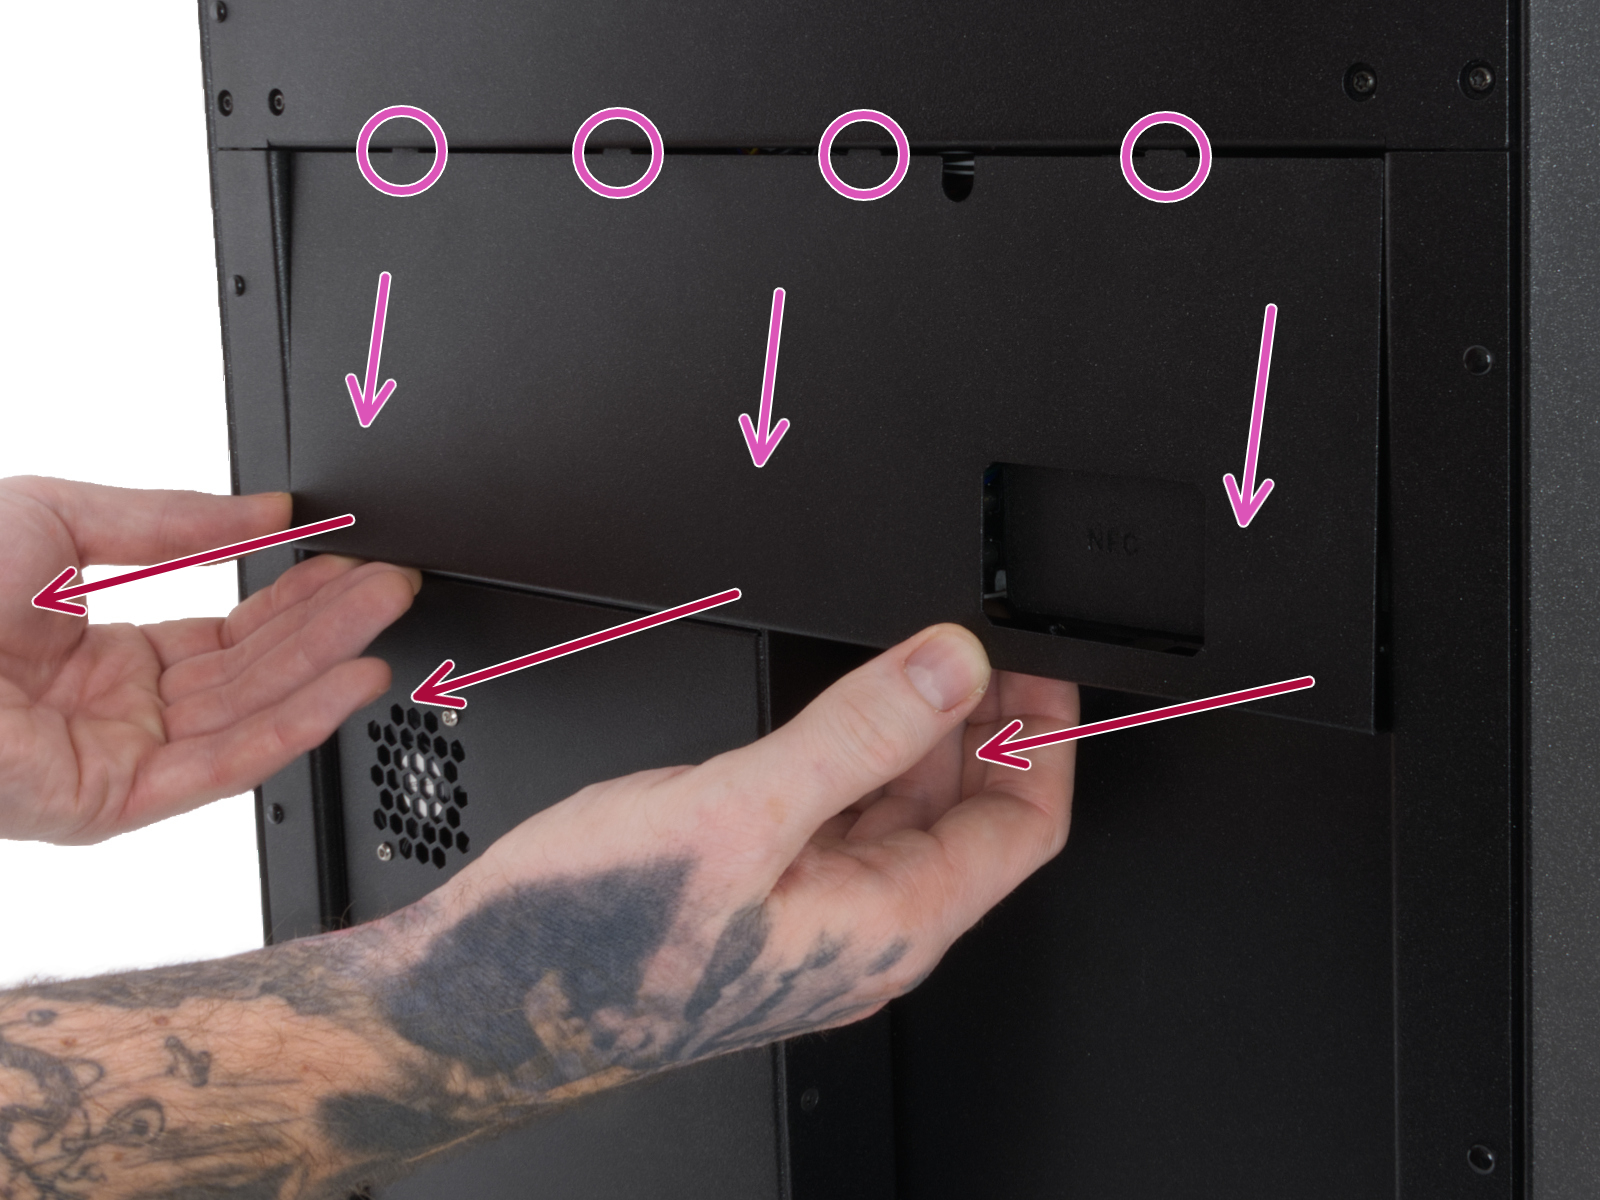
From the inside of the printer, locate on the rear side the highlighted M3x4bT bolts.

Using a T10 Torx key, remove two M3x4rT bolts to release the rear xBuddy box cover. Lift the cover to expose the xBuddy and xBuddy extension boards.
 |  |
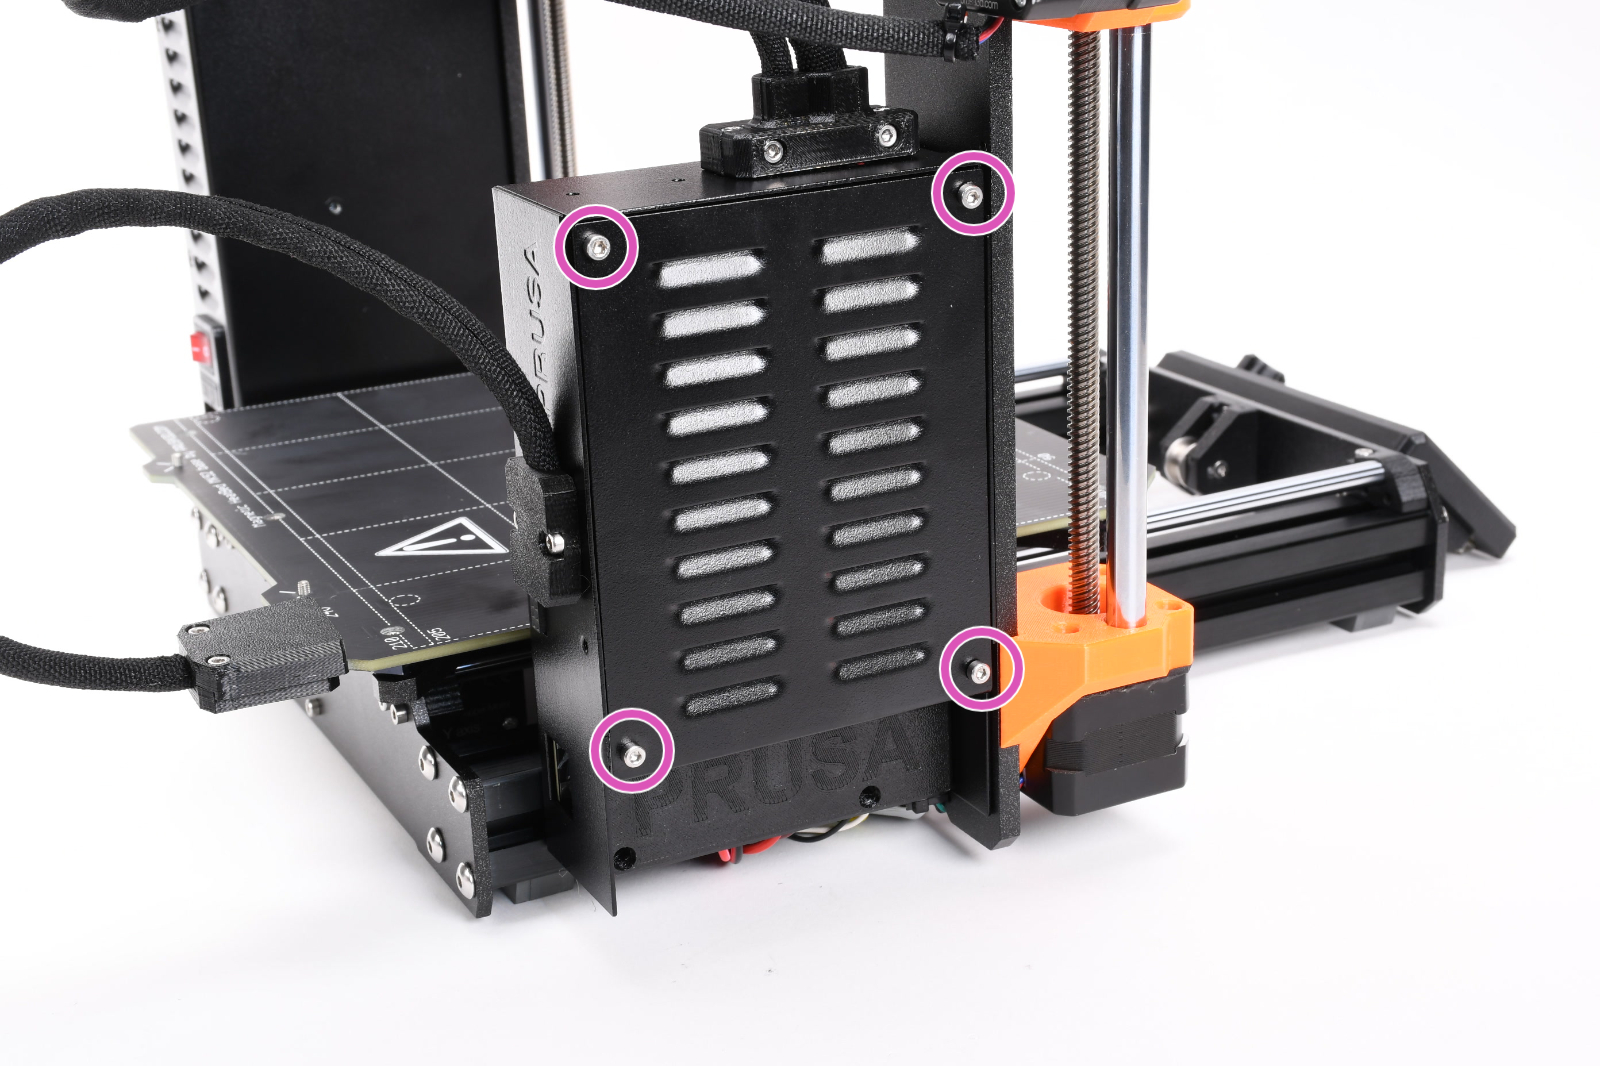
How to access the xBuddy board - MK4/S, MK3.9/S
Access the xBuddy board by loosening four M3x6 bolts.
Multimeter check
If you have a multimeter available, use this guide to check the resistance on the hotend heater and the hotend thermistor.
17 comments
In my case, Core One, I've managed somehow to swap 2 termistor cables. The imaged helped to check that both are next to each other and bingo, calibration is working.
The printer is reporting that the Nozzle temperature is at 196C at room temperature. I've not checked the thermistor resistance yet, but it's the only failure I think could still be viable. There's a way to Thermal model calibration for Mk3/+/S but not for Mk4/S. Could be useful for fixing issues like this?
Looking at getting a new thermistor, the price of shipping is more than the cost of the component itself...