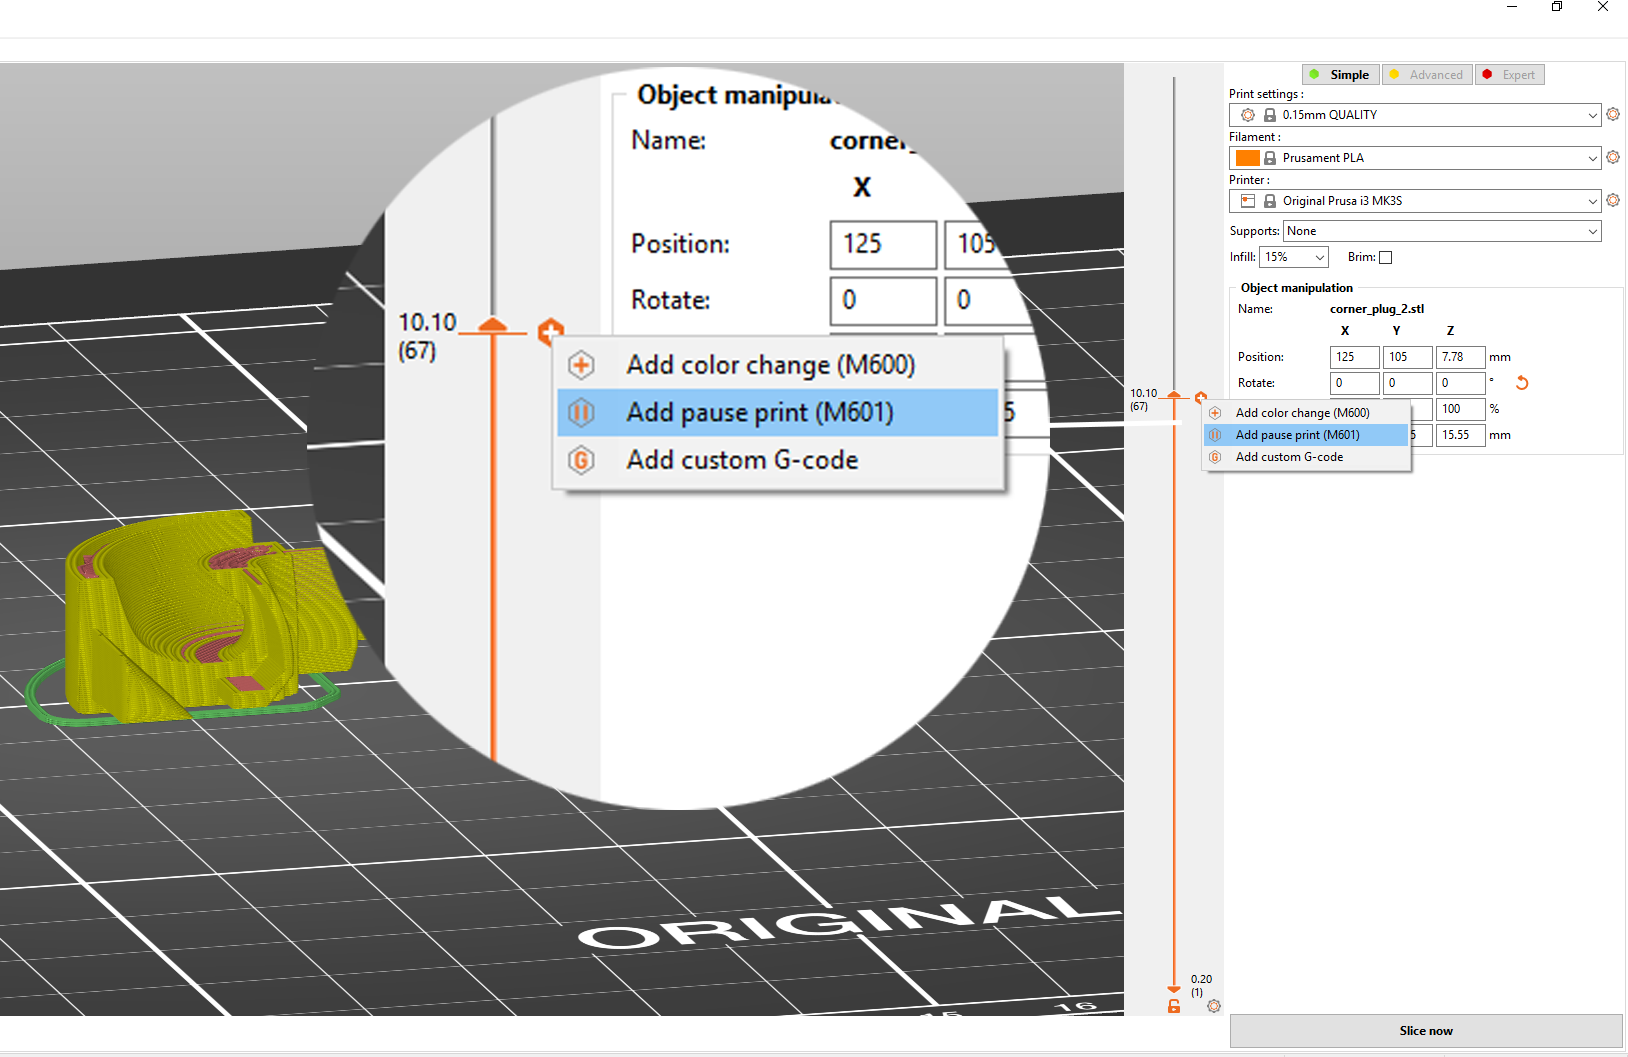
PrusaSlicer lets you schedule a filament change at a certain layer. This can be used to print basic multicolored models. The printer automatically pauses the print as soon as it reads the color change in the G-code (M600 command) and prompts the user to proceed with the filament change.
- Slice your model normally. A preview will show how the part will be printed.
- On the right side, you will see a layer slider. Drag the layer slider on the down to select the target layer
- Right-click on the orange plus icon
- Select Insert pause print (M601)
- The pause will be inserted before the selected layer is printed
- Insert a short message to be displayed on the printer LCD when the print is paused
- e.g. “Place bearings in slots and resume printing”
- Confirm the Pause by hitting OK
You can remove the pause by moving the slider to the pause layer and left-clicking on the grey cross icon.
You can edit the pause message by right-clicking on the grey cross icon.

You need PrusaSlicer 2.2 or newer to access the Insert pause and Insert custom G-code function. Both of these features do not work if you have Sequential printing enabled.
This feature is also not supported in old printer firmware versions (on the MK3/S/+ you need at least firmware 3.9.1).
When you slice the print again with inserted print pauses, you’ll get time estimates till each pause. The printer will also signal the pause with a beep.
Insert custom G-code at layer
Inserting a custom G-code can be useful for advanced users when creating a calibration G-code, like a temperature tower.
Verify twice that you inserted the right G-codes and that you understand what they do. For example, with some G-codes you could accidentally override the EEPROM values or move the nozzle into the print bed.
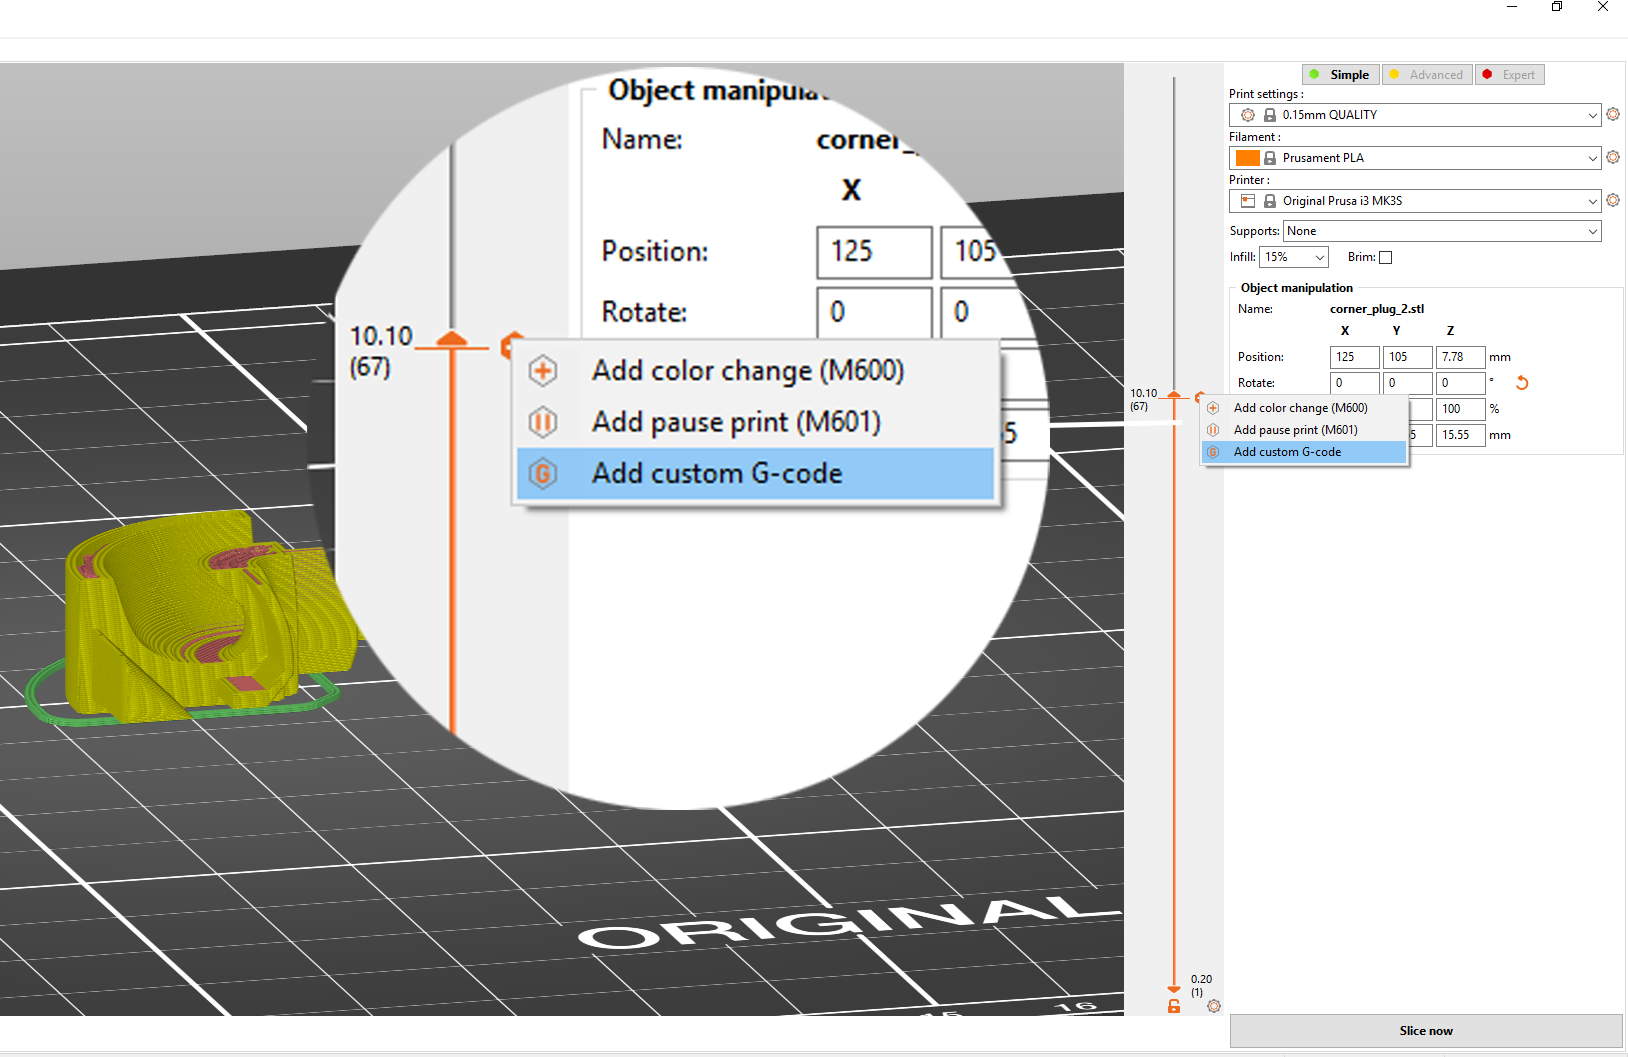
- A custom G-code can be inserted from the Preview window
- Drag the layer slider on the right to select the target layer
- Right-click on the orange plus icon
- Select Add custom G-code
- The custom G-code will be inserted before the selected layer is printed
- Insert the custom G-code into the newly opened window. You can add several commands at once, simply press Enter to insert a new line
- Confirm by hitting OK
You can remove the custom G-code by moving the slider to the target layer and left-clicking on the grey cross icon.
You can edit the custom G-code by right-clicking on the grey cross icon.

Most commonly used Custom G-code commands
M104 S260 ; set the current hotend temperature to 260 degrees
You can use this command to create a temperature tower by changing the hotend temperature at various layers.
M109 - Wait for Hotend Temperature
M109 S260 ; wait for the hotend to reach 260 degrees before proceeding
If the temperature is set with the letter S then M109 waits only when heating. If the temperature is set with the letter R then M109 will also wait for the temperature to go down.
46 comments
What should happen:
Print pauses at set layer
Head moves to front (not rear)
Hot end STAYS hot
You have time to extract one colour, put in new colour, purge until colour runs clean
Press re-start when you're ready.
I'm no master coder, but this doesn't sound hard. Along with all the other things going wrong here, who thought 'back left' (is behind the thing you're printing) was the place to park the head for a filament swap?
Article states "Select Insert Pause Print - The pause will be inserted before the selected layer is being printed"
I've an M6 nut to insert into my model. I slice my model and scroll through the layers until I see the first layer that covers the space for the m6 nut.
I insert the print pause on that layer because, as the article states, the print pause will be inserted before that layer starts to print. WHen the printer pauses and I go to insert the nut, I can't insert it because the first covering layer has been printed, the layer that covers the space for the nut.
What am I missing here?
OMG, just figured it out (maybe not....)
If you insert a print pause in layer 10, the actual print pause gcode is inserted in layer 11.
OMGx2 I removed the pause and inserted it again the same layer and now the gcode appears in that same layer.
And this happened when chatting to support who also had the same thing happen to them using the same project file I was using. Looks like a bug.....
If not, what can I do to adjust the retraction? Or, what else should I adjust to fix this problem?