The IR sensor is a hybrid solution that combines an IR laser sensor triggered by a tiny mechanical lever. This means that in case one of the functions of the IR sensor is not working, the source of the issue might not be the sensor itself.
Issues can appear as:
- Autoload not working.
- Filament sensor runout not working.
- The printer asking you at the beginning of a print to unload the filament and then to load it back in.
Wrong firmware
There are two different versions of the firmware available, one for the S and S+ upgrade and one for the initial filament-sensor. Make sure you have the correct one. The new IR Filament sensor requires the S/S+ version of the firmware.
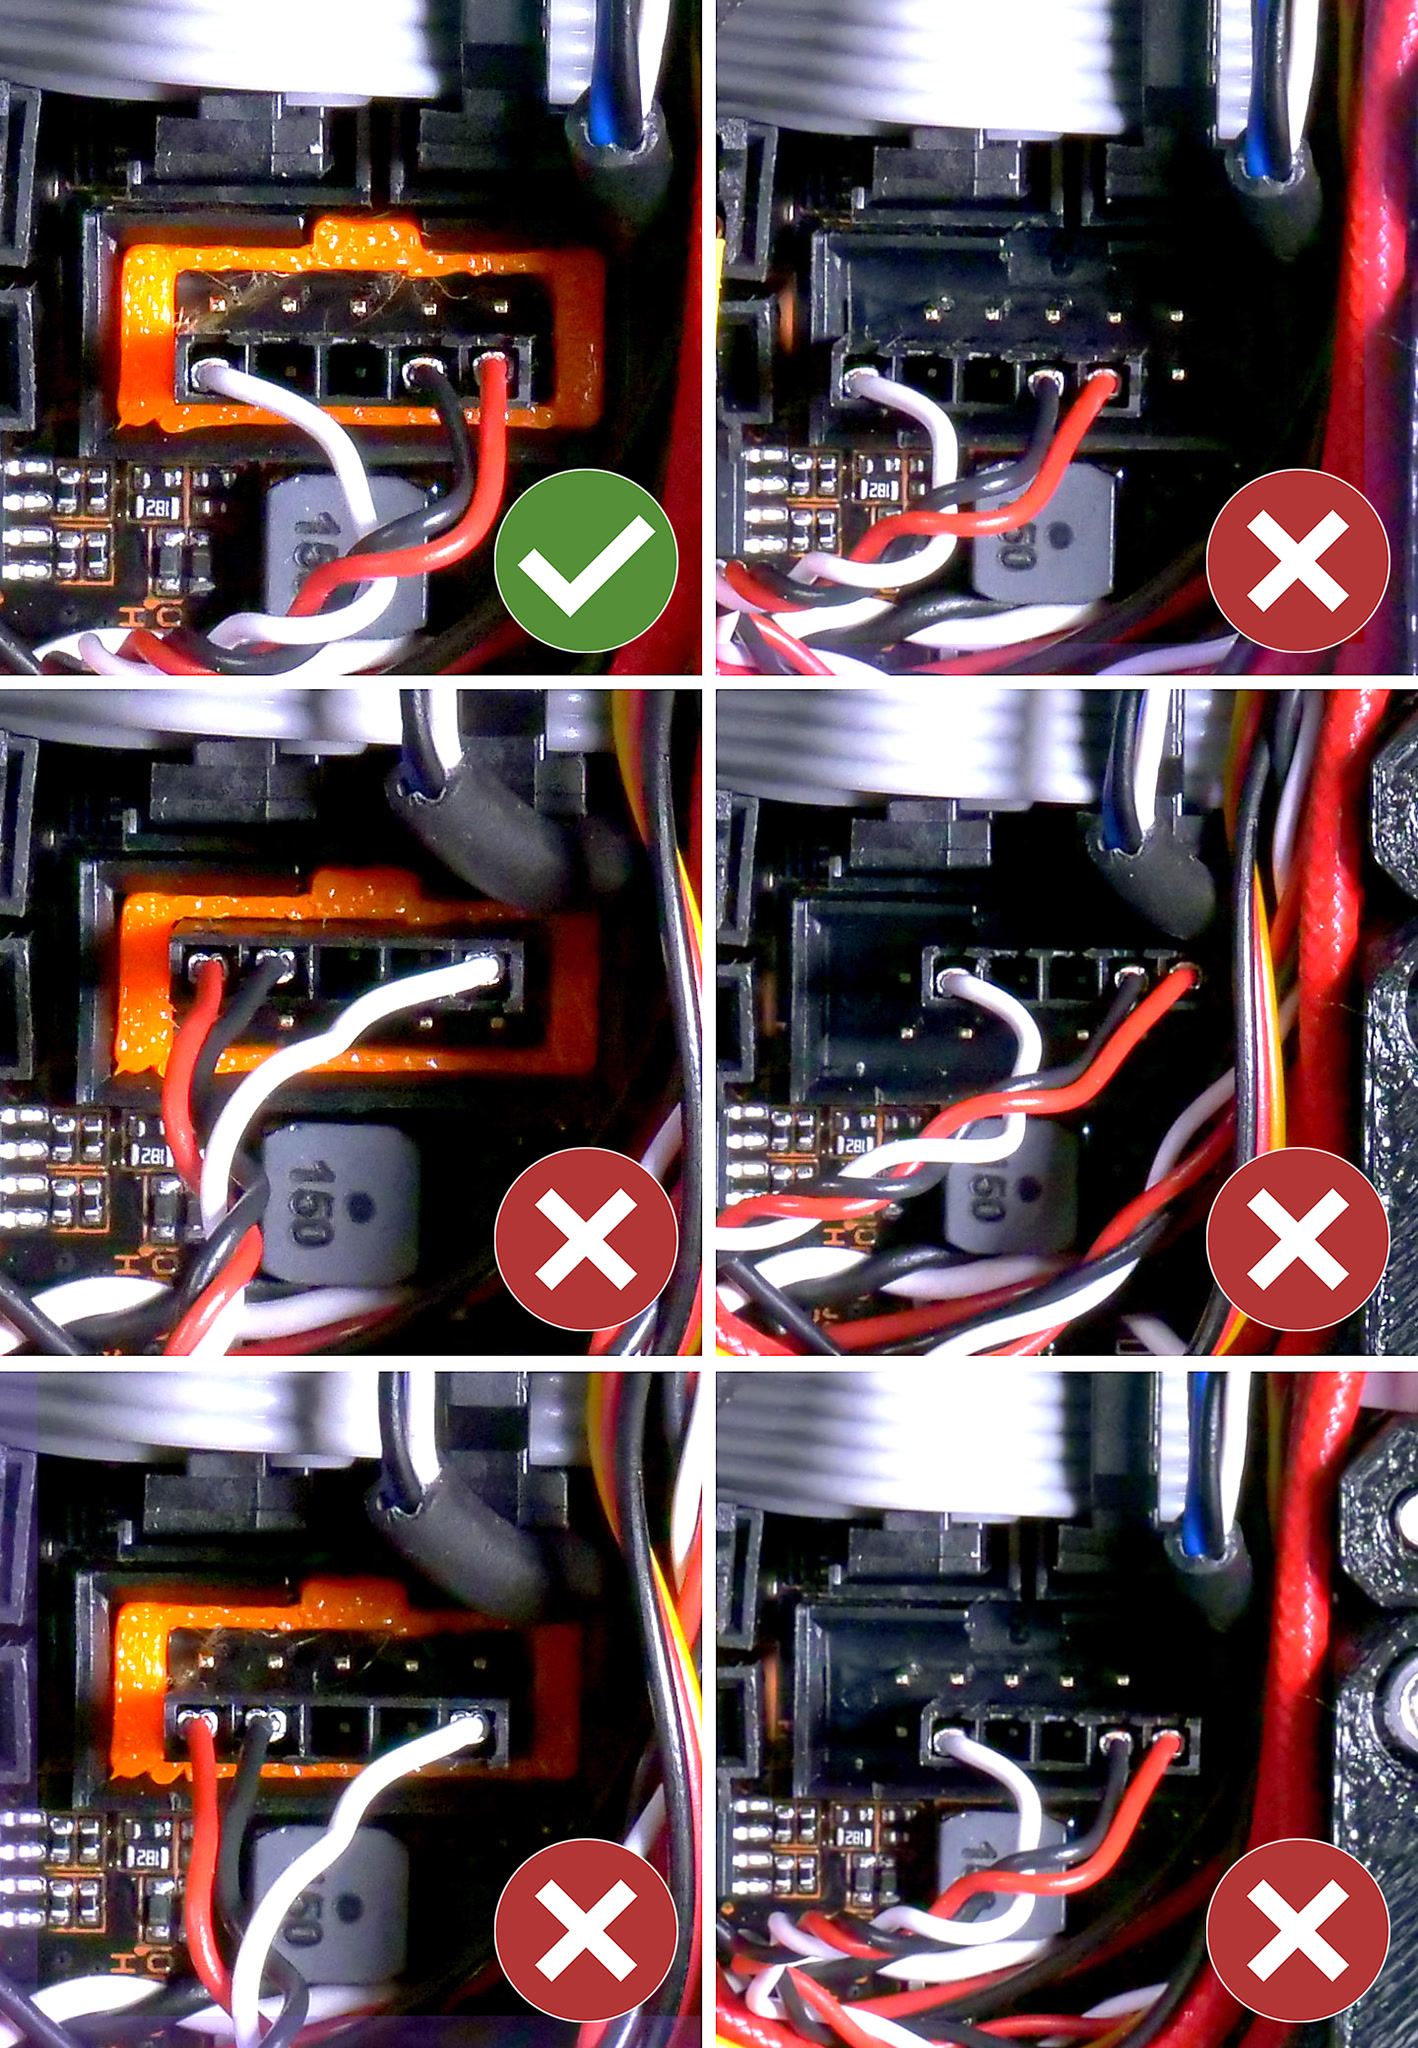
Wiring
The connector should be on the bottom row of pins, covering all pins, with the red wire on the right. See the picture below. The only correct orientation is depicted on the top-left.
Assembly of the extruder
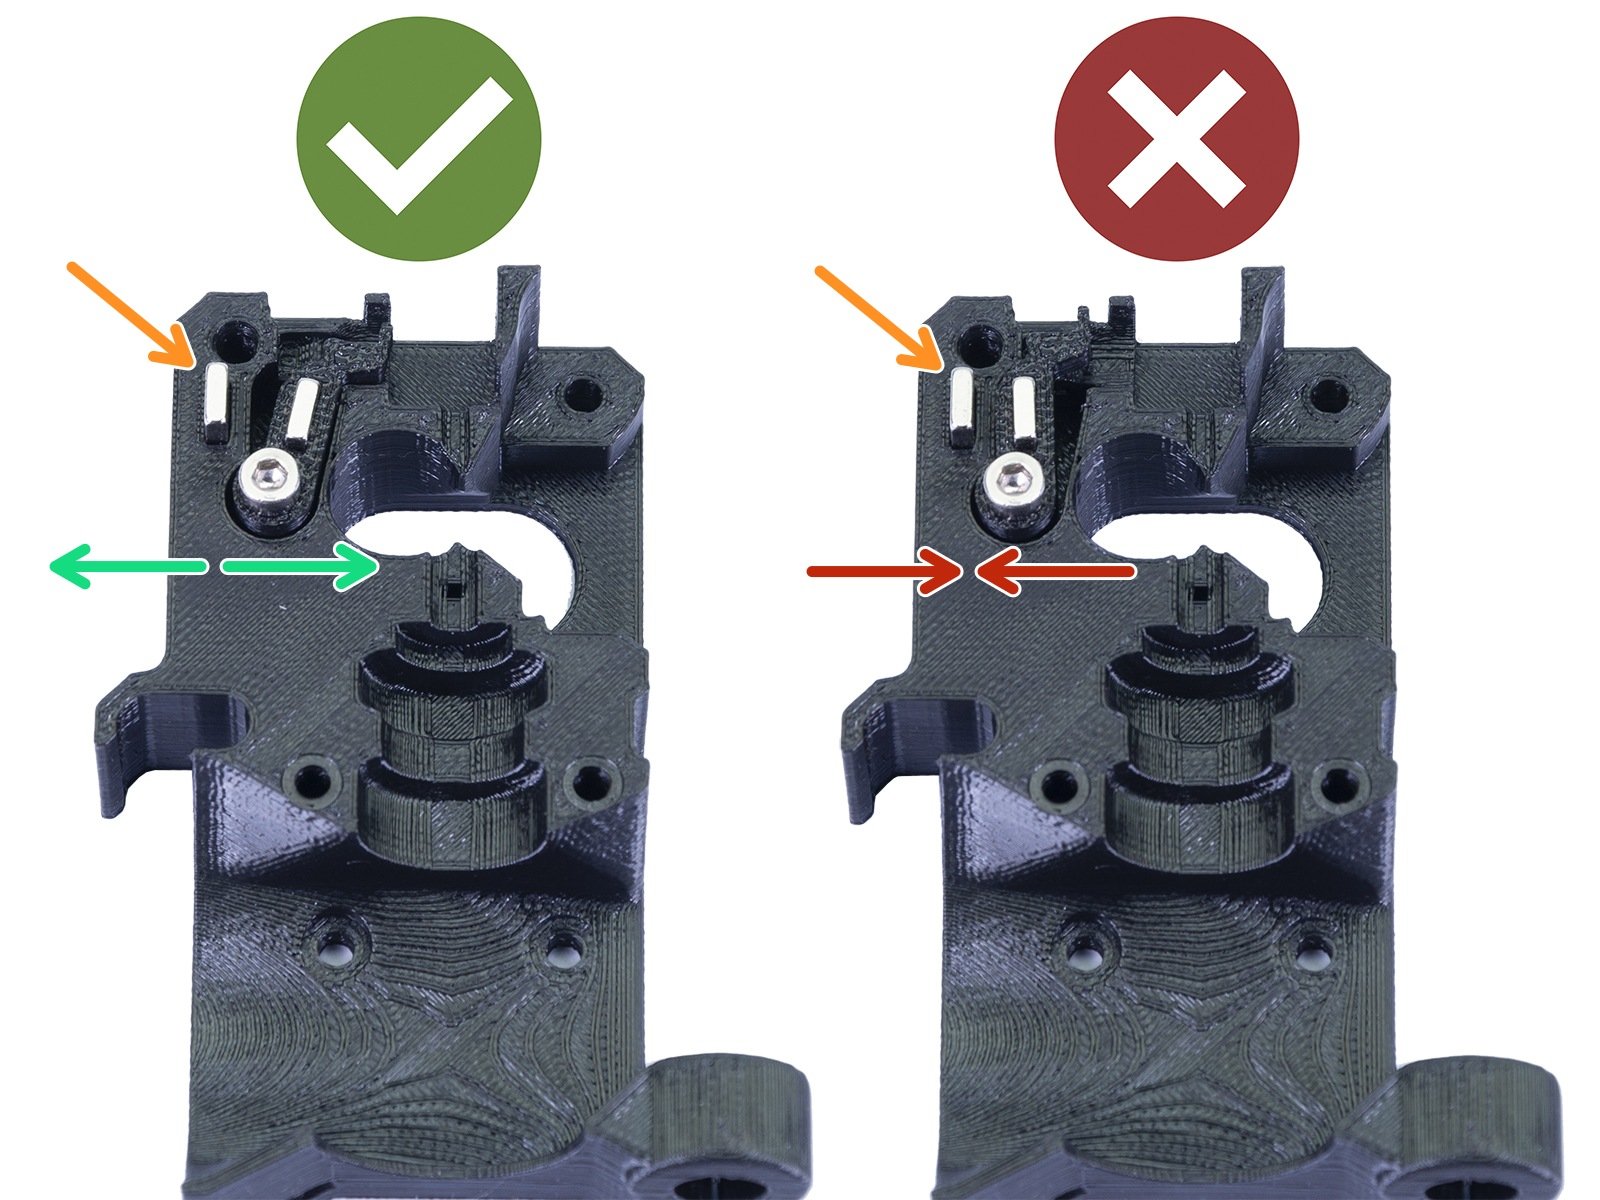
Before going into disassembly you should check some key parts of your extruder assembly. You may have overtightened some screws which can affect the tight tolerances used in the trigger mechanism.
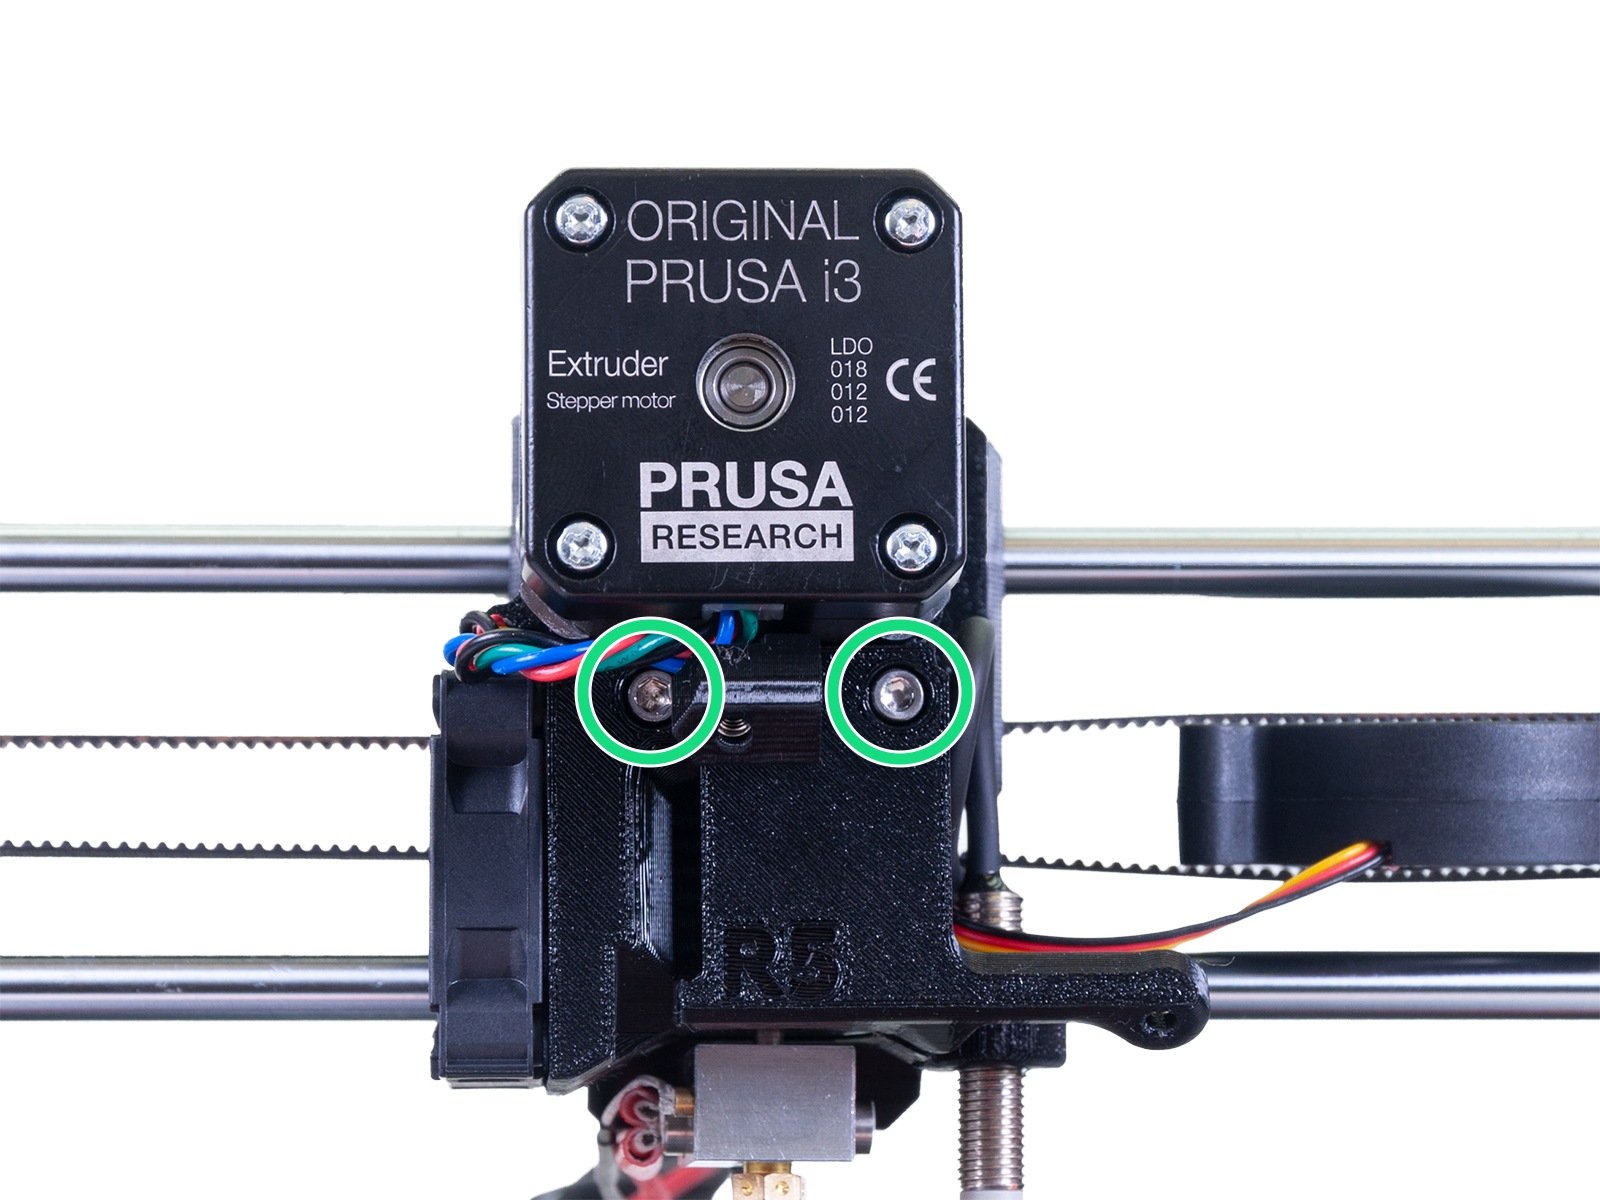
There have been some reported issues when overtightening the screws pictured below. Navigate to LCD Menu -> Support -> Sensor info and see if the 'Fil. Sensor' value (1 or 0) when adjusted.
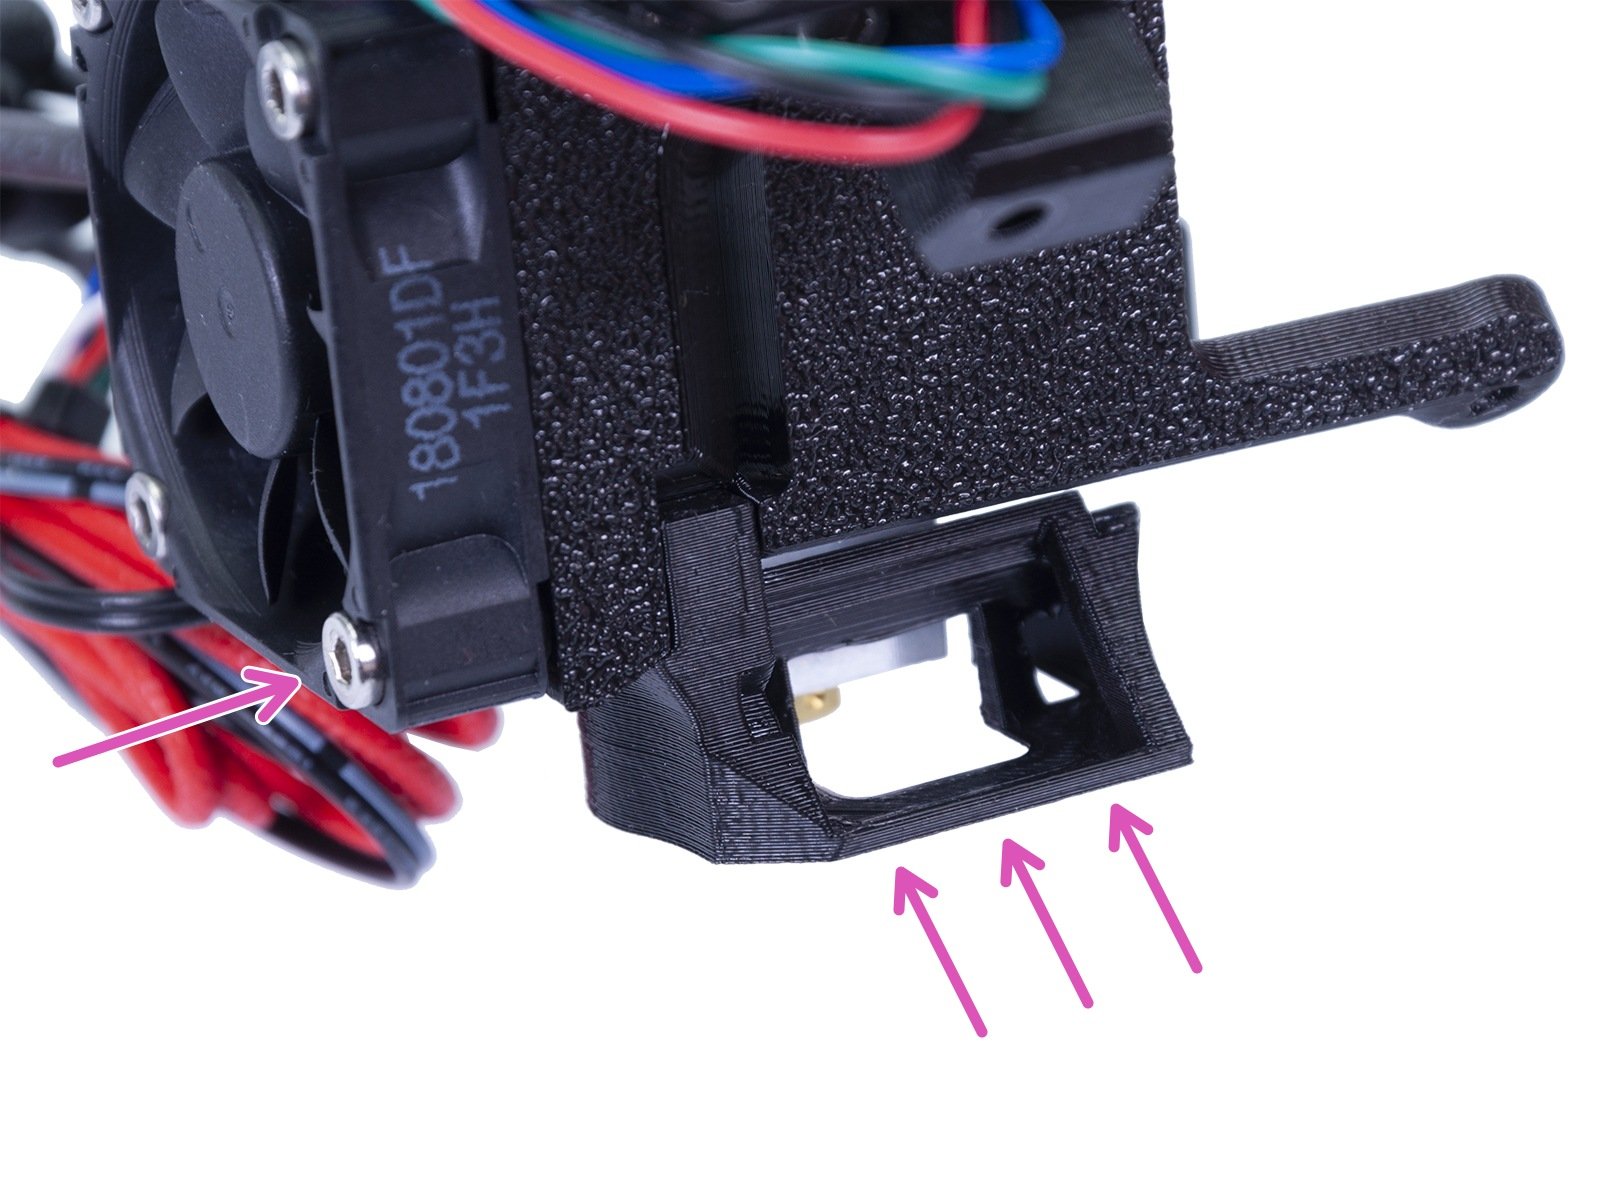
- The M3x40 screw going from the back into the extruder motor (orange arrow left picture).
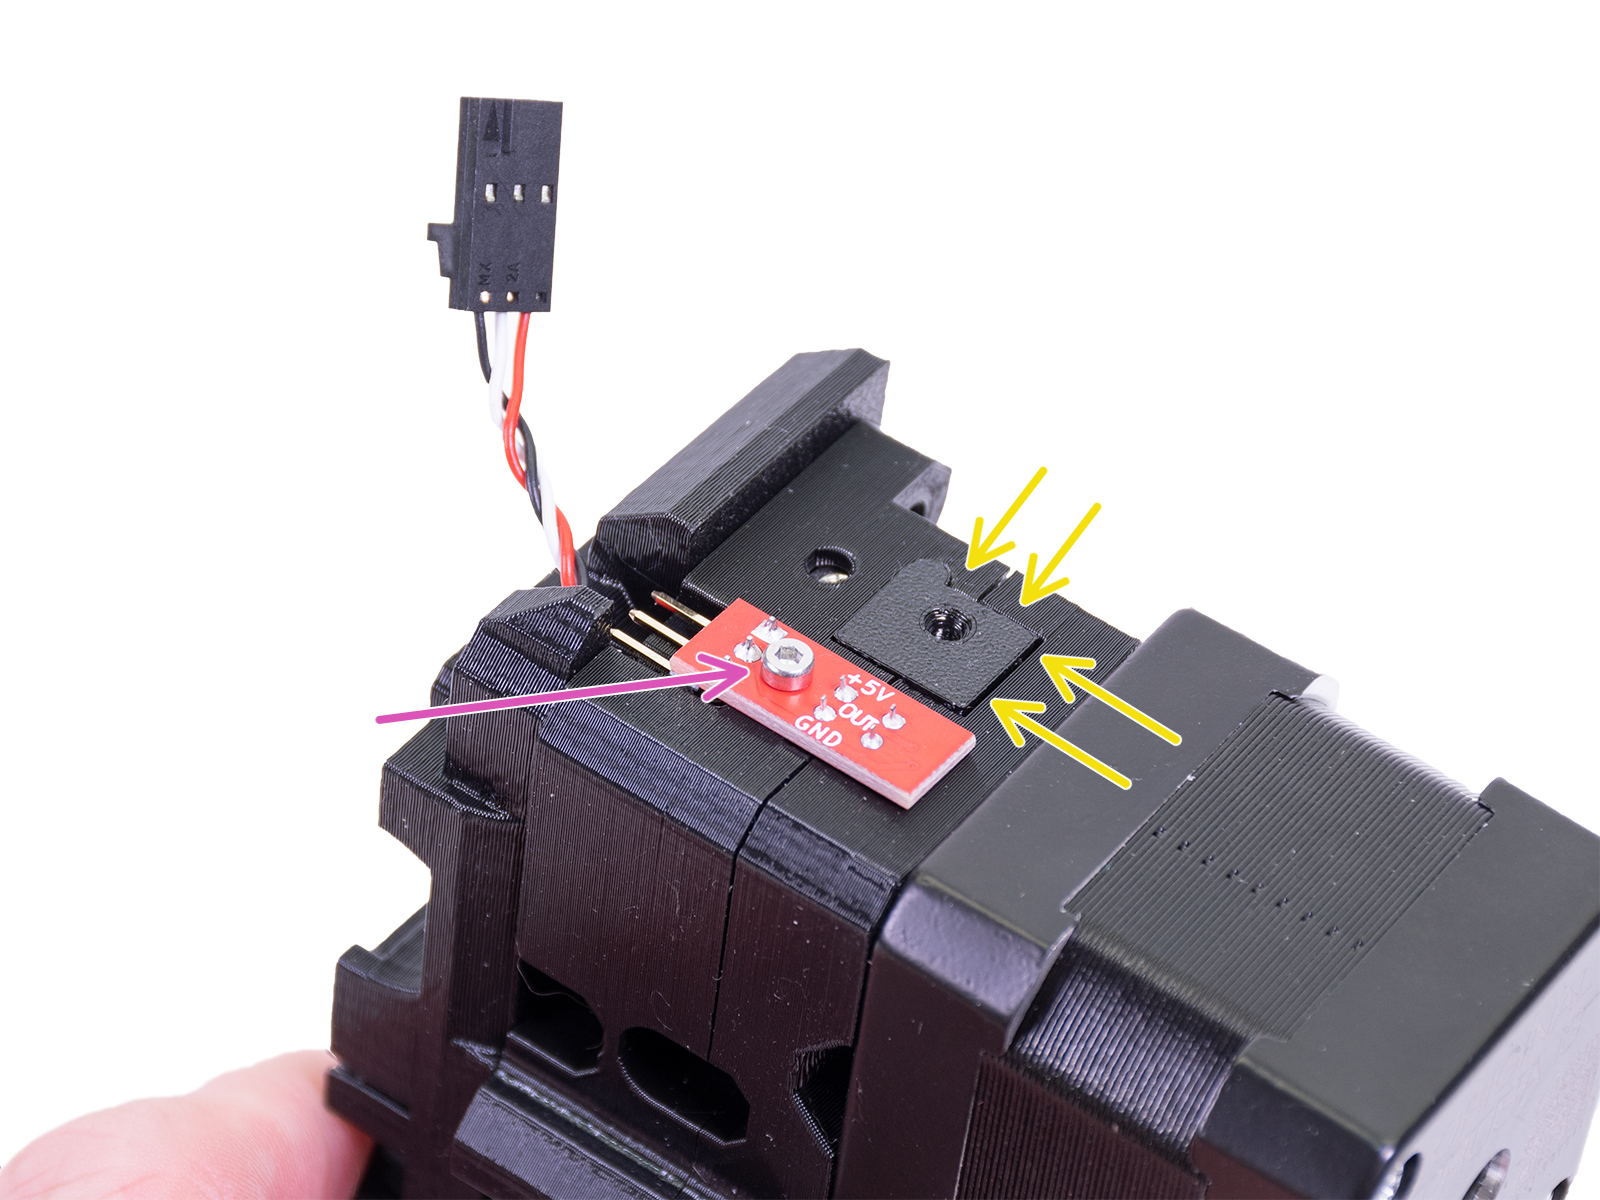
- The M2x8 screw securing the IR sensor itself (purple arrow right picture).
- The printed part 'adapter-printer' for the steel ball is protruding slightly above the surface of the surrounding extruder parts (yellow arrows right picture).
- The M3x10 screw securing the 'FS-cover' plate, which covers the filament sensor chip and 'adapter-printer' depicted to the right.
 |  |
Access the filament sensor mechanism
The FS lever is the part that is moved by the filament to activate the sensor. It is important that this moves as expected.
How to access it:
-
- The first step is to toggle the Filament autoload off. Do it in the LCD Menu -> Settings -> F. autoload. (but 'Fil. sensor' must be still ON!)
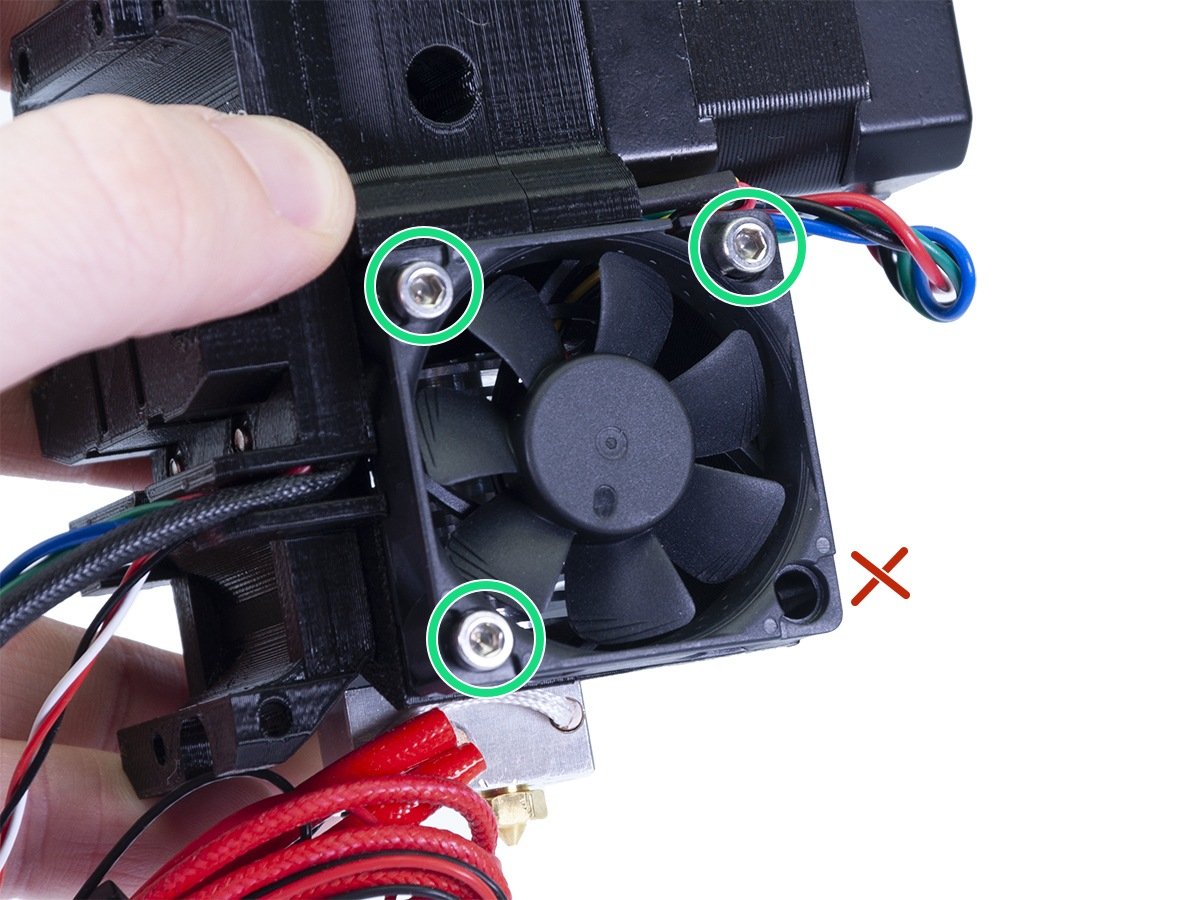
- Now we need to get to the filament sensor mechanism. Before you start, make sure the printer is cold and that none of the fans are spinning.
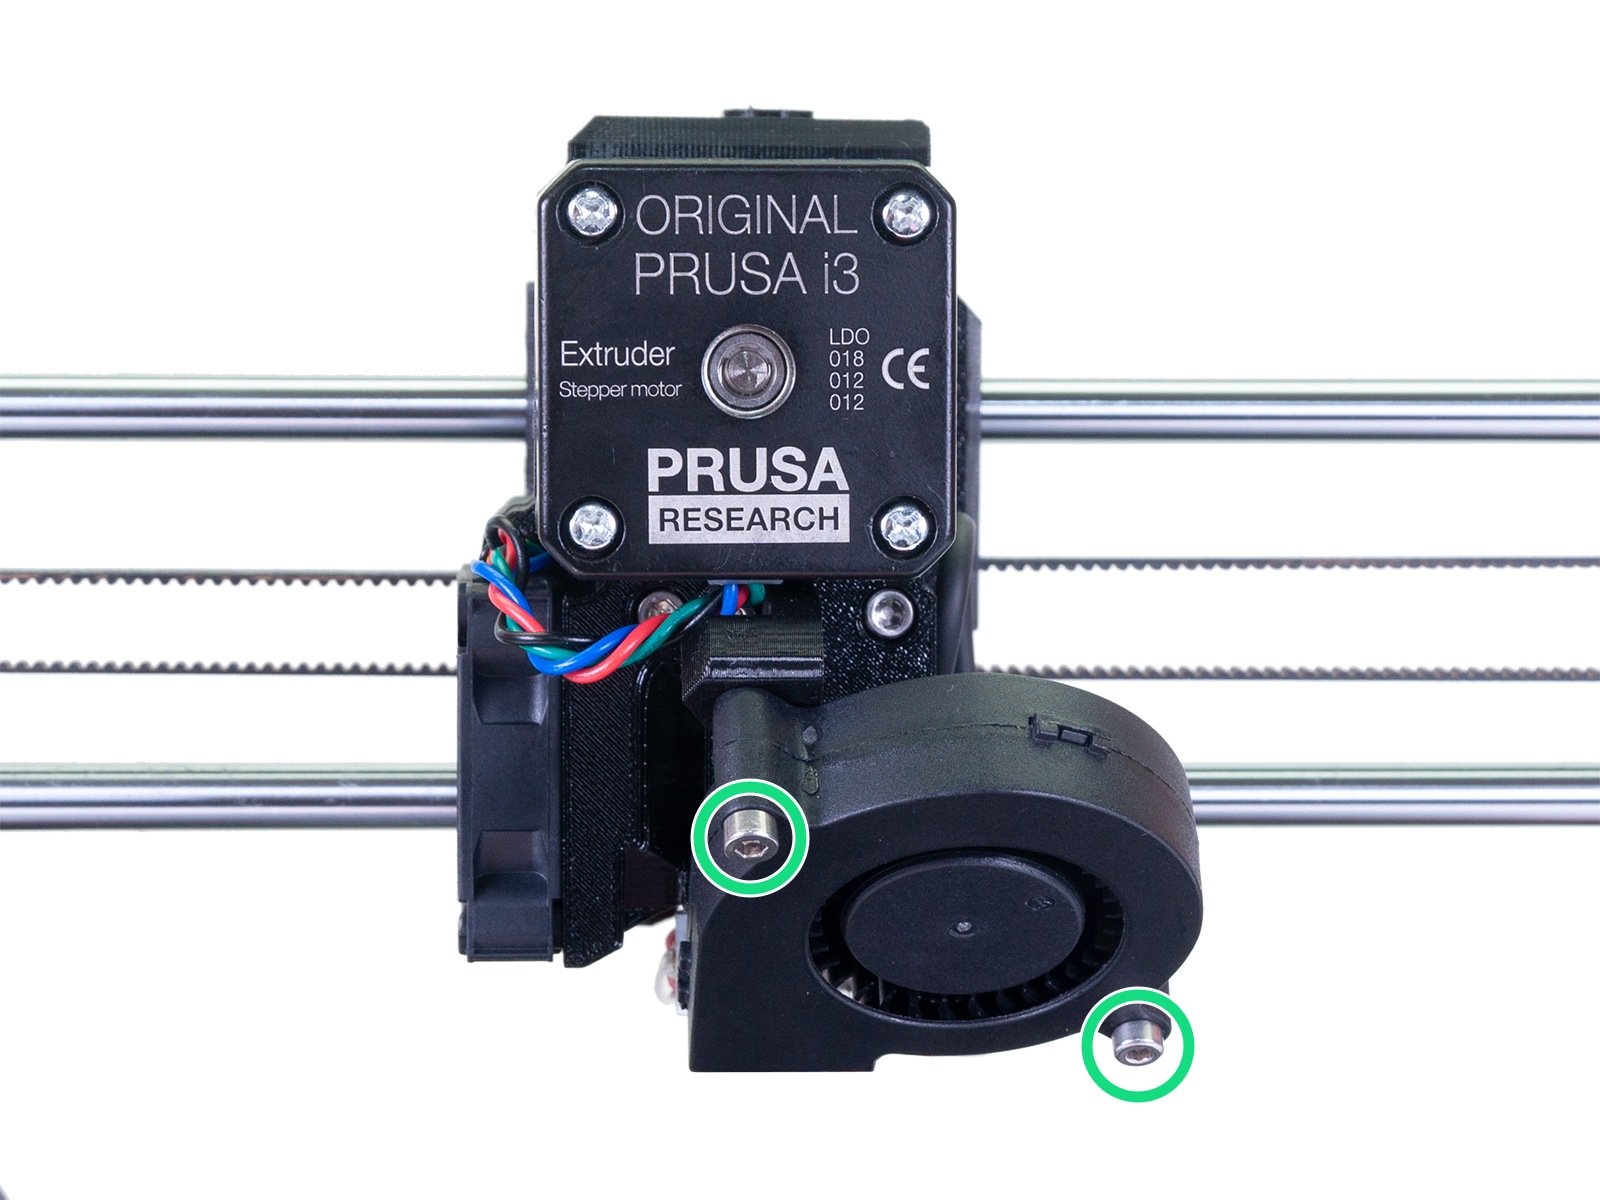
- Take the Print fan off by unscrewing both M3x20 screws holding it on the Extruder. Do not lose the nuts for these screws. You can insert the fan in between the belts on the left side, it should fit there just fine.
- Unscrew 2 out of 4 screws of the Noctua Hotend fan that are the closest to the original position of the Print fan. One of them is M3x18 (or M3x20 if you decided to use it instead) and the other one is the top-right M3x14.
- Unscrew both long M3x40 screws located below the Extruder motor and take the Extruder cover off.
- Unscrew the M3x40 screw holding the Extruder idler door as well as the other M3x40 screw holding the upper part of the assembly together.
- Take the Extruder motor off.
- You now have full access to the hotend and to the filament sensor mechanism.
Now you need to go to the LCD Menu -> Support -> Sensor info
-
- Here you can see the status of all sensors we are using on our printers: the 'PINDA', the 'FINDA' (if MMU2S is installed), and the 'IR sensor' (renamed to 'Fil. Sensor' in firmware 3.10.0). We will only need IR sensor/Fil. Sensor.
- See how the IR sensor status changes from 0 to 1 as you are inserting a piece of filament inside the opened extruder. Also, observe how the filament sensor lever moves.
- To be sure, blow some canned air (or just blow with your mouth) in the general direction of the sensor to get rid of any potential dust particles.
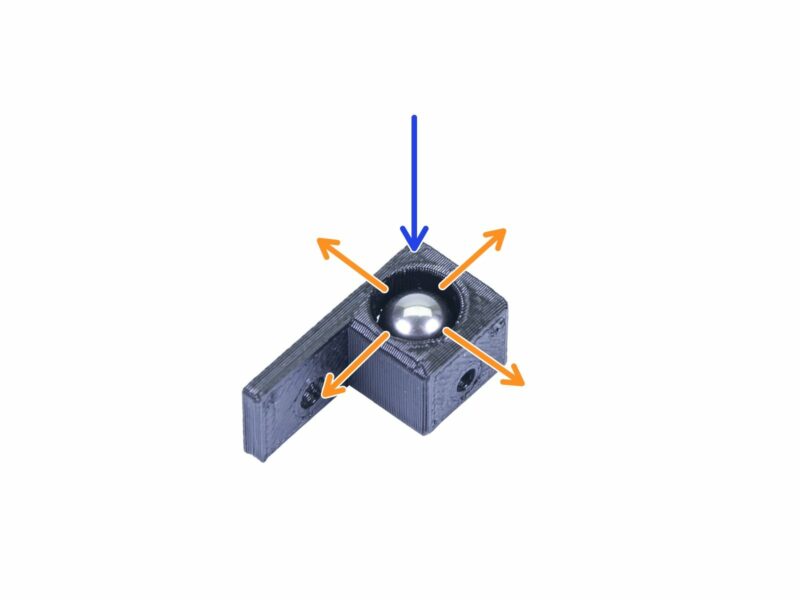
Summary
All in all, the lever has to move freely and get pushed by the steel ball in a regular manner.
- Make sure the steel ball is in its housing.
- Make sure that you did not forget to put in the M3x18 screw that serves as a shaft for the lever movement. This M3x18 screw also has to be tightened just right. Overtightening it makes the lever not move or move insufficiently. Having it too loose might make the lever move in other directions than intended.
- Also, make sure the magnets have the correct orientation. They need to be repelling one another.
- The FS-lever has to be printed in black PETG. The color of the extruder plastic parts can be different, but the tiny FS-lever must be black.
After fixing this issue, assemble the extruder following 5. E-axis assembly you can also turn the Filament autoload back on. Re-do the Z calibration, it should not be necessary to re-do the entire XYZ Calibration, unless you have by mistake touched/moved with the P.I.N.D.A./SuperPINDA sensor.
Clean up of printed part
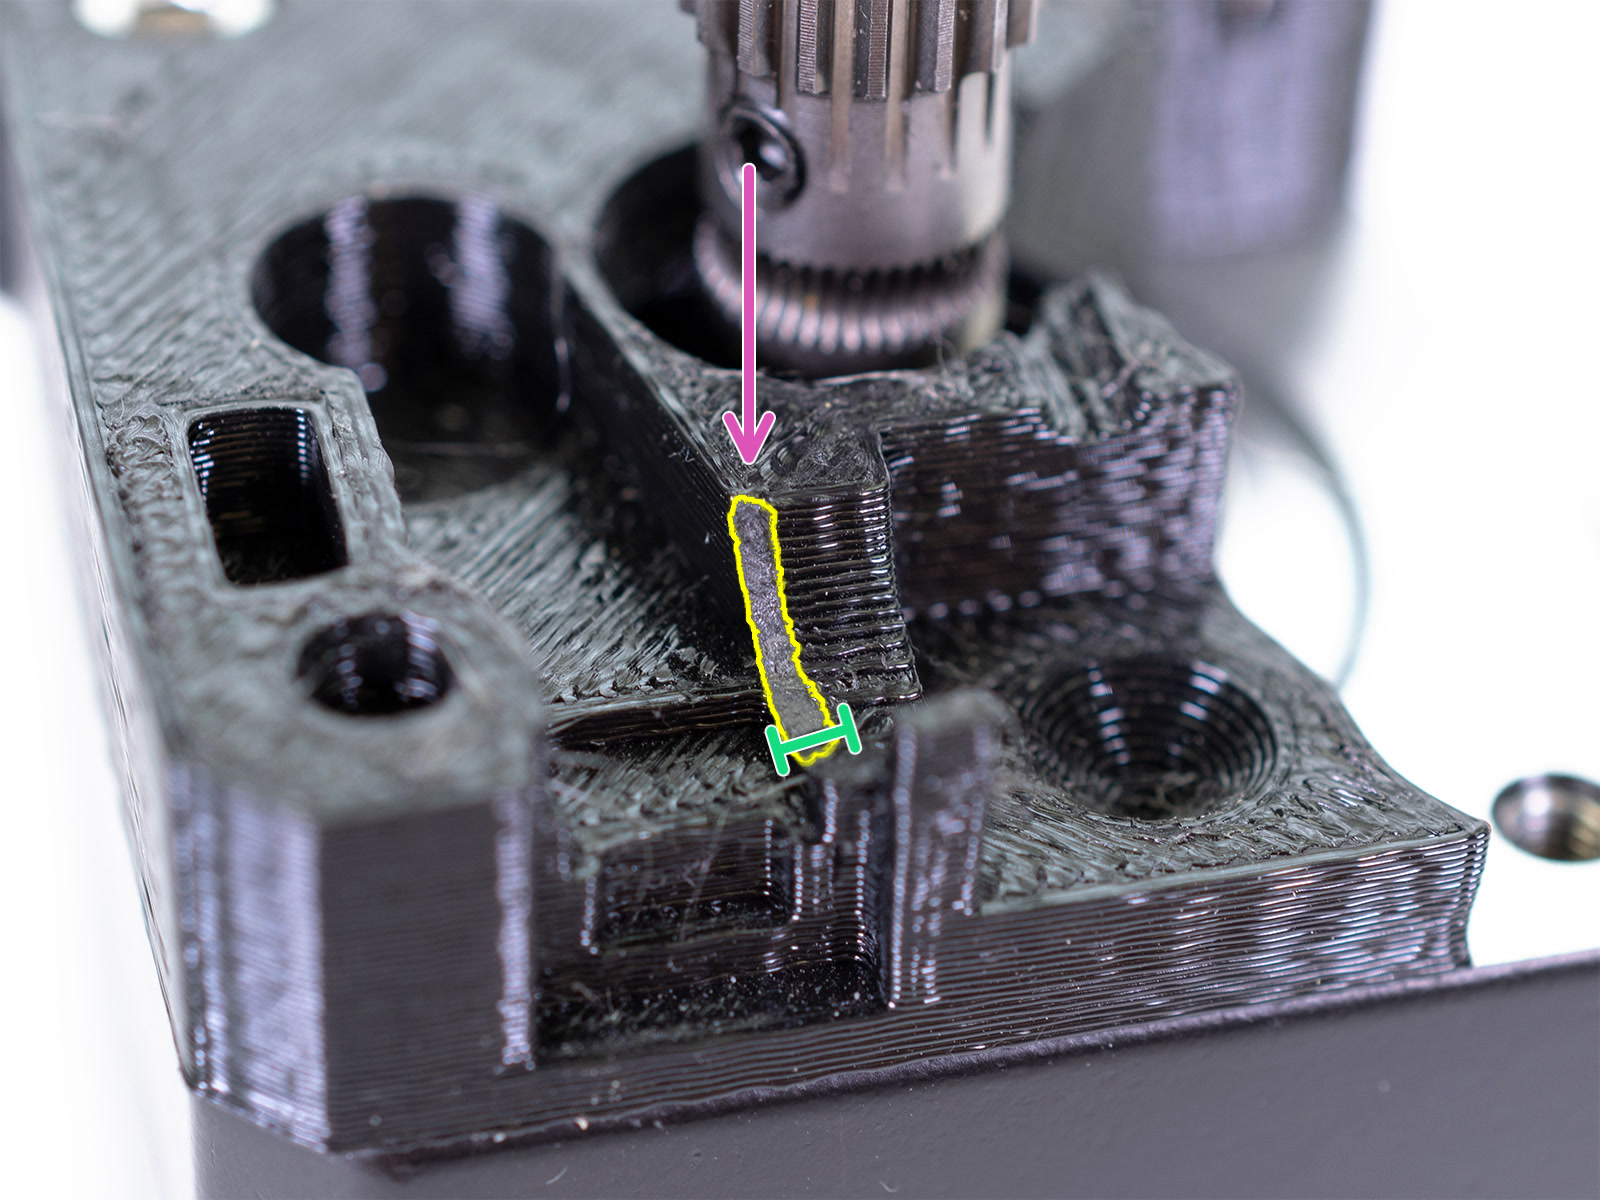
If all of the steps above do not solve your issue, and the IR sensor will continuously trigger, it may be necessary to do some clean-up of a printed part. The tolerances within the IR filament sensor mechanism are very tight. On some prints of revision R4/C4 of the extruder-motor-plate, it may be necessary to shave off a little bit of material to have the right clearance.
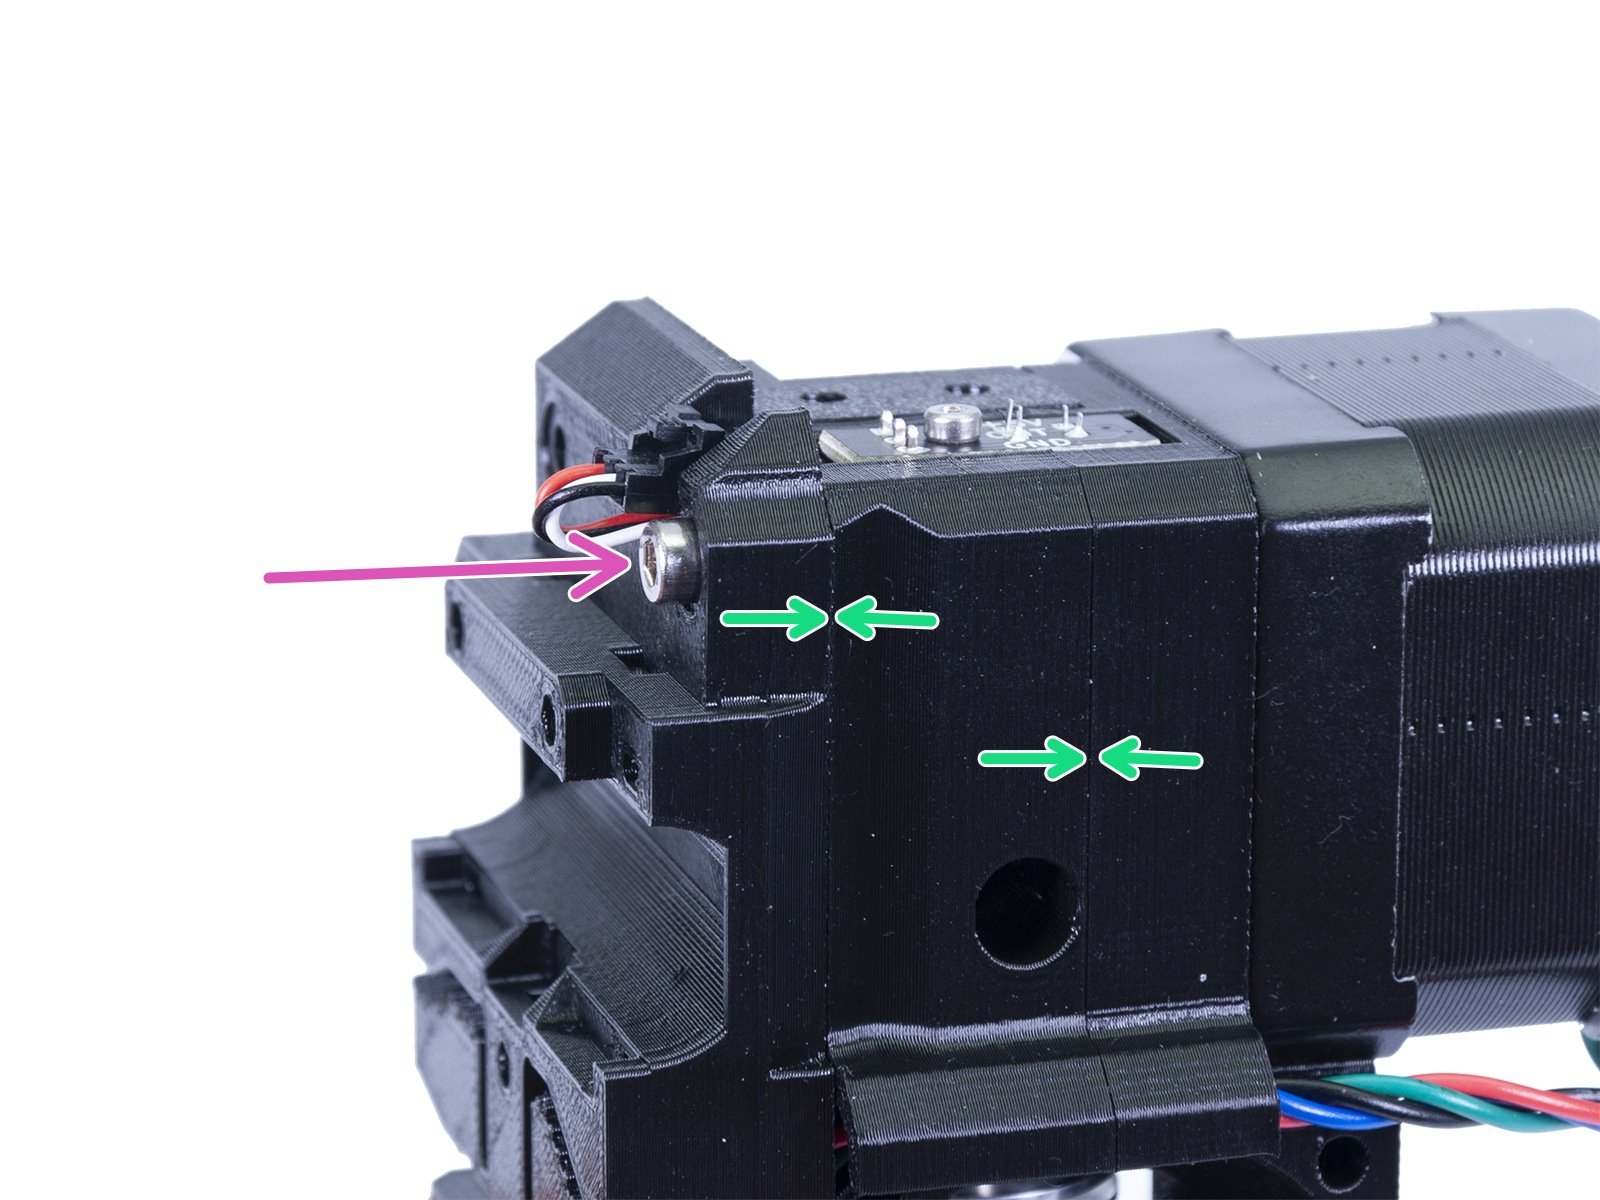
Using an Exacto knife, cut away the plastic ~0.5 mm deep around the edge, marked in the picture below (purple arrow and green measure). In essence, remove the steps from the layers in the round area where the Fs-lever triggers the sensor.
When the sensor is removed, you will see if the extruder-motor-plate is still interfering with the Fs-lever, moving it when placed back on.
60 comments
Neither cleaning the sensor nor replacing the leveler did solve the problem.
I have been for hours with the chat to solve the problem - unfortunately with no luck.
Then I read somewhere here to replace the part holding the metal ball.
This resolved the problem. I suppose after some time, due to wear, the ball has too much space and can wiggle a little, triggering the sensor there is no filament inserted (or the filament ran out).
Regards
https://help.prusa3d.com/guide/5-e-axis-assembly_28536#28872
The sensor is working perfectly now after reassembling it! Hope this helps others that may be having the same issue!
If I don't have PETG (have never used it) how much trouble am I asking for if I use black PLA? Not excited about buying a spool of something I will likely not use for anything else just to make this part. PrusaSlicer says it will take .35m of material and 11 minutes machine time…anyone want to mail me a meter or so?