This article covers how to configure your own image for any Raspberry Pi (RPi) from scratch. Following this article, you will have connected a base installation of Octoprint which you can expand upon. It will also include how to configure the Raspberry Pi Zero to be connected by its GPIO pins. However, the Raspberry Pi Zero is not powerful enough to utilize advanced Octoprint features and plugins, like video streaming, and is officially not recommended by the Octoprint project.
Required parts
- A Raspberry Pi A, A+, B, B+, 2B, 3A+, 3B, 3B+, 4B 1/2/4GB, or Zero W/2 + PSU.
- WiFi dongle if your RasPi does not have built-in WiFi.
- USB Cable:
- Original Prusa i3: USB type-A cable.
- Original Prusa MINI: Micro USB cable.
- An SD or microSD card for your RasPi of at least 8GB.
- Computer with a working SSH client, like PuTTY. Mac/osX and Linux have SSH integrated into their Terminal.
- A (micro)SD card-reader to flash your SD-card.
- WiFi network.
Flashing the Octoprint image
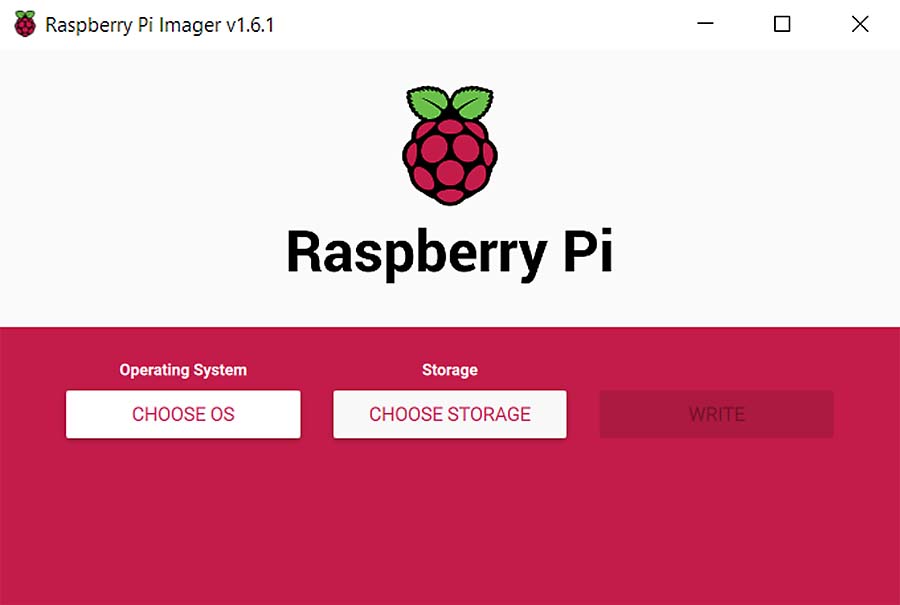
Since the Raspberry Pi Foundation released their "Raspberry Pi Imager", it is no longer necessary to edit config files after flashing. All can be configured in the imager, within its Advanced options menu. Raspberry Pi Imager even allows you to download images through it. Let's go through it.
- Download and install the Raspberry Pi Imager for your computer. This is found here.
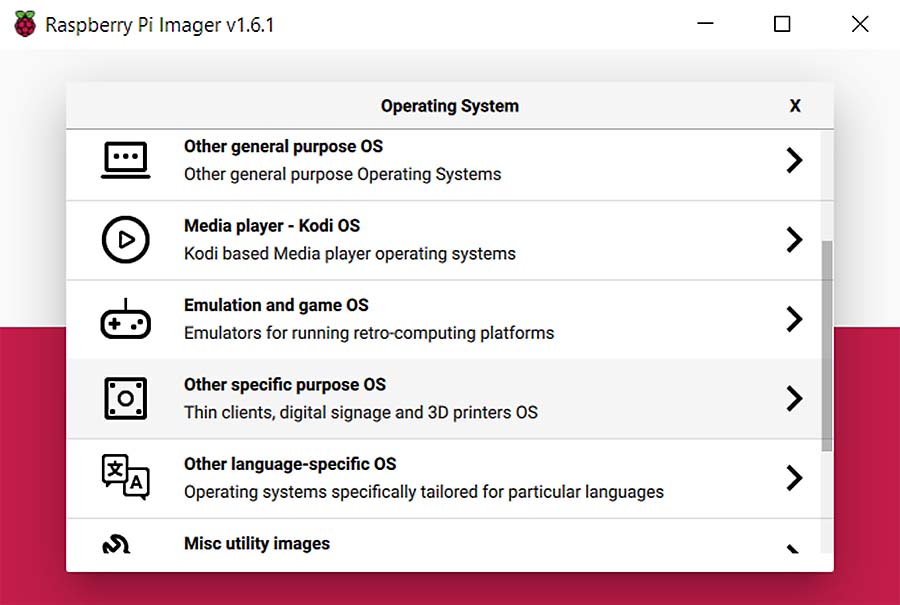
- Click the 'CHOOSE OS' button and navigate to ‘Other specific purpose OS’ -> ‘OctoPi’ -> ‘stable’ version.
 | 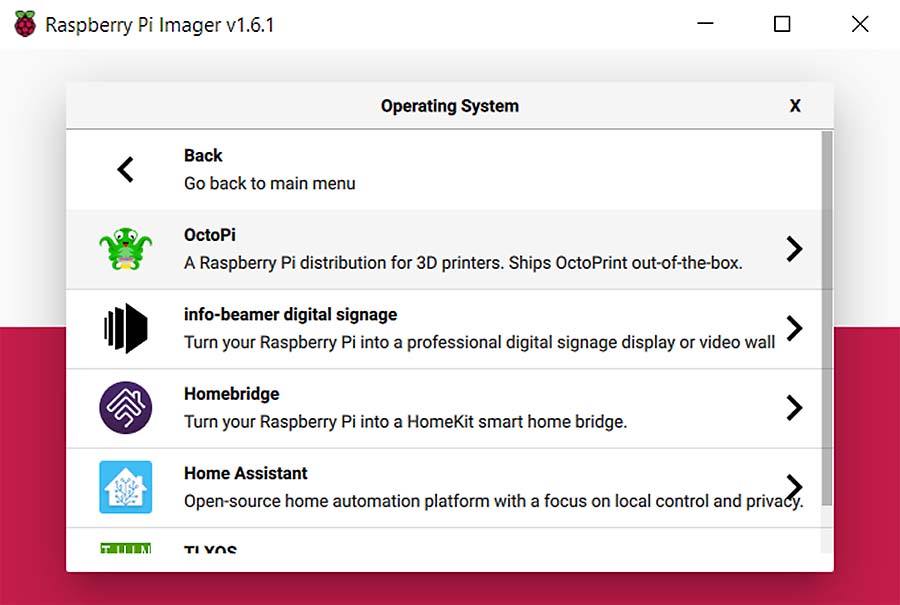 |
- Enter the Advanced Options by pressing Shift + Ctrl + X. Enable SSH to set a hostname (name of the RPi on the network) and main password right away, as well as your WiFi network and password to connect to the Raspberry Pi later.
- After this, select your SD card under 'CHOOSE STORAGE', before clicking 'WRITE' to start the flashing process.
Connecting the RasPI
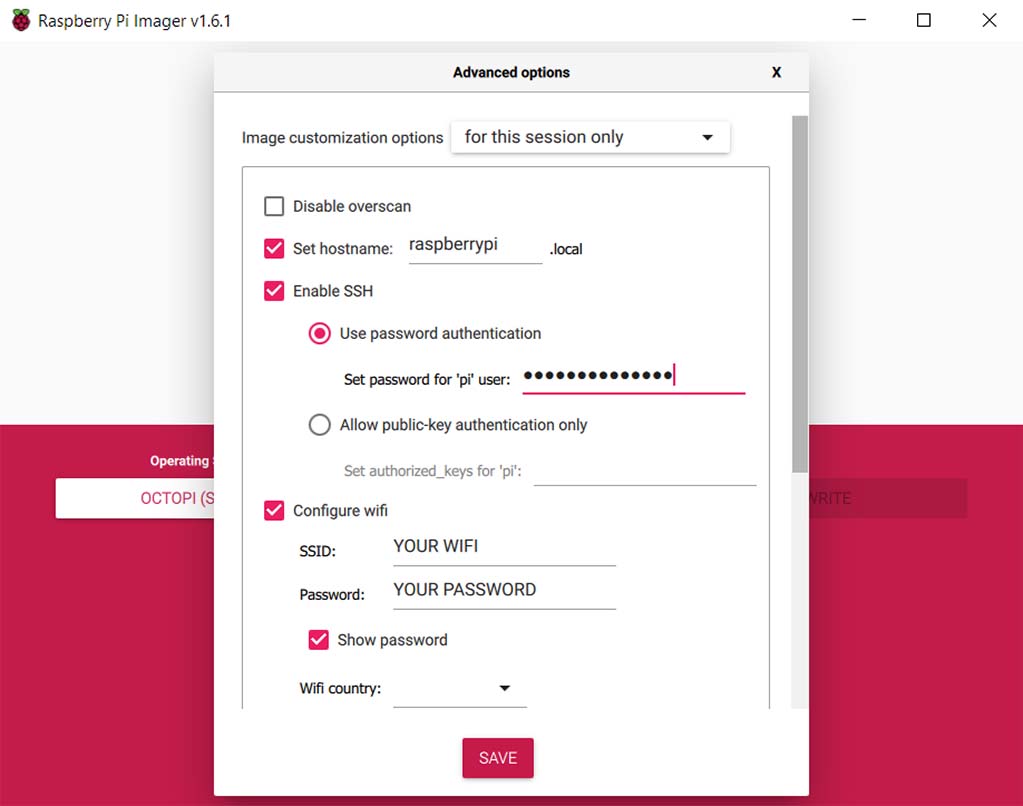
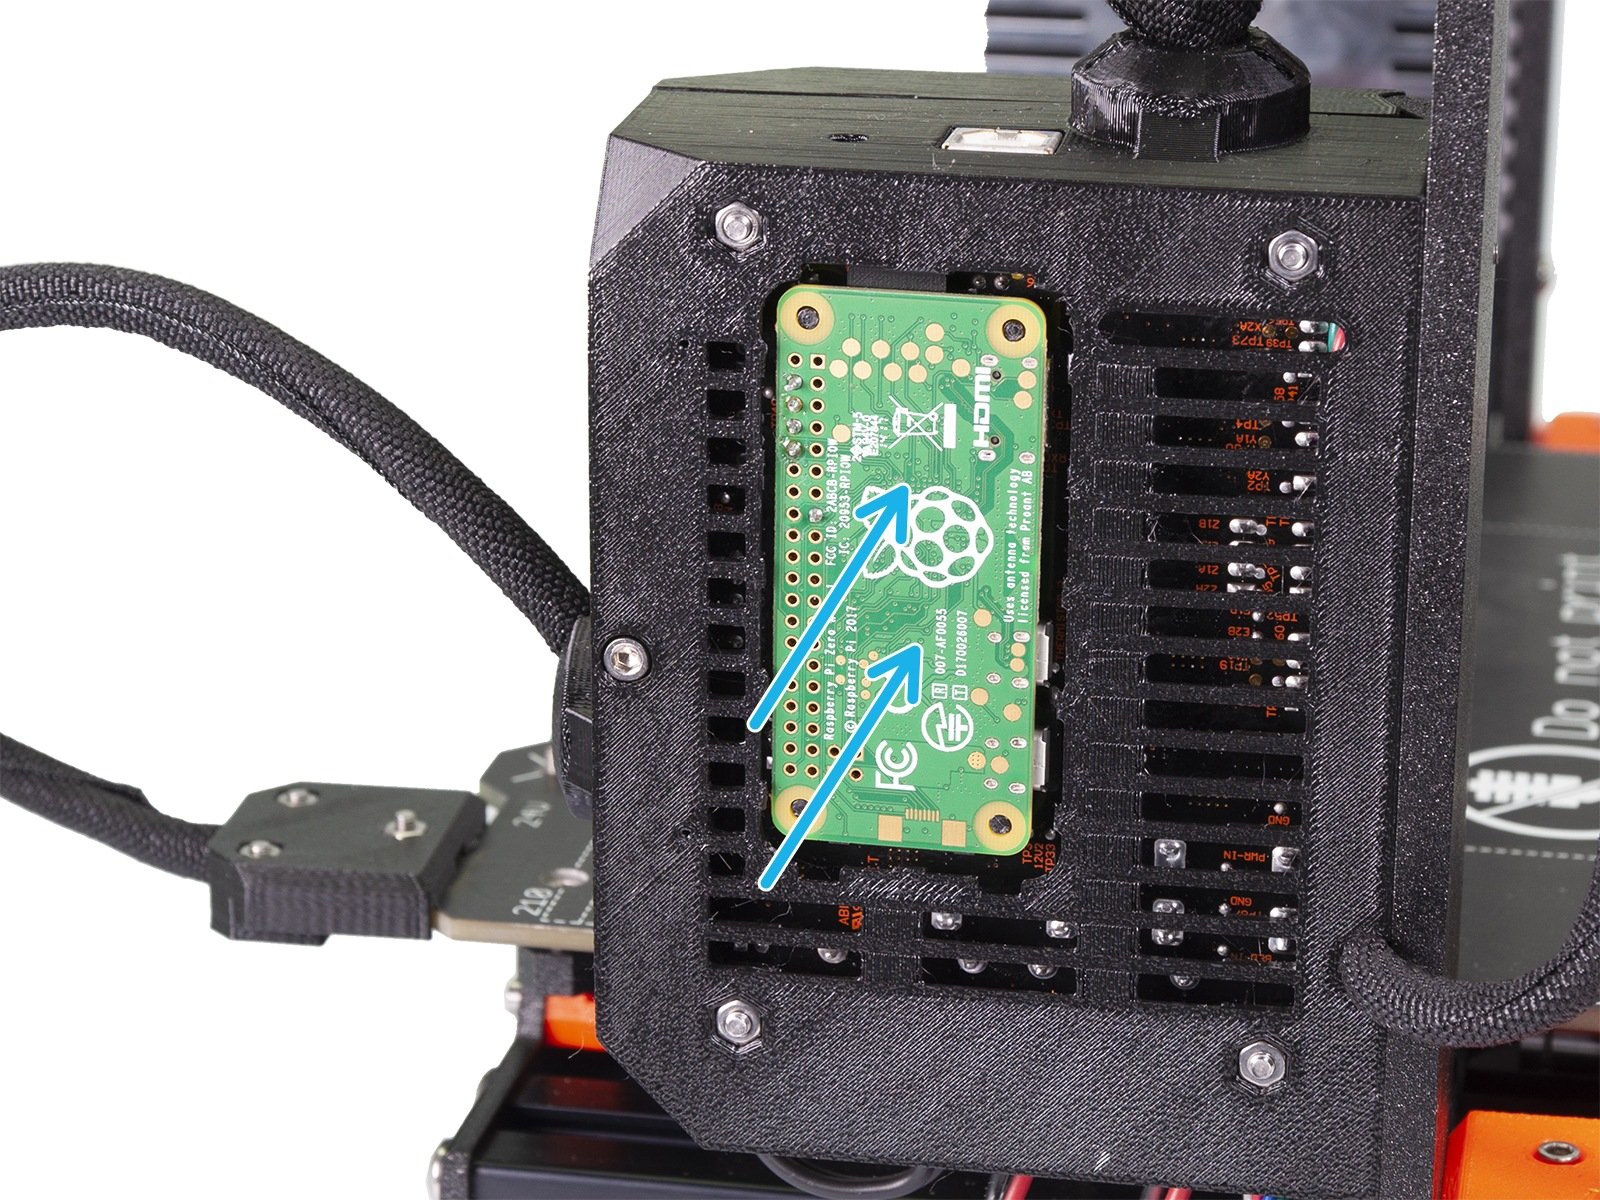
Insert the (micro)SD card into your RPi and connect it to the printer by USB. After this, power your RPi. The Raspberry Pi Zero W will be connected to the printer using its GPIO pins, not USB. We recommend doing this before proceeding. However, for these configurations, you can power it using a 5V phone charger and connect it later.
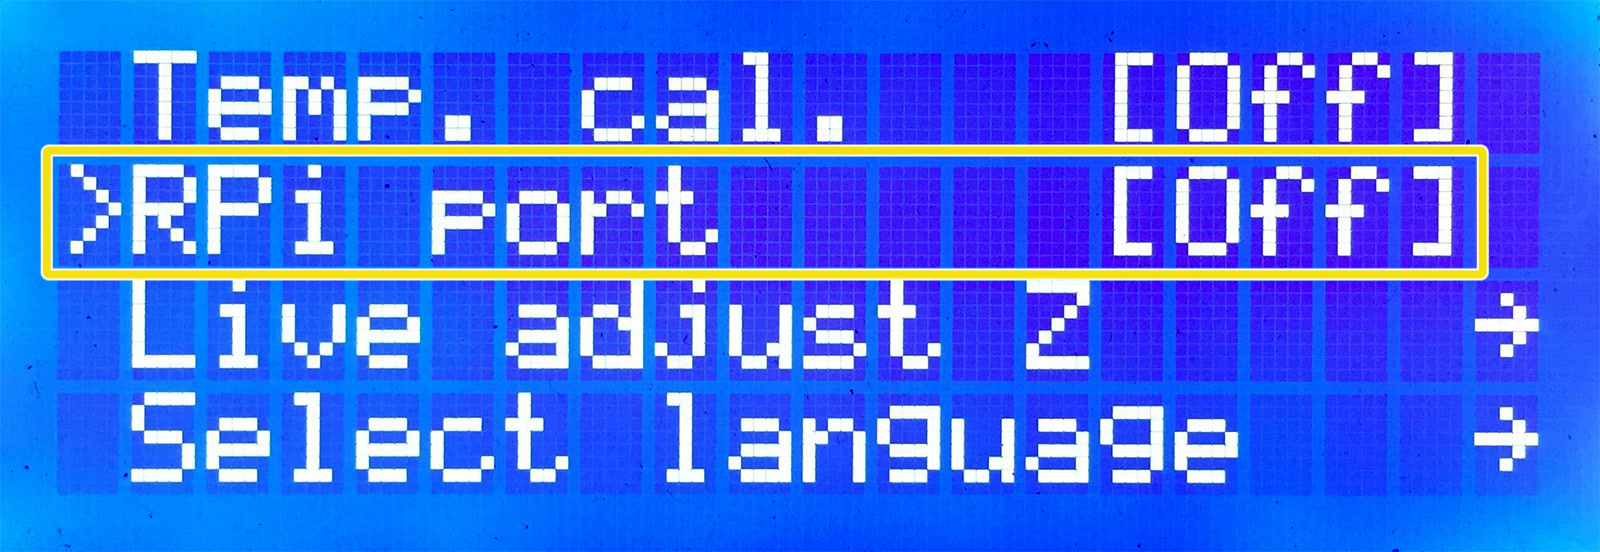
When using USB to connect to the printer, deactivate the RPi port (LCD menu -> Settings -> RPi Port and set it to "Off").
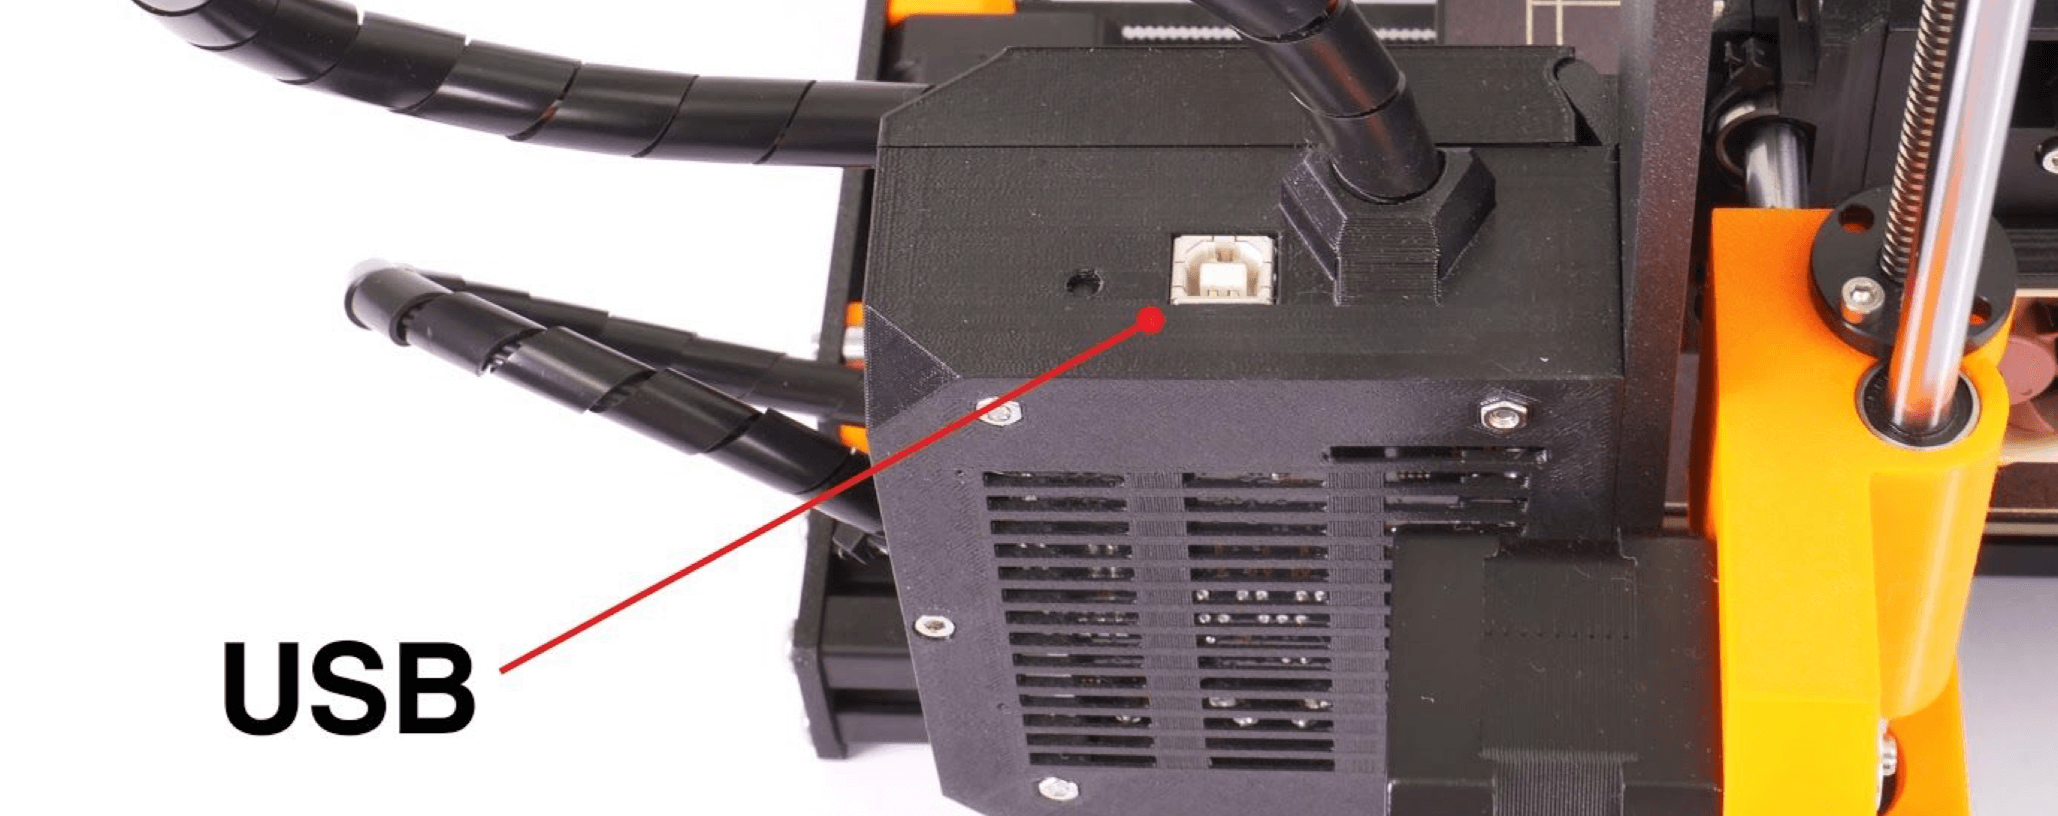 | 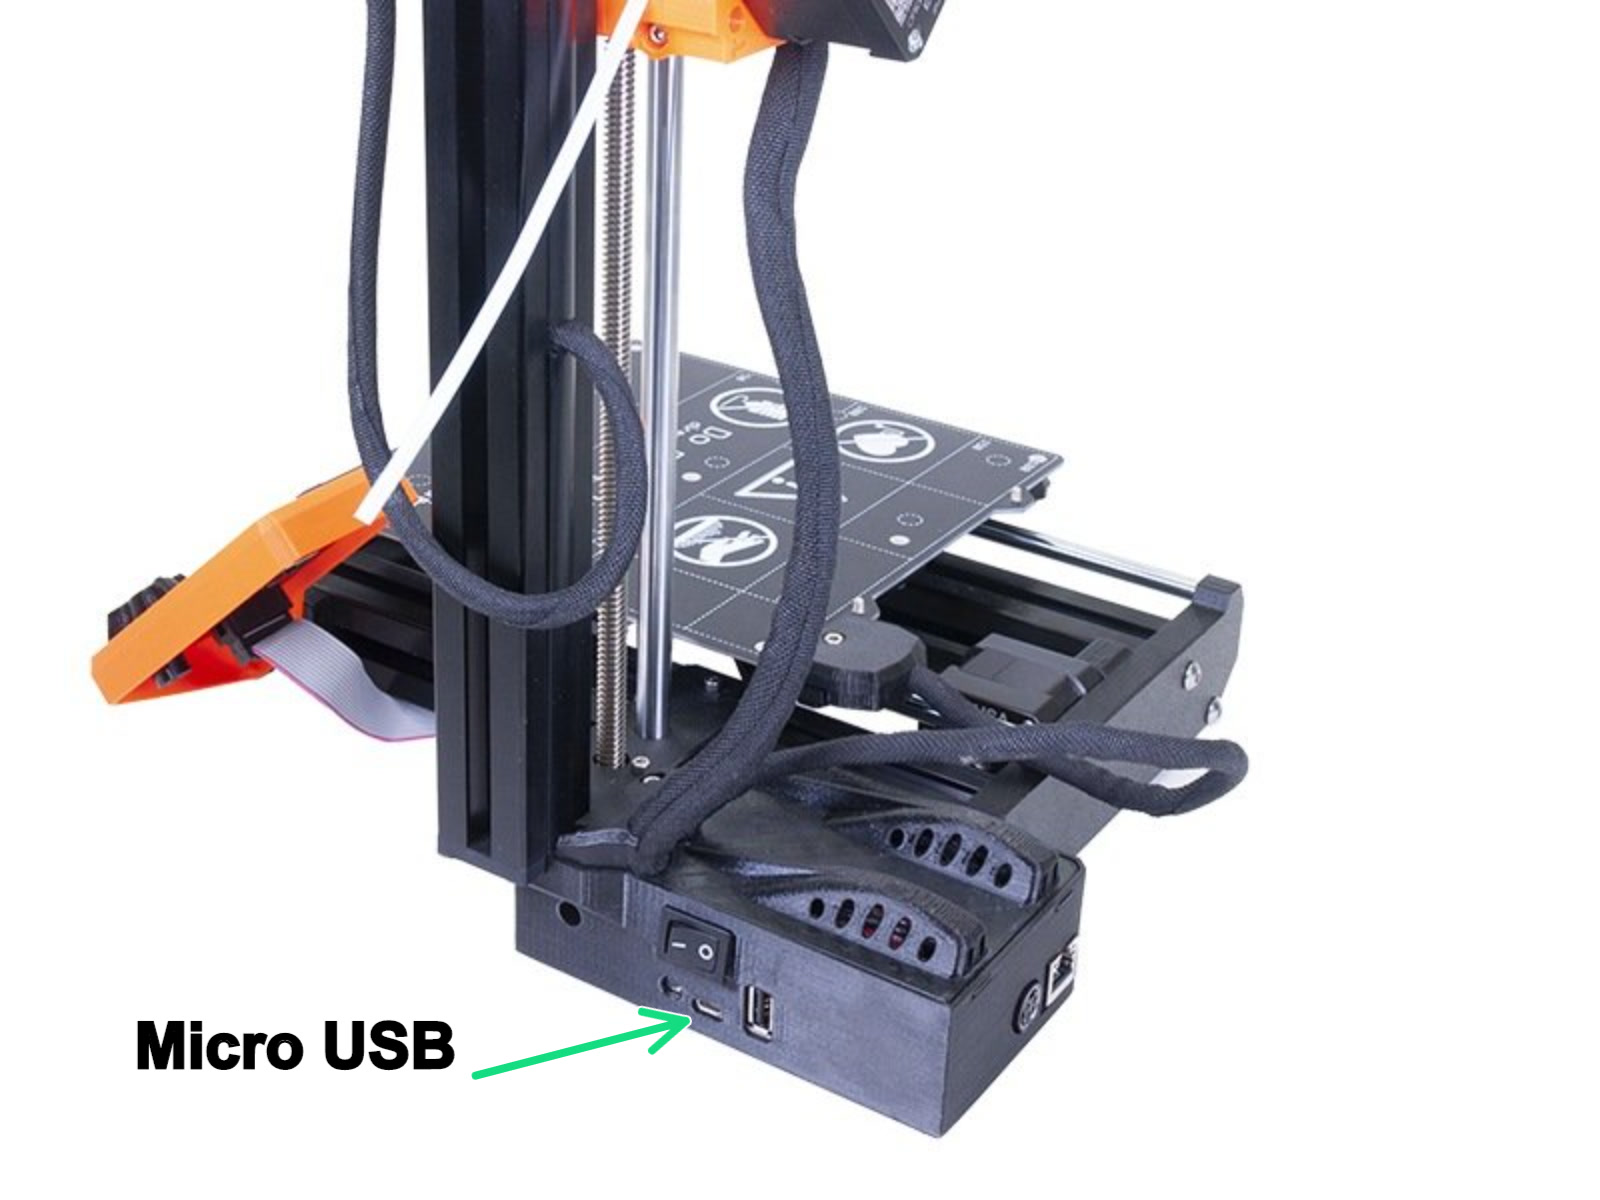 |
| MK3s/MK2.5S USB Type-B USB port | MINI Micro USB port |
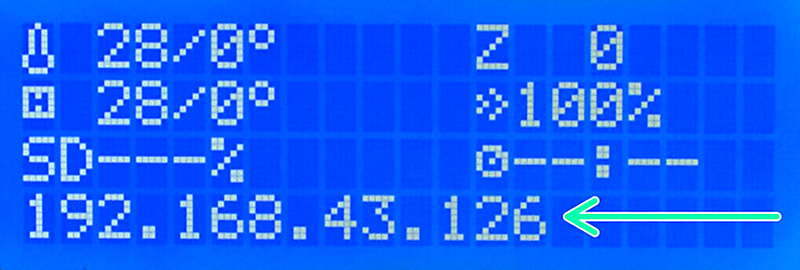
Finding the IP
The RPi will need a few minutes on its first boot before it will connect to your network. You should then be able to find the RPi IP address in a mobile app like "Fing" or a similar IP scanner. The IP address will have the same prefix as your computer, but with a different ending. It probably also be Named "Octoprint" and/or "Raspberry Pi" or a variation of this. Common local IP addresses are 10.0.0.XXX or 192.168.0.XXX.
Launching and configuring Octoprint
Open your browser and type in either "octopi.local" or the IP address of the RPi. You may be greeted with a welcome wizard. Please go through it and add a printer profile. Then we need to configure the Printer profile.
Click the Settings-wrench in the top right (purple arrow). Here you can configure your profile, install plugins, and other settings (green square).
 | 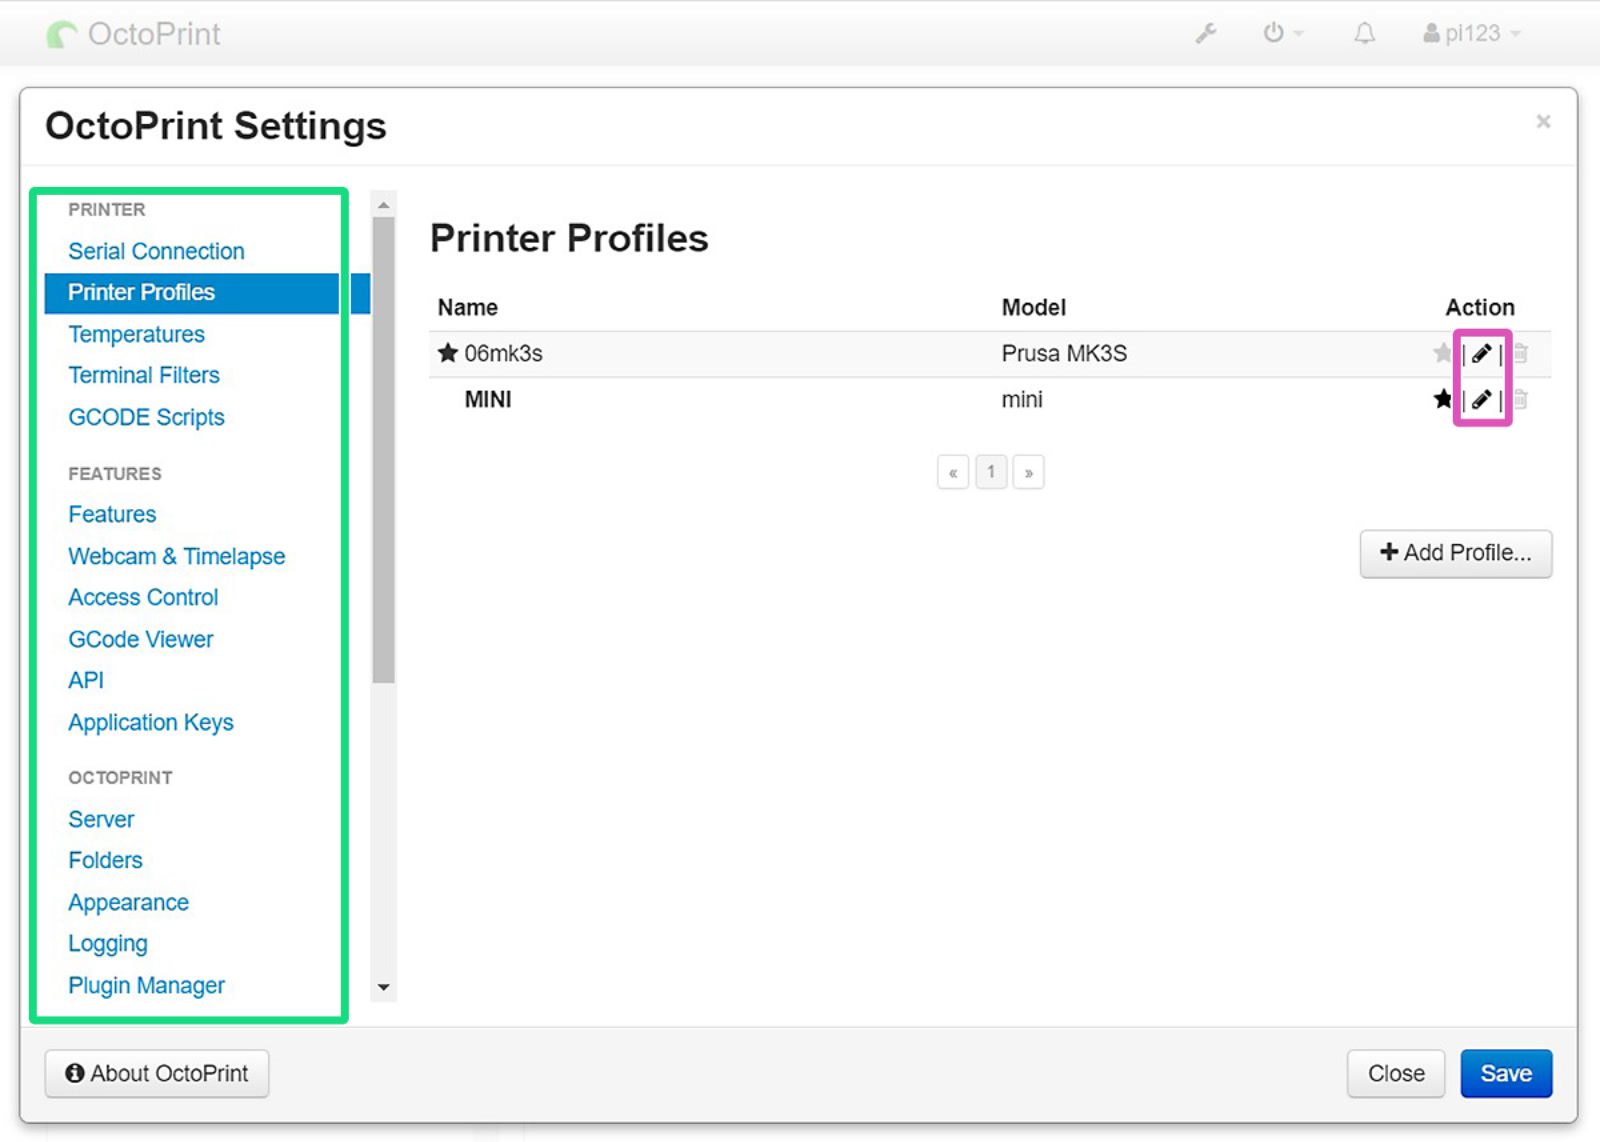 |
Select "Printer profiles" and click the pen icon (purple square) to edit. Under "Print bed & Build volume", change the values in the table below. All other values can be left to default. This will only affect Octoprint's control over your printer, and will not affect sliced G-codes.
| Form Factor | Origin | Heated Bed | Width | Depth | Height | Custom Bounding Box | |
| MK3S | Rectangular | Lower left | Yes | 250mm | 210mm | 210mm | X: 0/250, Y: -4/210, Z: 0/210 |
| MINI | Rectangular | Lower left | Yes | 180mm | 180mm | 180mm | X: 0/180, Y: -3/180, Z: 0/180 |
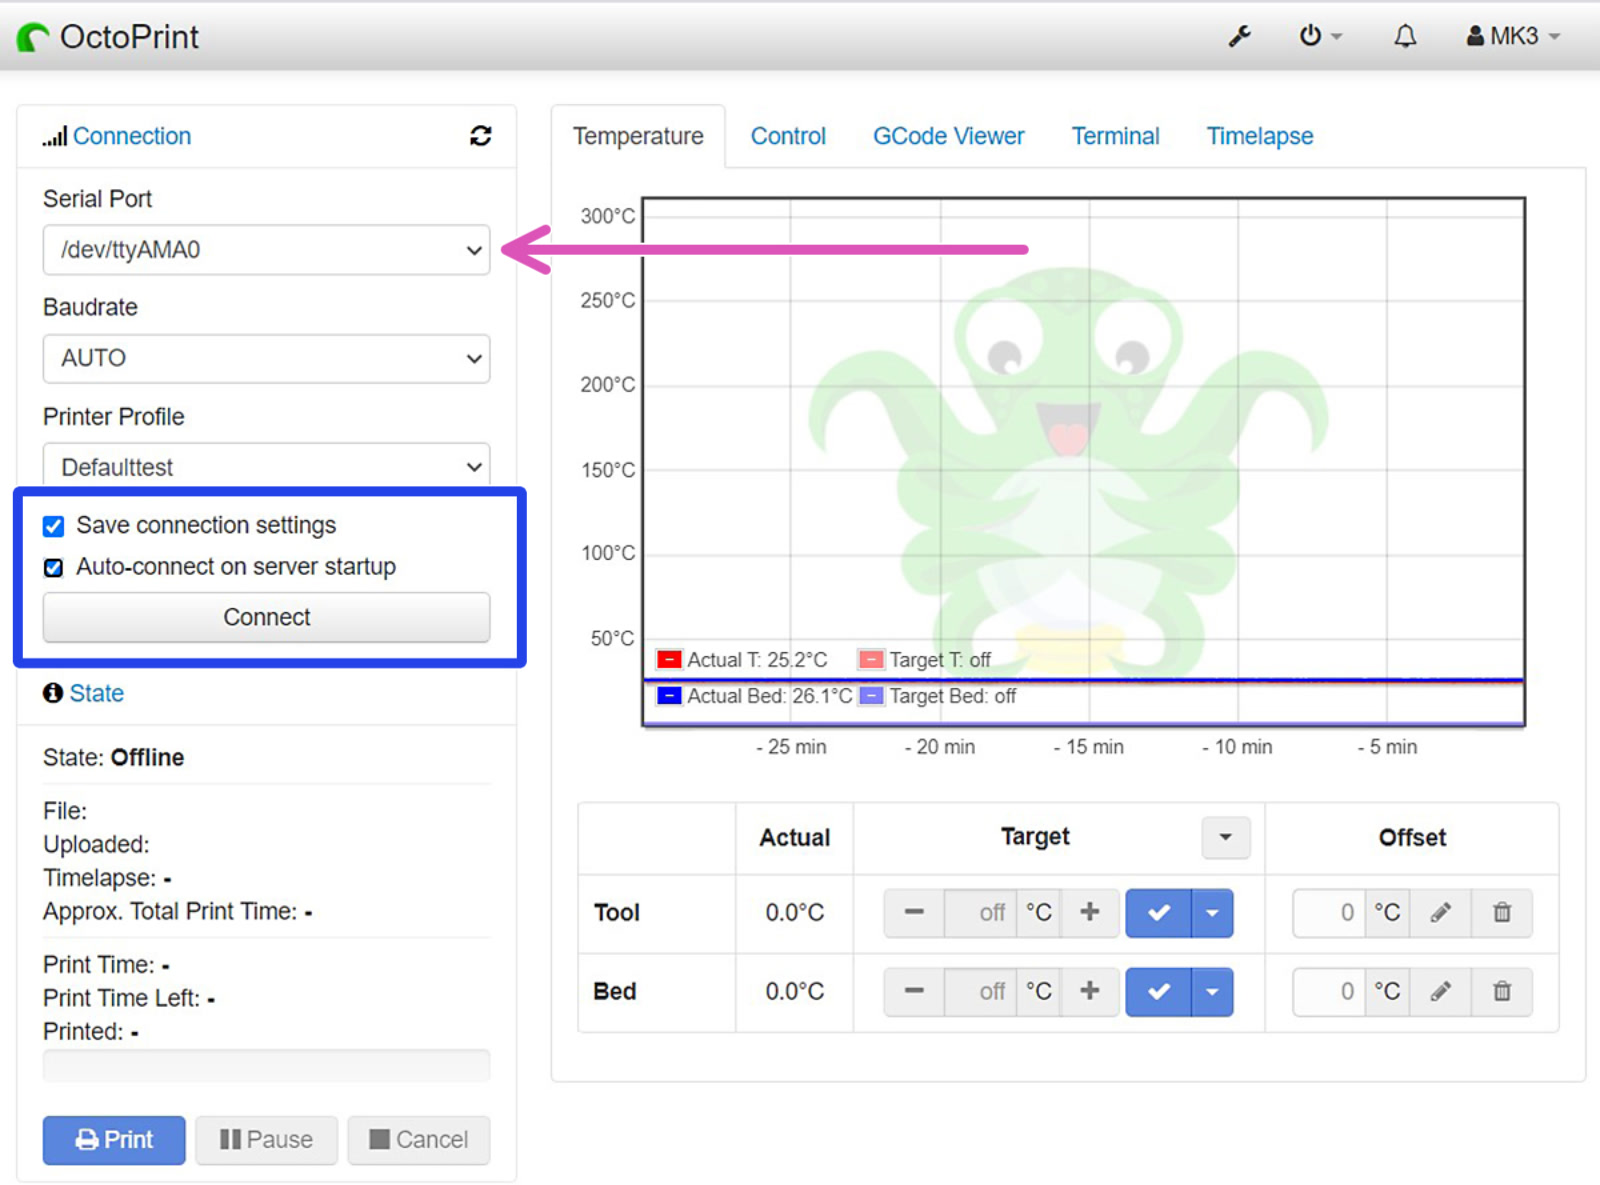
For RPis connected by USB, you can leave 'Serial Port' and 'Baudrate' on "AUTO" (blue square), and click the Connect button. Congratulations! You are now ready to use Octoprint with your printer. Octoprint will ask if you wish to update. Do so now, before installing any plugins.
 | 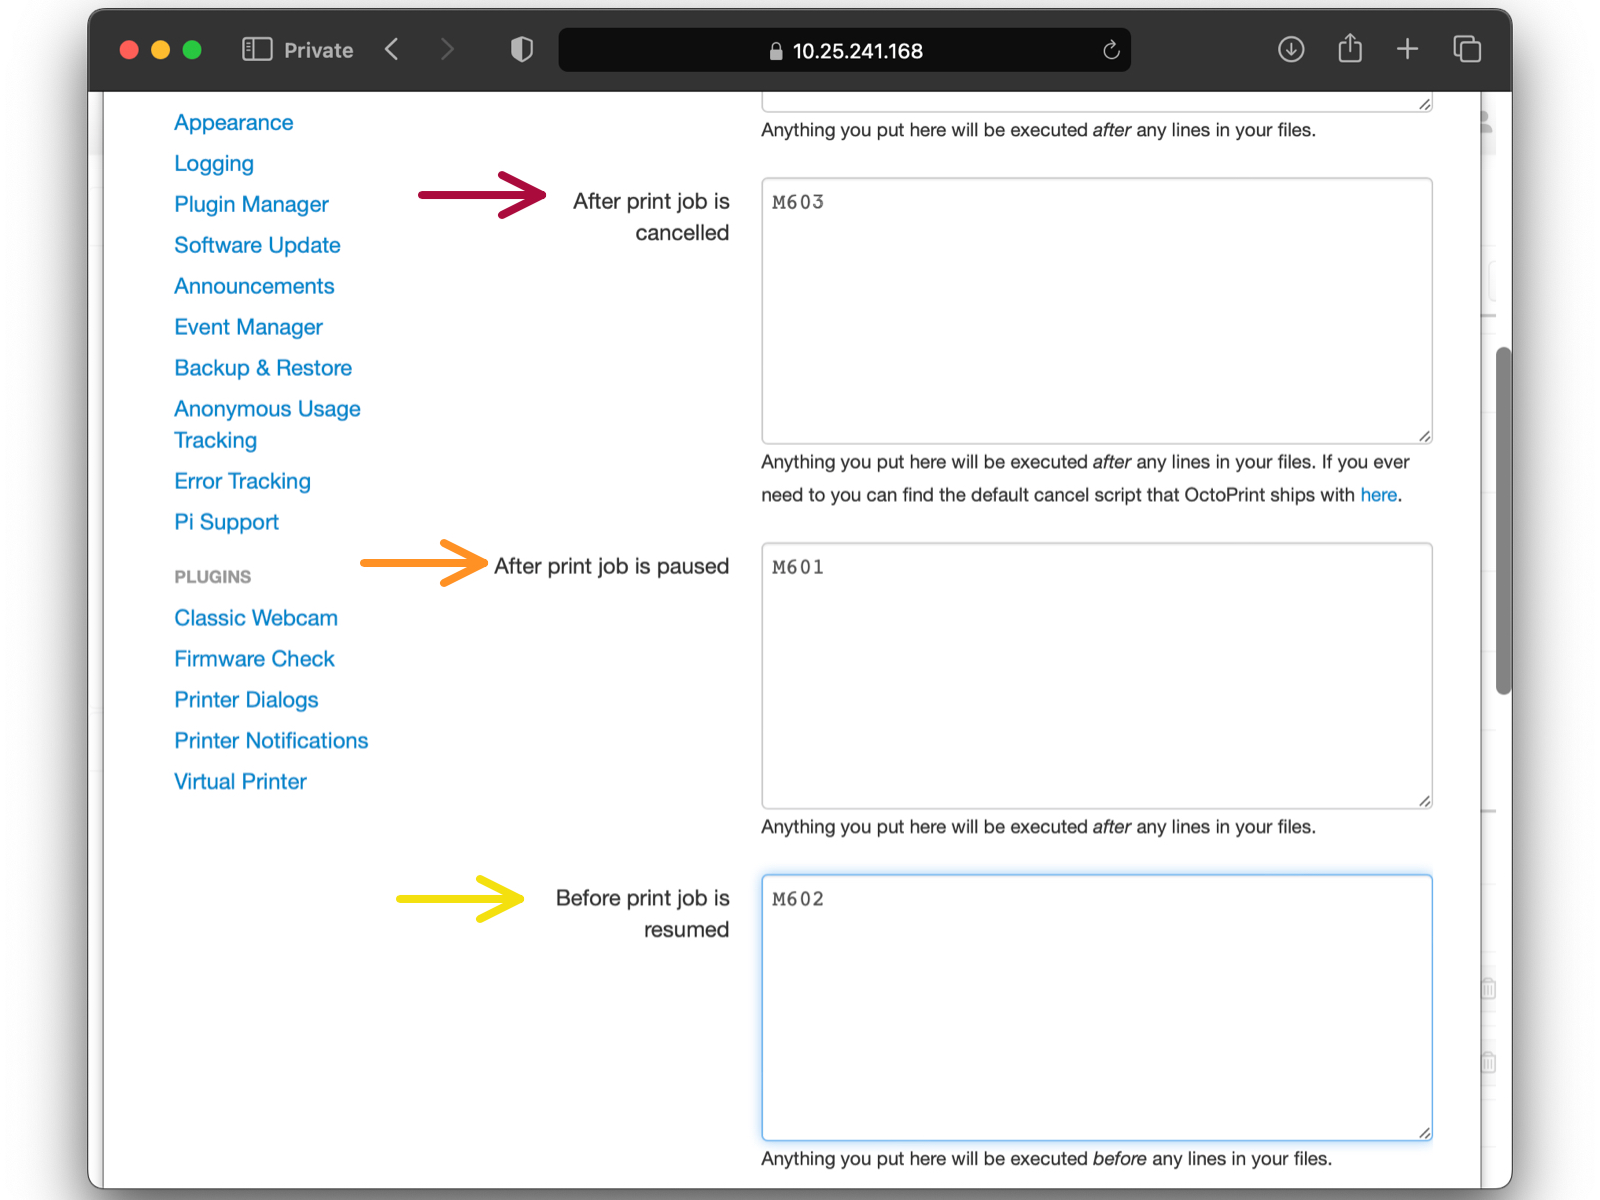 |
in GCODE Scripts section (blue arrow), edit these items:
After print job is cancelled: M603 (red arrow),
After print job is paused: M601 (orange arrow),
Before print job is resumed: M602 (yellow arrow).
Installing plugins
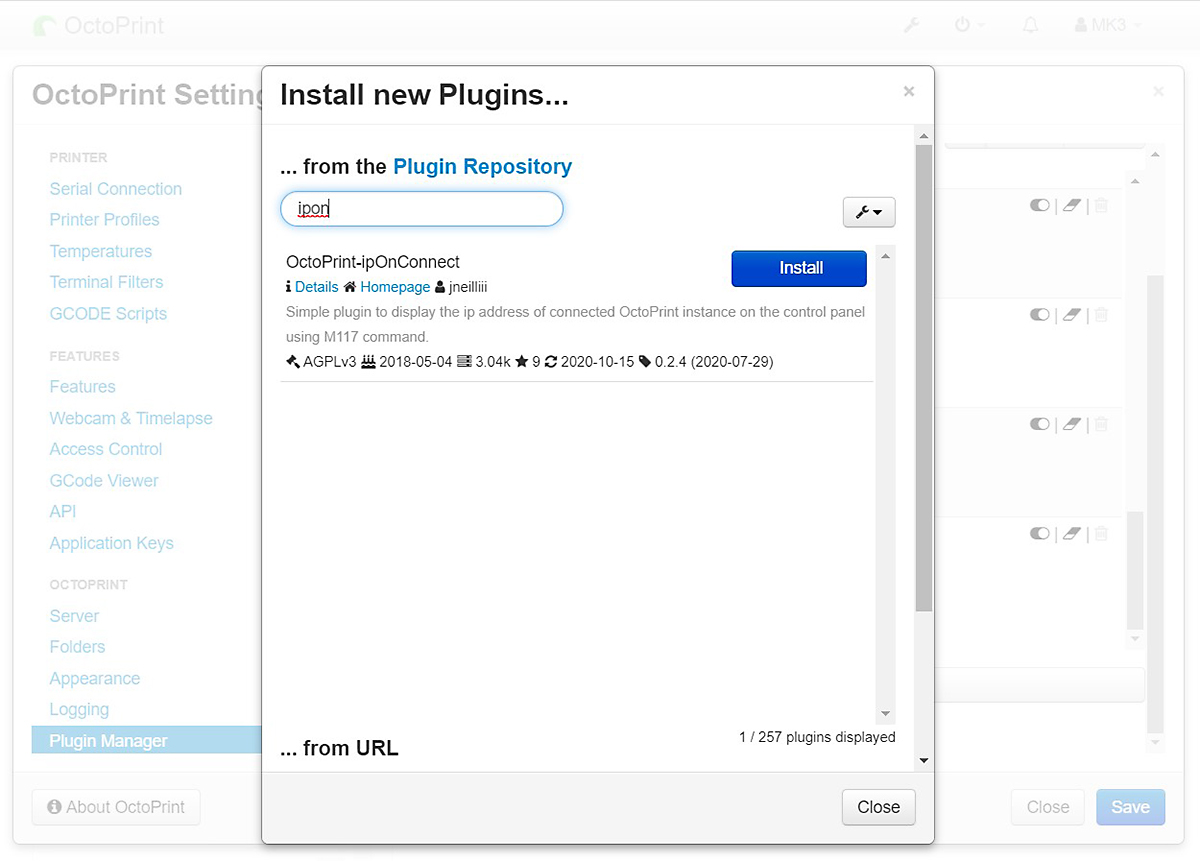
Running Raspberry Pi on your printer is sometimes called having a headless system, as there is no screen directly connected to the Pi board. Whenever you move your printer to a different network (and have edited octopi-wpa-supplicant.txt for the new network) or forget the printer's IP address, there is a plugin that will show the IP address on the printer's screen.
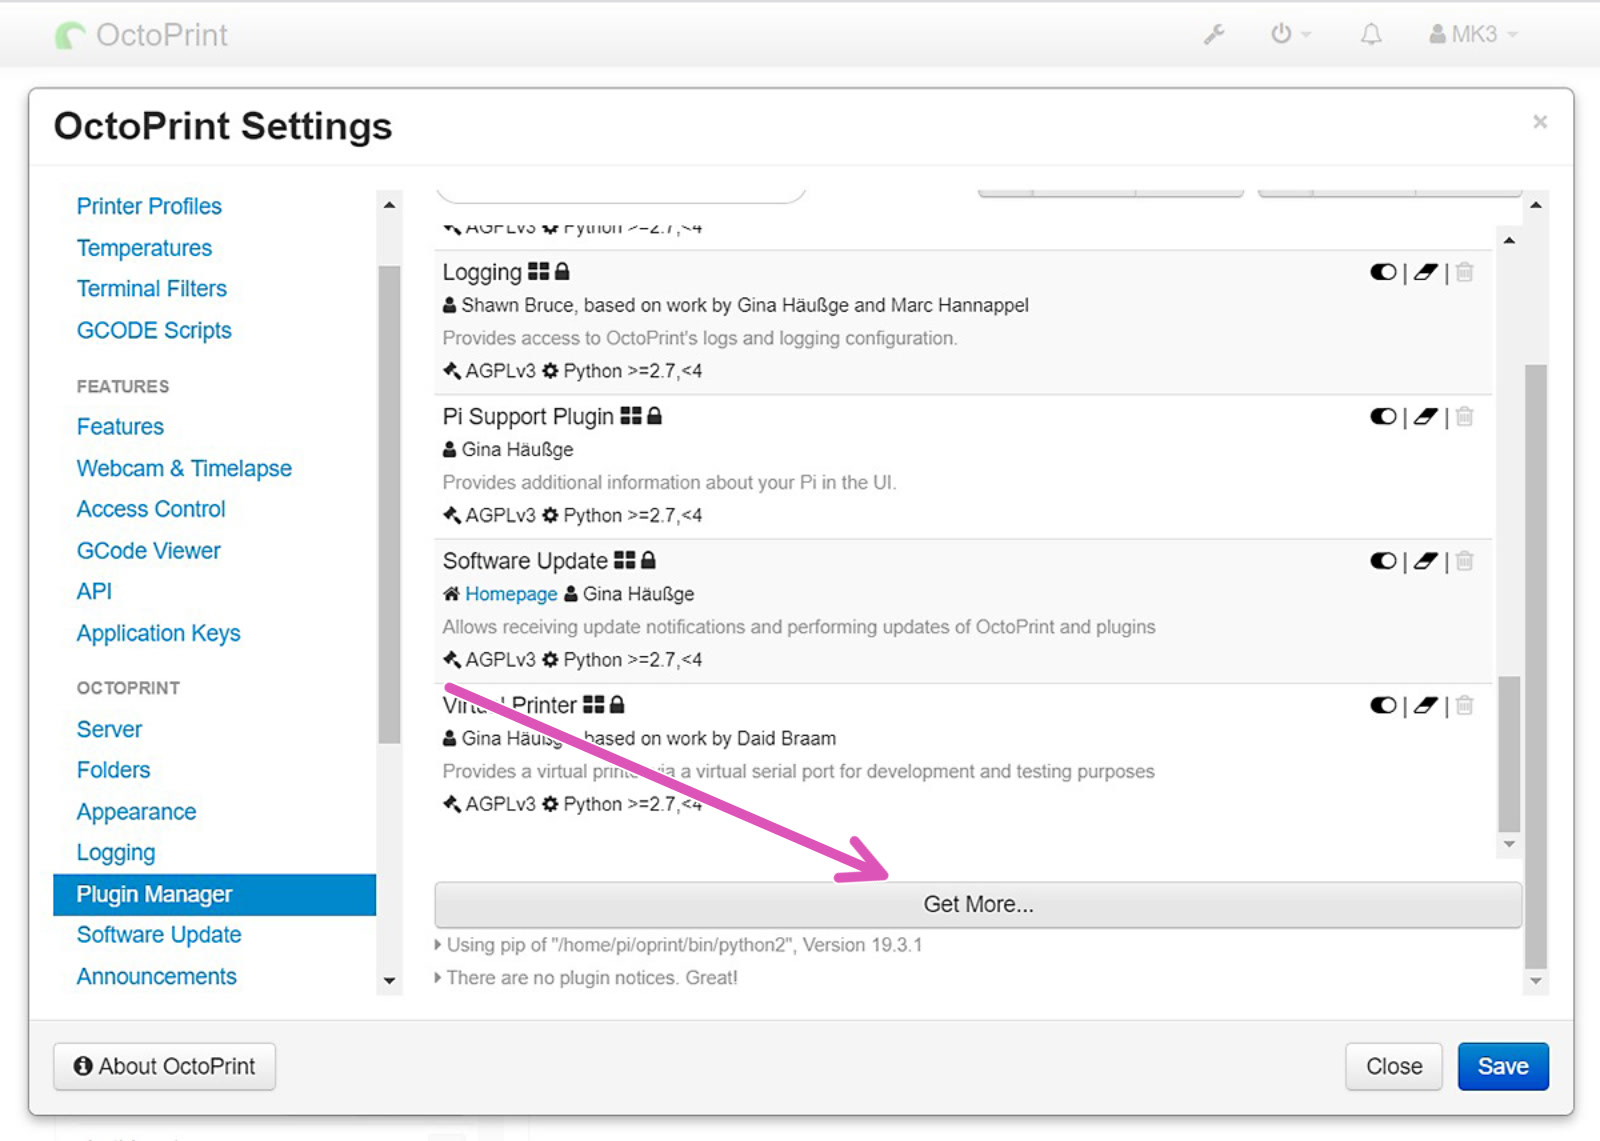
Open your OctoPrint's web interface. Open Settings and in the left column find "Plugin manager", Scroll down click on "Get More..." (purple arrow) and search for "IPonConnect". Click install. After installation, a pop-up will prompt you to Refresh the page. Click "Refresh".
 |  |
Turn the printer off and on again by flipping the switch on the side. Give it a few minutes and you should see the IP address on the display. Note that if you enter the printer's menu or insert an SD card, the IP address can disappear from the screen and you have to reboot the printer to see it again.
Use
As we do not develop Octoprint, we can not cover all aspects of use. For that, we suggest checking out Octoprint's own resources. However, we recommend checking out our guide covering:
Below is a list of Octoprint plugins you might find useful or cool:
- Simple Emergency Stop - Button on UI to stop everything immediately.
- NavBar Temp - Temperature is shown in the navigation bar.
- Heater Timeout - Shuts off heaters after set duration when idle.
- OctoLapse - Better timelapse
- Themeify - Cool (mostly dark) themes for the UI.
Configure RPi Zero W GPIO
To use RPi Zero/2 W connected directly to an MK3/S+ GPIO, you must change a setting in the printer's menu and configure how the Pi handles serial communication. By default, OctoPrint does not use the Raspberry Pi GPIO pins for Serial-communication. You configure this by connecting to it over SSH. This part only applies to the Raspberry Pi Zero/2 connected by GPIO directly to the MK3S Einsy mainboard.
Printer setting
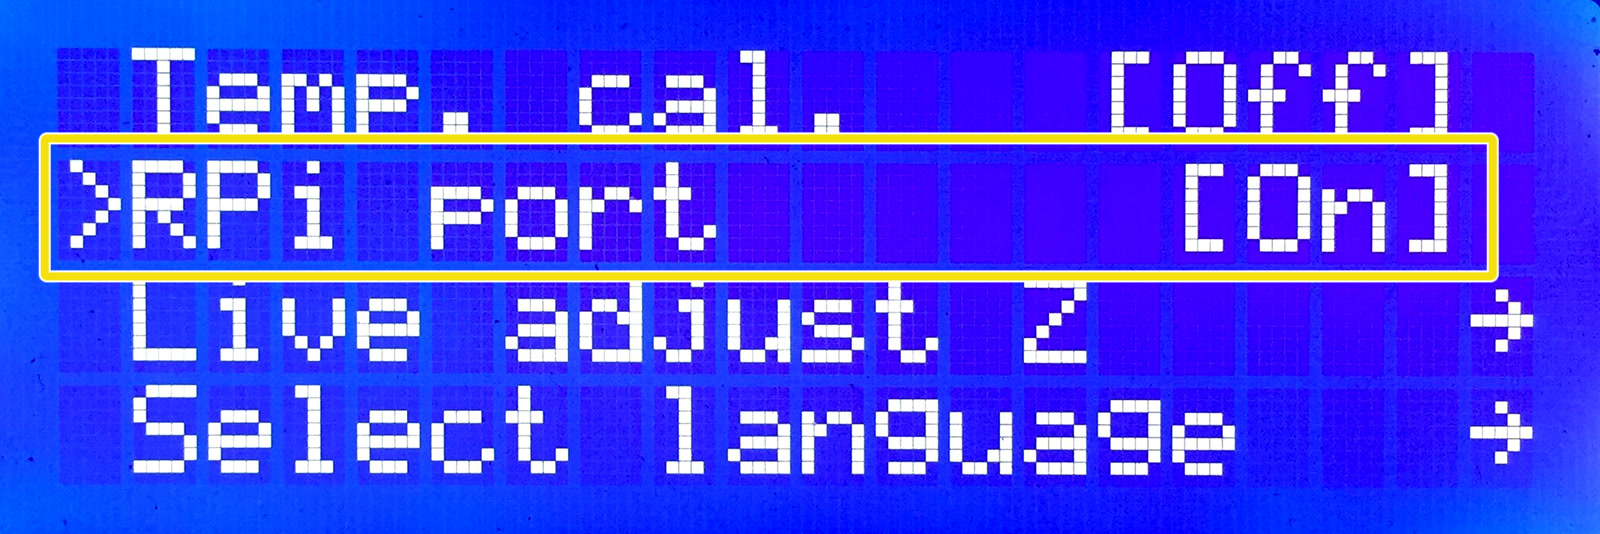
First, to use the GPIO pins for connecting to the printer, activate the RPi port (LCD menu -> Settings -> RPi port and set it to "On").
Using SSH
The Octoprint image which you flashed should have SSH (Secure SHell) enabled. SSH is a way to have remote command over a device after inputting a hostname (what you called the RPi) and password. Make sure the RPi and your computer are connected to the same network and use the credentials below.
On Windows:
Open PuTTY and input "hostname@your_IP_address" (Example '[email protected]') to the Host Name field (green square). Most users can leave 'Port' number to 22. Make sure 'Connection type' is "SSH" and click Open (purple arrow).

On Mac:
An SSH client is built into Terminal. Open Terminal and type the following:
In the console, you will be asked for a password. Input your password. No characters will appear as you type. Hit enter and you will have shell-command over your RPi.
On Linux:
Most popular distros also have an SSH Client installed and you connect the same way as on Mac. However, for all edits except changing the super-user password of the RPi, you can locate and edit the files using a card reader, from your desktop environment. Built-in card readers may not work on virtual machines. Use a USB card reader.
In the console, you will be asked for a password. Input your password. No characters will appear as you type. Hit enter and you will have shell-command over your RPi.
Swapping ports used by GPIO and Bluetooth
Two config files must be updated and a serial port added, over SSH. Some of the following codes are taken from a thread in our forum (Shout out to Scott.w12:).
The first thing to enable serial connection is to swap ports used by the GPIO (soldered pins) and the internal Bluetooth chip. We need to add a line in the config file on the boot partition.
With the down-key, move the cursor to the very end and add:
Press Ctrl+X to exit the Nano text editor. Press "Y" to save and hit enter to confirm the file name.
For Raspberry PI Zero 2:
If you experience connection or read/write issues, add the following line to the same file.
dtoverlay=disable-bt
For good measure you can also disable Bluetooth services globally with the following Terminal commands:
sudo systemctl disable hciuart.servicesudo systemctl disable bluetooth.service
Disabling the serial console
Moving to another config file, where part of the code must be deleted to disable the serial console.
Look for the following string (text) and delete it.
Rebooting RPi
For all changes to take effect, enter the following command to reboot the RPi.
Adding a serial port to Octoprint
The last part of the configuration is in the web interface. Open your browser and type either "octopi.local" or the IP address of the RPi Zero W. You might be greeted with the welcome wizard, please go through it first.
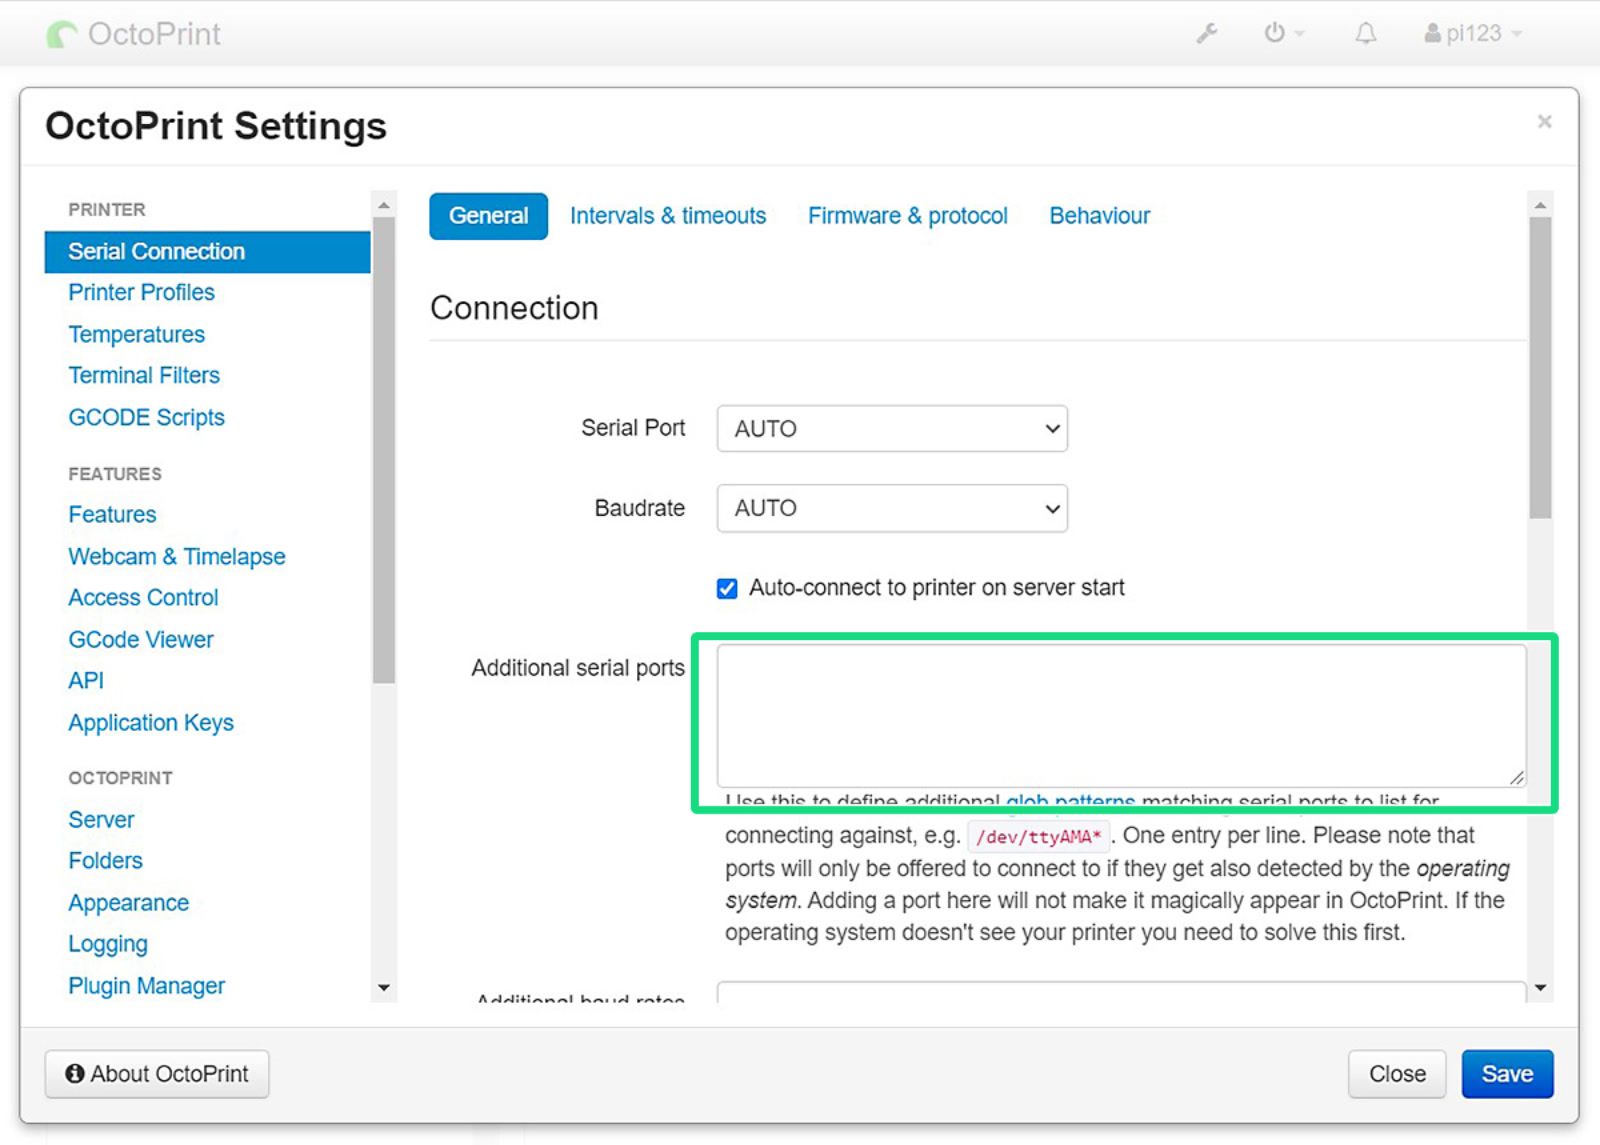
As soon as you arrive at the home screen, open "Settings" by clicking the wrench. Then head to "Serial Connection", and insert the line below to "Additional serial ports" (green square).
Save the change and reboot OctoPrint. After reboot, select the new port (purple arrow) and connect to your printer (blue box). Also, tick "Save connection settings" and "Auto-connect on server startup" for your convenience.
 |  |
47 comments
https://plugins.octoprint.org/plugins/bgcode/
Maybe this should be added to the docs as a recommended plugin?
1 - The files have moved from /boot to /boot/firmware. The files still exists, but they just contain a note saying "don't edit this file, edit the one in /boot/firmware" (paraphrased).
2 - I followed all the instructions, but I can't connect to the printer. The status just stays at "Opening serial connection" forever.
Longer post: I has trouble running PrusaLink, but this tutorial (Octoprint) still works with MK3S+ Raspberry Pi Zero 2W, Latest OctoPrint and firmware 3.14.0
Now I can easily send from PrusaSlicer to Octoprint with just a press of a button. Finally no need to fiddle with an SD card.
If you are using a camera, which one?
You should shut down the RPI (Raspberry PI Zero 2), which is connected via GPIO and thus also receives its power, manually before switching off the printer. This can be done via the Octoprint menu or via SSH with "sudo poweroff".
Otherwise, the data still in the RPI's memory will not be written to the microSD card. In the worst case, this can lead to a corrupted operating system.