Bridging is a term for printing layers over thin air without the use of supports. It may sound like an impossible feat, but with our printers, it’s not that difficult. Keep in mind that the best results are achieved only over short distances because the printer’s fans need to cool the extruded plastic mid-air in order to create a solid connection. There are three key settings for printing good looking bridged layers: PrusaSlicer settings, speed, and cooling.
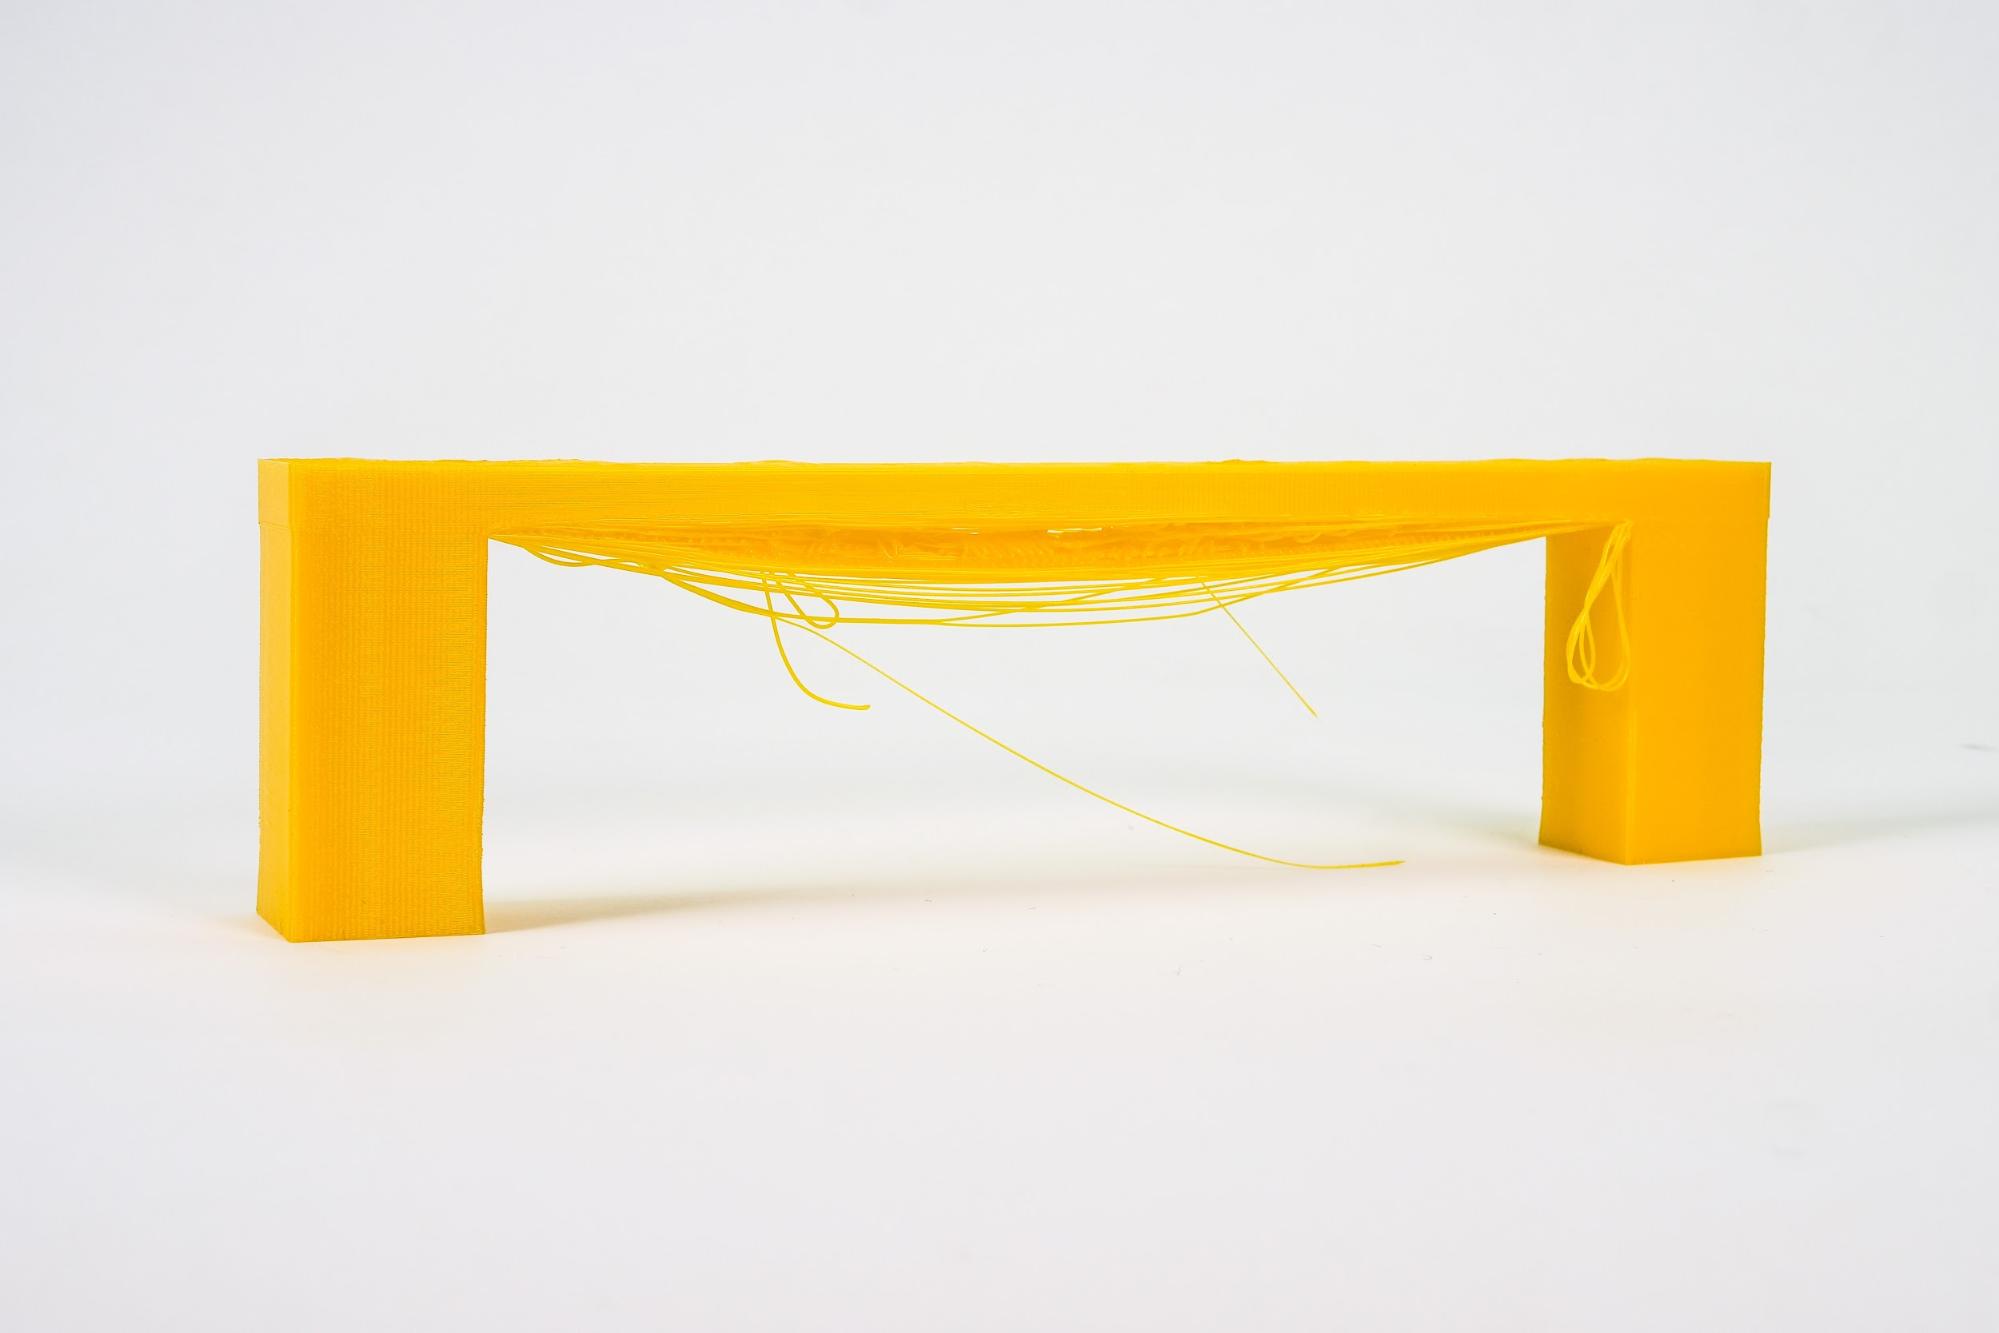
The typical problem of bridging layers is sagging or drooping as seen in the photo above.
How to fix it
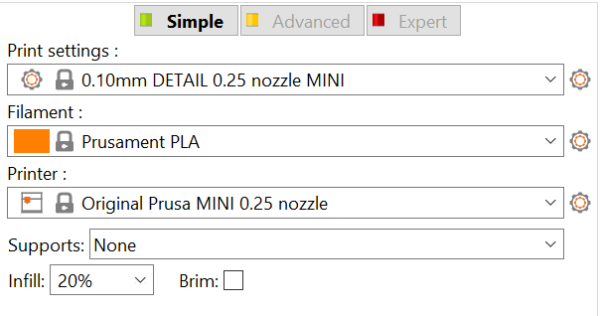
To access some settings/parameters in PrusaSlicer, you must be in 'Advanced' or 'Expert' mode. You can switch to a different mode using the buttons in the right panel or by going to Configuration -> Mode -> Simple/Advanced/Expert. For more information please see Simple, Advanced, Expert modes.
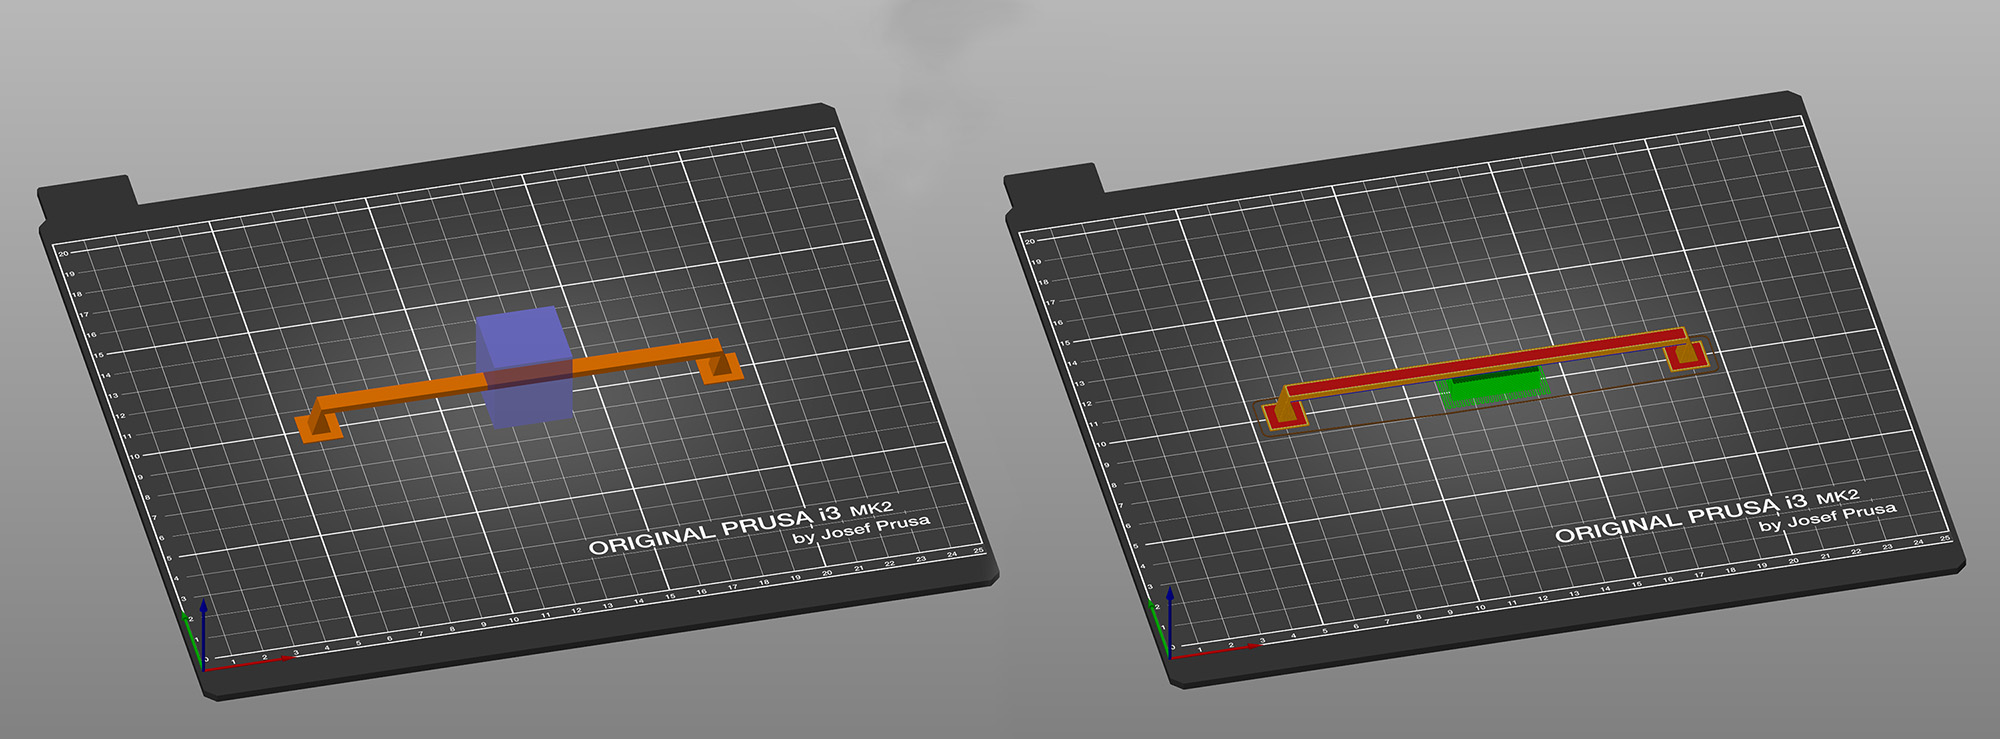
 Bridging flow
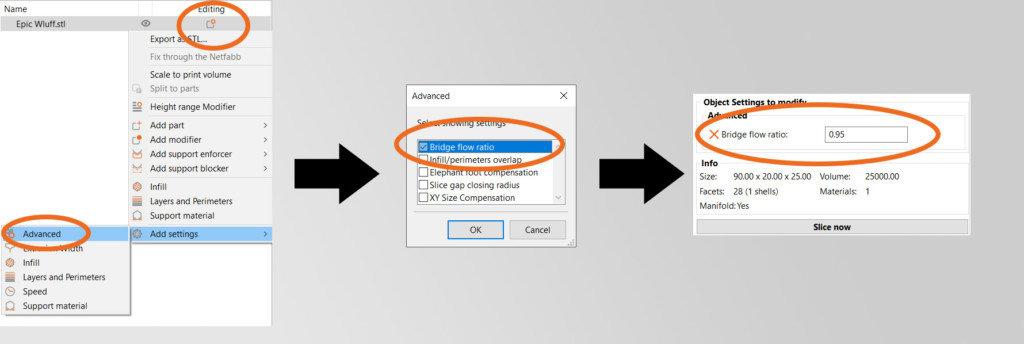
The best way to prevent the layers from breaking in bridging mode is to change the “Bridging flow” setting in the PrusaSlicer. The first bridging layer should be done with a lower flow of the material. Open the settings in PrusaSlicer by right-clicking the model, then go to Object settings – Advanced – Bridge flow ratio. We recommend using lower speed for printing bridges and also lower bridging flow. The idea is to “pull” the string of extruded filament behind the nozzle, so it drops less. The ideal approach is to download bridging test models, for example, this one, put it in the slicer several times, and set up a different flow for every model. This should be a relatively quick way how to find correct settings for your printer/material without the need to perform many test prints.
Tweak the speeds in PrusaSlicer
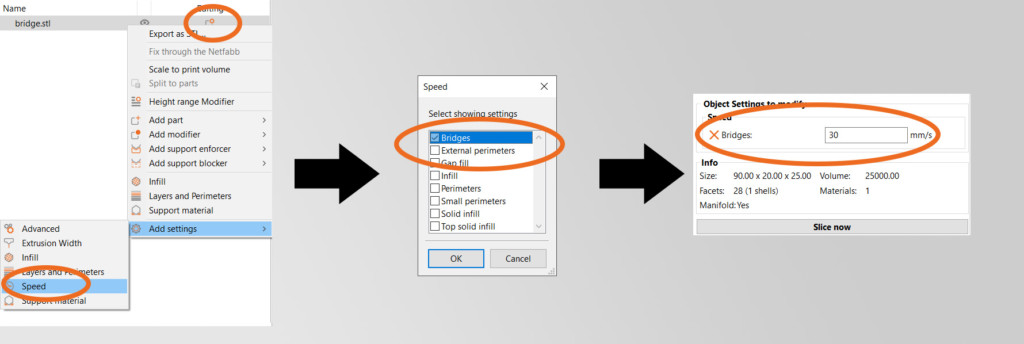
Right-click the object in the 3D view or click on the Editing icon in the Object list to open the context menu. Then select Add settings - Speed - Bridges and tweak the speed for printing bridges.
Enforce supports half-way through the bridge
If the bridge is very long, you can use support enforcers to create a support island half-way through. Right-click on the model in the 3D view and select Add support enforcer - Box. Then transform the box using the move, rotate and scale tools.
Change the orientation of the object
The best solution is to change the orientation of the object (rotate it) until you get rid of the bridges completely and you don’t have to worry about bridges or supports. It won’t be possible in many cases, but the rule of thumb here is to try to avoid bridges and supports completely.
6 comments
Hi! Unfortunately, even other brands of PETG-CF behave similarly. You can partly improve the bridging performance by increasing the bridging speed and overal cooling.
I am printing a circular candle holder that has christmas trees cut in it. The bridging works find as the extrusion comes around counter clockwise and does the bridging on the left side BUT all of the right side trees are not working at all. Confirmed level plate, tried dif filament and tried various settings from above comments on bridging.
*Prusa Mini+
*ABS filament
Hello, sorry for the late response. If this is still an issue, the bridging angle can be changed through this menu >print settings >infill >advanced >bridging angle. If that setting is not visible in the submenu, ensure that you are running PrusaSlicer in either the 'advanced' or the 'expert' mode.
I tried this solution in an small square "tunnel" shaped print 5*3*150 mm but no matter the bridging angle it keeps trying to bridge over the 150mm instead op the 3mm. (running 2.6.1 win64) Is there a setting that affects the angle of (the first layer) a bridge (other than the one u mentioned, as it is in the "infill" section it might not nesseseraly be about the actual bridging)?
This is good enough if you only need bridging in one orientation but if you need two or more directions the best option I found to have fine control of the bridging was to apply an object modifier over the areas I needed the bridging and then add settings > Infill > Bridging Angle.
I should add I'm on Prusa Slicer 2.9.4