Thermal Runaway is a safety feature designed to cut power to the heaters in case of a thermistor malfunction. If your printer's thermistor would somehow dislodge itself, electronic parts would get a lower (incorrect) temperature reading. In an attempt to compensate for the lower temperature, the heater could reach dangerously high temperatures, with the printer potentially becoming a fire hazard. Thermal Runaway prevents that from happening.
Make sure to distinguish between the Thermal runaway error and the Bed thermal runaway error:
- Thermal runaway - indicates an issue with the temperature readout of the hotend.
- Bed thermal runaway - indicates an issue with the temperature readout of the heatbed.
Thermal Runaway is configured to shut down the printer when the temperature drops by more than 15 °C for more than 45 seconds. If the temperature reading doesn't recover in the set time period, the printer will shut down and display the Thermal Runaway error.
Thermal Runaway (hotend)
- If you have recently re-assembled your hotend, make sure everything is exactly as instructed. An incorrectly assembled hotend can also cause this error.
- Check the ambient temperature. The suggested ambient temperature is 16 °C or more. An unheated garage in winter might cause thermal runaway as the heater doesn't have enough power once the print cooling fan kicks in.
- Visually check the thermistor if it is still securely and correctly installed in the heater block. The whole cartridge should be inside the block, with no part of it sticking out.
- Move the whole extruder left and right, at the full length of the X-axis, and wiggle the cable wrap behind it. Check whether there are any fluctuations in the temperature readings. This would indicate an issue with the cable.
- Check the thermistor cable connector on the EinsyRAMBO or miniRAMBo. Re-seat the connector so you know it is secure.
- Check the fan shroud for any kind of damage. In some cases, users bent the shroud during assembly or when they were removing the printed object. A damaged or tilted shroud can change the airflow and start cooling the heater block directly. For safety reasons, the heater doesn't have enough power (by design) to compensate for that.
MK2.5/S consideration
Due to the cooling properties of the MK2.5/S extruder design and the Mk2.5/S being a 12-volt system, you may need to run the print fan at only 70-80% when printing at PLA temperatures (190 - 215 °C). Printing other higher temp materials, like PETG and ASA, should need no changes to your slicer settings.
E3D Silicone Sock
During the testing, we didn't find the E3D sock to be very beneficial, as it can fall off and cause print failures and even damage the printer. However, if you are facing issues with Thermal Runaways on MK2.5/S and 70-80% fan flow is not sufficient for your application, this may be worth considering. We do not provide this, but it can be ordered from E3D directly.
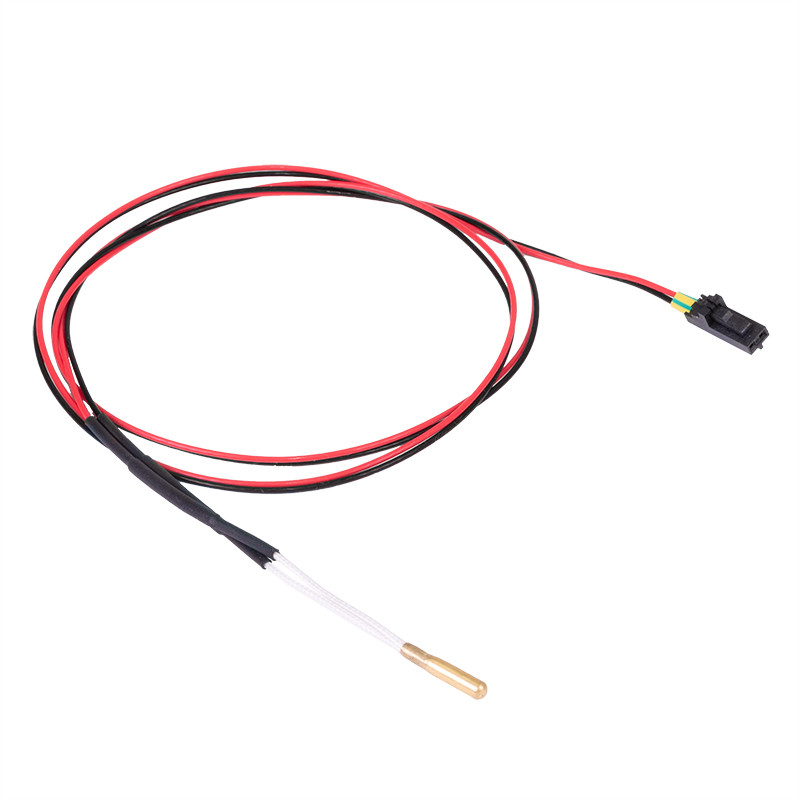 Cartridge-type hotend thermistor used on MK2/S, MK2.5/S, MK3/S/+, and MINI/+.
Bed thermal runaway
- Check the ambient temperature. The suggested ambient temperature is 16 °C or higher. An unheated garage in winter might cause a bed thermal runaway error if the heater doesn't have enough power when the print cooling fan kicks in.
- Keep the printer away from any unintentional sources of cooling. Positioning the printer near an air-conditioning unit or an open window might be the cause of unwanted temperature drops.
- Make sure the bed thermistor is still secured underneath the golden Kapton tape.
- Move the heatbed back and forth, at the full length of the Y-axis, and wiggle/move the cable wrap behind it. Check whether there are any large fluctuations in the temperature readings (more than 15-20 °C). This would indicate an issue with the cable.
Check the thermistor cable connector on the EinsyRAMBO or miniRAMBo. Re-seat the connector so you know it is secure. - If you are printing small objects with PETG, try to multiple at once and/or place them away from the center of the heatbed.
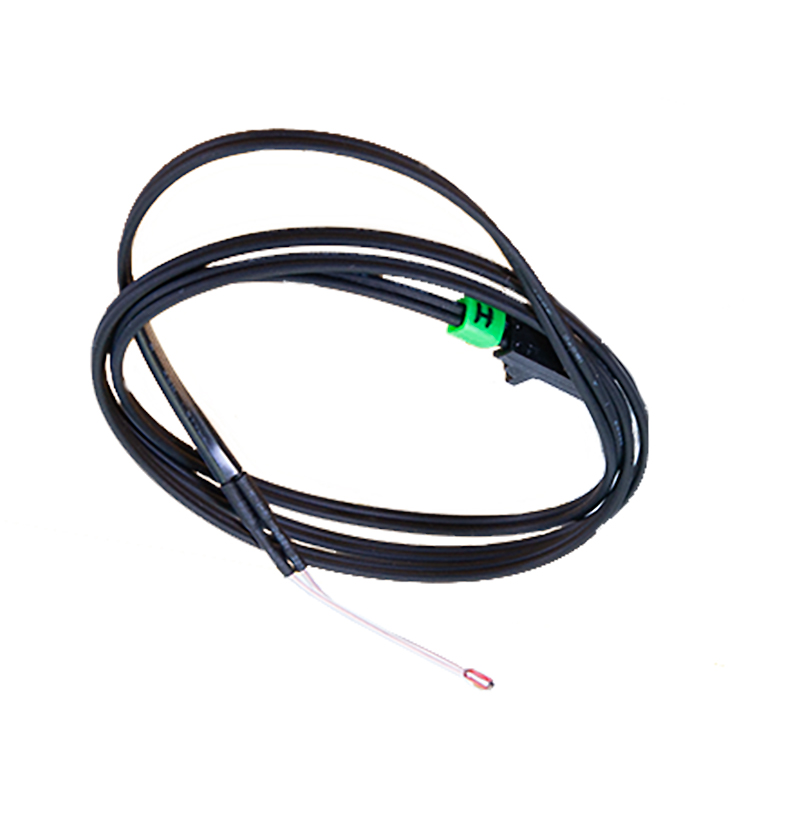 Glass bead heatbed thermistor used on MK2/S, MK2.5/S, MK3/S/+, and MINI/+.
Damaged component
If the thermistor, or more likely its cable has been damaged it must be replaced completely. As the thermistor functions by the mainboard reading its resistance, this might change if soldered or spliced and is therefore not recommended.
- For how to replace the hotend thermistor, please see How to replace a hotend thermistor (MK3S/MK3S+).
- For how to replace the heatbed thermistor, please see How to replace a heatbed thermistor (MK3S+/MK3S/MK2.5S/MK2S).
19 comments
Even setting the printer setting that the silicone sock was OFF didn't help.
Somehow this check in firmware should be related to the fan kicking in, and if the same timing, there should be made some other adjustments first, like reducing the fan speed or reducing overall print speed etc. Otherwize it can be print object of 24 h of printing just ruined with no real issue ...
It will be nice if Pursa in the slicer marked coordinates x1,y1 and x2,y2 where the purge tower is and in this area disables the warnings.
Hi!
This might be due to the geometry of the wipe tower effectively diverting the air from the print fan onto the nozzle.
Please, try re-doing the thermal model calibration - but this time with the nozzle sitting very close to the middle of the heatbed’s surface. This way, the algorithm can count in the factor of print fan cooling down the nozzle.
I I got the THERMAL RUNWAY error and a continuous loud beep I’m sure you are all familiar with. This was after I upgraded the firmware to 3.13. After talking to support, they suggested I downgrade. So I went back to the previous firmware. Everything looked ok. I tried to print again and it printed great.
Well, today the same thing happened. So I replaced the hot end thermistor with a prusa replacement. After I installed it, I turned on the printer and all I got was little white boxes on the lcd screen. And nothing else will start up. Here’s what I’ve tried so far:
-checked all the fuses with a multimeter (including the small ceramic one near the power jack).
- plugged the printer into my computer to try and re-flash the firmware. It won’t connect.
- tried to turn it on, press the reset button and then hold down the selector knob per the instructions.
-inspected each cable and made sure everything was plugged in correctly. Even though the only cable I unplugged was for the old thermistor.
- tried reversing the lcd cables even though they have never been been unplugged since I assembled this printer. (You never know!)
I’m fresh out of ideas. I have a feeling this board is fried.
for assistance, it is best to contact support directly by either pressing the chat now button in the lower right hand corner or via email at [email protected]