XYZ calibration is a procedure that will tell you how well you have assembled your printer. Essentially, it measures the skew of your X/Y axis and compensates for any imperfections. It may indicate two sets of error messages [compromised/failed]. See below for a detailed description.
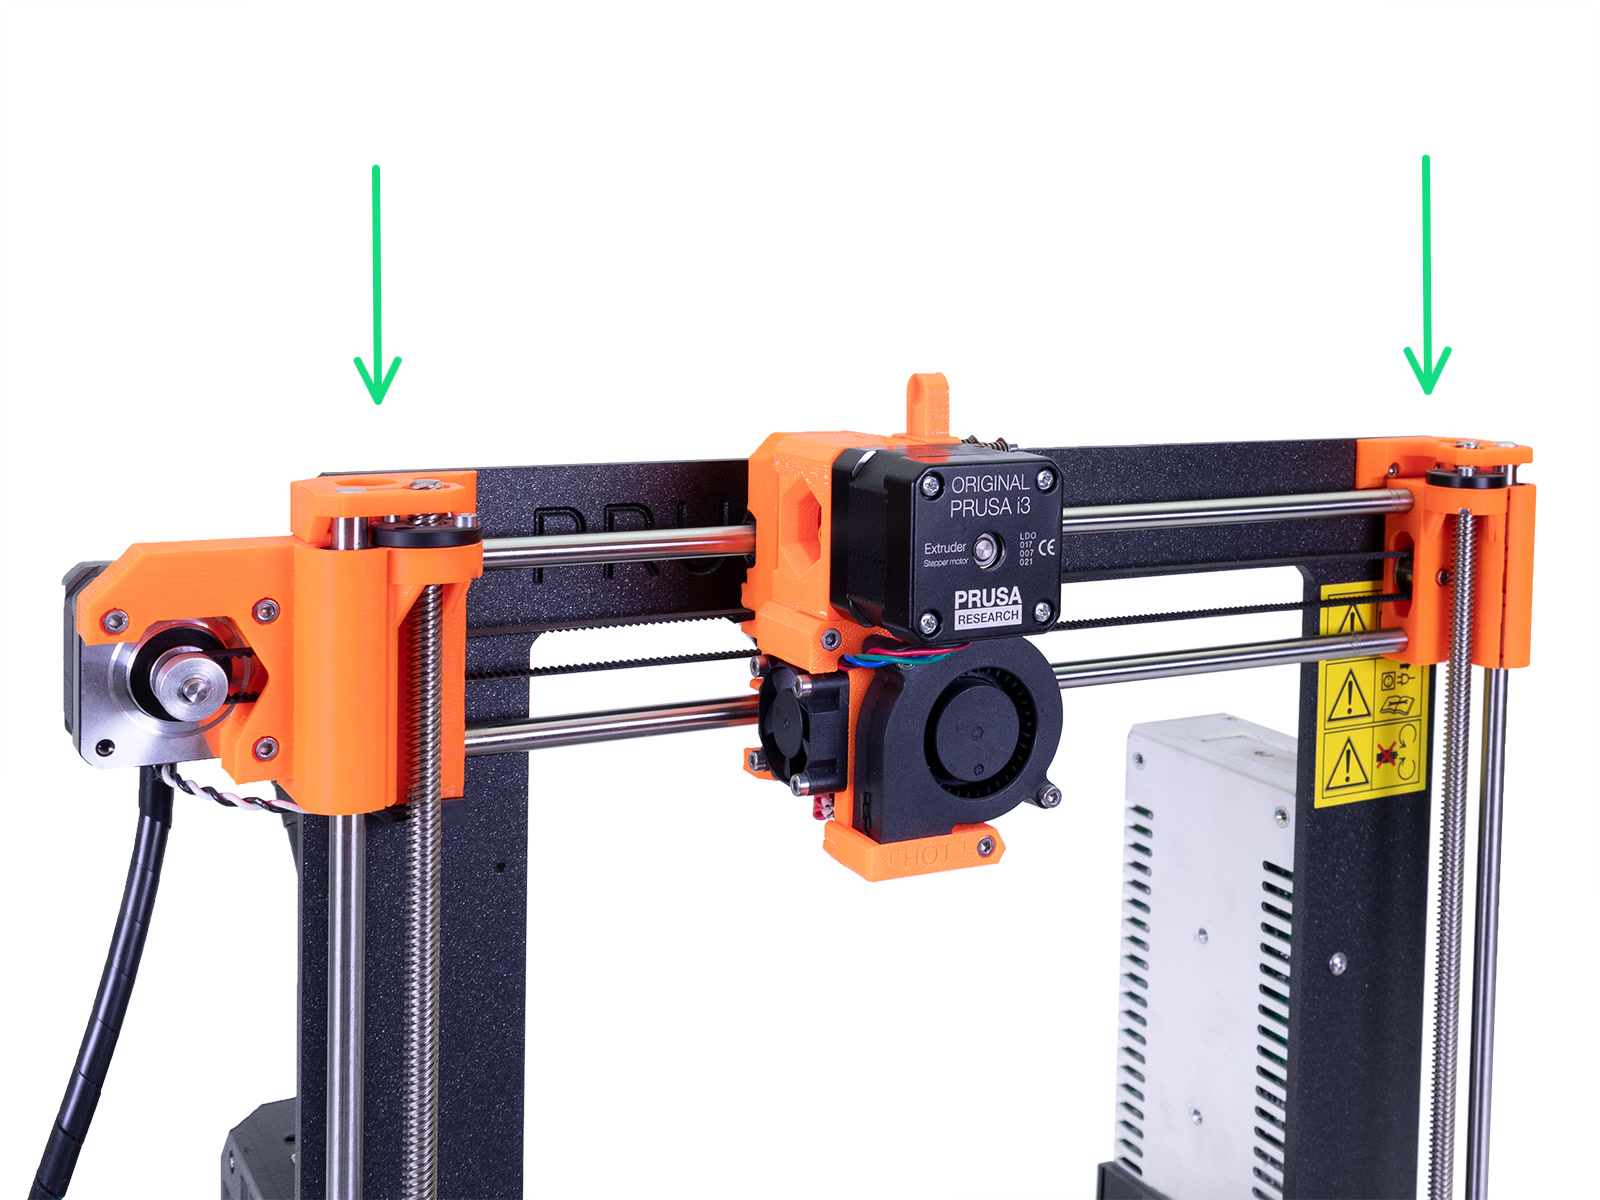 Make sure the Z-axis is moved all the way to the top.
Calibration walkthrough
During the initial process, only four main points are being measured - Front, Right, Rear and Left.
In the second round, all nine points are being measured. All of the compensations are then stored in non-volatile memory. This routine is called Mesh-bed leveling.
Click here for what each of the error messages means!
Improving calibration
If you encounter any of these error messages, then there is usually something wrong with the assembly of your printer.
Go through the following tasks:
- Make sure that you have followed the instructions on the LCD screen precisely. Especially make sure that your X-axis was moved to the very top. Otherwise, your X-axis might not be perfectly level.
- Make sure there is nothing blocking or reducing the movement of any of the axes, like:
-
- Unlubricated smooth rods/bearings.
- Pulleys are secure, aligned, and free of any filament debris.
- Belt tension too tight or too loose.
-
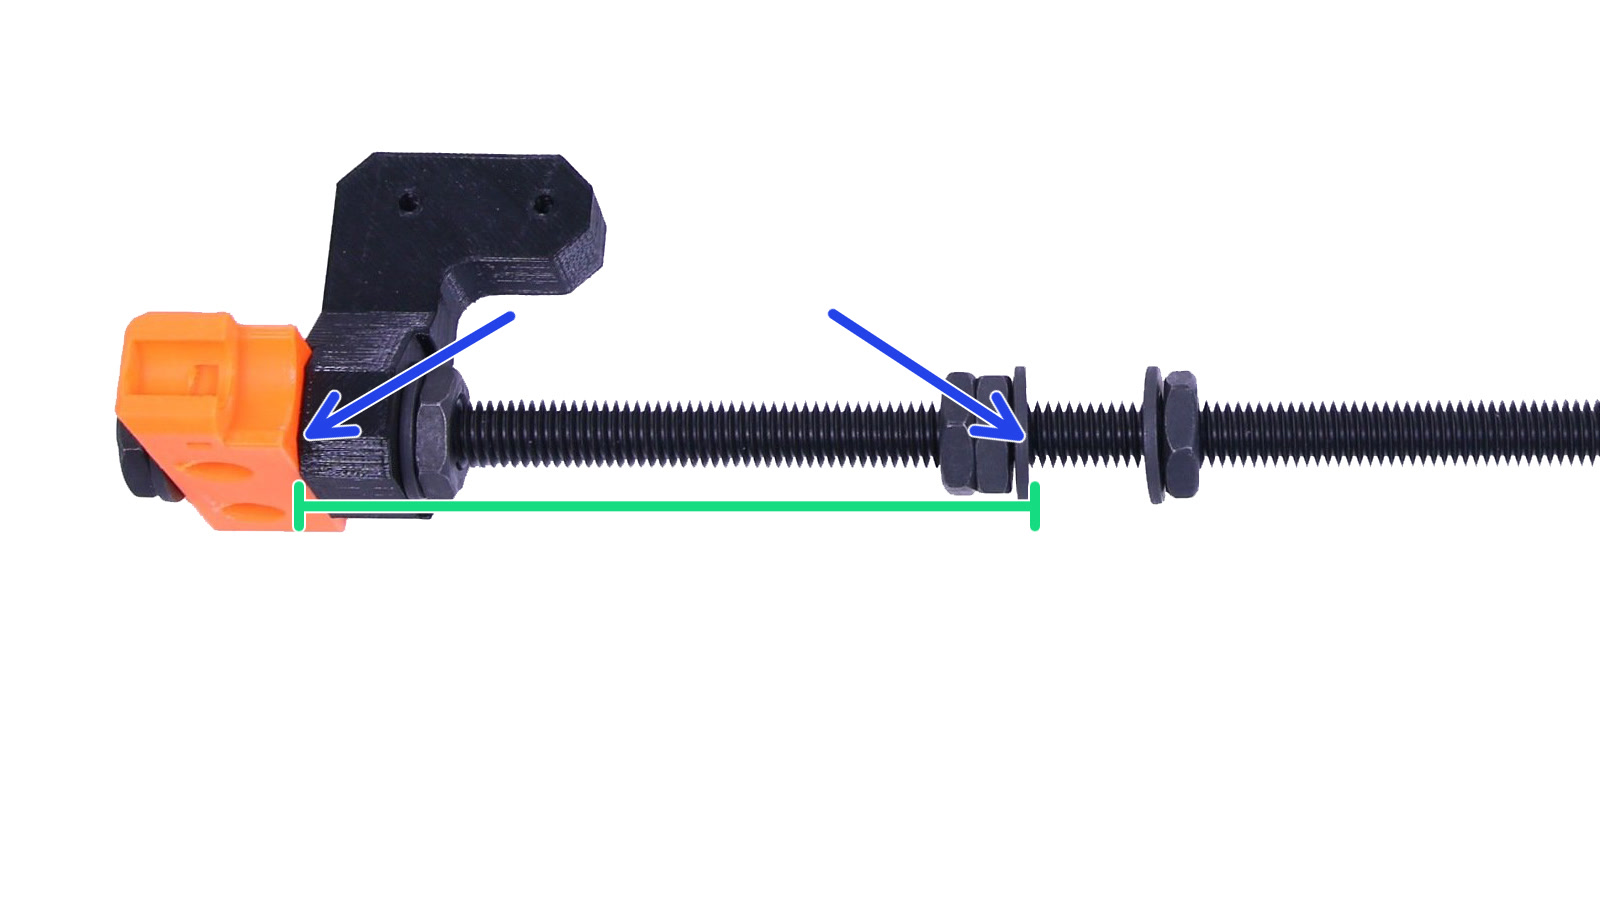
- Double-check that there's a 100mm (3.937inches) distance between the Y-corners and the frame.
- Navigate to LCD menu - Calibration - Auto-home. The P.I.N.D.A. sensor must stop right in the center of the 1st and also the last calibration point (please refer to photos below). Also, make sure that the P.I.N.D.A. sensor is roughly 1mm higher than the tip of the nozzle.


- It is rather unlikely, but there is a small possibility that your P.I.N.D.A. sensor could be defective. The easiest way to check for potential issues is to go to the LCD Menu - Calibration - Show endstops. While placing anything metal (e.g. a spatula) under the P.I.N.D.A. sensor. The endstop reading should change from 0 to 1. More information can be found in P.I.N.D.A./SuperPINDA Sensor testing.
3 comments