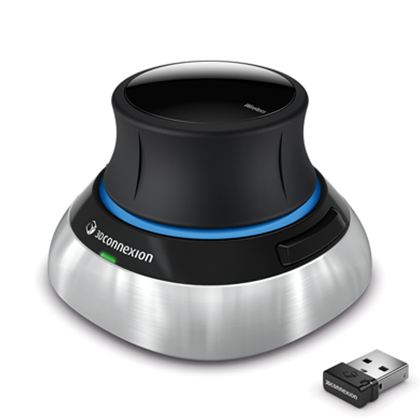
Si votre appareil 3DConnexion ne fonctionne pas avec le pilote, vous devrez probablement procéder comme suit pour le moment : https://github.com/prusa3d/PrusaSlicer/issues/7277#issuecomment-1006359238
(mise à jour en janvier 2022)
PrusaSlicer (à partir de la version 2.2.0) prend en charge les périphériques 3Dconnexion suivants :
- Spacemouse plus XT
- Cadman
- Spacemouse classic
- Spaceball 5000
- Space traveller
- Space pilot
- Space navigator (TESTÉ)
- Space explorer
- Space navigator for notebooks
- Space pilot pro
- Space mouse pro
- Spacemouse wireless (câble USB) (TESTÉ)
- Spacemouse wireless receiver
- Spacemouse pro wireless (TESTÉ)
- Spacemouse pro wireless receiver
- Spacemouse enterprise
- Spacemouse compact (TESTED)
- Spacemouse module
- Nulooq
- 3Dconnexion universal receiver (TESTÉ)
Sous Linux, appuyez sur Ctrl + M dans la vue du plateau pour ouvrir la boîte de dialogue des paramètres de 3Dconnexion.
Si vous ne parvenez pas à configurer votre appareil, activez Configuration - Préférences - Active la prise en charge des dispositifs 3DConnexion. Vous devrez peut-être le faire même pour des appareils relativement nouveaux, en raison du manque de support de 3Dconnexion. Appuyez ensuite sur CTRL+M (Maj+Commande+M sur Mac).
 3Dconnexion SpaceMouse
Windows
Il suffit de brancher l'un des appareils listés sur le PC pour le faire fonctionner.
L'implémentation actuelle ne prend pas en charge l'inversion des axes dans le pilote 3dconnexion sous Windows.
Mac
Il suffit de brancher l'un des appareils listés pour le faire fonctionner.
Le récepteur universel 3Dconnexion ne fonctionne pas actuellement sur Mac.
Linux
Les utilisateurs de Linux doivent créer un fichier nommé "90-3dconnexion.rules" avec le contenu suivant :
# Logitech vendor devices
KERNEL=="hidraw", ATTRS{idVendor}=="046d", ATTRS{idProduct}=="c603", MODE="0666"
KERNEL=="hidraw", ATTRS{idVendor}=="046d", ATTRS{idProduct}=="c605", MODE="0666"
KERNEL=="hidraw", ATTRS{idVendor}=="046d", ATTRS{idProduct}=="c606", MODE="0666"
KERNEL=="hidraw", ATTRS{idVendor}=="046d", ATTRS{idProduct}=="c621", MODE="0666"
KERNEL=="hidraw", ATTRS{idVendor}=="046d", ATTRS{idProduct}=="c623", MODE="0666"
KERNEL=="hidraw", ATTRS{idVendor}=="046d", ATTRS{idProduct}=="c625", MODE="0666"
KERNEL=="hidraw", ATTRS{idVendor}=="046d", ATTRS{idProduct}=="c626", MODE="0666"
KERNEL=="hidraw", ATTRS{idVendor}=="046d", ATTRS{idProduct}=="c627", MODE="0666"
KERNEL=="hidraw", ATTRS{idVendor}=="046d", ATTRS{idProduct}=="c628", MODE="0666"
KERNEL=="hidraw", ATTRS{idVendor}=="046d", ATTRS{idProduct}=="c629", MODE="0666"
KERNEL=="hidraw", ATTRS{idVendor}=="046d", ATTRS{idProduct}=="c62b", MODE="0666"
KERNEL=="hidraw", ATTRS{idVendor}=="046d", ATTRS{idProduct}=="c62e", MODE="0666"
KERNEL=="hidraw", ATTRS{idVendor}=="046d", ATTRS{idProduct}=="c62f", MODE="0666"
KERNEL=="hidraw", ATTRS{idVendor}=="046d", ATTRS{idProduct}=="c631", MODE="0666"
KERNEL=="hidraw", ATTRS{idVendor}=="046d", ATTRS{idProduct}=="c632", MODE="0666"
KERNEL=="hidraw", ATTRS{idVendor}=="046d", ATTRS{idProduct}=="c633", MODE="0666"
KERNEL=="hidraw", ATTRS{idVendor}=="046d", ATTRS{idProduct}=="c635", MODE="0666"
KERNEL=="hidraw", ATTRS{idVendor}=="046d", ATTRS{idProduct}=="c636", MODE="0666"
KERNEL=="hidraw", ATTRS{idVendor}=="046d", ATTRS{idProduct}=="c640", MODE="0666"
KERNEL=="hidraw", ATTRS{idVendor}=="046d", ATTRS{idProduct}=="c652", MODE="0666"
# 3D Connexion vendor devices
KERNEL=="hidraw", ATTRS{idVendor}=="256f", ATTRS{idProduct}=="c603", MODE="0666"
KERNEL=="hidraw", ATTRS{idVendor}=="256f", ATTRS{idProduct}=="c605", MODE="0666"
KERNEL=="hidraw", ATTRS{idVendor}=="256f", ATTRS{idProduct}=="c606", MODE="0666"
KERNEL=="hidraw", ATTRS{idVendor}=="256f", ATTRS{idProduct}=="c621", MODE="0666"
KERNEL=="hidraw", ATTRS{idVendor}=="256f", ATTRS{idProduct}=="c623", MODE="0666"
KERNEL=="hidraw", ATTRS{idVendor}=="256f", ATTRS{idProduct}=="c625", MODE="0666"
KERNEL=="hidraw", ATTRS{idVendor}=="256f", ATTRS{idProduct}=="c626", MODE="0666"
KERNEL=="hidraw", ATTRS{idVendor}=="256f", ATTRS{idProduct}=="c627", MODE="0666"
KERNEL=="hidraw", ATTRS{idVendor}=="256f", ATTRS{idProduct}=="c628", MODE="0666"
KERNEL=="hidraw", ATTRS{idVendor}=="256f", ATTRS{idProduct}=="c629", MODE="0666"
KERNEL=="hidraw", ATTRS{idVendor}=="256f", ATTRS{idProduct}=="c62b", MODE="0666"
KERNEL=="hidraw", ATTRS{idVendor}=="256f", ATTRS{idProduct}=="c62e", MODE="0666"
KERNEL=="hidraw", ATTRS{idVendor}=="256f", ATTRS{idProduct}=="c62f", MODE="0666"
KERNEL=="hidraw", ATTRS{idVendor}=="256f", ATTRS{idProduct}=="c631", MODE="0666"
KERNEL=="hidraw", ATTRS{idVendor}=="256f", ATTRS{idProduct}=="c632", MODE="0666"
KERNEL=="hidraw", ATTRS{idVendor}=="256f", ATTRS{idProduct}=="c633", MODE="0666"
KERNEL=="hidraw", ATTRS{idVendor}=="256f", ATTRS{idProduct}=="c635", MODE="0666"
KERNEL=="hidraw", ATTRS{idVendor}=="256f", ATTRS{idProduct}=="c636", MODE="0666"
KERNEL=="hidraw", ATTRS{idVendor}=="256f", ATTRS{idProduct}=="c640", MODE="0666"
KERNEL=="hidraw", ATTRS{idVendor}=="256f", ATTRS{idProduct}=="c652", MODE="0666"
et enregistrez-le dans :
/etc/udev/rules.d
Après cela, il suffit de brancher l'un des périphériques listés sur le PC pour le faire fonctionner.
Le fichier cité fait partie de la distribution de PrusaSlicer. Vous pouvez le trouver dans :