English
Login
3D printers
Materials
Parts & Accessories
For Business
Software
3D Models
Community
Help
Courses
Blog
Company
Support
Original Prusa i3 MK2S
Original Prusa i3 MK2 kit assembly
7. PSU & Heatbed assembly | Getting the necessary tools
1. Getting the necessary tools
Step 1 of 20 (Chapter 7 of 9)
Contents
Comments
⬢
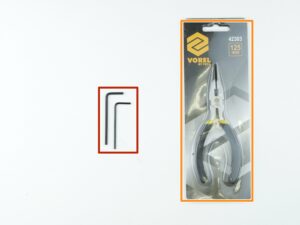
2 and 2.5 mm Allen key
⬢
Needle-nose pliers
Loading...
Next
Contents
Original Prusa i3 MK2 kit assembly
1. Introduction
2. Y-axis assembly
3. X-axis assembly
4. Z-axis assembly
5. Extruder Assembly
6. LCD assembly
7. PSU & Heatbed assembly
Getting the necessary tools
3D printed parts
Assembling the PSU
Securing the PSU
Connecting PSU-Y part
Assembling PSU-Y-part
Main power cables guide
Configuring the PSU
Y-belt holder helping nuts removal
Preparing the heatbed
Assembling the heatbed
Finalizing the heatbed
Preparing heat bed cable cover
Assembling heat bed cover
Preparing the filament
Assemble heatbed cable cover
Wrapping the heatbed cables
Securing spiral wrap in place
Check if everything is correct
Last finishing touch and done!
8. Electronics assembly
9. Preflight check
Comments
Log in
to post a comment
Raino Kolk
•
same here. Can't suggest time. My suggestion is 40 min. with minimal parallel line adjustments
Reply
Bruce Boyes
•
Clicked on "suggest a time" but that's not allowed. I suggest 2 hours.
Reply