- Home
- PrusaSlicer
- Advanced features
- SVG embossing tool
SVG embossing tool
- About PrusaSlicer
- Configuration and profiles
- User interface
- Input/output
- Left toolbar
- Top toolbar
- Print settings
- Filament settings
- Printer settings
- Advanced features
- Color change
- Compare presets
- G-code substitutions
- Insert pause or custom G-code at layer
- Modifiers
- Negative volume
- Per model settings
- Post-processing scripts
- Reload from disk
- Shape Gallery
- Simplify mesh
- SVG embossing tool
- Using SVG as a part, negative volume or as a modifier
- Text tool
- Multi-material slicing
- SLA slicing
- Other (PrusaSlicer)
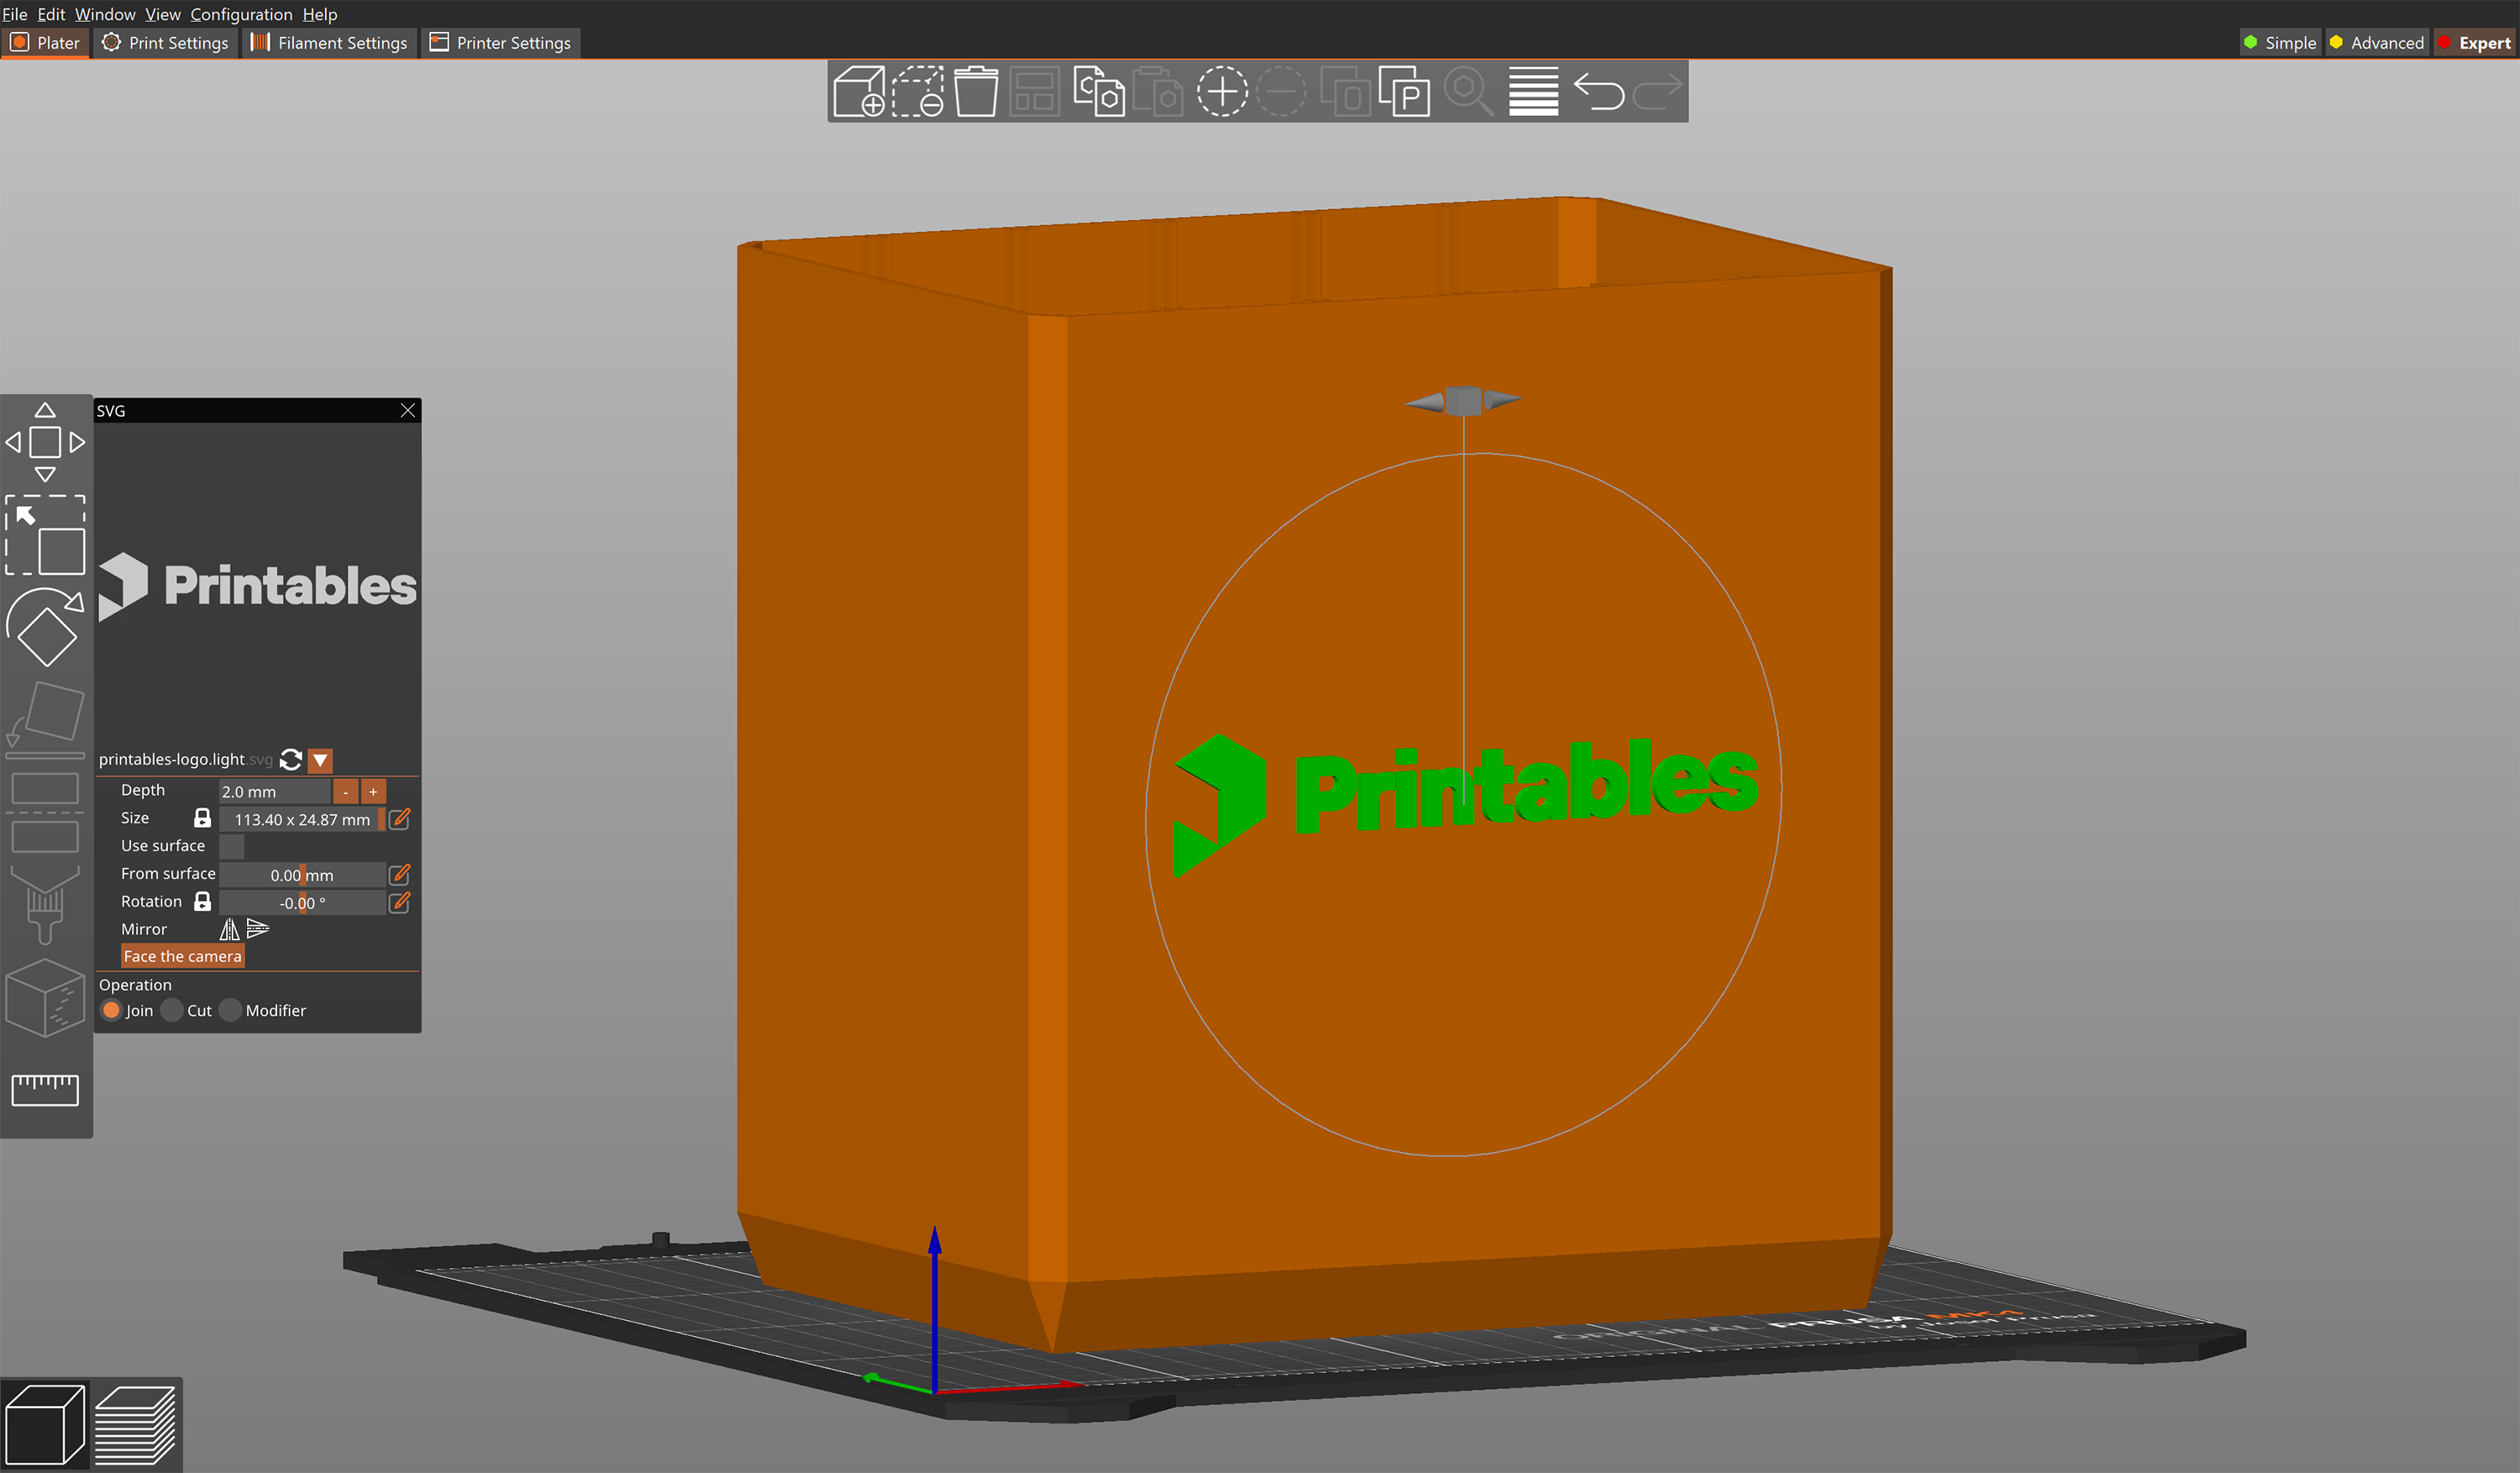
The SVG emboss tool provides a convinient way to add intricate designs, logos, QR codes and patterns onto 3D printed objects, directly in PrusaSlicer. PrusaSlicer can also wrap any SWG around the object, smoothly following curved surfaces.
Using SVG as a part, negative volume or as a modifier
- Right-click on an object
- Select Add part - SVG
Depth - sets how far will the SVG be extruded from the object
Size - lets you scale the object, the level of detail is automatically recalculated based on the size
Use surface - when enabled, the SVG will wrap around the object
From surface - offsets the beggining of the SVG extrusion
Rotation - rotates the SVG around its center point
Mirror - lets you quickly flip the SVG horizontally or vertically
Face the camera - rotates the SVG so it faces the current camera view
Operation
- Join - Adds the SVG as a printable part to the object
- Cut - subtracts the SVG from the object
- Mofifier - lets you use the SVG to modify the object's properties, e.g. turn on the Fuzzy skin

Comments
Still have questions?
If you have a question about something that isn't covered here, check out our additional resources.
And if that doesn't do the trick, you can send an inquiry to [email protected] or through the button below.