V tomto návodu se dozvíte, jak pomocí vlastního modelu vygenerovat objekt pro kalibraci resinu. Doporučujeme tento přístup pouze zkušeným uživatelům.. Předpřipravený kalibrační objekt resinu by měl posloužit většině uživatelů, ale mohou existovat některé specifické modely, které sami dobře znáte nebo které mají funkce a geometrii speciální pro vaši aplikaci.
Soubory .sl1/.sl1s- pro vaši resinovou tiskárnu Original Prusa jsou ekvivalentem souborů G-code pro tiskárny typu FFF, ale jsou trochu odlišné. Soubory pro Original Prusa SL1 nebo SL1S SPEED (.sl1/.sl1s) jsou archivy podobné zip souborům s řadou obrázků. (.png) pro každou vrstvu tisku, kromě konfiguračního souboru. (.ini). Po slicování je pro vytvoření kalibračního objektu třeba upravit především konfigurační soubor. O zbytek se postará tiskárna.
Výběr modelu
Číslo a velikost
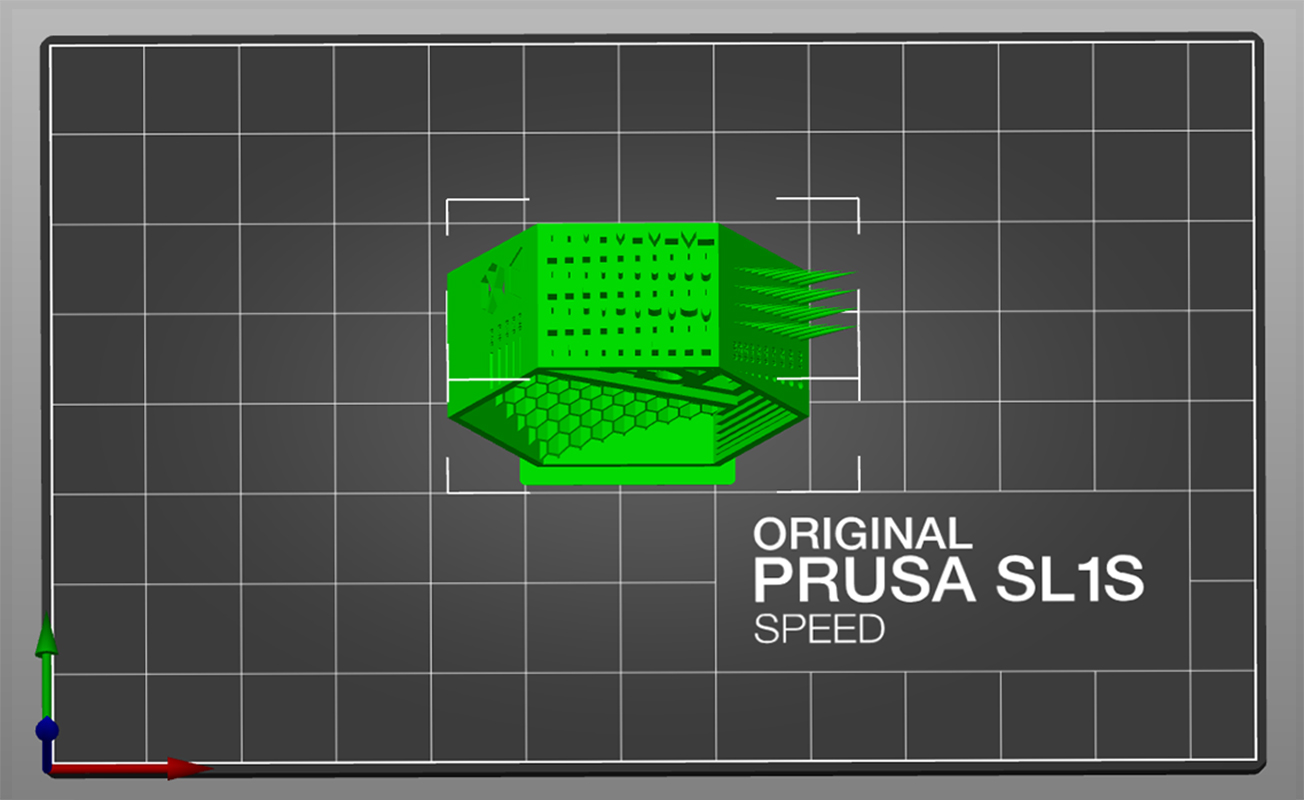
Při výběru kalibračního objektu je třeba zvážit dvě hlavní skutečnosti: Velikost objektu a počet objektů na desce. Systém nebude znát velikost objektu, takže pokud vyberete něco příliš velkého, může se stát, že bude oříznut nebo se na desku vůbec nevejde. Můžete to vyzkoušet tak, že vytvoříte více instancí a zjistíte, kolik jich bude na tiskové platformě (maximálně 9). Ve finálním projektu však musíte mít pouze jednu instanci. Zbytek vygeneruje tiskárna.
Další informace o velikosti a orientaci objektu najdete na konci tohoto článku.
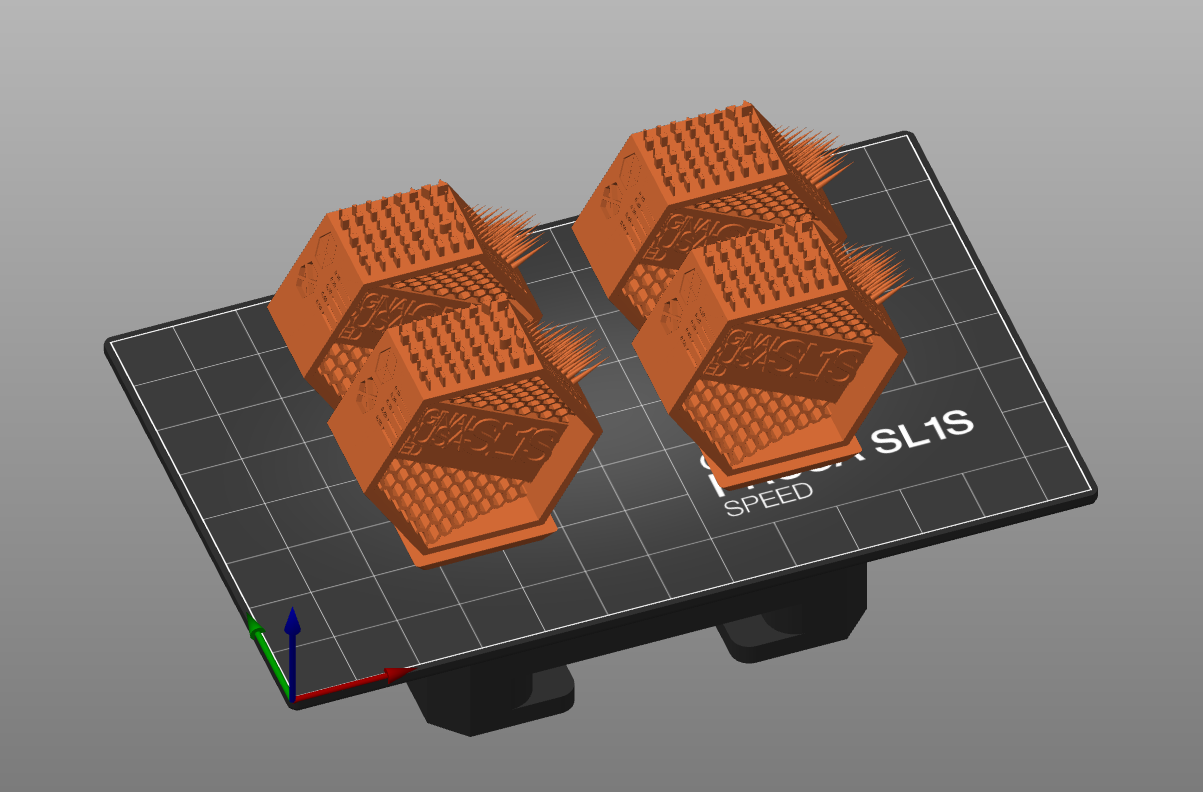
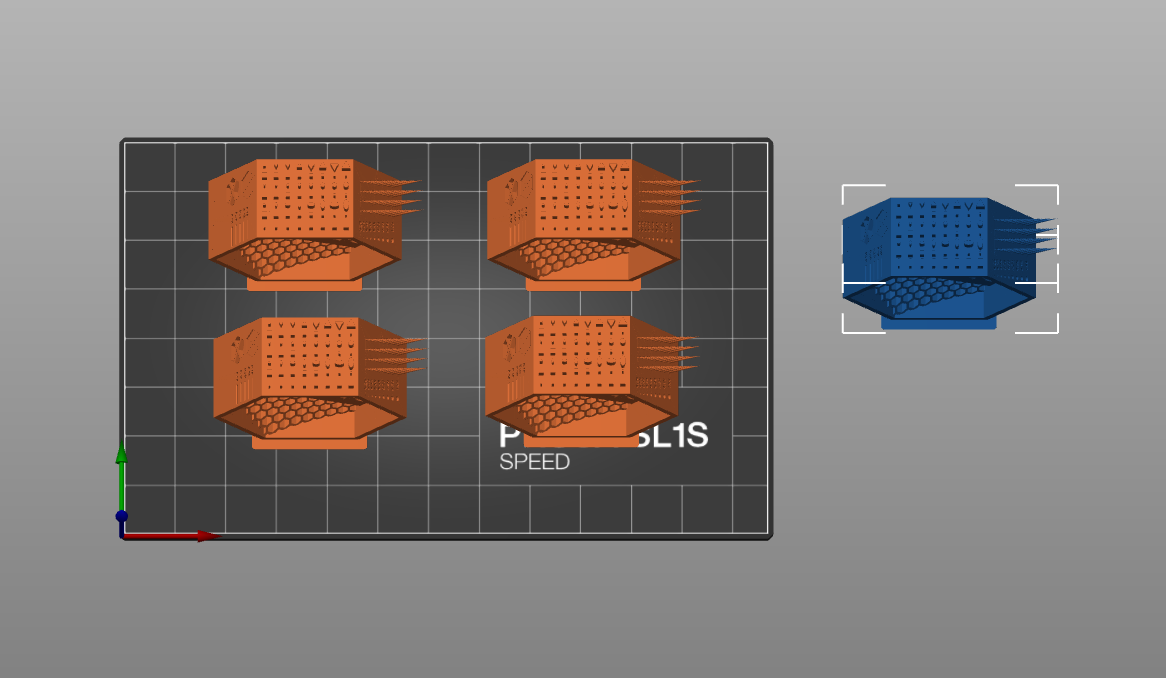 Examples of how many instances will fit on the plate. In this case, 4 instances.
Geometrie
Doporučujeme model bez extrémních převisů, které vyžadují podpěry. To vám ušetří spoustu času. Objekty mohou zcela selhat, což musíte před dalším spuštěním kalibrace odstranit. Se "zátěžovými testy" tiskárny byste měli experimentovat později. Jde pouze o nalezení optimální doby expozice v obecných geometriích. V této příručce bude použita verze testovacího objektu Original Prusa SLA, který je mírně upraven, aby měl menší rozměry. Můžete si ho stáhnout z Printables.com.
Vytvoření souboru projektu
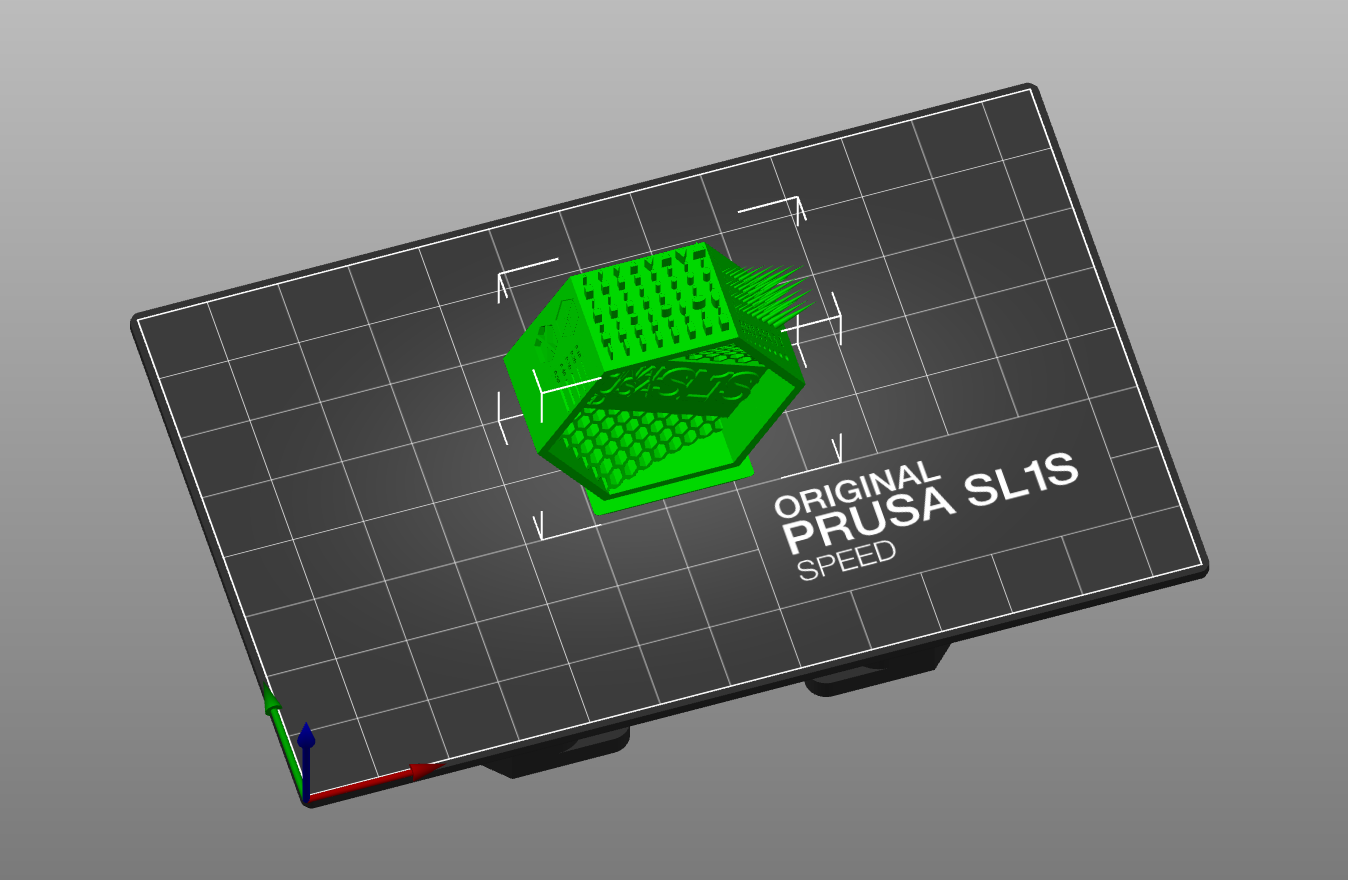
- Otevřete PrusaSlicer a vyberte, pro kterou tiskárnu budete kalibrovat (SL1 nebo SL1S).
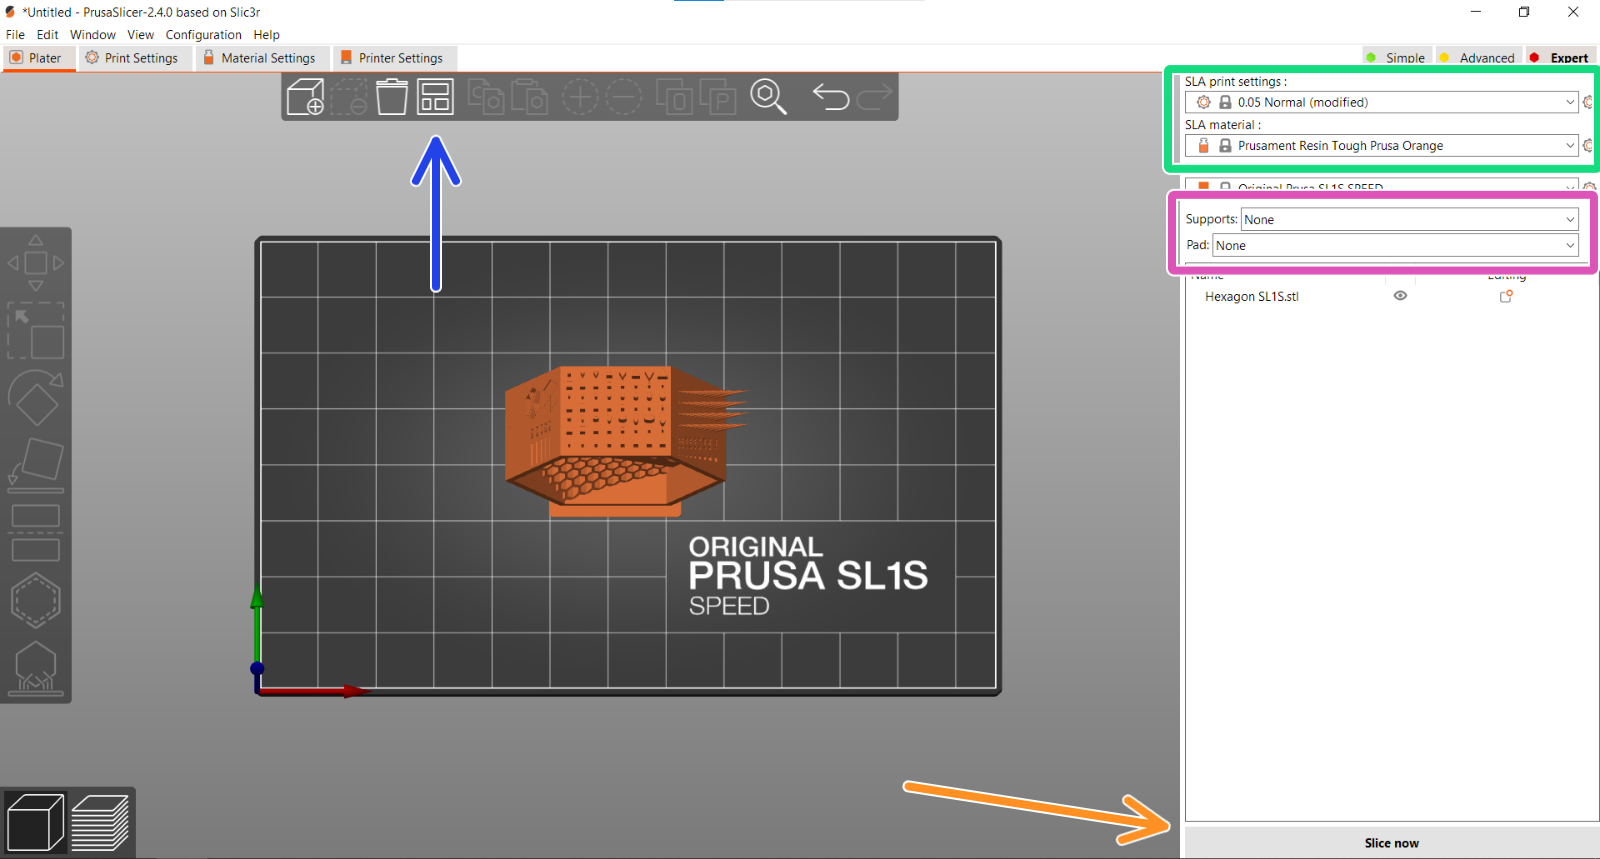
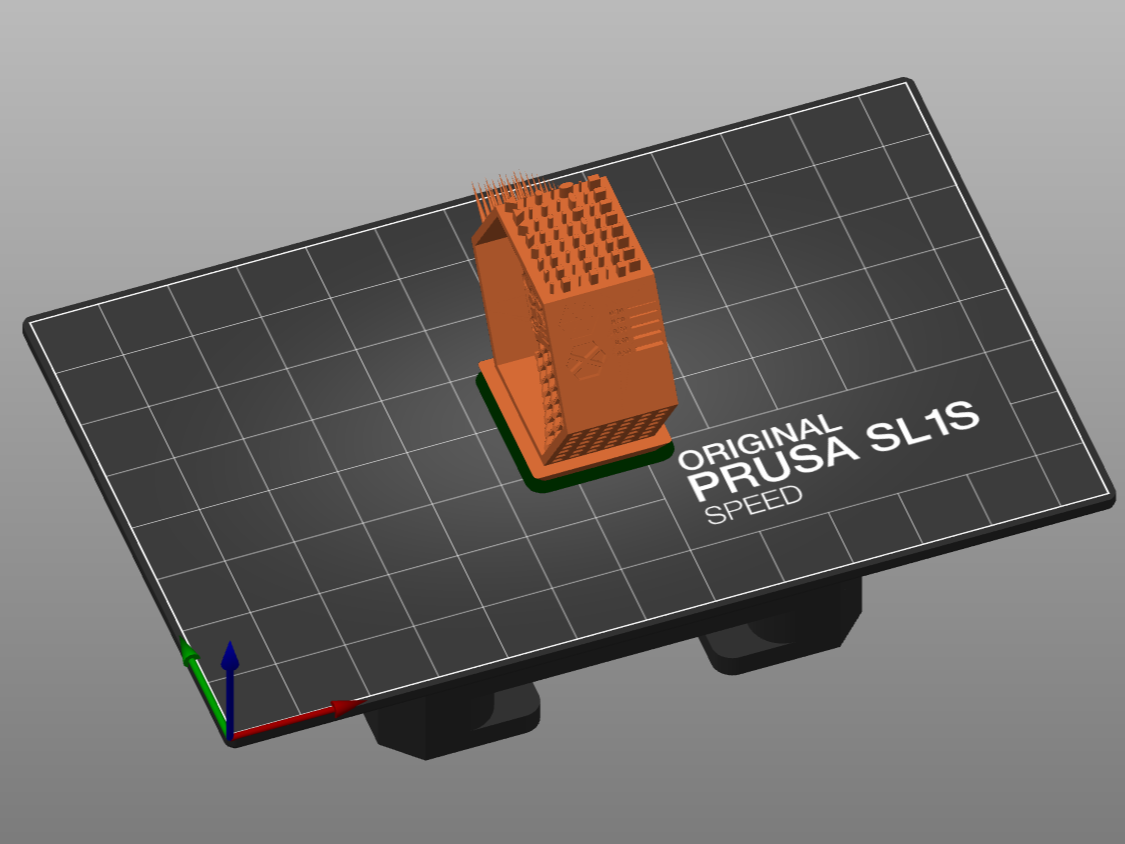
- Přidejte model do aplikace PrusaSlicer a vycentrujte jej pomocí nástroje Auto-arrange (modrá šipka). Vytvořte pouze jednu instanci!
 |  |
- Typ resinu vyberte Prusament Resin Tough Prusa Orange na 0,05 Normální jako tiskové nastavení SLA (zelený čtvereček). To je dobrý výchozí bod pro Tough resiny.
- Nepoužívejte žádné podpěry ani podložky (fialový čtverec).
- Tiskárna vygeneruje štítek s časem expozice. Ten je vždy umístěn vpravo od modelu. Možná budete muset model otočit, aby se na desku vešly všechny.
- Slicujte a exportujte svůj projektový soubor SL1/SL1S.
- Exportovaný soubor zkopírujte na USB disk nebo jej nahrajte přes PrusaLink a vytiskněte projekt.
Úprava souboru projektu
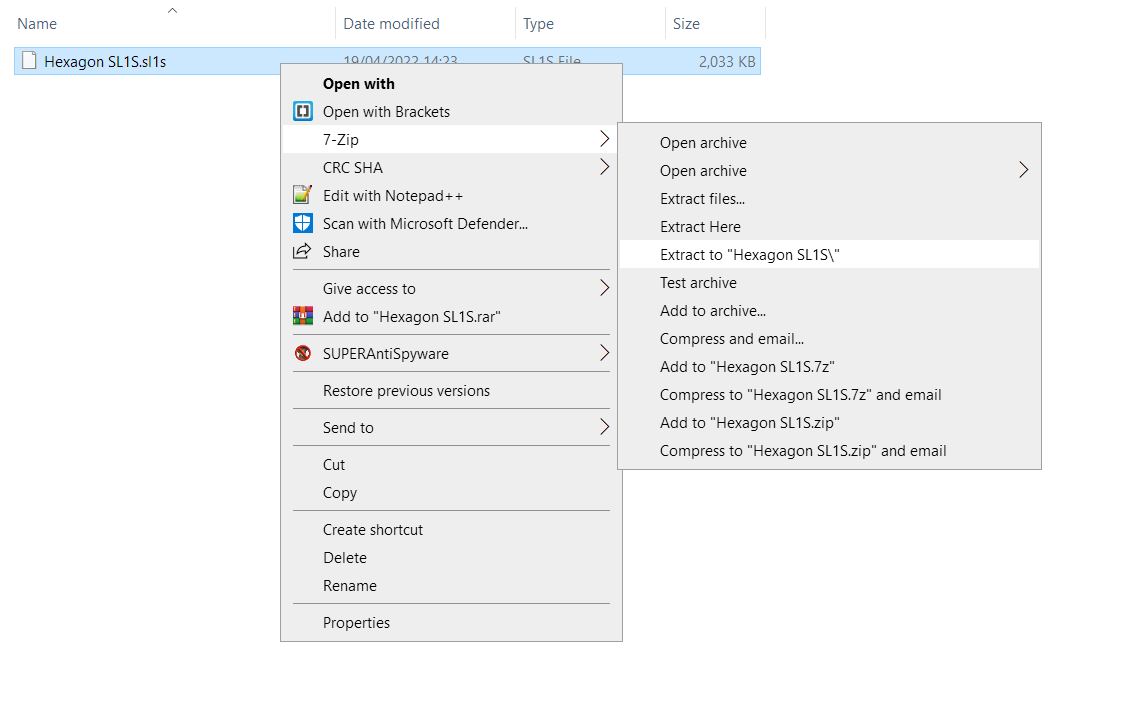
- Program jako 7zip je open-source a automaticky rozpozná projekt jako archiv. Klikněte na soubor pravým tlačítkem myši a zobrazí se možnost „Extrahovat“ obsah do složky. Pokud nechcete mít nainstalovaný program 7zip, změňte název souboru z „.sl1“ na „.zip“ a všechny archivační aplikace jej rozpoznají.
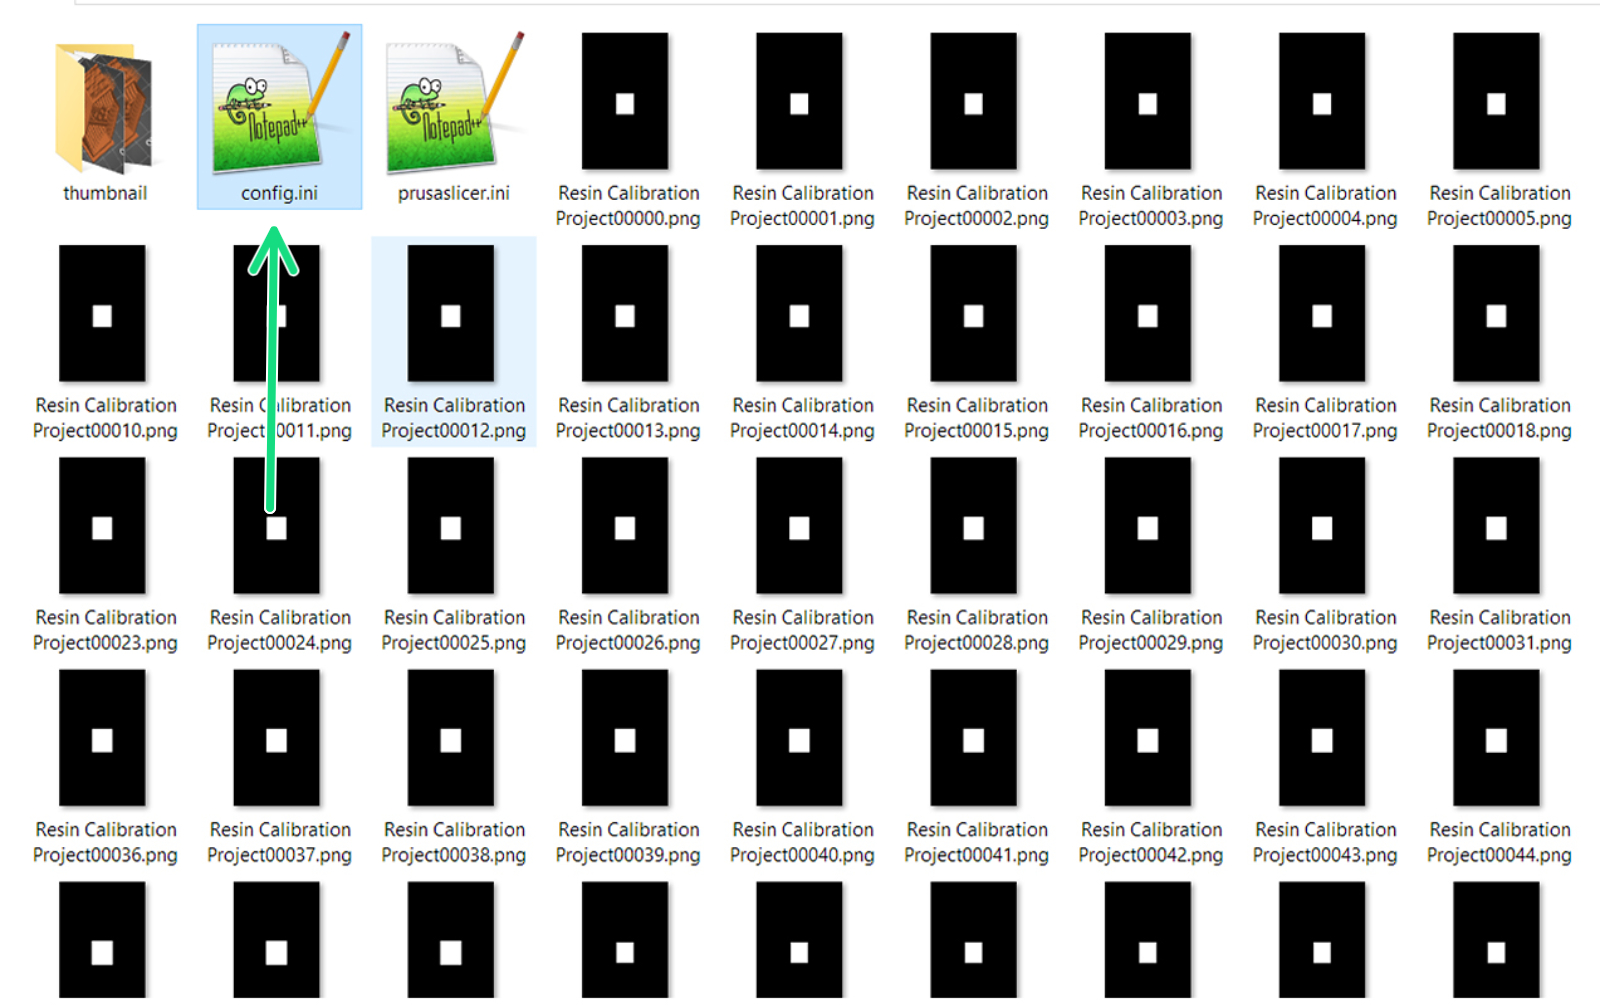
- Objeví se složka se spoustou obrázku a dvěma konfiguračními soubory. Je třeba otevřít soubor „config.ini“ v Poznámkovém bloku, Brackets nebo jiném textovém editoru. Soubor "PrusaSlicer.ini" ignorujte.
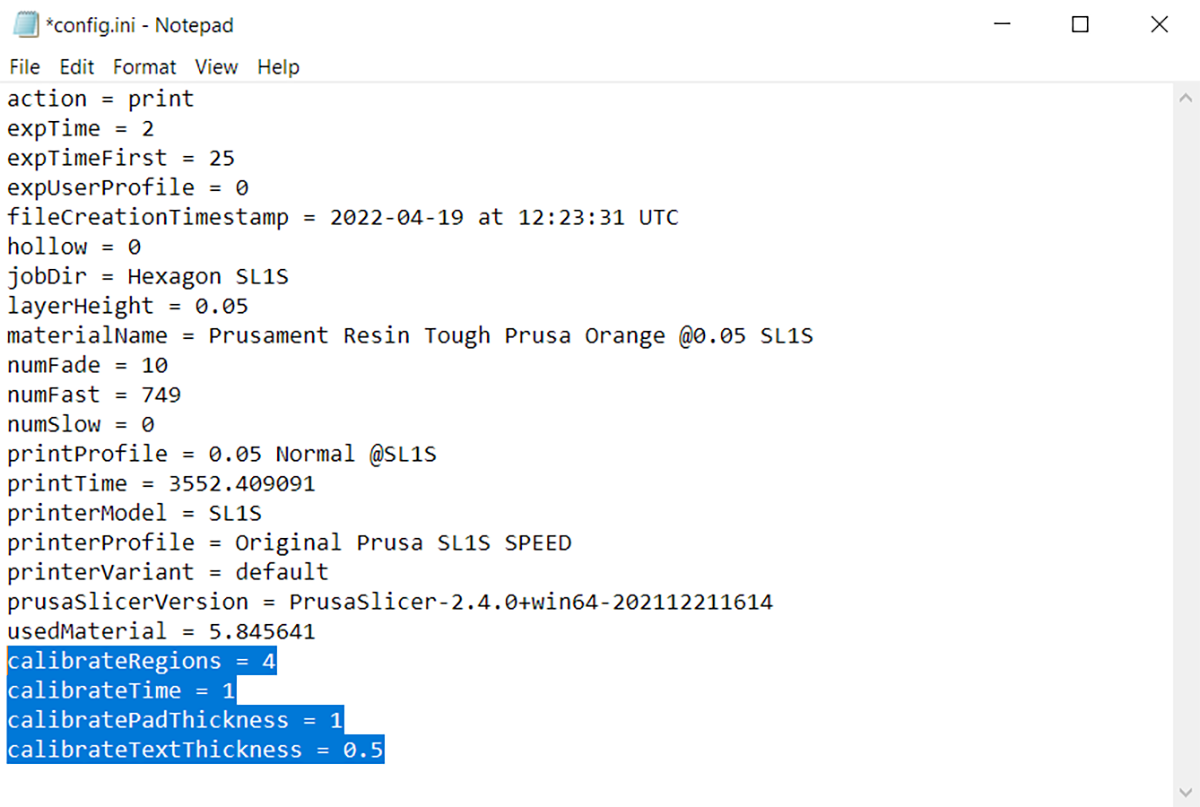
- Po posledním řádku ("usedMaterial = ***"), vložte níže uvedené tři řádky kódu pro vaši tiskárnu. Je důležité, abyste použili hodnoty kompatibilní s modelem tiskárny (SL1 nebo SL1S SPEED) vzhledem k jejich velmi rozdílné průměrné délce expozice.
Vysvětlení parametrů:
-
-
- calibrateRegions představuje počet objektů na tiskové desce. U tohoto modelu je vzhledem k velikosti objektu nastaven na hodnotu 4. Tuto hodnotu můžete změnit, ale v závislosti na velikosti můžete použít pouze čísla 2 4 6 8 9.
- calibrateTime je časový přírůstek v sekundách na objekt. Lze nastavit na 1 desetinné místo (0,1 s).
- calibratePadThickness je tloušťka štítku v milimetrech vytvořená pro dobu expozice.
- calibrateTextThickness je výška textu na štítku v milimetrech.
-
| SL1 | SL1S SPEED |
|---|---|
Navrhované hodnoty pro resin typu tough u jednotlivých verzí tiskáren.
- Ujistěte se, že máte konfiguraci jako na obrázku níže, uložte (ctrl/cmd+S) soubor config.ini a zavřete textový editor.
* Výchozí hodnoty konfigurace.
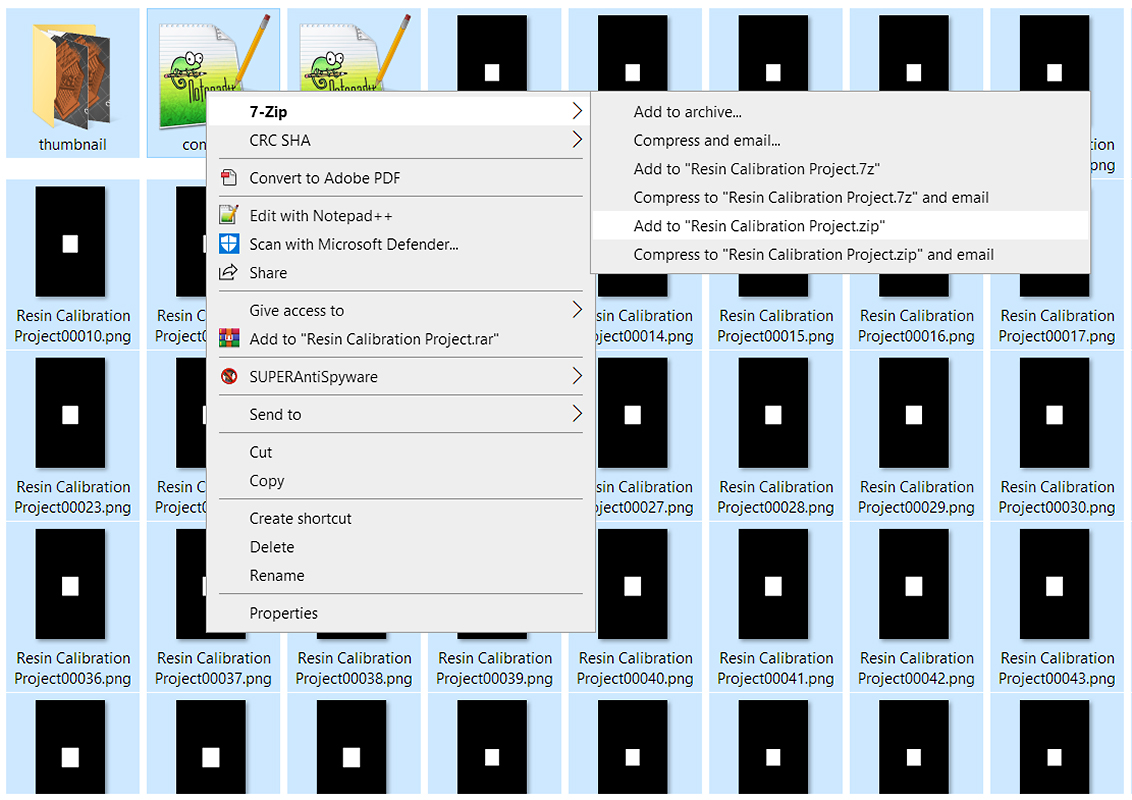
- Vyberte všechny soubory ve složce (ctrl/cmd+a), klikněte pravým tlačítkem myši a vytvořte archiv (.zip) obsahu.
 | 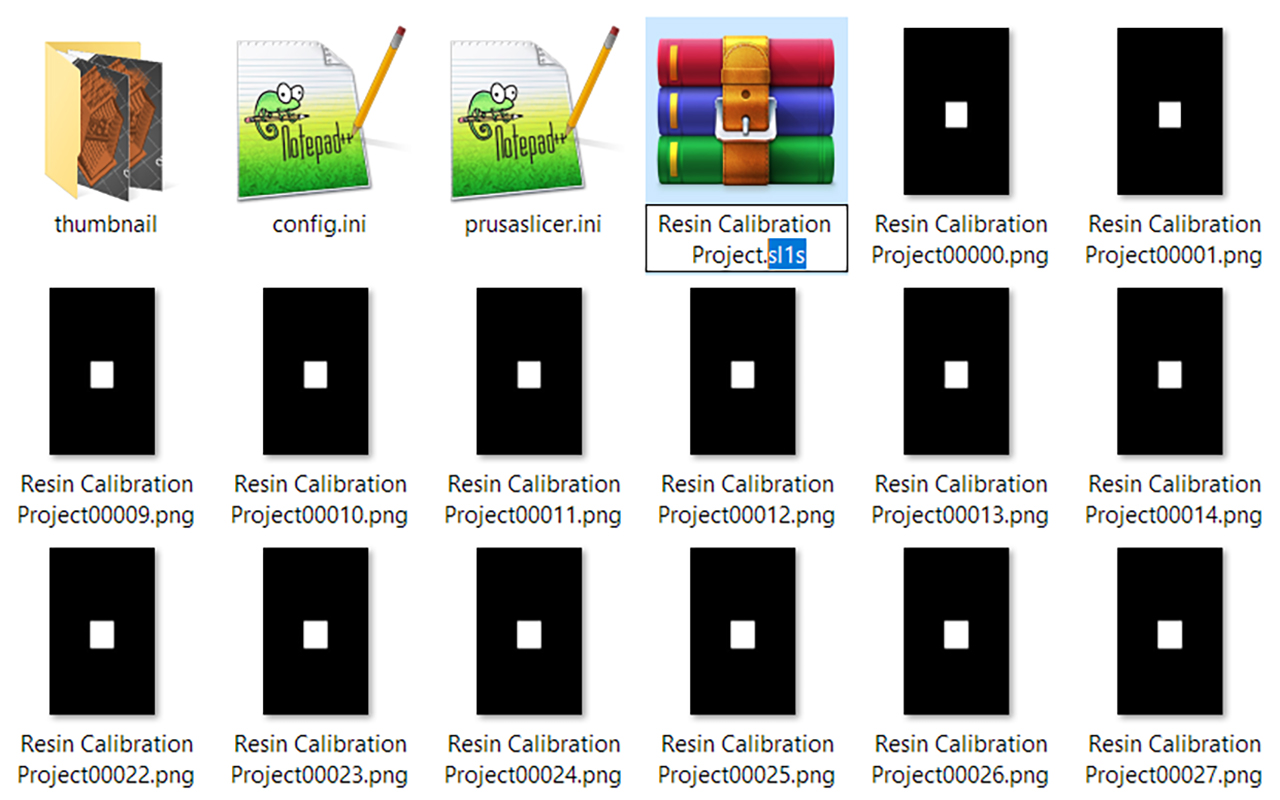 |
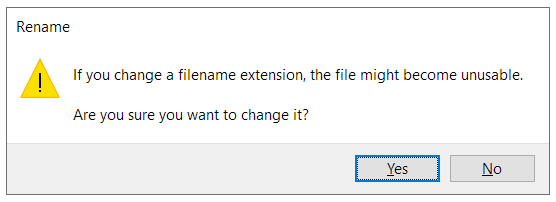
- Změňte koncovku tohoto souboru Zip na ".sl1" nebo ".sl1s", v závislosti na modelu tiskárny. Systém Windows vás upozorní, že soubor může být nepoužitelný a zeptá se, zda si přejete pokračovat. Klikněte na Ano.
- Zkopírujte si nově vytvořený kalibrační objekt resinu SL1 na USB flash disk a můžete jej spustit na tiskárně.
Spuštění tisku
- Po výběru projektu potáhněte prstem doleva a potvrďte nastavení tisku.
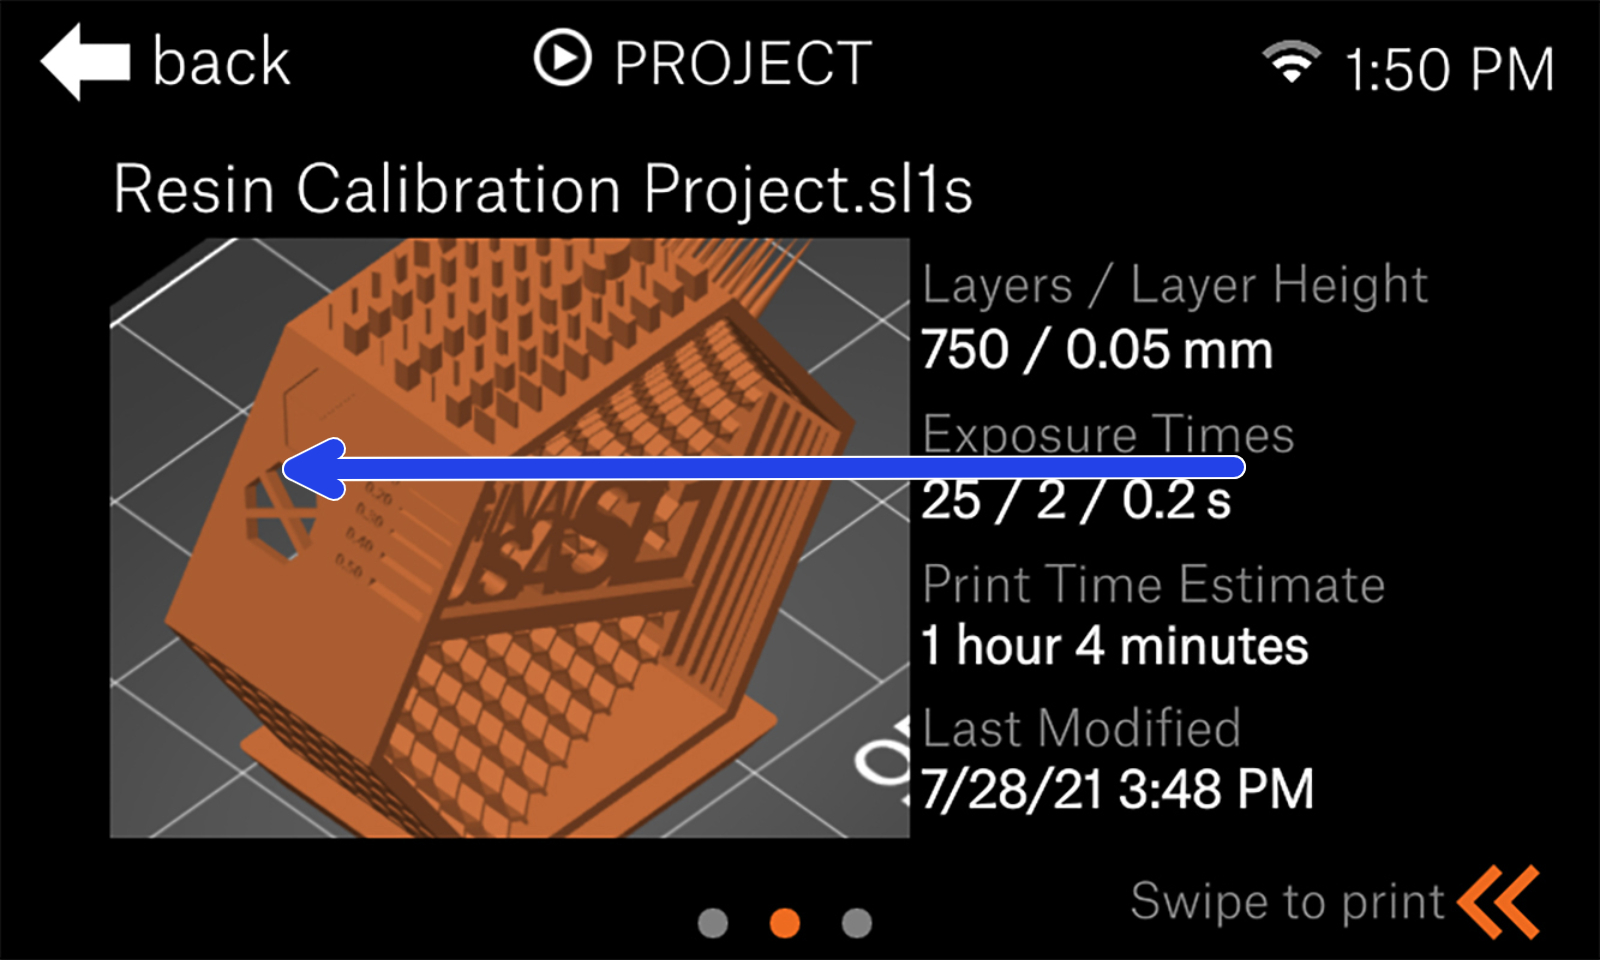 | 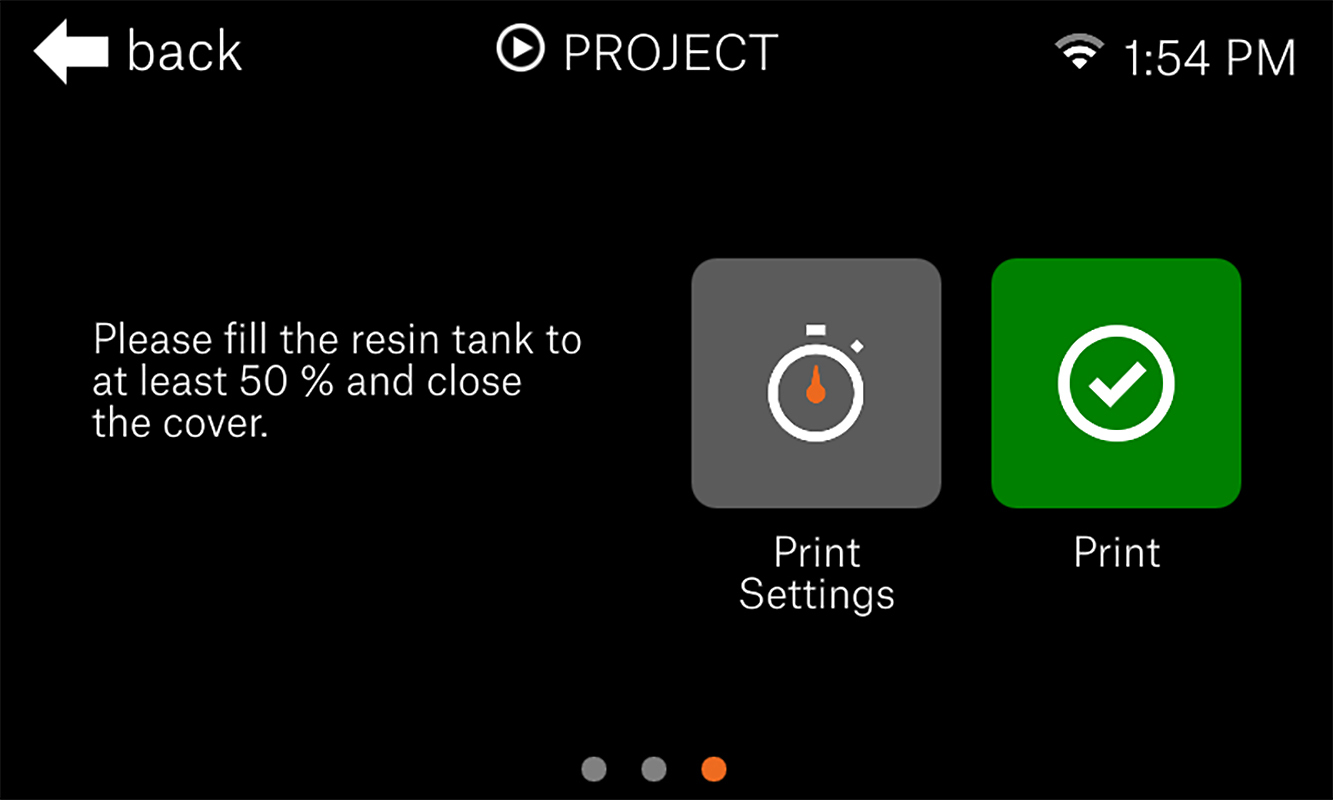 |
- V rámci nastavení tisku můžete upravit hodnoty některých parametrů, které jste vložili v předchozích krocích. Zkontrolujte, zda jsou takové, jaké potřebujete, a klepněte na tlačítko „Zpět“ v levém horním rohu.
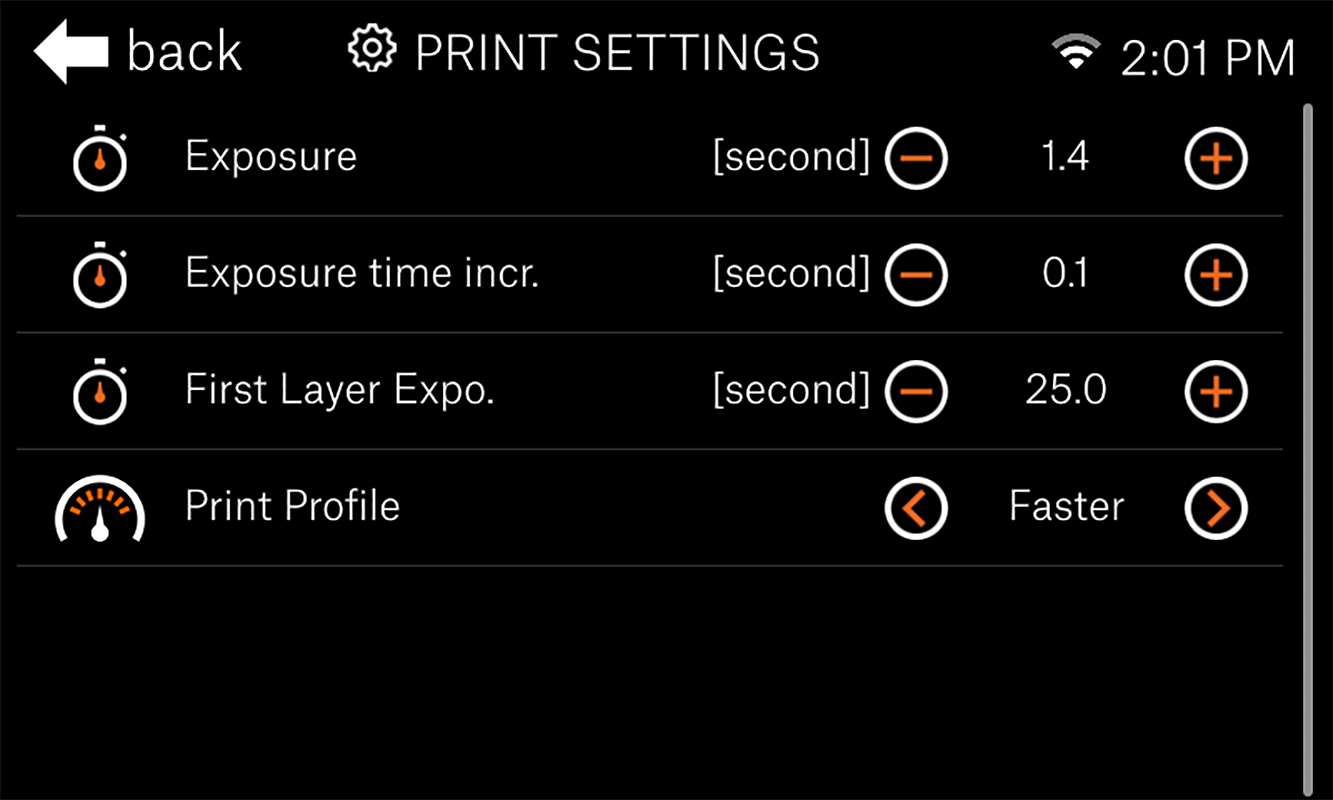
Nastavení pro SL1S SPEED. Tyto hodnoty NEBUDOU kompatibilní s SL1.
- Spusťte tisk a nechte jej dokončit. Uvidíte, že tiskárna vytvořila více instancí objektu a přidala štítek s celkovou dobou expozice vrstvy pro každou instanci.
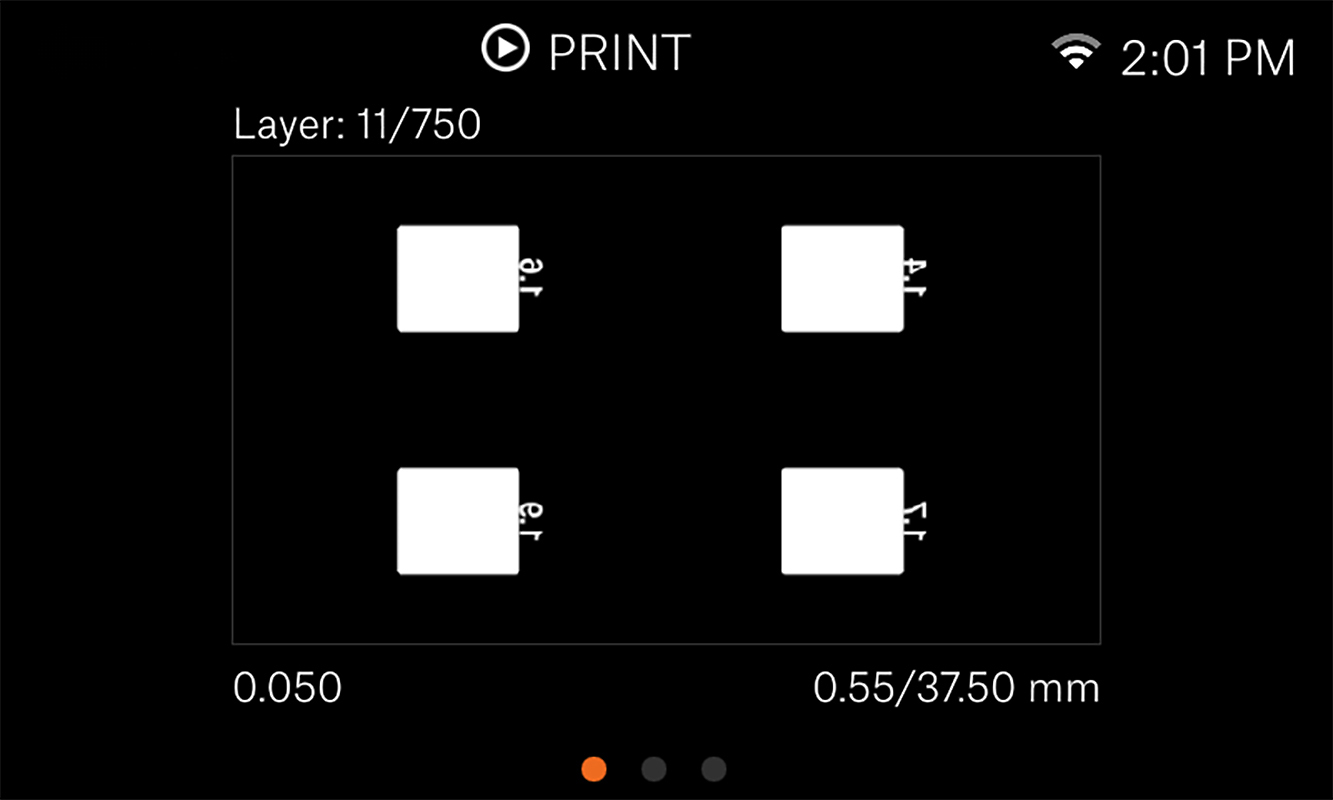
Během tisku můžete přejetím doprava zobrazit masku aktuální vrstvy.
Vyhodnocení výsledků
Hodnocení výsledků závisí na geometrii, ale existuje několik obecných pravidel, kterými se můžete řídit: Geometrie tisků roste s dobou expozice. V praxi to znamená, že pokud vám chybí detaily, musíte prodloužit dobu expozice. A naopak, pokud jsou prvky, například tenké otvory, zcela vyplněny, měli byste expozici zkrátit.
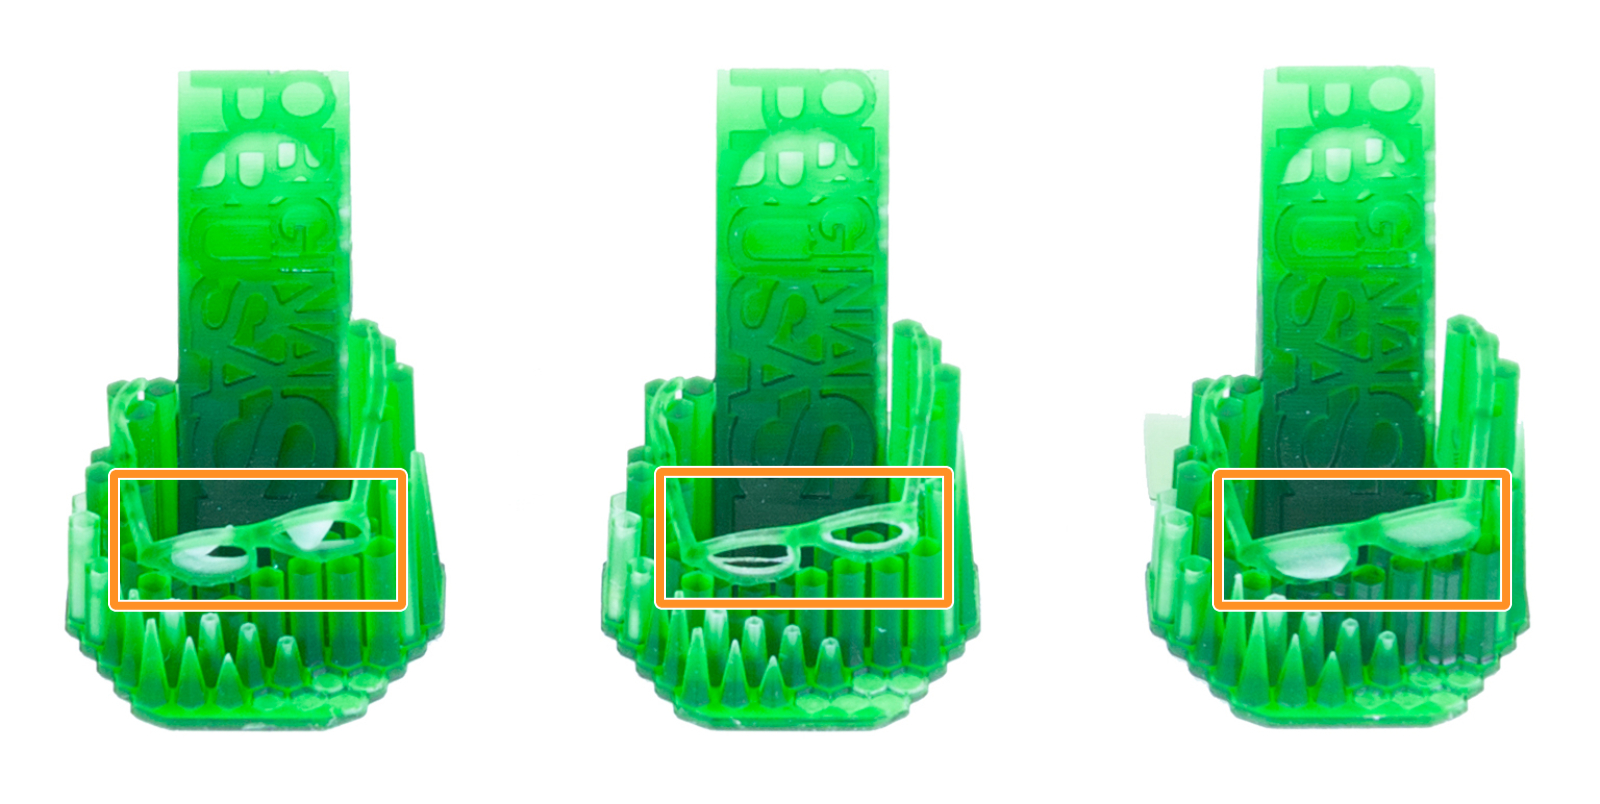 Příklad toho, jak se geometrie formuje, můžete najít třeba u předpřipravených kalibračních brýlí, kde se samotné sklo v obroučkách nevytiskne, pokud je nastavena příliš krátká doba expozice.
Toto lze pozorovat i v místech, kde se setkávají/kontaktují různé geometrie. Řekněme, že máte dvě šipky směřující k sobě, které se dotýkají v samotném hrotu; při nedostatečné expozici se hroty nedotýkají. Naopak při příliš dlouhé expozici nebude bod dotyku tvořit jeden bod, ale spíše se oba hroty šipek mírně spojí.
Jak jsou objekty uspořádány
Tiskárna automaticky vezme odmaskovanou oblast tisku a zkopíruje ji tolikrát, kolikrát je nastaveno v konfiguračním souboru (calibrateRegions). Jedná se o základní kopírování/vkládání, které se řídí přísnými pravidly, což znamená, že nebude objekty otáčet ani aranžovat. V případě více než 2 objektů je umístí do mřížkového vzoru.
| Regiony | Velikost mřížky | Max. X/Y velikost objektu SL1S SPEED | Max. X/Y velikost objektu SL1 |
|---|---|---|---|
| 4 | 2x2 | 63 mm x 40 mm | 60 mm x 34 mm |
| 6 | 3x2 | 42 mm x 40 mm | 40 mm x 34 mm |
| 8 | 4x2 | 31 mm x 40 mm | 30 mm x 34 mm |
| 9 | 3x3 | 42 mm x 26 mm | 40 mm x 22 mm |
* Hodnoty se zaokrouhlují směrem dolů. Je třeba zohlednit nerovnoměrné/symetrické/extrémní geometrie. Všimněte si, že ke každému objektu je připojena značka (5x10 mm). To ovlivňuje maximální velikost objektu.
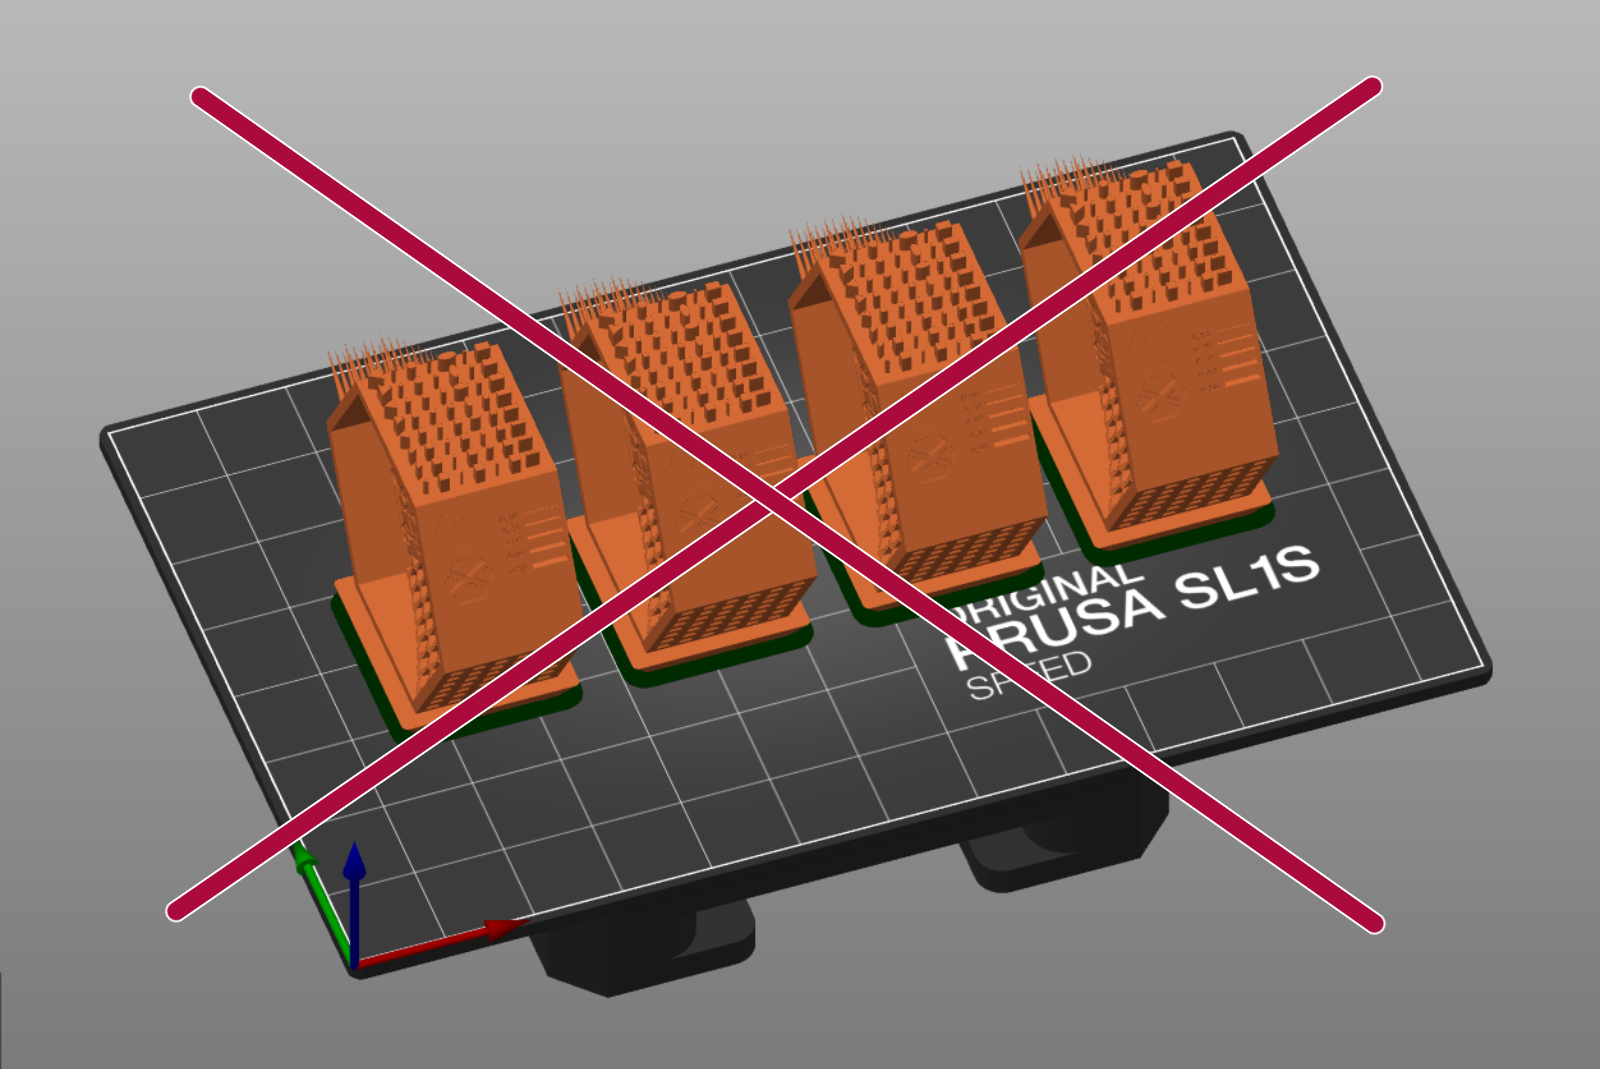
Pokud není správná orientace nebo velikost
 |  |
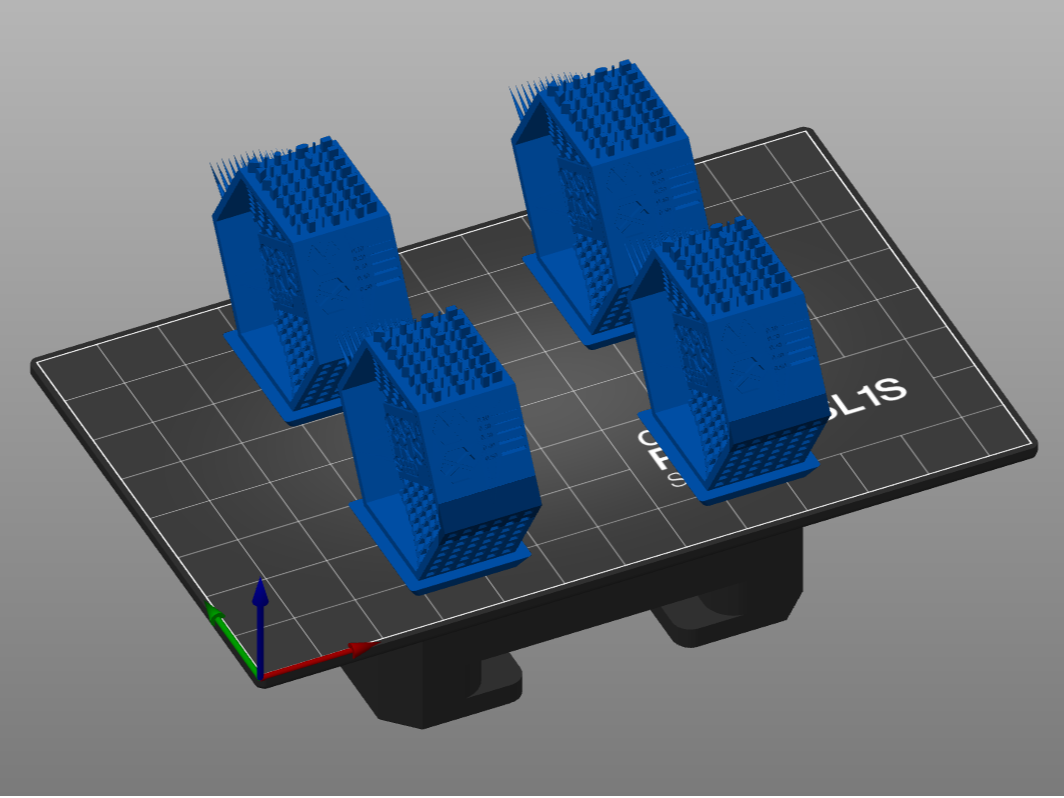
U čtyř oblastí je vždy umístí po dvou. Velikost a orientace modelu tedy může ovlivnit, zda se vše vejde na desku, nebo bude oříznuto tím, že bude mimo platformu.
 |  |
Nebude brát v úvahu celkovou plochu objektu a umístí je všechny za sebou, pokud by se tak vešly, jako to dělá PrusaSlicer.
Vytvoření předvolby PrusaSliceru
Našli jste nejlepší expoziční dobu pro váš resin? Skvěle! Můžete ihned zahájit normální tisk a před tiskem na displeji tiskárny nastavit dobu expozice nebo si můžete vytvořit vlastní profil resinu:
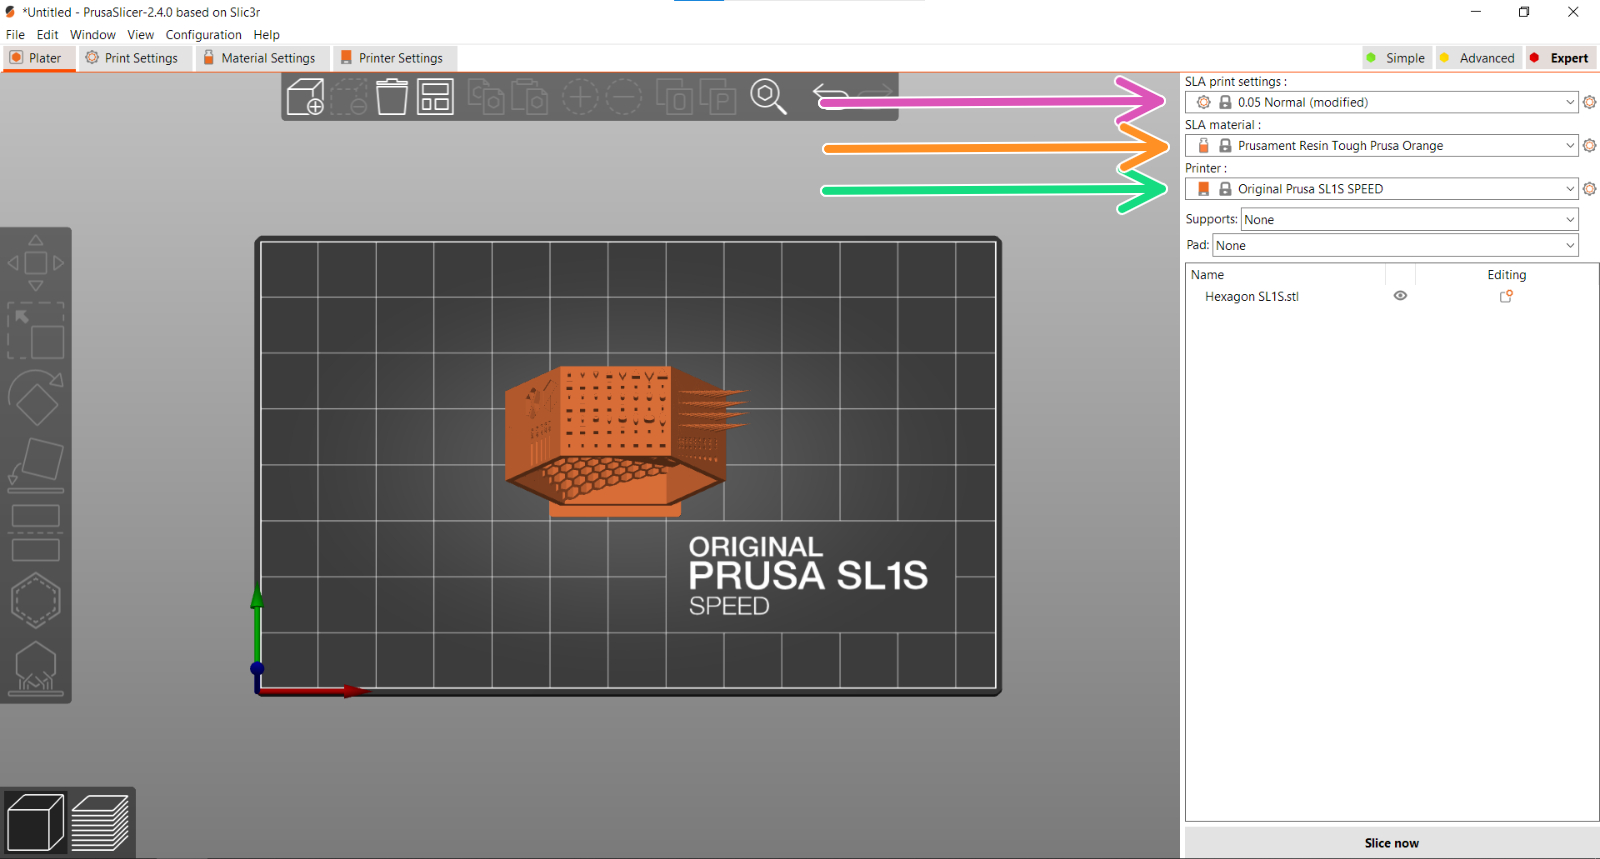
- Otevřete PrusaSlicer a v pohledu Plater, vyberte ze seznamu tiskáren (green arrow), Original Prusa SL1/SL1S SPEED, podle toho kterou máte.
- Vyberte Prusament Resin Tough Prusa Orange jako "SLA material" (oranžová šipka).
- V tiskovém nastavení SLA (fialová šipka), vyberte výšku vrstvy, pro kterou chcete resin kalibrovat. Tím se načtou všechny dostupné resiny.
- Klikněte na záložku "Nastavení materiálu" nahoře.
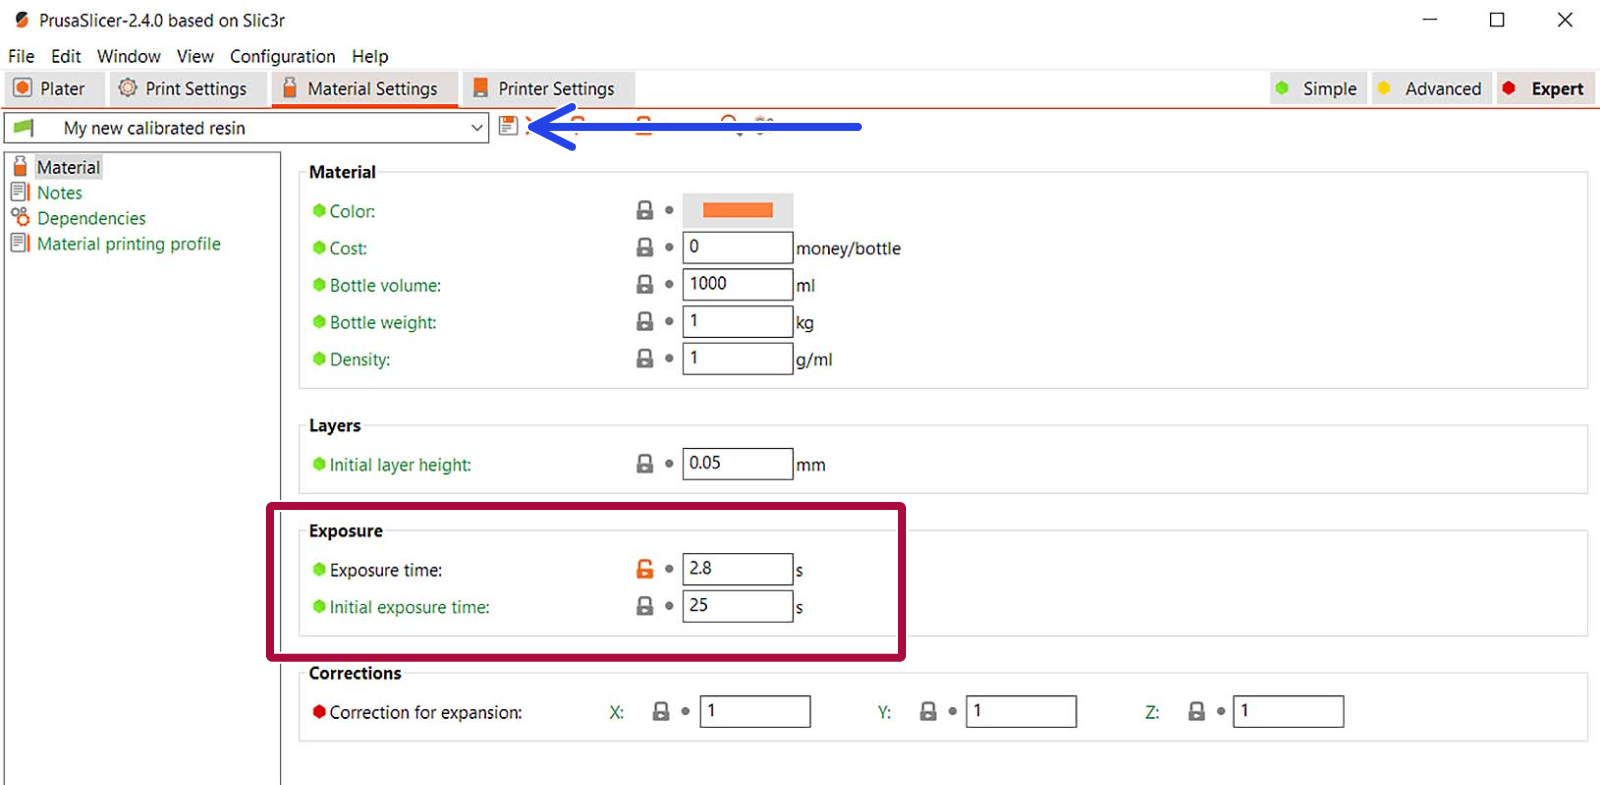
- V rozevíracím seznamu vyberte libovolný resin s výškou vrstvy, pro kterou chcete provést kalibraci. Ta bude použita jako základ pro váš nový profil. Poté klikněte na ikonku "Uložit" (💾) vedle seznamu (modrá šipka).
- Otevře se dialog, ve kterém pojmenujete svou předvolbu (třeba "Můj nový zkalibrovaný resin") a kliknete na "OK".
- U nového resinu profil upravuje pole "Počáteční doba expozice" a "Doba expozice" (červený čtverec), který nastavuje dobu, po kterou jsou jednotlivé vrstvy slicovaného objektu vystaveny UV záření.
- Tak a můžete začít. Slicujte svůj další model a šťastný tisk!