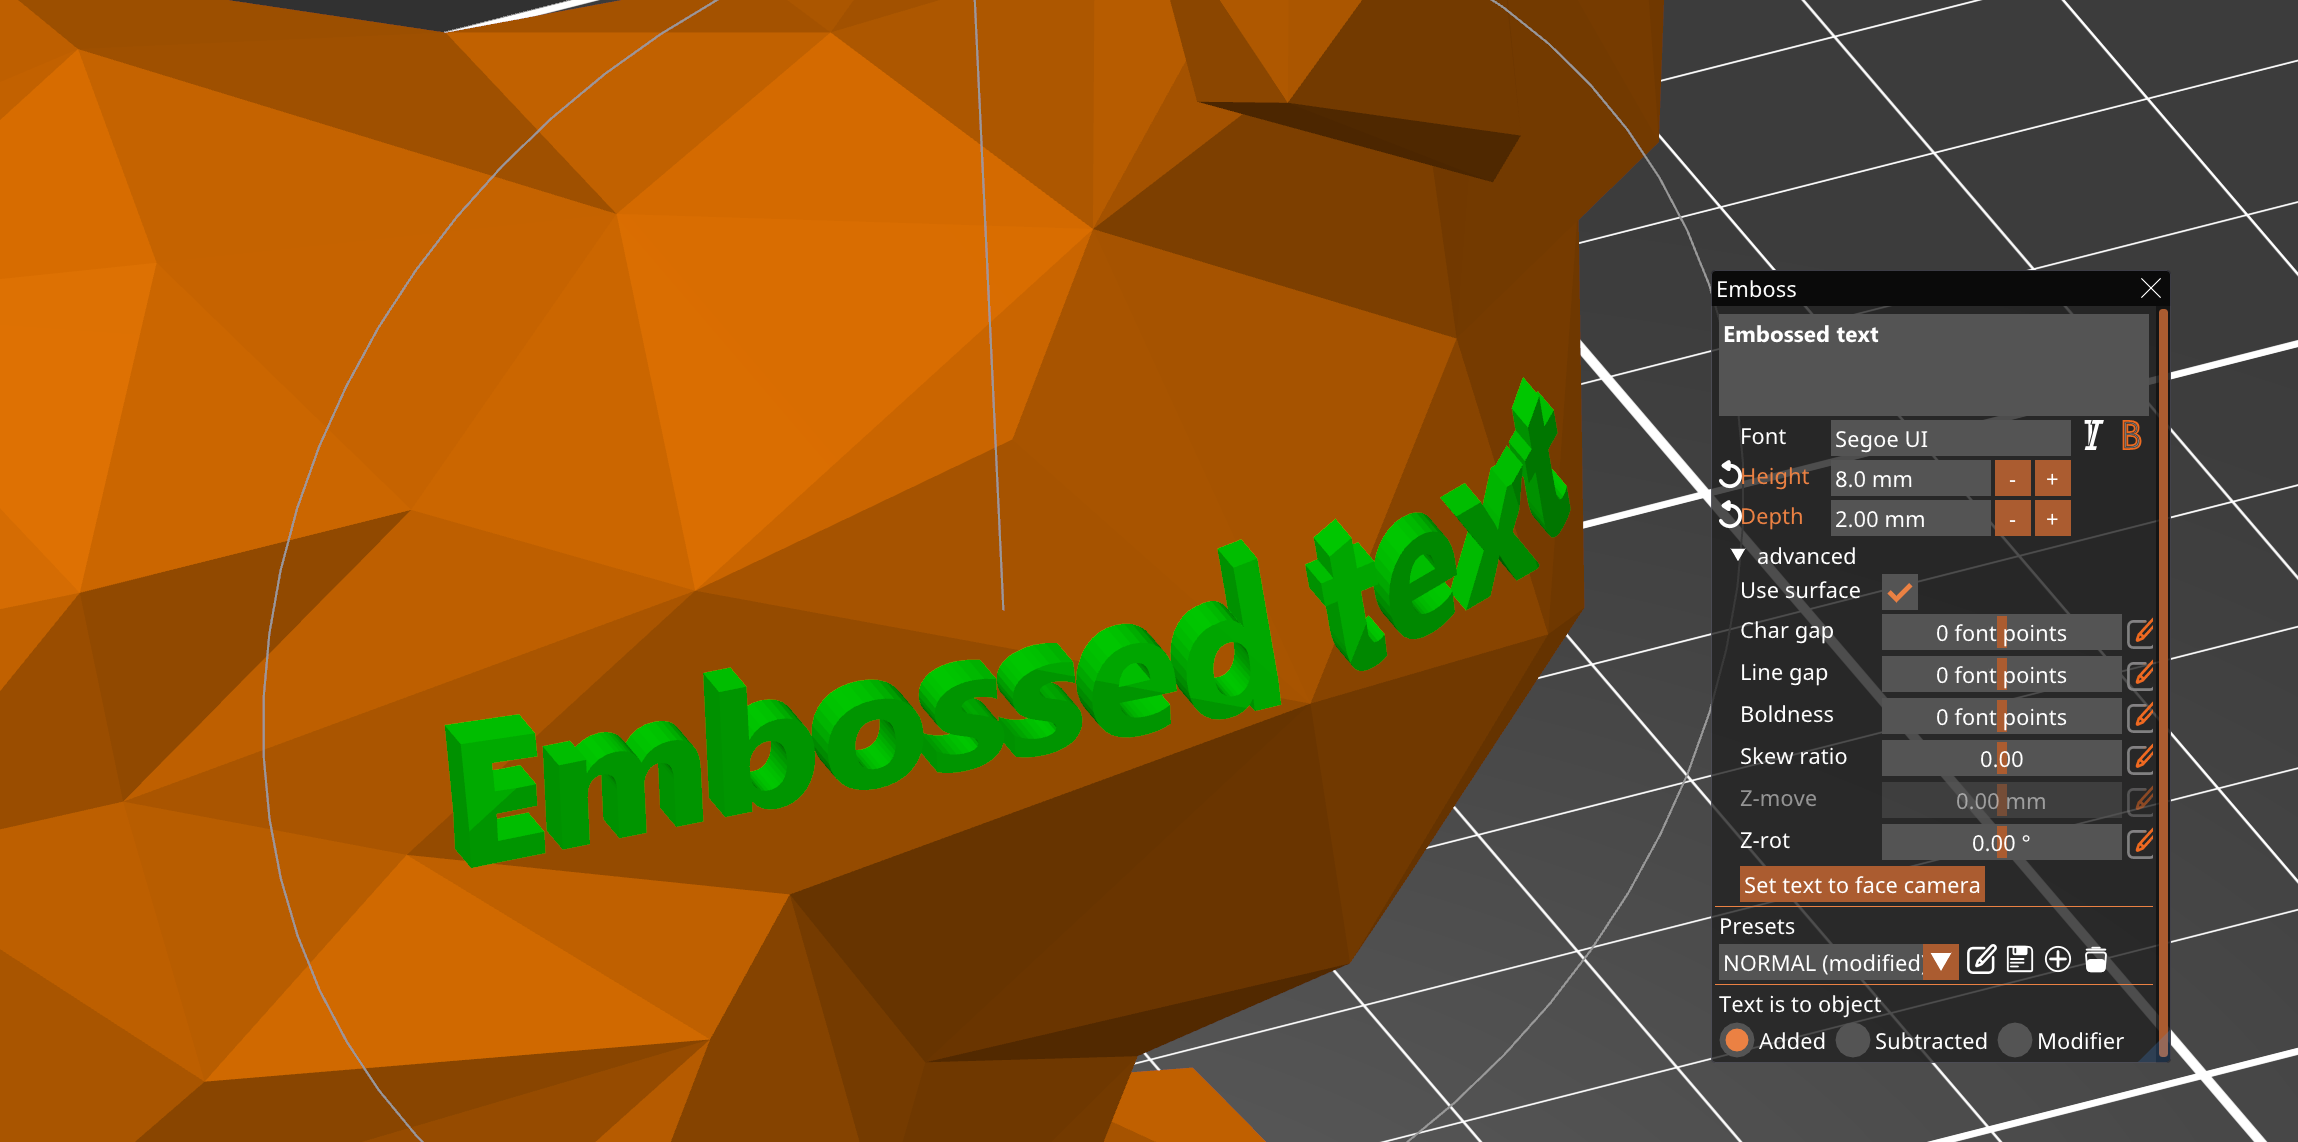
La herramienta Texto te permite añadir fácilmente etiquetas, notas, signos, números de serie o de versión a tus modelos directamente en PrusaSlicer. Puedes añadir texto a cualquier tipo de superficie, no solo a caras planas, sino incluso a superficies curvas. Las entidades de texto son totalmente editables incluso después de volver a abrir un archivo de proyecto guardado.
Añadiendo texto a modelos existentes
Selecciona el modelo de destino y pulsa la tecla T. También puedes hacer clic con el botón derecho del ratón sobre el modelo y seleccionar Añadir pieza - Texto en el menú contextual.
Creación de objetos de texto independientes
Haz clic con el botón derecho del ratón en la bandeja y selecciona Añadir forma - Texto. Esto creará un objeto independiente que no estará conectado a otros objetos del proyecto.
Manipulación del texto
Puedes manipular el texto arrastrándolo alrededor del objeto y colocándolo en la posición deseada. Cuando arrastres el objeto de texto sobre el modelo, aparecerá un marcador blanco que resaltará la posición en la que se calcula la normal de la superficie.
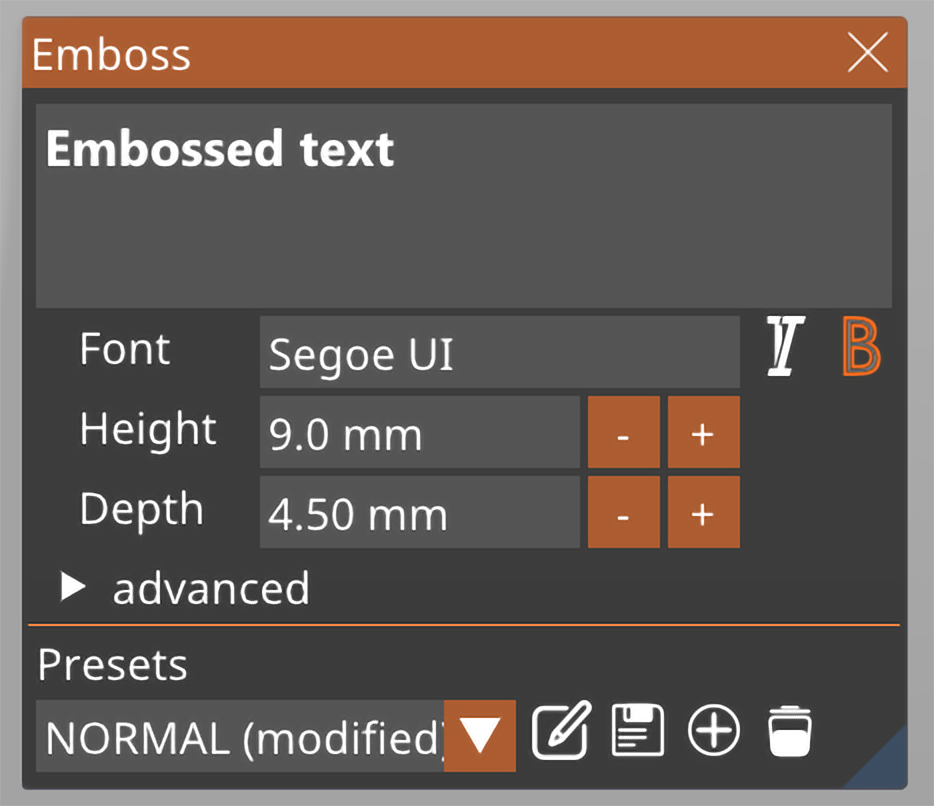
También tienes la opción de rotar el texto a lo largo del eje Z (Z-rot) y elevarlo a lo largo del eje Z (Z-move).
Fuentes
La herramienta de texto importa automáticamente la biblioteca de fuentes de tu dispositivo. Cualquier fuente TrueType (TTF) debería funcionar correctamente. Si instalas una nueva fuente en tu dispositivo, no es necesario reiniciar PrusaSlicer para poder utilizarla, simplemente cierra y vuelve a abrir la herramienta de texto y PrusaSlicer cargará las fuentes recién añadidas.
Plantillas de texto
Puedes guardar y cargar plantilas de texto. Estos incluyen todos los ajustes de texto, como la fuente seleccionada, la altura y la profundidad del texto, pero también todos los ajustes avanzados. Las plantilas de texto son especialmente útiles si deseas mantener un estilo de texto coherente al crear números de versión y etiquetas similares.
Grabado en relieve, grabado en hueco y modificadores
En el menú contextual de la herramienta Texto, puedes seleccionar si el texto debe ser un objeto:
- Unir - esto crea una nueva parte y estampa el texto en relieve
- Cortar - esto crea un volumen negativo, que graba el texto en relieve
- Modificador - esto crea un modificador
También puede cambiar entre estos tipos de objetos más adelante. Simplemente haz clic con el botón derecho del ratón en el objeto Texto de la lista Objetos y selecciona Cambiar tipo en el menú contextual.
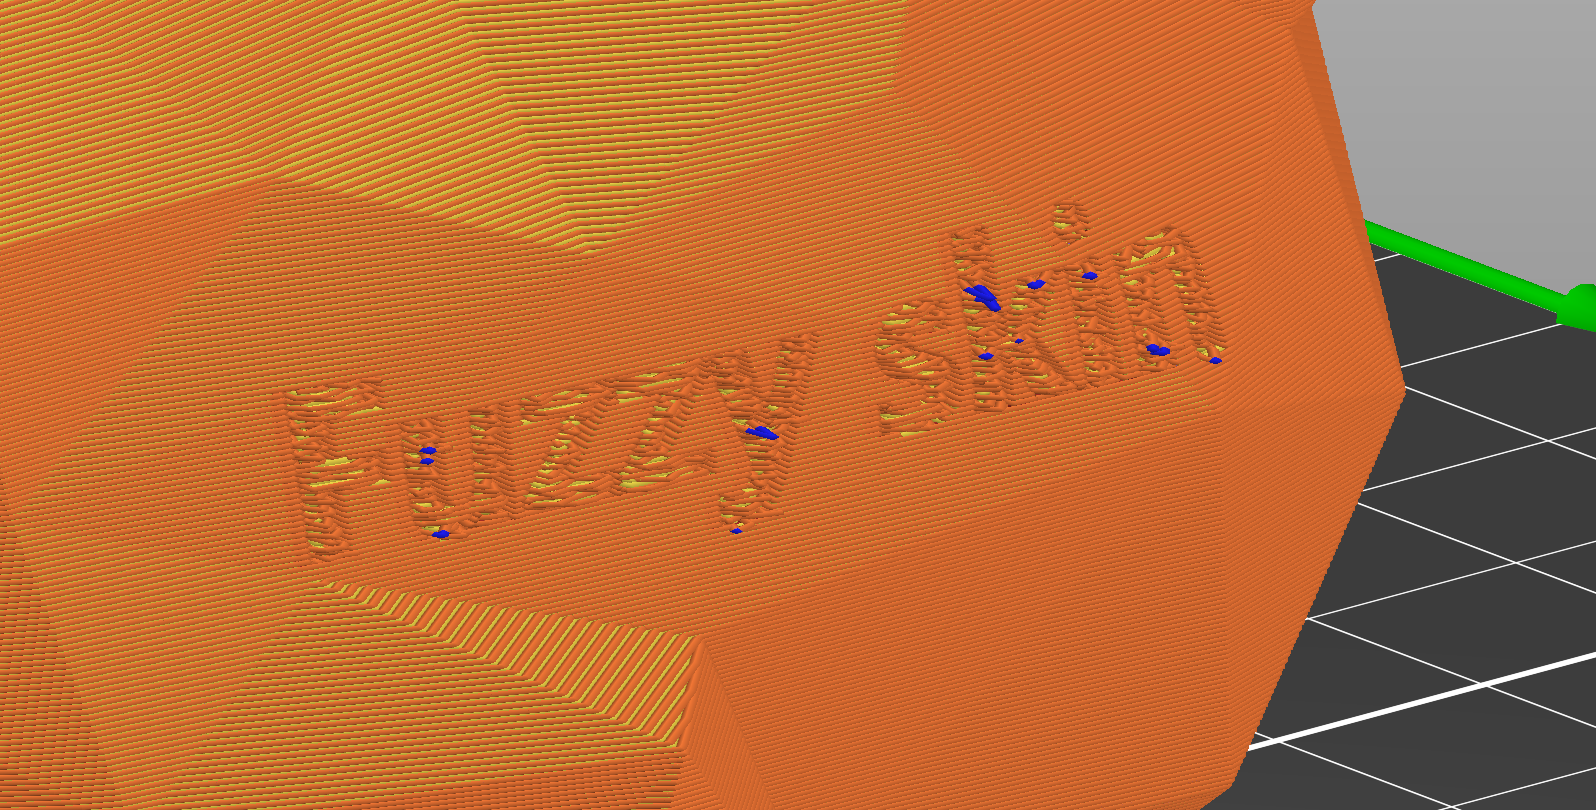
Hacer que el texto siga superficies curvas
Si amplías el menú de texto avanzado, tienes la opción de habilitar la opción Usar superficie. El texto se curvará a lo largo de la superficie que hay debajo.
Sin embargo, el límite es de 90 grados. A medida que te aproximes a este ángulo, el texto se deformará cada vez más.