Español
Login
Impresoras 3D
Materiales
Piezas y accesorios
Para Empresas
Software
Modelos 3D
Comunidad
Ayuda
Cursos
Blog
Empresa
Soporte
Original Prusa MK4
Mantenimiento de la impresora
Cómo reemplazar un ventilador de impresión (MK4 / MK3.9) | Comenzar el montaje
1. Comenzar el montaje
Paso 1 de 11 (Capítulo 10 de 14)
Contenidos
Comentarios
Dificultad
Moderada
Idiomas disponibles
Comenzar el montaje
Contenidos
Mantenimiento de la impresora
Complemento Guía de Filamento (MK4)
Cómo instalalar el Adaptador Nextruder a boquilla V6 (MK4)
Como reemplazar la boquilla Prusa (MK4/MK3.9)
Como reemplazar la Loveboard (MK4S/MK4/MK3.9S/MK3.9)
Cómo sustituir la fuente de alimentación plateada por la negra
Cómo sustituir un calentador del hotend (MK4/MK3.9)
Como reemplazar un termistor del fusor (MK4/MK3.9)
Como reemplazar un ventilador del fusor (MK4 / MK3.9)
Cómo reemplazar la placa xBuddy (MK4/MK3.9/MK3.5)
Cómo reemplazar un ventilador de impresión (MK4 / MK3.9)
Comenzar el montaje
Introducción
Herramientas necesarias para este capitulo
Preparation
Loveboard cover removal
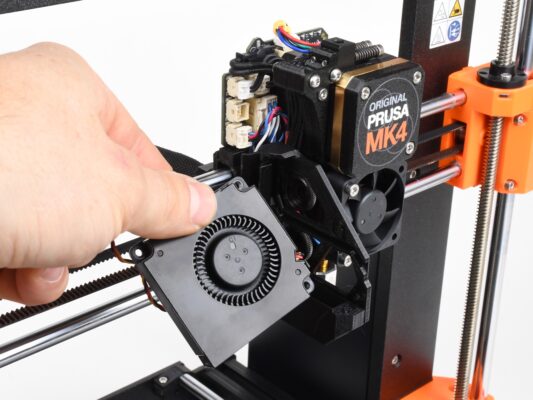
Extracción del ventilador
Parts preparation: Print fan
Print fan cable management
Print fan installation
Finishing the fan installation
Hecho
Cómo sustituir un conjunto del hotend (MK4/MK3.9)
Como reemplazar un Termistor de la Base Calefactable (MK4/S, MK3.9/S, MK3.5/S)
How to replace a hotend heatsink (MK4 / MK3.9)
Como reemplazar la xLCD (MK4/MK3.9/MK3.5)
Comentarios
Inicia sesión
para publicar un comentario
Sin comentarios