日本語
Login
3Dプリンター
マテリアル
部品 & アクセサリー
法人向け
ソフトウェア
3Dモデル
コミュニティ
ヘルプ
コース一覧
ブログ
会社概要
サポート
Original Prusa i3 MK2.5S
プリンターメンテナンス
How to replace a heatbed thermistor (MK3S+/MK3S/MK2.5S/MK2S) | 組み立てを始める
1. 組み立てを始める
ステップ 1 / 17 (章 4 / 8)
内容
コメント
難易度
ほどほど
利用可能な言語
組み立てを始める
内容
プリンターメンテナンス
ヒートブレーク/ヒートシンク/ヒートブロックの交換方法 (MK3S+/MK3S/MK2.5S/MMU2S)
PTFEチューブのトリミング方法 - マルチマテリアル
プリントパーツの後処理方法
ヒートベッドサーミスターの交換方法 (MK3S+/MK3S/MK2.5S/MK2S)
組み立てを始める
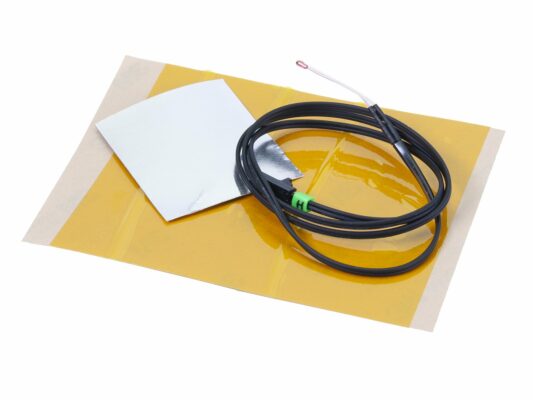
交換セットの入手
このガイドに必要な工具
プリンターの準備
ヒートベッドの取り外し MK3S+/MK3S/MK3
ヒートベッドを取り外します MK2.5S/MK2.5/MK2S
Removing the heatbed MK3S+/MK3S/MK3
ヒートベッドを取り外します MK2.5S/MK2.5/MK2S
カバーとテキスタイルスリーブ/スパイラルチューブの取り外し
交換セットの準備
ヒートベッドとサーミスターを準備する
サーミスタを所定の位置に固定する
サーミスタを所定の位置に固定する
ヒートベッドの再組立て
ヒートベッドの接続 MK3S/MK3
ヒートベッドの接続 MK2.5S/MK2.5/MK2S
最終チェック
ホットエンドPTFEチューブの交換方法 (MK3S+/MK3S/MK2.5S/MMU2S)
How to replace a hotend thermistor (MK2S)
PTFEチューブのトリミング方法 - Original Prusa プリンター
PEIシートの交換 (MK3S/MK3/MK2.5S/MK2.5)
コメント
ログイン
してコメントを投稿する
コメントなし