This error can appear during the Self-test or the XYZ-calibration when the firmware detects a shorter distance of axis travel than expected. The exact length of each axis is stored in the printer's memory. Depending on where it is triggered, it will name the running process (Selftest, XYZ calibration, etc.) and will state the message "Please check: Axis length" on the display and the letter for the problematic axis, in the bottom right ("X/Y/Z").
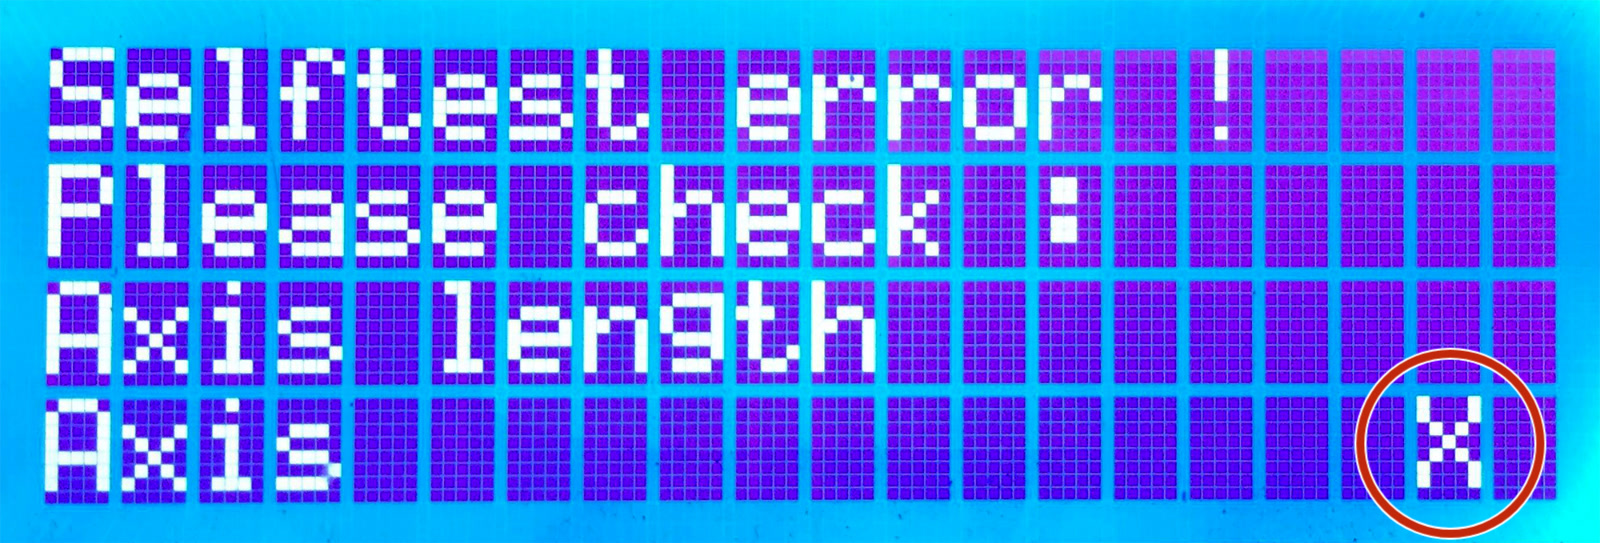
Possible causes for X/Y-axis
Most often it indicates an issue on the hardware level, and as it is the same method used for Crash detection on the Original Prusa MK3/MK3S/MK3S+ printers, the issue should initially be troubleshot the same way. Check that belts and pulleys are installed as is shown in the Assembly manual, and make sure the axis can move smoothly along the full length of the axis, in both directions. Nothing should be loose. Make sure the pulley set-screw is secured on the flat side of the motor shaft. See Crash detection for more information.
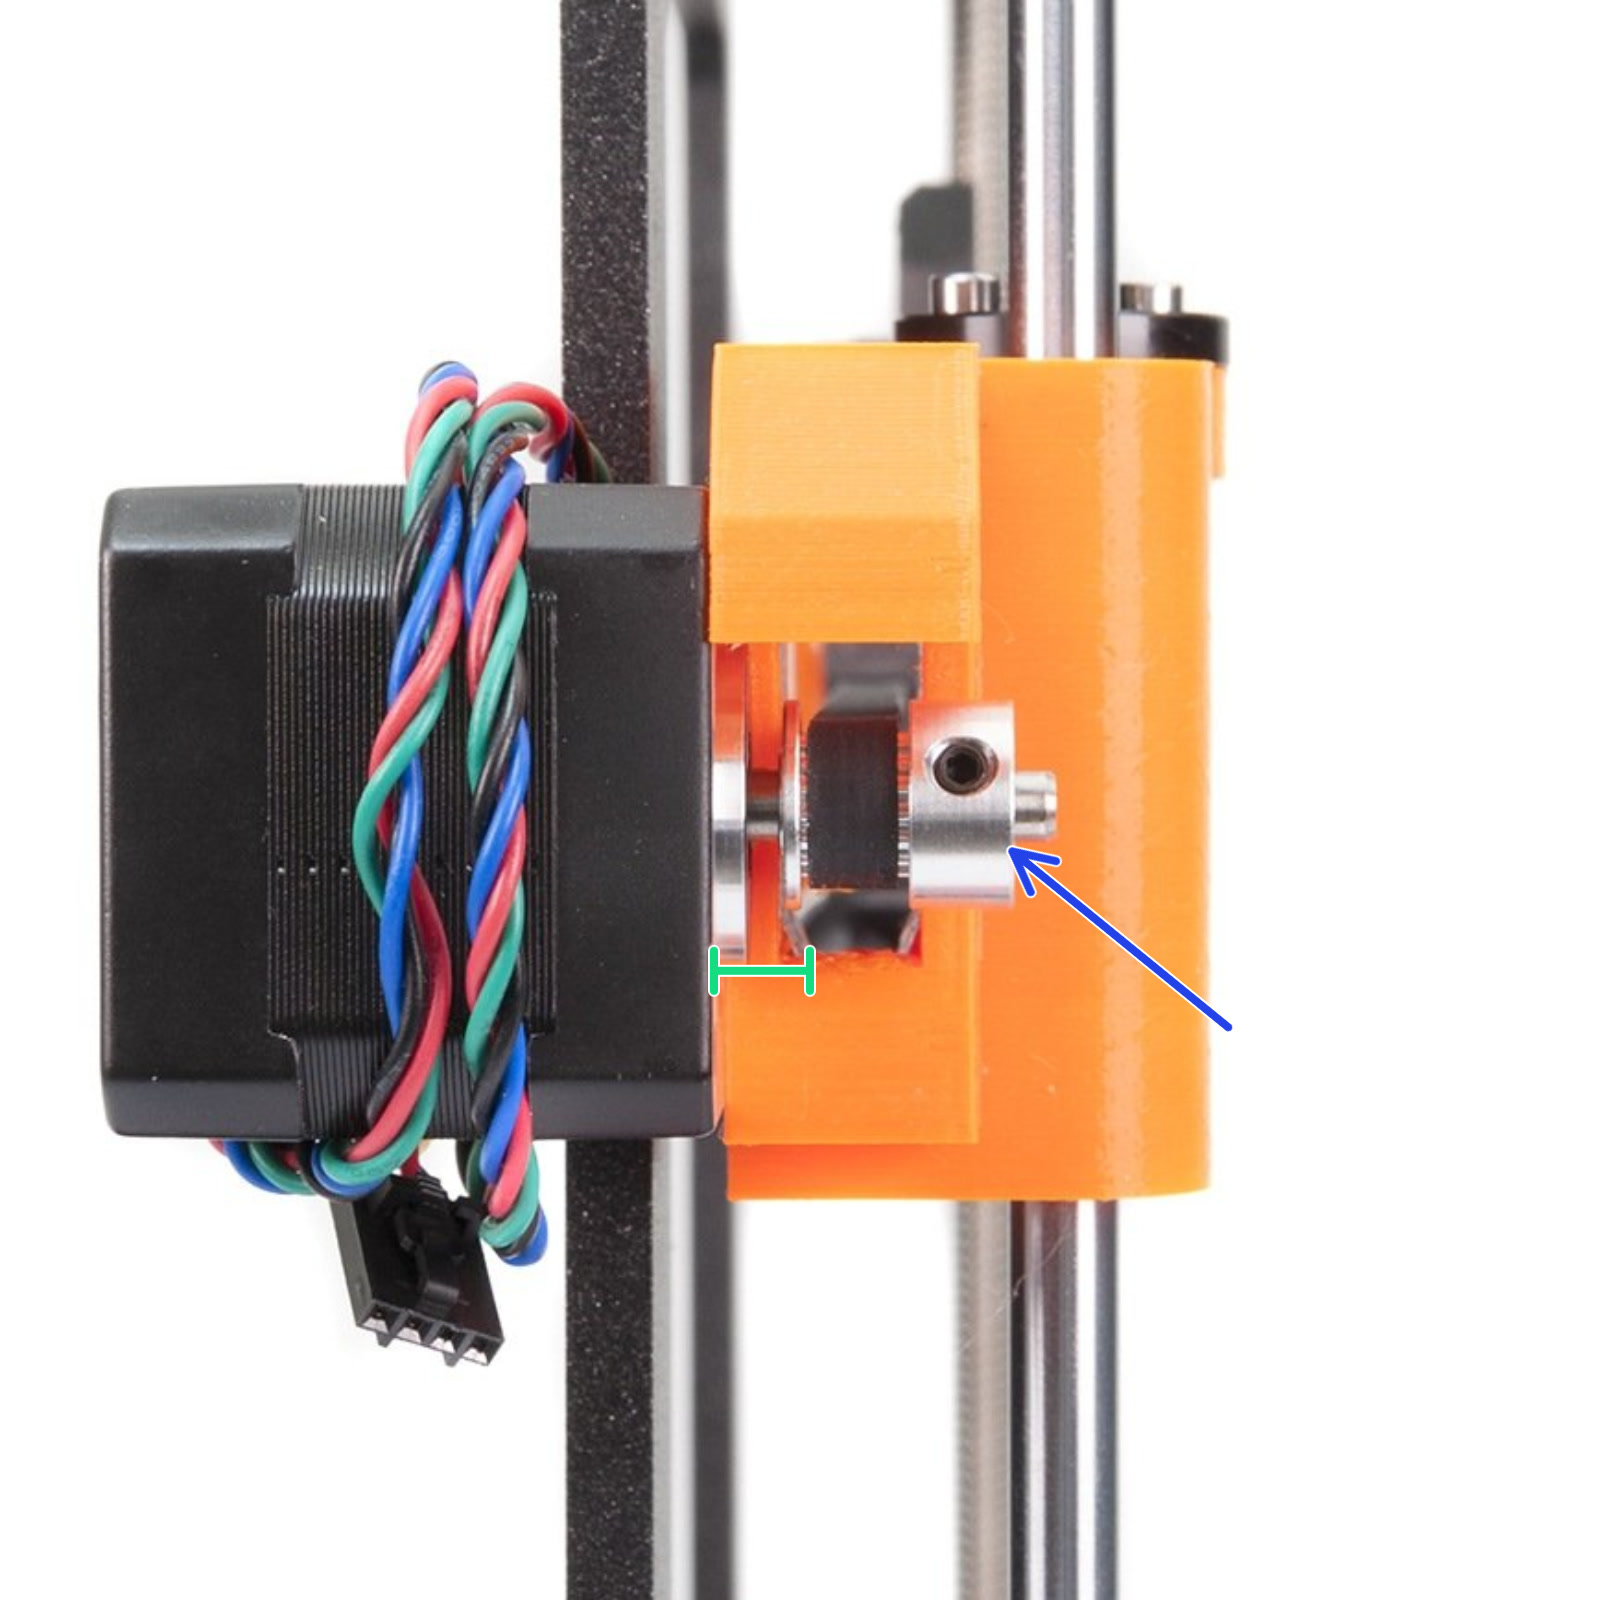 | 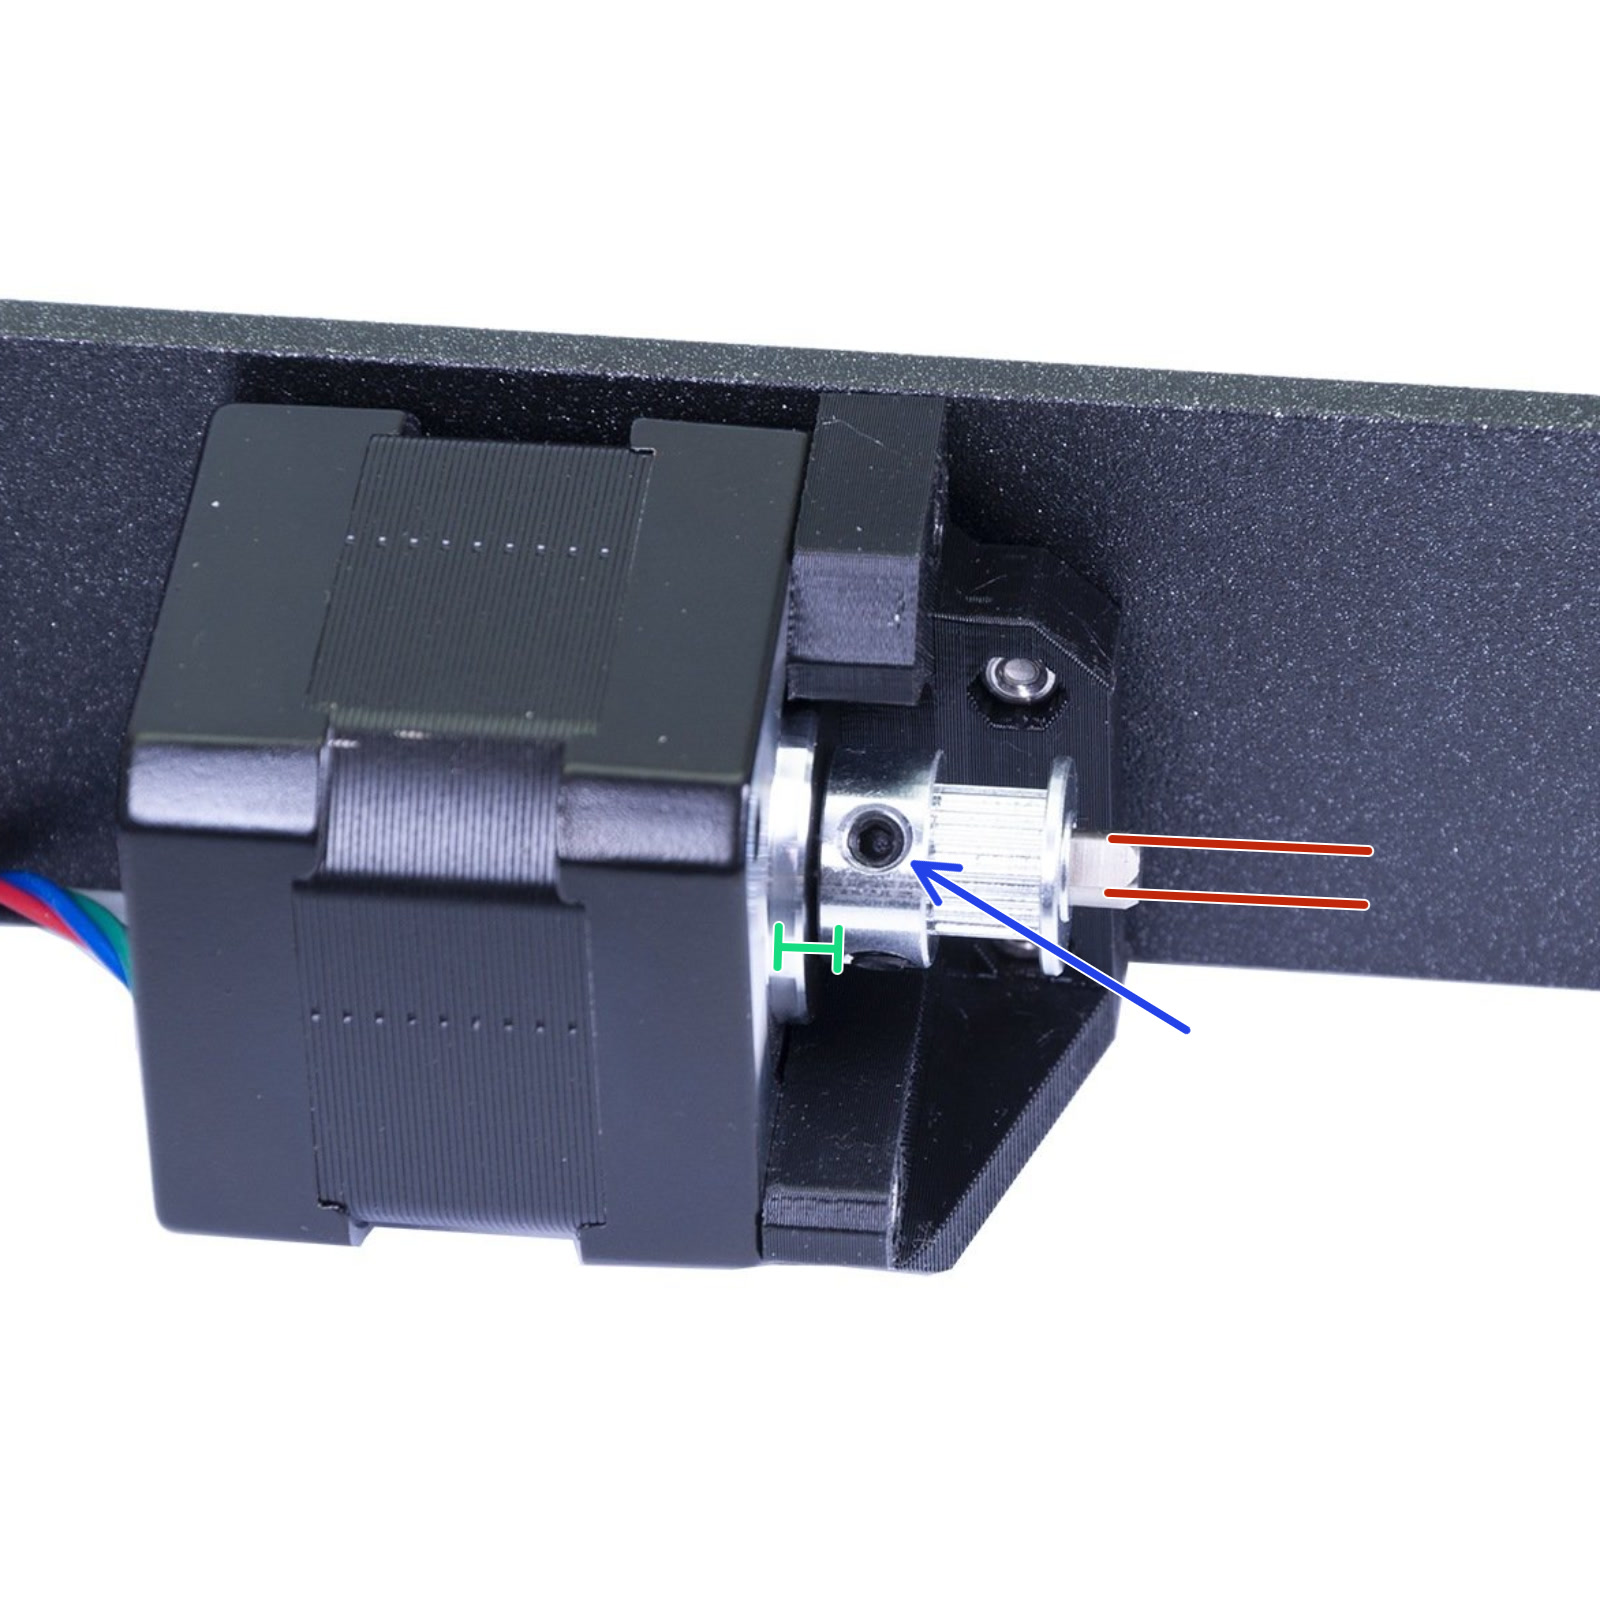 |
| Correct X-axis pulley orientation and position. | Correct Y-axis pulley orientation and position. |
Take a look at the extruder from behind, make sure that the cable bundle with the textile sleeve (or spiral wrap) isn't too wide, and touching the frame of the printer before the extruder can move to the initial position.
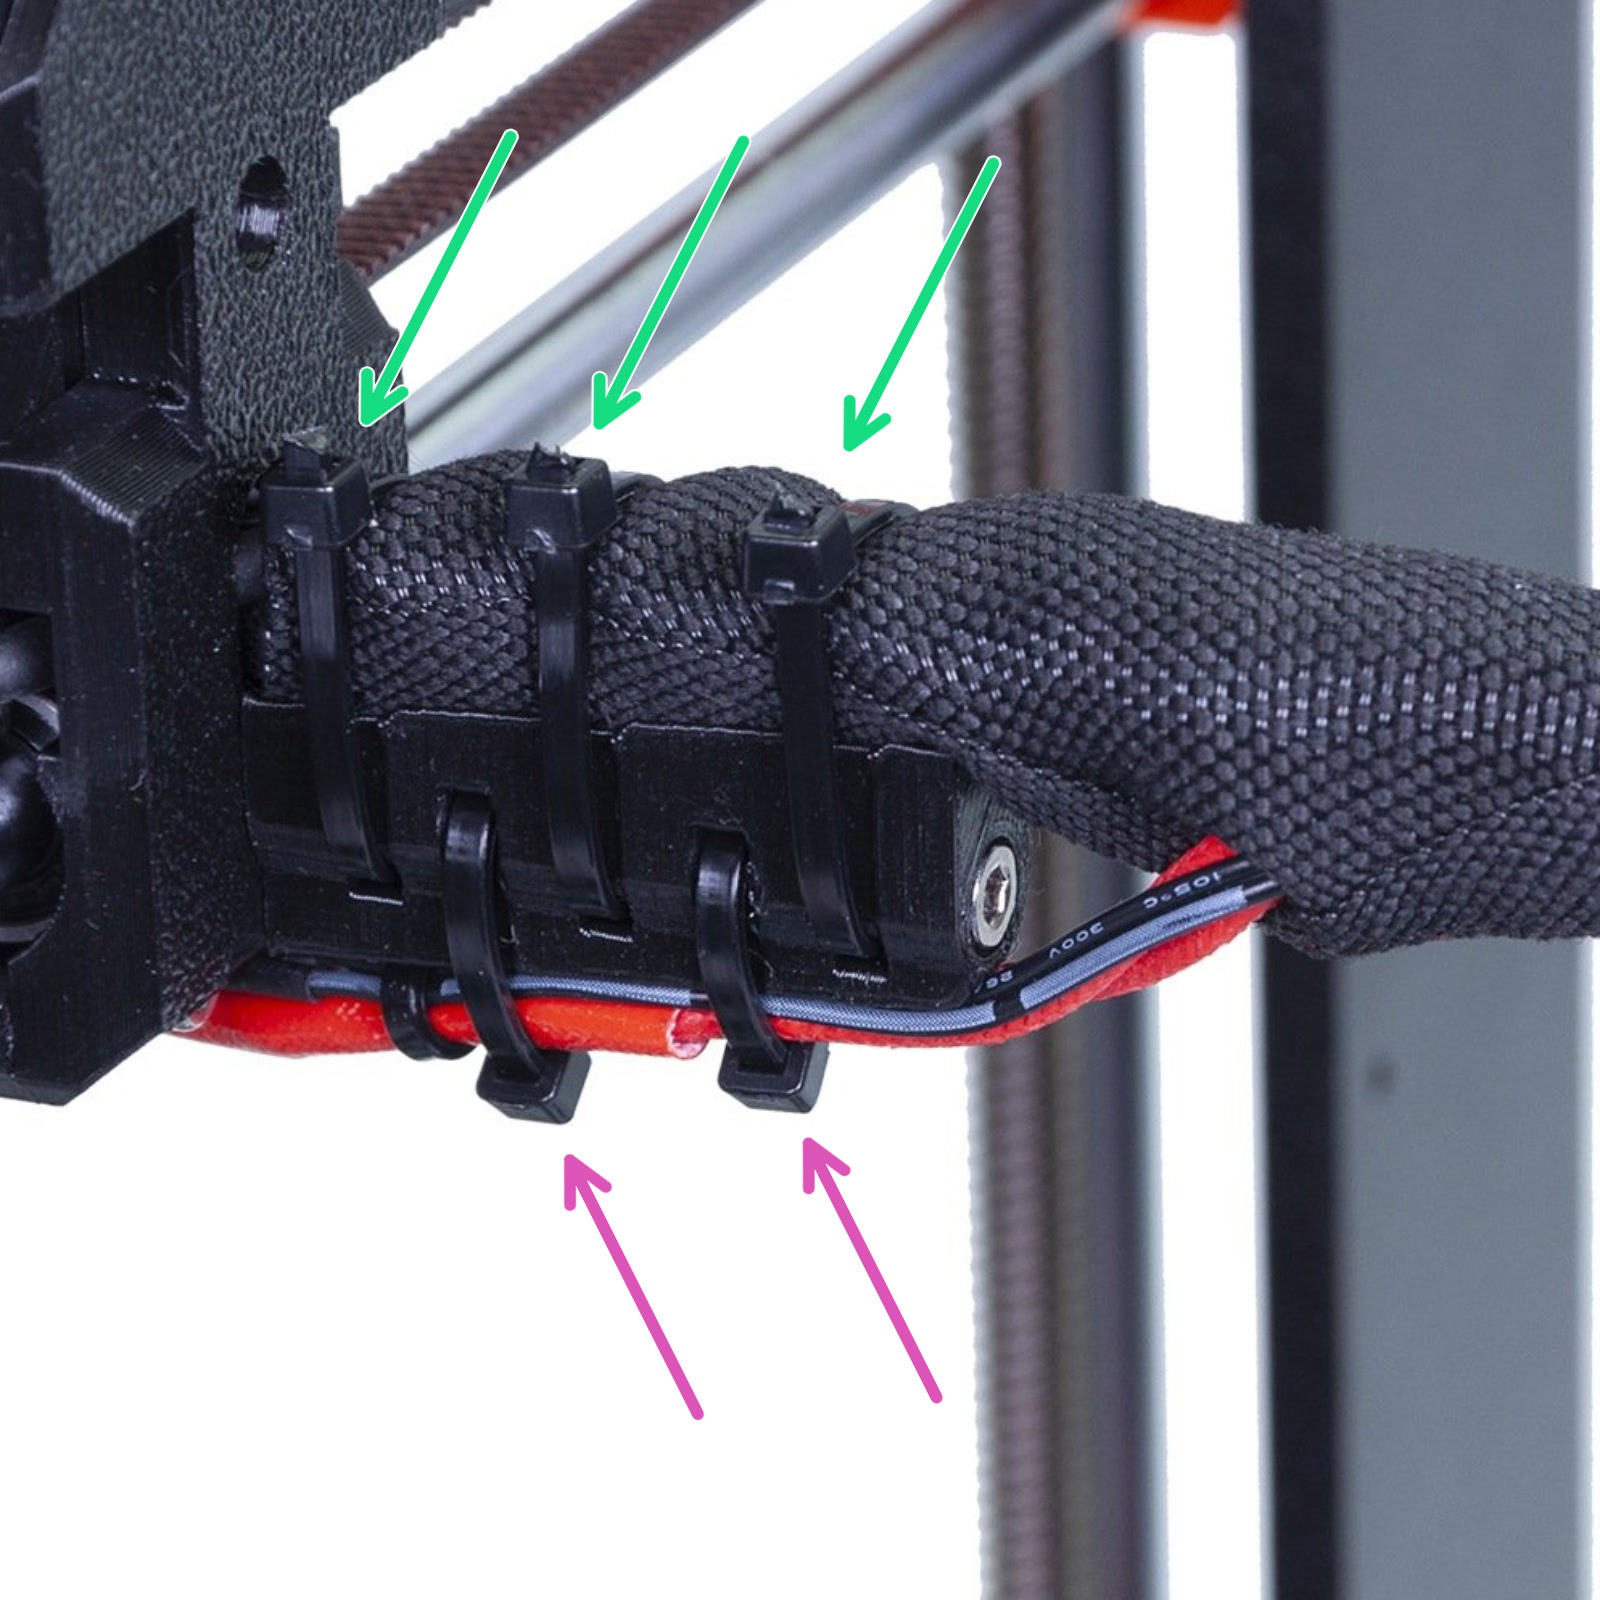
Position of zip ties on the cable-holder
Make sure the zip ties are situated exactly like instructed in the assembly manual. You want the top zip ties on the very top (green arrows) or cleanly against the printed cable-holder. Zip ties must not interfere with either end of the axis Einsy-door or the PSU. Move the extruder to each end and check if the zip ties are touching either end.
The bottom zip ties holding the heater and thermistor cable must also be positioned so they do not interfere with the ends of the axis (purple arrows), but also do not touch the Heatbed-cable-cover. Make sure they are cut flush with the head of the zip tie.
Possible causes for Z-axis
The main end-stop of the Z-axis is the P.I.N.D.A. sensor, so you should first make sure this is not set too high or not working correctly. See P.I.N.D.A./SuperPINDA Sensor testing for more information.
However, more often there is an issue with your assembly, which interferes with the distance traveled. You need to look over your assembly and pay extra attention to the orientation of the Trapezoid nuts (Z lead screw). A section of its threads should be inside the printed part, not protruding up from the printed part. The highest point should be the M3 bolts securing the Trapezoid nuts. Also, if the error occurs during calibration, make sure nothing is touching the bed, i.e. a zip-tie on the bundle of cables.
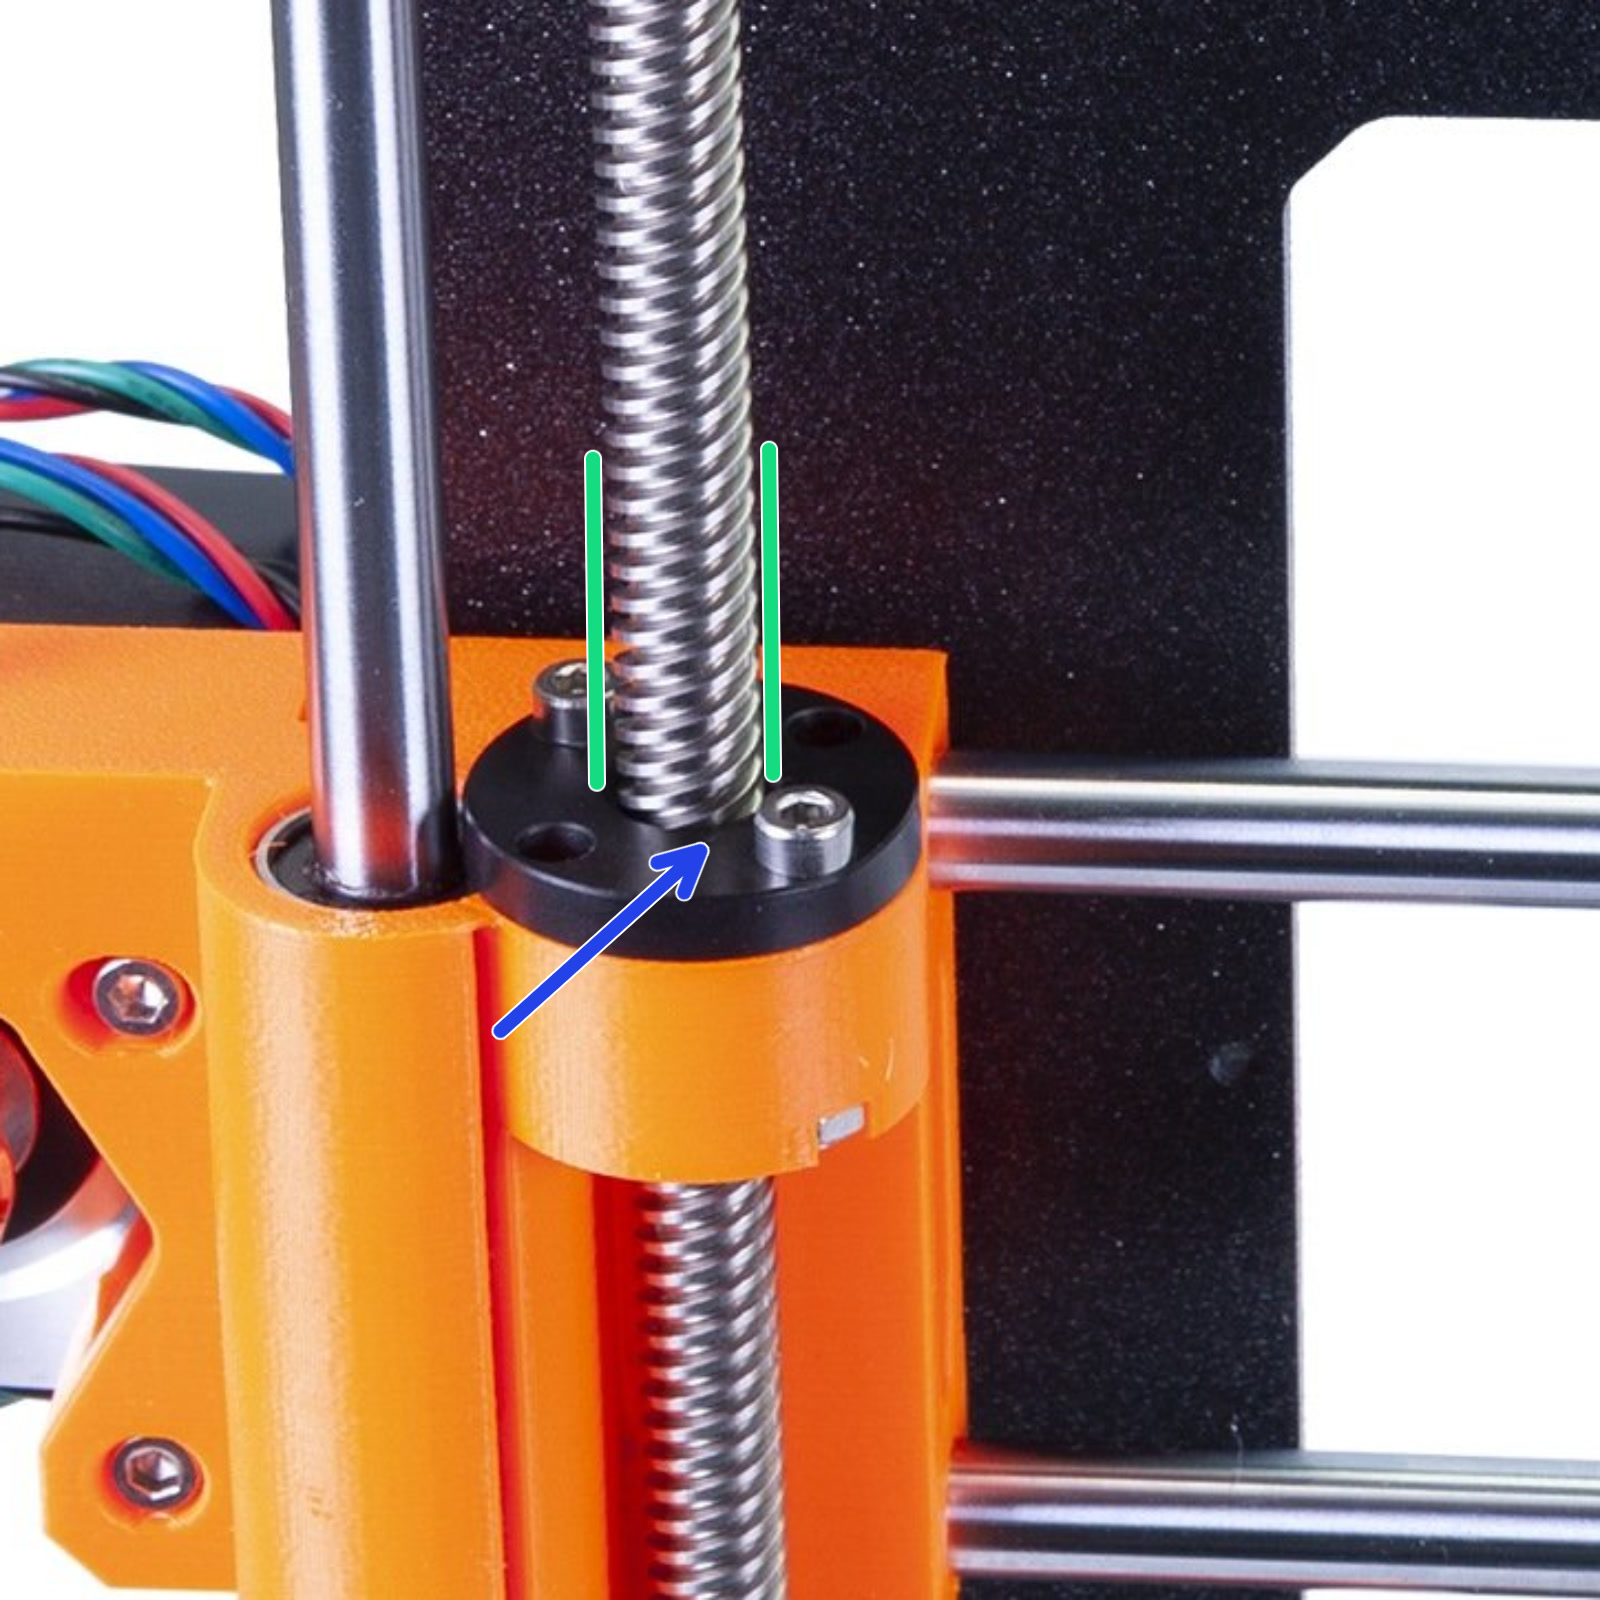 |
| Correct orientation of the Trapezoid nut (Z lead screw). |
Another possible cause is that you have loaded an incorrect version of the firmware. For instance, the extruder for the Original Prusa MK3 and MK3S/MK3S+ are of different size, and therefore have a different length of expected travel. Always make sure you are using the correct firmware.
For more info on issues with the Z-axis, please see Failing Z calibration (MK3S/MK2.5S).
Lubrication
Try to lubricate the smooth rods, as instructed in Maintenance tips. The Original Prusa MK3S/MK3S+ is supplied with a tube of lubricant.

25 comments
I have tried:
1. Lubricating the Y axis rods
2. Ensuring to move the pulley away from the motor head as suggested above.
I could not resolve the Y-axis length error inspite of above changes. If anyone has inputs on what else could have went wrong in my assembly, please let me know.
Hello! Thank you for the message and sorry for the late response here. If this is still an issue, I'd recommend contacting our Customer Support, so that we can see some videos of the failed test to see all movements from start to fail and better evaluate from there.
Other common causes could be related with the pulley: not only we'd need to leave a small space between pulley and motor, but also we'd need to ensure that one of the set screws on the motor pulley is aligned with the flat part of the motor shaft. The other set screw, not aligned with the flat part of the motor shaft, should also be sufficiently tight, though not excessively.
Another very common cause is related with the belt tension. A slightly too tight or too loose belt tension could cause the length error. Here we have a detailed article on belt tension and how to adjust it.
It passed when I turned off the printer, moved the carriage to the left, turned on the printer and redid the calibration.
https://photos.app.goo.gl/2WHwtELhRLj9xjvk9
thanks for any help you can offer