The Original Prusa FFF printers and upgrades use a screw(s) with a spring(s) to provide tension between the filament and the filament pulley. It is important to have this tension correct. If too loose the pulley will not be able to "grab" the filament, while if it is too tight the extruder motor can overexert itself and even start grinding the filament. With the exception of the MK2/S and MMU1, the correct tension remains the same across all of our printers.
CORE One, MK4/S, MK3.9, XL
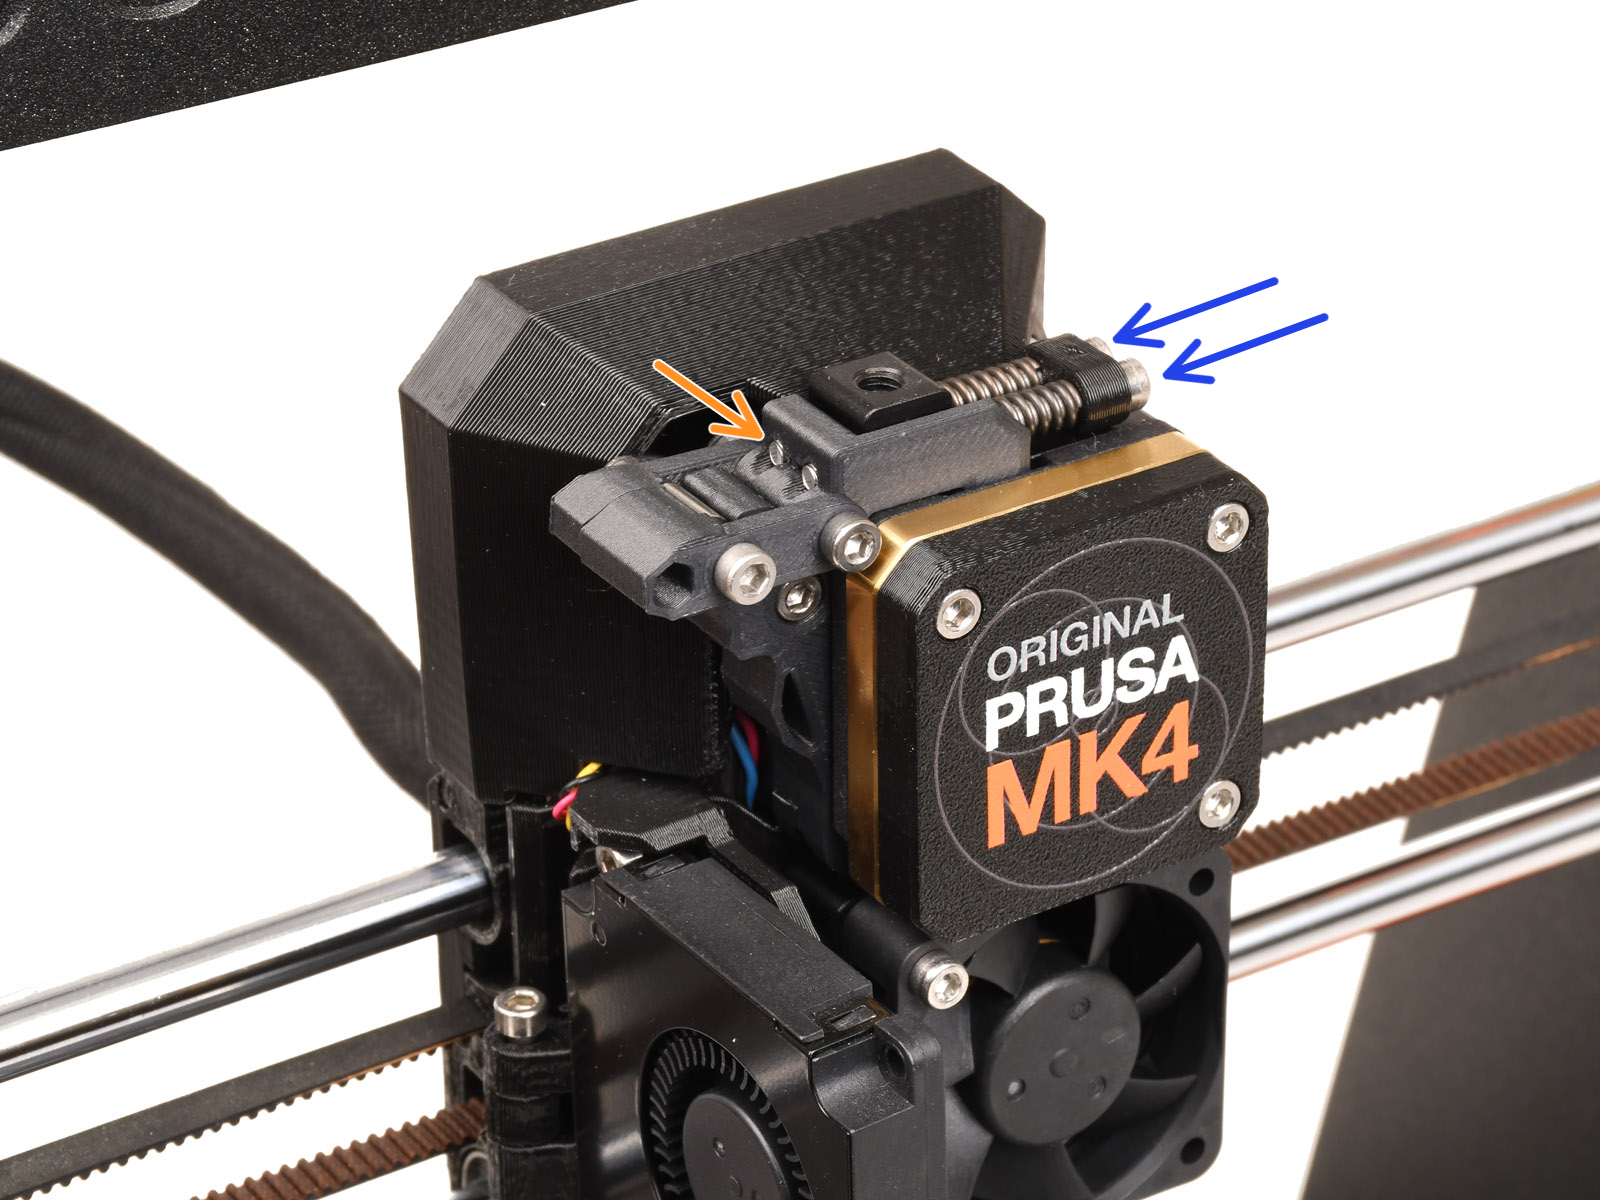
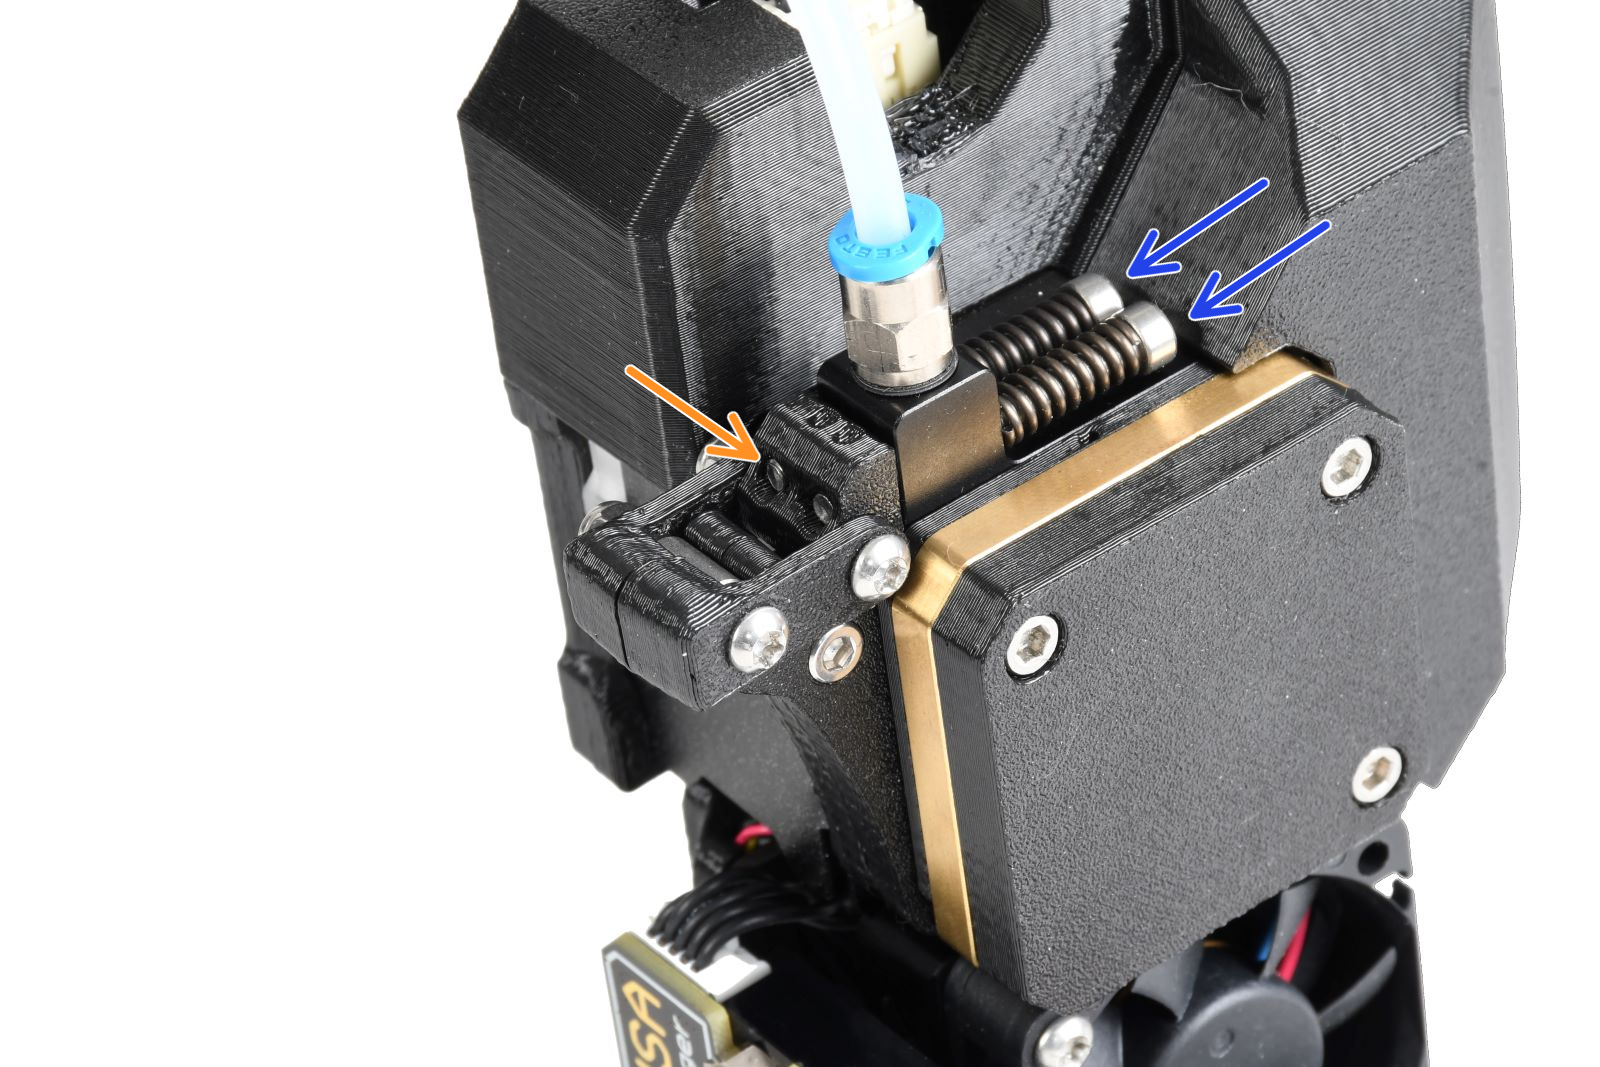
The Prusa CORE One, and the Original Prusa MK4/S, MK3.9/S, and XL have two idler screws, that are inserted into the Idler Nut. The Idler Nut keeps the Idler, the part that includes the two driven gears, in place. The tips of the screws must be aligned with the front surface of the Idler Nut.
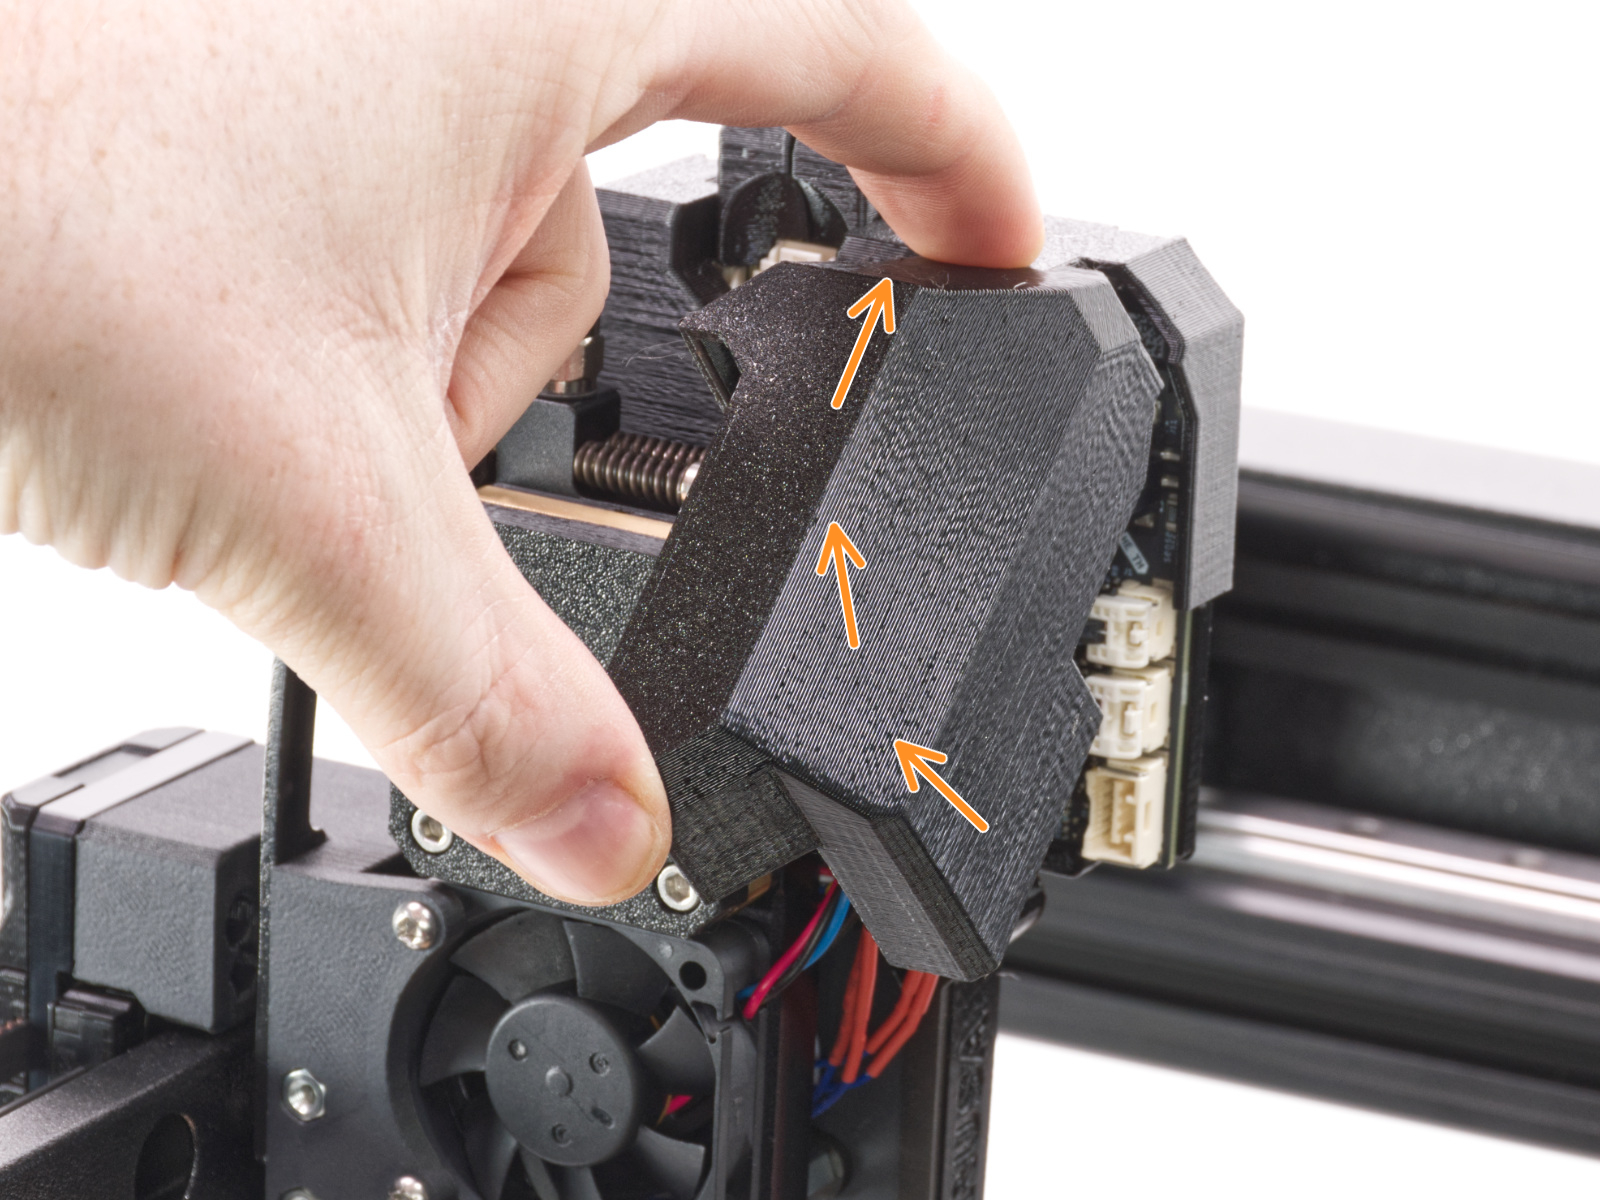
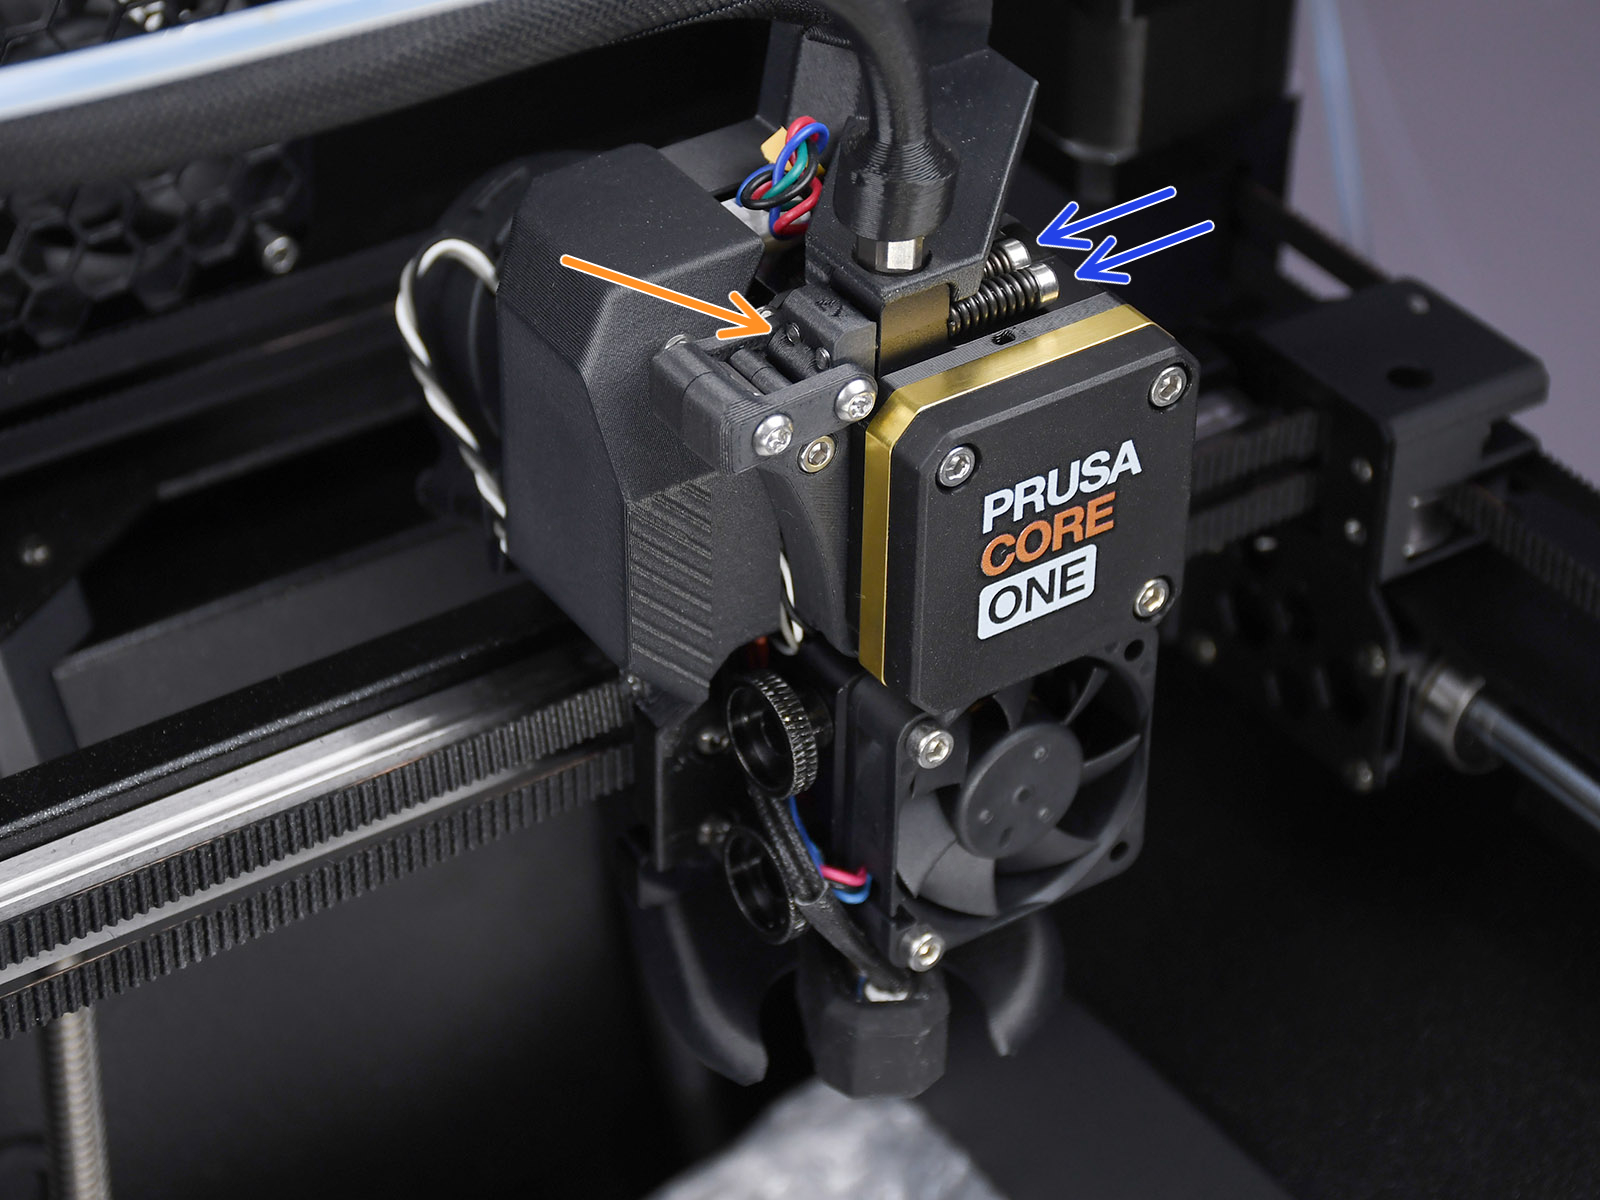 Prusa CORE One
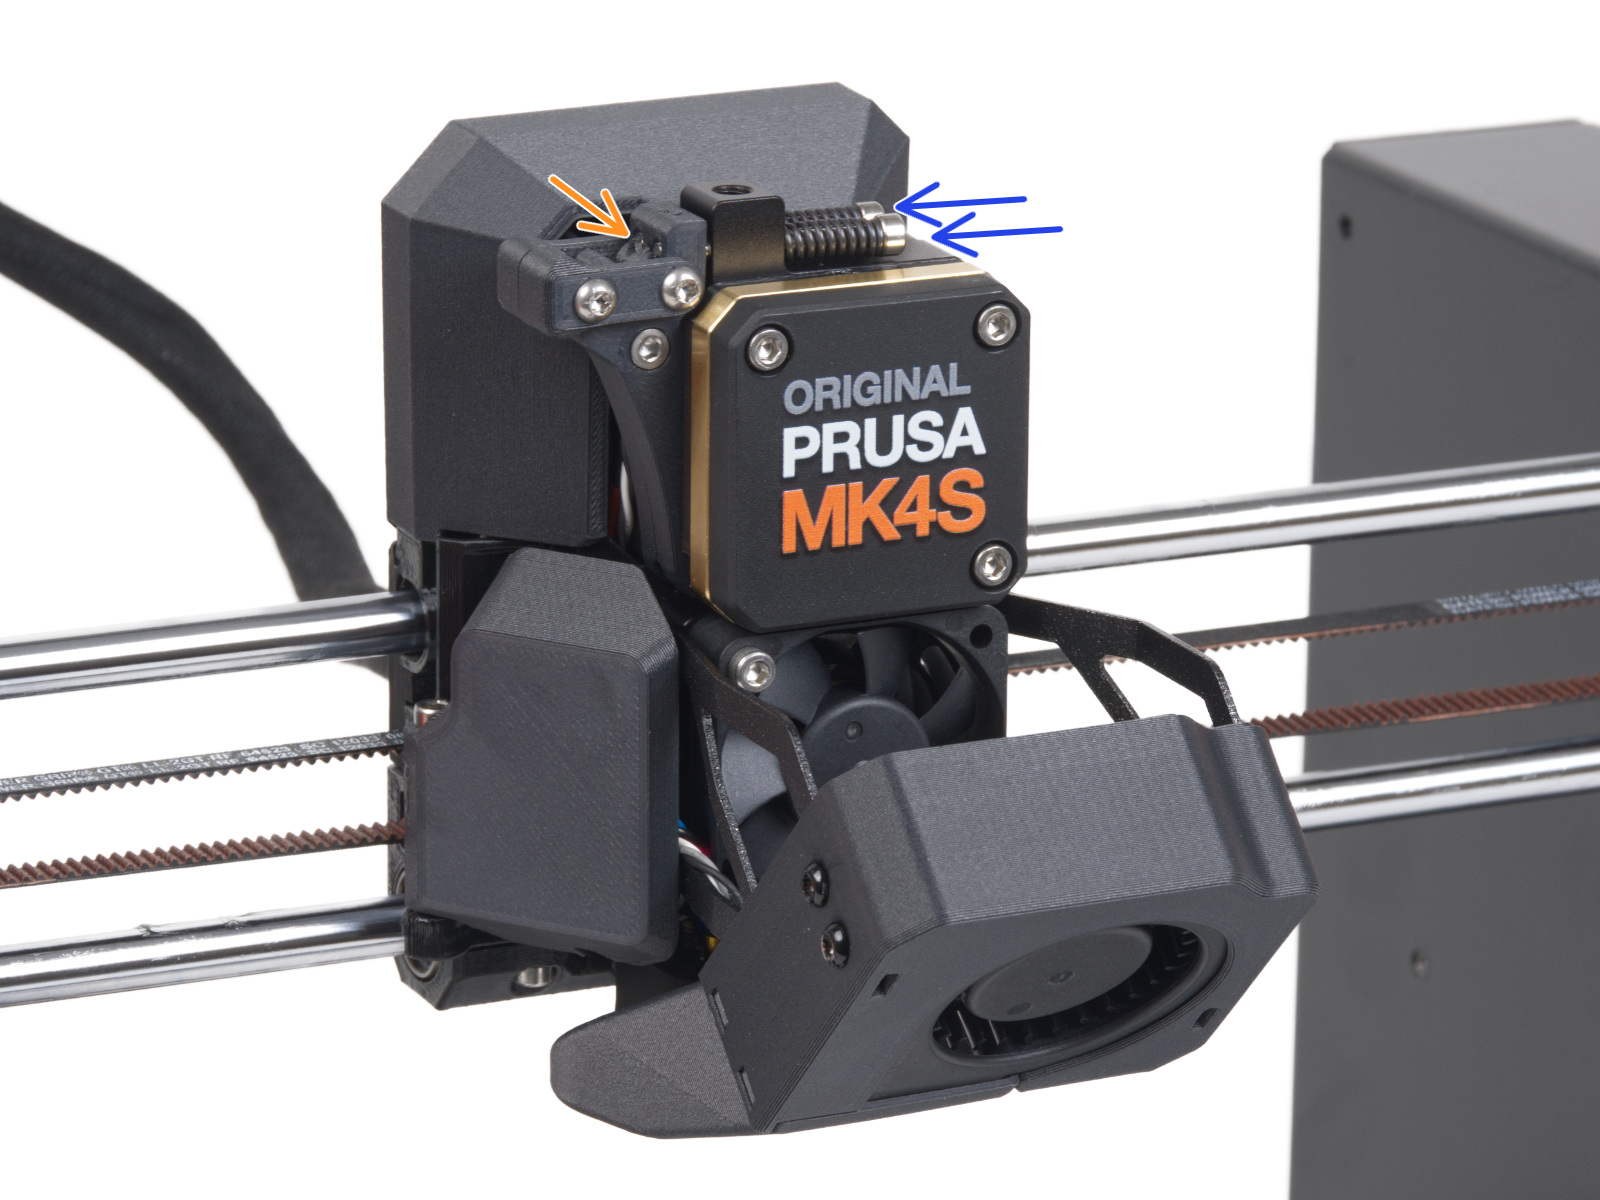 | 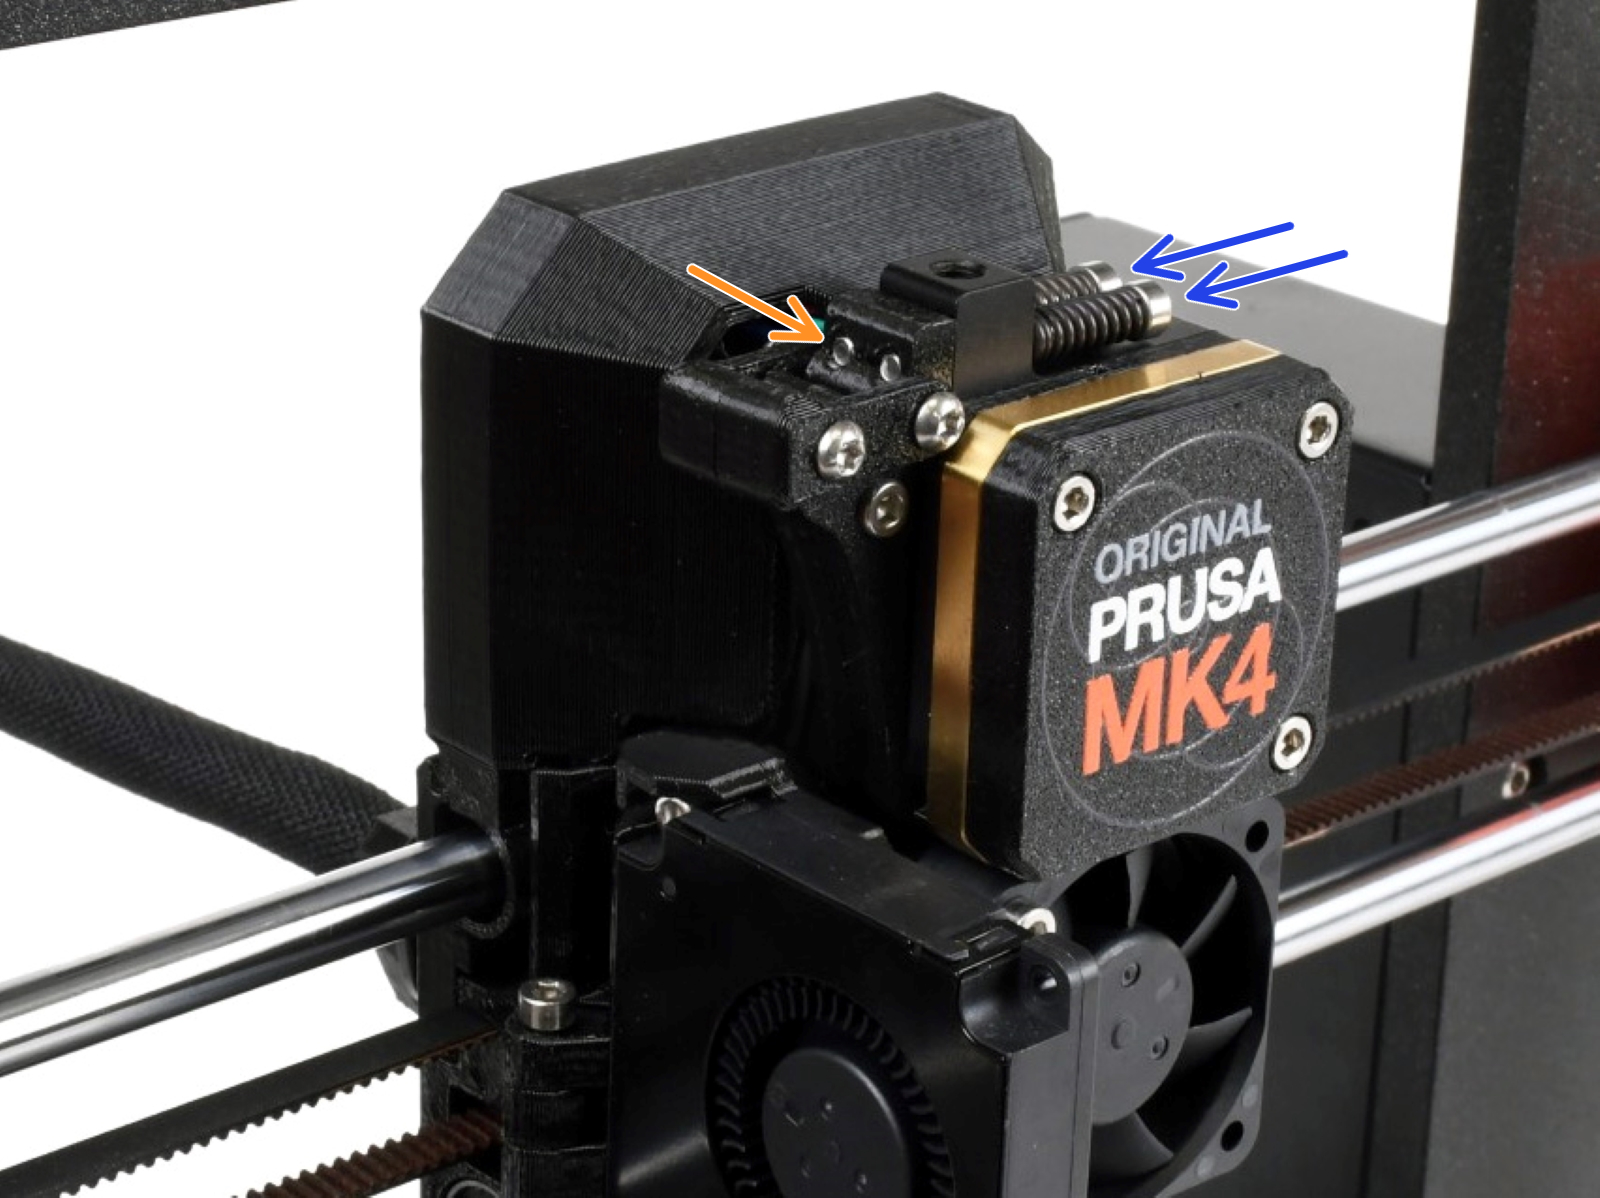 |
| Original Prusa MK4S, MK3.9S | Original Prusa MK4, MK3.9 |
 |  |
| Original Prusa MK4 with MMU3-modified extruder | Original Prusa XL |
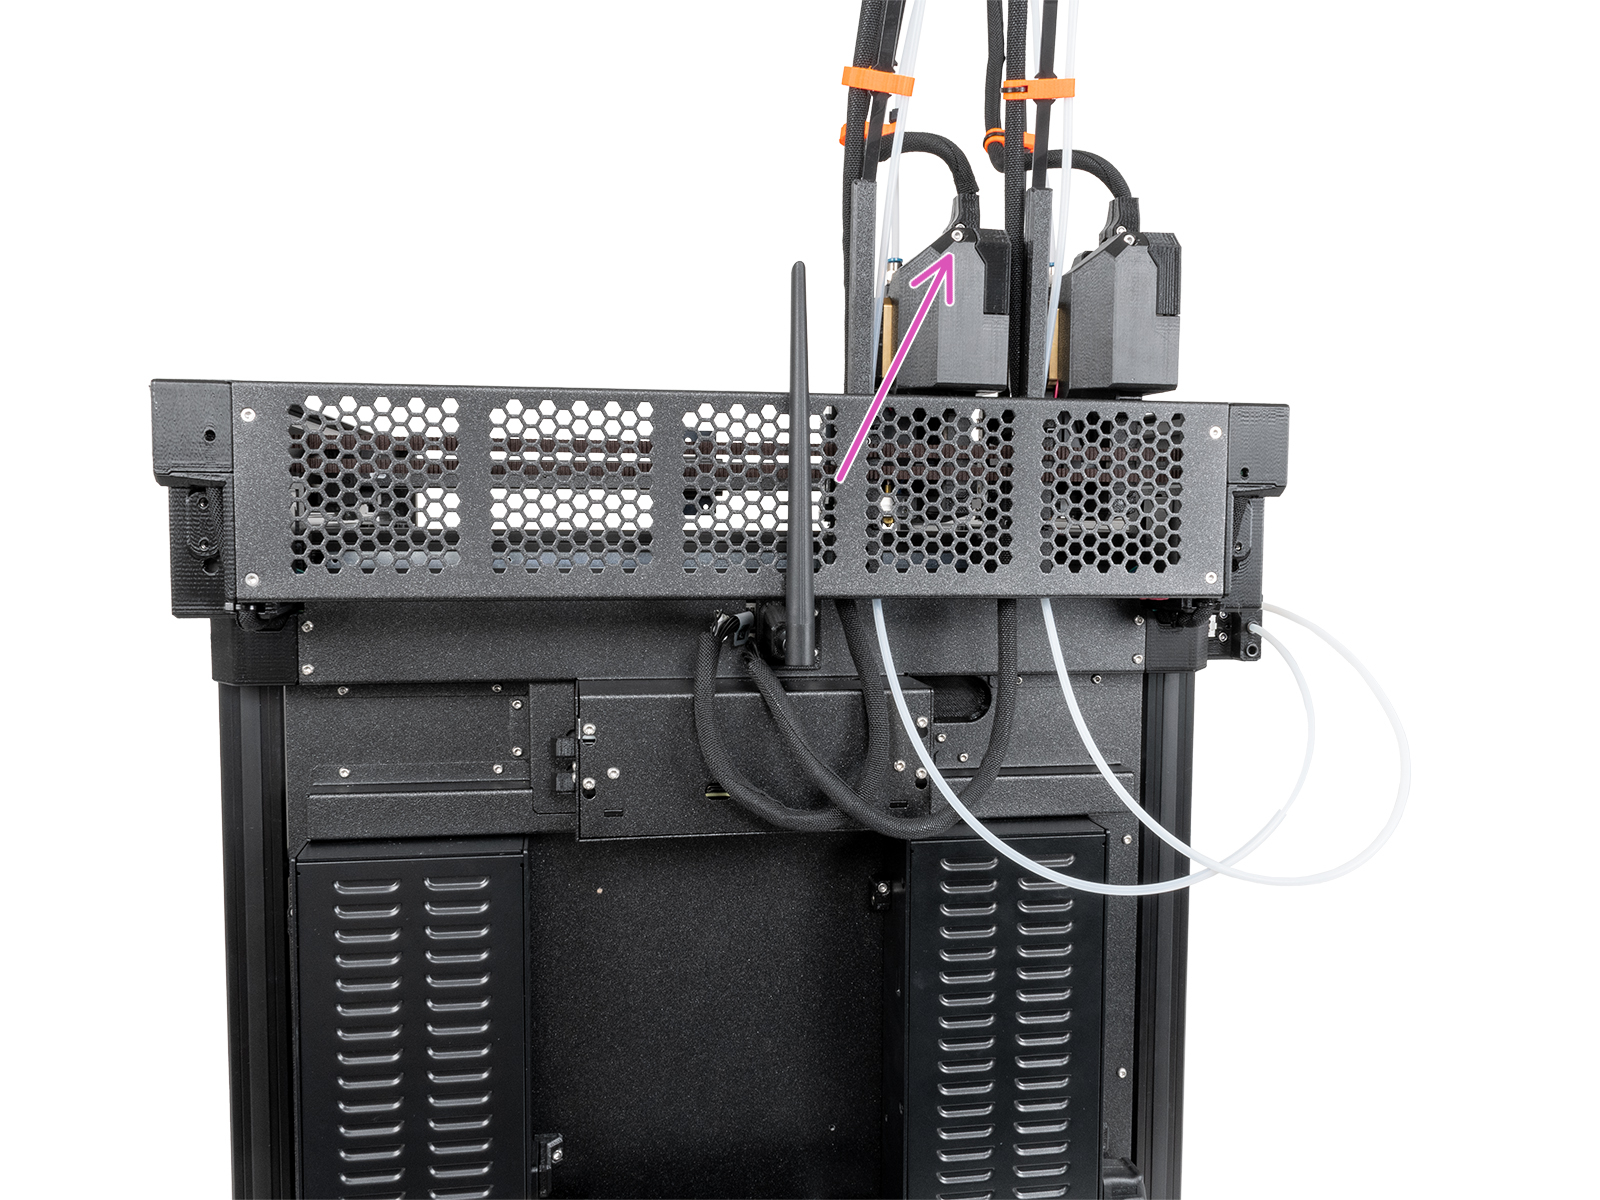
On the Original Prusa XL, the dwarf-cover-door prevents access to adjusting the idler tension screws.
On single-head XL, it is possible to gain access by rotating the dwarf-cover-door. On dual-head and five-head XL, with the tool in the parked position, loosen the M3x12 bolt to remove the dwarf-cover-door.
 |  |
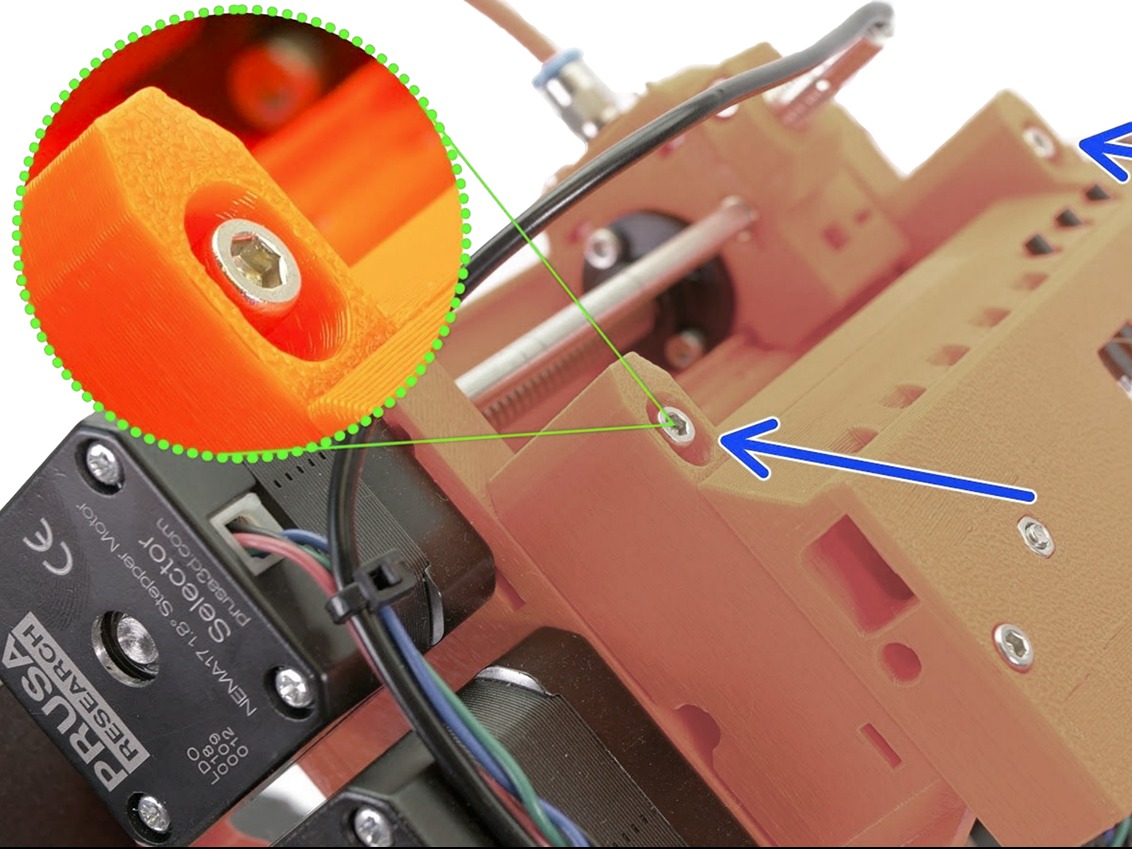
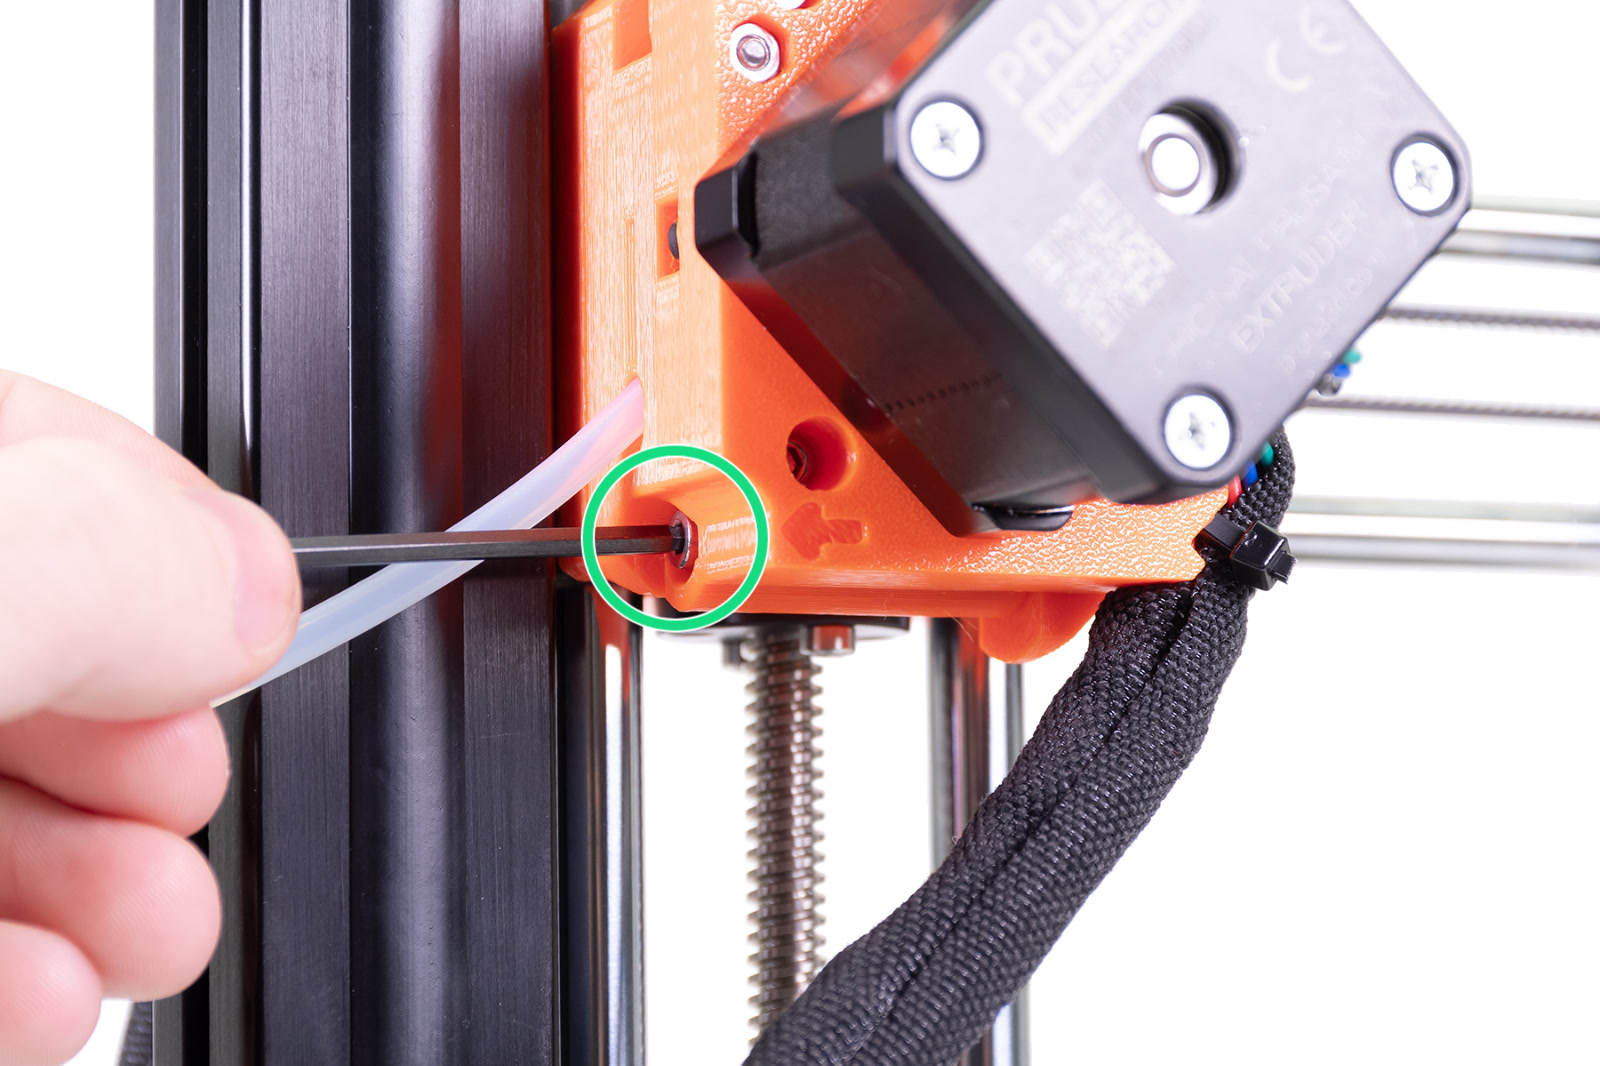
MK2.5S/MK3S/MK3S+/MK3.5/MK3.5S
The idler screw should be about flush to protruding 0.5 -1 mm with the plastic part when the filament is not loaded.
 |  |
| Original Prusa MK3S | Original Prusa MK3S+ |
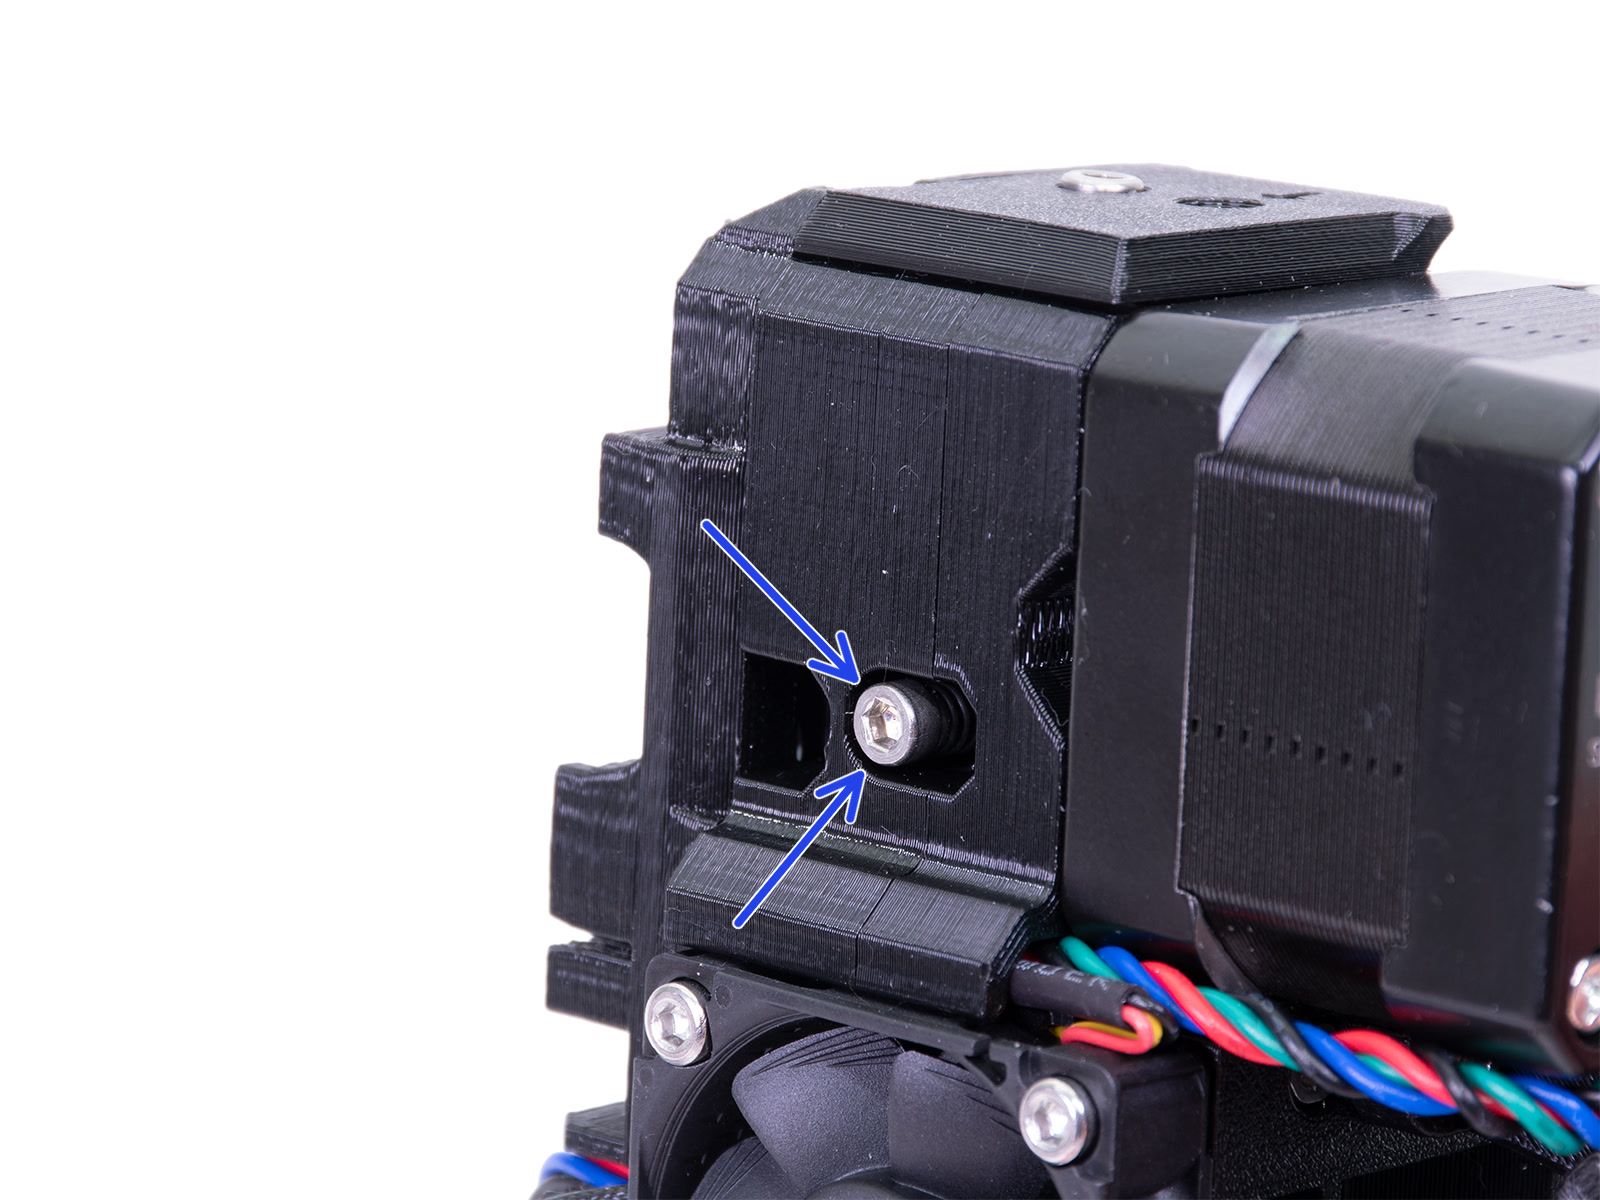
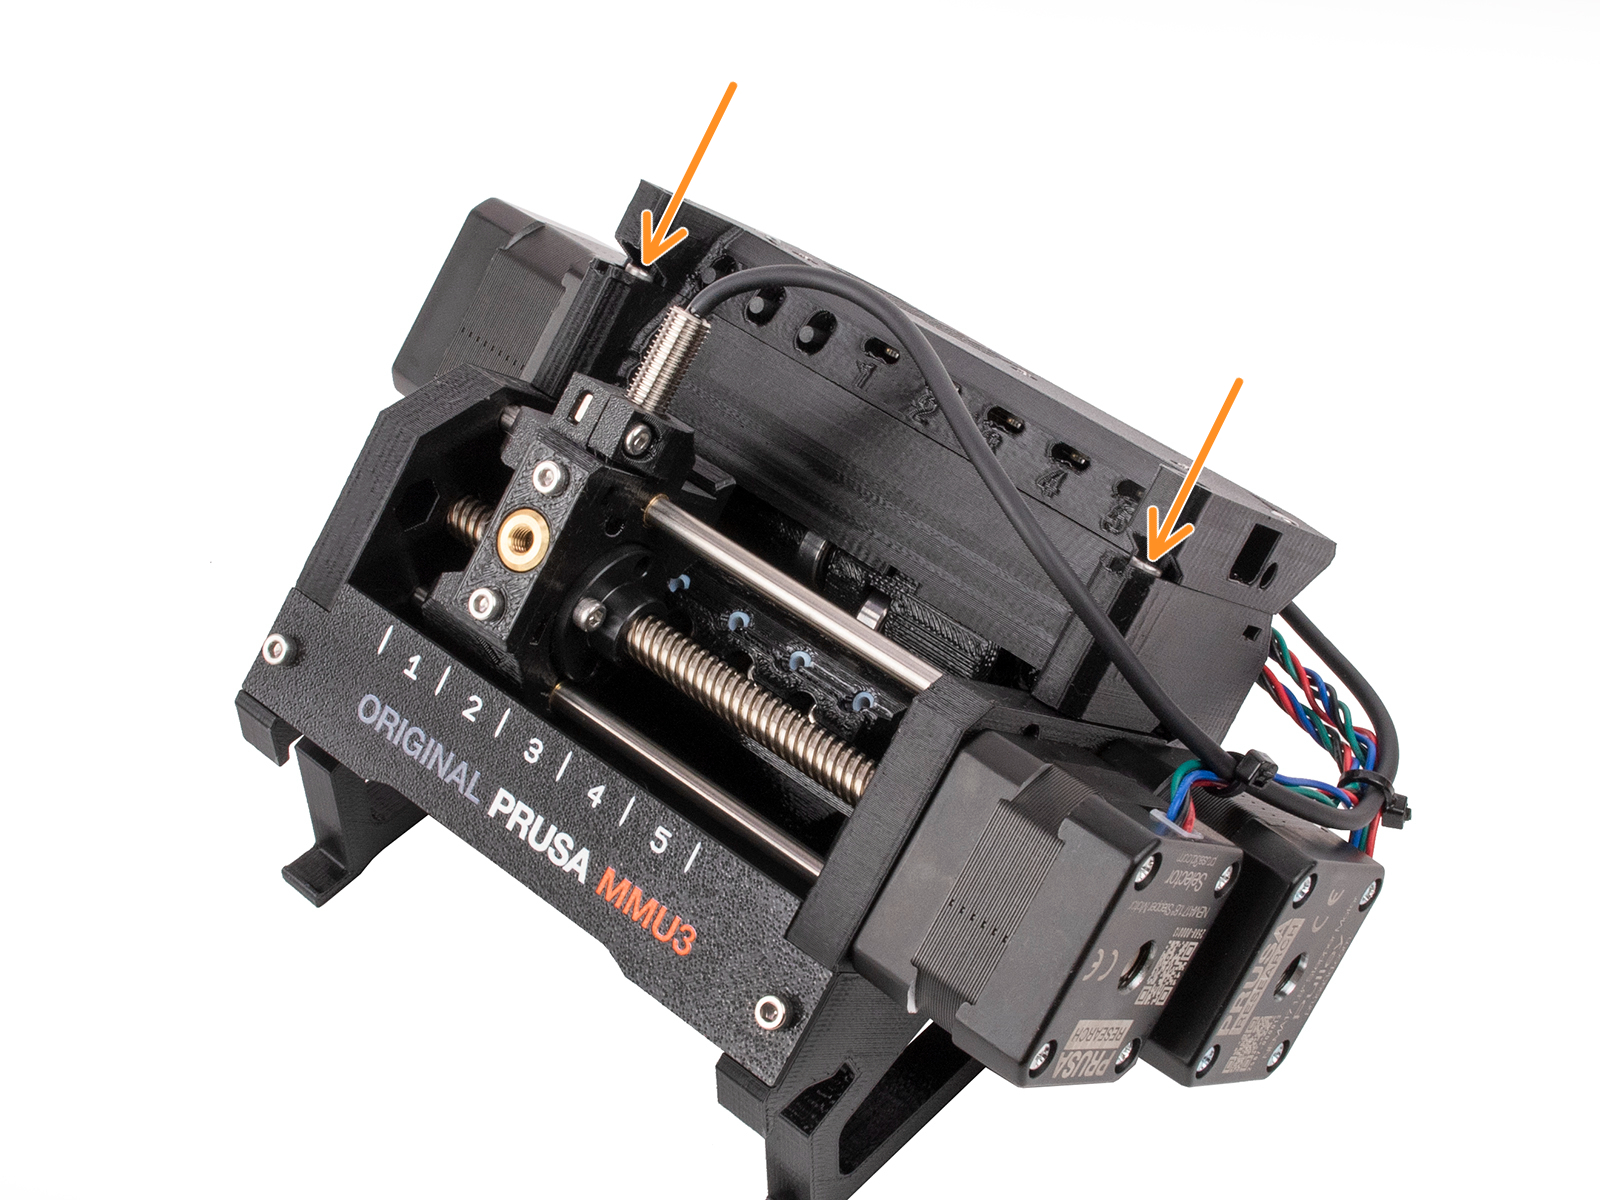
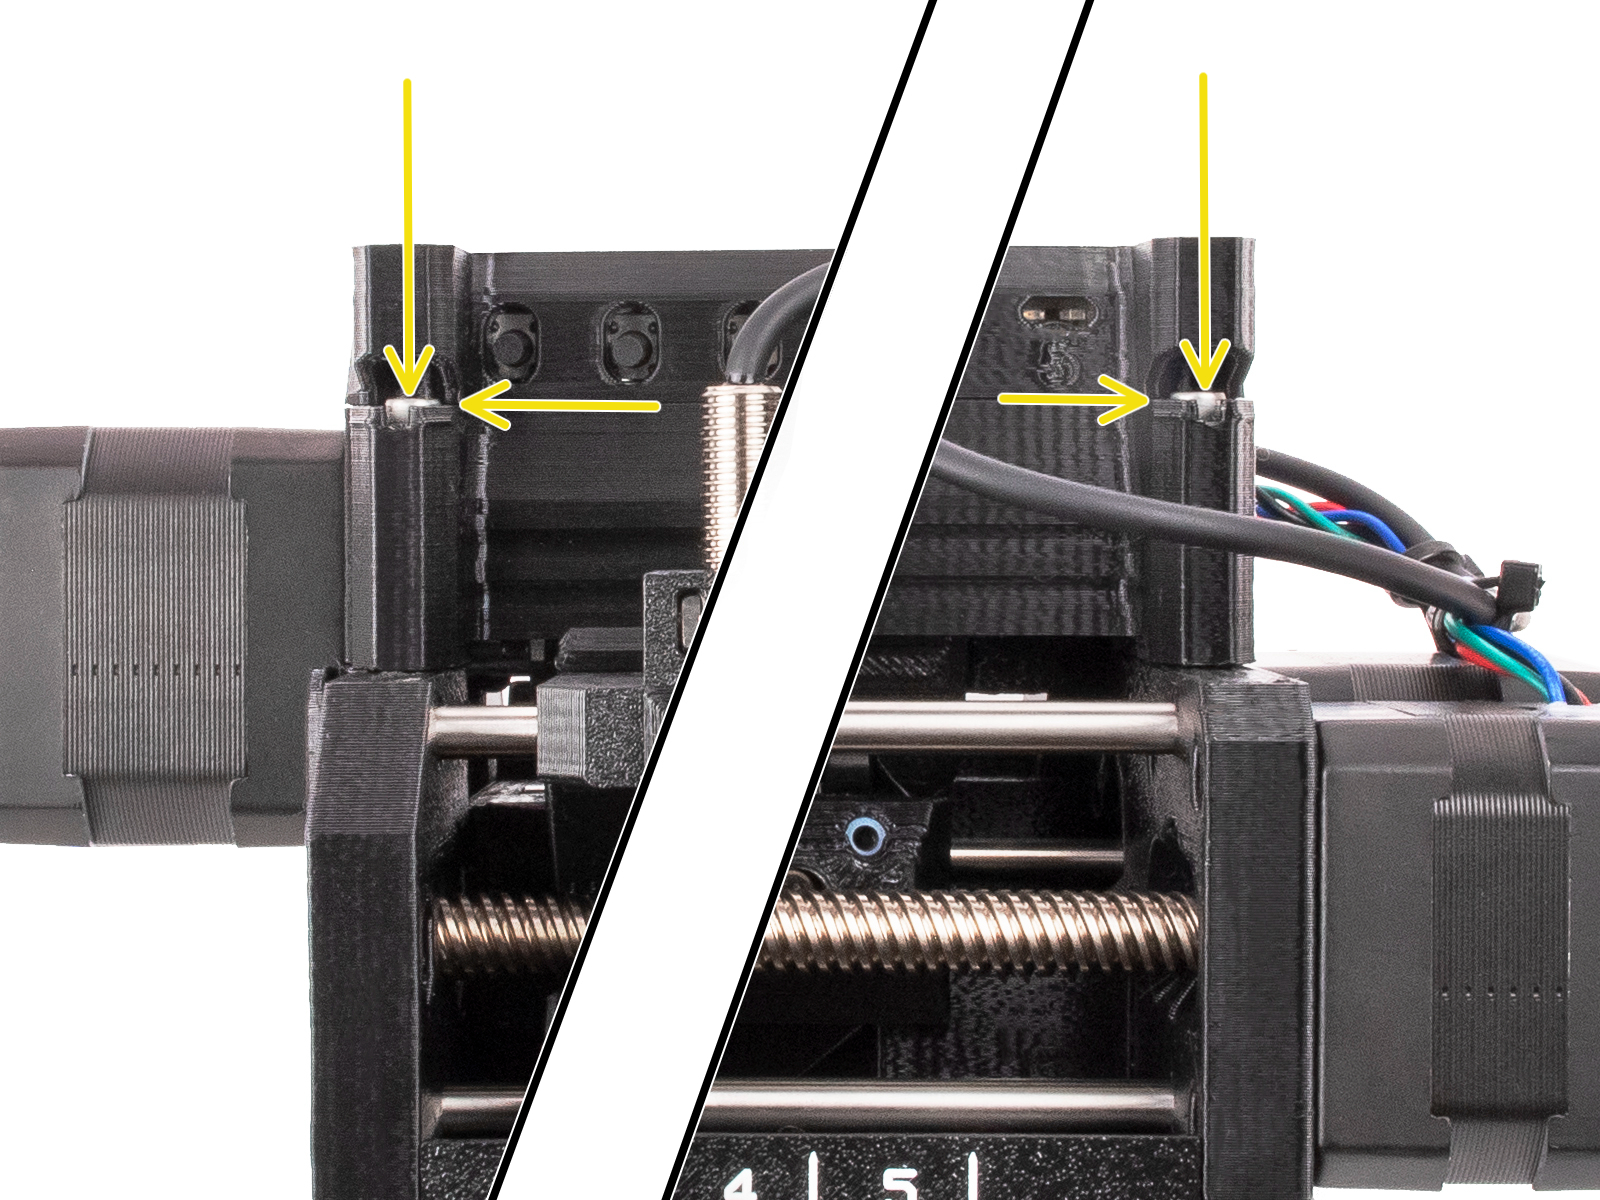
MMU3 unit
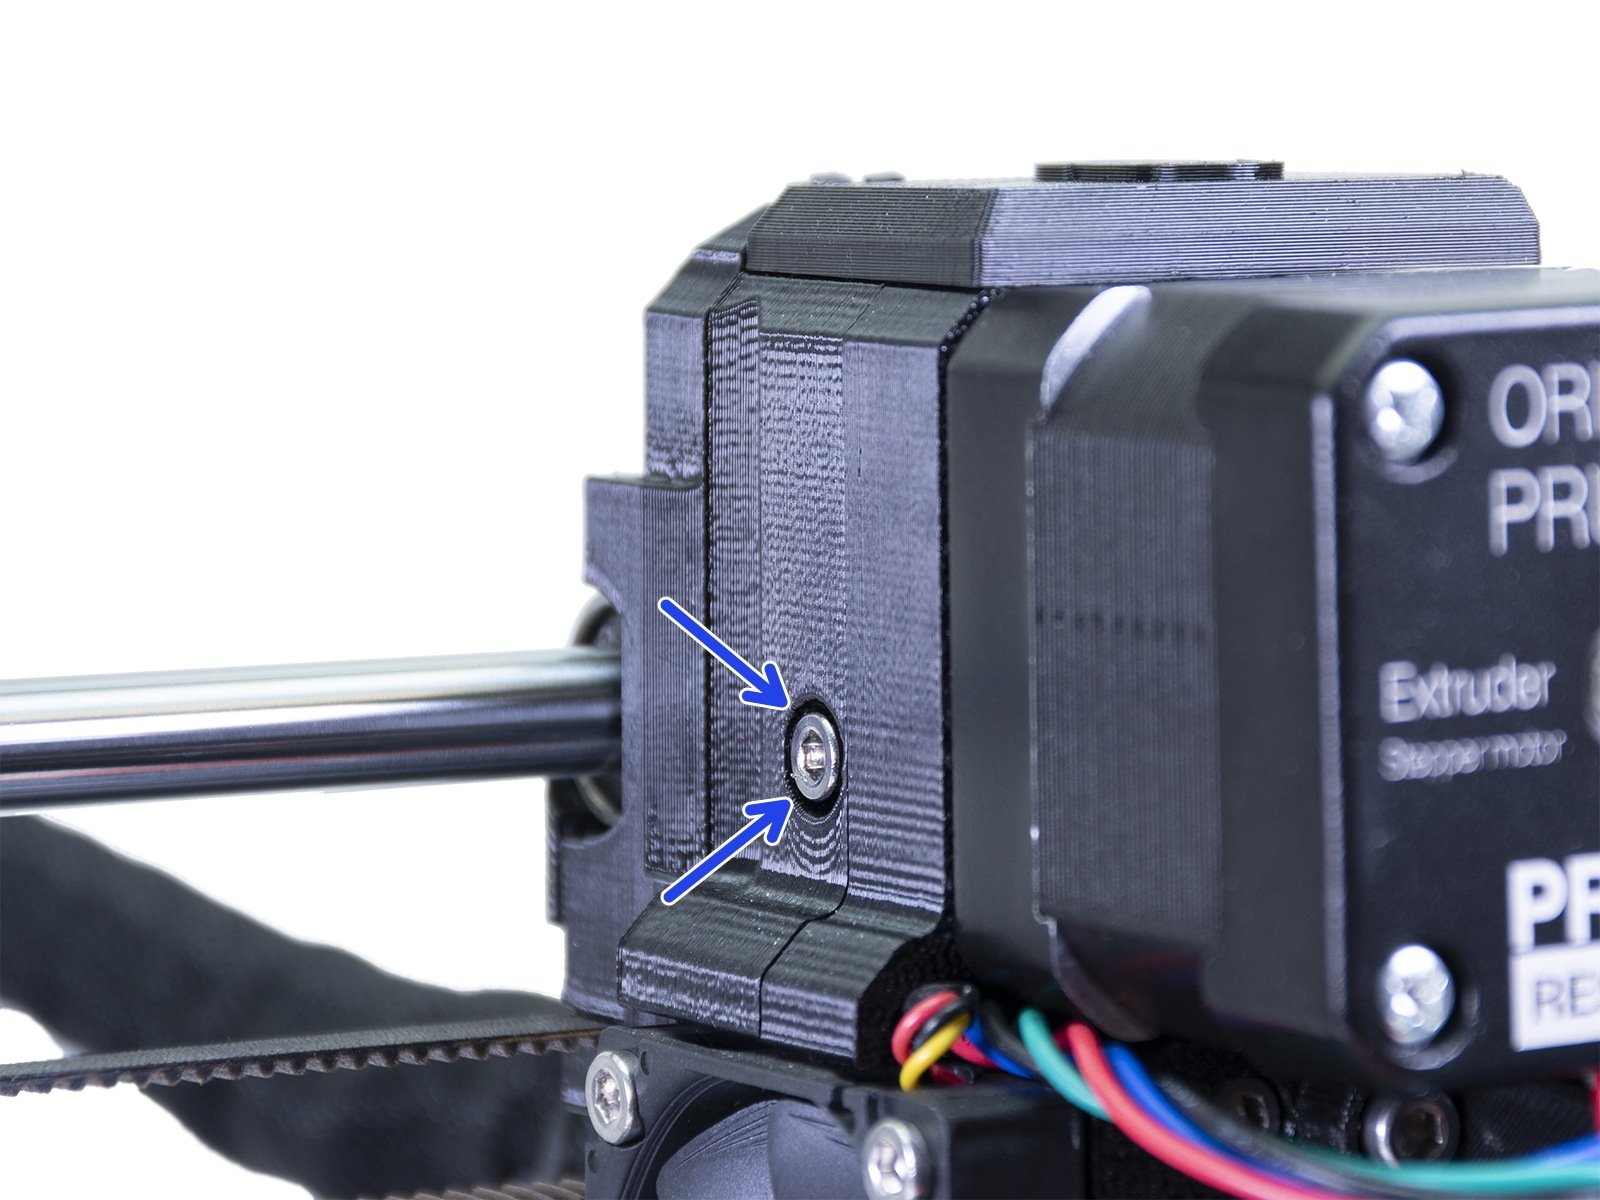
Both Idler tension screws should be adjusted so that the top of the screw head is flush or slightly above the top surface of the idler-body, as a default setting.
 |  |
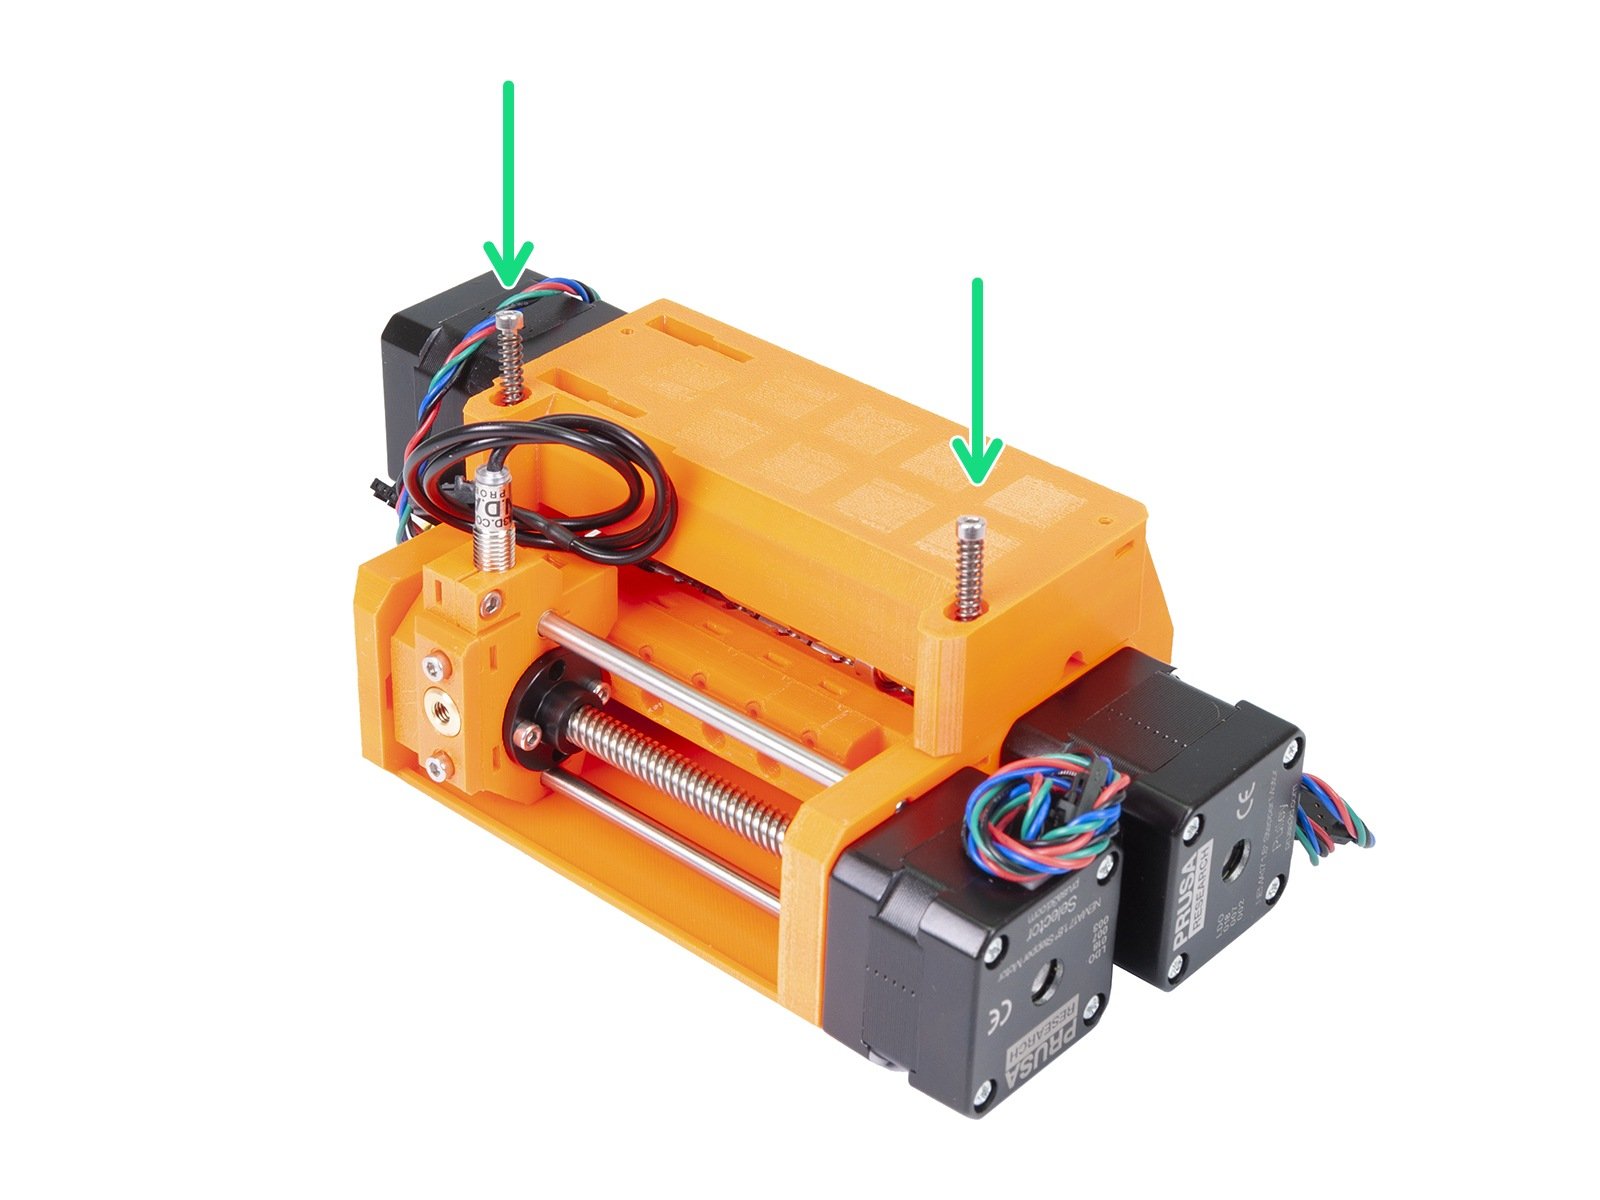
MMU2S unit
The MMU2S requires a slightly different extruder but also has 1 idler-screw on the left side of the extruder, like the picture above. Roughly the same tension should be applied but it should only be adjusted as a part of the IR filament sensor calibration.
In addition to the screw on the extruder, the MMU2S unit itself has two tension screws on top (green arrows left picture), applying pressure to the filament upon load/unload. These should be slightly below the surface of the plastic part (about 1 millimeter) when the filament is not loaded to the nozzle (right picture).
 |  |
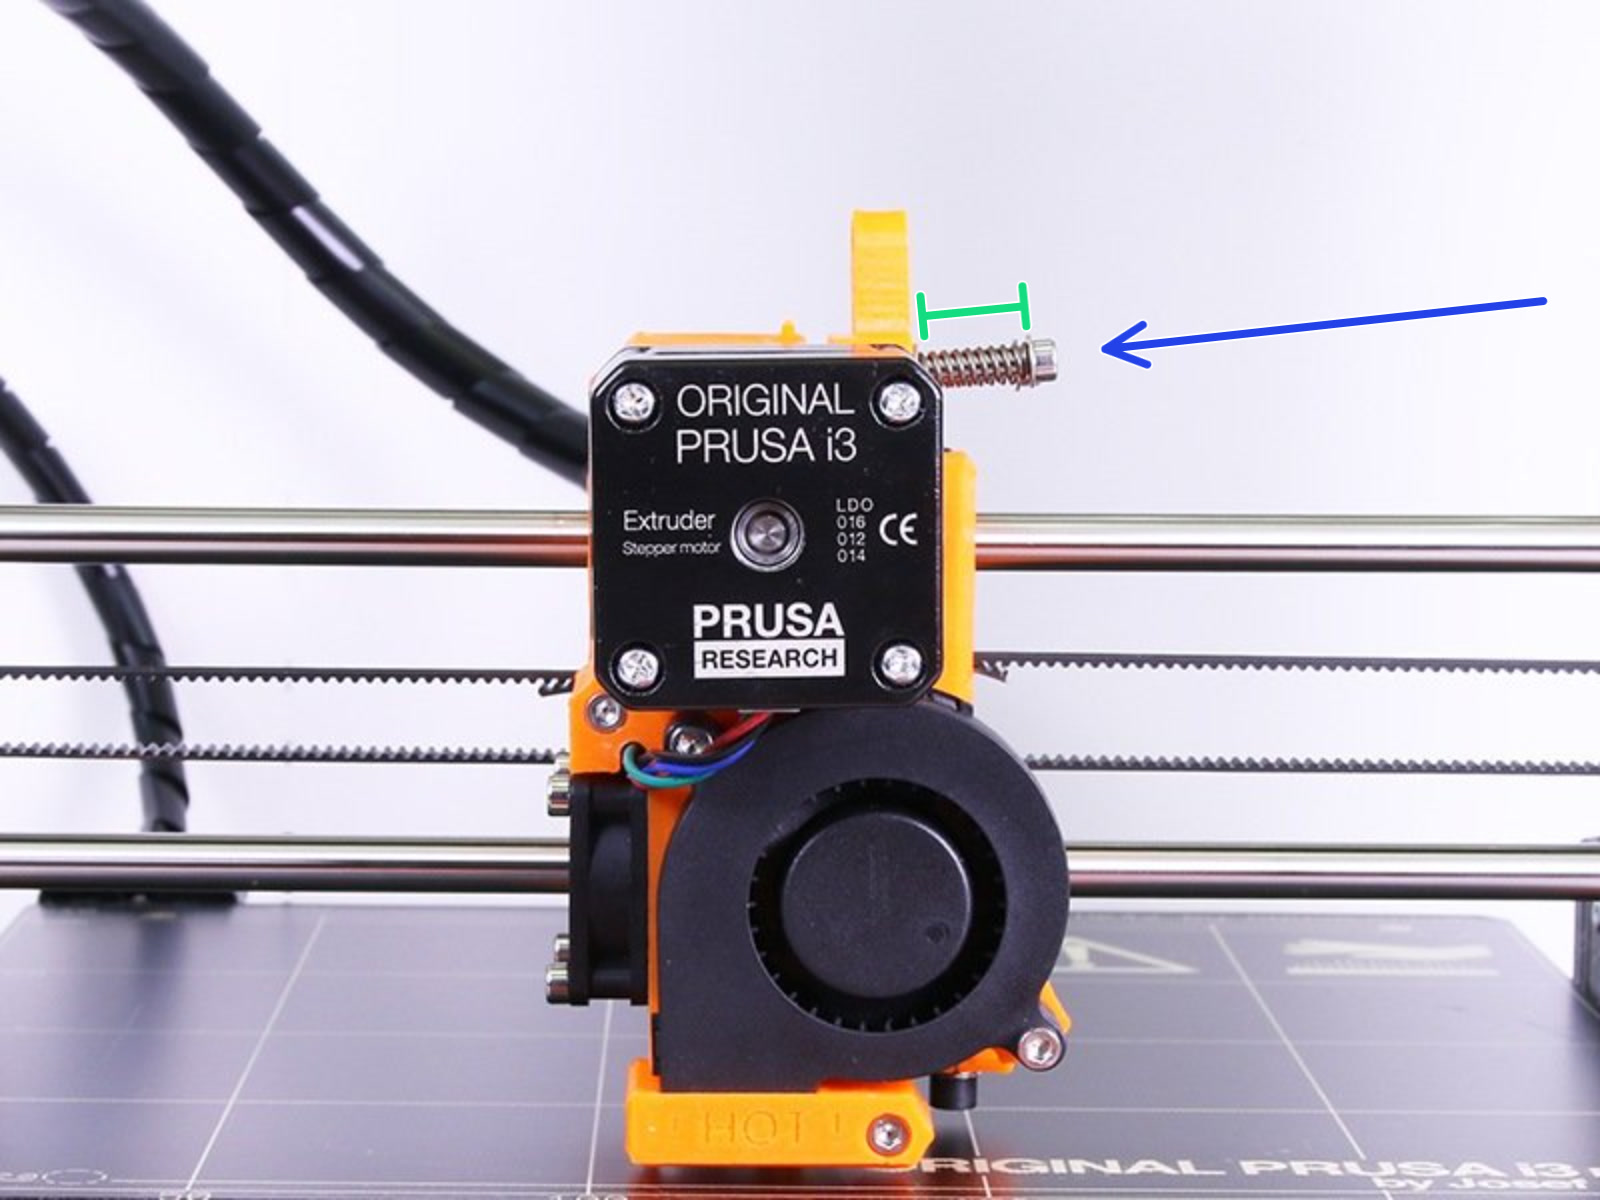
MINI/MINI+
The Original Prusa MINI/+ has its idler screw on the bottom of the extruder, located on the Z-axis extrusion. This too should be about flush with the plastic, when the filament is not loaded.
 |  |
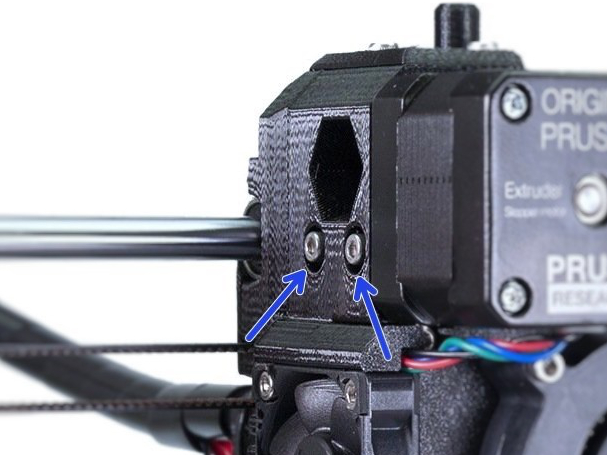
MK3/MK2.5
This extruder design has two idler screws. The head of the screw should be about flush to sticking out 1 - 1.5 mm when a filament is loaded.
MK2S
The Original Prusa MK2S had a different extruder design. It has two screws, where the length of the springs should be circa 13 mm when tightened. After some use, it is ok to tighten them a little bit more, but the two screws must be equal.
10 comments
Nextruder feels like a regression from the rock solid MK3 which I pumped thousands of hours on. 530 hours on the Nextruder feels like I am fighting the thing to work.
What values should it be for the Prusa XL ?
Hi! Just make sure the screw goesx against a nut in the idler door. Help it engage by pressing a nut towards the screw if neccessary :)