Standalone PrusaSlicer G-code Viewer is a lightweight application, which you can use to quickly preview G-codes from all popular slicers. Its behavior is identical to the preview in PrusaSlicer (the same code is used), however, you can load an external G-code file.
Supported slicers
We currently parse, and up to some level interpret, G-code from:
- PrusaSlicer
- Slic3r and Slic3rPE
- CURA
- ideaMaker
- Simplify3D
- Craftware
- KISSSlicer
PrusaSlicer Standalone G-code Viewer tries hard to estimate the extrusion widths, layer heights, extrusion types, types of moves, layers, etc. from the G-code generated by various slicers. The G-code itself does not contain all the information mentioned above, thus the G-code is usually augmented with slicer specific comments. We try to get as much data as possible, but some parts might still get marked as unknown.
PrusaSlicer version 2.3 and newer augments the G-code with comments ";TYPE:", ";HEIGHT:", ";LAYER_CHANGE", ";COLOR_CHANGE", ";PAUSE_PRINT" and ";CUSTOM_GCODE". G-code generated by older PrusaSlicer which does not contain these new annotations will still be displayed, but the extrusion widths or extrusion types may not be shown reliably.
G-code generated with other slicers will most likely still load correctly, but some features, such as the print time analysis by feature might be unavailable.
Associate with .gcode file extension
If you associate the .gcode file extension with the G-code viewer, you'll be able to launch it simply by opening the file (double-clicking on it or pressing Enter). You can do so by enabling Configuration - Preferences - Associate .gcode files to PrusaSlicer G-code Viewer.
Alternatively, you associate the file extension using your operating system tools.
Windows
- Right-click any G-code file
- Select Open with - Choose default program... - PrusaSlicer G-code Viewer
- Click More at the bottom
- Tick Always use this app
macOS
- Select any G-code file in the Finder and choose File > Get Info
- In the Open With section, select PrusaSlicer G-code Viewer
- Click Change All and confirm
Ubuntu
- Select any G-code file
- Right-click the file and select Properties
- Select the Open With tab
- Select PrusaSlicer G-code Viewer and click Set as default.
The process is similar on other Linux distributions.
Features
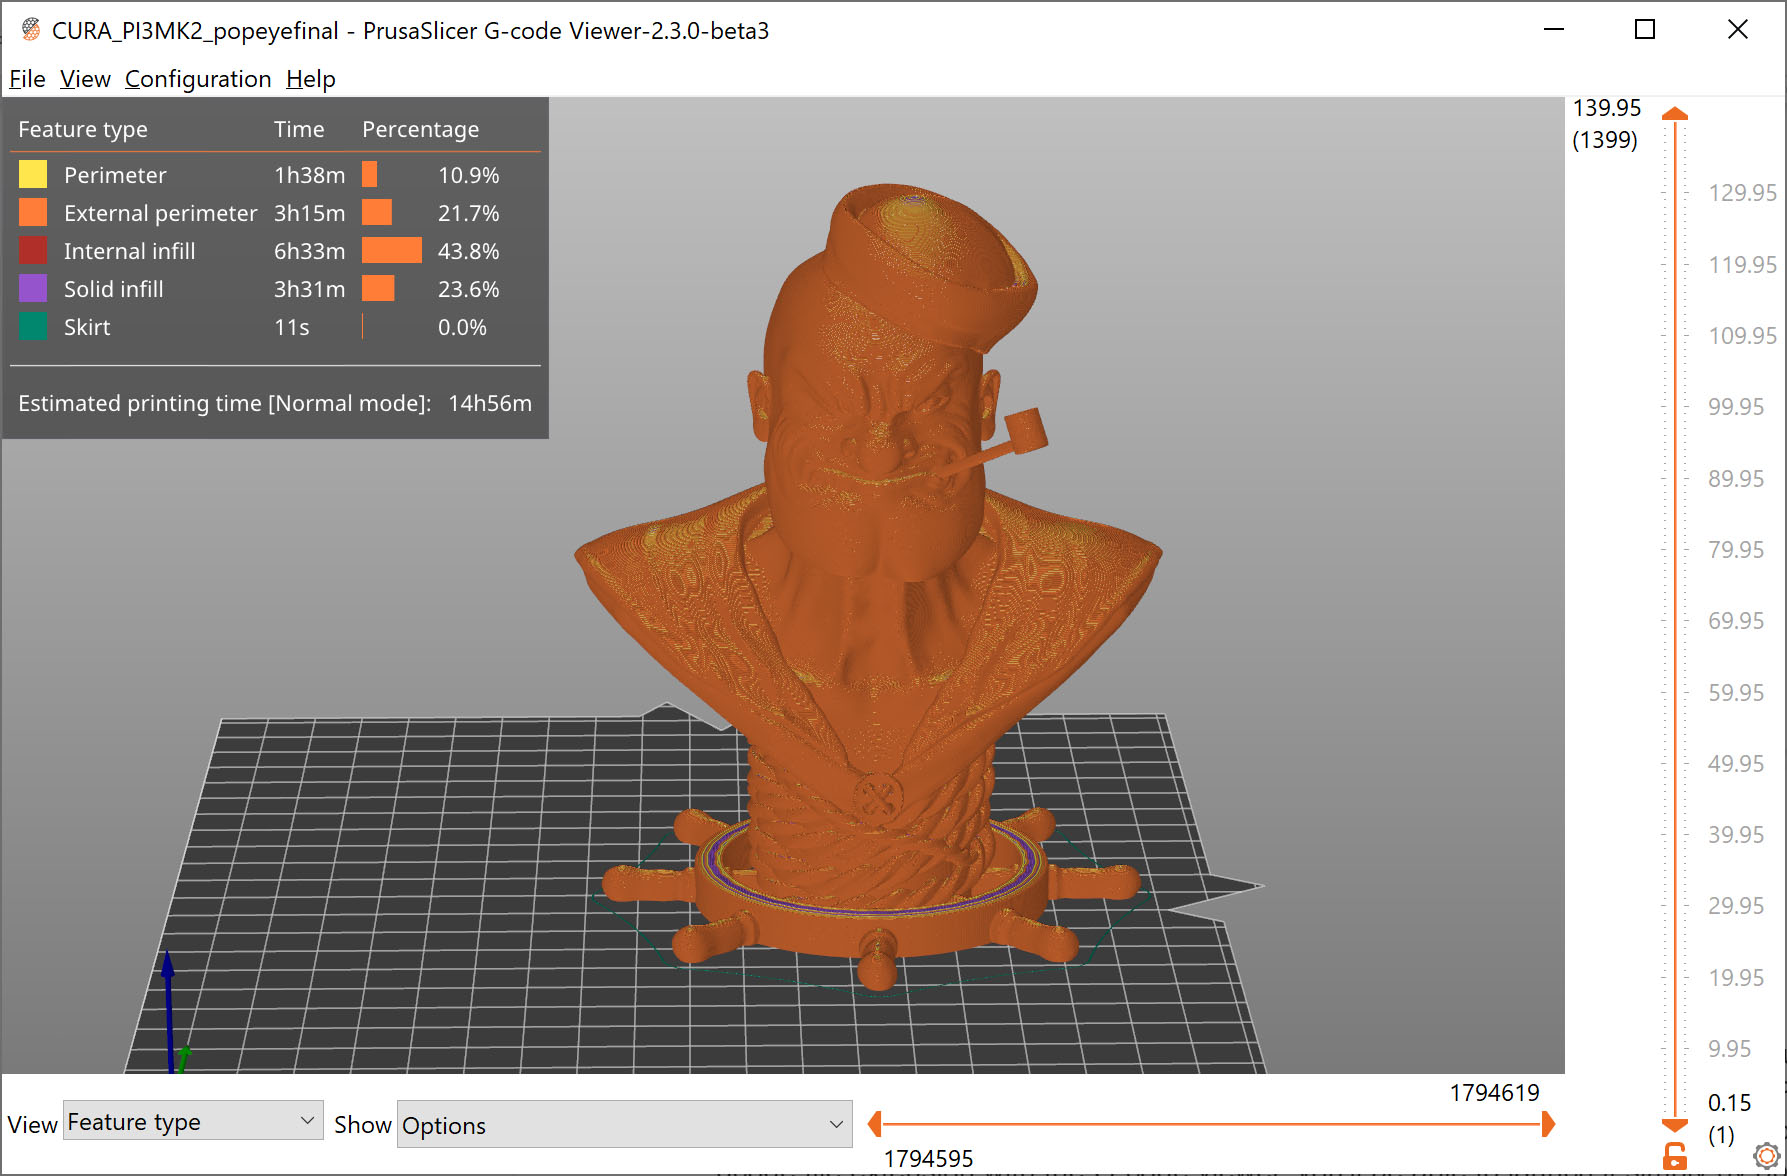
The stand-alone G-Code Viewer shows names of used Printer/Print settings/Filament.
Once the final G-code is available after slicing, a new horizontal slider shows up, limiting visualization of extrusions and travel by time thus allowing simulation of the print in time. By default the new horizontal slider limits visualization of the last layer selected by the vertical toolbar. Alternatively the horizontal slider limits the extrusions in all layers selected by the vertical slider. In the first case, if the horizontal slider limits visibility of the top layer, then the other layers below are rendered in a gray color. We borrowed this visualization strategy from the Craftware user interface as Cura did.
The legend newly shows the print time and the print time fraction per feature (perimeter, infill etc.), and the legend labels serve as buttons to show / hide the particular extrusion time. The print time estimate is available in both the G-code preview after slicing and in the stand-alone G-code viewer.
Multiple instances
One can start as many PrusaSlicer G-code Viewers as he wishes either by opening a G-code from the "File->G-code preview" menu, by starting the G-code viewer application, or by double-clicking on a G-code file in a File Explorer/Finder.
How it works
From the technical point of view, the stand-alone G-code viewer is a PrusaSlicer in disguise. The stand-alone G-code viewer is started as a new PrusaSlicer process. The way how the G-code viewer process is started is platform specific:
Windows
The PrusaSlicer.dll contains all the code while the prusa-slicer.exe, prusa-slicer-console.exe and the new prusa-gcodeviewer.exe wrappers just load PrusaSlicer.dll with the proper parameters.
OSX
The application distribution format supports a single binary, which in our case is PrusaSlicer.app/Contents/MacOS/PrusaSlicer. For command-line usage, this binary may be symlinked to prusa-gocdeviewer to start in a G-code viewer mode. Starting new instances of PrusaSlicer does not quite fit the OSX system, as the Finder only expects a single instance of a GUI application to be running. Thus when drag & dropping onto a dock icon of PrusaSlicer resp. G-code viewer, the file is sent to the first instance of PrusaSlicer resp. G-code viewer.
Linux
We support two binary distributions: AppImage and .tar.bz2. The .tar.bz2 format contains a new prusa-gcodeviewer starter script, while the AppImage may be symlinked to prusa-gcodeviewer to start the G-code viewer. The AppImage works by mounting the zipped filesystem image embedded inside the AppImage file and starting the application from there. It is not recommended to start prusa-gcodeviewer from an already mounted AppImage, as the AppImage will be unmounted when the PrusaSlicer that mounted it closes. When the user starts a G-code viewer from an AppImage PrusaSlicer application, another AppImage is mounted by the G-code viewer, which means the PrusaSlicer binary is being loaded into RAM the second time. Therefore if one is low on RAM, it is recommended to use the .tar.bz2 distribution instead of the AppImage until the AppImage is improved to support multiple processes running from a single mounted AppImage.
6 comments
I was not able to find the download link to gcodeviewer.
The option "gcode viewer" in file menu of Prusa slicer is missing.
Any idea?
Best regards
BTW the "3D Viewer" from Microsoft, when set as the default "STL" viewer, does it and it is extremely useful as it shows the 3D preview and also allows to rotate the object in the preview.
Hi Raf! You can request the feature at: http://github.com/prusa3d/PrusaSlicer