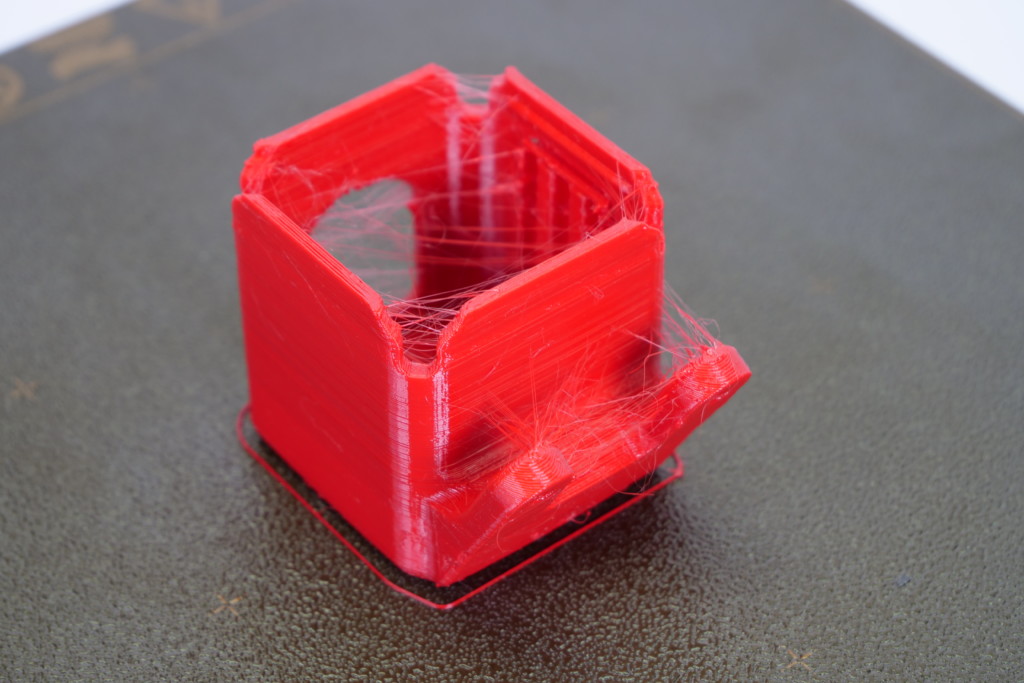
Stringing or oozing, also known as "hairy prints", is the name given for when small strings of filament are left on a printed model. This usually happens when the filament keeps flowing from the nozzle while the extruder is moving to another object. You can see this as a marginal line of filament left between the objects.
This issue is caused by very high printing temperatures and/or using incorrect retraction settings. This can be solved by changing a couple of settings in PrusaSlicer and checking your hardware.
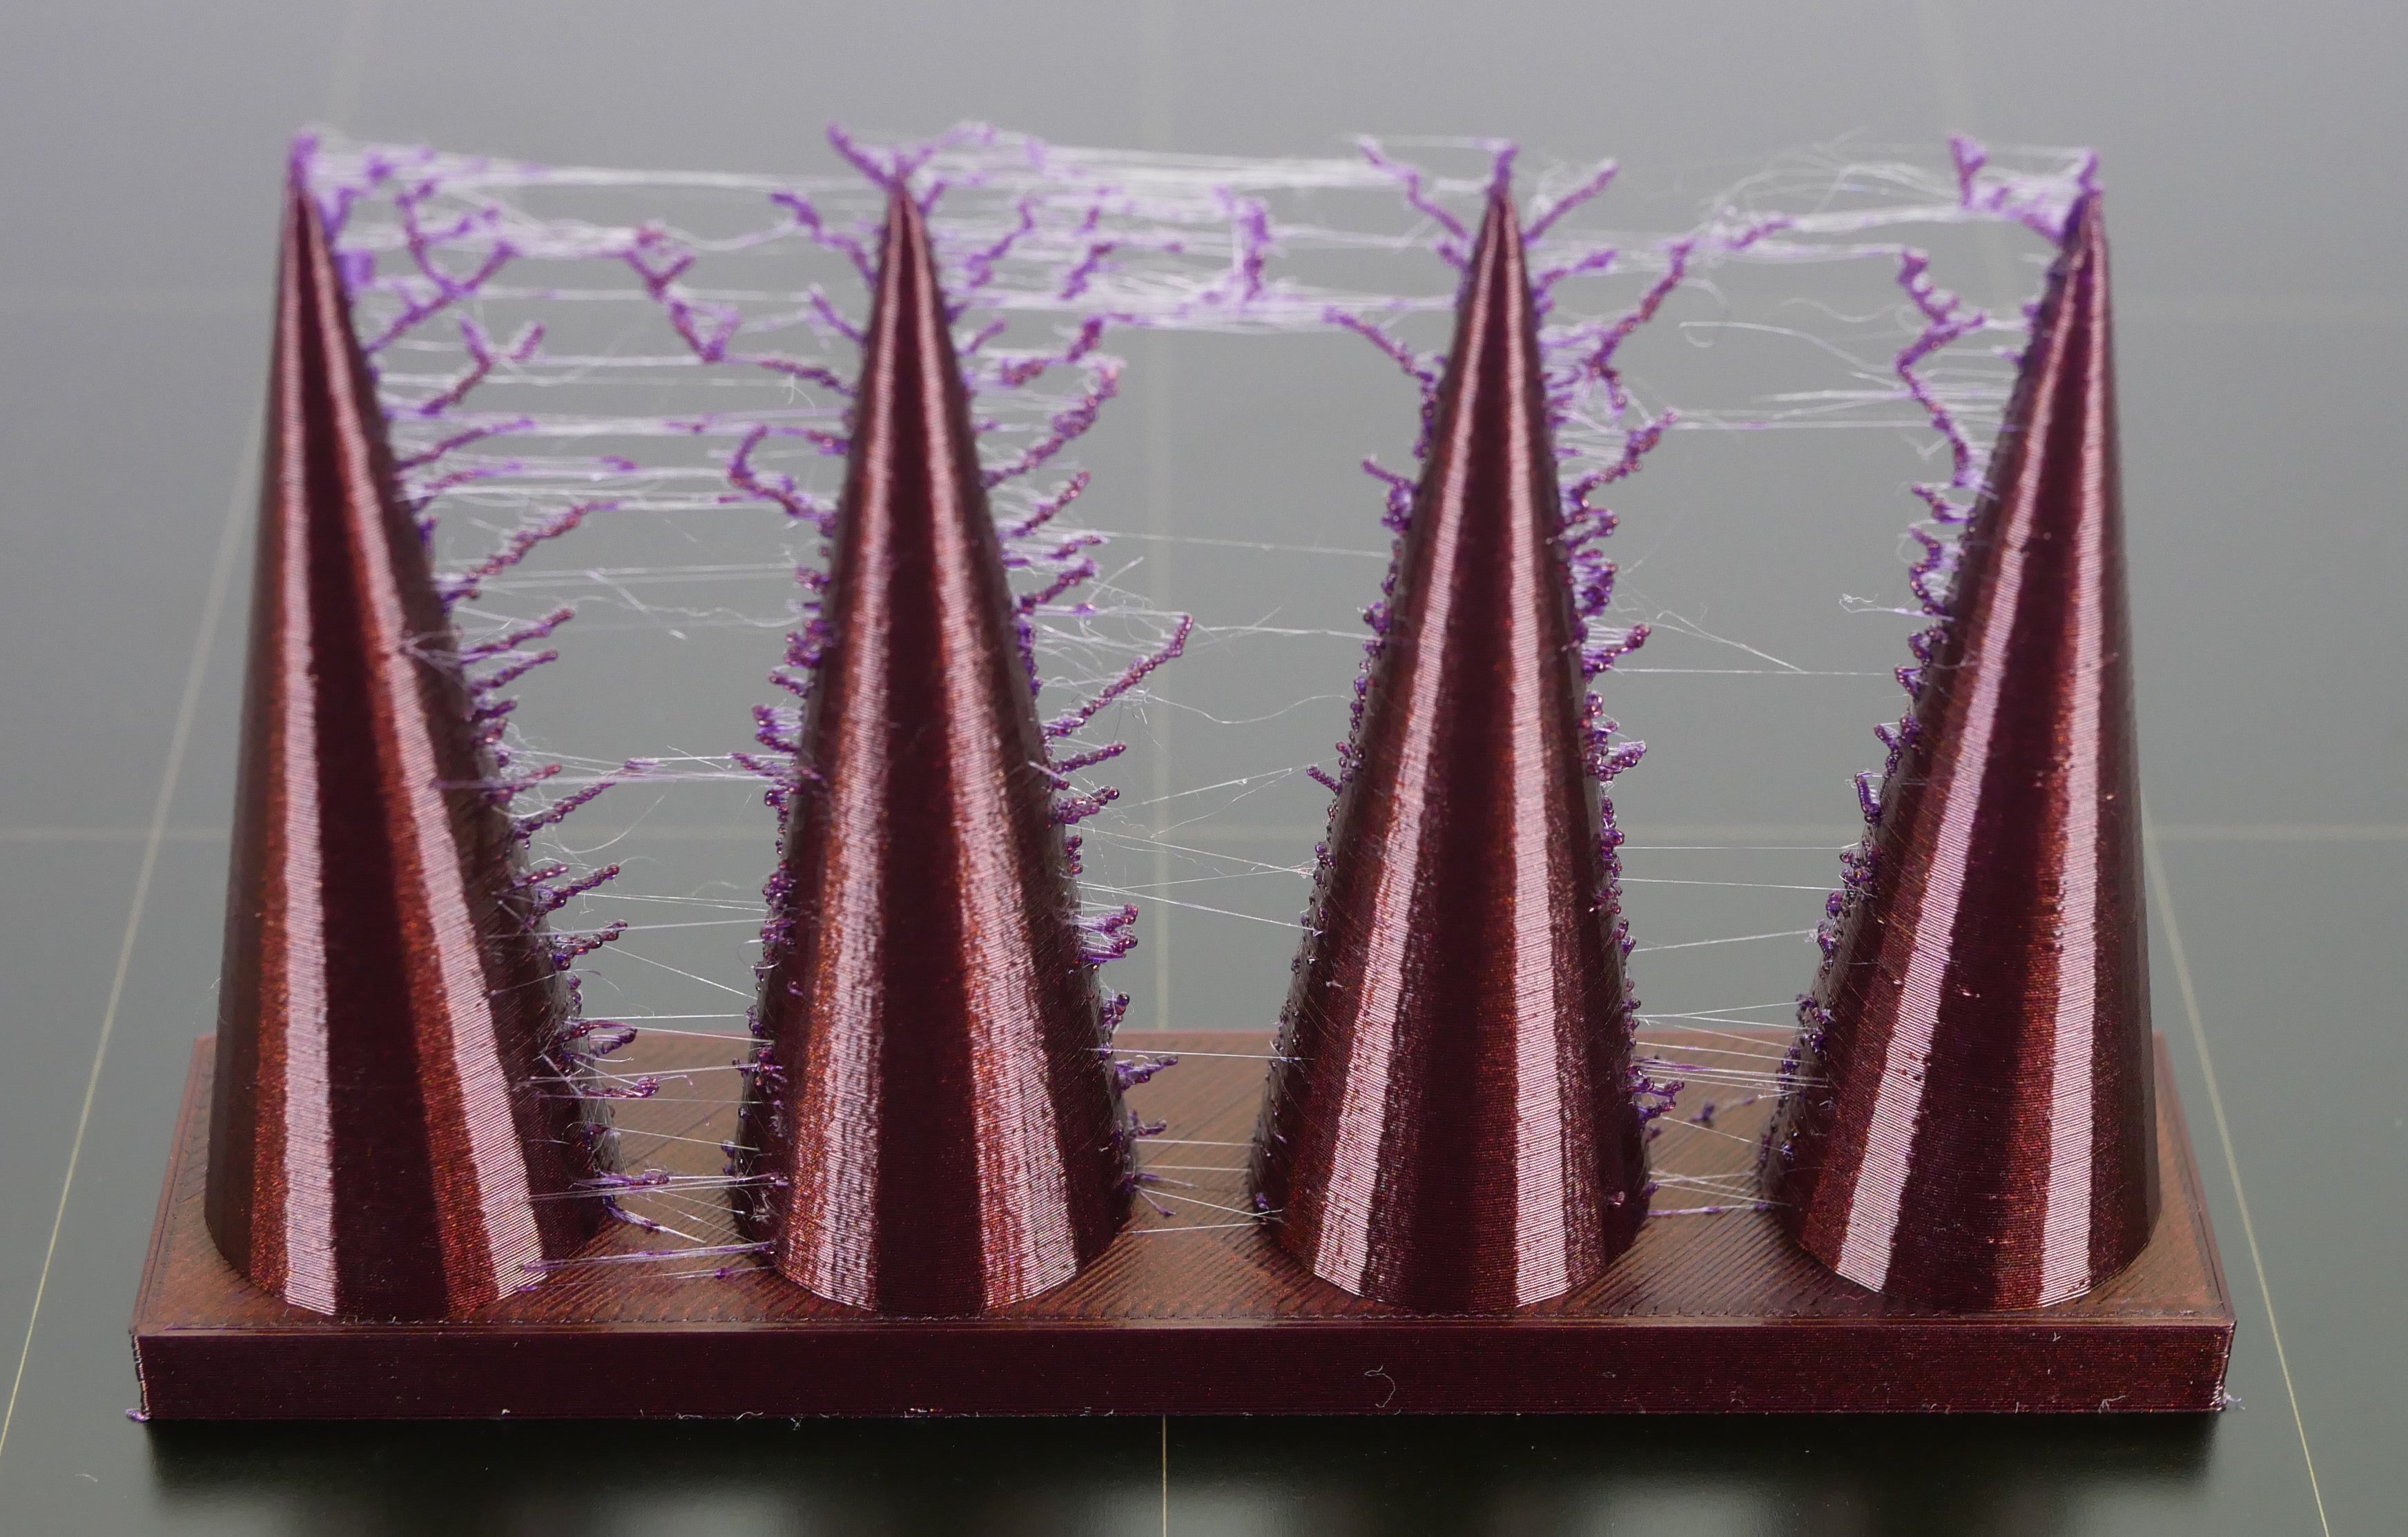 |  |
Stringing from material left on the nozzle
If you print for a long time from a single type of filament, such as PET-G, the filament can create a thin layer in the nozzle. This can cause stringing as the strands of the filament stick to the surface of the print. Therefore, thoroughly clean the nozzle before printing and make sure that any dirt or remnants of previous filaments are removed from the nozzle.
PrusaSlicer settings
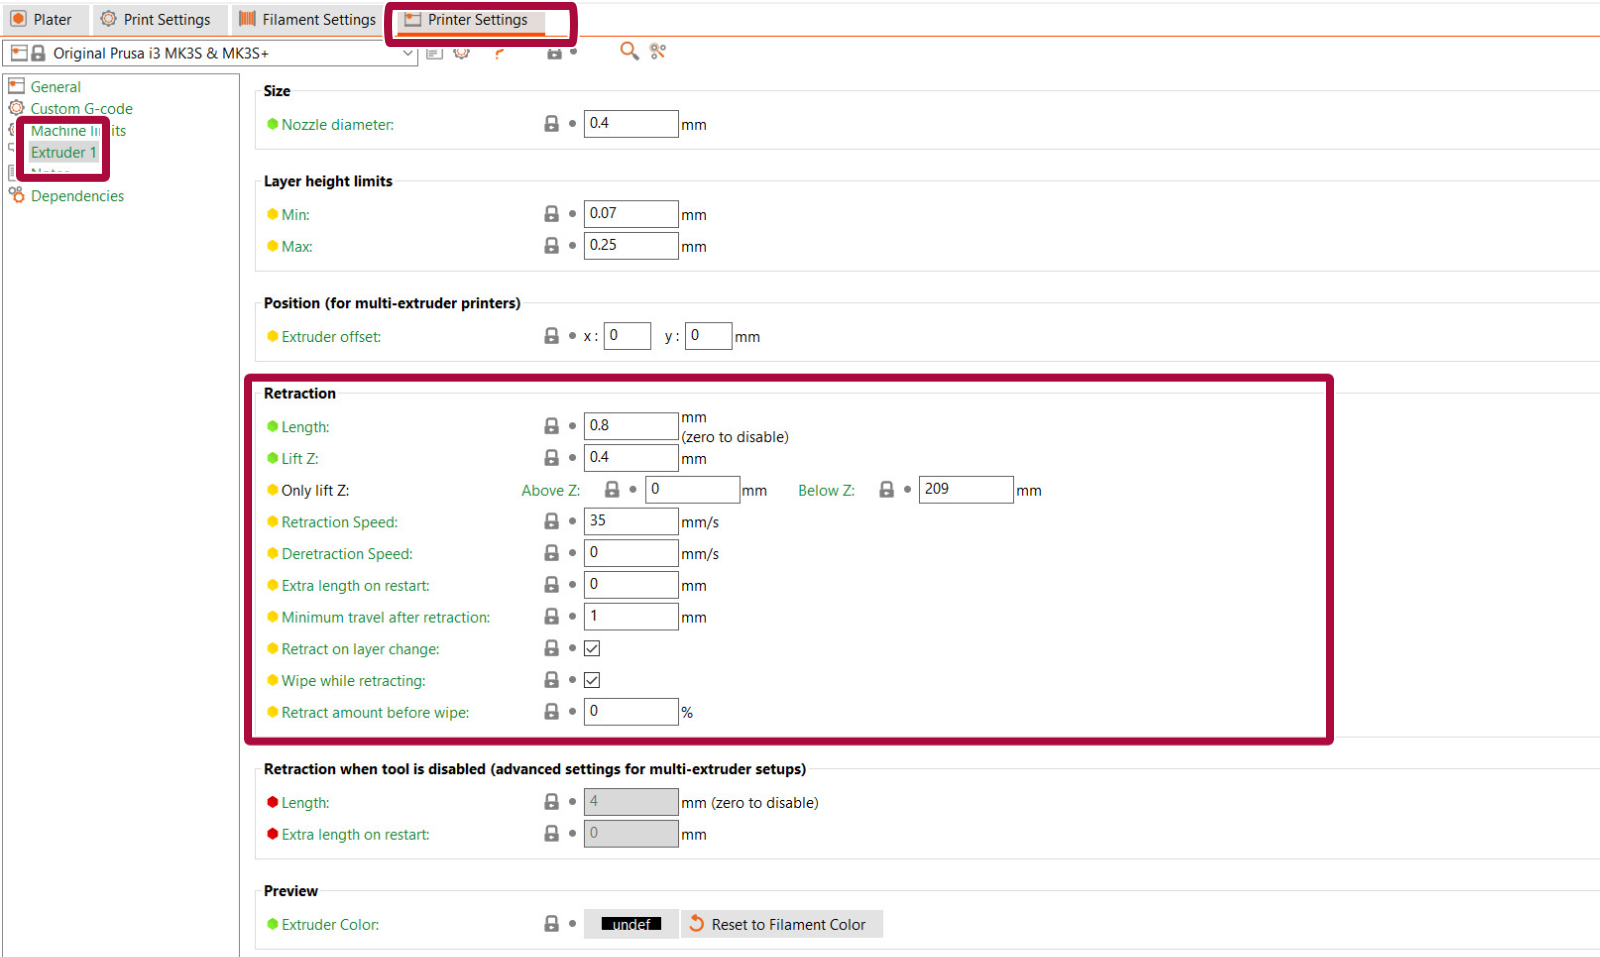
You should start by checking a parameter known as Retraction. What does retraction do? When the extruder has finished printing one section/object of your g-code, the filament is pulled back into the nozzle. Once the extruder moves to the next location the printing process continues – the filament is pushed back out and it starts extruding from the nozzle again. Retraction settings can be found in PrusaSlicer in Printer Settings -> Extruder 1.
Flexible filaments usually need longer retractions, because the material stretches while being pulled back to the nozzle. Flexible materials are a special case and can need a lot of tweaking and tuning.
The retraction settings are:
- Retraction length: Amount that the filament is pulled back when a retraction is triggered. On the MK2.5/S and MK3/S/+, the retraction length should be a maximum of 2 mm.
- Lift z: lifts the extruder during movement. Having this setting lower will improve stringing. Note that disabling this feature may cause the nozzle to hit the printed part.
- Retraction Speed: Extruder motor speed on retraction. A higher value improves stringing, but if it is too high it may skip steps in the motor.
- Minimum travel after retraction: Amount of move that will trigger a retraction (mm). The preset number in PrusaSlicer is 1 mm, which is a low amount. Having this number higher will get lower printing times, but increase oozing and stringing.
- Retract on layer change: Activates retraction when the layer changes to the next one. It is recommended to leave this option on.
- Wipe while retracting: Moves the nozzle (wipe) while the retraction is happening. It is recommended to leave this option on.
- Retract amount before wiping: This option does a quick retract before doing the wiping movement. More suitable for the Original Prusa MINI/MINI+.
Other settings that affect retraction:
- Only retract when crossing perimeters: (Print settings -> Infill -> Advanced): Disables retraction when the travel path does not exceed the upper layer's perimeter. Any oozing that happens will be within the walls and should be invisible.
- Avoid crossing perimeters: (Print settings -> Layers and perimeters -> Quality): Optimize travel moves in order to minimize the crossing of perimeters. This will lower the stringing amount, especially in the MINI/MINI+.
- Sequential printing: (Print settings -> Output options -> Sequential printing): Printing each object individually has a smaller chance of causing stringing between the parts. When using this feature, PrusaSlicer will warn you of any possibility of the extruder colliding with an already printed part, but follow the print closely.
- Nozzle temperature: (Filament settings -> Filament -> Nozzle): Lowering the temperature decreases the occurrence of strings. Try decreasing the nozzle temperature by 5 – 10°C and check whether there’s less stringing.
Filament
Try using a different spool than the one that is causing the stringing. The filament might have gathered moisture, which will cause a lot of stringing.
Hotend
Stringing in the nozzle might be caused by a heat dissipation issue in the nozzle. Try re-applying thermal paste on the threads between the heatbreak and the heatsink.
If you have recently changed any component in the hotend, it is also possible that some individual parts are not in place. Go over the assembly of the hotend and check for any parts that may be different from the instructions.
Enough settings, pass me my heat-gun!
If you don’t feel like tweaking any of the settings, well, then there is an alternative. You can get rid of the strings with a heat gun (or often with a lighter – but be very careful). Set your heat-gun to around 200 °C and aim at the strings for one or two seconds. This will melt the strings, and the printed object should remain undamaged. Do not leave the heat source on the printed model for longer than one or two seconds, as this may deform the part.
28 comments
Should the word "increase" be changed to "decrease" in the above sentence? This is talking about the retraction amount.
This is an skipping action. When you have a print with a lot of "mini islands" with small details like spikes, fine text, or single line infill. The extruder will retract A LOT in a small "time" (printing DISTANCE). This takes time and also, the start of the perimeter gets bad and you could get a heatcreep or stripping the filament
That's why you set this value. If the nozzle jumps into an "island" like a small single line infill, or spike, and the PRINTED perimeter is less than 1mm, it wont retract for the next jump, this concatenates with multiple islands, giving oozing/stringing
You should use the same or more than your retraction amount
Gli oggetti già impostati dalla stampante vengono bene (prima di iniziare il lavoro fa la pulizia dell'ugello in automatico)
Il problema è sia con quelli importati da Internet che con il progetto fatto da lui
In entrambi i casi perde un pò di filamento mentre si sposta sul centro del piatto e non va prima a fare la pulitura
X il suo modelo ha usato (come usano a scuola) sketch up poi abbiamo importato su prusa slicer
Fatto gcode e salvato sulla schedina in dotazione
Come faccio ad impostare la pulizia automatica?
A quick google shows several options, but not all of them seem to be related to stringing. What is the best way to clean the nozzle to reduce stringing?
2) Only the section on filement describes how to test for the issue. The other sections only describe how to solve the issue. Maybe not all causes can be tested, so I hope the suggestions are listed in the recommended order (cleaning the nozzle, then chaning slicer settings, etc.) Is this indeed the case?
Filament Settings Overides are pertinent to this discussion topic.