日本語
Login
3Dプリンター
マテリアル
部品 & アクセサリー
法人向け
ソフトウェア
3Dモデル
コミュニティ
ヘルプ
コース一覧
ブログ
会社概要
サポート
Original Prusa MMU1
プリンタートラブルシューティング
Filament pulleys MMU1 | 組み立てを始める
1. 組み立てを始める
ステップ 1 / 5 (章 4 / 5)
内容
コメント
難易度
ほどほど
利用可能な言語
組み立てを始める
内容
プリンタートラブルシューティング
MMU1のトラブルシューティング
Multi Material Post Processor Troubleshooting
マルチプレクサ
MMU1のフィラメントプーリー
組み立てを始める
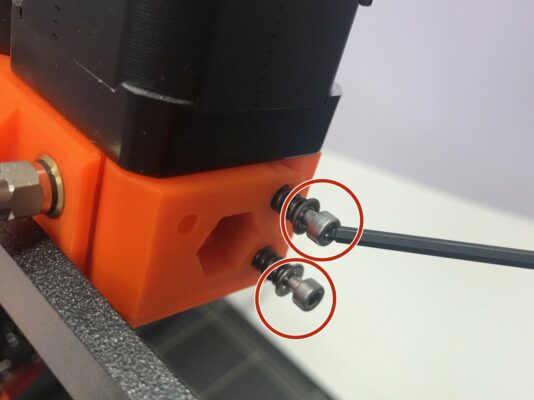
アイドラーネジの取り外し
プーリーのスロットの清掃
プーリーの位置
元通りに組み立て
フィラメントをアンロードできない(MMU1)
コメント
ログイン
してコメントを投稿する
コメントなし