During a filament change, a small amount of melted plastic remains in the nozzle. As the new filament is loaded, it’s melted as well and starts pushing the nozzle content out. During this time, you’ll see a gradual change in the color of the extruded filament.
In order to ensure a sharp color transition, PrusaSlicer provides several ways to deposit this filament:
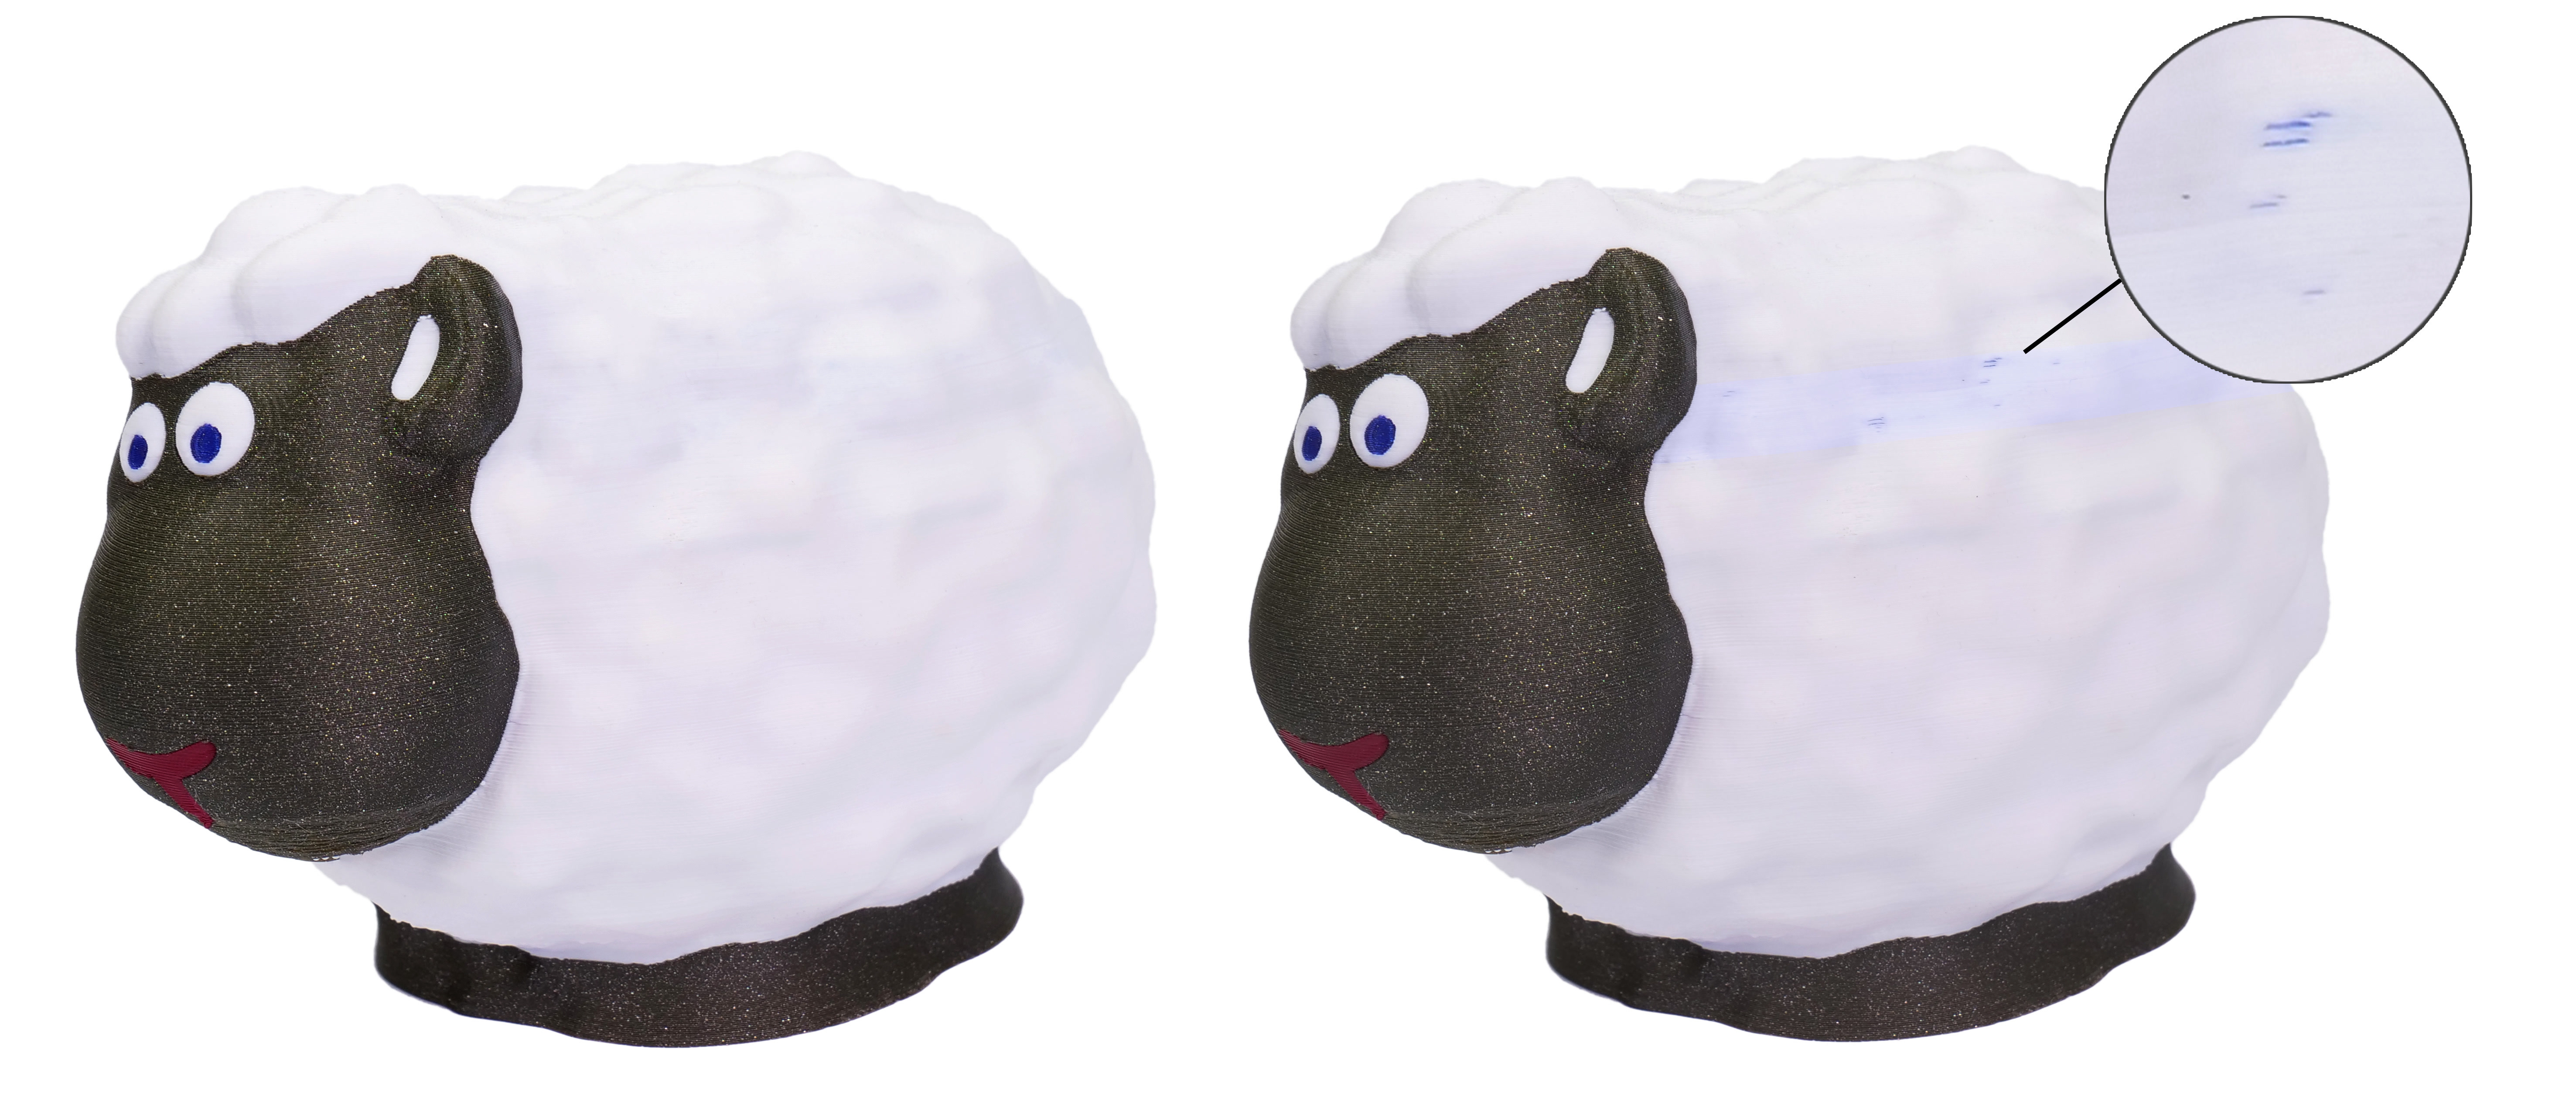
The sheep on the right has the white color contaminated by the blue pigment from the previous filament
Purging volumes
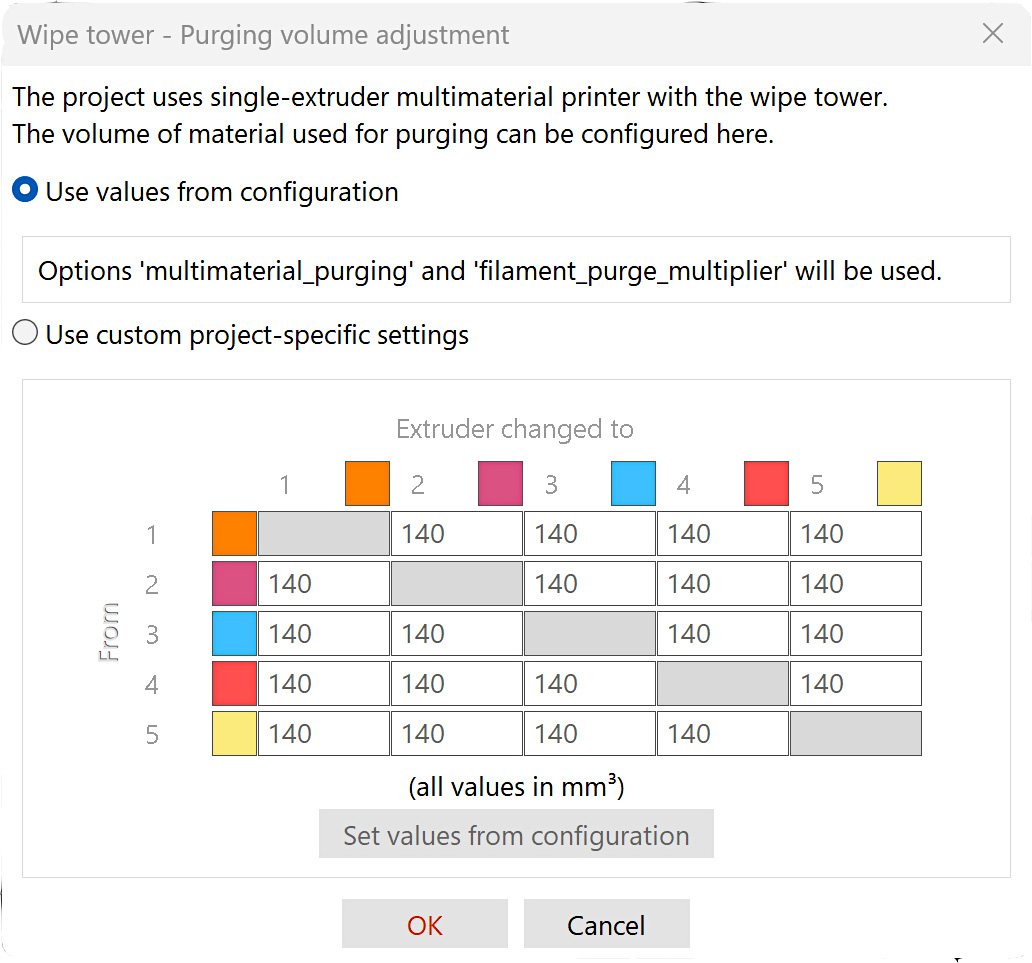
Two modes are possible to set the purging volumes. Use values from configuration, or use custom project-specific settings.
Use values from configuration
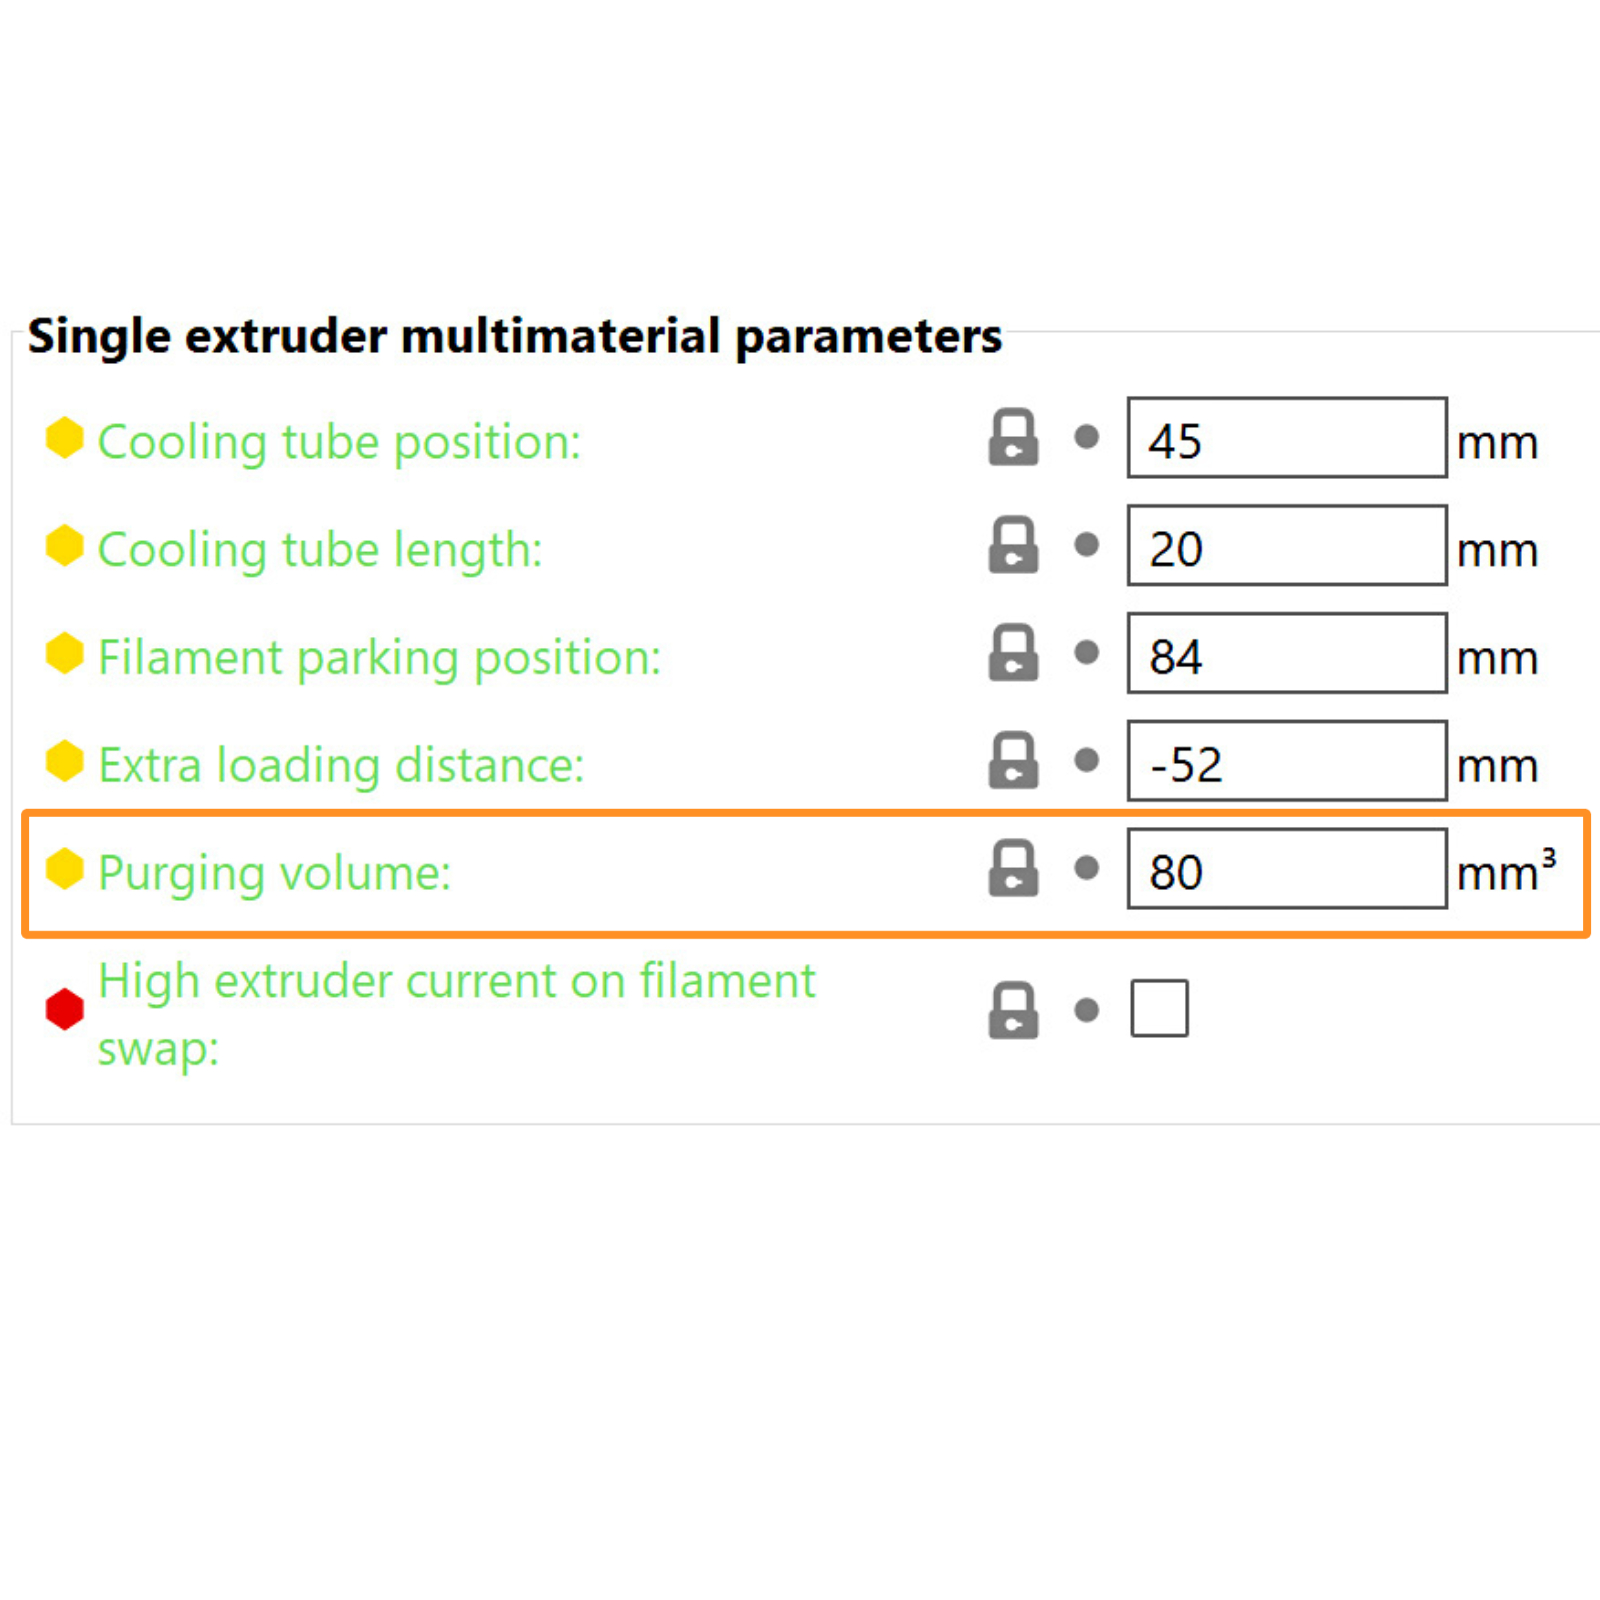
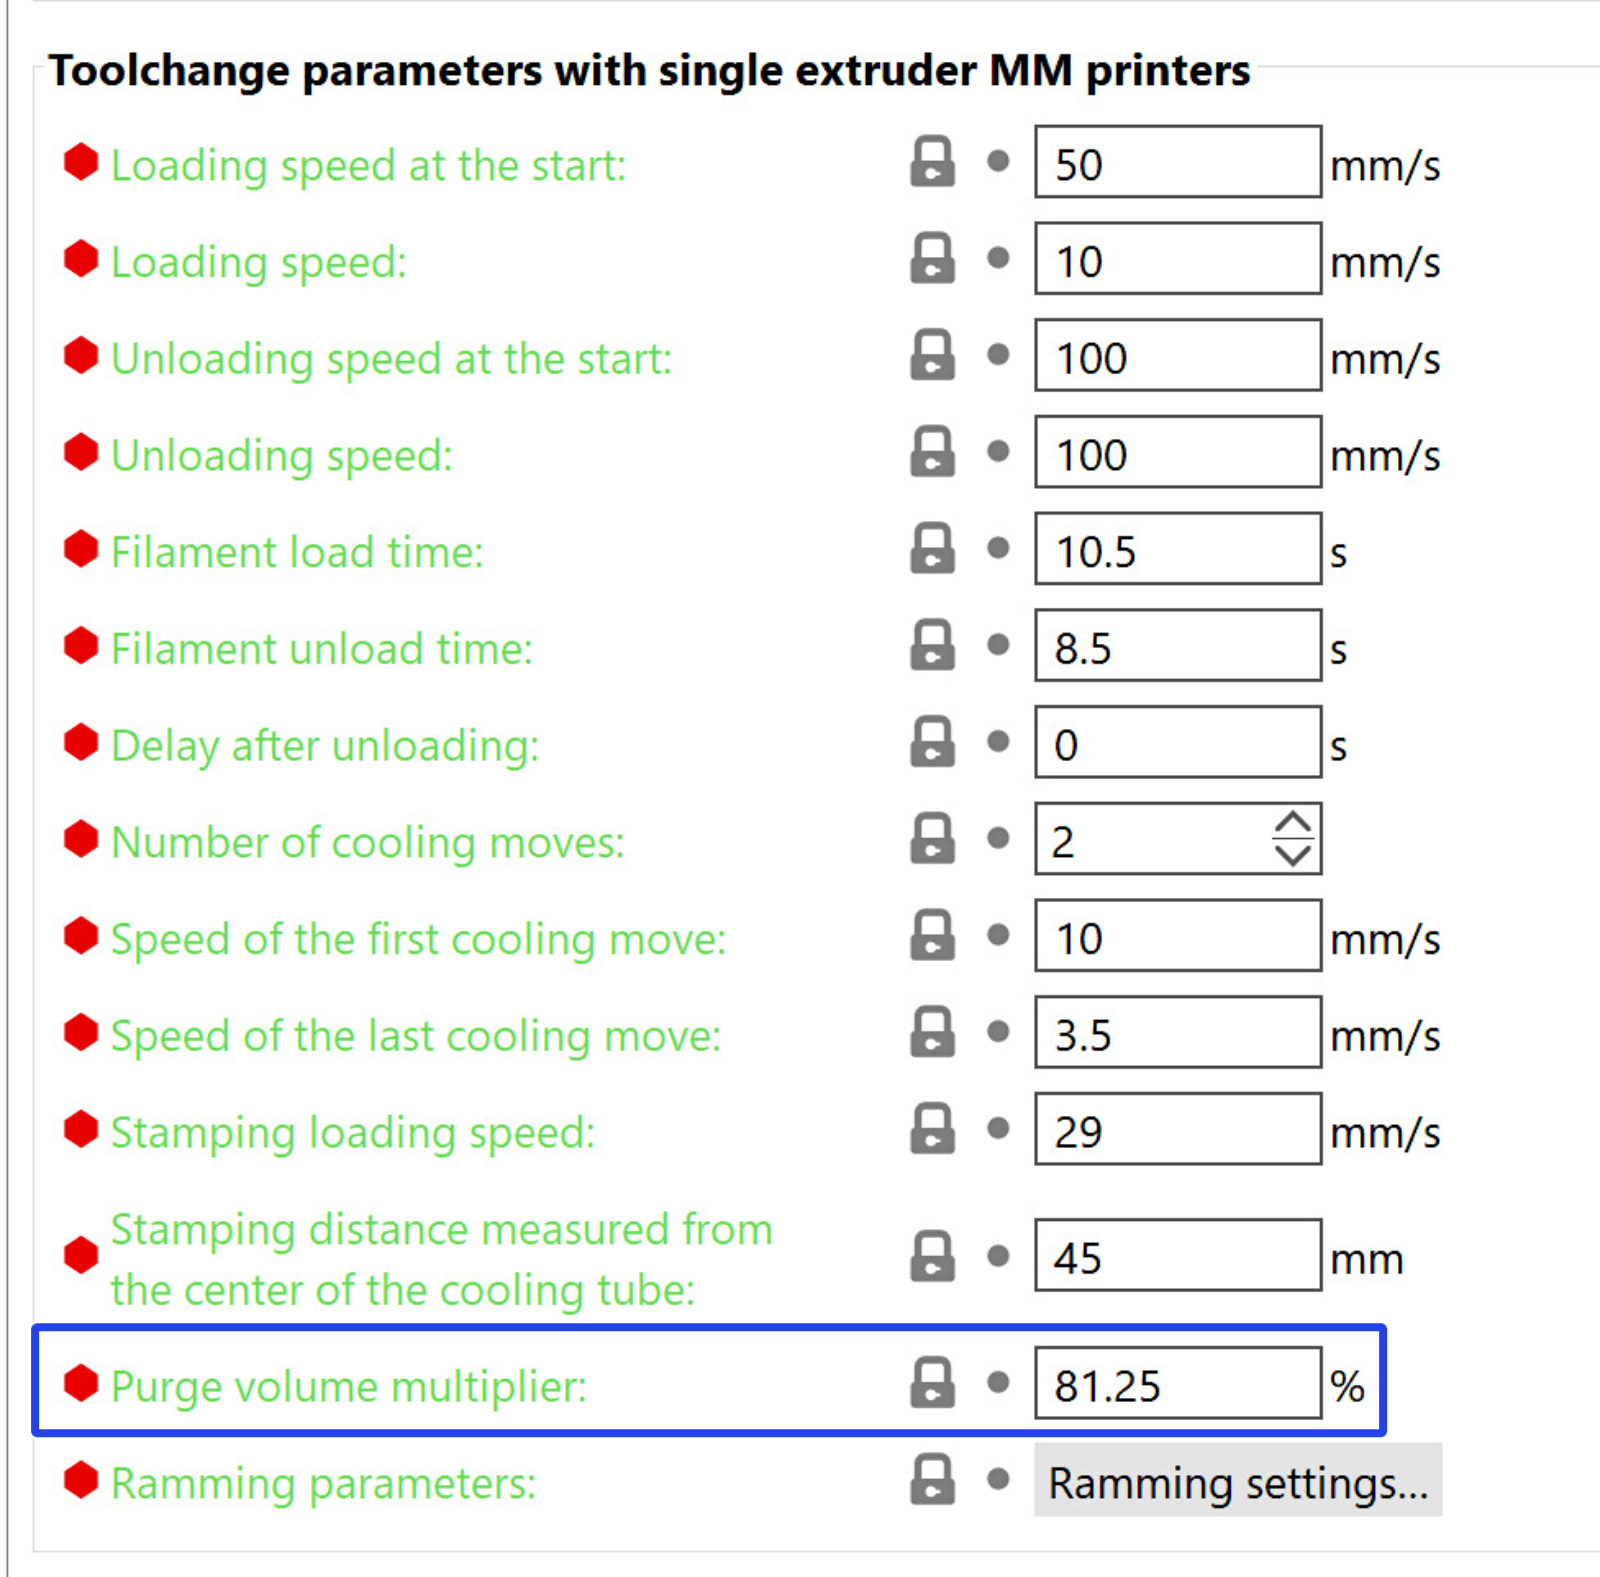
The volume to purge is set by changing the Purging Volume in Printer Settings -> Single extruder MM setup. This value can be further modified on the filament level using Purge Volume Multiplier in Filament Settings -> Advanced. The values cannot be modified in the purging volumes matrix.
 |  |
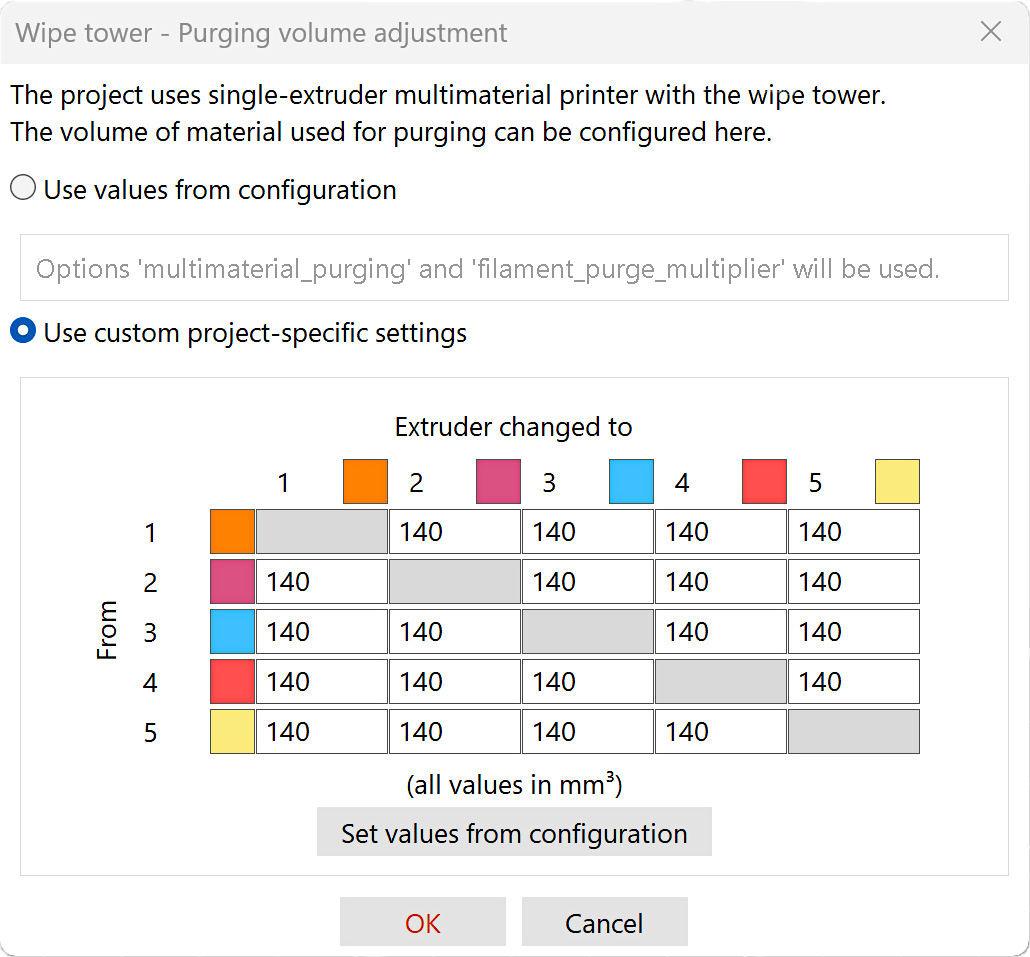
Use custom project-specific settings
Clicking on the purging volumes settings opens a new window that contains a matrix. Each cell represents the amount of filament required to purge during filament change from filament X (left column) to filament Y (top row).
By selecting use custom project-specific settings, you can set each matrix cell individually. The values from the configuration are not used in this mode.
 |  |
Example values
| unload | load | |
| Black | 80 | 30 |
| White | 20 | 70 |
Transition Black to White = Black unload + White load = 80 + 70 = 150 mm³
Transition White to Black = White unload + Black load = 20 + 30 = 50 mm³
When using a soluble filament to print supports, or filaments with additives (highly glossy, glitter, etc.), increased purging volumes are most likely needed, compared to the standard example values.
9 comments
I don't suppose you have ballpark figures for white to any other colour? Thanks again
so Maybe #4 @140 to #5 since it it lighter under the #5 column to 160 ????
So in your example of Black to White, Black unload, - Black at 80 should be in the "From" line and then in the White Column would be the 70 ?
Am I understand this correctly??
Hi! It might be called a "beginner mode" instead in 2.8.x Alpha.
Are you going to update this article for the changes to purge volumes for 2.7.x and higher?