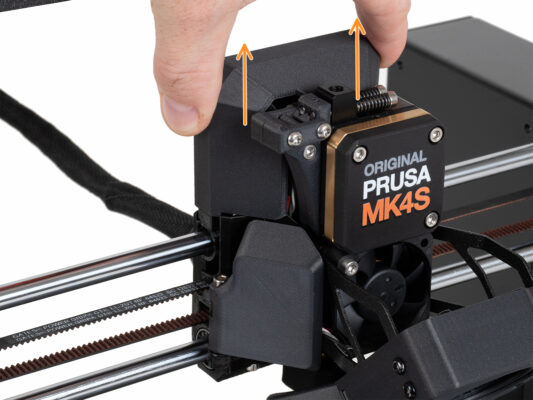
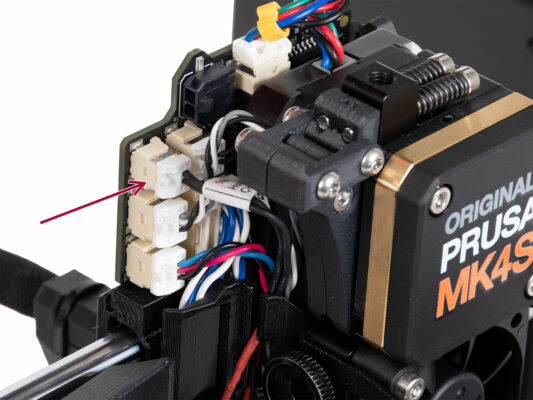
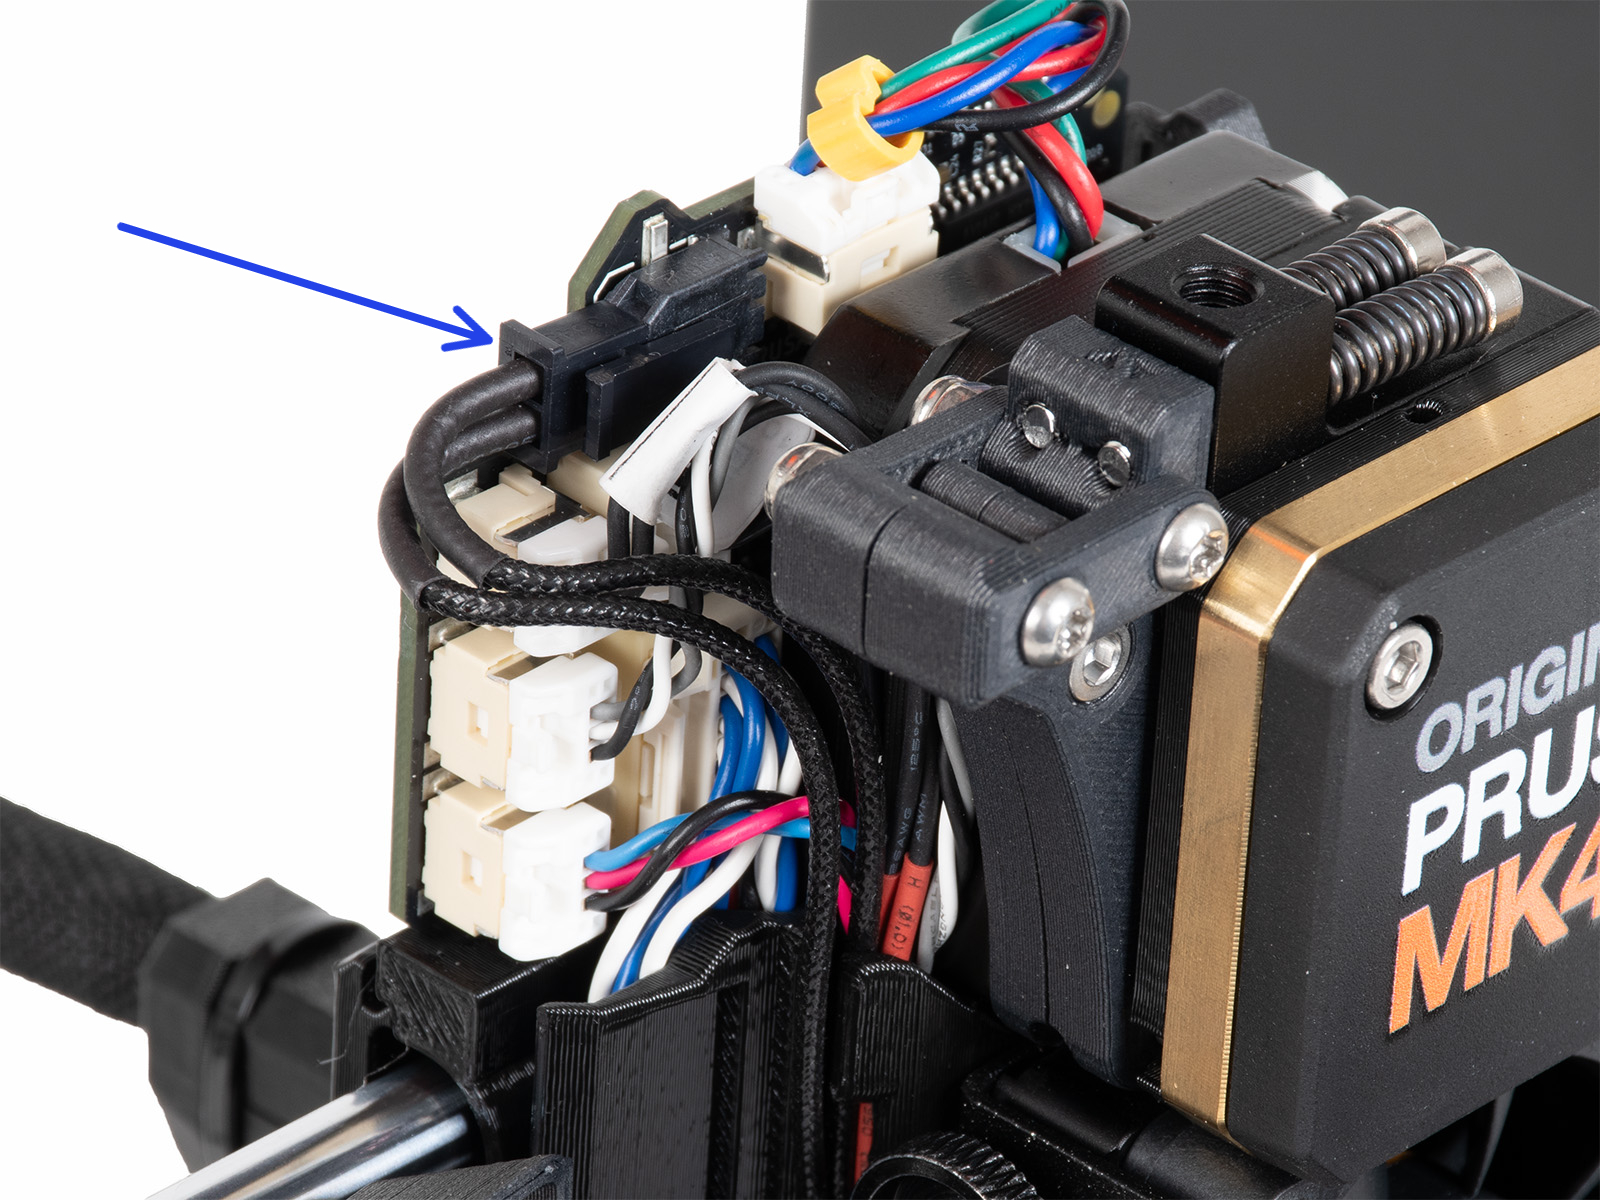
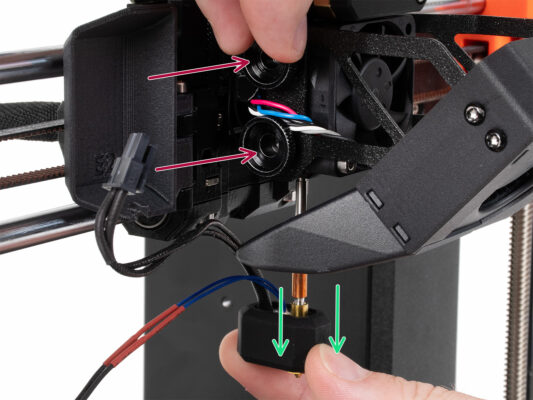
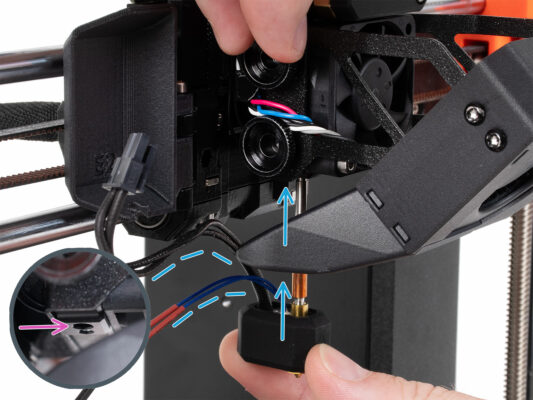
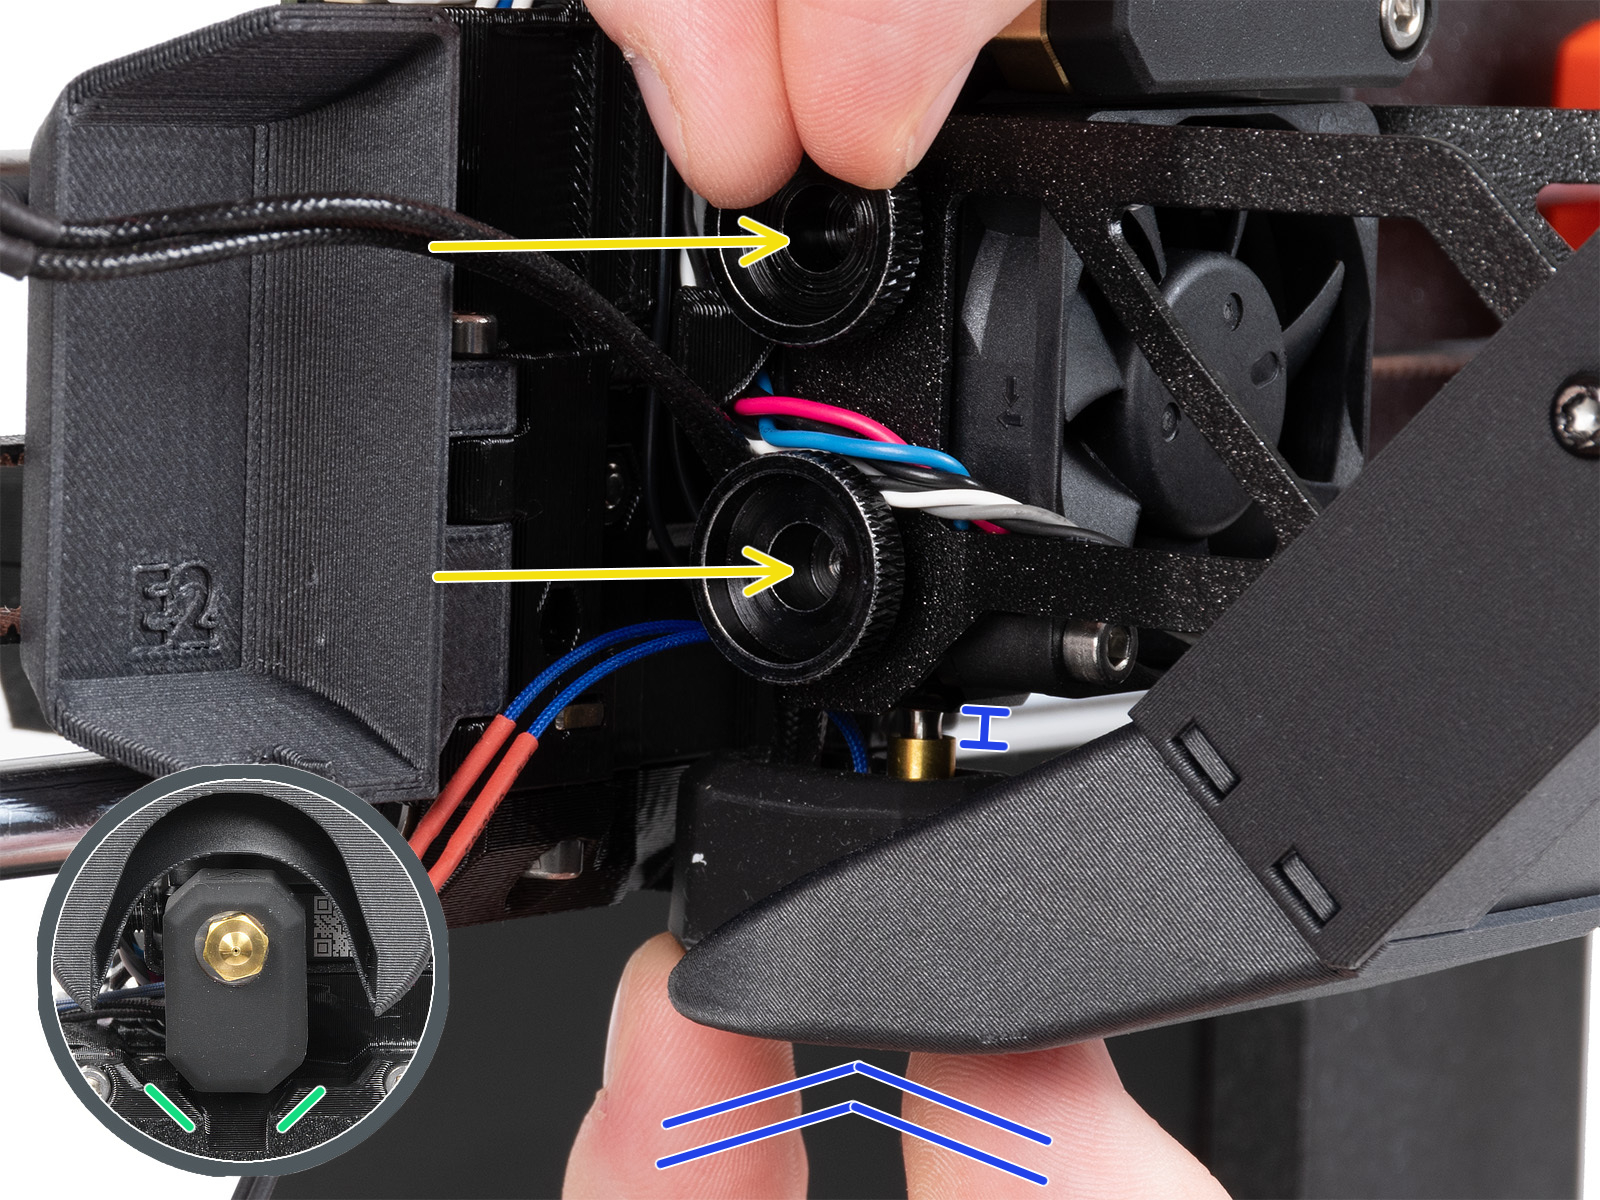
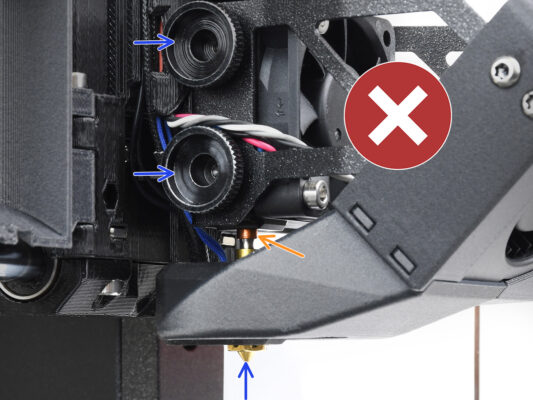
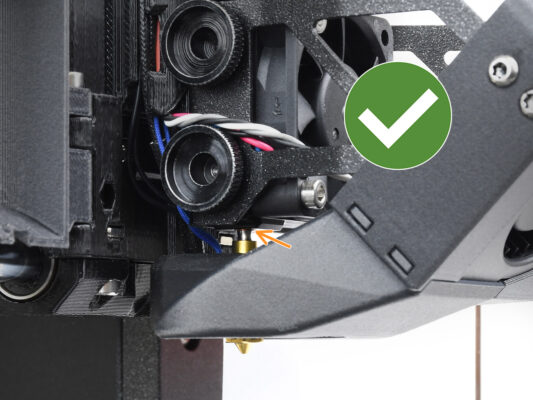
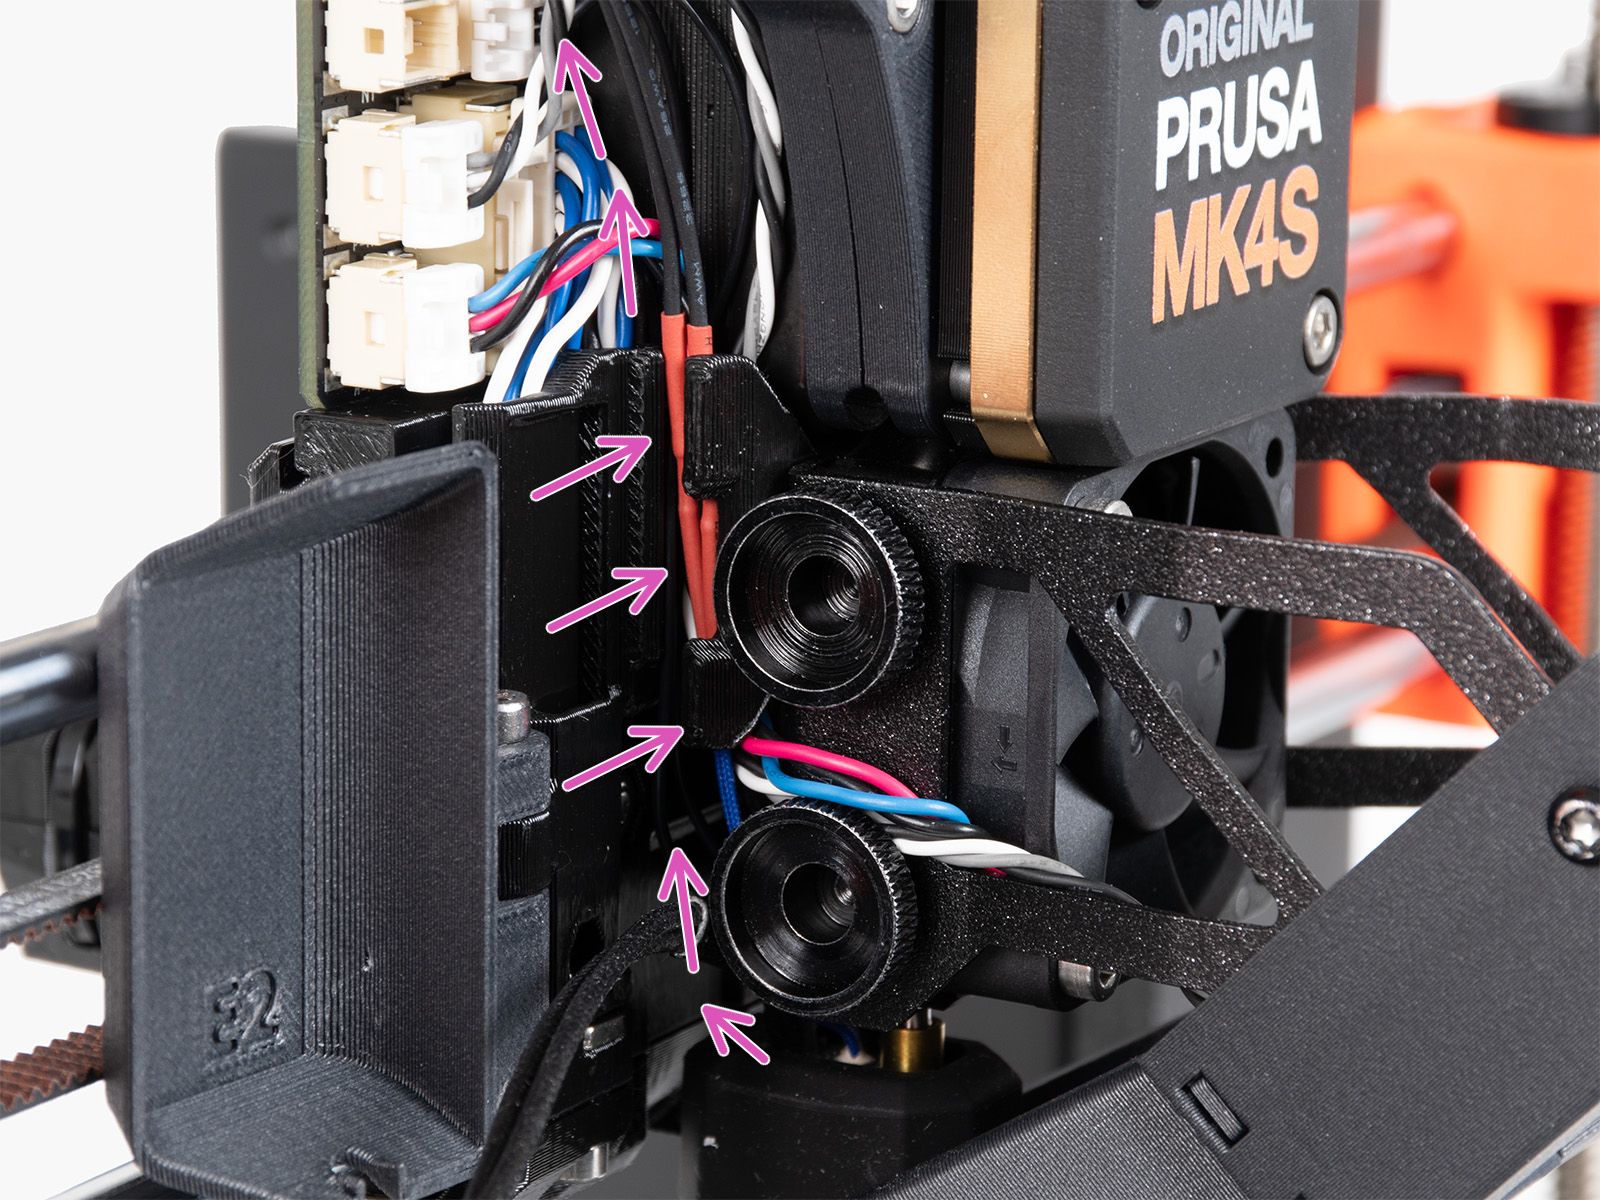
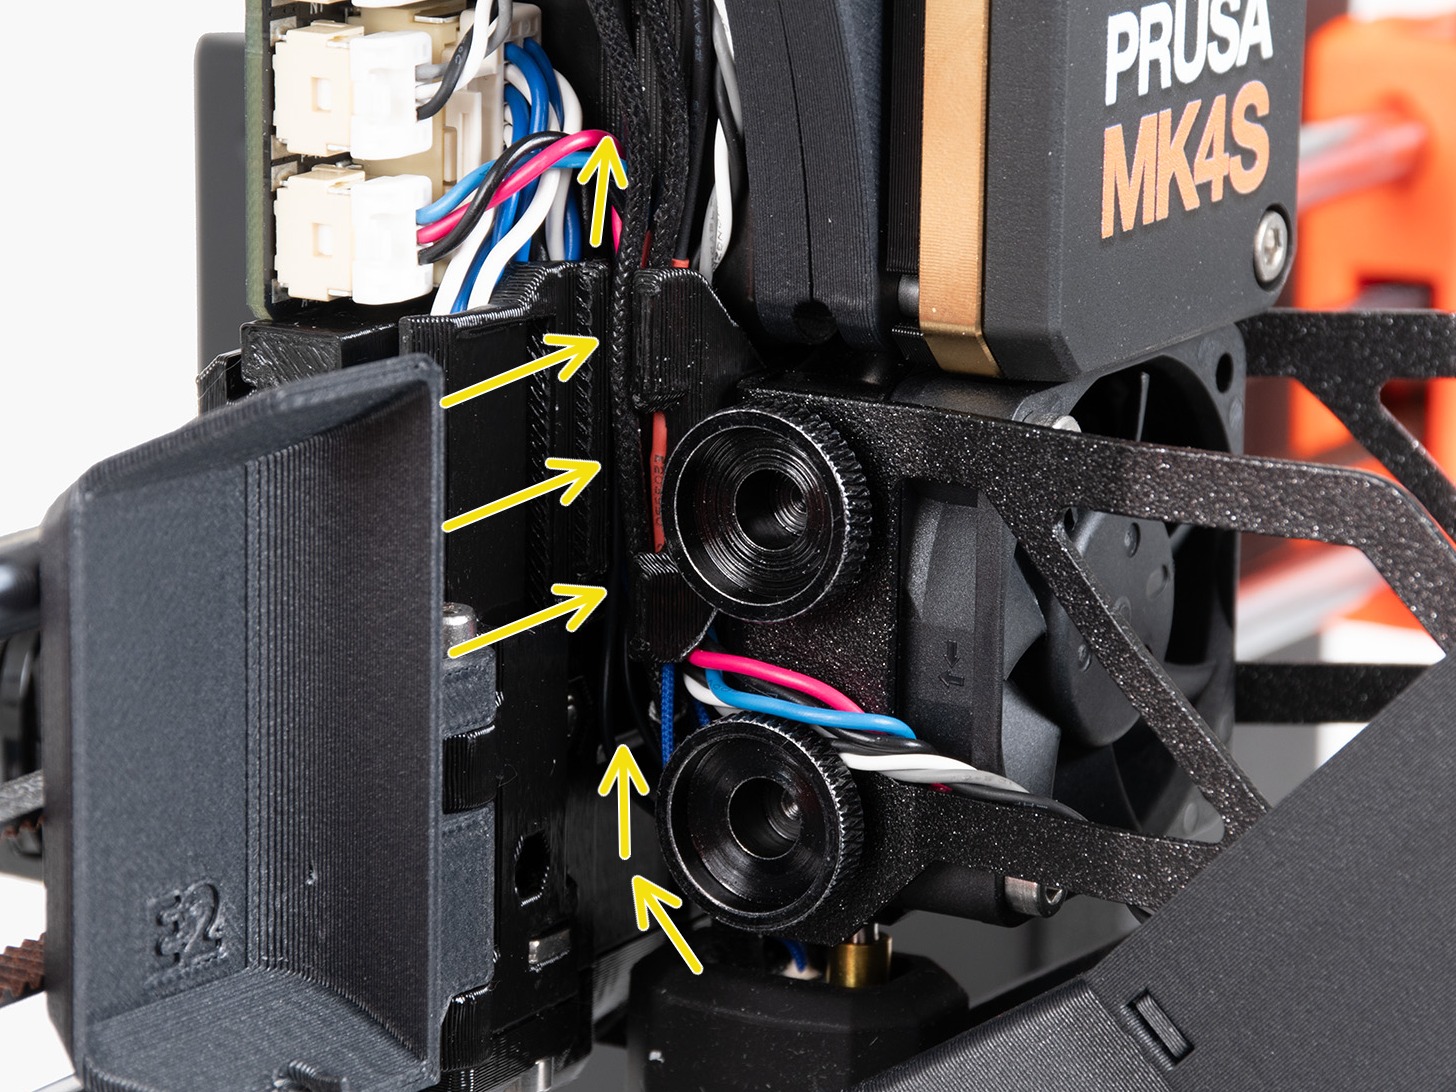
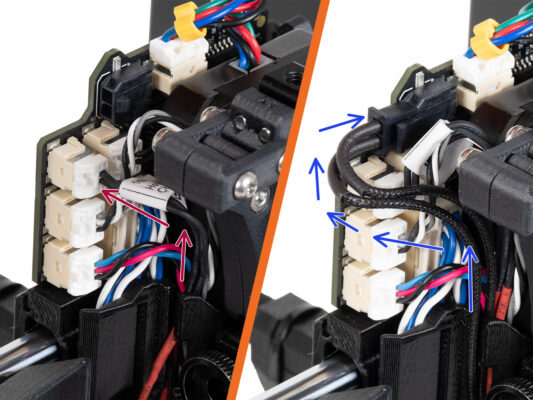
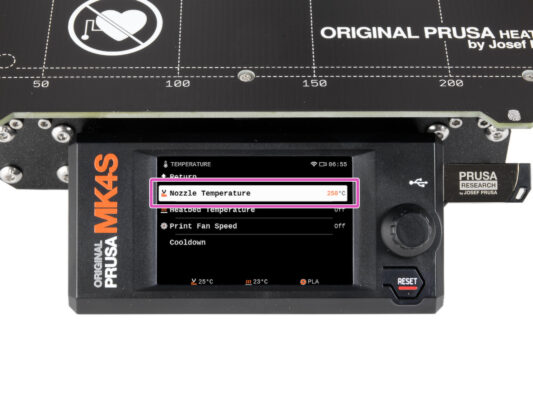
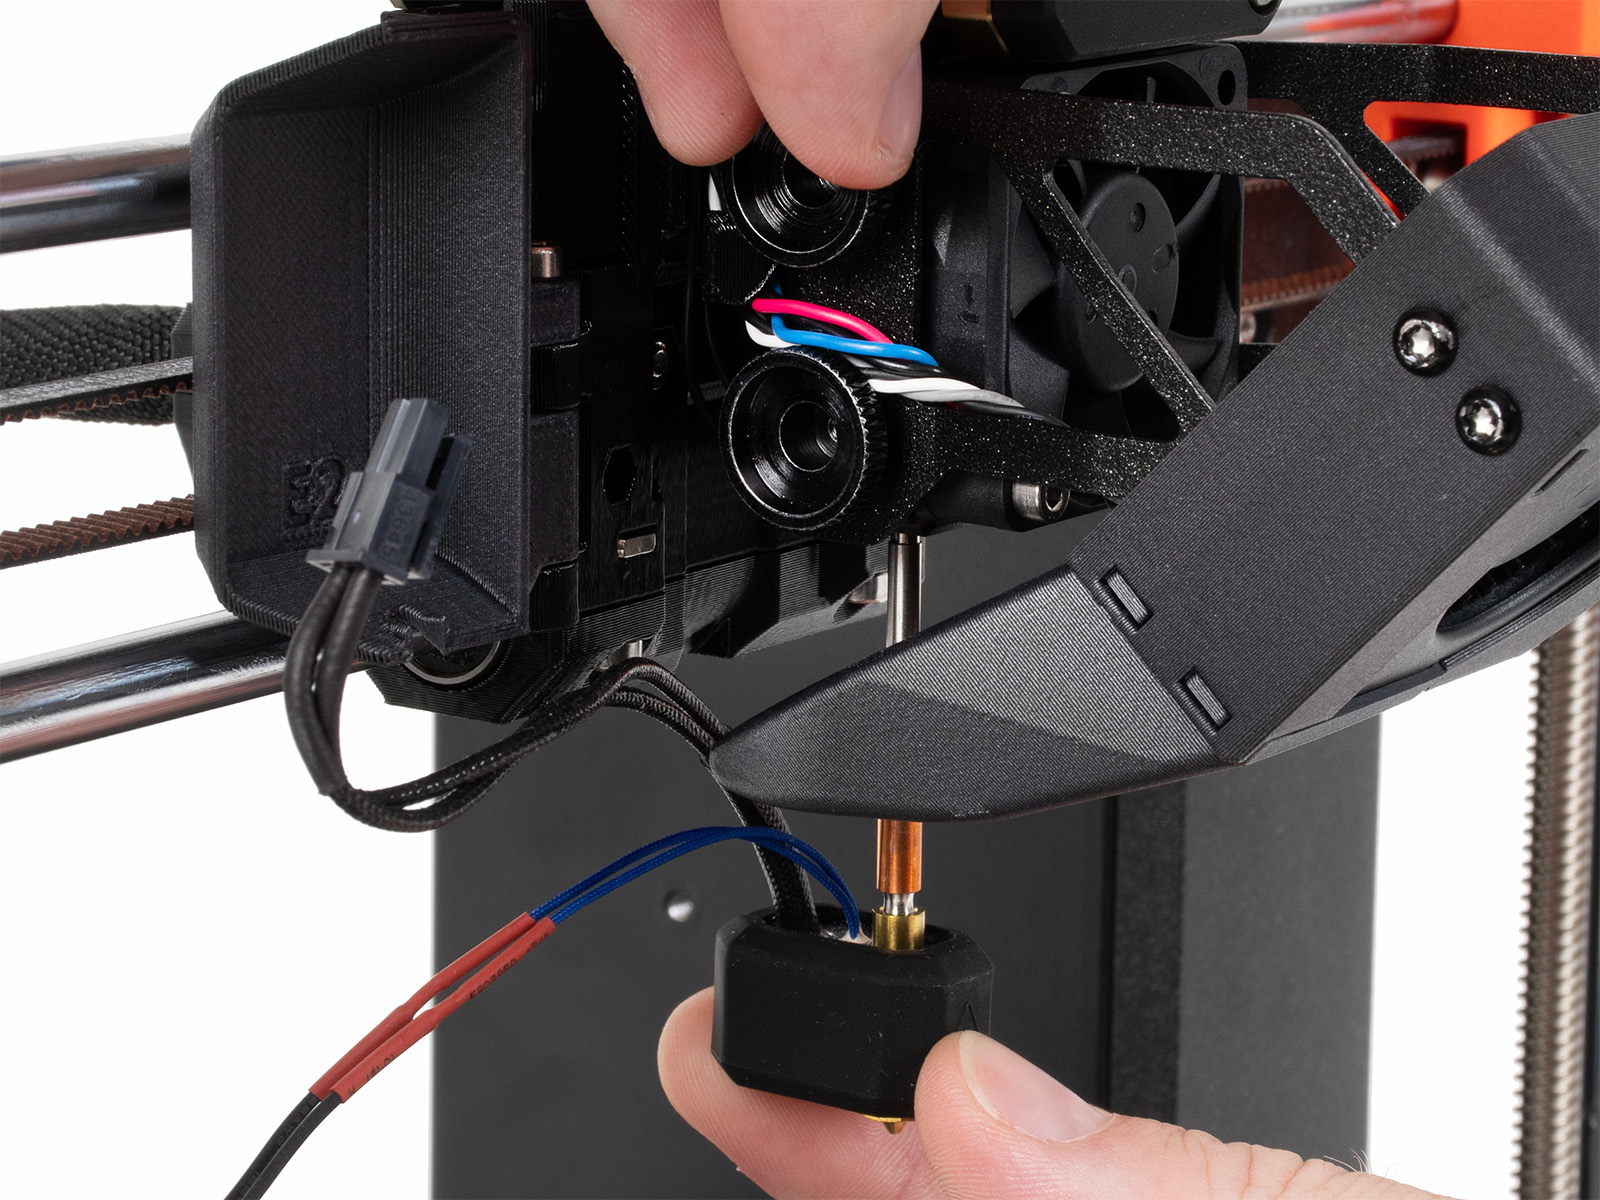
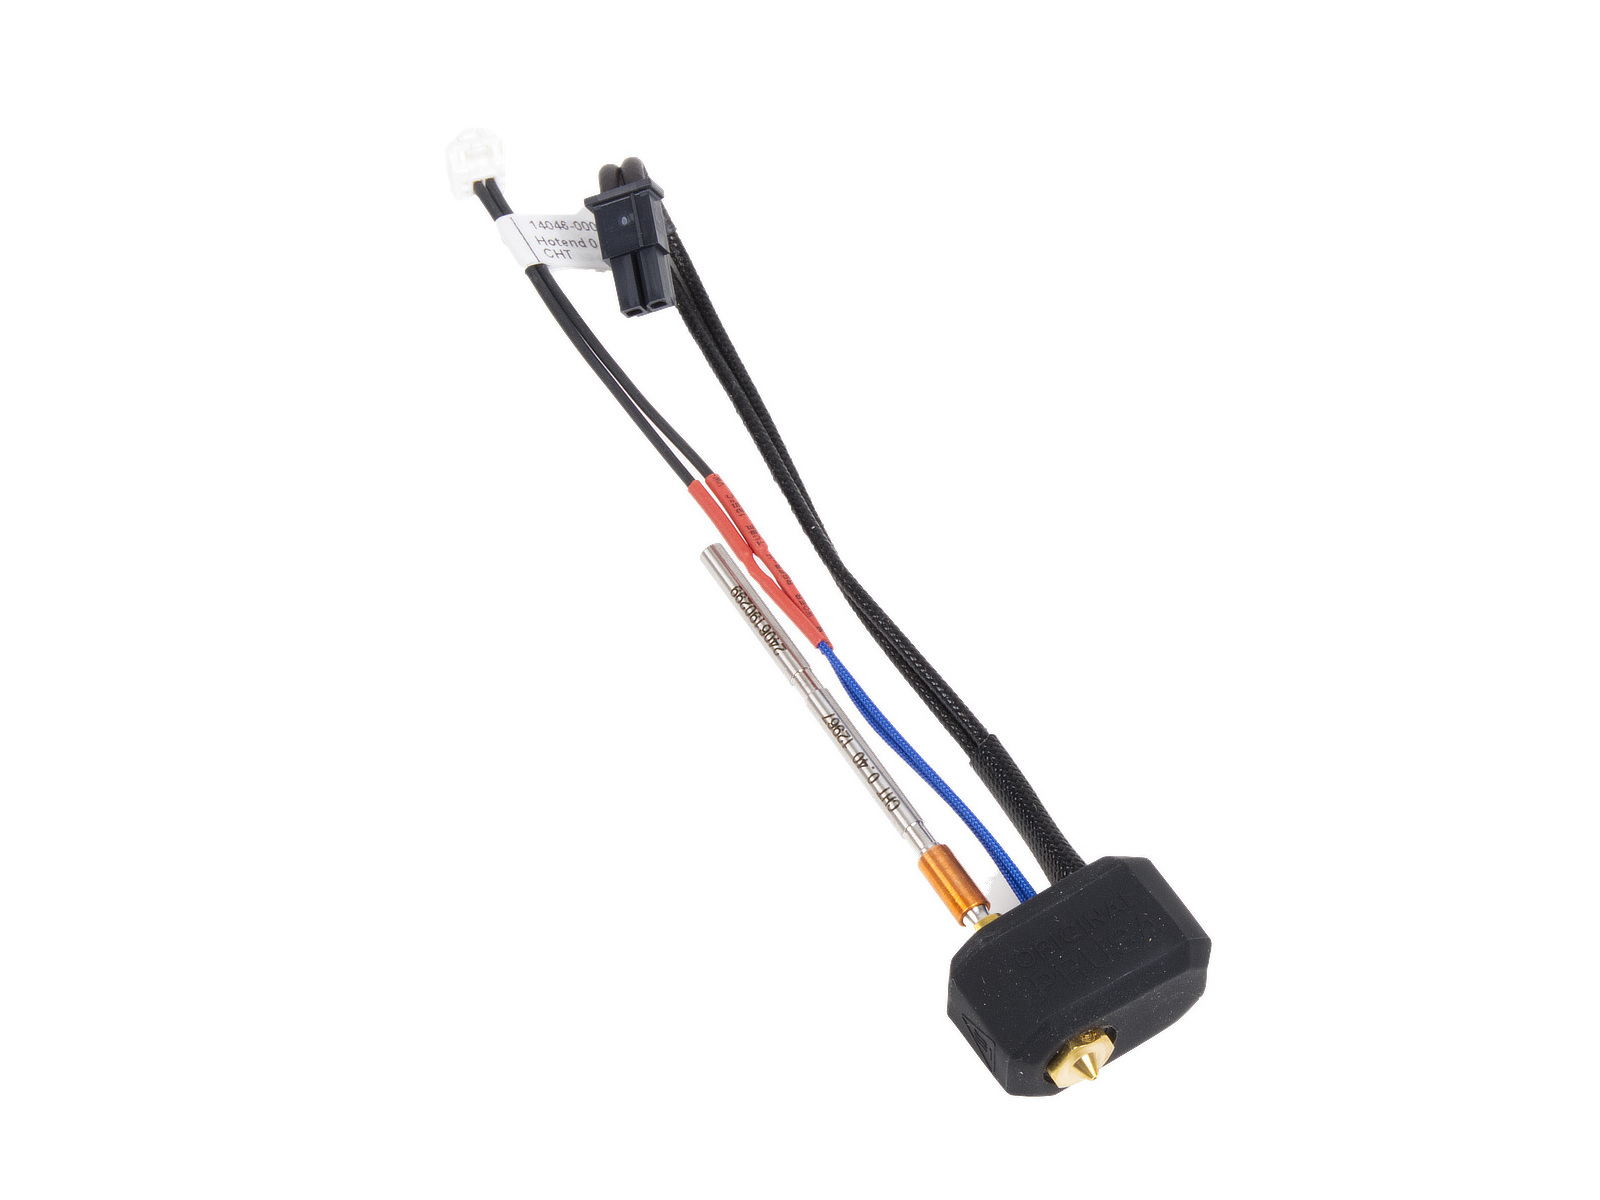
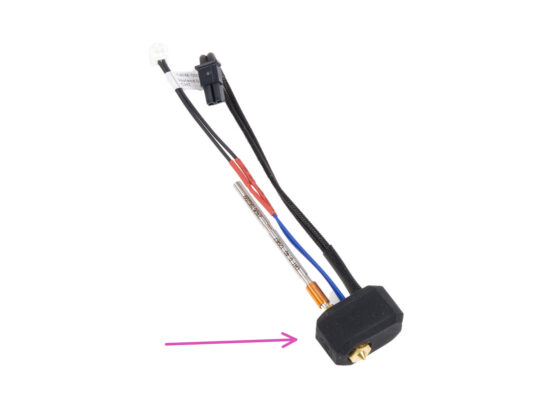
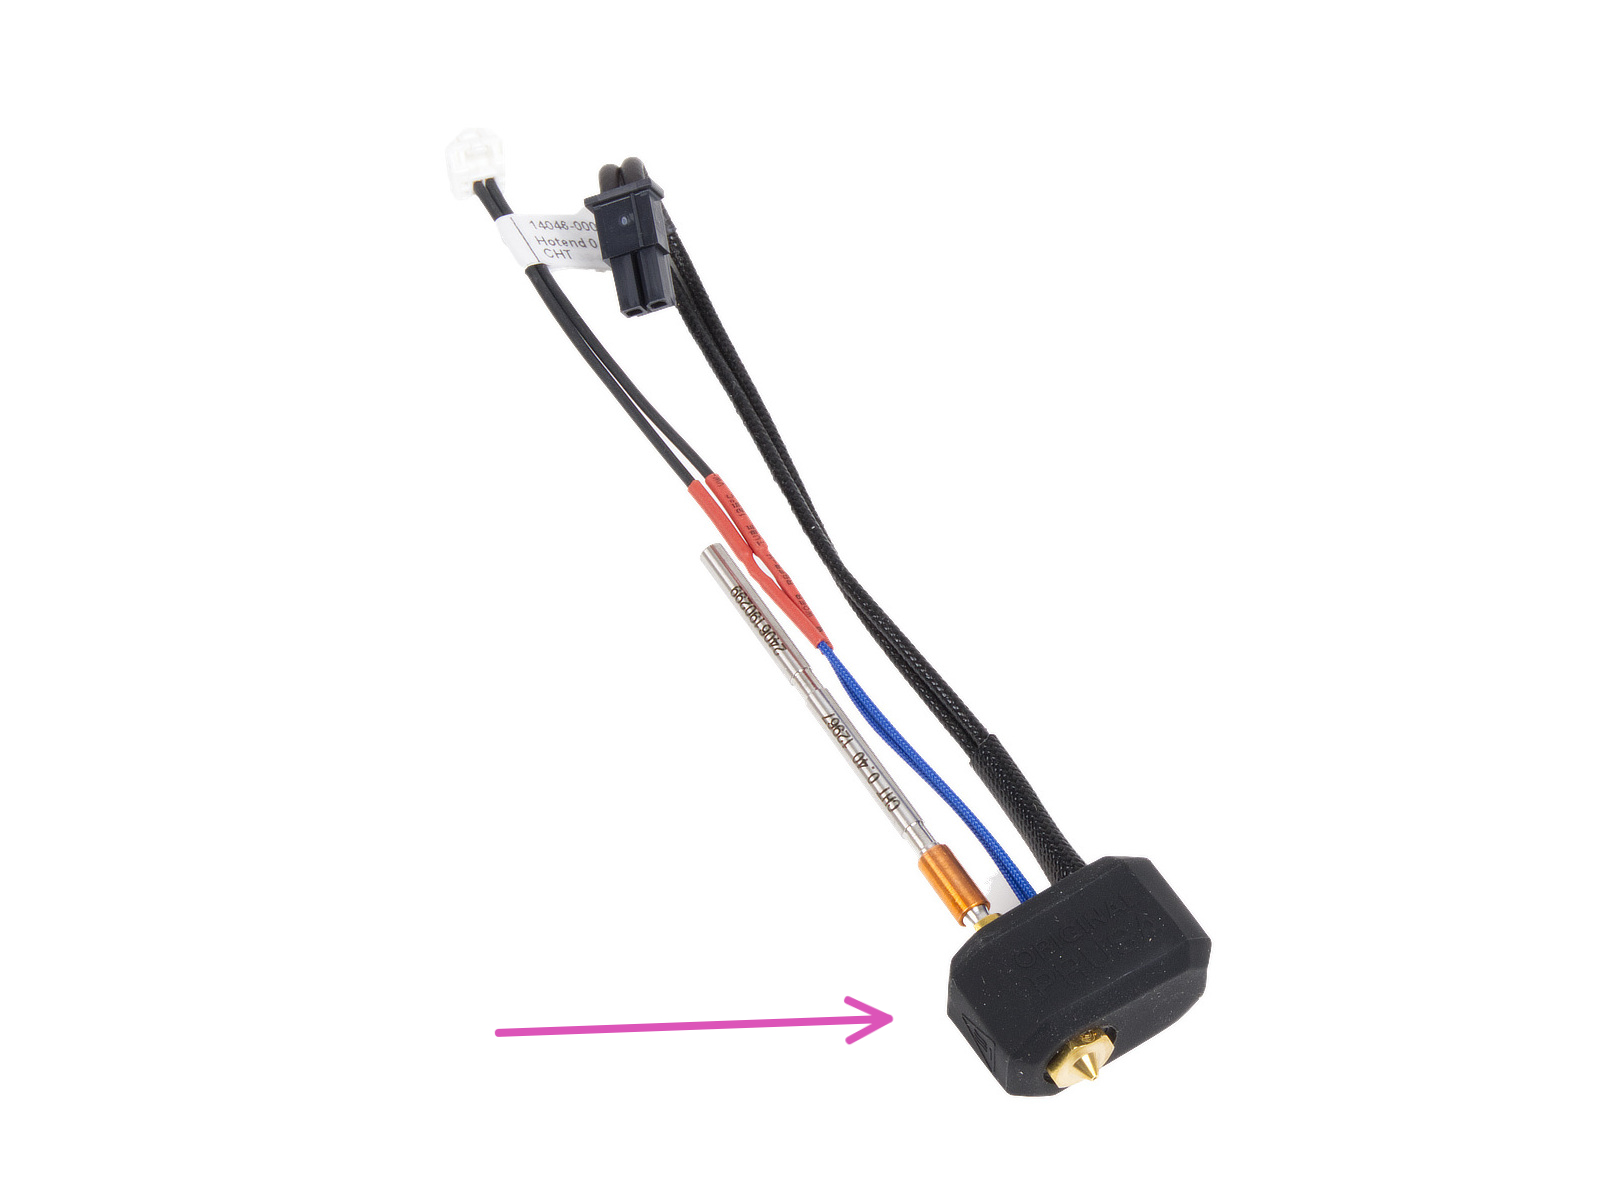
ES
  • English
  • Čeština
  • Deutsch
  • Polski
  • Français
Iniciar sesión

How to replace a hotend assembly (MK4S / MK3.9S)

How to replace a hotend assembly (MK4S / MK3.9S)

How to replace a hotend assembly (MK4S / MK3.9S)
Relevante para :
Ultima actualización a month ago
How to replace a hotend assembly (MK4S / MK3.9S)
 Dificultad
Muy fácil
 Pasos
14
 Idiomas disponibles
ENCSPLDEFR
Introduction
Introduction
This guide will take you through the Hotend assembly replacement on your Original Prusa MK4S or MK3.9S.
Las siguientes instrucciones son compatibles con todos los diámetros de las boquillas Prusa.
Todas las piezas necesarias están disponibles en nuestra tienda prusa3d.com.
Note that you have to be logged in to have access to the spare parts section.
Preparing the printer
Descarga el filamento de la impresora.
Se recomienda retirar el portabobinas de la impresora.
Mueve el eje Z a la posición central para acceder fácilmente al extrusor desde la parte superior e inferior.
Protecting the heatbed
Apaga la impresora y desenchufa el cable de alimentación de la fuente de alimentación.
Asegúrate de que las piezas de la impresora, tanto el fusor como la base calefactable, se han enfriado hasta la temperatura ambiente.
¡Antes de continuar, te recomendamos proteger primero la cama de calor!
Retira la lámina de acero flexible.
Usa un paño o un trozo de tela que sea lo suficientemente grueso para cubrir la base calefactable. Así te asegurarás de no dañar (rayar) la superficie durante el desmontaje.
Desconectando los cables del hotend
Each connector has a safety latch. It is necessary to press the latch before disconnecting. Otherwise, the connector may get damaged.
Desconecta el cable del calefactor del hotend.
Desconecta el cable del termistor del hotend.
Removing the hotend
Removing the hotend
Removing the hotend
Remove the hotend cables from the cable channel.
Sujeta el hotend con la mano.
Utiliza la otra mano para aflojar los dos tornillos de pulgar. No es necesario retirarlos por completo, basta con darles unas vueltas.
Extrae el conjunto del hotend del disipador térmico.
Hotend assembly parts preparation
Para los siguientes pasos, por favor prepara:
MK4S Hotend assembly (1x)
The MK4S hotend assembly has a Nextruder Silicone Sock installed by default. It is optional, and you can remove it at any time.
For more information, read the article Nextruder Silicone Sock.
Inserting the hotend
Locate the corresponding opening on the bottom of the extruder heatsink and insert the hotend into the heatsink.
At the same time, push the hotend cables behind the heatsink fan up towards the electronics.
Empuja el conjunto del hotend hasta el fondo del disipador térmico. Debe haber un espacio de aproximadamente 2 mm entre el disipador y la parte de latón de la boquilla.
While pushing the hotend assembly in, firmly tighten the lower thumb screw and the upper thumb screw.
¡Evita atrapar los cables entre los tornillos y el disipador!
Desde la parte inferior, comprueba que el hotend está orientado correctamente. Debe encajar entre los recortes del carro X.
Guiando los cables del fusor
Localiza el canal de cables detrás de los tornillos de pulgar. Guía primero el cable del termistor del hotend a través del canal. A continuación, inserta el cable del calefactor del hotend.
Guía el cable del ventilador del hotend como puedes ver en la imagen. Empújalo en el canal del cable.
Connecting the hotend
Conecta el termistor del hotend a la ranura superior izquierda de la LoveBoard.
Conecta el calentador del hotend a la ranura negra de la parte superior de la LoveBoard.
Arranging the cables
Arrange all the cables according to the picture (view from above). All cables must be squeezed as close to the extruder body as possible.
Close the Fan-door-cover.
Desliza la Loveboard-cover sobre el extrusor. Y empújala hacia abajo.
¡Ten cuidado de no atrapar los cables!
Cuando la tapa esté correcta y completamente introducida, notarás un ligero "clic" de la pestaña trasera.
Configurando el diámetro de boquilla
This step is important only if you changed your nozzle diameter or type.
Visit the Settings > Hardware menu
Select the Nozzle diameter you are using (e.g. 0.25 / 0.3 / 0.4 / 0.5 / 0.6 / 0.8)
On MK4S, the 0.40mm is the stock nozzle size.
Turn on the silicone sock option if you are using one.
Select a Nozzle type, if you switched switched between the Normal nozzle and a high flow version.
Final check
Final check
Final check
To check if everything is connected correctly go to Control > Temperature > Nozzle Temperature and set it to a temperature above 200°C.
Vuelve a la pantalla principal y comprueba en la barra inferior si sube la temperatura.
That's it!
That's it!
Great job! You just successfully replaced the Hotend assembly on your Original Prusa MK4S.
¿Fue útil esta guía?

Comentarios

¿Todavía tienes preguntas?

¿Todavía tienes preguntas?

Si tienes alguna pregunta sobre algo que no se ha tratado aquí, comprueba nuestros recursos adicionales.
Y si eso no lo soluciona, puedes enviar una petición a [email protected] o mediante el botón que hay más abajo.

Contacta con nosotros