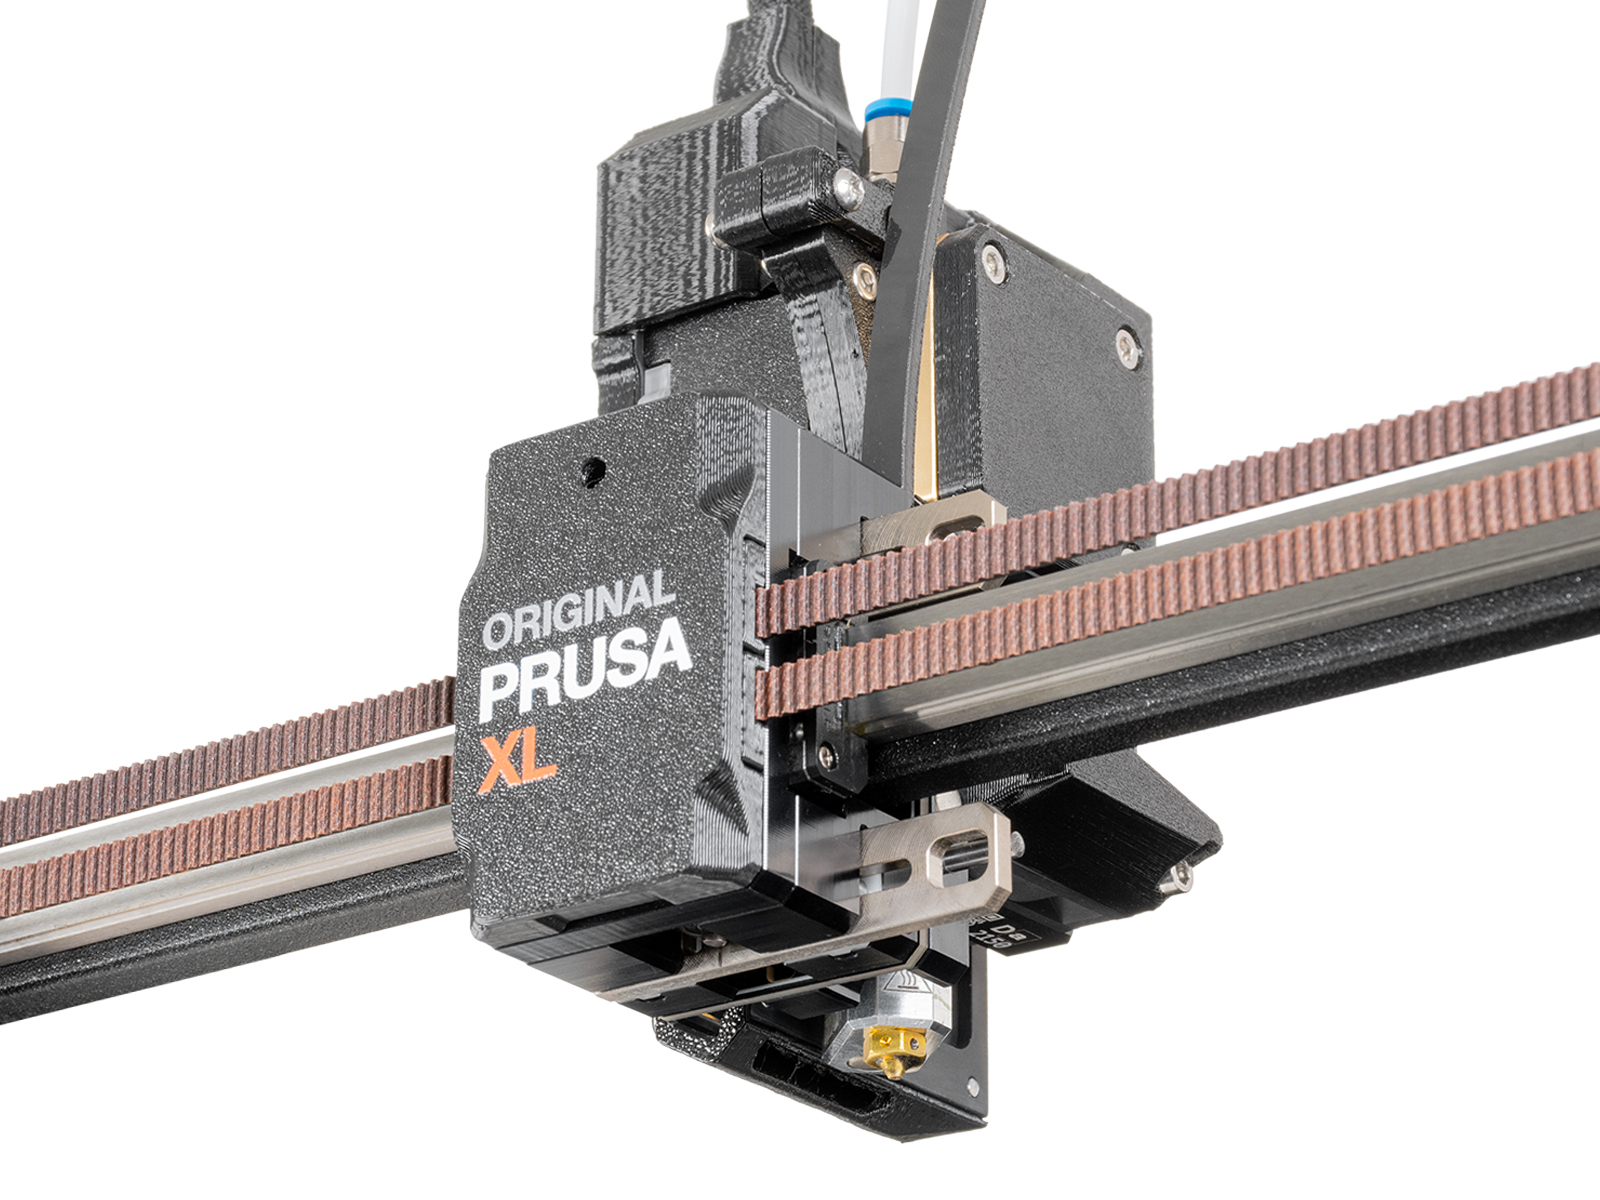
JA
  • English
  • Čeština
  • Español
  • Deutsch
  • Polski
  • Français
Login

How to replace the Prusa Nozzle (XL multi-tool)

How to replace the Prusa Nozzle (XL multi-tool)

How to replace the Prusa Nozzle (XL multi-tool)
Relevant for:
Last updated 13 days ago
How to replace the Prusa Nozzle (XL multi-tool)
 Difficulty
Moderate
 Steps
18
 Available languages
ENCSPLDEESFR

Step 1 Introduction

Introduction
Introduction
This guide will take you through the replacement of the Prusa Nozzle on the Original Prusa XL multi-tool.
To replace the Prusa Nozzle on the Original Prusa XL (single-tool) go to How to replace the Prusa Nozzle (XL single-tool).
To replace the Prusa Nozzle on the Original Prusa MK4 go to How to replace the Prusa Nozzle (MK4).
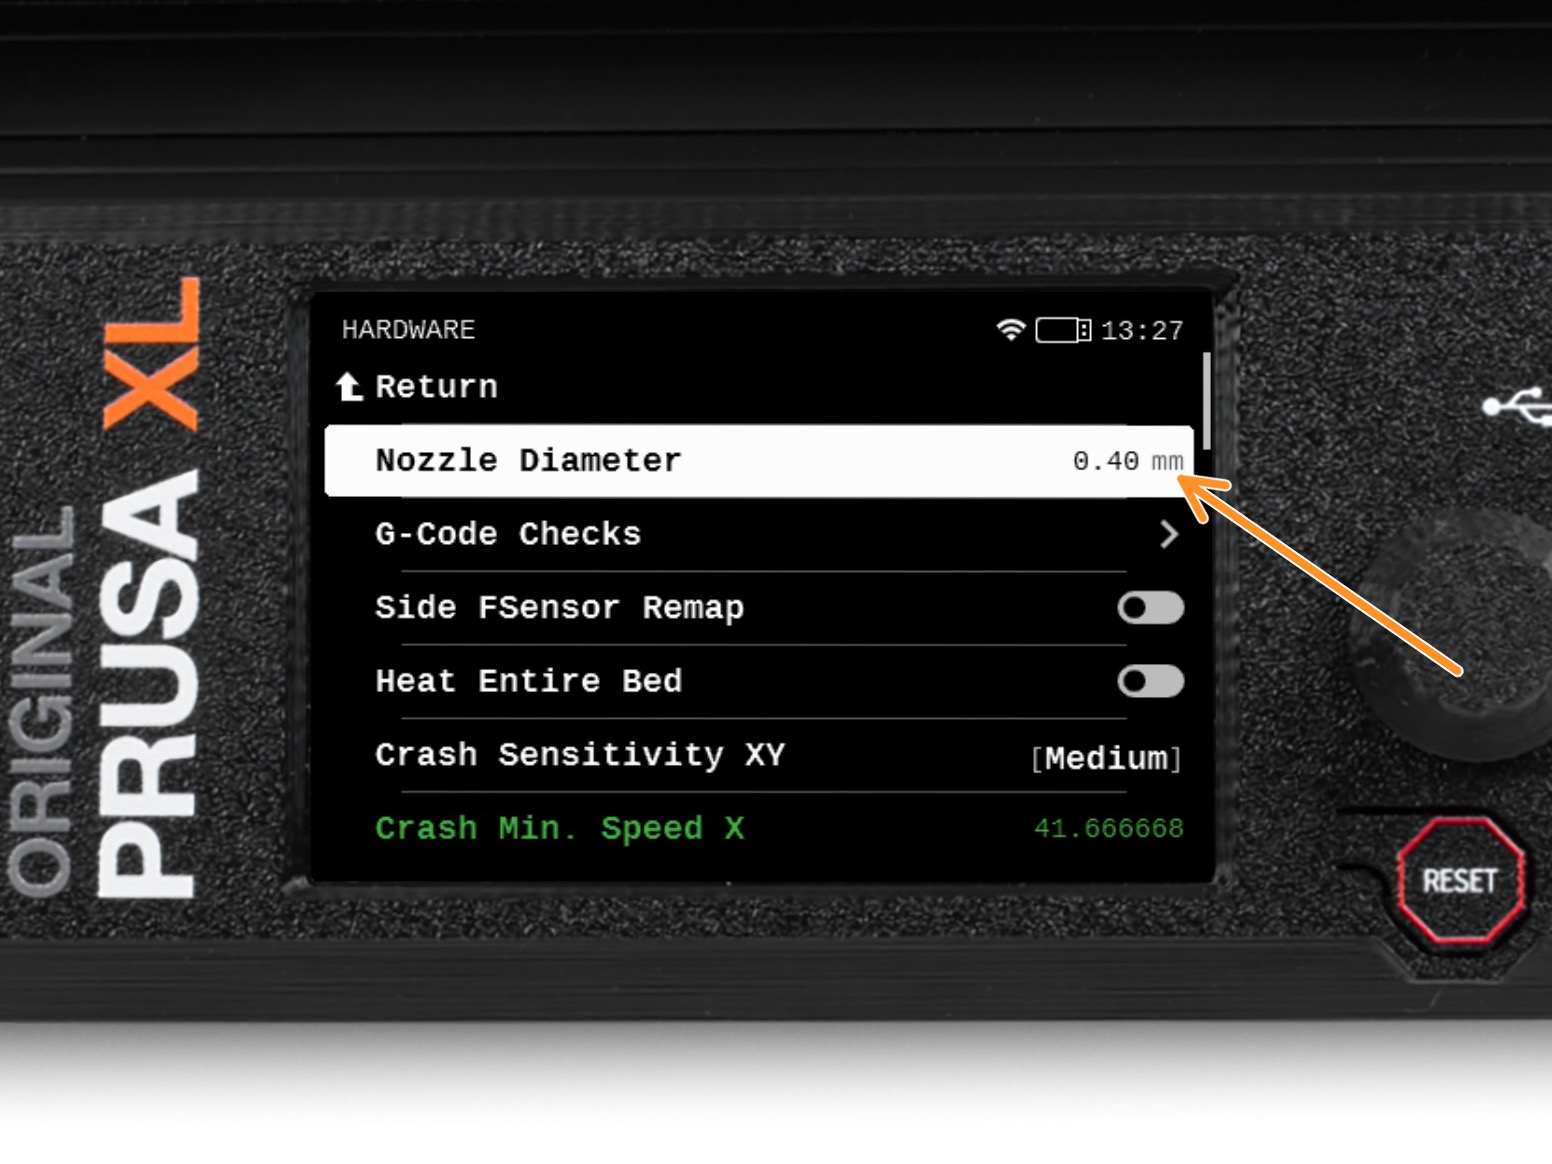
The following instructions are compatible with all Prusa Nozzle diameters.
All necessary parts are available in our eshop prusa3d.com.
Note that you have to be logged in to have access to the spare parts section.

Step 2 Necessary tools

Necessary tools
Necessary tools
Necessary tools
Necessary tools
For this guide, please prepare:
TX 8 Torx key
Wrench 13-16
Universal wrench
A cardboard box for use as a heatbed protection during the assembly. Hint: use the Prusament box.
Small brass brush for cleaning the nozzle

Step 3 Preparing the printer

Preparing the printer
On the printer screen, navigate to Control ->Pick/Park Tool ->Pick tool, and select the tool that has the nozzle to be changed.
Move the extruder approximately to the center of the X-axis.
If you have loaded the filament, unload it from the hotend. On the screen, navigate to Filament -> Unload Filament.
WARNING: The hotend and heatbed are very HOT. Do not touch these parts!!!
Remove the filament from the hotend. It is not necessary to completely remove it from the printer. Just a few centimeters (inches) above the extruder.

Step 4 Cleaning the hotend

Cleaning the hotend
Cleaning the hotend
Cleaning the hotend
Cleaning the hotend
WARNING: The hotend and heatbed are very HOT. Do not touch these parts!!!
次のステップでは、ヒーターブロックとホットエンドをフィラメントゴミからきれいにしておく必要があります。そうしないと、ノズルを外すのが難しくなります。
If you have a Prusa hotend sock on the hotend, remove it.
On the printer screen, go to Preheat and select the latest used material. (e.g. ABS)
Wait at least 5 minutes. The remains of the filament must be warmed up slightly so that they can be removed more easily.
Using the brass brush, carefully clean the heaterblock and the hotend from the filament residue. Avoid contact of the brush with the hotend cables, as this could cause a short circuit.
When the heaterblock and the hotend are perfectly clean, cool down the printer. On the screen, navigate to Preheat -> Cooldown.
Wait until the hot parts are cooled down to ambient temperature. It takes approximately 10 minutes.

Step 5 Parking the tool

Parking the tool
Parking the tool
Parking the tool
On the printer screen, navigate to Control ->Pick/Park Tool ->Park Current Tool.
Turn the power switch OFF (symbol "O").
From the rear side of the printer, unplug the PSU cable.

Step 6 Protecting the heatbed

Protecting the heatbed
Before you proceed, it is recommended to protect the heatbed.
Make sure the heatbed is cooled down to ambient temperature. Place the empty cardboard box approximately to the front center part of the heatbed.

Step 7 Removing the Nextruder

Removing the Nextruder
Remove the Nextruder, by pulling it outwards from the metal inserts.
Although a small resistance is expected, as the metal inserts are magnetic, use moderate force.
Carefully place the Nextruder on the cardboard box.

Step 8 Disconnecting the hotend

Disconnecting the hotend
Loosen the M3x12 screw to open the dwarf-cover-door.
Each connector has a safety latch. It is necessary to press the latch before disconnecting. Otherwise, the connector may get damaged.
Disconnect the hotend thermistor cable.
Disconnect the hotend heater cable.
Leave both cables free for now.

Step 9 Removing the hotend

Removing the hotend
Removing the hotend
Removing the hotend
Insert the Torx TX 8 key all the way through the Tool Plate until it reaches the grub screw in the extruder. Loosen the screw. Do not remove the screw, a few turns are enough!
Carefully pull the hotend assembly out of the extruder.
At the same time push the hotend cables behind the fan out of the extruder.

Step 10 Prusaノズルの取り外し

Prusaノズルの取り外し
Prusaノズルの取り外し
Prusaノズルの取り外し
万能レンチX 13-16の13mmの切り込みを使ってヒーターブロックをつかみます。
ユニバーサルレンチYの7mmの切り込みを使ってノズルをつかんで、緩めます。
Manually release and remove the Prusa Nozzle from the hotend assembly.

Step 12 Installing the Prusa Nozzle

Installing the Prusa Nozzle
Insert the nozzle all the way into the heaterblock until the nozzle touches the heaterblock surface.
Grasp the heaterblock with the wrench 13-16.
ユニバーサルレンチYの7mmの切り込みを使ってノズルをつかんで、緩めます。余計な力を入れないよう気をつけてください。
The specified torque value is 1.5 Nm (13.3 lb-in).

Step 13 Inserting the hotend

Inserting the hotend
Push the hotend cable behind the heatsink fan up to the electronics.
Locate the hole in the heatsink from the bottom of the extruder and insert the hotend nub into the heatsink.
Push the hotend all assembly the way in.
Rotate the heaterblock as in the picture. There must be approximately 35° - 40° angle to avoid damaging the hotend cables. (picture of angle)
Maintain the position and using the TX 8 Torx key tighten the grub screw to secure the hotend. Do not use extra force while tightening, it may damage the hotend tube.

Step 14 Connecting the hotend

Connecting the hotend
Connect the hotend heater to the upper slot on the electronics board.
Connect the hotend thermistor to the lower slot on the electronics board.
Tighten the M3x12 screw and close the dwarf-cover-door.
Remove the cardboard box from the heatbed.

Step 15 Docking the Nextruder

Docking the Nextruder
Take the Nextruder and place it carefully next to the dock.
Place the two metal inserts through the white holes in the dock. The magnets will help you dock the Nextruder.
Check that the Nozzle seal lightly touches the nozzle.

Step 16 Final check

Final check
Final check
Final check
Final check
To check if everything is connected correctly go to Preheat and select any of the material temperatures (e.g. ABS with 255°C on hotend)
Go back to the main screen and watch on the bottom bar to see if the temperature rises.
Before you proceed to the next step, cool down the printer. On the screen, navigate to Preheat -> Cooldown.
Wait until the hot parts are cooled down to ambient temperature. It takes approximately 10 minutes.

Step 17 Setting the nozzle diameter

Setting the nozzle diameter
If you have replaced your nozzle twith the one having a different diameter, you have to change the nozzle diameter setting in the printer’s menu too.
Go to Settings > Tools > Tool > Nozzle Diameter and set it to the corresponding size.
When slicing in PrusaSlicer, make sure to have the correct nozzle diameter selected in the Printer: menu.
To add other nozzle diameter versions of the printer profile in PrusaSlicer, hit the small cog icon and select Add/Remove Presets. Then, select the nozzle diameters you are going to use.

Step 18 It's done

It's done
It's done
That's it, good job! You just successfully installed the Prusa Nozzle on your Original Prusa XL.
Was this guide helpful?

Comments

Still have questions?

Still have questions?

If you have a question about something that isn't covered here, check out our additional resources.
And if that doesn't do the trick, you can send an inquiry to [email protected] or through the button below.

Contact us