What happened?
The printer displays the message "Failed to home the Z-axis, make sure the loadcell is working".
Error name: Homing error Z
Error code: #17301
How to fix it?
Check if the nozzle is not loose
On single-tool XL, after removing the x-carriage cover, hold the heater block (make sure that the nozzle is not heated!), and use the Torx TX8 key as shown in the picture to tighten the set screw. Do not use extra force while tightening, it may damage the hotend tube. The nozzle must be approximately at a 35°-40° angle to avoid damaging the hotend cables.
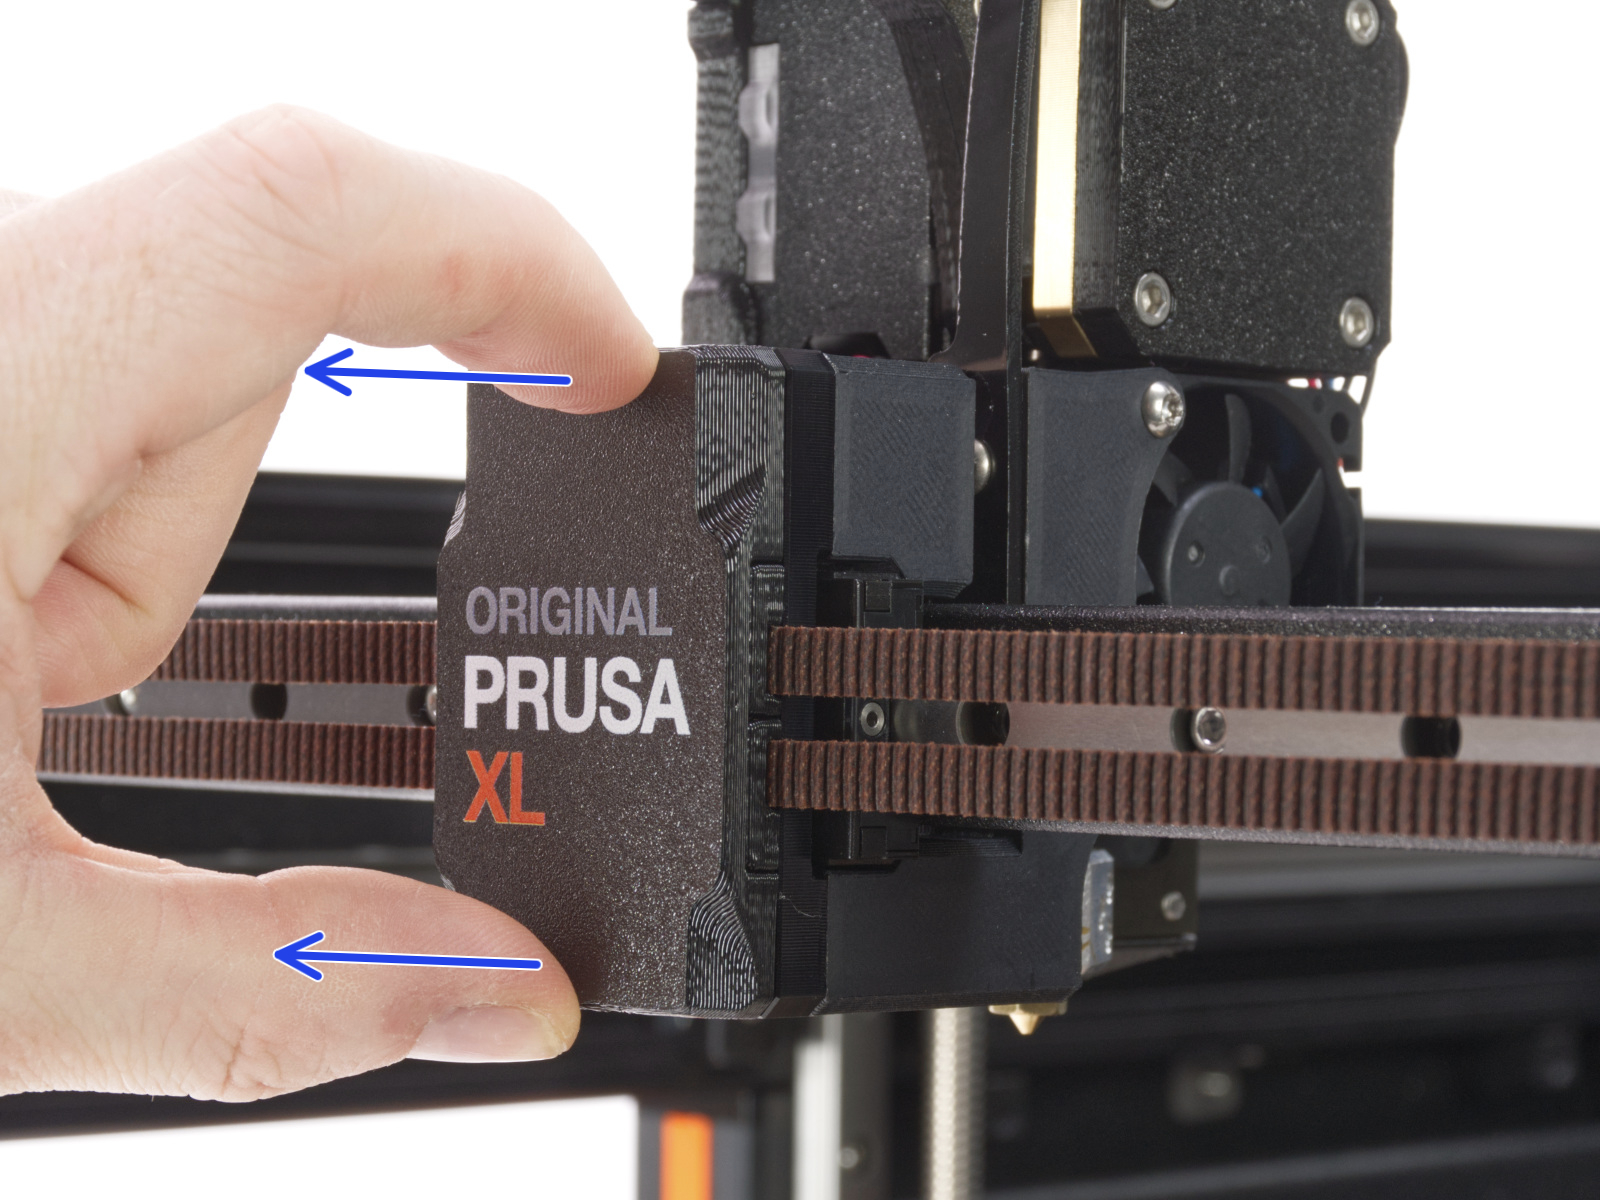 |  |
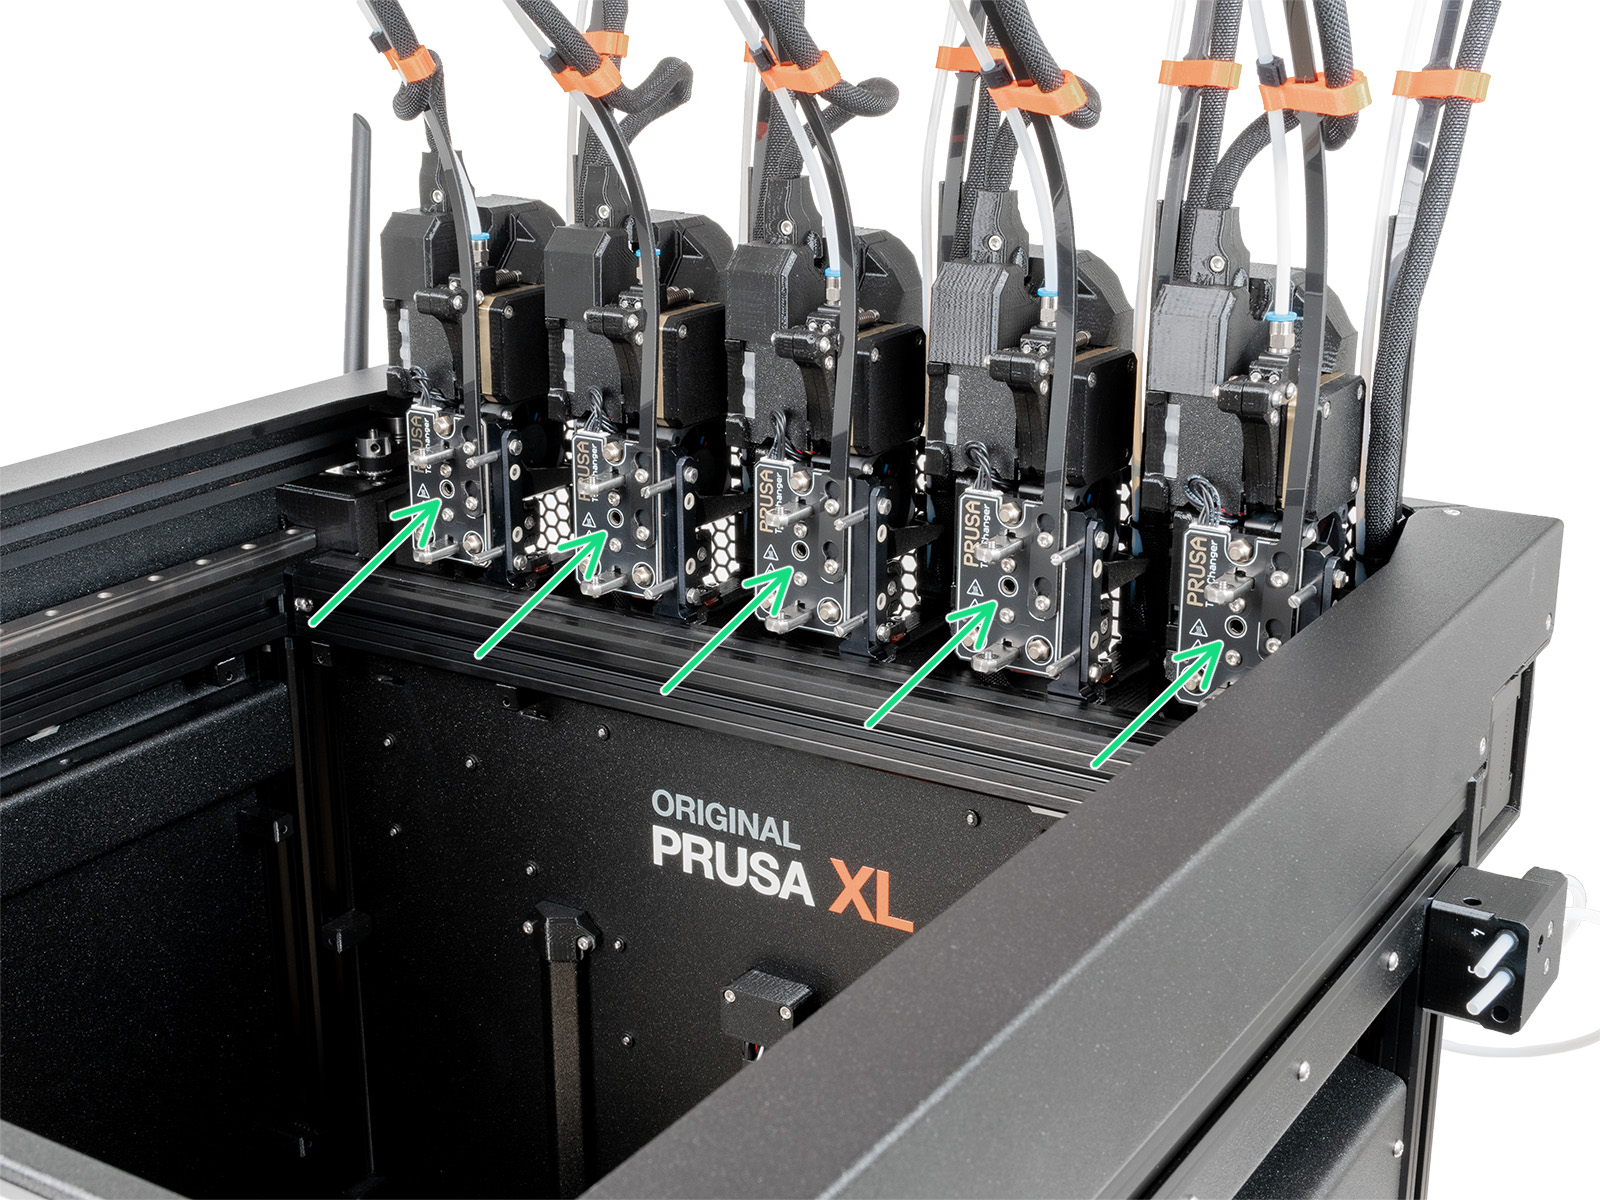
On multi-tool XL, identify the tool that has the nozzle to be checked, and park it. Hold the heater block (make sure that the nozzle is not heated!), and use the Torx TX8 key in the part shown in the picture to tighten the set screw. Do not use extra force while tightening, it may damage the hotend tube. The nozzle must be approximately at a 35°-40° angle to avoid damaging the hotend cables.
Once this is done, with the printer still cold and off, check whether the heater block has any rotational play. If the heater block can rotate:
- Check nozzle tightening from the previous steps once more.
- Check whether the nozzle and heater block have a loose joint. If needed, follow the nozzle replacement guide as a reference for temporarily extracting the hotend and retightening the nozzle.
Test the loadcell
A fault in the loadcell can trigger a homing error. Ensure that the printer is fully cooled down, go to LCD Menu - Control - Calibration and test - Loadcell test.
During the test, you will be asked to tap the nozzle at a specific time, and a progress bar on top of the screen will be filled. If the progress bar is not filled or the printer shows any errors, please contact our customer support.
Reduce vibrations
Any form of vibration propagated to the surface under the printer, or a not fully stable surface under the printer might cause a false reading on the loadcell, causing the homing error to trigger.
A printer that is in operation next to your Original Prusa XL can be a possible cause of vibrations. An easy solution to dampening the noise and vibration of a printer is to add some additional padding underneath the printer.
2 comments