- Čeština
- Español
- Italiano
- Deutsch
- Polski
- Français
- 日本語
- Home
- Calibration
- Basic calibration
- Selftest Failed (MK4)
Selftest Failed (MK4)
- Basic calibration
- Failing Z calibration (MK3S/MK2.5S)
- First Layer Calibration (i3)
- First Layer Calibration (MINI/MINI+)
- Full system refresh Original Prusa i3
- Gearbox alignment (MK4)
- Idler screw tension
- Live adjust Z
- Mesh bed leveling
- MMU2S Setup and Inspection
- MMU3 Setup and inspection
- Multi-tool manual calibration (XL)
- Selftest (SL1)
- Selftest failed (MINI/MINI+)
- Selftest failed (MK2/S, MK2.5, MK2.5S)
- Selftest failed (MK3.5)
- Selftest failed (MK3/MK3S/MK3S+)
- Selftest Failed (MK4)
- What it tests
- Troubleshooting
- Temperature Calibration
- XYZ Calibration (MK2.5/MK2.5S)
- XYZ Calibration (MK2/S)
- XYZ Calibration (MK3/MK3S/MK3S+)
- XYZ Calibration details
- Advanced calibration
- Calibration Error Messages
When you first turn on your Original Prusa MK4/MK3.9 printer, it will start a selftest to verify the most common components of the printer.
What it tests
The printer goes through the following procedures:
- Hotend fan check
- Print fan check
- Switched fans check
- Loadcell test
- X-axis check
- Y-axis check
- Z-axis check
- Nozzle heater check
- Heatbed heater check
- Gearbox alignment
- Filament sensor test
The Loadcell test, Gearbox alignment, and Filament sensor test need user input, so stay near the printer for these parts of the selftest.
Troubleshooting
Fans
During the fans test, the RPM of each fan is shown on the bottom of the screen. Check and take note of the values. The expected maximum values are in the range of 7500-8000 RPM for the heatsink fan, and 5500-5900 RPM for the print fan.
In case one of the fans fails the selftest, verify if there is nothing blocking the rotation of the fans, as debris might get between the blades. Bigger parts can be cleared with tweezers, and dust can be cleared with a computer cleaner spray.
Hold the fan with your hand while using the compressed air. Otherwise, you might damage the blades.
Loadcell
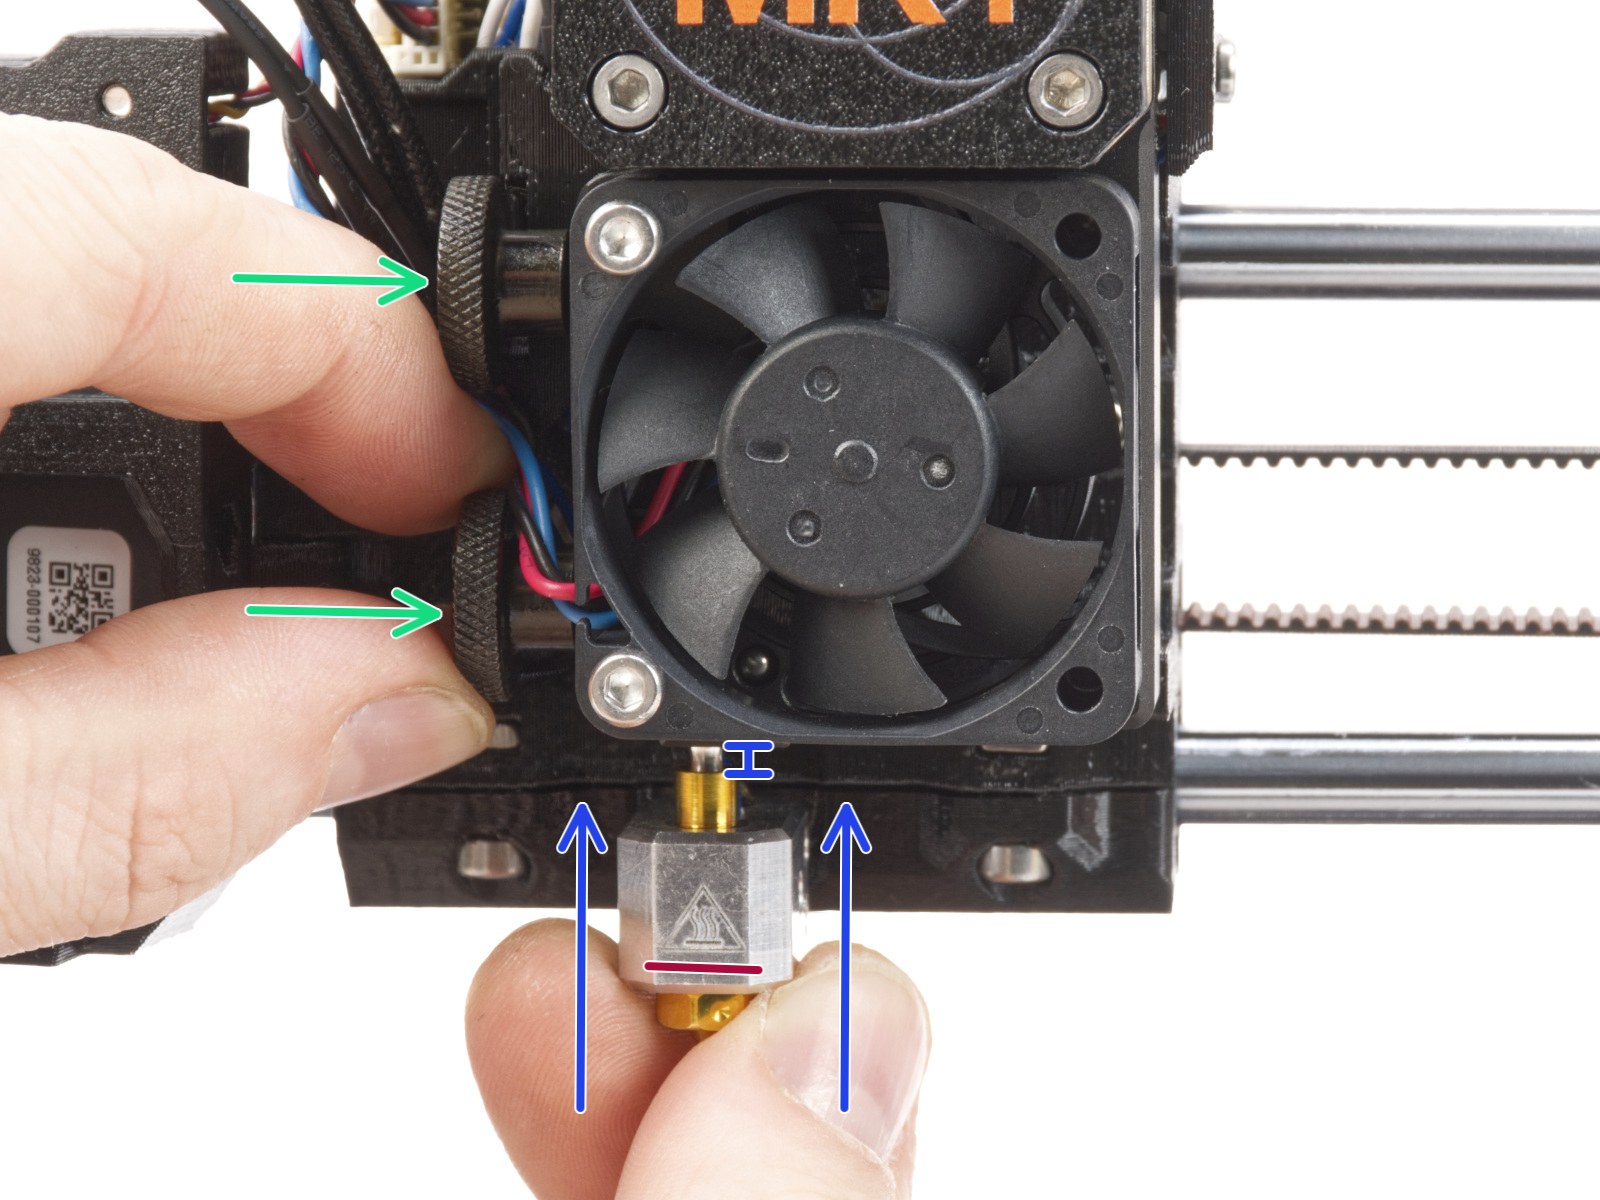
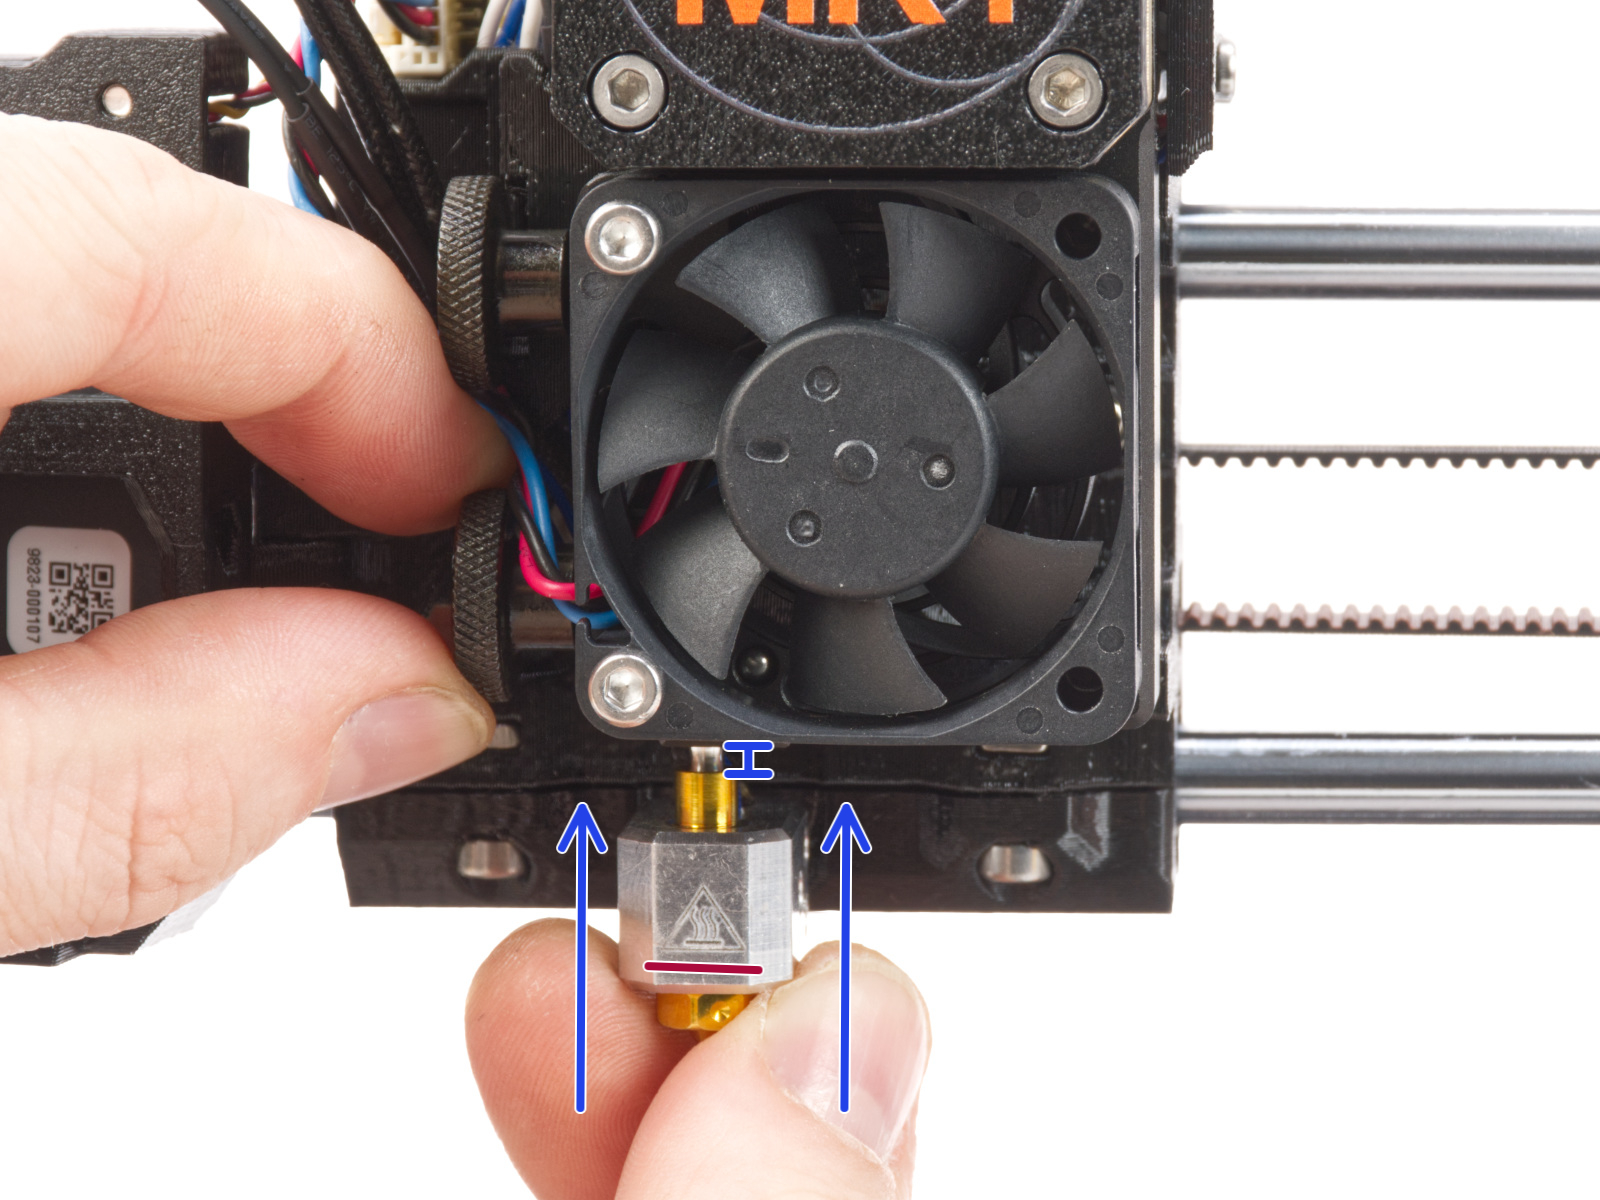
The nozzle on the Nextruder has to be at the correct height and tightened. To check this aspect, loosen the thumb screws (do not completely remove the screws, a few turns are enough) on the side of the heatbreak, and push the nozzle up. Tighten the thumb screws just by hand, do not use any tools.
If you have a Nozzle Adapter, check the installation again to make sure that the nozzle has not been lowered or loosened with the installation of the adapter.
Some of the Nextruder bolts, if too tight, might generate extra forces that can be sensed by the loadcell, skewing its readings, hence potentially causing an error. Check if slightly loosening the following bolts, while having the parts still tight and secured in place, can solve the issue:
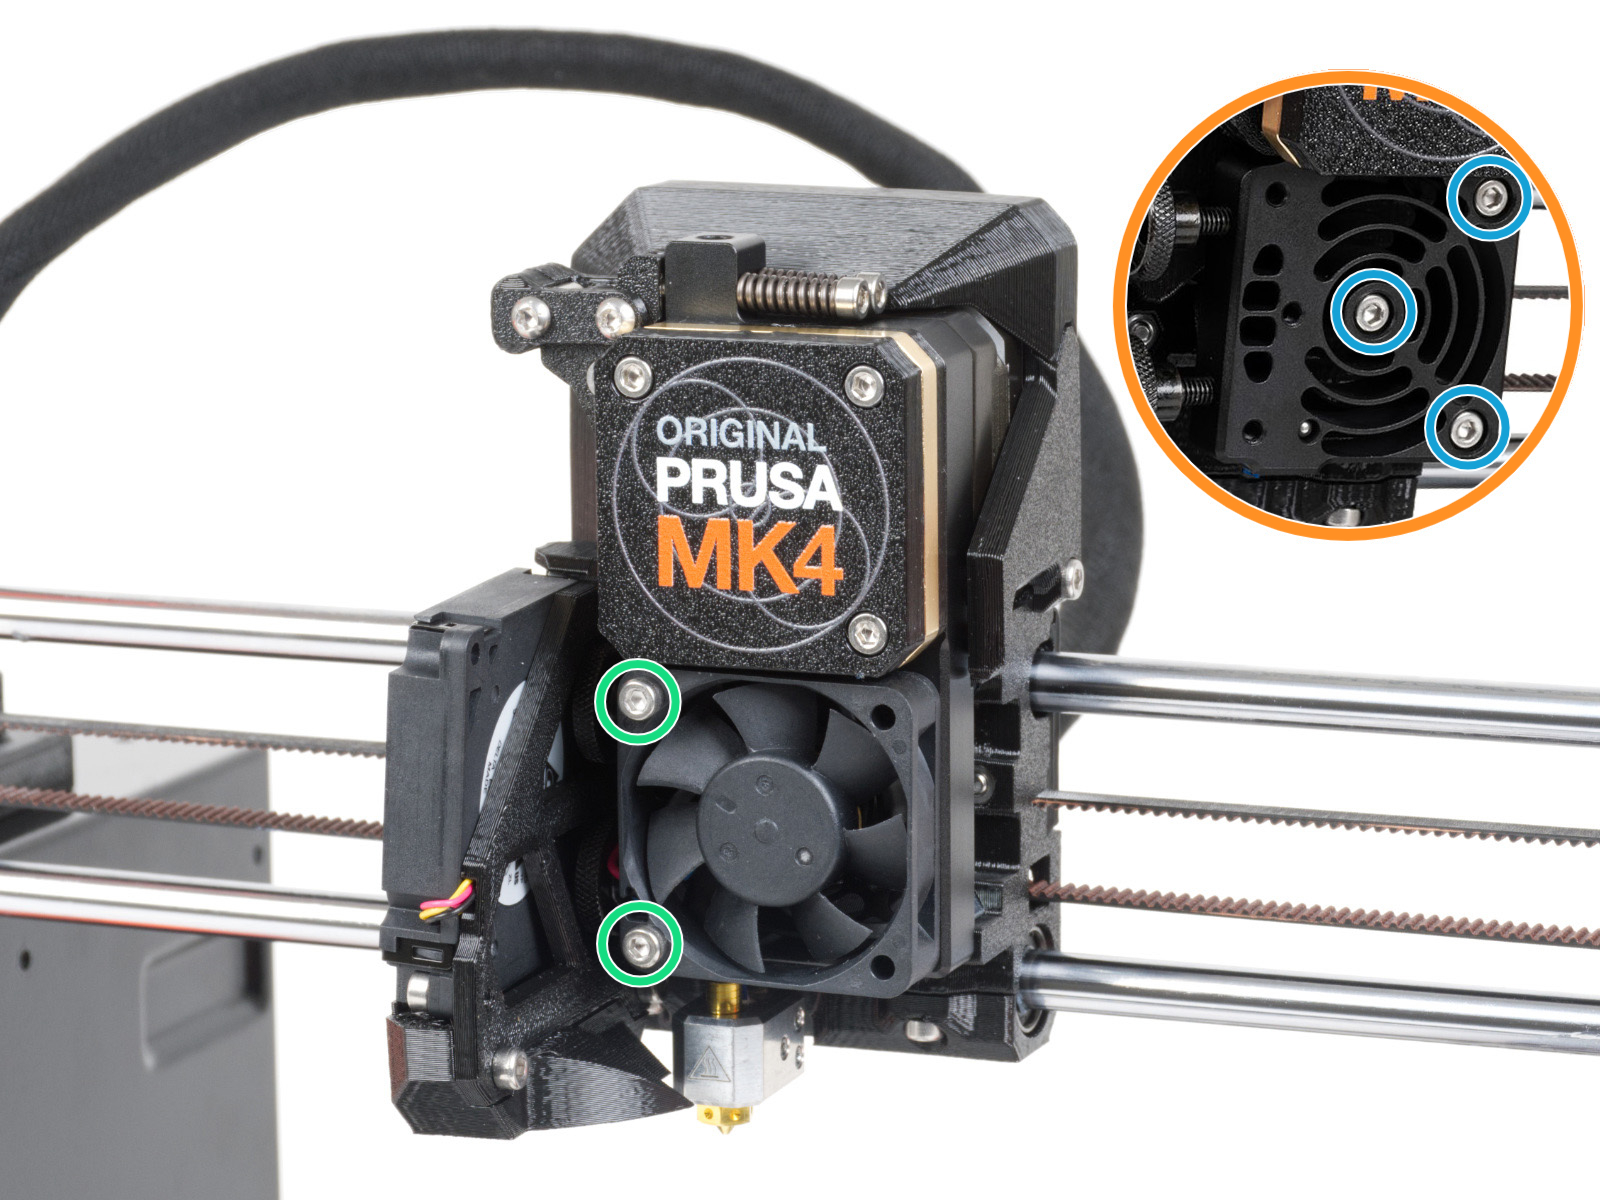
- Slightly loosen the two bolts holding the hotend fan. If this doesn't solve the issue, proceed to the next step.
- Temporarily remove the hotend fan by removing the previously adjusted bolts. This will expose the heatsink/loadcell. Then, loosen very slightly the three bolts that hold the heatsink/loadcell in place.
During the Loadcell test, you will be asked to tap the nozzle at a specific time. In case you do not tap the nozzle, the printer will restart the loadcell test.
If the Loadcell is being triggered too soon, make sure that you are not touching any other part of the extruder other than the nozzle.
X/Y Axes
In case of a failure in the X or Y axis, check the following:
- Make sure that nothing is blocking the axis path.
- Turn off the printer and move the axis by hand. It should be moved easily.
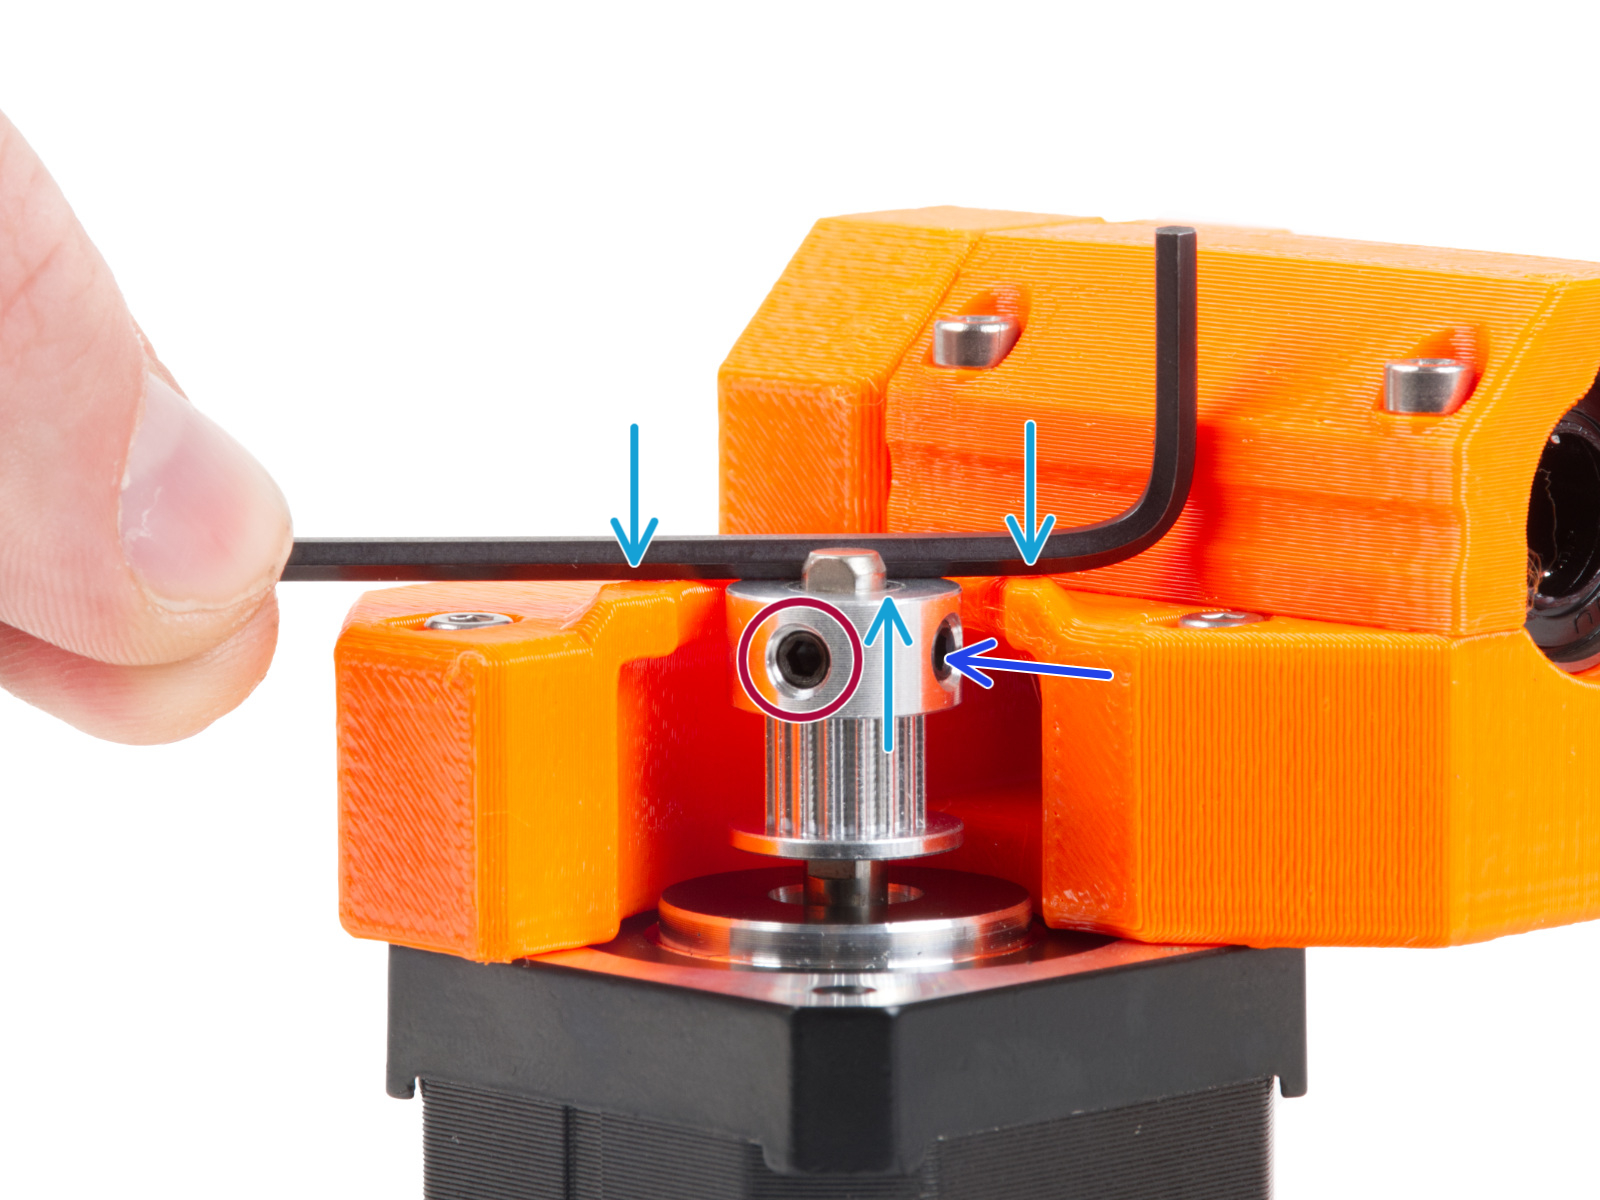
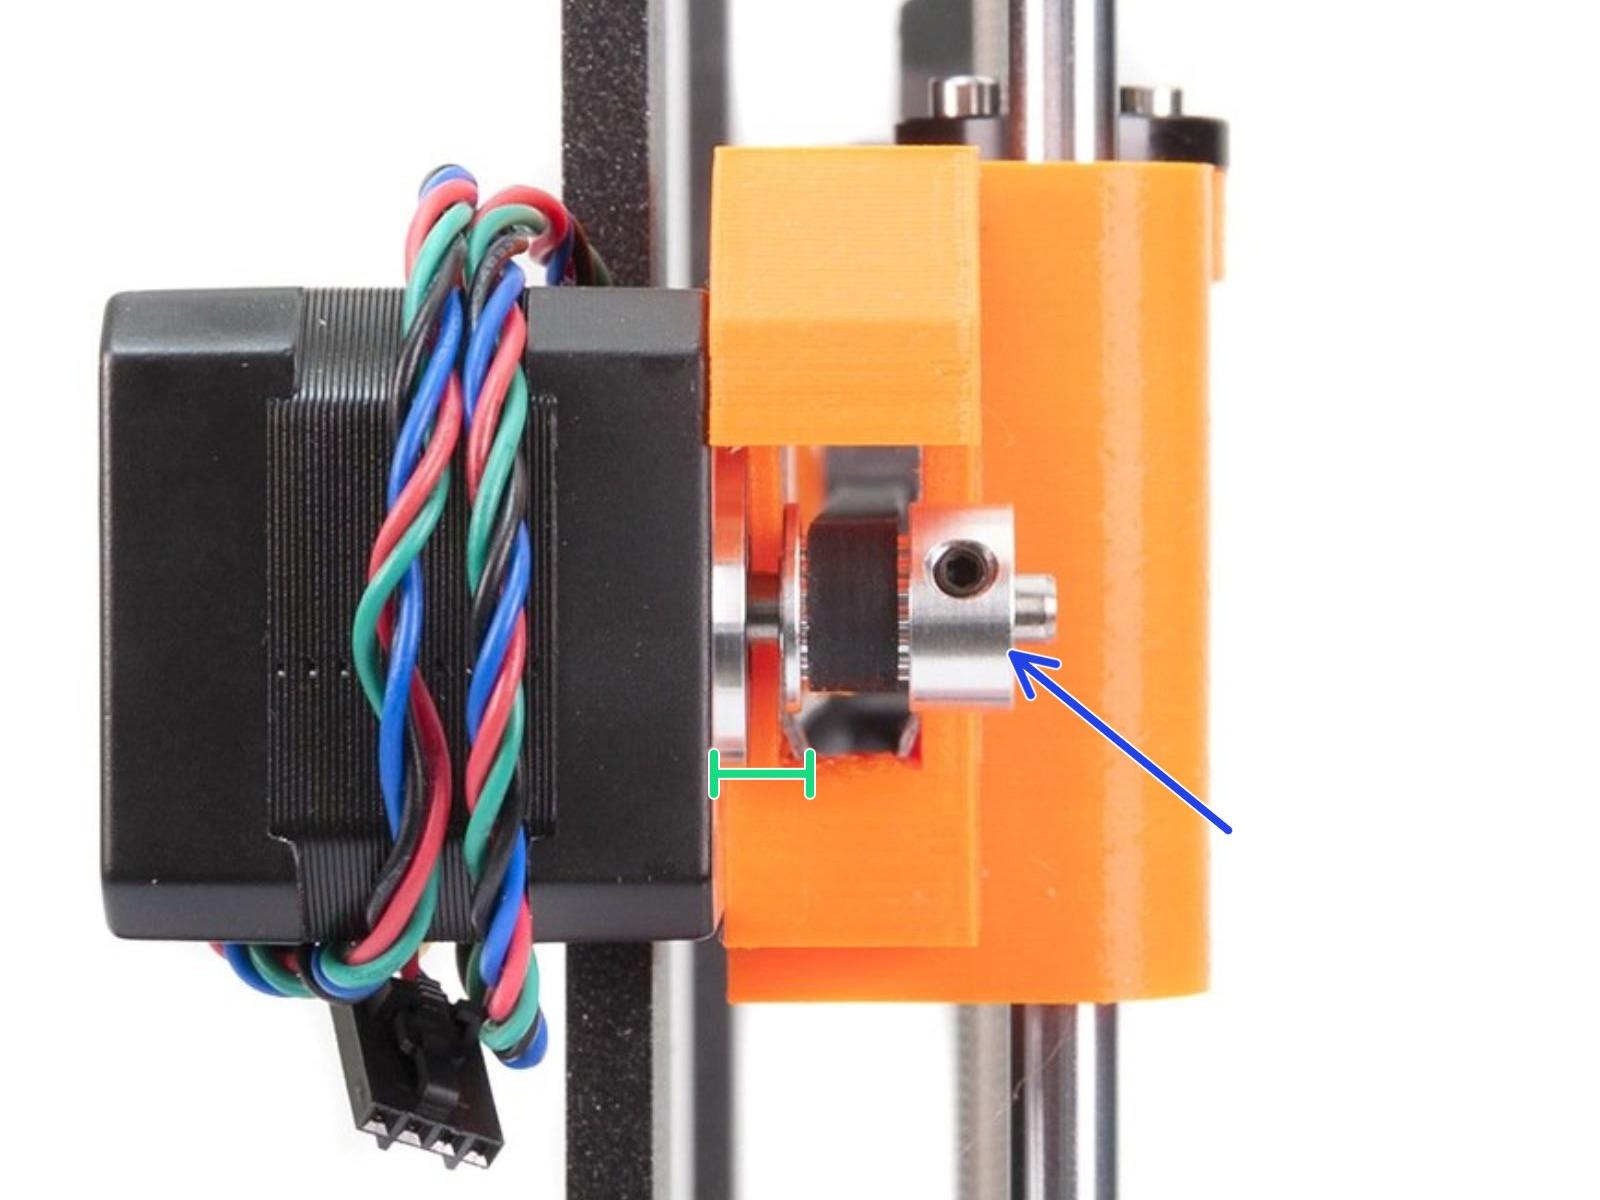
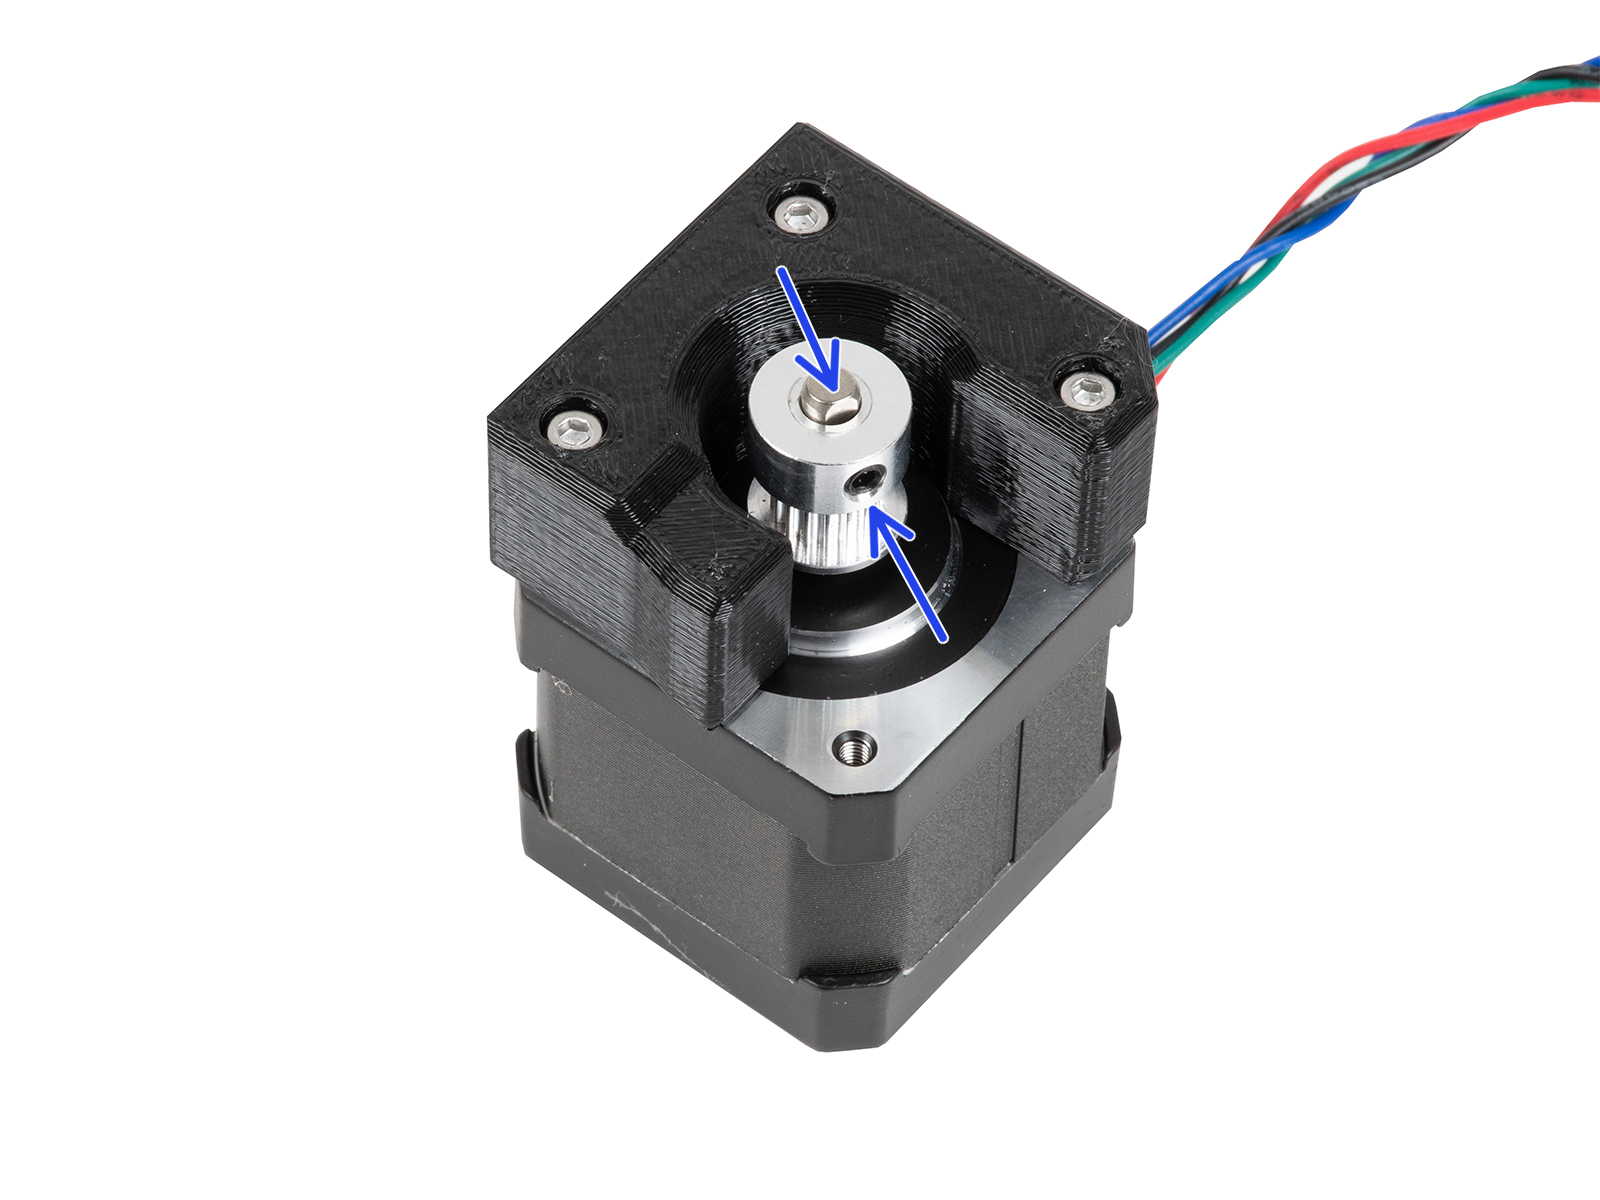
- Check the belt pulleys on the X and Y motor shafts. One of the set screws must be firmly tightened over the flat part of the motor shaft, there should be a small gap between the motor and the pulley, and they need to be in the correct orientation and position.
 |  |
| Correct X-axis pulley orientation and position. | Correct X-axis pulley orientation and position. |
 | 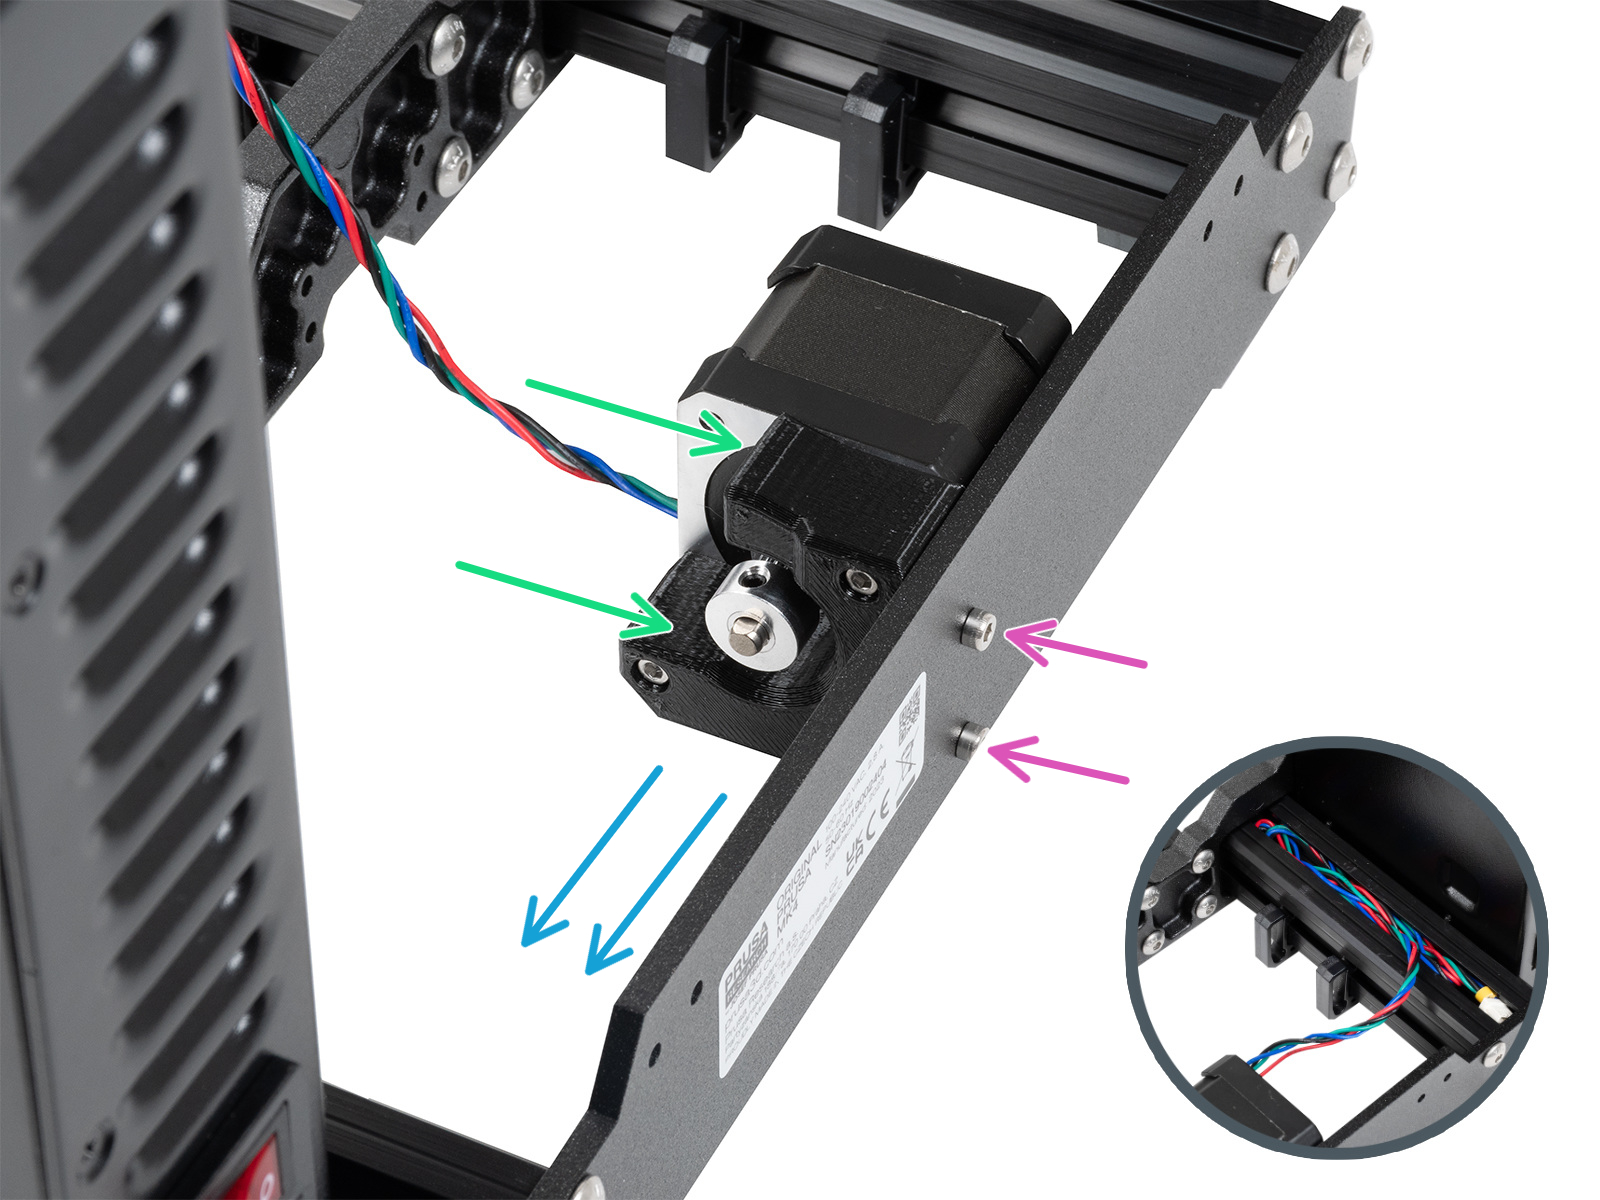 |
| Correct Y-axis pulley orientation and position. | Correct Y-axis pulley orientation and position. |
- Check if the belts aren't loose or too tight, as they might skip on the teeth of the belt pulley.
- Check the position of the linear bearings.
- X-axis, check the position of the bottom bearings.
 | 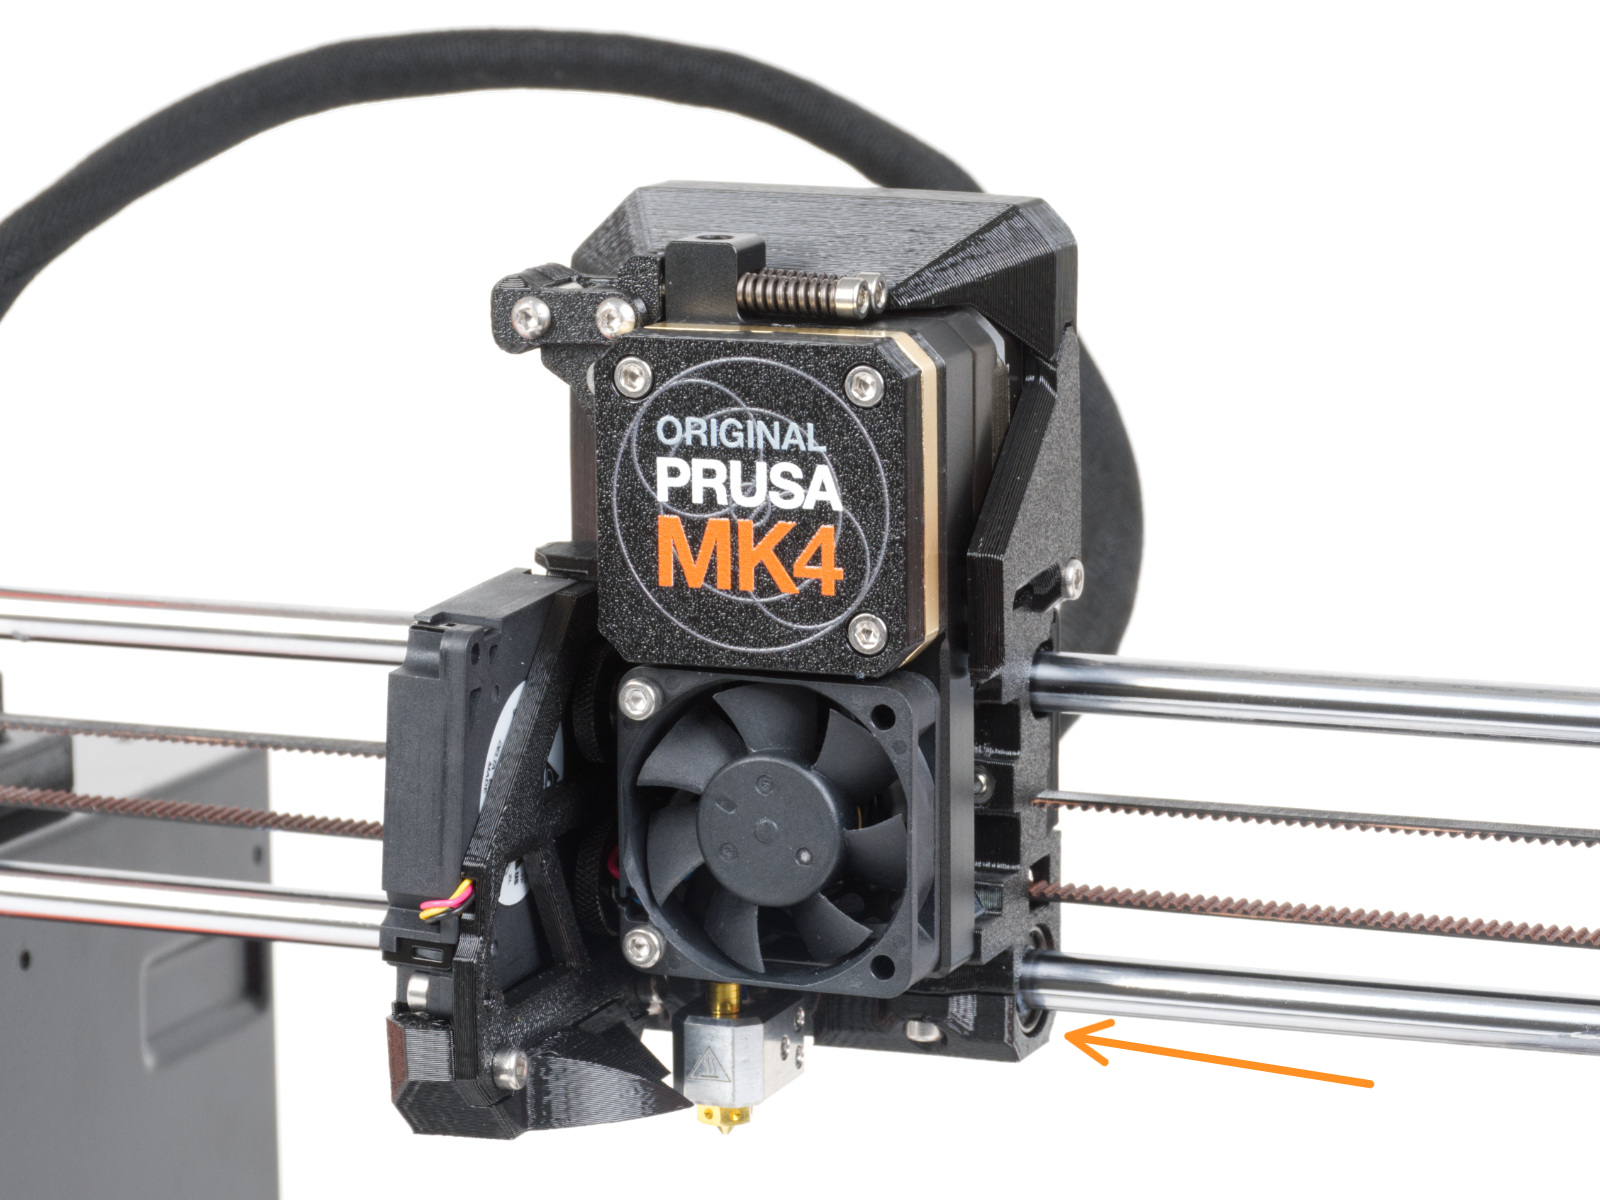 |
-
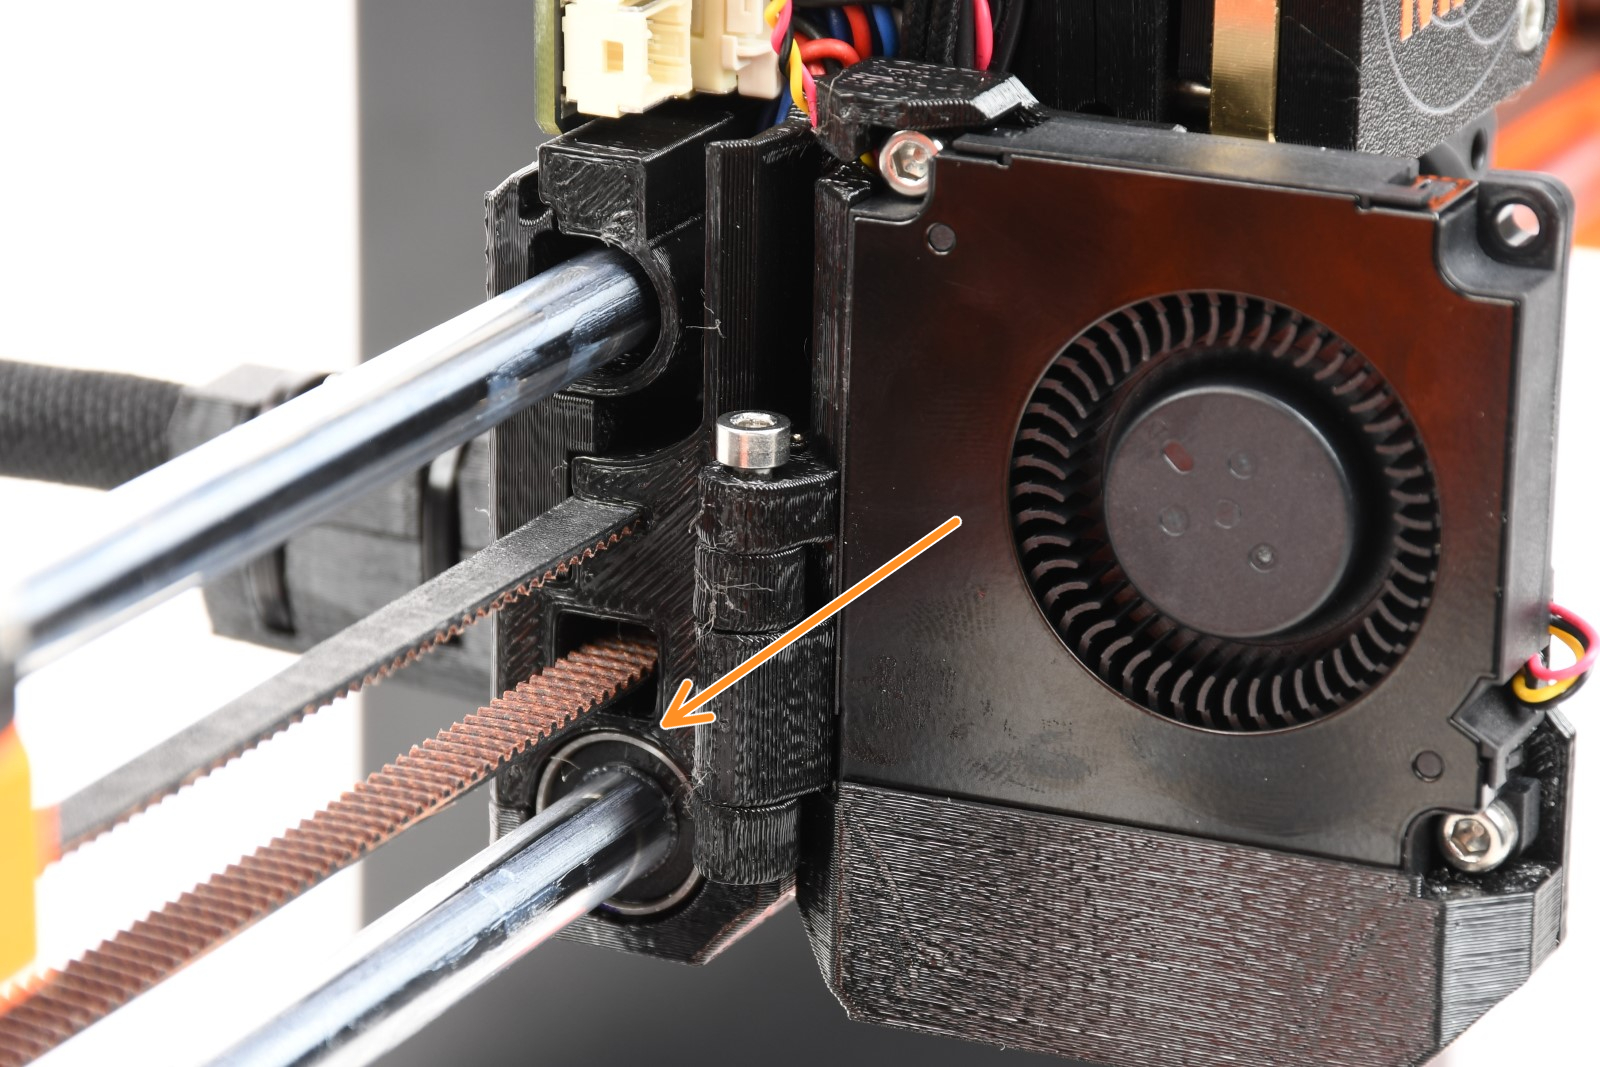
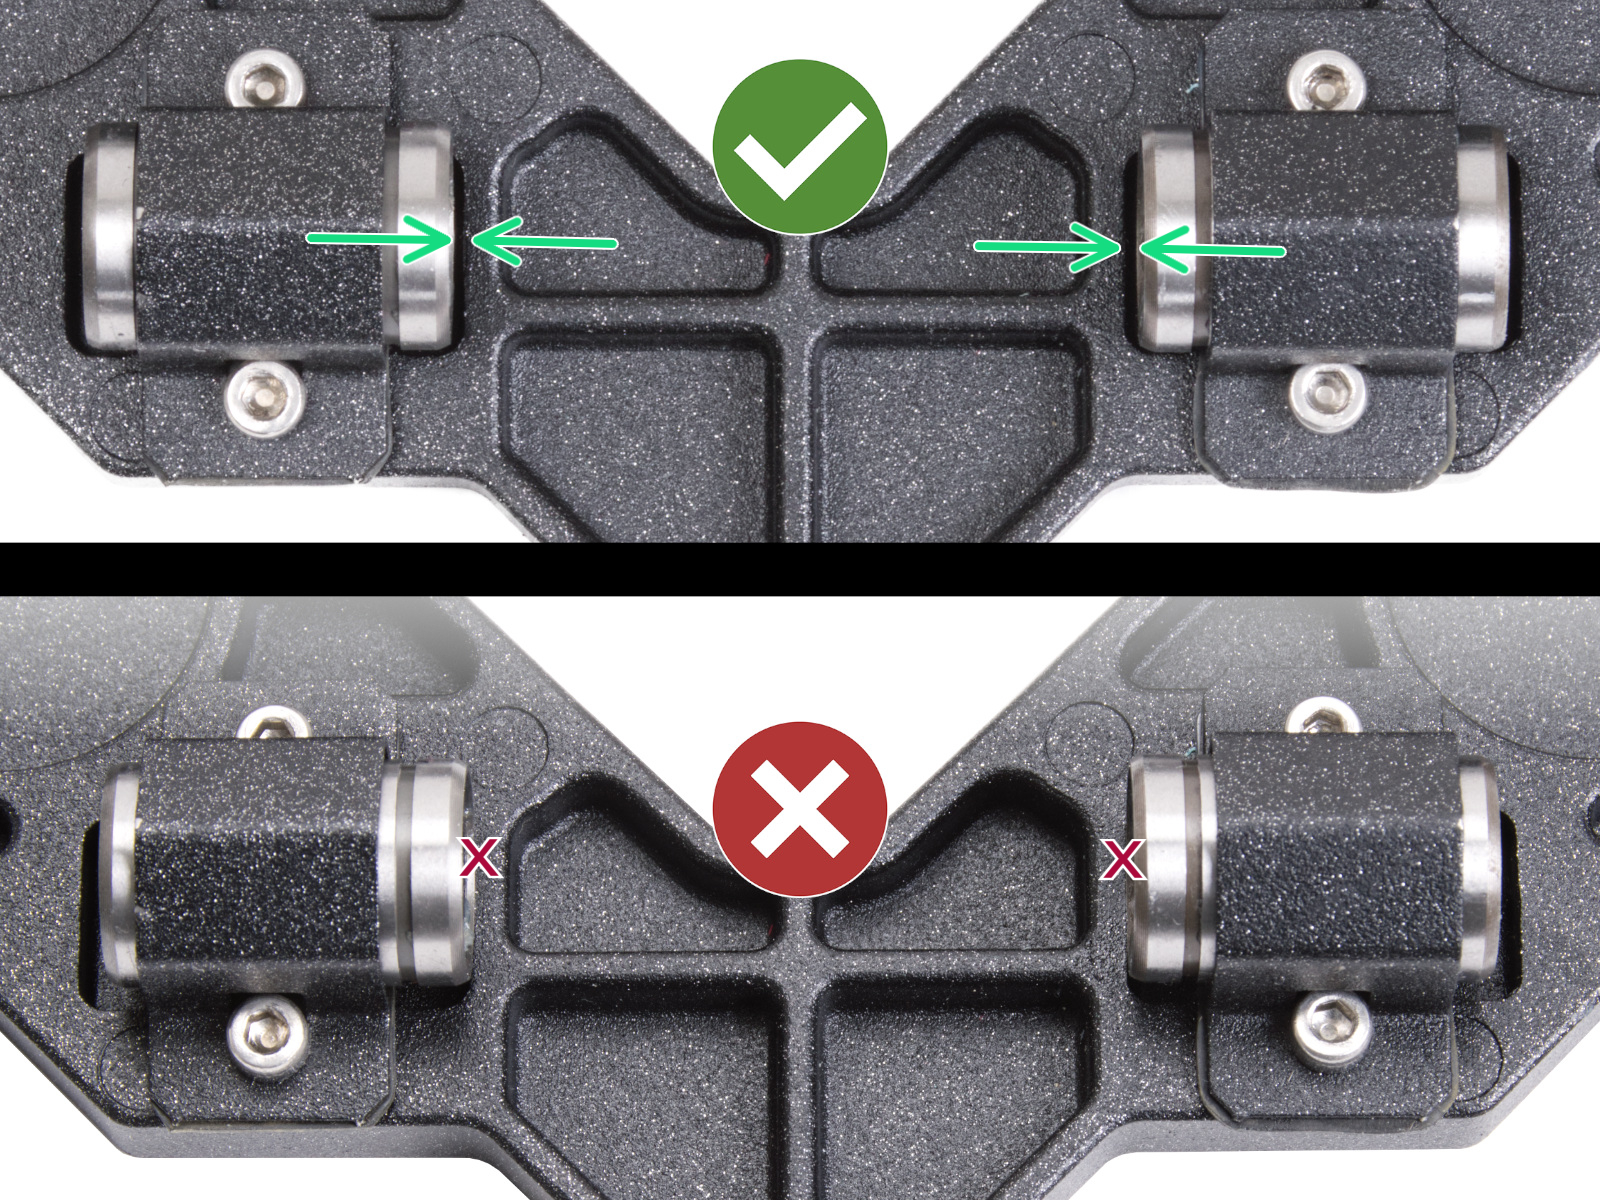
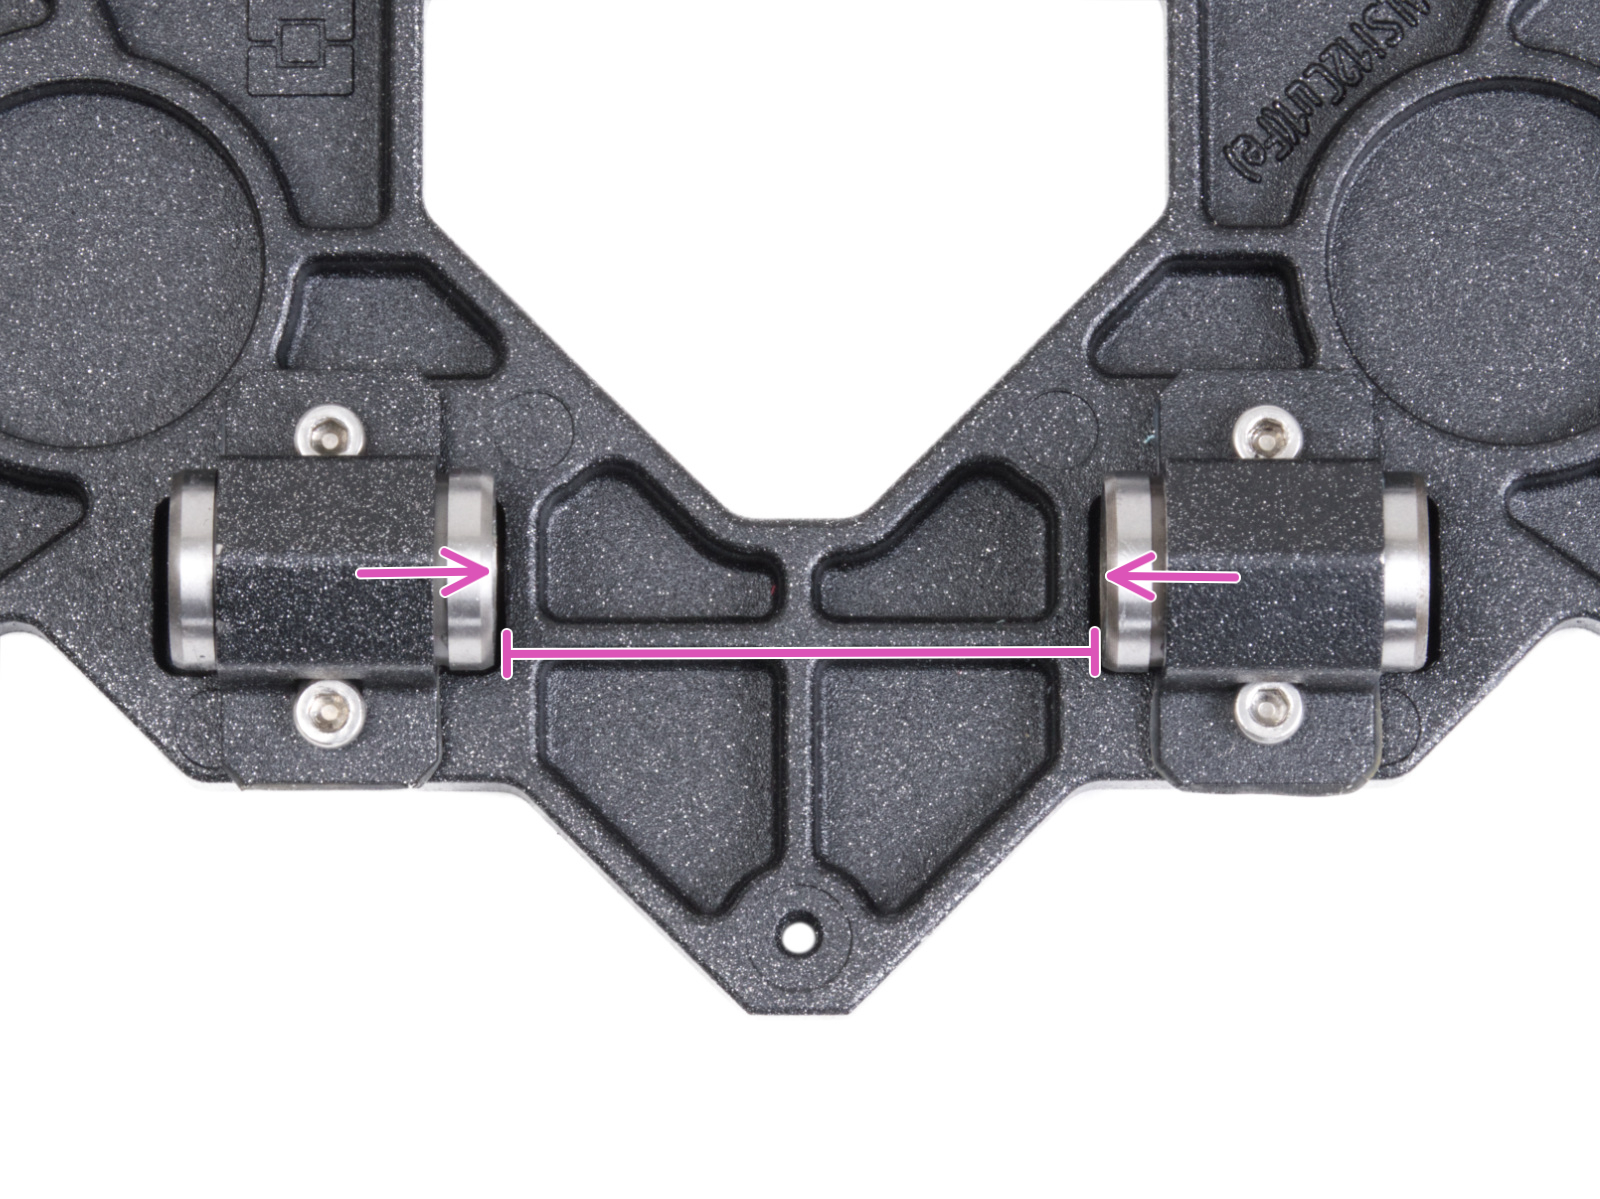
- Y-axis, check the position of the bearings in the Y-carriage, and that the distance between the bearings is 46.5mm.
 |  |
- Clean and lubricate the smooth rods, using moderate quantities of Prusa Lubricant (lithium-based grease).
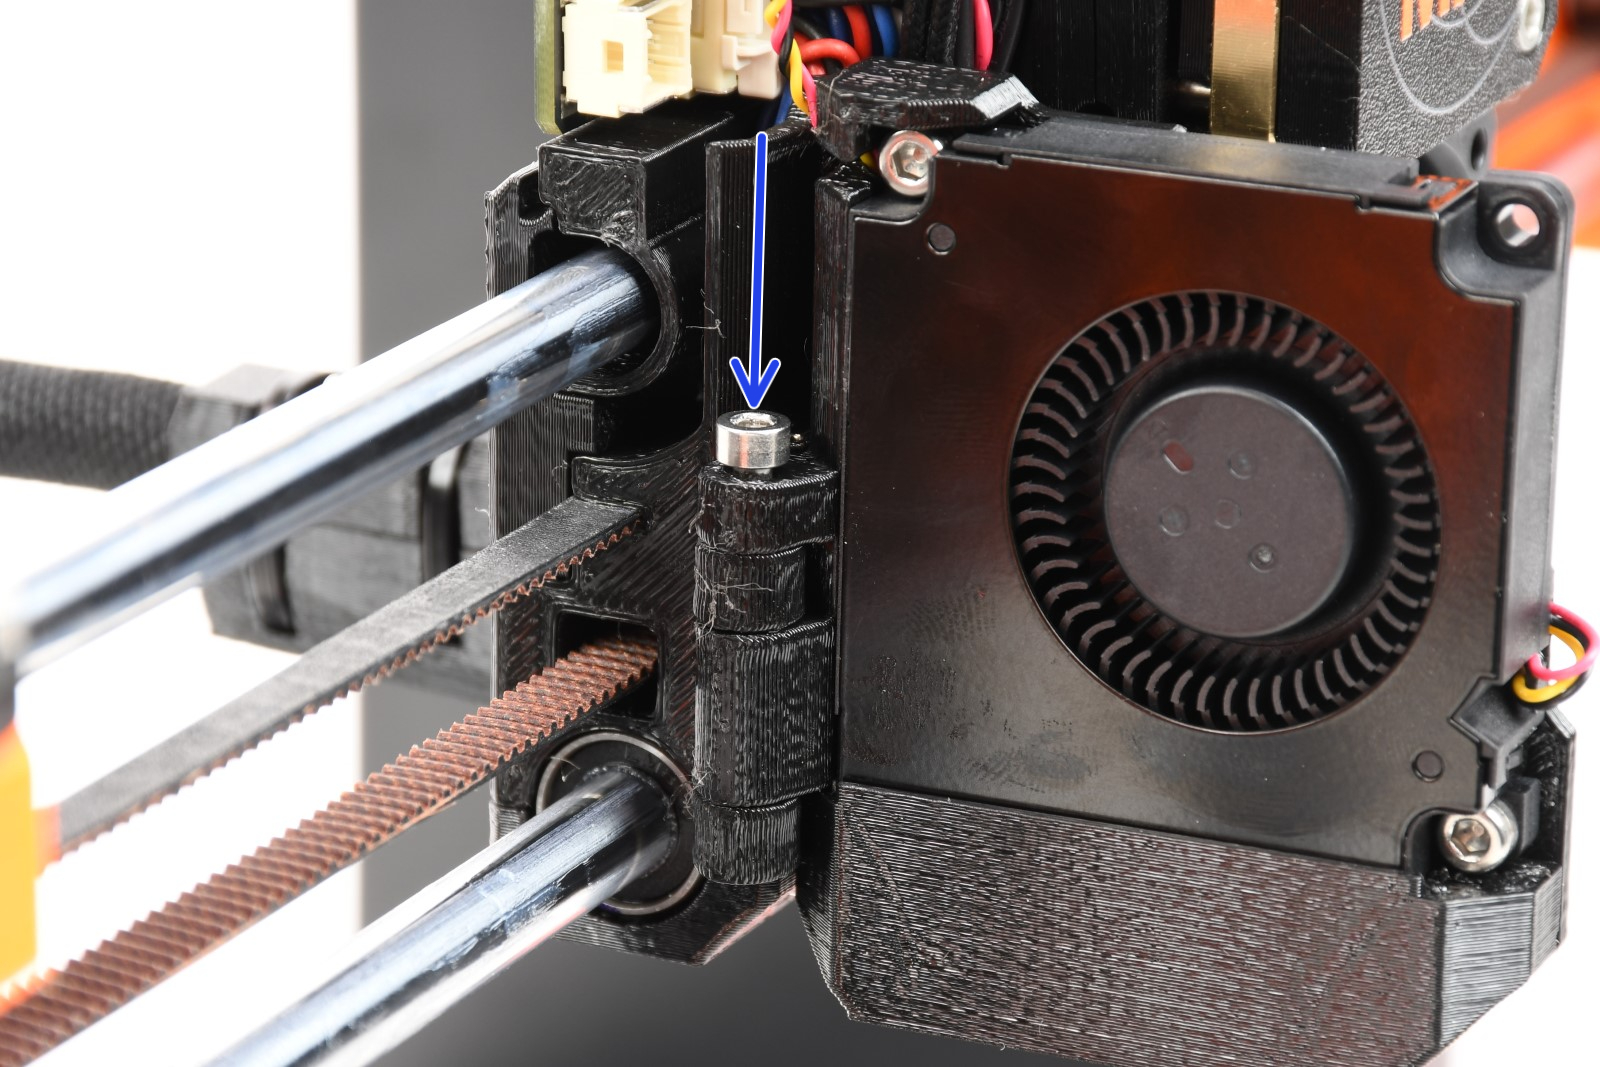
- Check if the M3x30 screw that holds the fan door is firmly tightened.
Z-axis
The printer will not perform the Z-axis test if the Loadcell test is skipped.
In case the Z-axis test does not pass, check the direction of the trapezoid nut. Make sure that the hotend is properly positioned in the Nextruder.
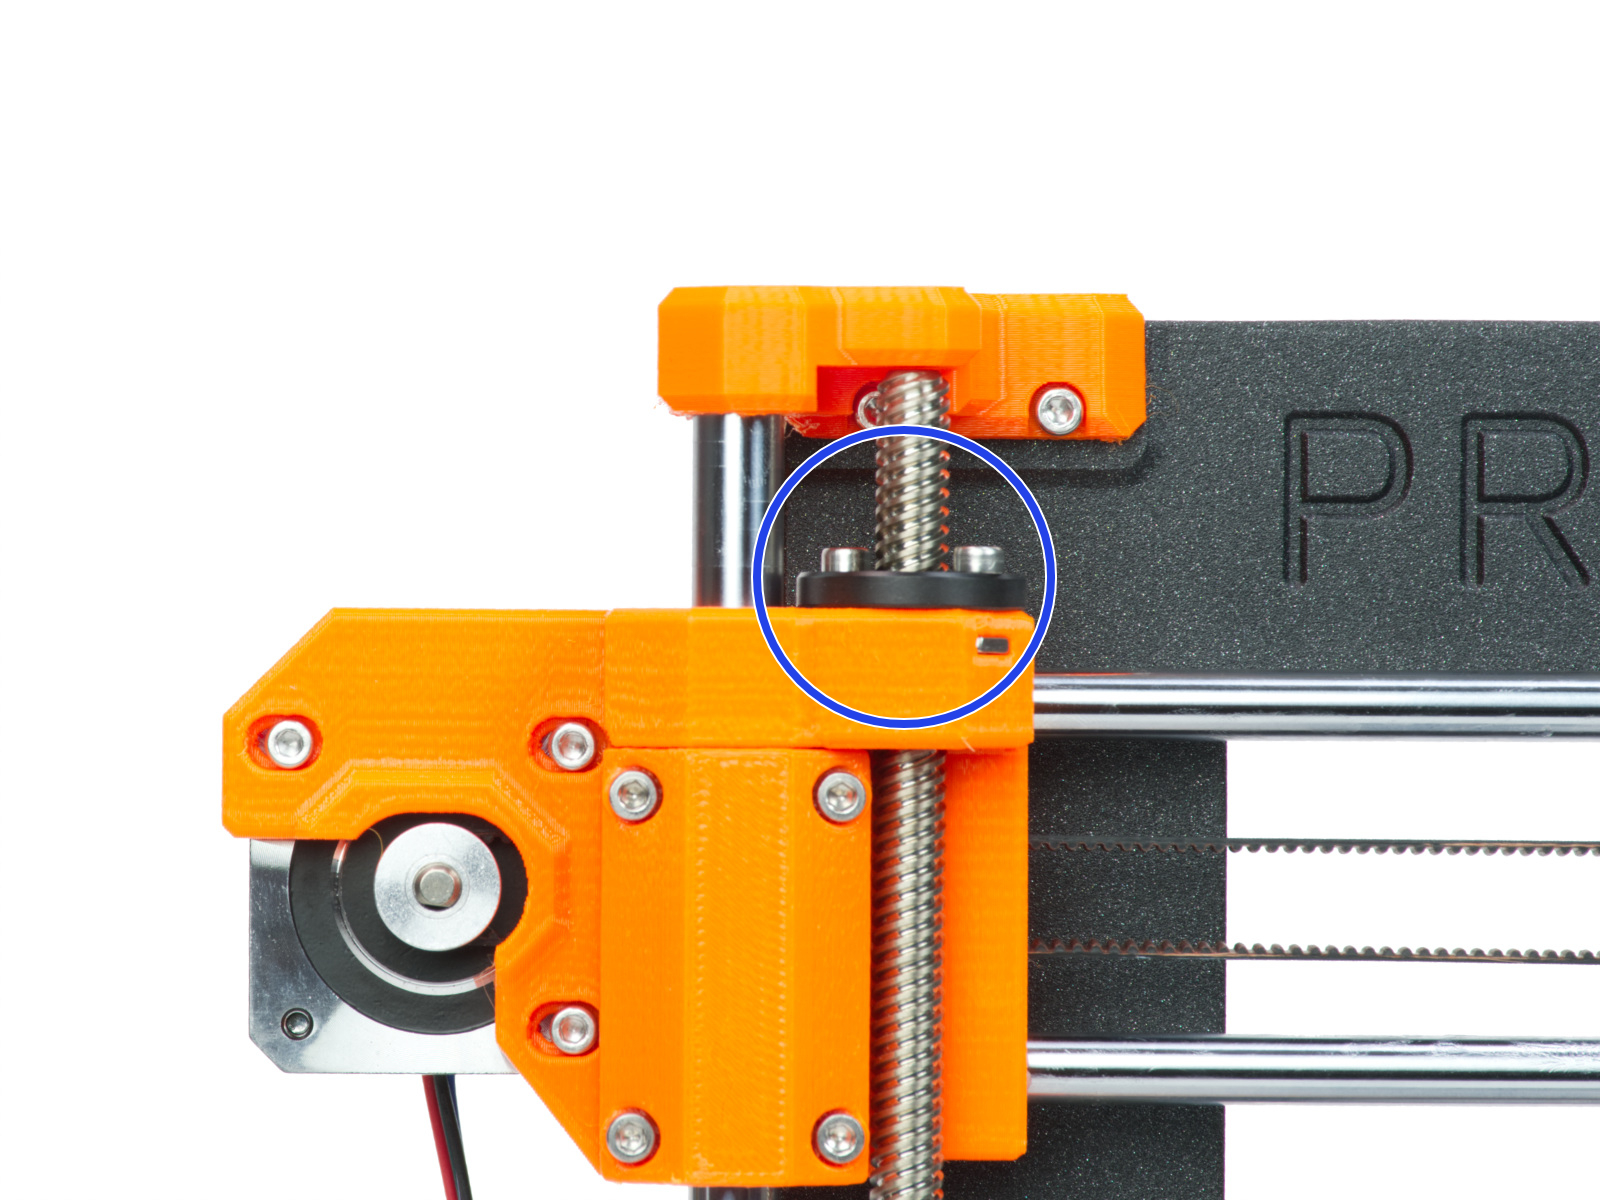 |  |
Nozzle heater
In case the test results in a QR code error, scan the QR code shown on the screen, or search for the corresponding article on this platform.
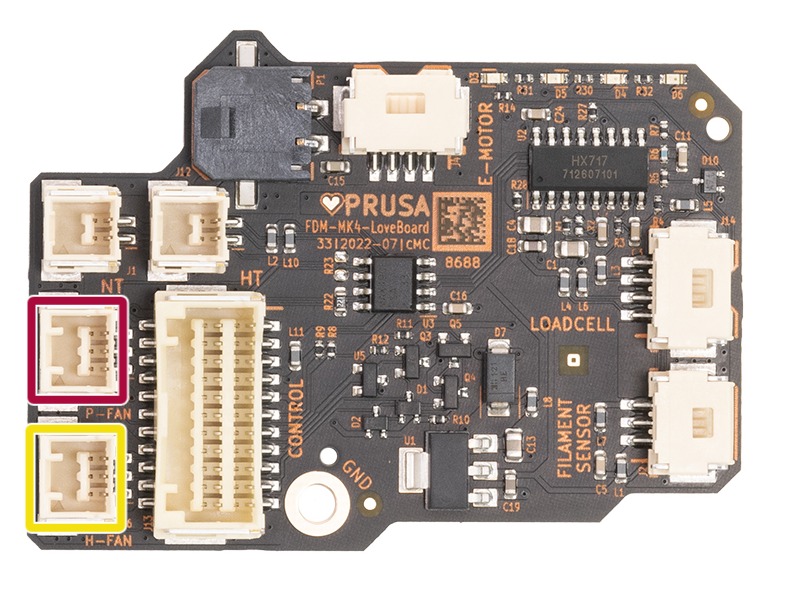
Inspect the hotend heater cable. Check the path between the hotend heater and the LoveBoard, and see if there are any parts that are broken or pinched.
In case there is no damage, check the cable connection to the LoveBoard board. Try reconnecting the cable to its connector.
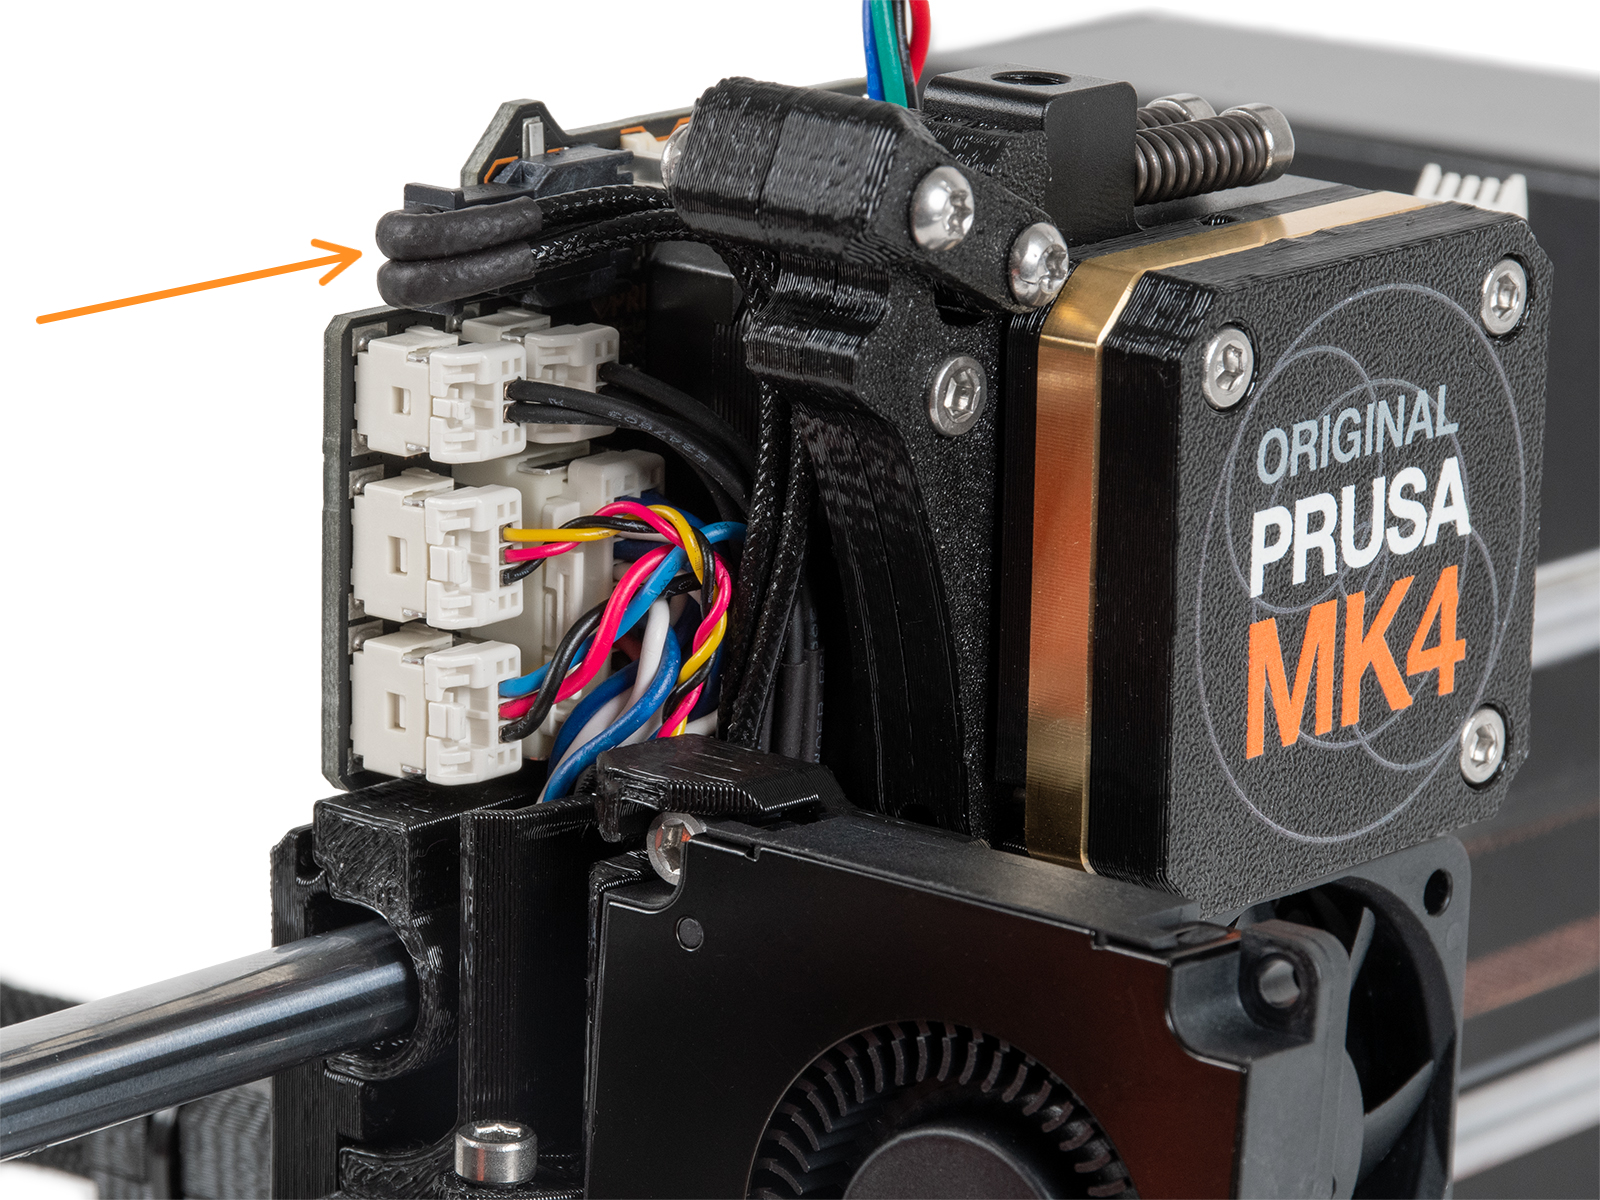 |  |
Heatbed heater
The steel sheet needs to be on the heatbed for this test.
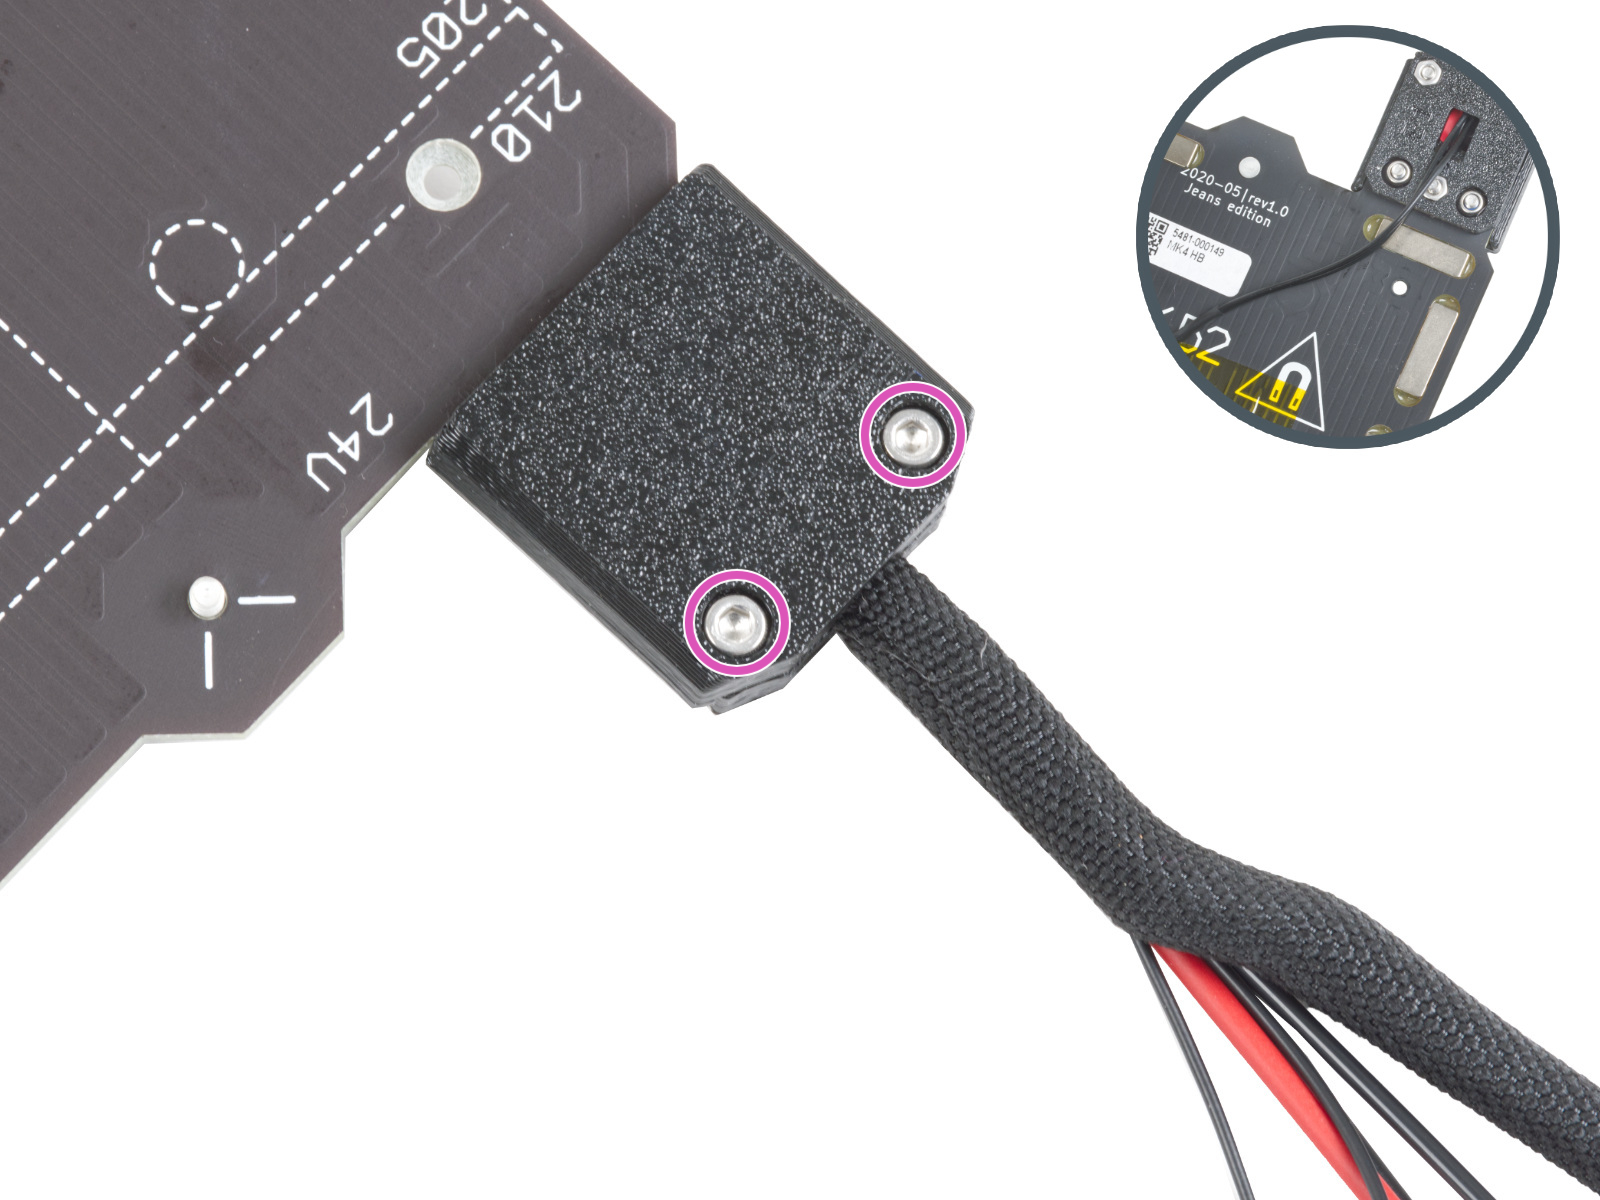
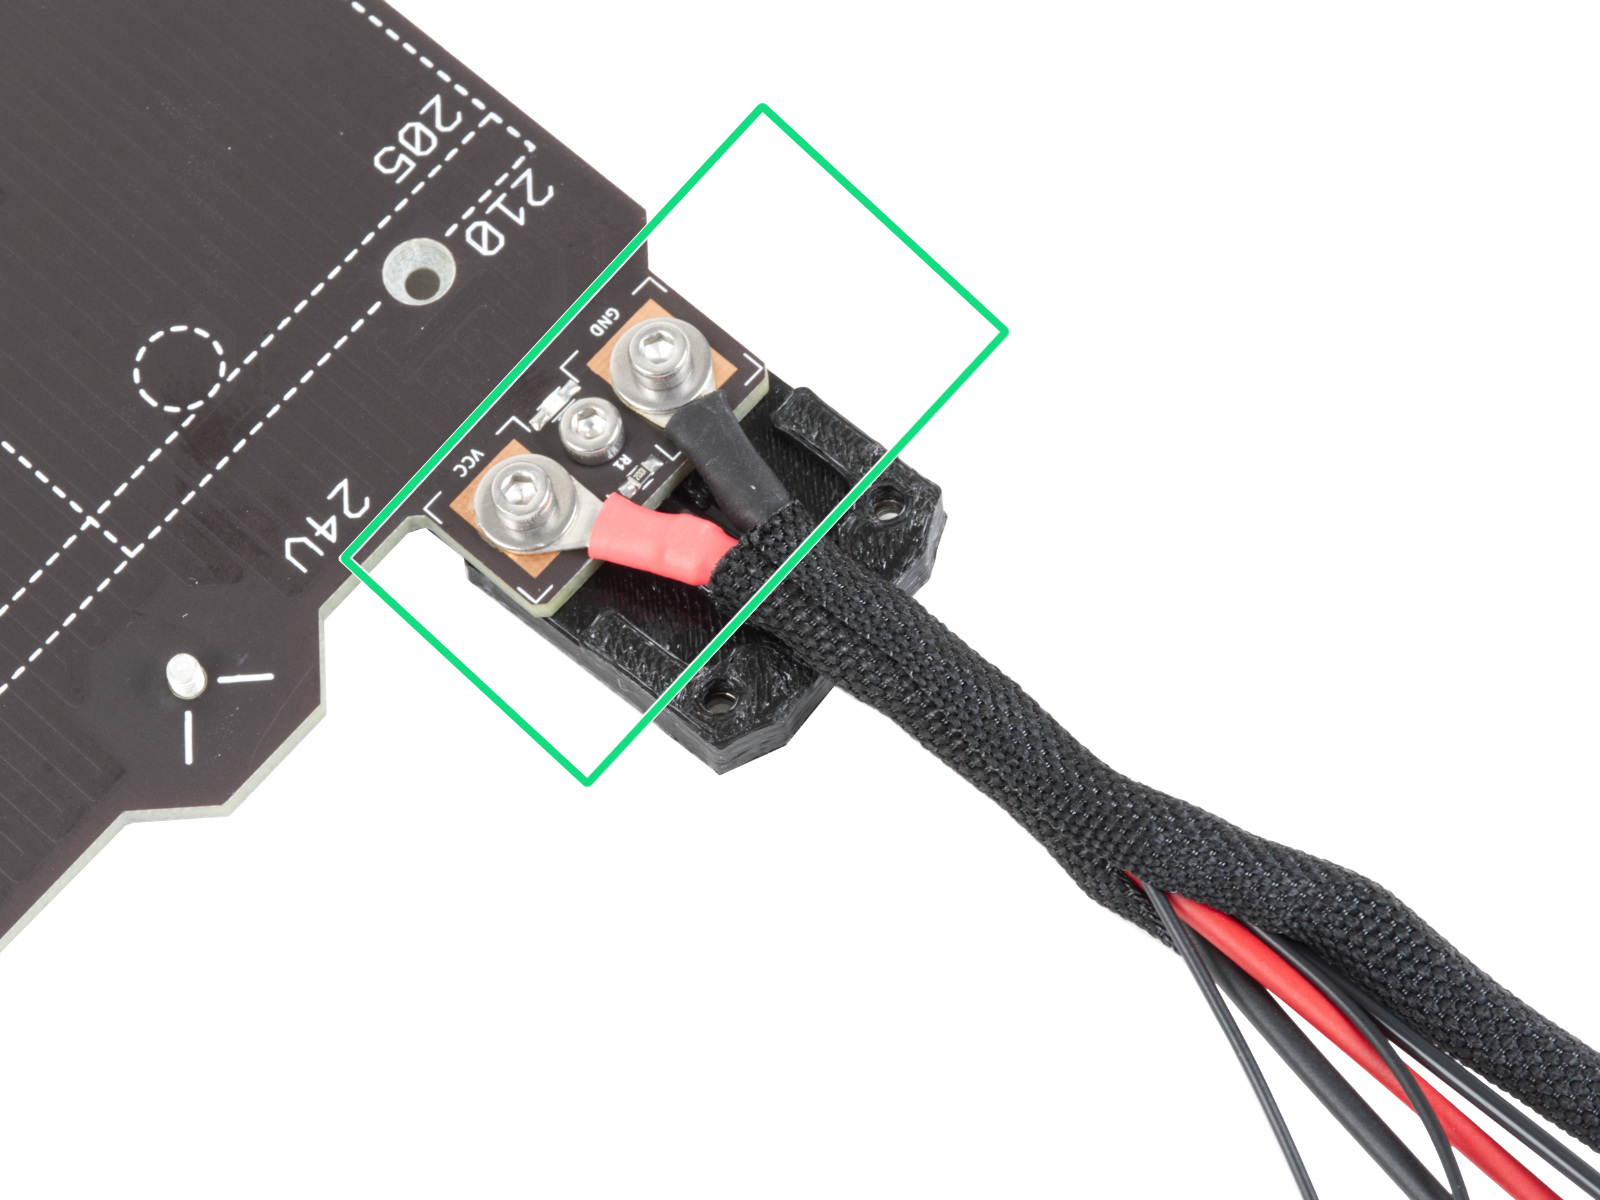
In case of a test fail, with the printer cold and off, check the screw-attached connectors on the heatbed side after removing its cover. Review the correct polarity, the correct position, and that they are fully tightened.
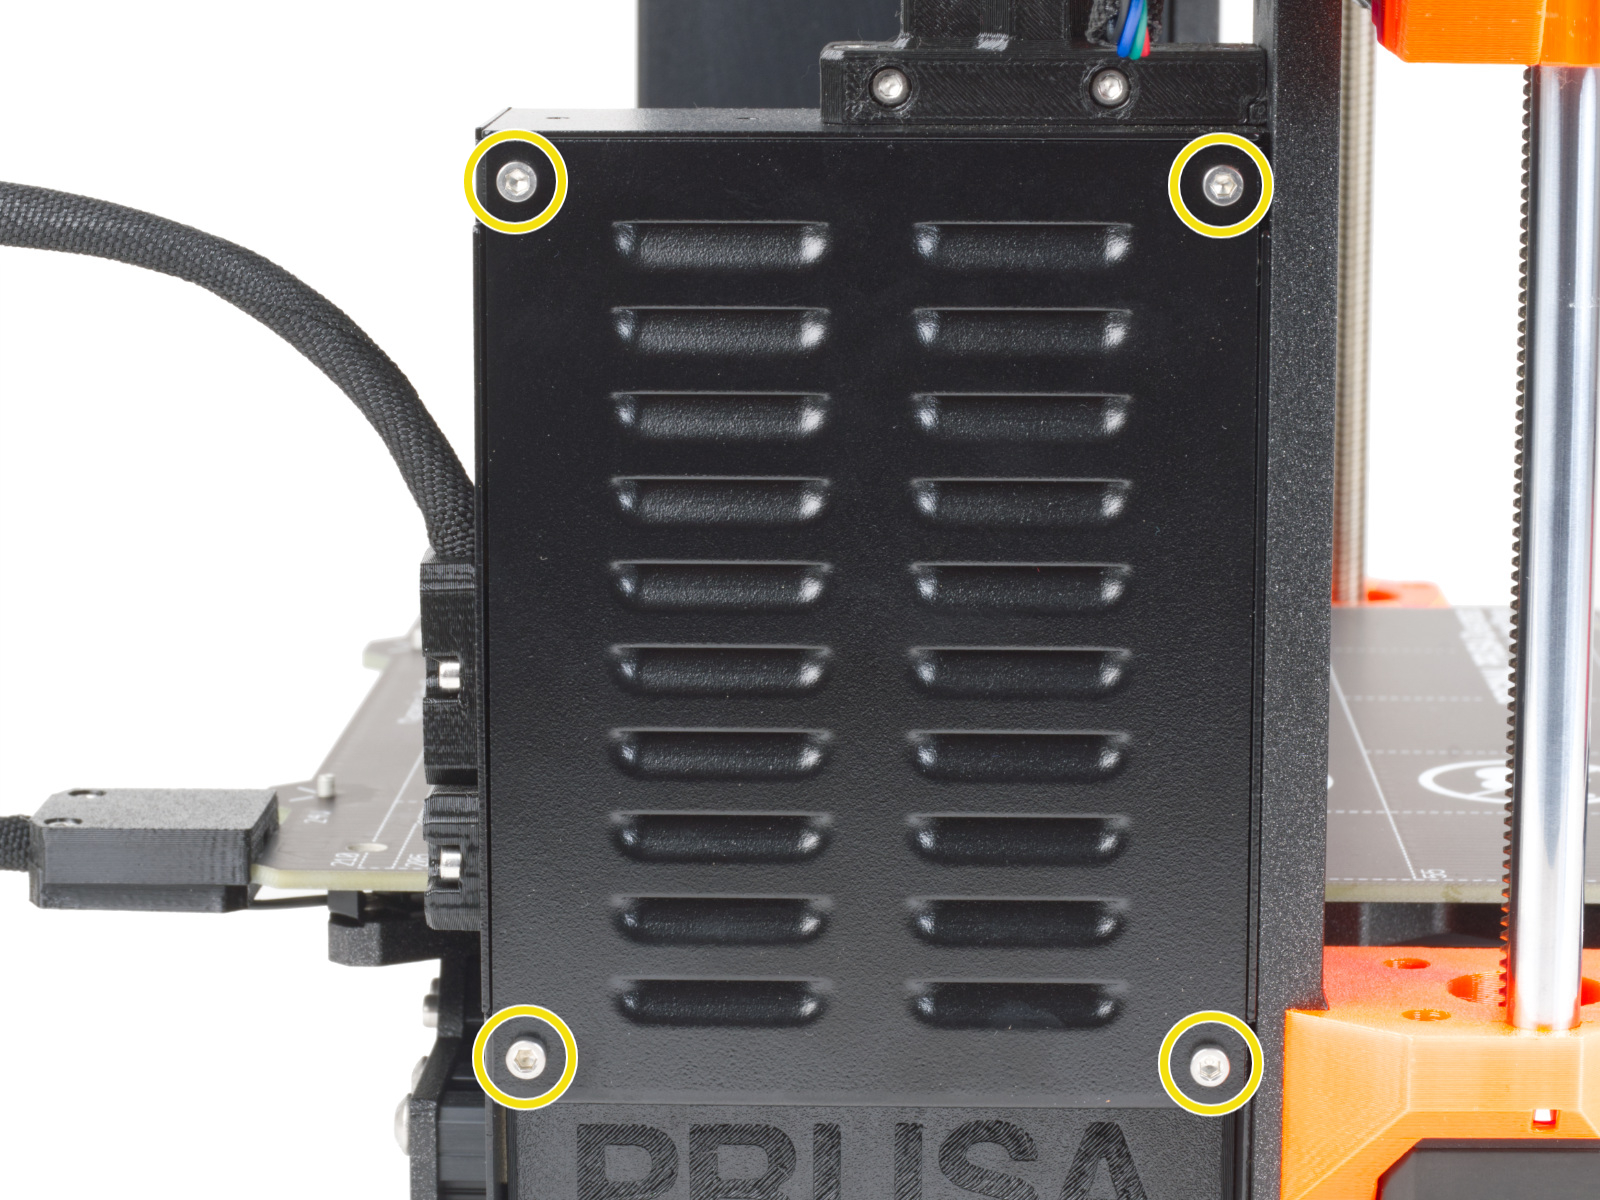
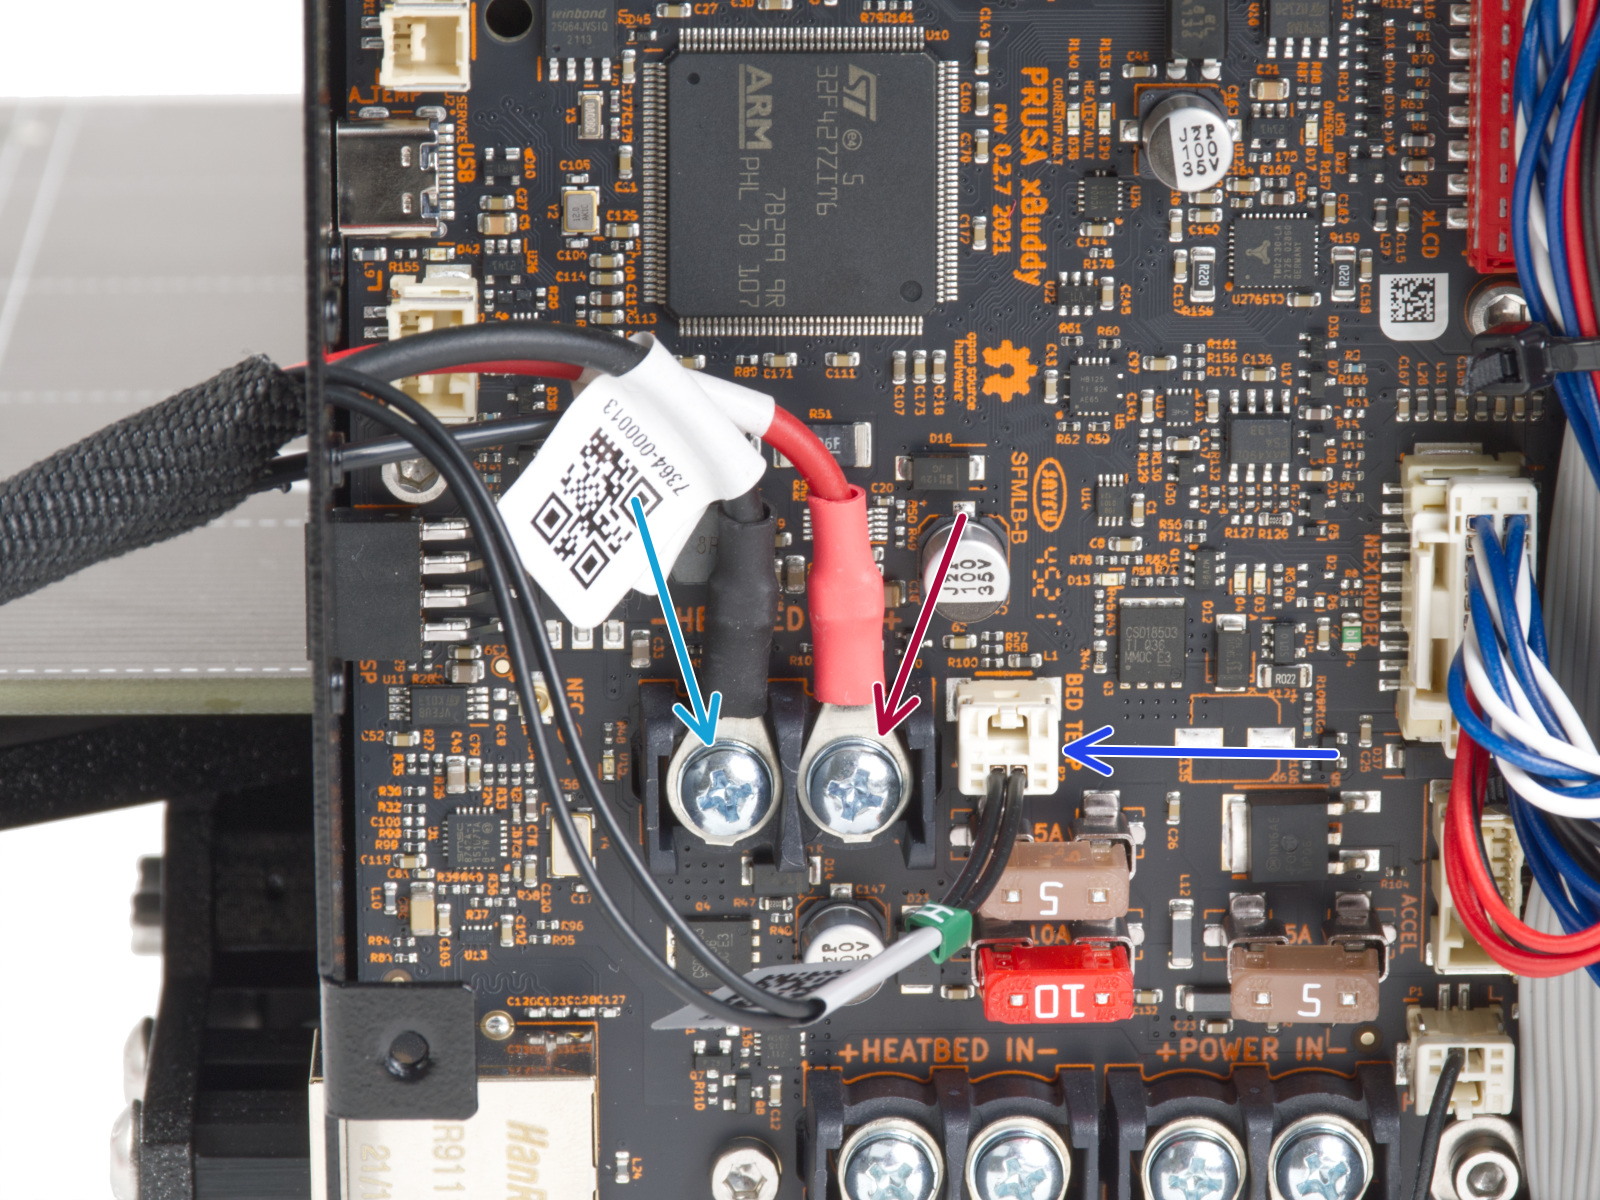
On the xBuddy board side, perform a similar check, after opening its case.
 |  |
 |  |
Filament sensor
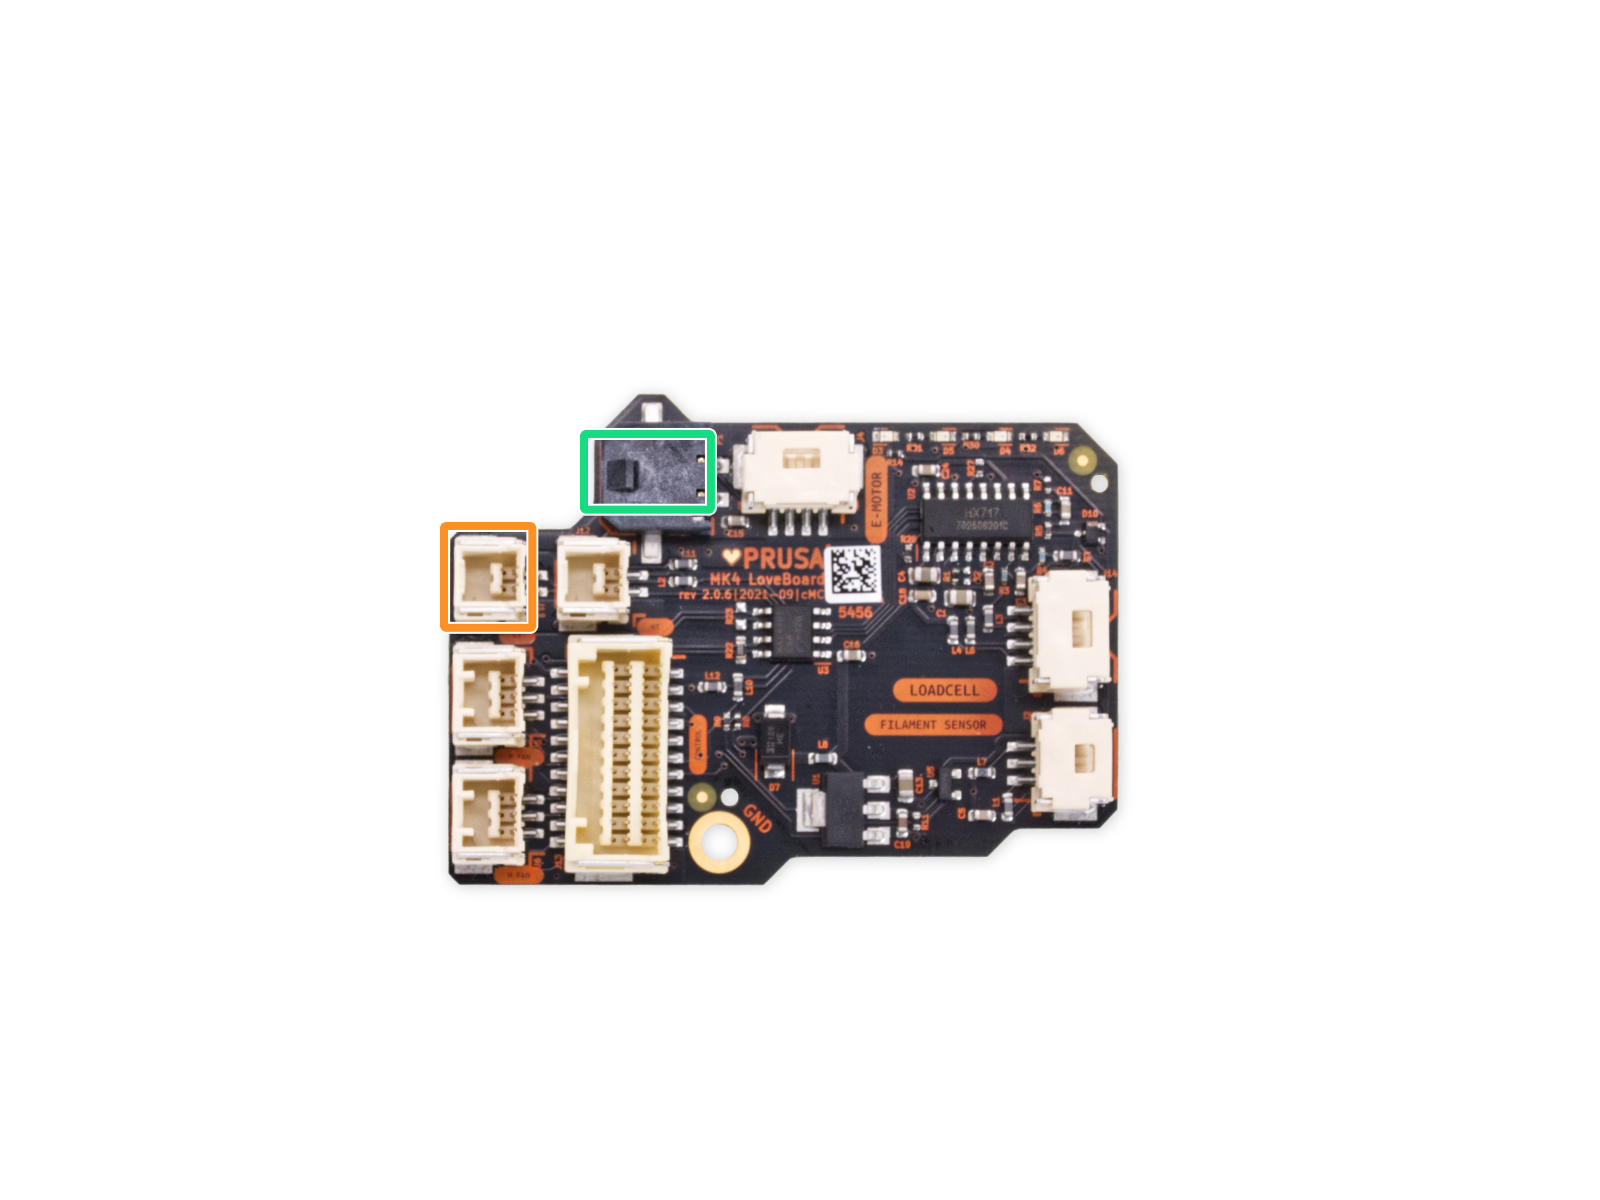
If the filament sensor does not detect the filament during the selftest, check the LoveBoard to see if the cable is properly connected. Also, follow the dedicated article on cleaning the filament sensor to make sure that there is no debris in the Prusa ball holder.
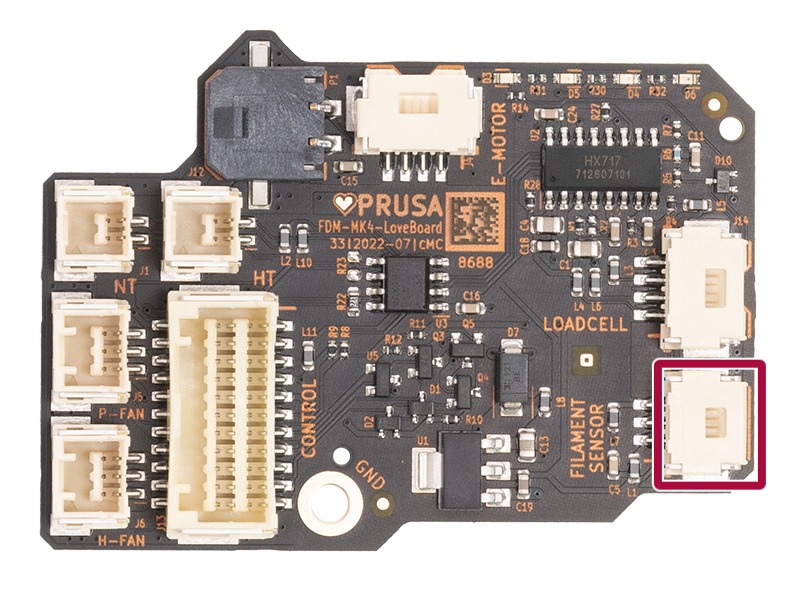 | 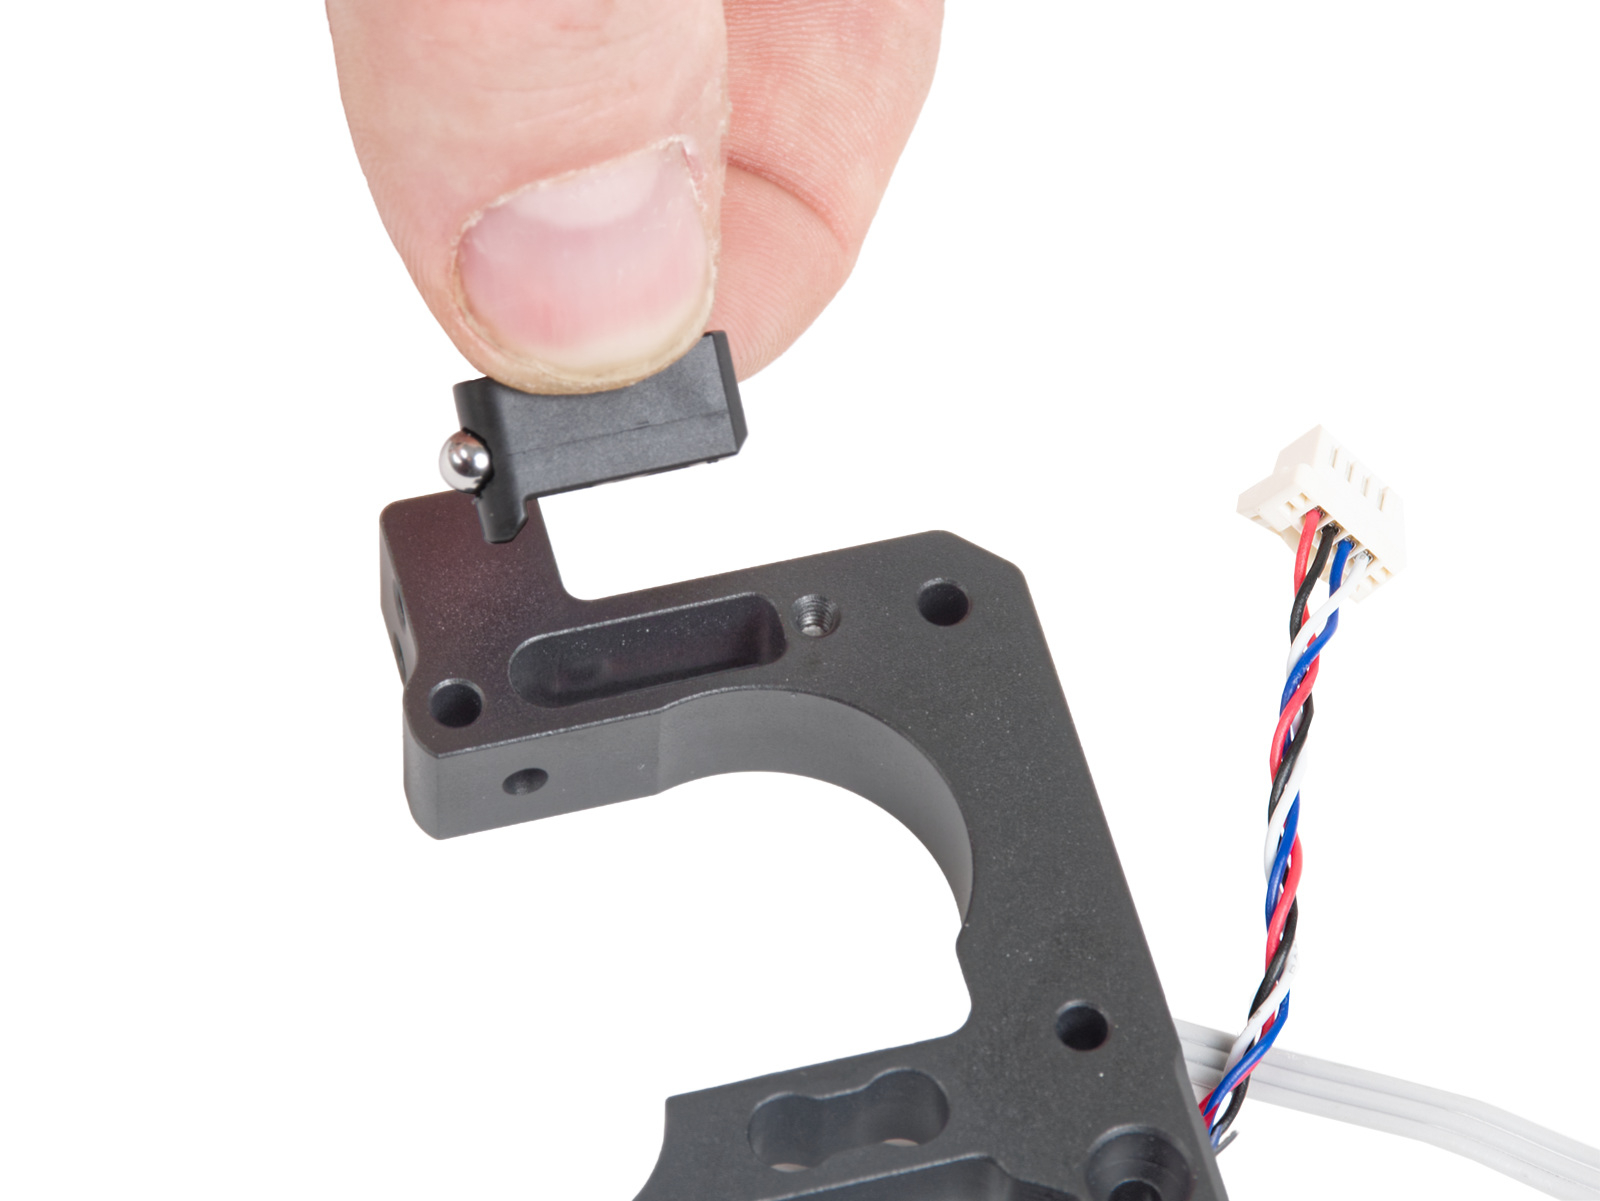 |
It is possible to skip this part of the selftest, but in this case, the features that depend on the filament sensor might not work.
Comments


Still have questions?
If you have a question about something that isn't covered here, check out our additional resources.
And if that doesn't do the trick, you can send an inquiry to [email protected] or through the button below.