- Čeština
- Español
- Italiano
- Deutsch
- Polski
- Français
- 日本語
- Home
- Using the printer
- Printer maintenance
- Regular maintenance (MINI)
Regular maintenance (MINI)
- 3D models
- Material guide
- Slicing
- Printer maintenance
- Adjusting belt tension (MINI/MINI+)
- Adjusting belt tension (MK4/S, MK3.9/S, MK3.5/S, MK3/S/+)
- Adjusting belt tension (XL)
- Buddy electronics Wiring (MINI)
- Changing or replacing the Nextruder Hotend
- Changing or replacing the nozzle (MK2.5/S, MK3/S/+, MK3.5/S)
- Changing or replacing the Prusa Nozzle
- Changing the print head
- Changing/replacing the nozzle (MINI)
- Checking/re-aligning the Bondtech gear (MK3.5/S, MK3S/+, MK2.5S)
- Cold pull (MINI)
- Cold pull (MK3/S/+, MK2.5/S, MK3.5/S)
- Cold pull (MK4/S, MK3.9/S, XL) #13702 #17702
- Community translations
- CW1 maintenance
- FEP film replacement (SL1)
- Fire Suppression system (Enclosure)
- Firmware updating (CW1)
- Firmware updating (MINI/MINI+)
- Firmware updating (MK2.5S/MK2S)
- Firmware updating (MMU2S)
- Firmware updating (SL1/SL1S)
- HEPA filter replacement (HT90)
- Hotend disassembly & heatbreak stuck in the heatsink
- How to downgrade firmware (MK4/S, MK3.9/S, MK3.5/S, XL)
- How to remove a stripped screw
- How to update firmware (HT90)
- How to update firmware (MK3S+/MK3S/MK3)
- How to update firmware (MK4/S, MK3.9/S, MK3.5/S, XL)
- How to update firmware (MMU3)
- i3 Printer Regular Maintenance
- IPA pigment filter (CW1/CW1S)
- MMU2S regular maintenance
- MMU3 regular maintenance
- Nozzle replacement (HT90)
- PETG sheets (Enclosure)
- Print surface preparation
- Printing without purge tower on the XL (Multi-Tool)
- Regular maintenance (MINI)
- Clean the sheet
- Bearings maintenance
- Fans
- Extruder driver gear cleanup
- PTFE tubes
- Nozzle
- Updating the firmware
- Regular printer maintenance (HT90)
- Regular printer maintenance (MK3.5/S)
- Regular printer maintenance (MK4/S, MK3.9/S)
- Regular printer maintenance (XL)
- Removing filament from extruder manually
- SD cards and USB drives
- SL1/SL1S maintenance
- SL1/SL1S print removing
- Testing safety features (MK3/MK3S)
- Vibration/noise when printing (MINI/MINI+)
- Prusa Connect & PrusaLink
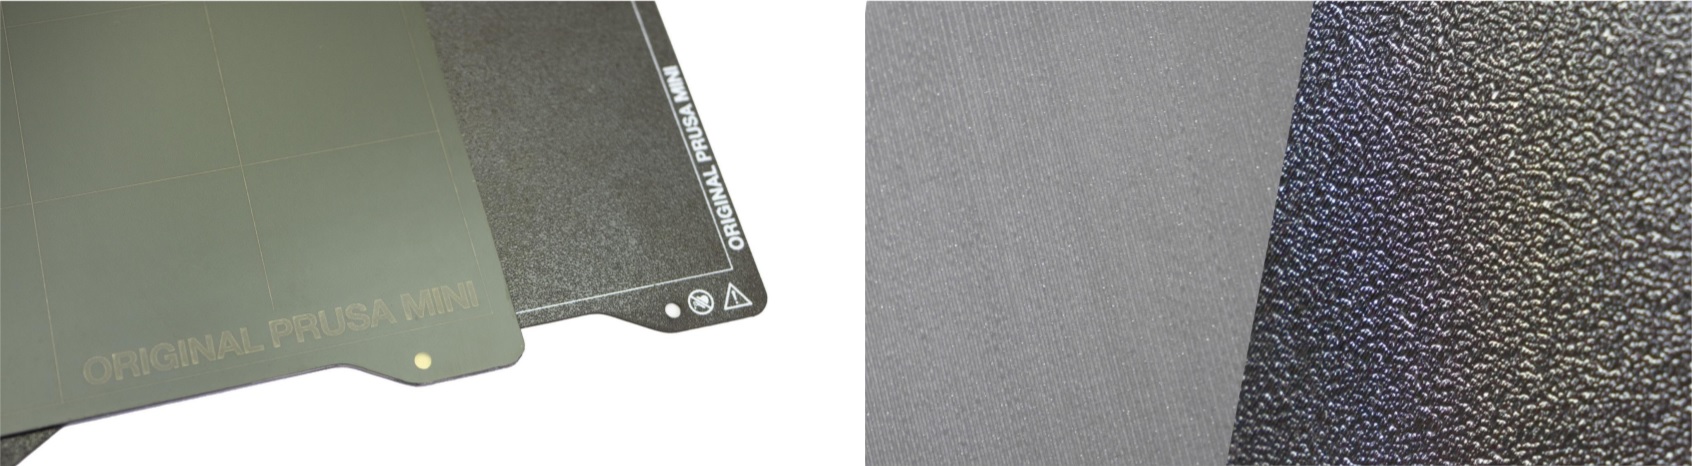
Clean the sheet
If the printed objects have trouble adhering to the steel sheet surface, you need to wipe the sheet clean. Choose the right cleaning product for your sheet (IPA, Windex, etc.), pour a small amount of it onto an unscented paper towel, and wipe the print surface. The surface does not have to be cleaned before every print. It is just important not to touch the steel sheet with your hands or dirty tools.
The sheet should be cleaned while cold to achieve the best results - cleaning it when hot can lead to potential injury, either from the heated bed or nozzle. When cleaning at higher temperatures, the alcohol will also evaporate before it can clean anything. More details can be found in the First layer issues.
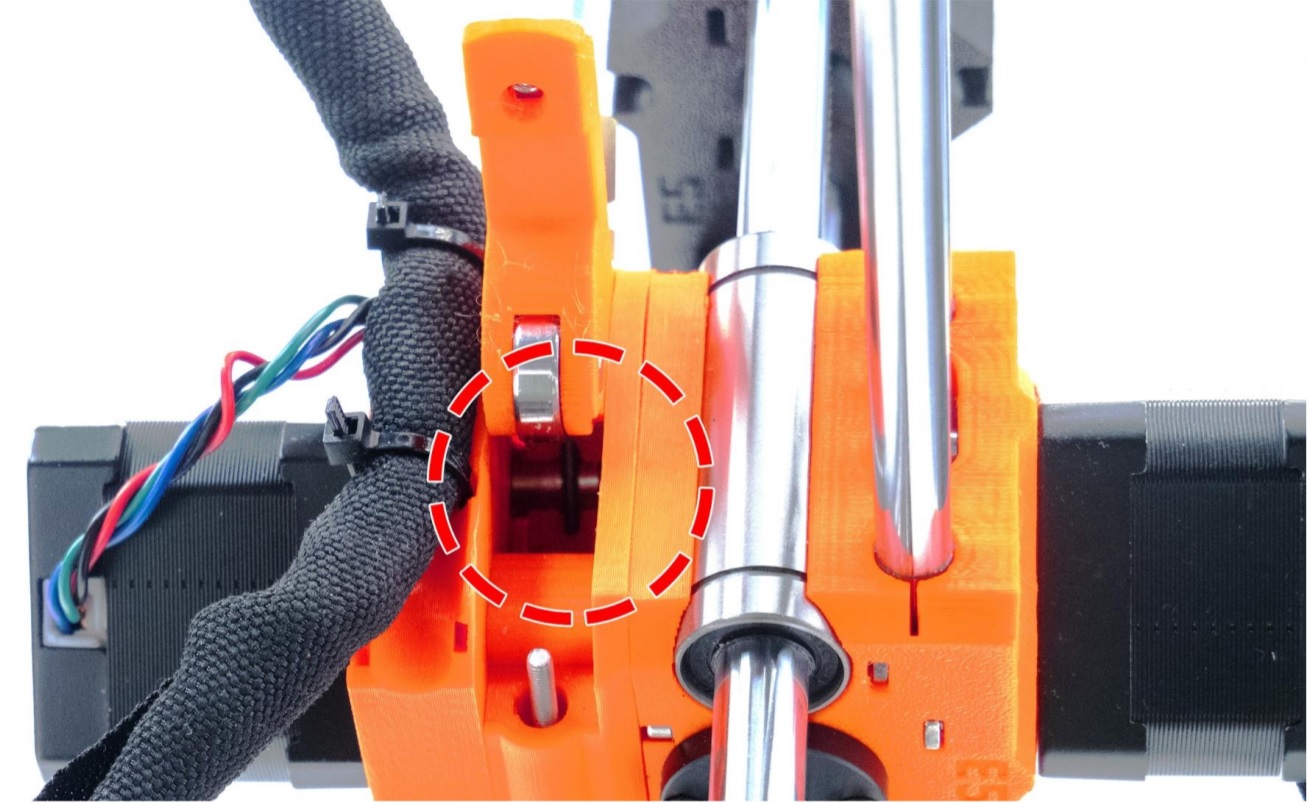
Bearings maintenance
After ~200 hours of printing, the smooth rods should be cleaned with a paper towel. You can buy a lubricant (any good super lube will do) and apply it onto the smooth rods (XYZ axes). MINI is supplied with a tube of Prusa lubricant and it is also available in our eshop.
With the printer turned off, move the X-axis (extruder) and Y-axis (heatbed) by hand back and forth a couple of times. If you feel that one of the axes doesn’t move smoothly anymore, the bearings can be taken out and greased on the inside (they should be removed from the axis because the plastic lip-seal will prevent most of the grease from getting inside).
For our detailed maintenance guide, please see Maintenance tips.
Fans
Both fans should be checked and cleaned every couple hundred hours. Computer cleaner spray (compressed air) will get the dust away and tweezers can be used for little plastic strands. Always hold the blades when cleaning the fan with compressed air.
Extruder driver gear cleanup
The extruder gears do not need any lubrication. However, over time they can suffer from a build-up of filament shavings in the grooves, and loose gripping force that can cause under-extrusion. Use compressed air to blow the debris out or use a small brass brush to clean the grooves, a regular toothpick will do the job as well. Check and clean from the access window on the top of the extruder assembly. Clean what you can, then rotate the gear and repeat. A very small amount of lubricant on only the drive teeth does not hurt but can cause problems if it reaches the filament teeth or starts to collect debris.
For more extensive disassembly, see How to access and clean the extruder-pulley (MINI/MINI+)

Opening the idler will enable you to clean both gears and/or remove any filament leftovers caught in the extruder gears. It’s advised to inspect the gears from time to time and remove any debris caught in the extruder.
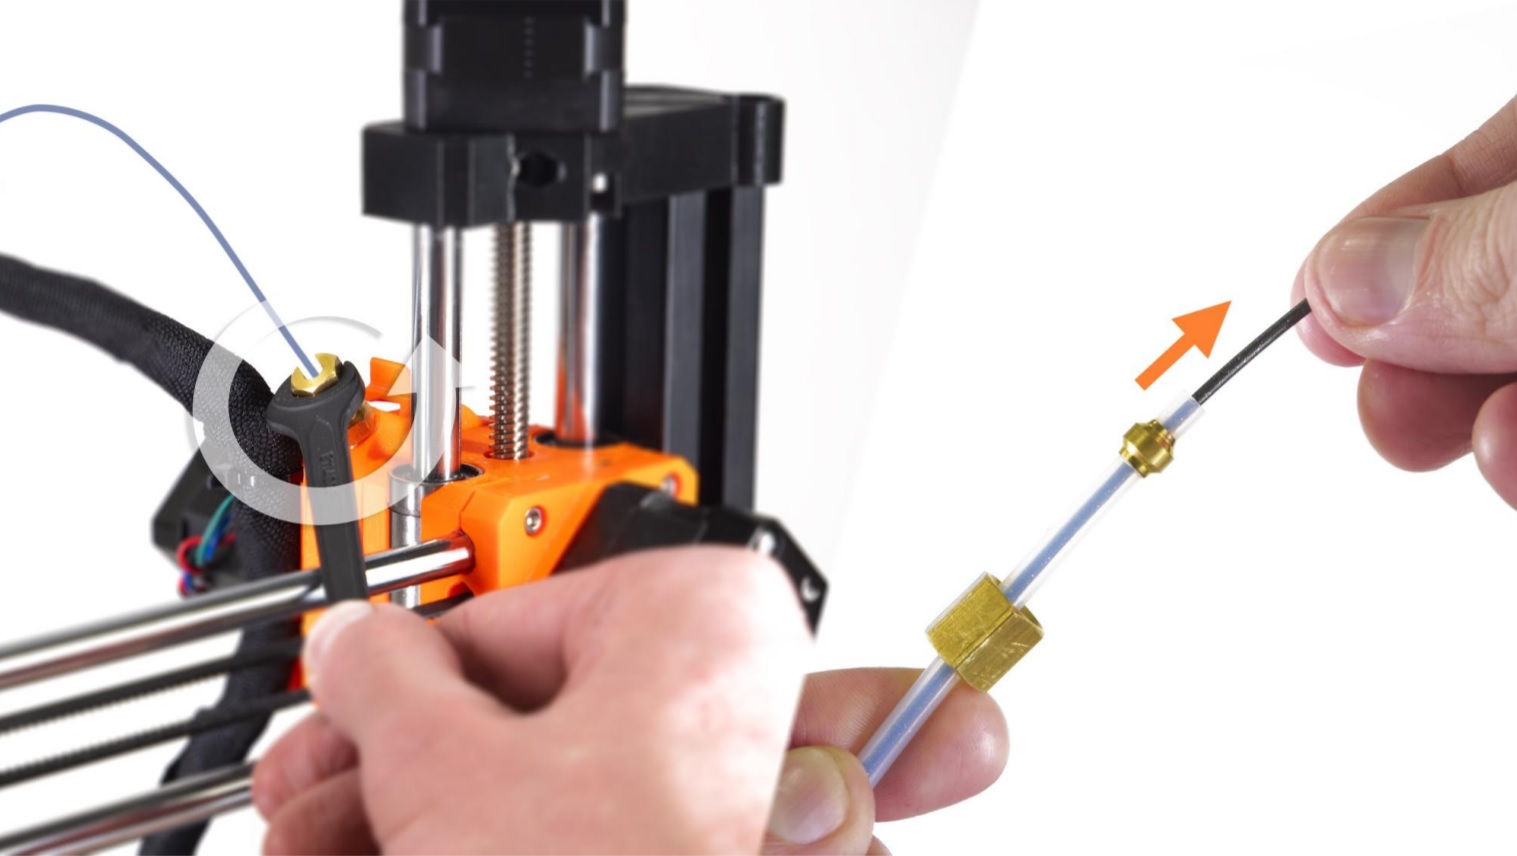
PTFE tubes
The MINI has four PTFE tubes, two external and two internal, that may need a basic level of attention from time to time. PTFE tubes are used to lead the filament strand from the spool, through the extruder, all the way to the nozzle. Over time, filament debris can accumulate in the PTFE tubes.
These tubes should be clean and uniform. If they are deformed they should be replaced. Use a can of compressed air to clean them. Using a piece of solid wire can damage them on the inside.
Accessing the PTFE tubes:
External tubes
- The first tube where you load filament, which leads to the extruder, can be pulled out by hand. If you are unable to pull out the first tube by hand, please follow How to access and clean the extruder-pulley (MINI/MINI+) to Step 8 to release the screw M3x12 screw securing it.
- The second, longer, main Bowden tube leads from the extruder to the print head. Use a spanner (size 10) to loosen the nuts securing it to the fittings, found at each end of it.
- Below each fitting of the main Bowden tube, you will find a PTFE tube. Both should be inspected if you have loading issues. The one located in the extruder is a short tube that assists the filament exiting the extruder.
- The hotend/print head PTFE-tube needs to be clean and slightly compressed when installed inside the heat break. Please see our comprehensive illustrated guide on replacing the PTFE-tube in the MINI.
Nozzle
Inside
If you have a clog or print failure you may need to do a couple of Cold pulls. Also, changing from PLA to PETG, at PLA temperatures can cause issues. Cold pulls should clear any partial or full clog and get you printing again. See our guide on doing a cold pull on the Prusa MINI. When heated, it can also help to use an acupuncture needle (one is included with the kit), to clean the inside of the nozzle.
Outside
If your nozzle is covered with plastic on the outside it can affect its thermal properties. To clean it, heat the nozzle for 5 minutes, and turn the printer off. Immediately after that use a small brass brush to clear away any old plastic stuck on the nozzle and heater block. Be extra careful around the fragile hotend heater and thermistor wires.
Replacement
Nozzles do wear out over time, even when only printing PLA and PETG. If you attempt to print abrasive filaments, like steel-fill, using the stock brass nozzle, the nozzle will be ruined quickly.
Should you need to change the nozzle, you will find a complete guide here, covering the whole procedure, as well as some common mistakes you want to avoid.
Updating the firmware
Keeping your system fresh and up to date is important. The firmware is continuously being developed and new features and operational improvements are implemented regularly, based on testing and feedback from our users. For a complete guide on flashing the firmware, please see Firmware updating (MINI/MINI+).
Comments


Still have questions?
If you have a question about something that isn't covered here, check out our additional resources.
And if that doesn't do the trick, you can send an inquiry to [email protected] or through the button below.