- Čeština
- Español
- Italiano
- Deutsch
- Polski
- Français
- 日本語
- Home
- About your printer
- Printer features
- Filament sensor (MK4/S, MK3.9/S, XL)
Filament sensor (MK4/S, MK3.9/S, XL)
- Printer description
- Printer features
- Accelerometer (MK4/S, MK3.9/S)
- Brightness adjustment (SL1)
- Buddy firmware-specific G-code commands
- Cancel Object (MK4/S, MK3.9/S, XL, MINI/+)
- Crash detection
- Crash dump
- Creating a resin calibration object (SL1/SL1S)
- Dump memory (MK3/S/+ and MK2.5/S)
- Experimental menu (MK3/S/+)
- Experimental settings (MK4/S, MK3.9/S, MK3.5/S, XL, MINI/+)
- Filament sensor (MK4/S, MK3.9/S, XL)
- Check assembly (MK4/S, MK3.9/S)
- How to clean the filament sensor
- Filament sensor MK3 (non-S)
- Flashing custom firmware (MK4/S, MK3.9/S, MK3.5/S)
- Flexible steel sheets (guidepost)
- GPIO Module
- High flow print head (HT90)
- High temperature print head (HT90)
- HW setup (MINI/MINI+)
- HW setup (MK2.5/S & MK3/S/+)
- Internet connection (SL1/SL1S)
- IR Filament Sensor (MK2.5S, MK3S/+, MK3.5/S)
- IR Filament sensor detection (MK3S)
- LCD brightness adjustment (MK3S)
- LCD screen contrast adjustment (i3)
- Loadcell (MK4/S, MK3.9/S, XL)
- Menu structure (SL1/SL1S)
- MMU3 Prusa Nozzle vs. CHT nozzle
- Model preview
- Network Connection (MK4S, MK3.9S)
- Nextruder silicone sock (XL, MK4, MK3.9)
- NFC antenna
- Noisy filament sensor (MINI)
- One-click print
- Pouring resin and starting print
- Power Panic
- Power-modes
- PP steel sheet
- Print Profile (SL1/SL1S)
- Print statistics
- Printer statistics and system information (SL1/SL1S)
- Pronterface and USB cable
- Prusa firmware-specific G-code commands
- Prusa Pro Filament Drybox
- Resin Calibration (SL1/SL1S)
- Resin Tank Cleaning (SL1/SL1S)
- Satin steel sheet
- SD card sorting
- Smooth Steel Sheet
- Sound mode (MINI/MINI+)
- Special PA Nylon steel sheet
- SpoolJoin (MMU2S)
- Steel sheet profiles
- Stuck filament detection #26101 (MK4S) #13101 (MK4) #21101 (MK3.9) #17108 (XL)
- Support menu (MK3/S/+)
- Support settings for the XL
- Textured steel sheet
- Thermal model calibration
- Tools Mapping (XL)
- Tools Mapping and Filament Mapping (XL, MMU3)
- Top-bar Notifications (SL1/SL1S)
- Touch screen (MK4/S, MK3.9/S, MK3.5/S, XL)
- Tune Menu
- Water-soluble materials (PVA/BVOH)
- General Information
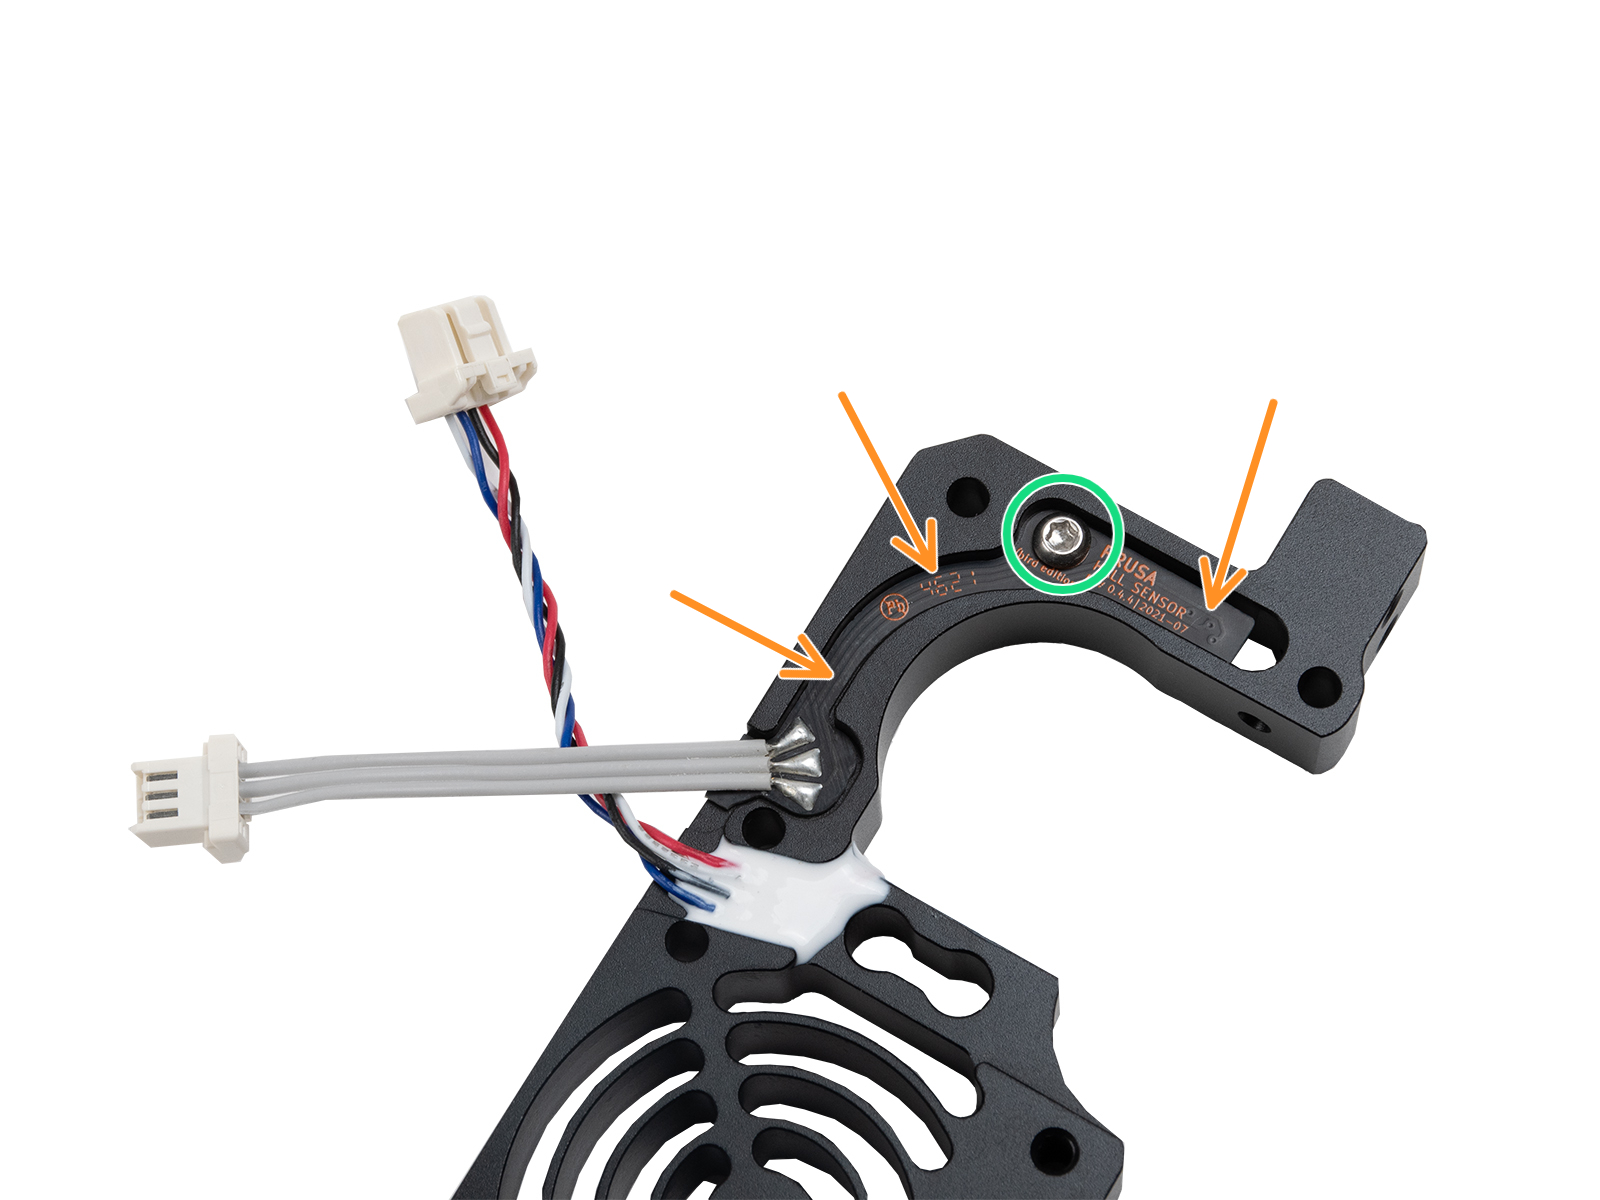
The filament sensor equipped on the Original Prusa MK4/S, Original Prusa MK3.9/S, and each tool of Original Prusa XL detects the presence of a filament and filament run-out. The sensor is a Hall sensor, triggered by a mechanism composed of a spring, a magnet, and a ball.
If an MK4/S or MK3.9/S is upgraded to the MMU3, some of the Nextruder components are modified, including the mechanism that triggers the filament sensor. In these printer versions, the mechanism does not rely on a system of spring, magnet, and ball, but is based on the idler tension bolt.
Check assembly (MK4/S, MK3.9/S)
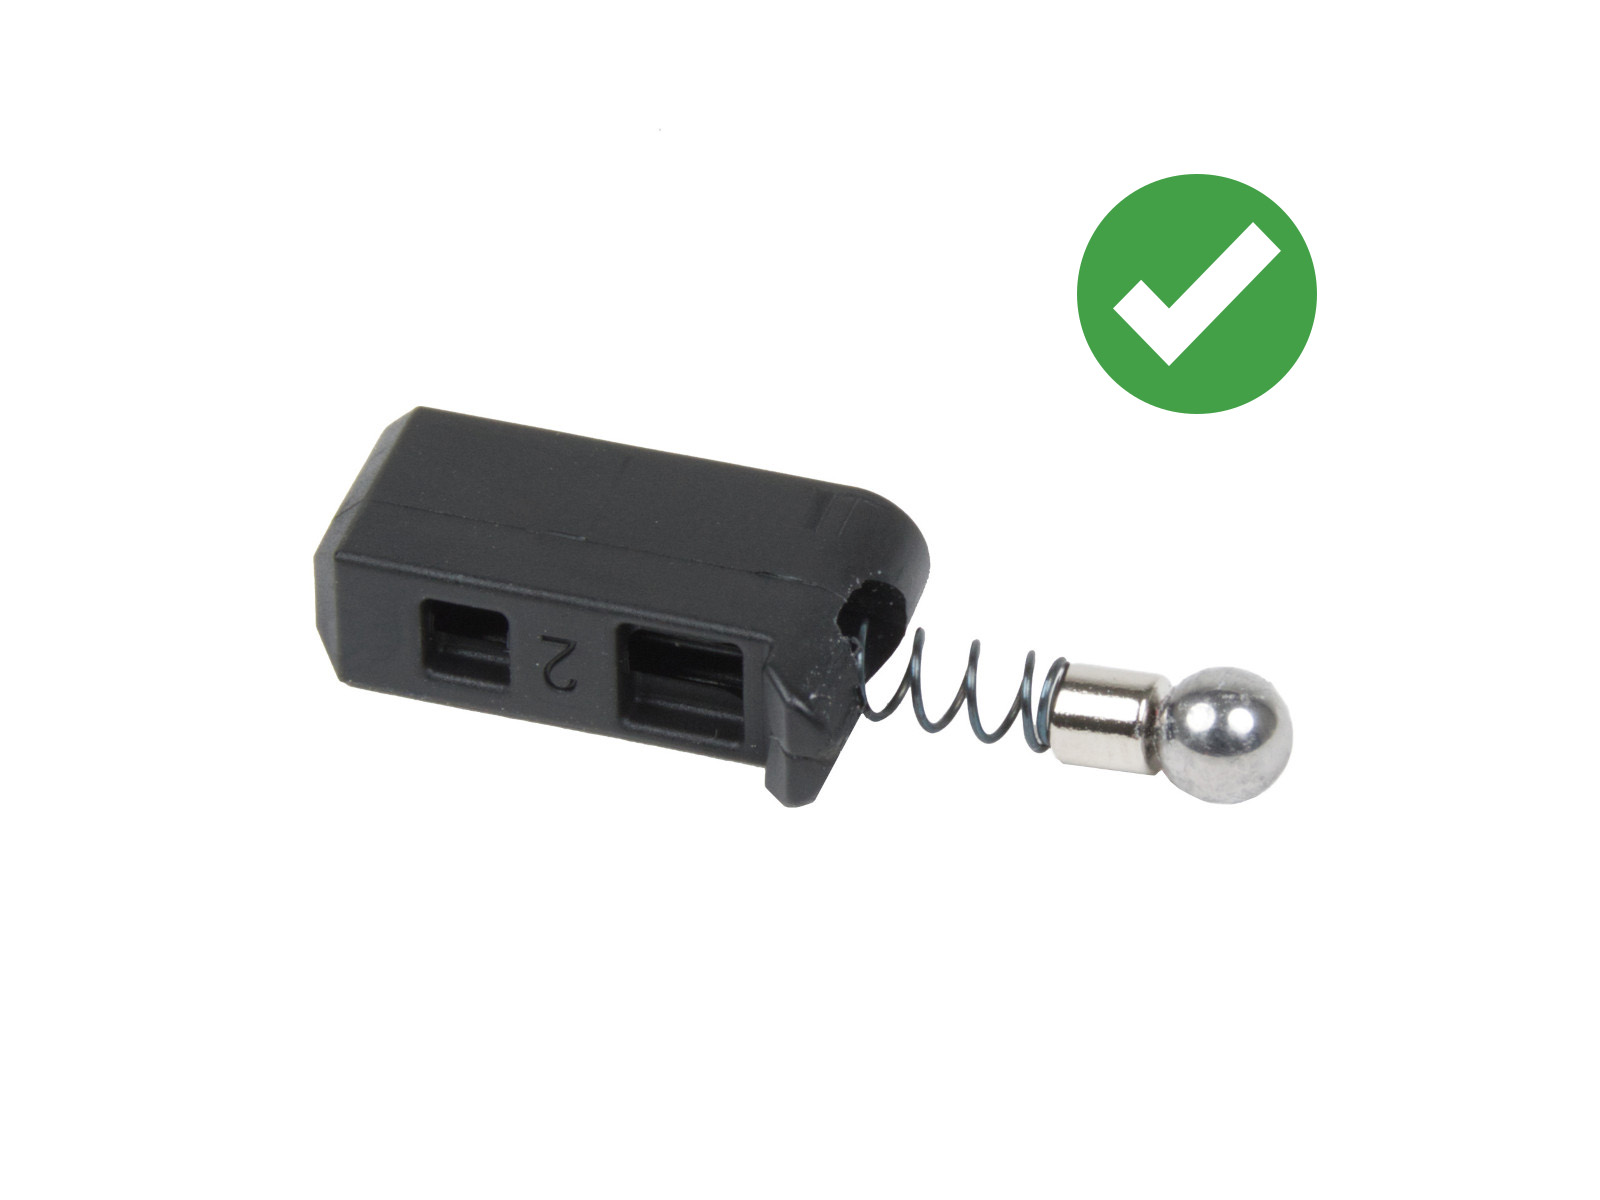
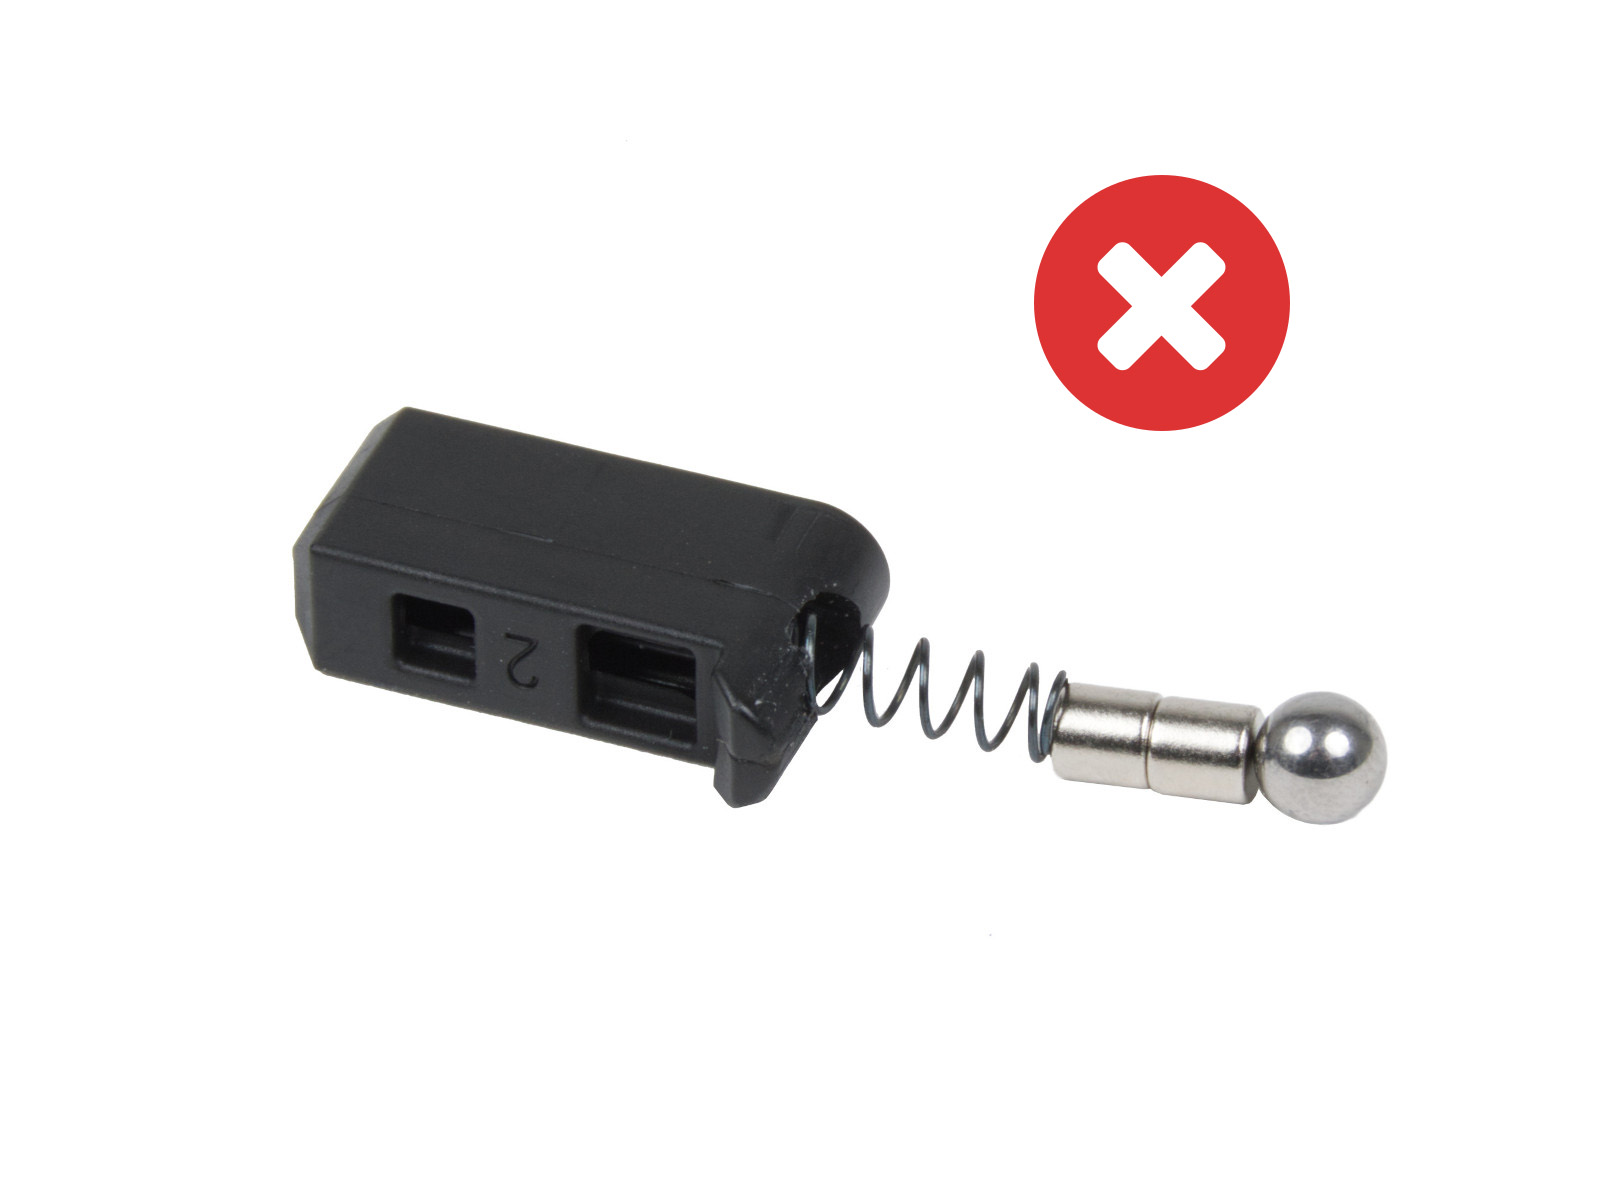
If your printer is an MK4 or MK3.9, you have received a package with magnets for the assembly. On MK4S and MK3.9S, this subcomponent comes pre-assembled in the heatsink.
Note that two magnets are sent, but one is meant to be used in the assembly, and the other is a spare. If your filament sensor does not work, check if two magnets have not been added by accident.
 |  |
How to clean the filament sensor
During usage, filament residue might build up around the sensor or its mechanism, possibly causing false readings and thus malfunctioning.
1) Compressed air
At the top of the extruder is a small hole, insert the tip of a compressed air can in the hole. With your free hand, prepare a bit of filament with a non-stringy tip. Repeatedly insert and remove the filament from the extruder, while blowing the compressed air. This will dislodge the build-up debris.
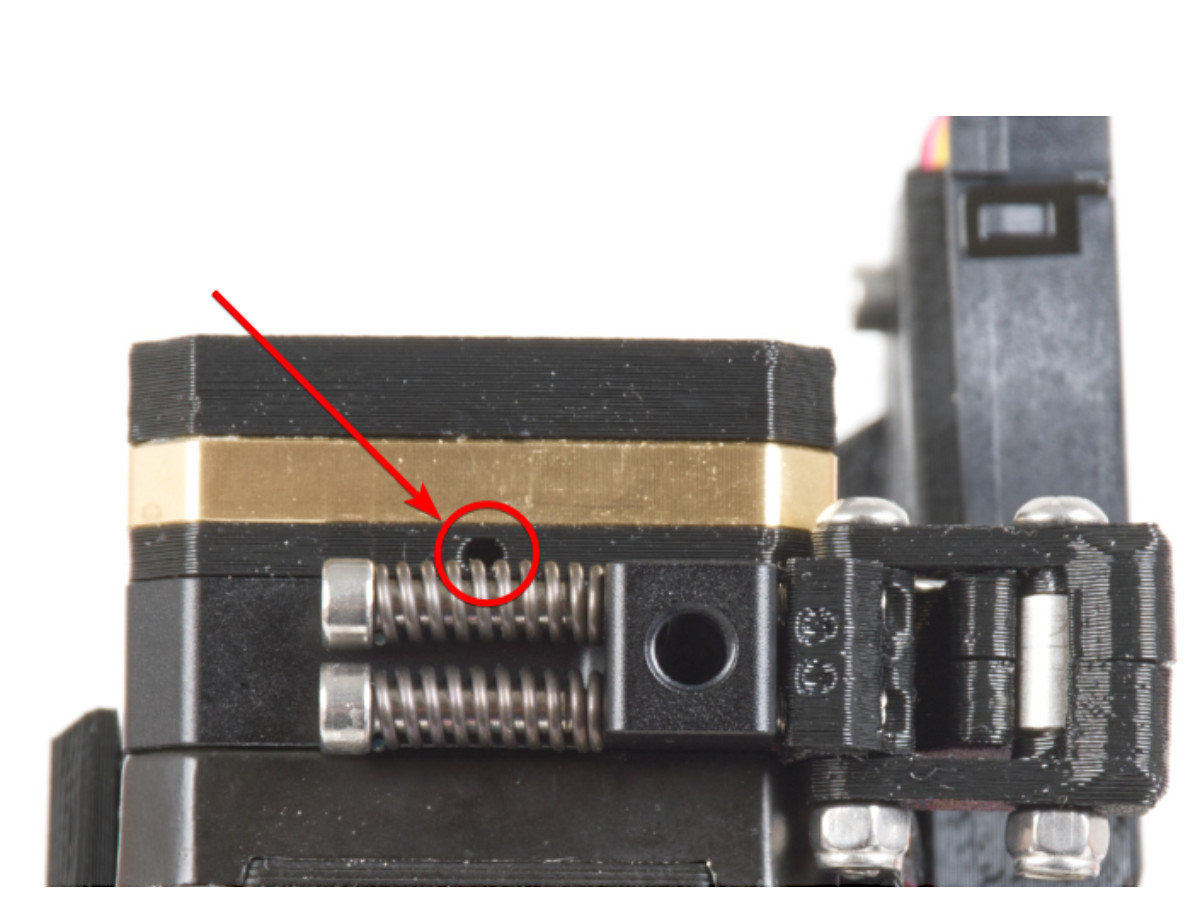 Top view of the MK4 print head. The XL print head has a similarly positioned small hole.
2) Filament tip insertion
In case you don't have compressed air at hand, a similar procedure to the one above can be attempted.
Prepare a bit of filament with a non-stringy tip. Repeatedly insert and remove the filament from the extruder. It will be necessary to insert and remove the bit of filament several times to achieve good cleaning, and the technique might not always be effective.
3) Removing the sensor (MK4/S, MK3.9/S)
Ensure to have the PG-assembly-adapter before continuing with the following procedure. If you do not have it, you can print it using the below files, depending on the printer you will use:
PG-assembly-adapter printed with MK4
PG-assembly-adapter printed with MK3/S/+
- Unload the filament, then wait for the printer to fully cool down. After that, turn the printer off.
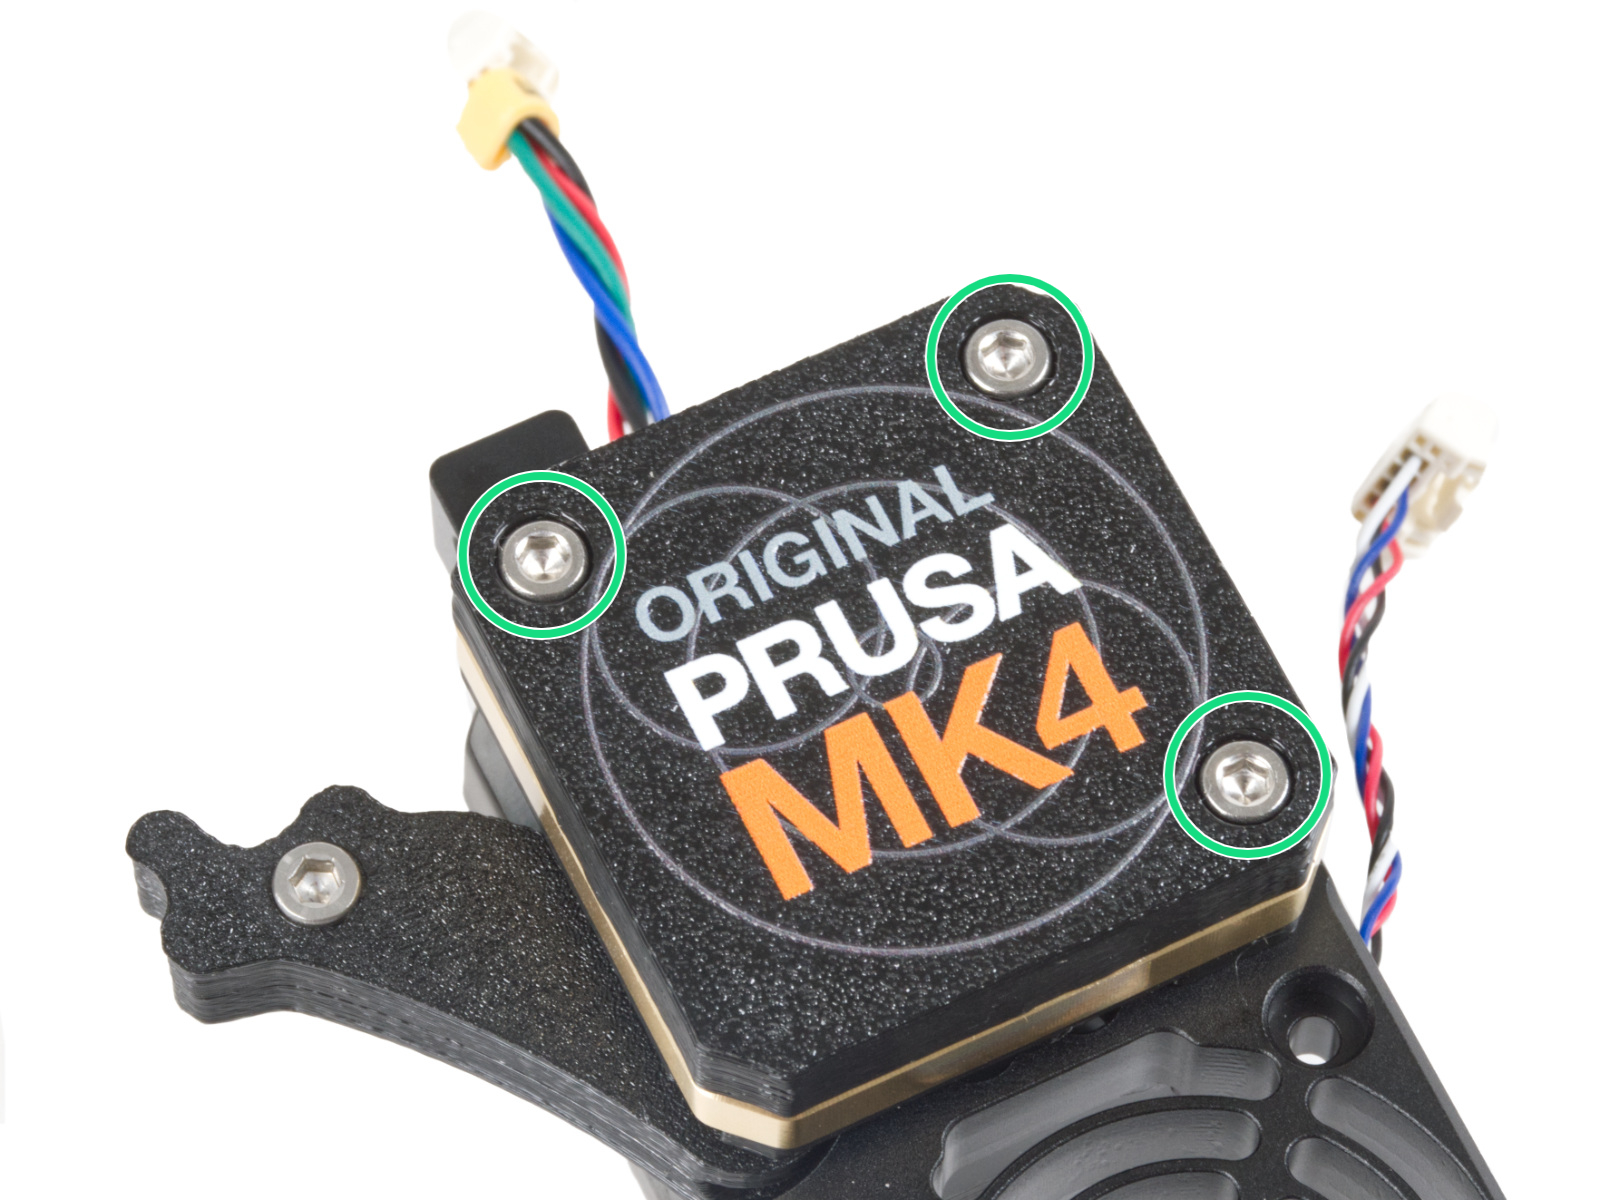
- Remove the PG-case, together with the PG-ring, gearbox, and main plate. Remove all of these parts in one piece.
 |  |
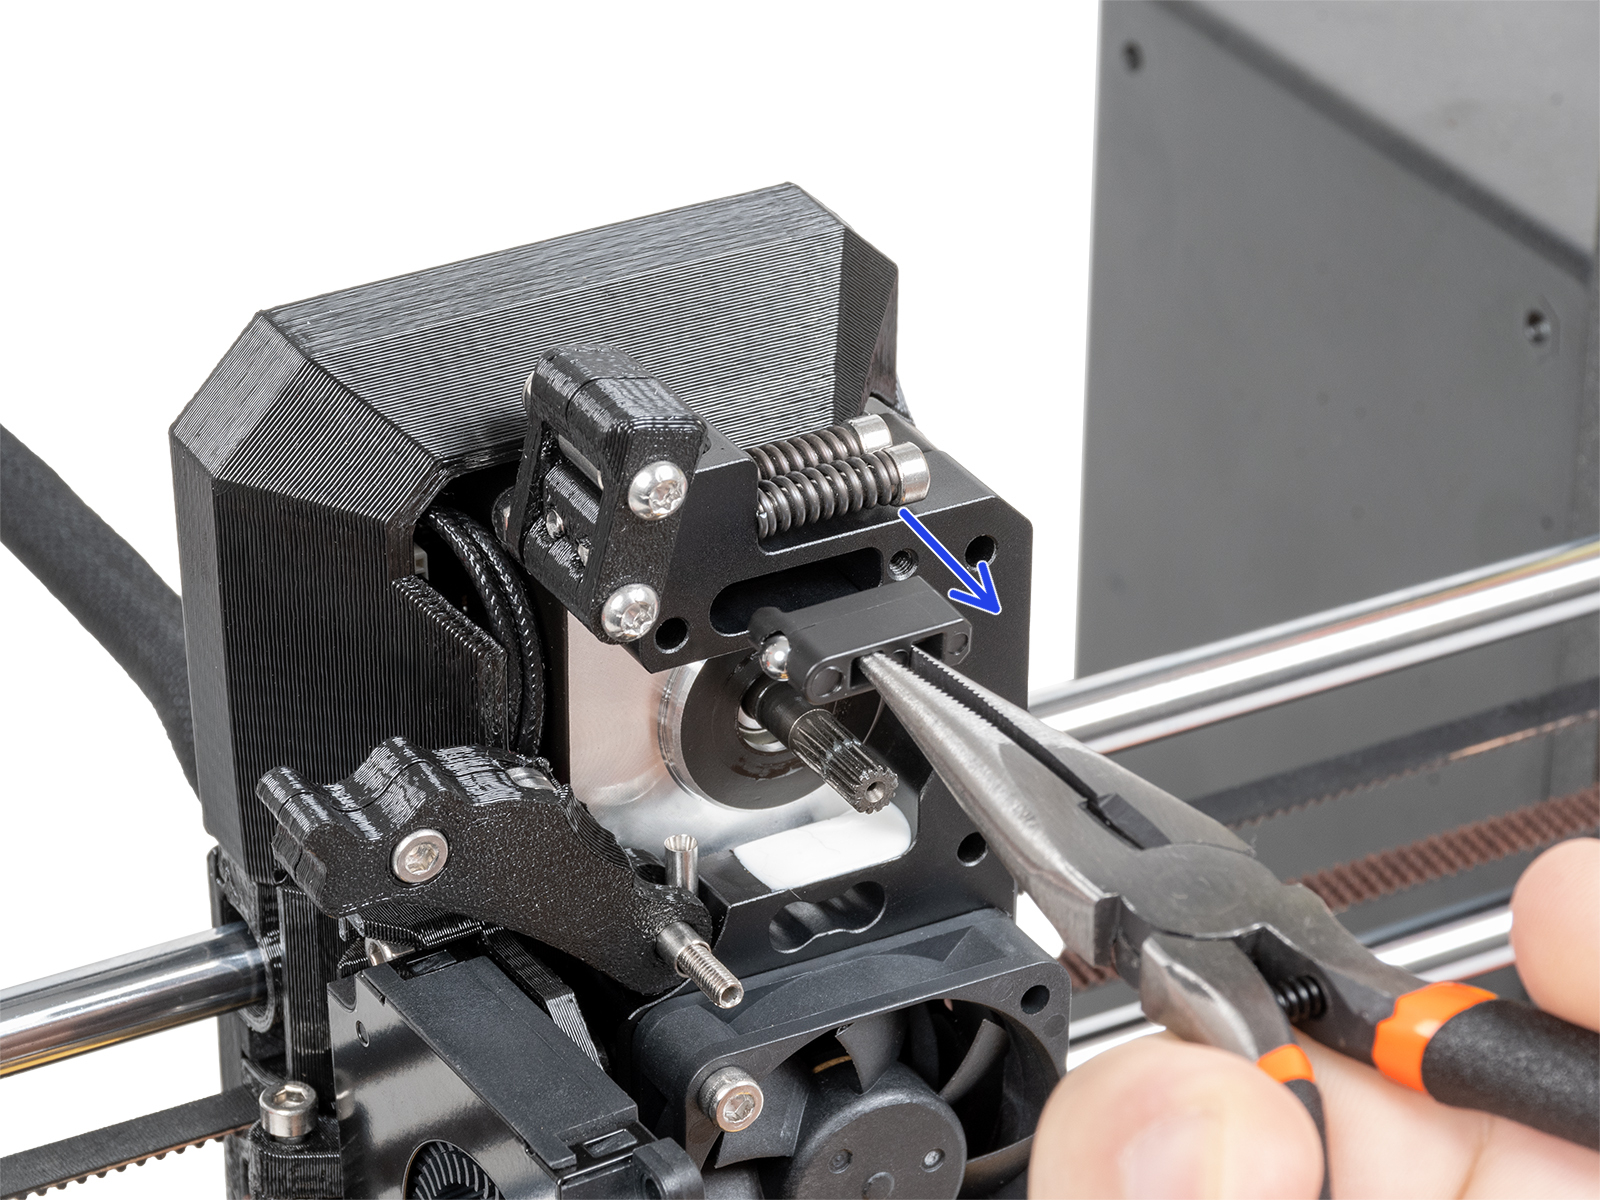
- Remove the Prusa-ball-holder using pliers.
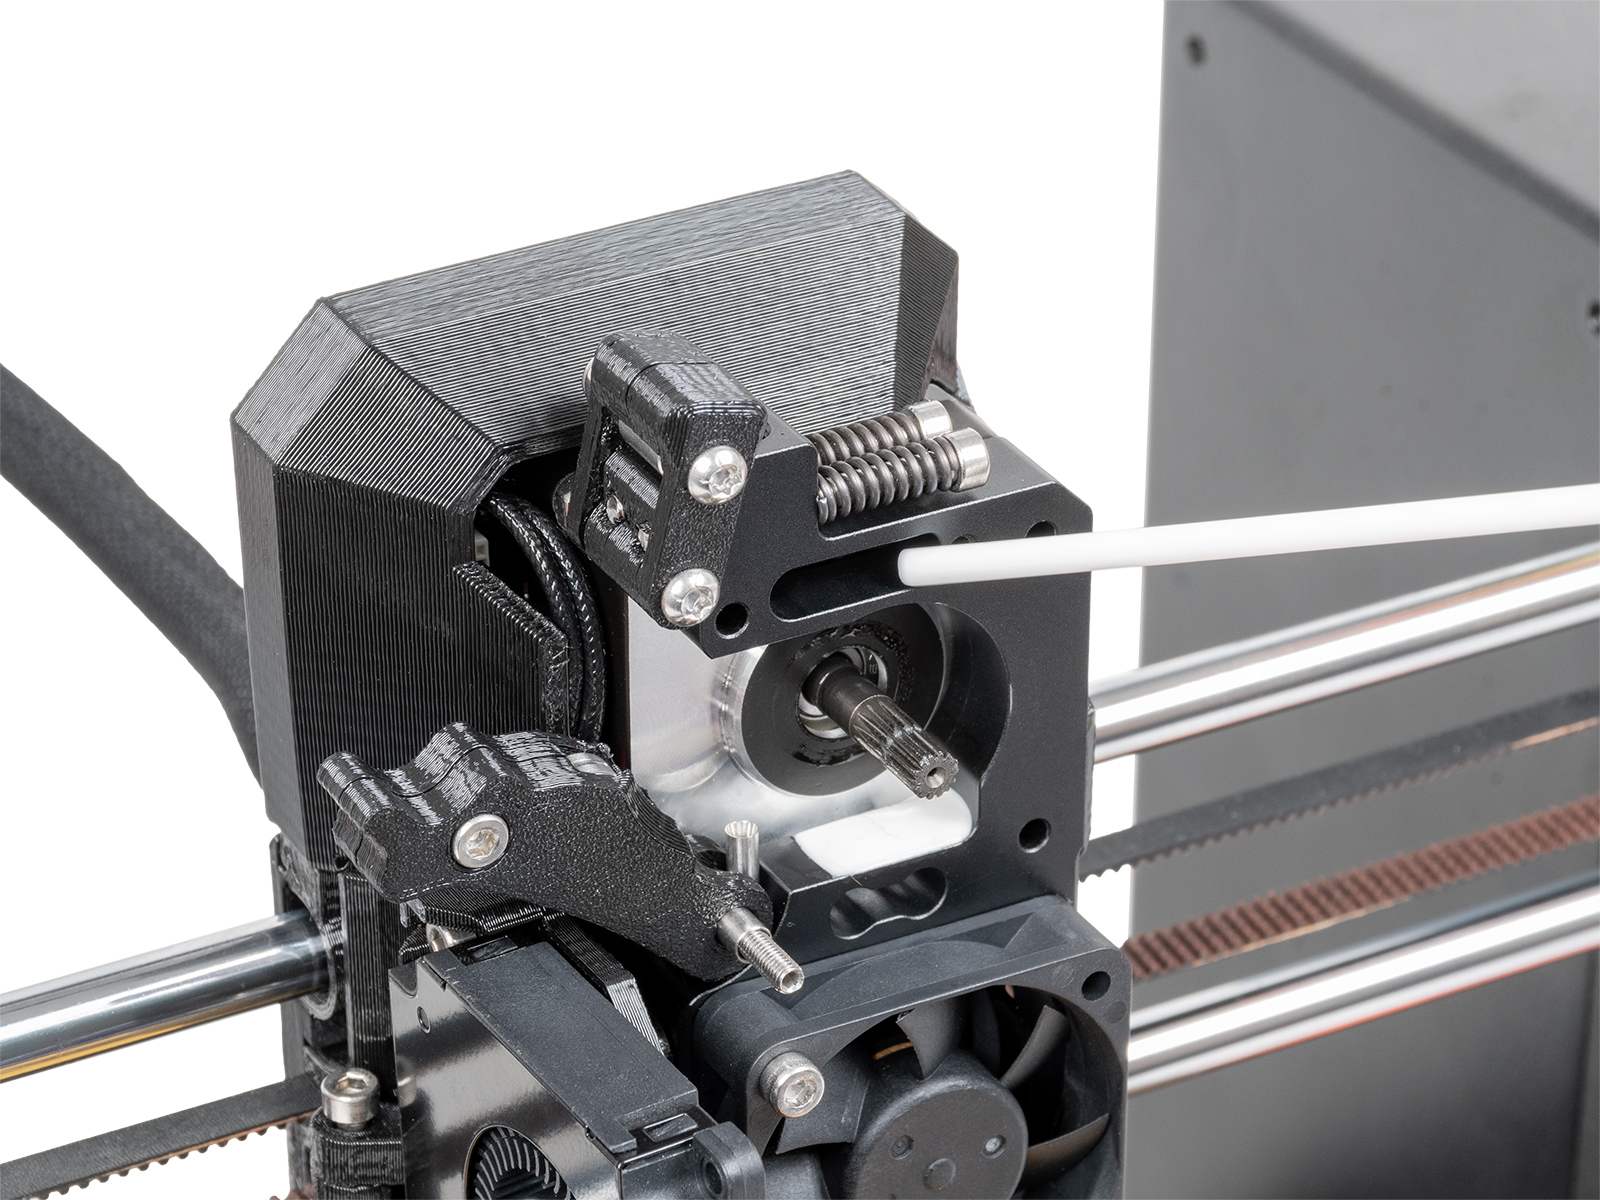
- Carefully remove the ball-magnet-spring combo from the Prusa-ball-holder and clean any debris out of it. Clean also the slot on the heatsink.
 |  |
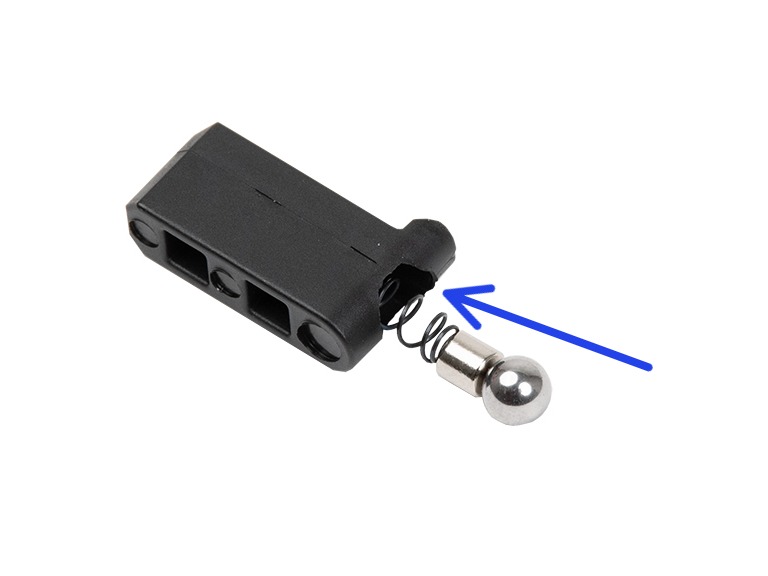
- Reassemble the Prusa-ball-holder in the following order: steel ball, magnet, and spring.
- Reassemble the block with PG-case, PG-ring, gearbox, and main plate.
Comments
Still have questions?
If you have a question about something that isn't covered here, check out our additional resources.
And if that doesn't do the trick, you can send an inquiry to [email protected] or through the button below.