Information from the data logged via serial line can be useful when doing advanced troubleshooting with your MMU2S unit or for providing it to カスタマーサポート when requested.
To obtain the log you will need to connect the printer to a Windows computer or to RPi/Linux computer.
When you connect the printer by the USB cable to a Windows computer, the printer should be showing up in the Windows Device Manager as a “COM device” under “Ports (COM & LPT). Write down or remember the number of the COM port.

The port number can be also found in the PrusaSlicer menu under Configuration -> Flash Printer Firmware and then in a row labeled Serial Port. This is applicable to Linux as well.
You will also need to download the logging script. It is available for Windows and for Linux.
Windows
To register the Multi-material log using Windows, find the script in GitHub, and do the following:
- Connect the printer with the USB cable to a Windows computer.
- Paste the code from GitHub to Notepad++.
- Go to File -> Save as and save the file as Windows PowerShell (*.ps1;*.psm1).
- Right-click the saved script file and from the menu select “Run with PowerShell”.
- If you get asked about “Execution Policy Change”, press “Y” [Yes].
- When prompted for “PortName”, enter the COM port your printer uses, e.g. "COM4" and hit Enter.
- When prompted for “BaudRate”, enter “115200” and hit Enter.
- After that, the script will start showing the communication between the printer and the MMU2S unit. It will also start saving everything into a .log file in the same folder where the script is located. (For example “2022-08-08-MMU.log”).
- Try to reproduce the MMU2S errors you are looking to resolve and mark down the time they occurred.
- To stop the script from running, press Ctrl+C or close the window.
The above steps should show a log similar to the one below. This is an example of one failed attempt at the “Load to nozzle” function for filament #3 (with MMU2S firmware 1.0.6).

Linux
In order to run the Linux script, you will need to have installed some extra packages. You can install them using this command:
Linux script:
To register the Multi-material log using Linux, do the following:
- Connect the printer with the USB cable to a Linux computer.
- Create a .sh file using the script above (file name example: prn-session2.sh).
- You will need to know the name of the serial port the printer is connected to in your system. For example, to log to a file test1_log.txt, using the serial communication on /dev/ttyACM0 and a with a description "MMU2S logging 08-08-2022" run the following command: sudo ./prn-session2.sh "test1_log.txt" /dev/ttyACM0 "MMU2S logging 08-08-2022".
- After that, the script will start showing the communication between the printer and the MMU2S unit. It will also start saving everything into a .log file.
- Try to reproduce the MMU2S errors you are looking to resolve and mark down the time the error occurred.
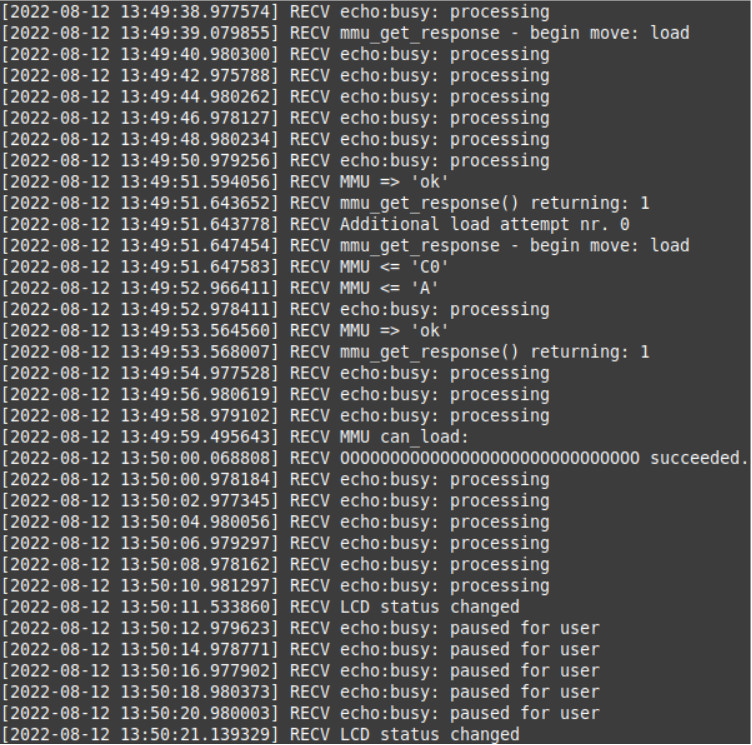
The above steps should show a log similar to the one below. This is an example of a successful attempt at the “Load to nozzle” function for filament #1 (with MMU2S firmware 1.0.6).