If your printer suddenly stops extruding filament, yet continues the print moves without reporting any error, you may be a victim of a heat creep.
What does it look like
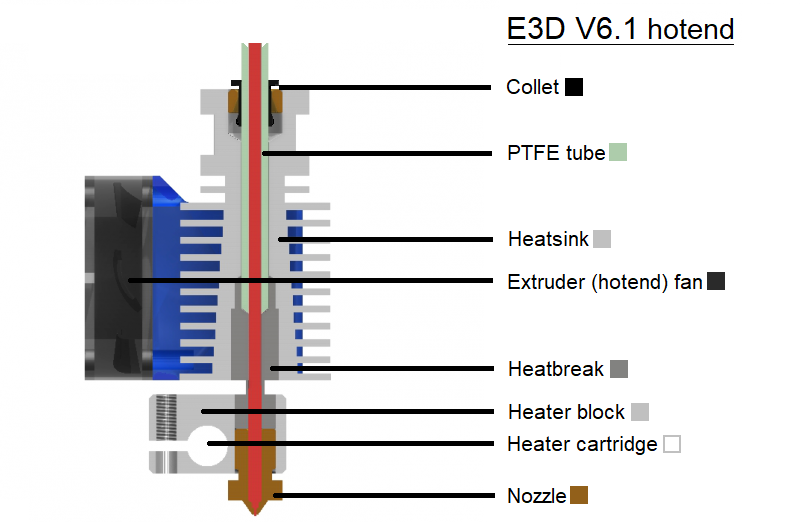
Broadly speaking, we refer to heat creep when parts of the hotend above the heater block get too hot. Under normal circumstances, the filament starts melting just above the nozzle. However, when the heatbreak gets too hot, the heat expands upwards irregularly throughout your hotend, the filament starts to soften higher inside the hotend and causes a clog. The extruder motor grinds into the filament, it can even make a “clicking” or "ticking" sound as it tries to push the filament down the extruder.
How to fix it
Most common causes:
- The ambient (room) temperature is above 35°C (30°C for some filaments) or the printer is in an enclosure.
- The filament you are using contains metal particles, which conduct the heat up the hotend.
- The hotend temperature is set too high.
- The thermal transfer between the nozzle, the heatbreak, and the heatsink is insufficient.
- There is not enough airflow cooling the heatsink.
- There is not enough filament flowing through the nozzle or it is not flowing fast enough.
How to prevent it from happening
After you have cleaned the hotend, check the collection of tips below to keep this problem from happening again.
Extruder assembly
Gap between the nozzle and the heater block
In all assembled E3D v6.1 hotends, there should be a gap of about 0.5 mm (0.02 inch) between the heater block and the hexagonal head of the nozzle. Again, this is to control heat flow inside the hotend. When screwing your nozzle into the heater block, you should tighten it all the way in, but never try to (over)tighten it so that the nozzle head would touch the heater block.
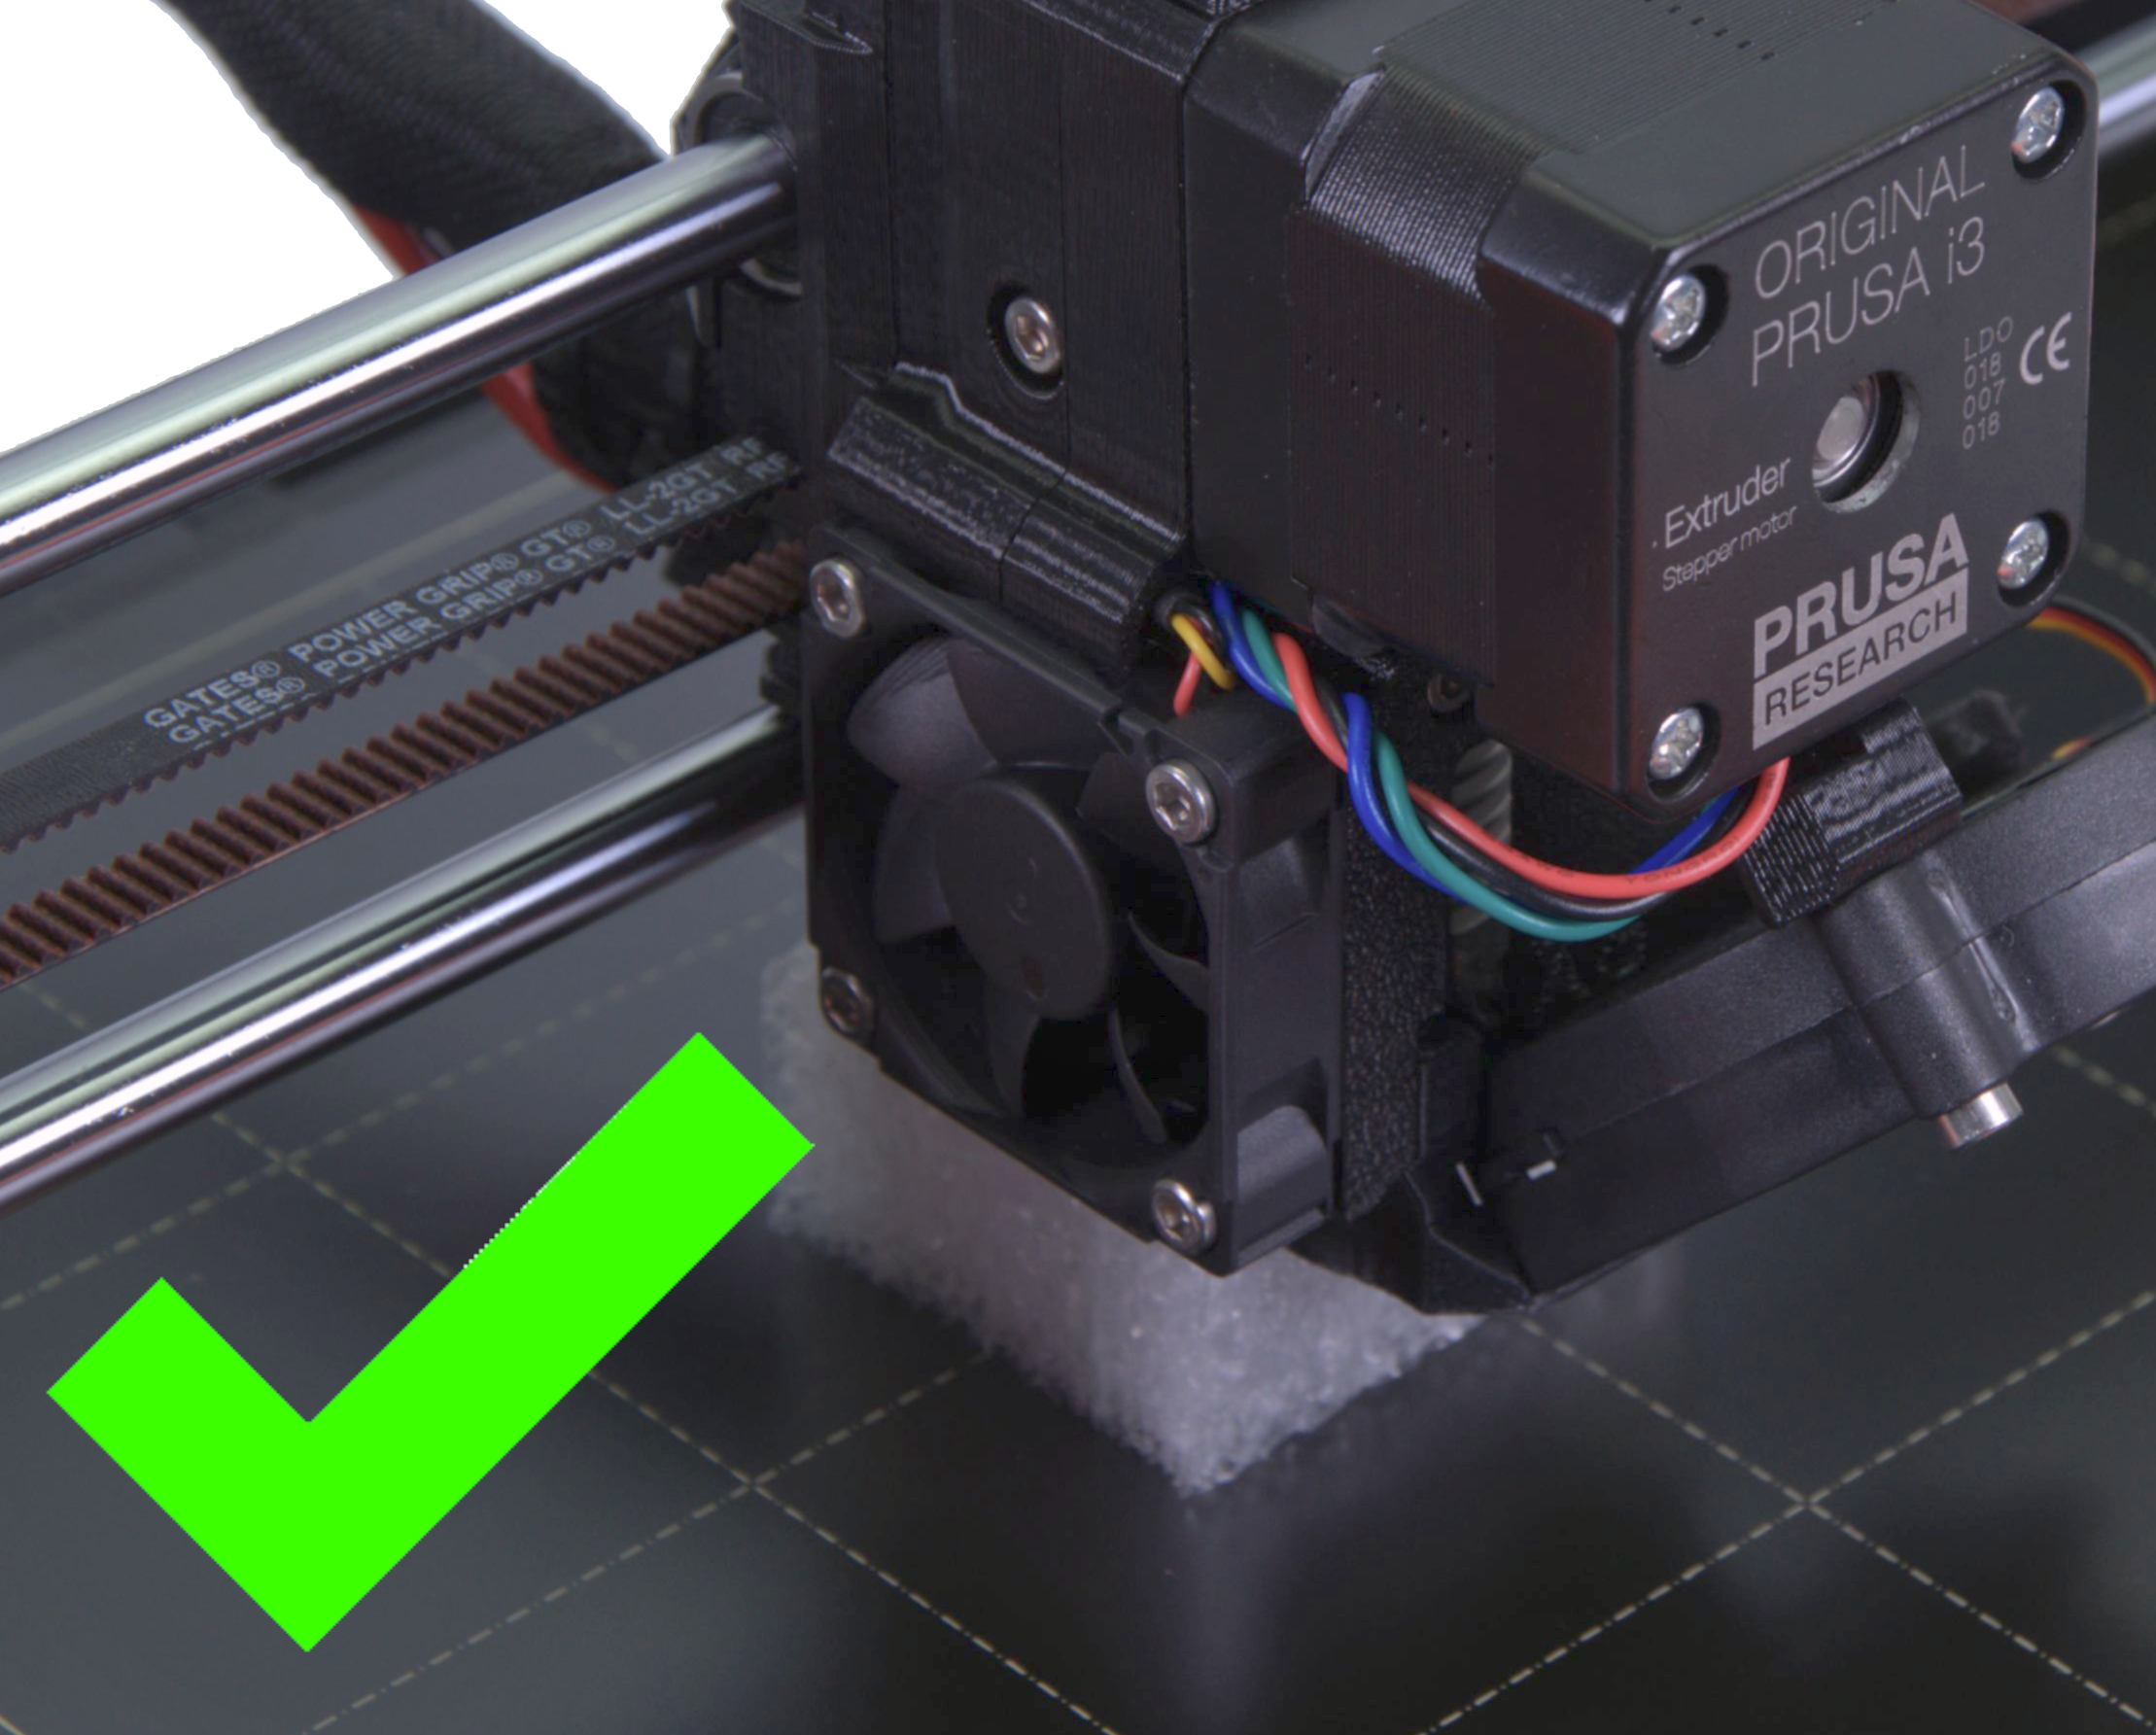
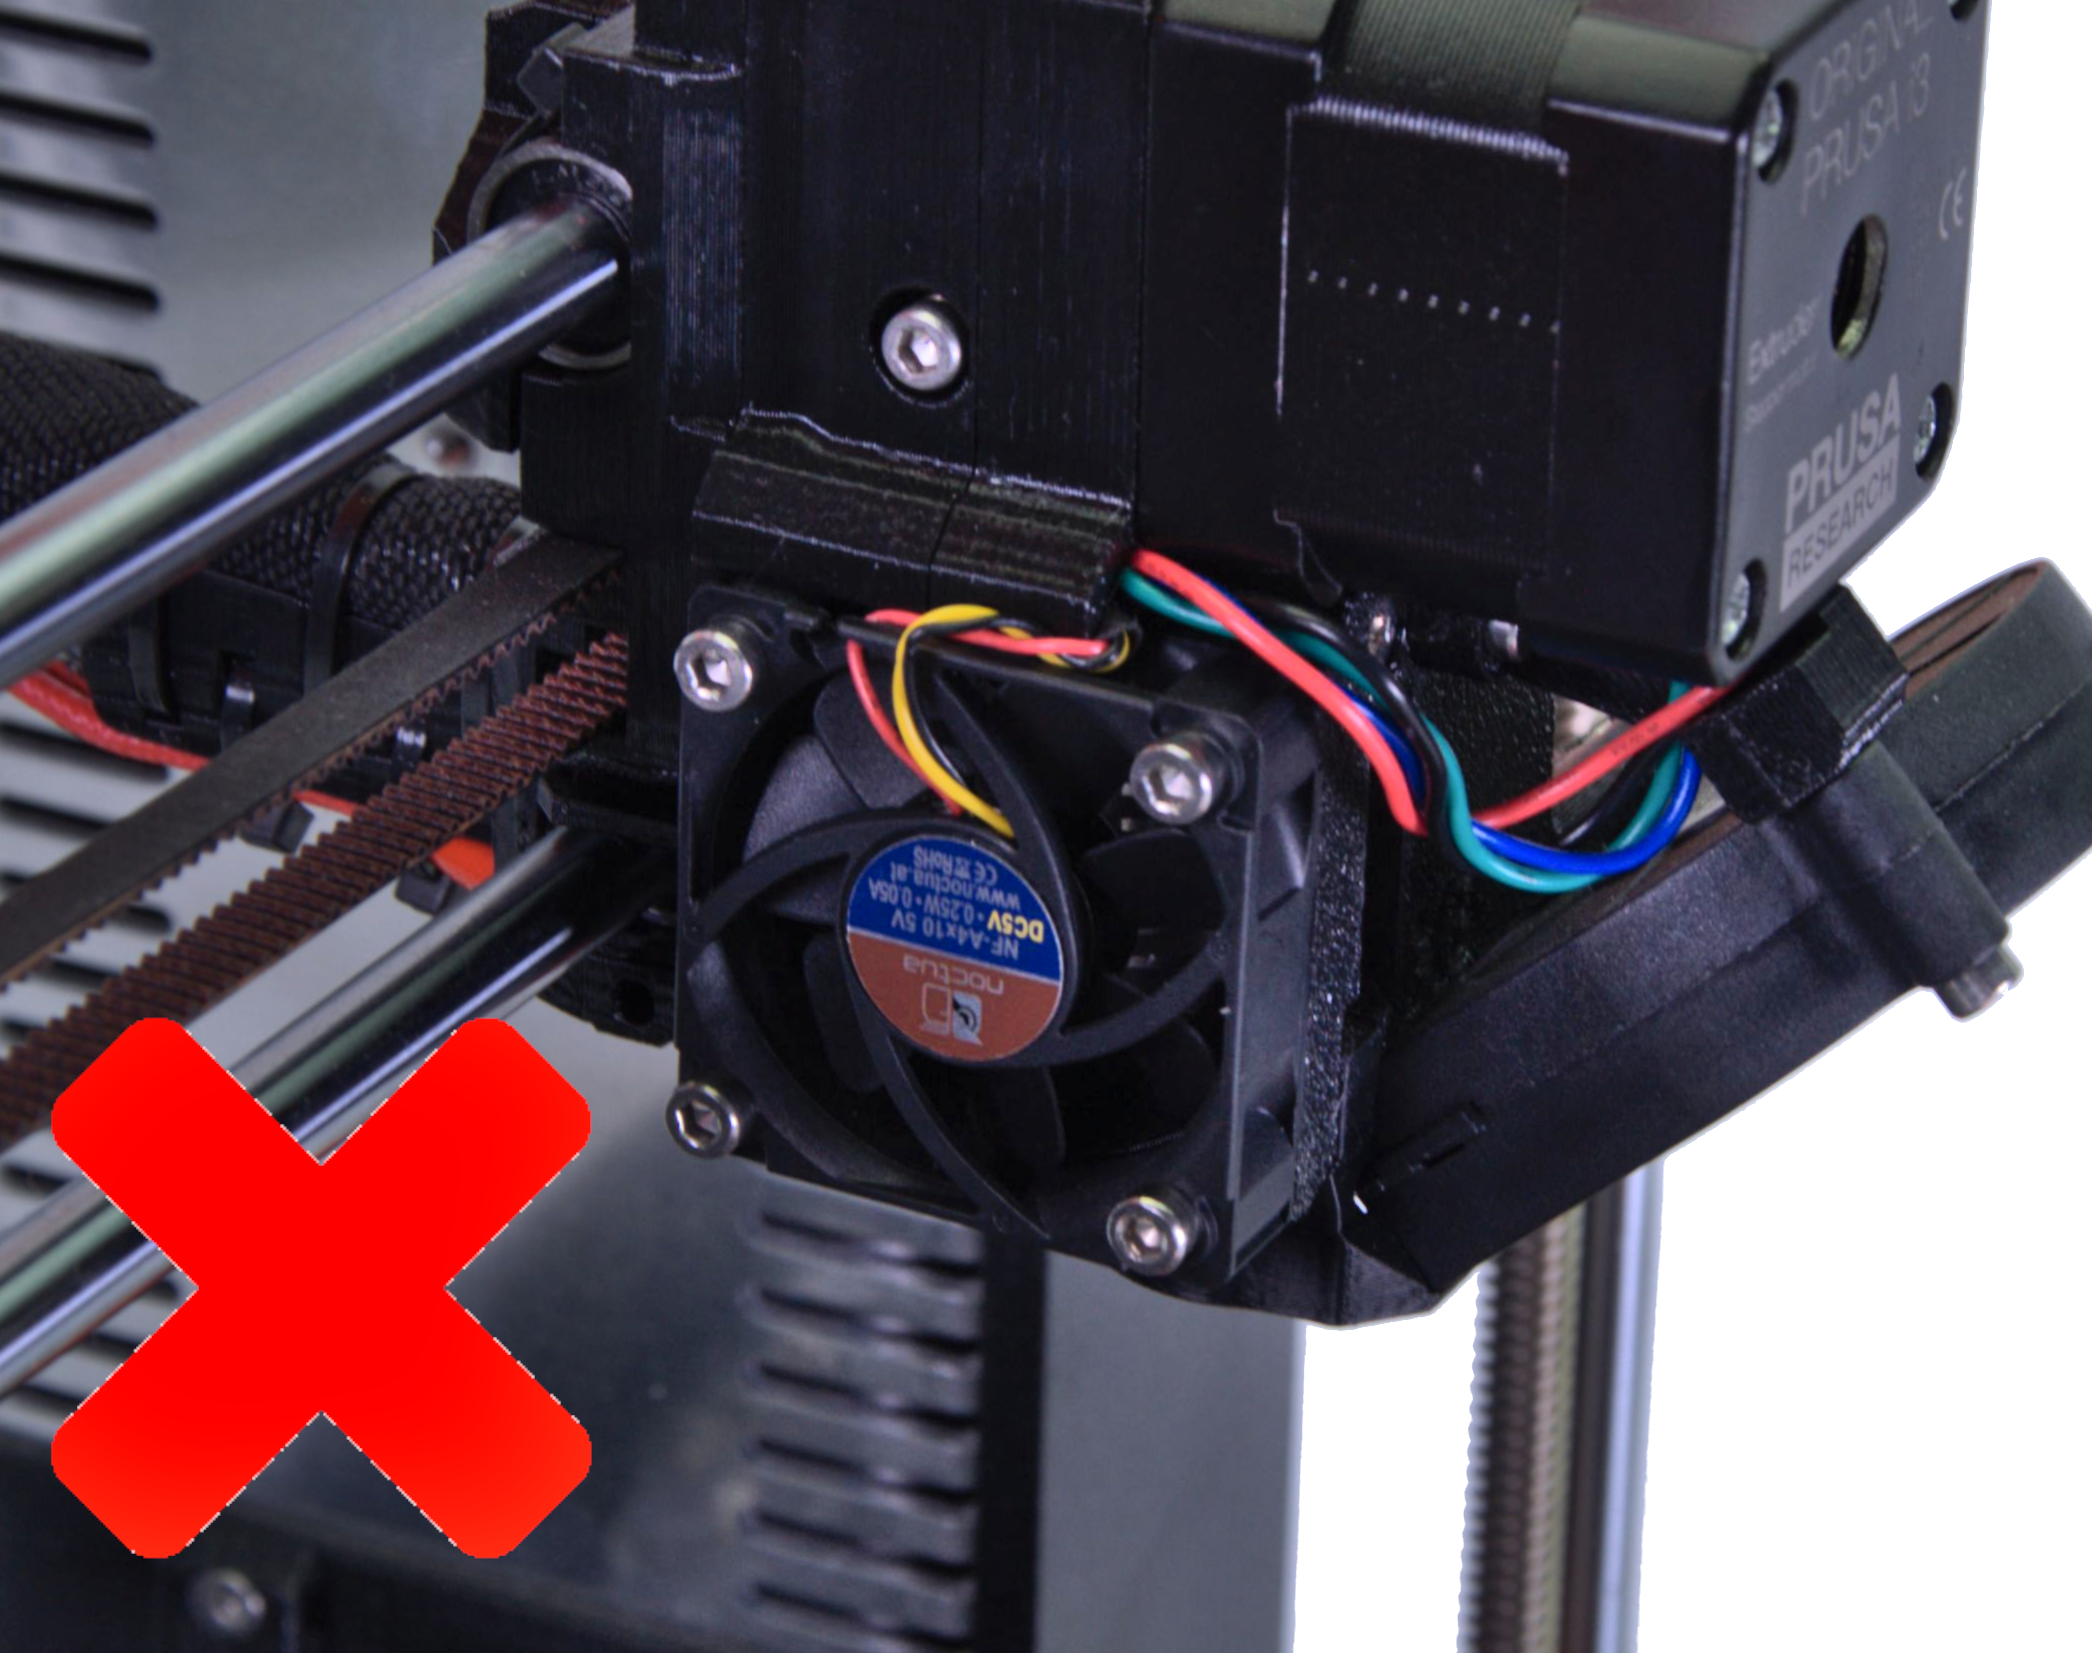
Check the extruder fan
As you can imagine, the cooling fan needs to be working properly to cool the heatsink enough. First off, make sure that you don’t see the sticker on the fan - that would mean the fan is mounted backward. While spinning, it must push air inside, not outside.
If the fan is correctly mounted, you can check whether it is spinning fast enough. During the print, navigate to LCD Menu -> Support -> Extruder info -> Fan speed. The RPM value for the Nozzle Fan should be between 4000 and 4400.
 |  |
Idler tension and Bondtech gear
Too little or too much tension on the extruder idler spring can also cause issues with filament extrusion. With the idler screw being too loose, the gears can't grip the filament and the motor can start skipping. With the idler screw being too tight, the teeth on the gears might grind the filament and get choked - always make sure the gears are clean.
Make sure the heatsink is dust-free
The heatsink’s job is to prevent the temperature from increasing too much along the filament path. After many hours of printing, the fins on the heatsink can accumulate fine dust, which decreases heatsink’s effectiveness at dissipating the heat. One easy way to solve this is to remove the hotend cooling fan (the square fan on the left side of the extruder) and blow the dust away with canned air. While at it, blow the dust from the fan itself too.
Check that the PTFE tube is fully inserted in the hotend
It is very important to ensure the PTFE tube inside the hotend sits flush with the edge of the heatbreak. If you’ve recently taken the PTFE tube out from the heatsink, it is always wise to double-check that the PTFE tube is secured in place and does not move up and down. Fortunately, we have a guide for that here.
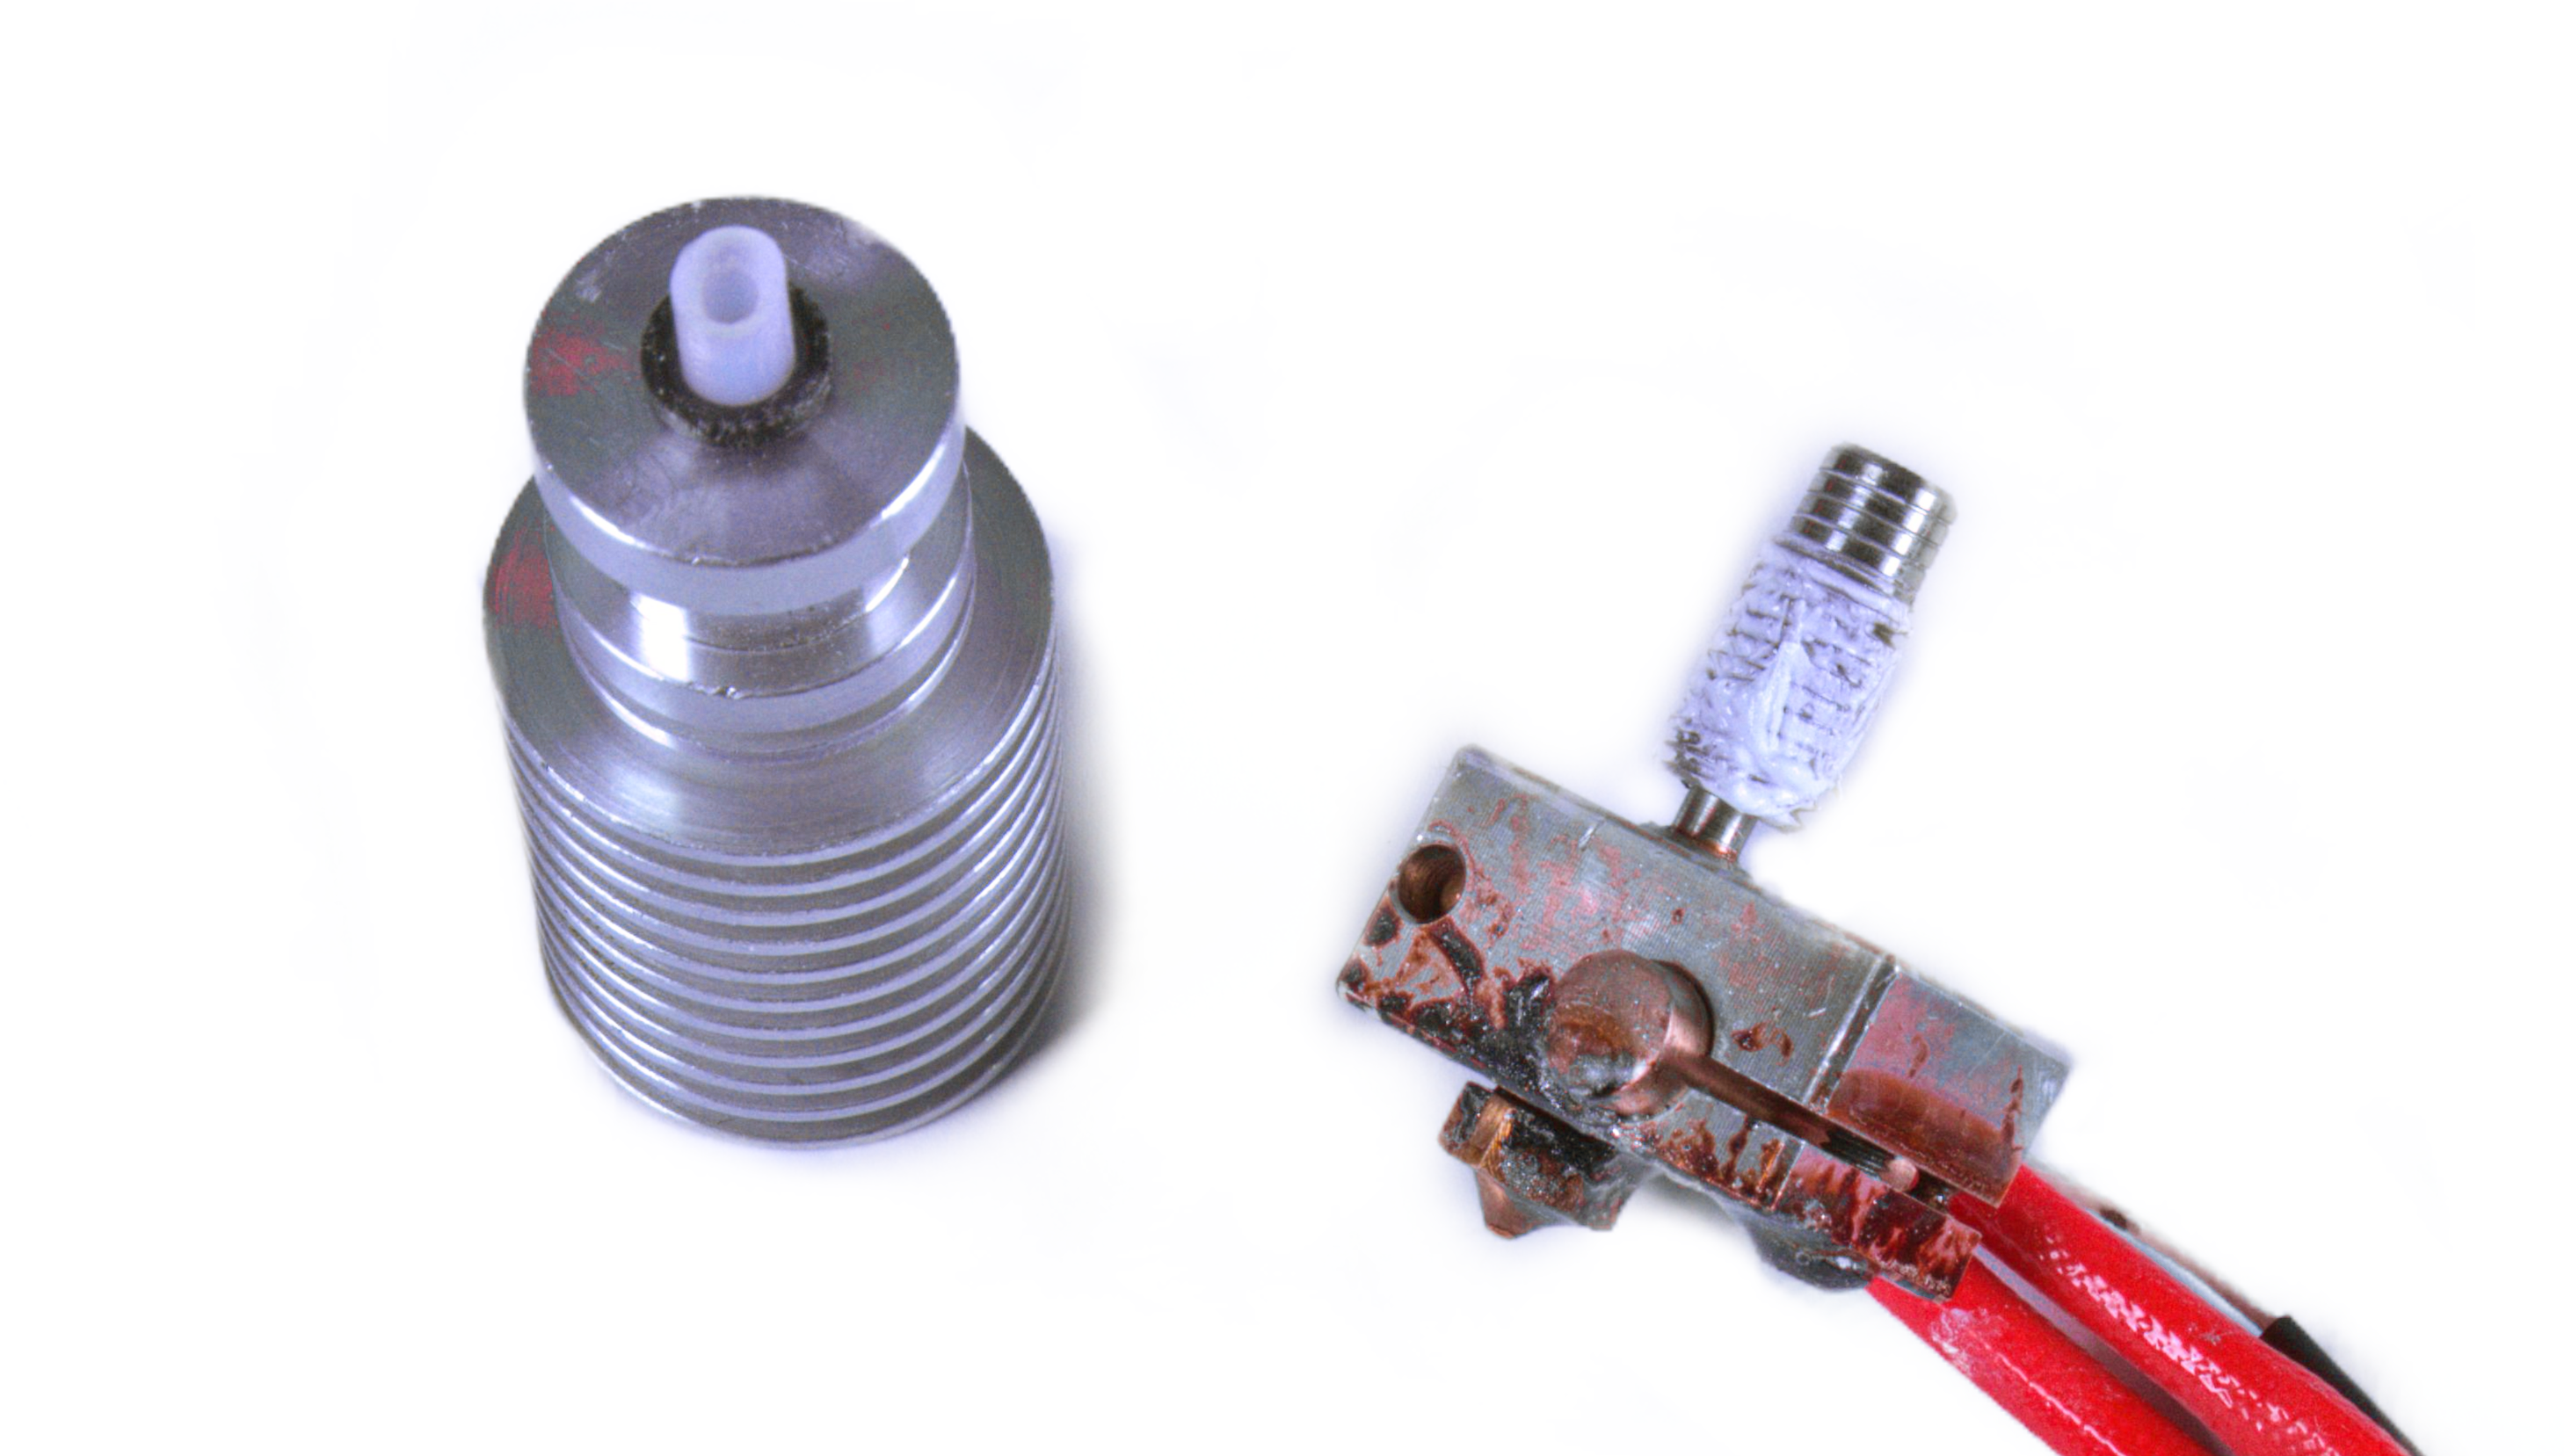
Add the thermal paste to the heatbreak
Especially if you were taking the hotend apart in order to clean it, before putting the hotend back together, don't forget to apply some thermal paste on the heatbreak thread that is in contact with the heatsink (the same kind of thermal paste used for computer processors). You can get the paste from our eshop, or similar high quality generic thermal paste. Here’s what your heatbreak should look like with enough thermal paste. Refer to this guide (for MK3S/MK2.5S/MMU2S. For MK3/MK2.5, there is a separate guide) for more information about how to dismantle the extruder and the hotend.
Print settings
Lower the heatbed temperature
The heat rising from the heatbed may contribute to the overheating of the extruder parts. Especially (but not only) for a PLA print you can lower the heatbed temperature in Prusa Slicer by 5 or 10 degrees. In the PrusaSlicer, you can go to Filament settings -> Filament and modify the temperature in the Temperature °C field.
You can also do this during the print, in the LCD Menu -> Tune -> Bed (and change the value by turning the knob), but in that case, do it only before the first layer finishes, otherwise, the sudden temperature change may deform the print.
Increase layer height
Printing with thin layers uses very little filament at a time, so there is not much filament flowing through the nozzle, which allows the heat to move up inside the extruder. One easy trick to test is to print with layer heights of 0.15mm or 0.20mm, for example. If you don’t need a particularly detailed print, go for thicker layers.
Increase print speed
A slow print can cause heat creep for the same reason when printing with thin layers. Increasing the print speed by 10% can help, however, we recommend not to exceed the speeds of 200 mm/s for infill print speed at layers of 0.20 mm and below.
10 comments
Since there doesn't seem (yet?) to be a way to make the printer pause and cool down when this happens, the solution is to print with the door open and possibly even point a fan at the cabinet to help cool down the heatsink on the front of the print head.
To check your idler isn't warped, undo the tension screw and rear hinge screw and remove it and then check to see if the outer surface is flat or not. Mine was warped by 2-3mm which was causing the cog to not be parallel with the one connected to the extruder itself.