Der Filament-Sensor in unseren Nextruder-Druckern erkennt das Vorhandensein eines Filaments und das Auslaufen des Filaments. Der Sensor ist ein Hall-Sensor, der durch einen Mechanismus aus einer Feder, einem Magneten und einer Kugel ausgelöst wird.
Auf einem Drucker, der auf die Original Prusa MMU3 aufgerüstet ist, sind einige der Nextruder-Komponenten modifiziert, darunter der Mechanismus, der den Filament-Sensor auslöst. Bei diesen Druckerversionen basiert der Mechanismus nicht auf einem System aus Feder, Magnet und Kugel, sondern auf dem Idler-Spannbolzen.

Montage überprüfen (MK4/S, MK3.9/S)
Wenn Ihr Drucker ein MK4 oder MK3.9 ist, haben Sie ein Paket mit Magneten für die Montage erhalten. Bei MK4S und MK3.9S, sowie beim CORE One und dem XL ist diese Unterkomponente bereits im Kühlkörper vormontiert.
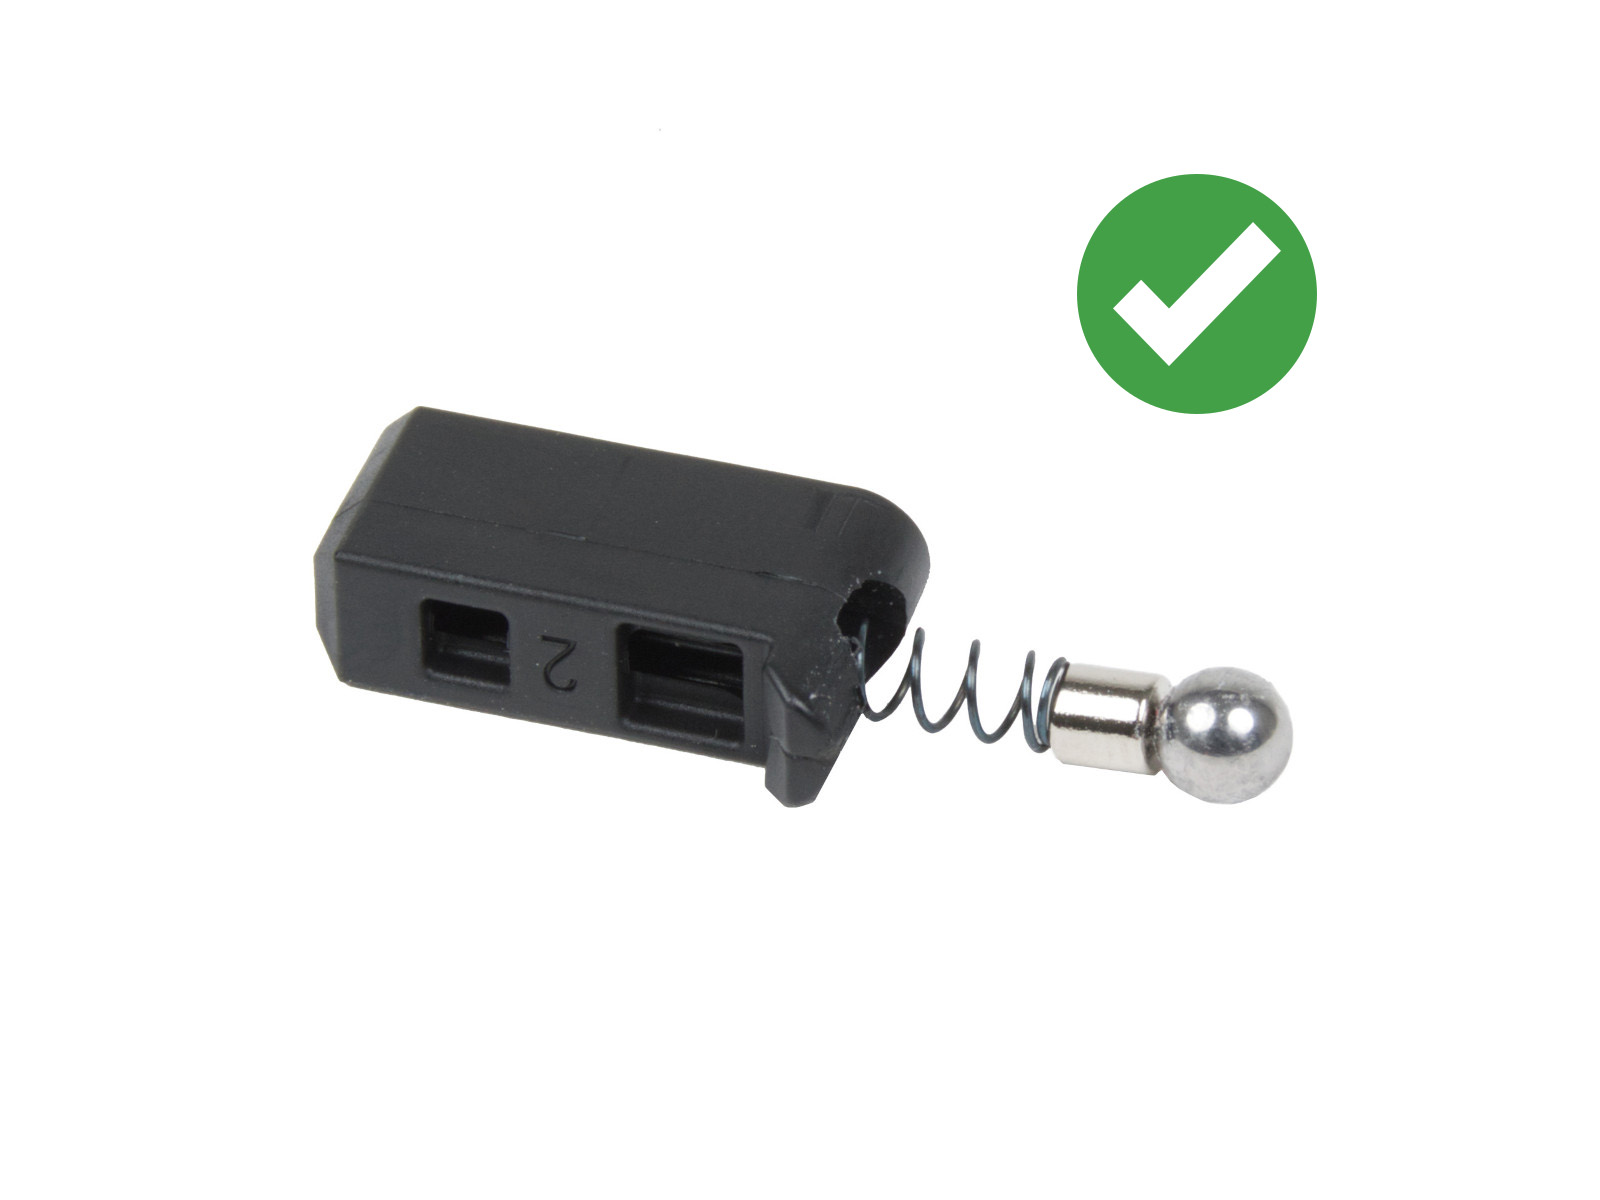
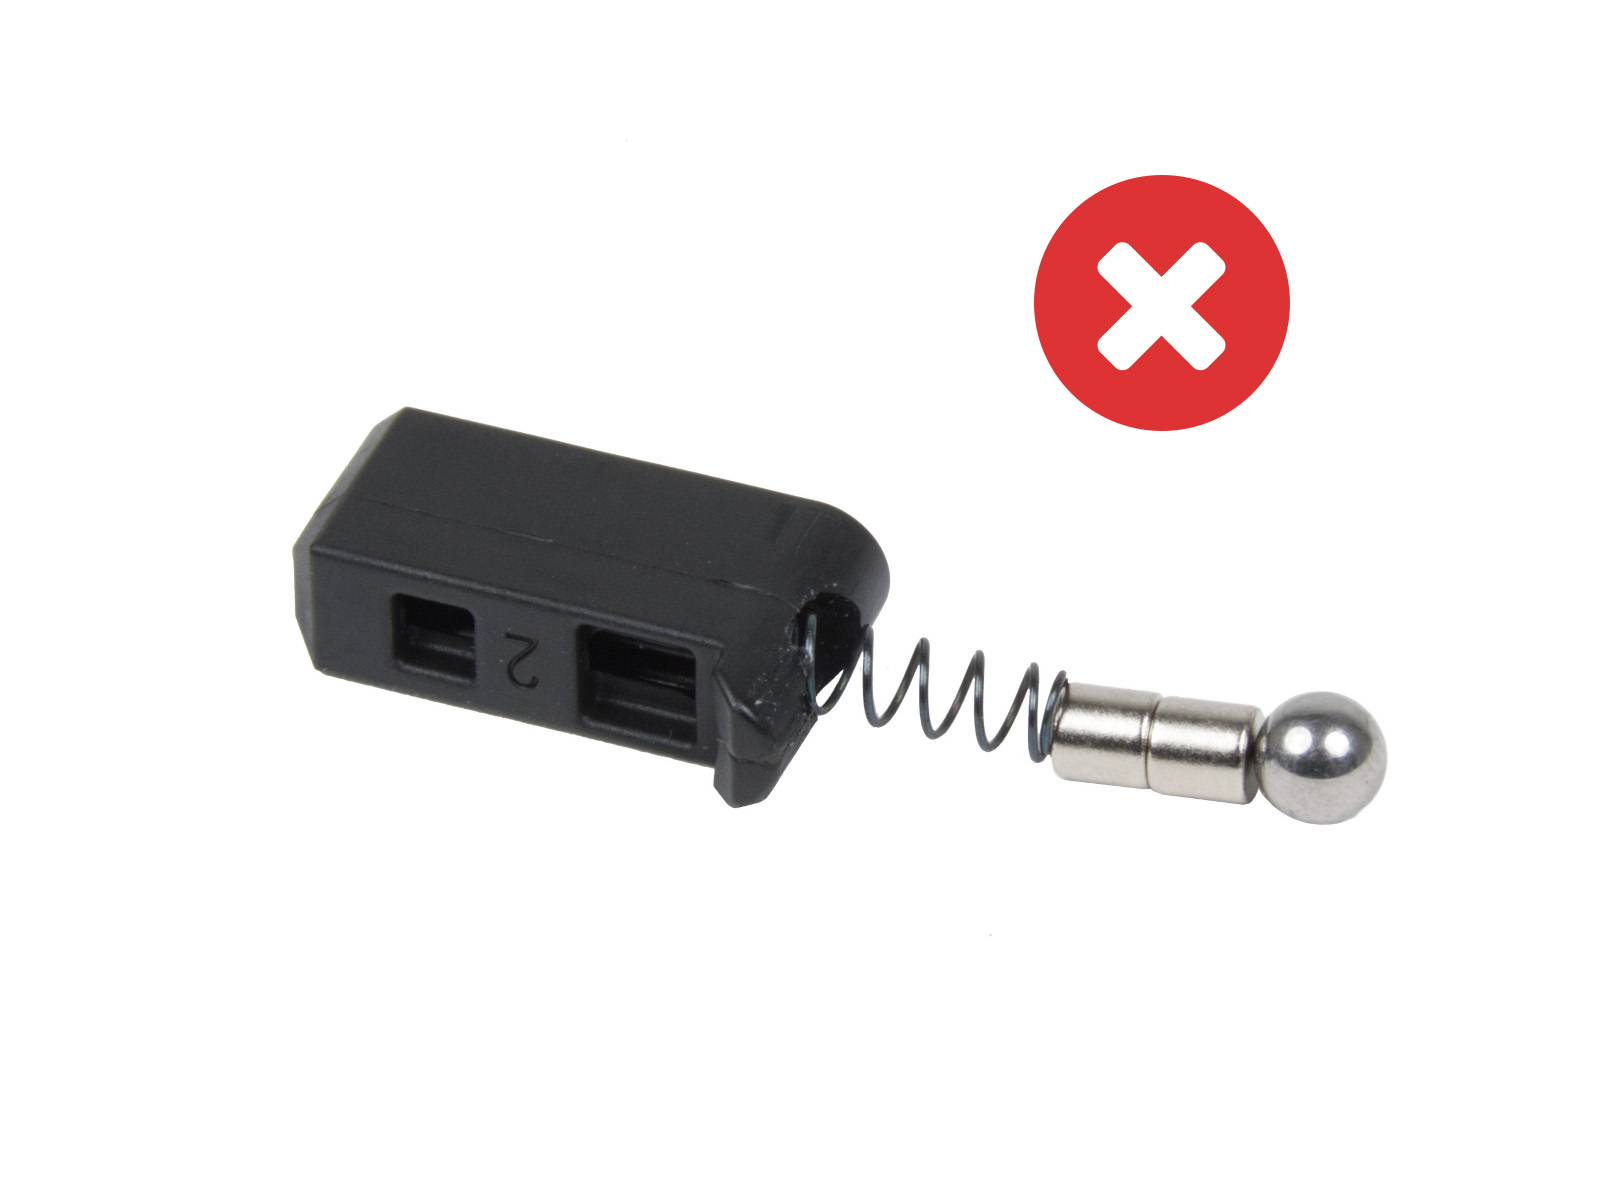
Beachten Sie, dass zwei Magnete mitgeliefert werden, von denen einer für den Zusammenbau bestimmt ist und der andere ein Ersatzmagnet ist. Wenn Ihr Filament-Sensor nicht funktioniert, überprüfen Sie, ob nicht versehentlich zwei Magnete hinzugefügt wurden.
 |  |
Nextruder mit MMU3-Modifikation
Wenn die MMU3 auf dem MK3.9/S oder MK4/S installiert ist, wird der Prusa-Kugelhalter durch eine Schwenkvorrichtung ersetzt. Wenn Sie die MMU-Modifikation in Ihrem Extruder haben, gelten die folgenden Schritte immer noch, werden aber auf die Schwenkeinheit angewendet, wenn der Prusa-Kugelhalter erwähnt wird.
So reinigen Sie den Filament-Sensor
Während des Gebrauchs können sich Filamentrückstände um den Sensor oder seinen Mechanismus ablagern, was zu falschen Messwerten und damit zu Fehlfunktionen führen kann.
1) Mit Pressluft
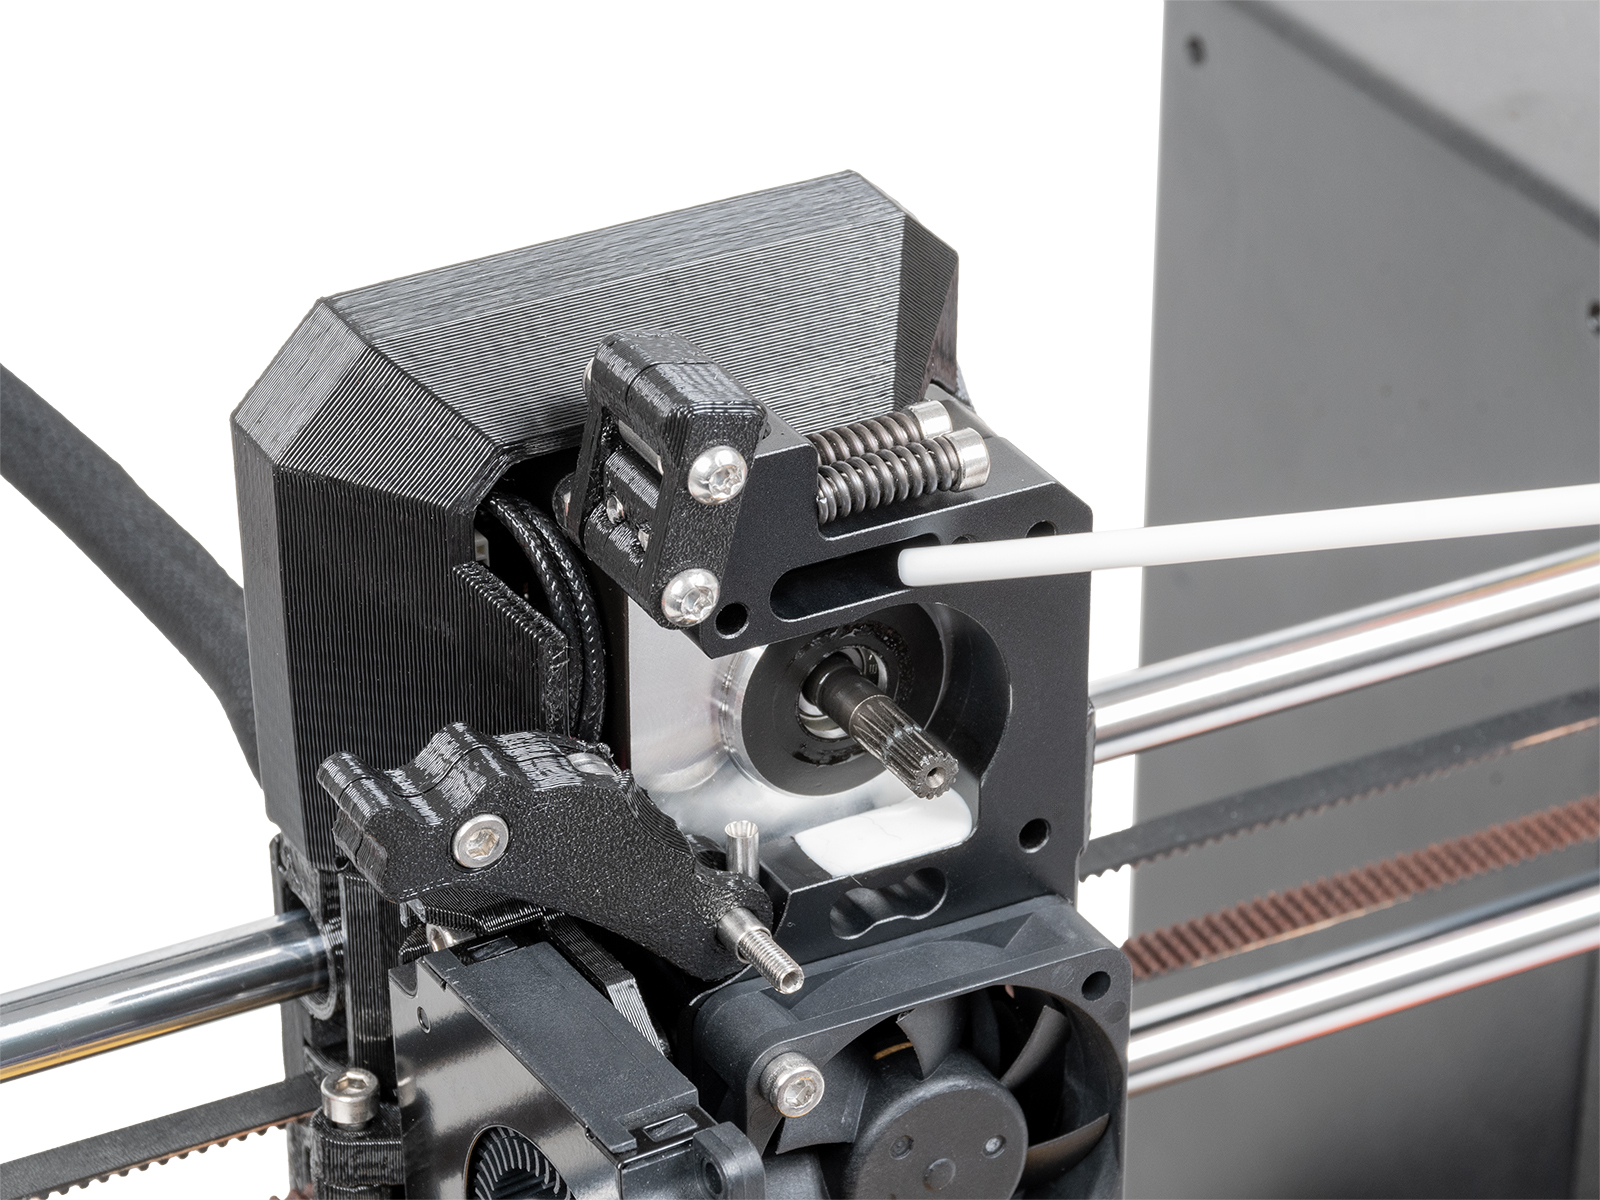
An der Oberseite des Extruders befindet sich ein kleines Loch. Stecken Sie die Spitze einer Druckluftdose in das Loch. Bereiten Sie mit der freien Hand ein Stück Filament mit einer nicht fadenförmigen Spitze vor. Führen Sie das Filament wiederholt in den Extruder ein und entfernen Sie es wieder, während Sie in die Druckluft blasen. Dadurch werden die Ablagerungen entfernt.
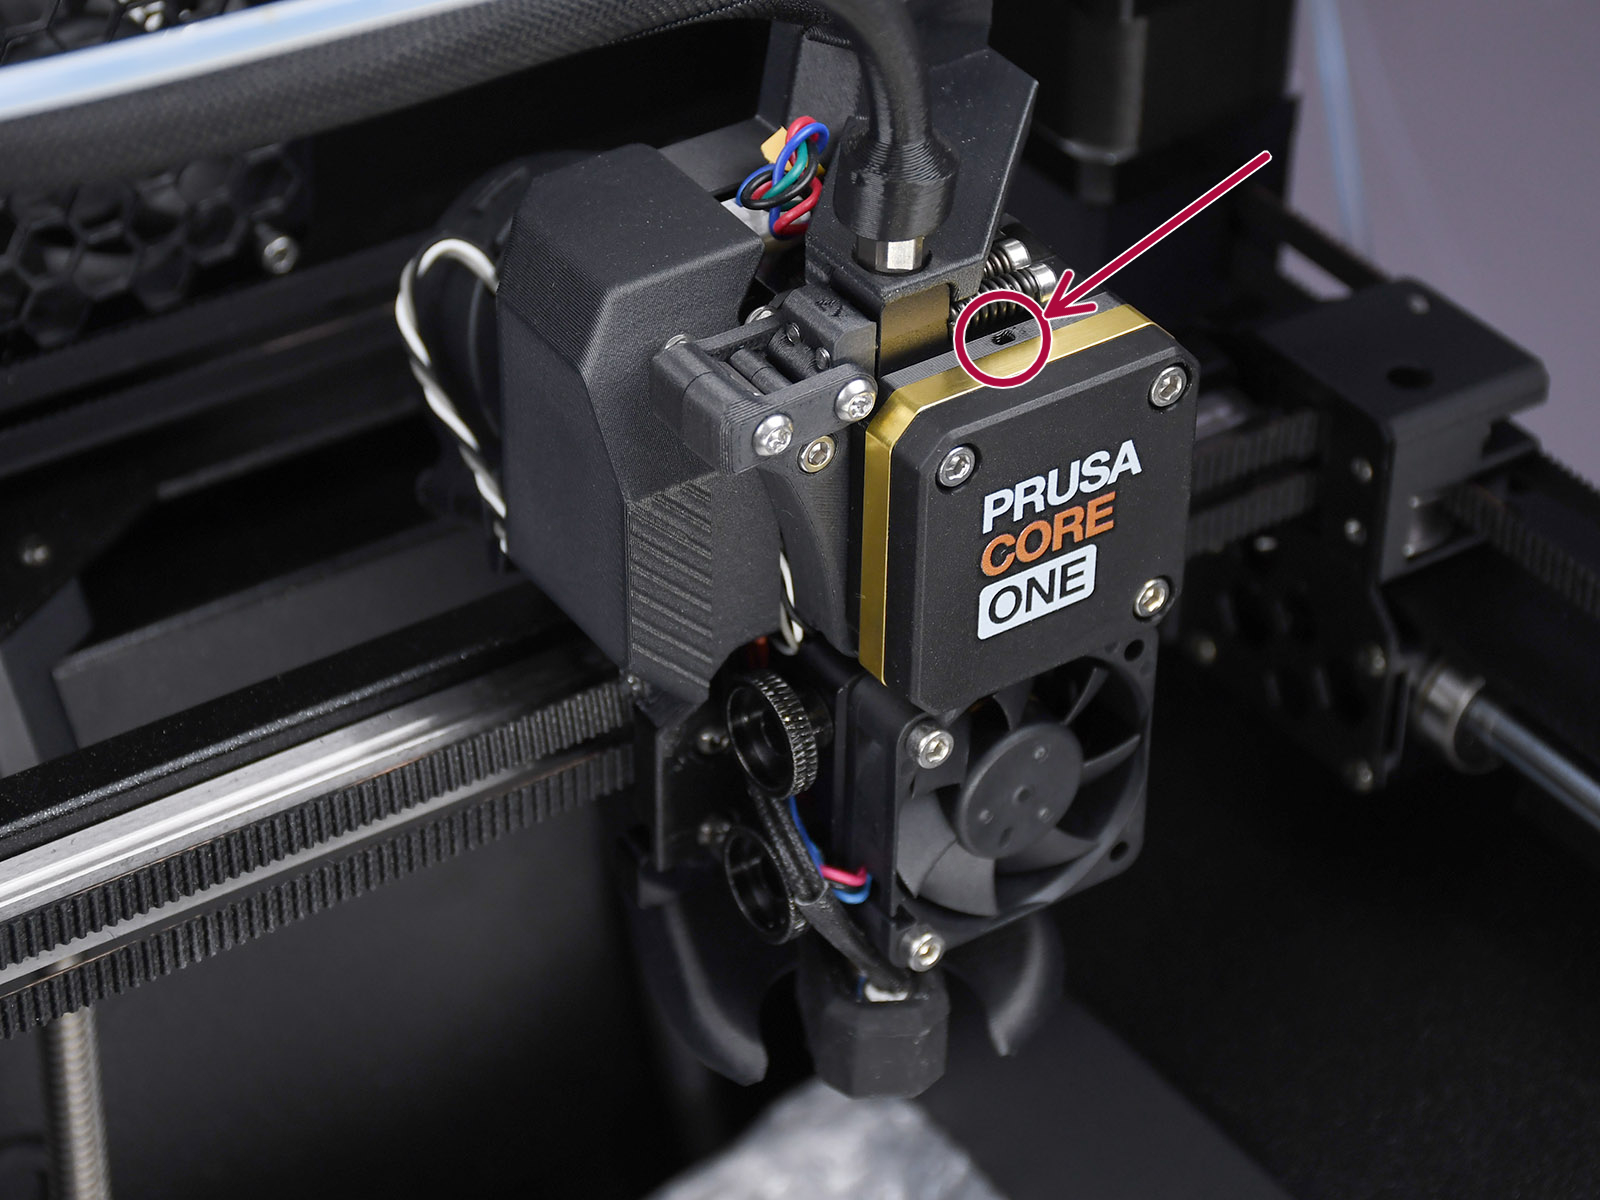 | 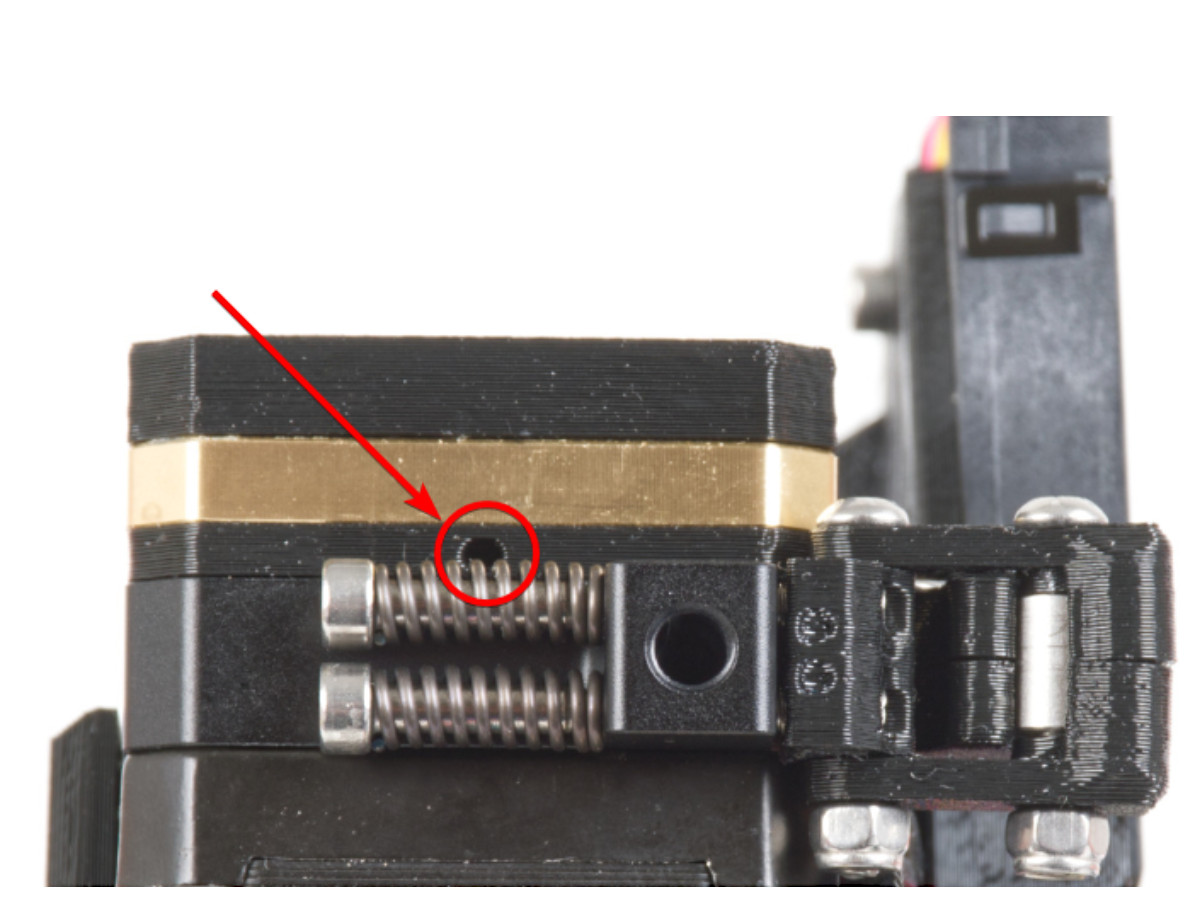 |
Aufsicht auf denCORE One (links) MK4 Druckkopf (rechts). Der XL-Druckkopf hat ein ähnlich positioniertes kleines Loch.
2) Einsetzen der Filament-Spitze
Wenn Sie keine Druckluft zur Hand haben, können Sie ein ähnliches Verfahren wie das oben beschriebene versuchen.
Bereiten Sie ein Stückchen Filament mit einer nicht fadenförmigen Spitze vor. Führen Sie das Filament wiederholt in den Extruder ein und entfernen Sie es wieder. Sie müssen das Filament mehrmals einführen und wieder herausnehmen, um eine gute Reinigung zu erzielen. Diese Technik ist möglicherweise nicht immer effektiv.
3) Entfernen des Sensors
Wenn die vorherigen Techniken nicht funktionieren, kann der Filament-Sensor zur manuellen Reinigung ausgebaut werden. Dieses Verfahren erfordert eine teilweise Demontage des Nextruders.
Beim XL stellen Sie sicher, dass die Firmware-Version 6.4.0 oder höher ist, um Zugriff auf die erforderliche Getriebeausrichtung im Druckermenü zu haben. Beim CORE One, MK4/S und MK3.9/S ist dieser Vorgang bei allen Firmware-Versionen verfügbar.
Versichern Sie sich, dass Sie den PG-assembly-adapter haben, bevor Sie mit dem folgenden Verfahren fortfahren. Wenn Sie ihn nicht haben können Sie ihn in unserem E-Shop kaufen oder Sie können ihn mit den unten stehenden Dateien drucken, je nachdem, welchen Drucker Sie verwenden.
PG-assembly-adapter E-Shop Seite
PG-assembly-adapter gedruckt mit CORE One, MK4/S, MK3.9/S, XL
PG-assembly-adapter gedruckt mit MK3/S/+, MK3.5/S
- Entladen Sie das Filament und warten Sie dann, bis der Drucker vollständig abgekühlt ist. Schalten Sie den Drucker danach aus.
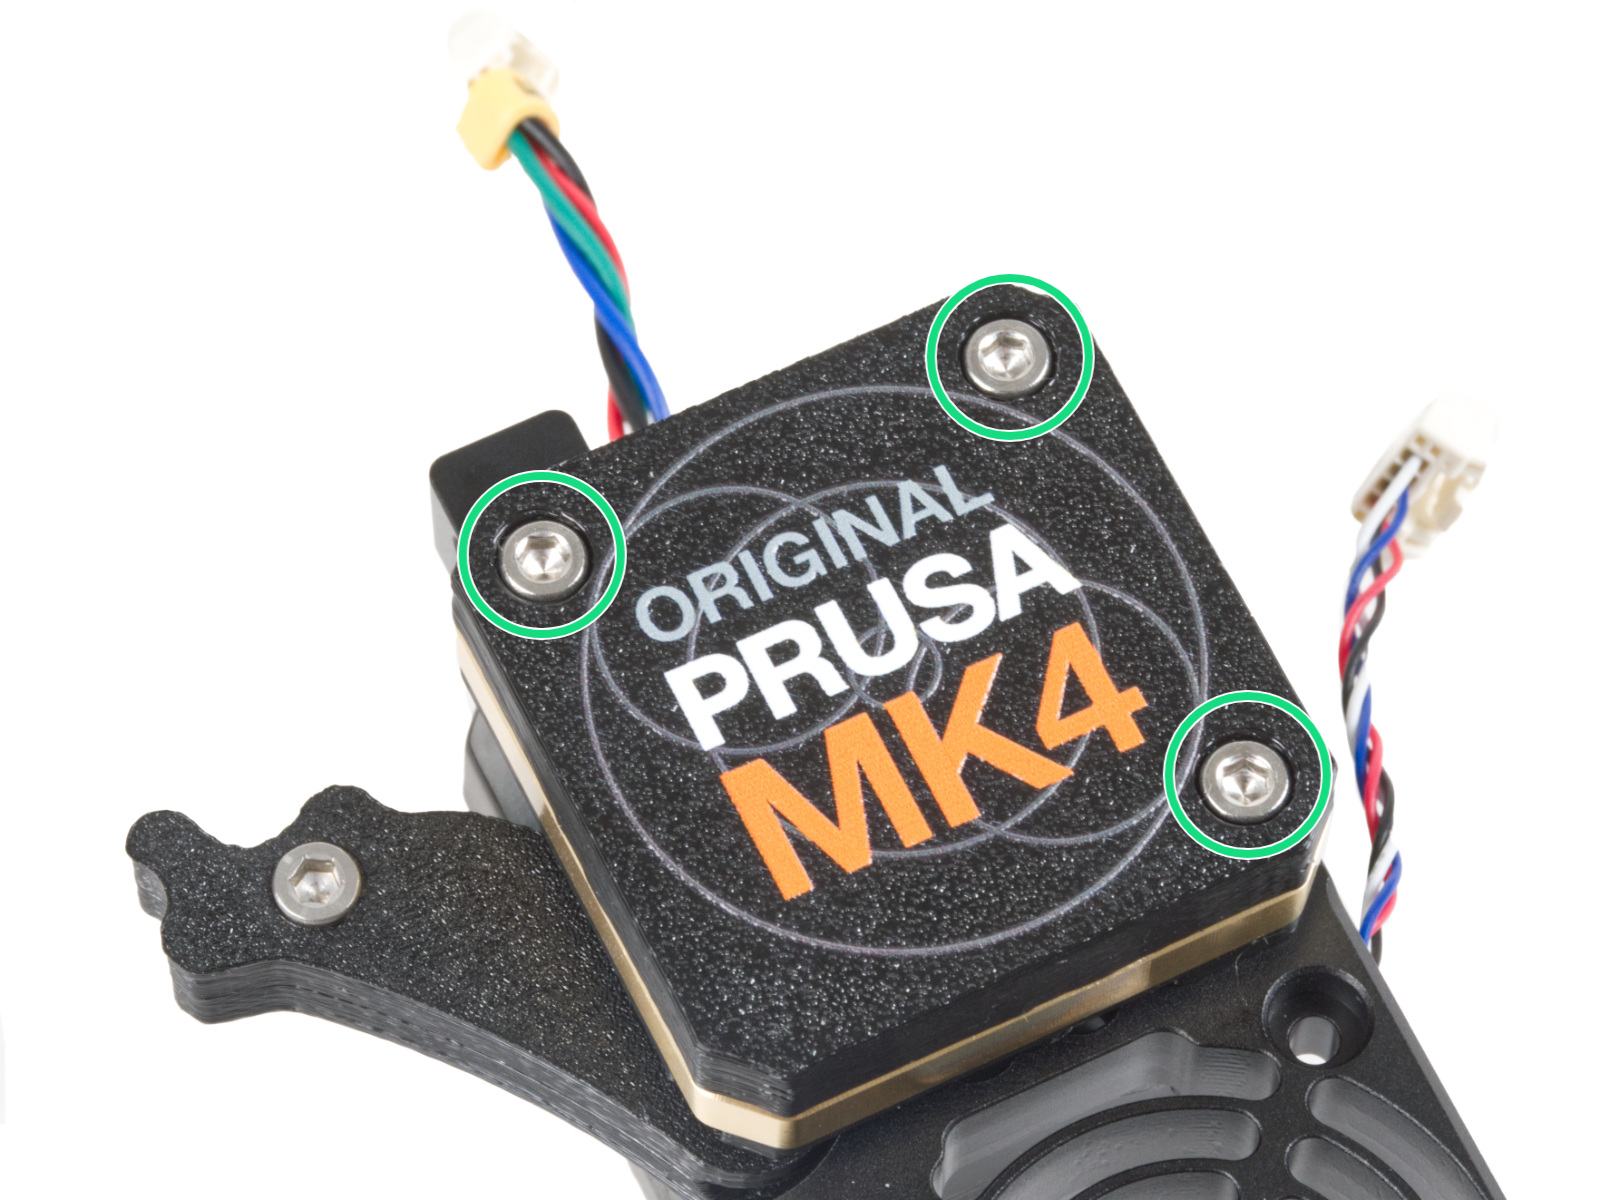
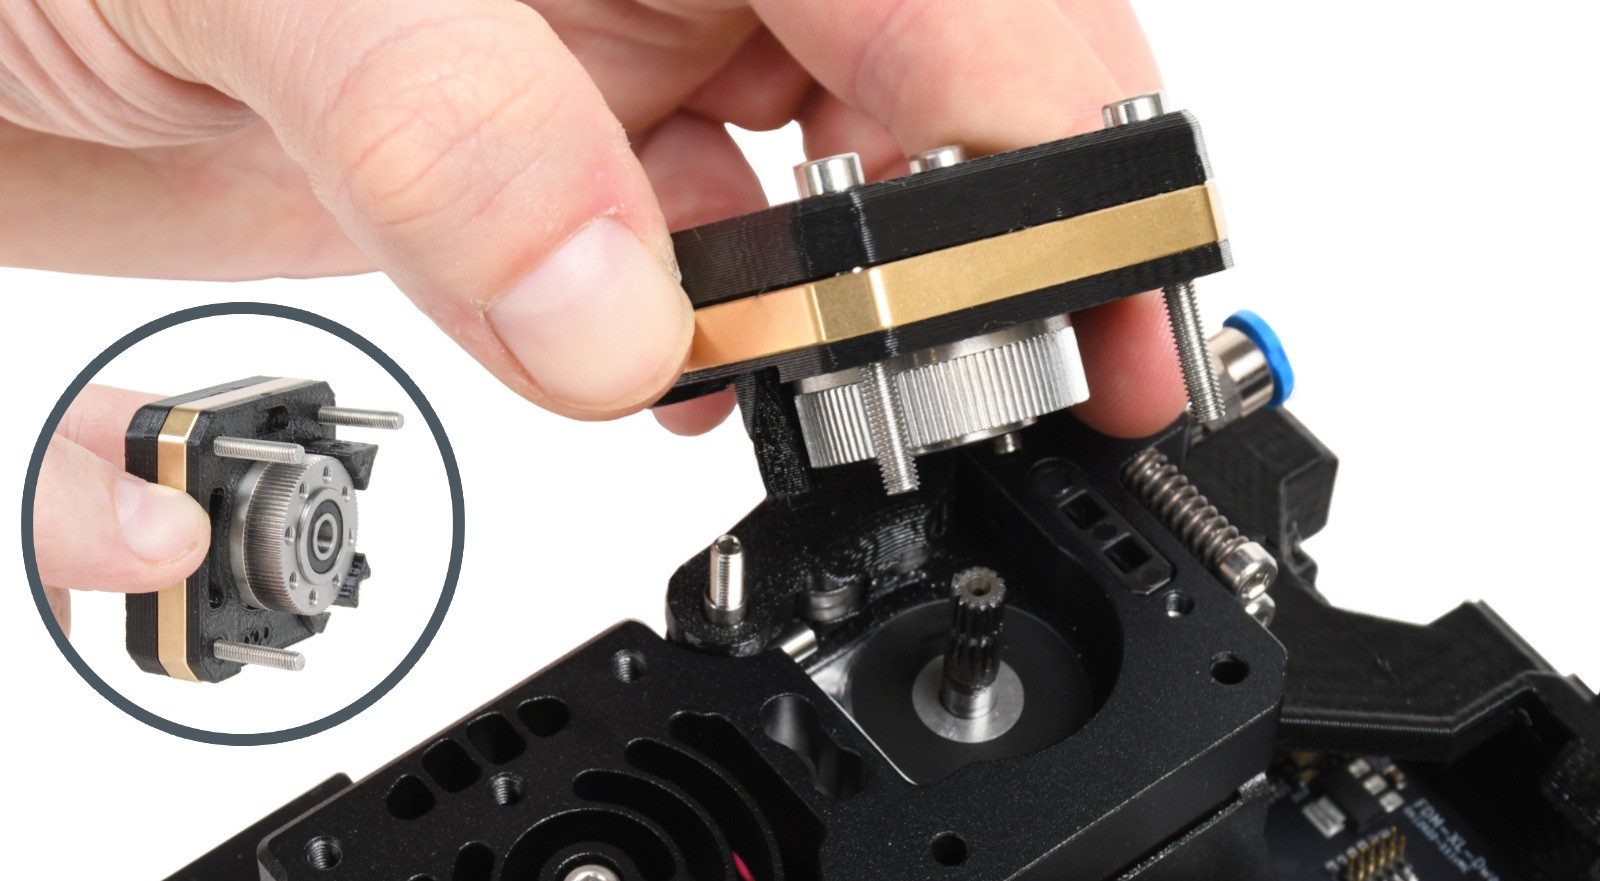
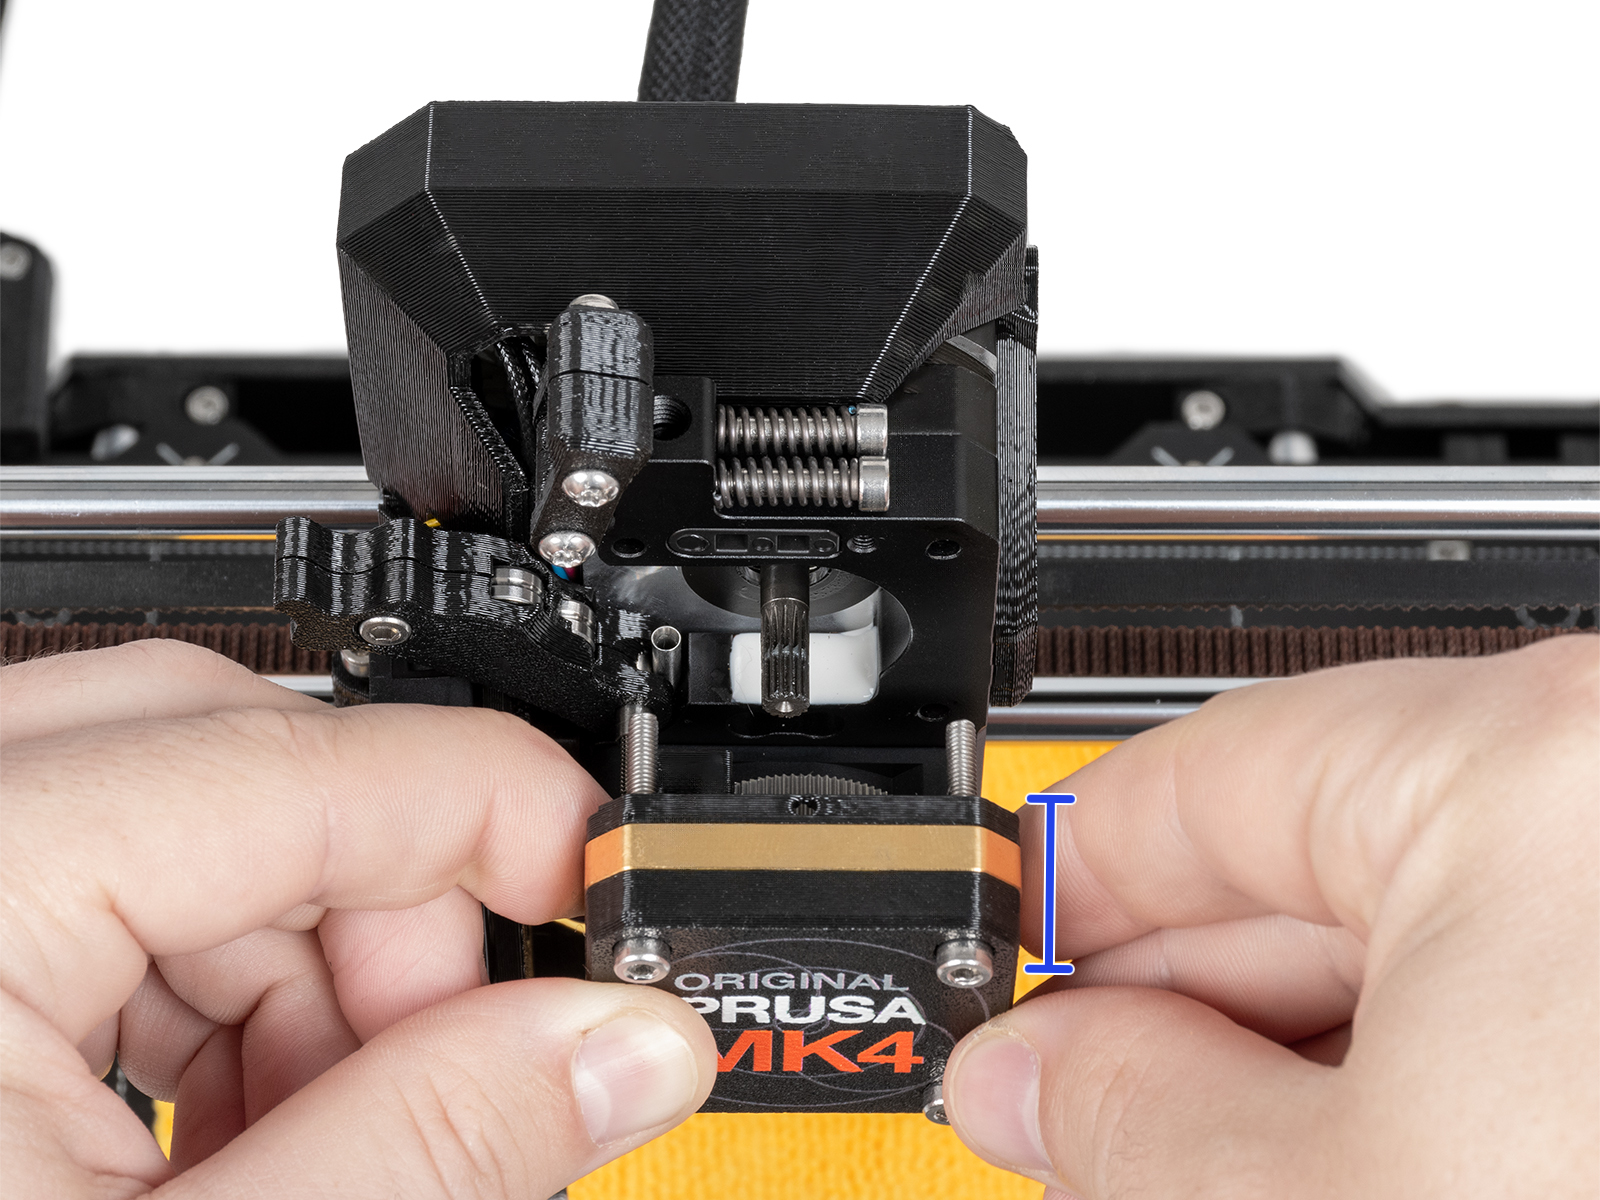
- Entfernen Sie den PG-Case zusammen mit dem PG-Ring, dem Getriebe und der Hauptplatte. Entfernen Sie alle diese Teile in einem Stück.
 |  |
 |  |
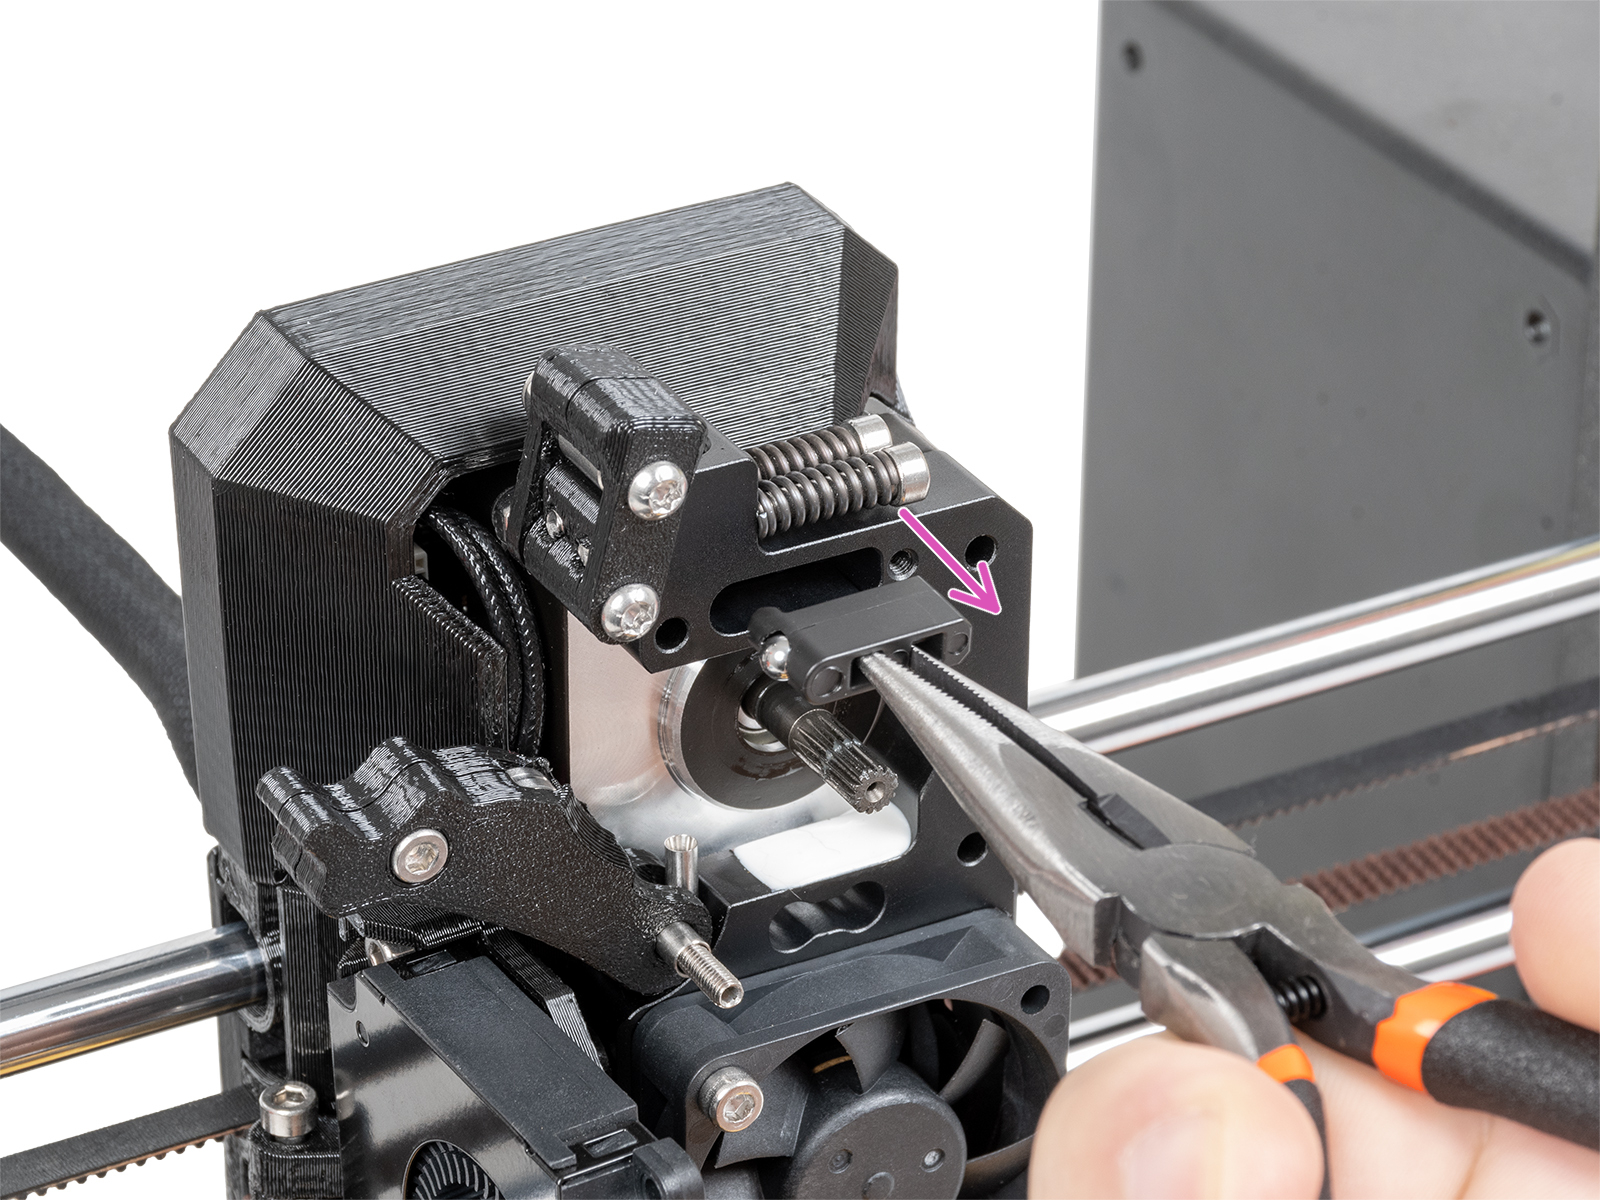
- Entfernen Sie den Prusa-ball-holder mit einer Zange.
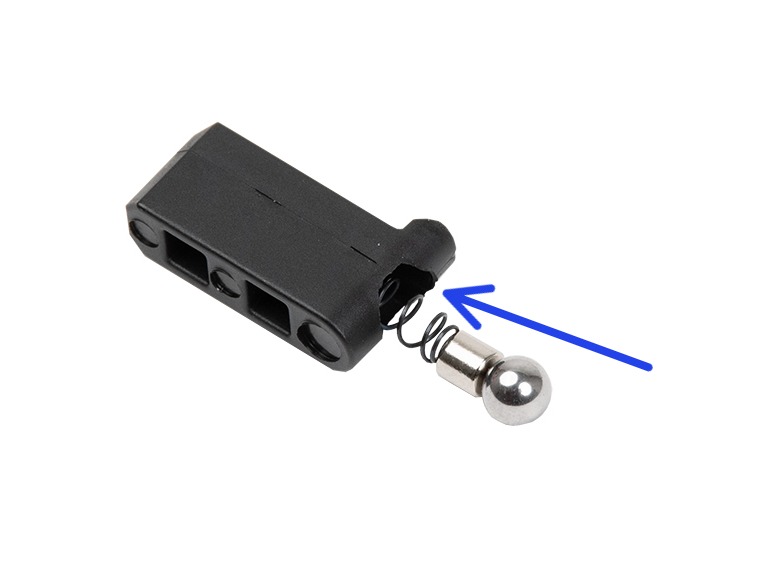
- Entfernen Sie vorsichtig die Kugel-Magnet-Feder-Kombination aus dem Prusa-ball-holder und säubern Sie sie von allen Verunreinigungen. Reinigen Sie auch den Schacht des Kühlkörpers.
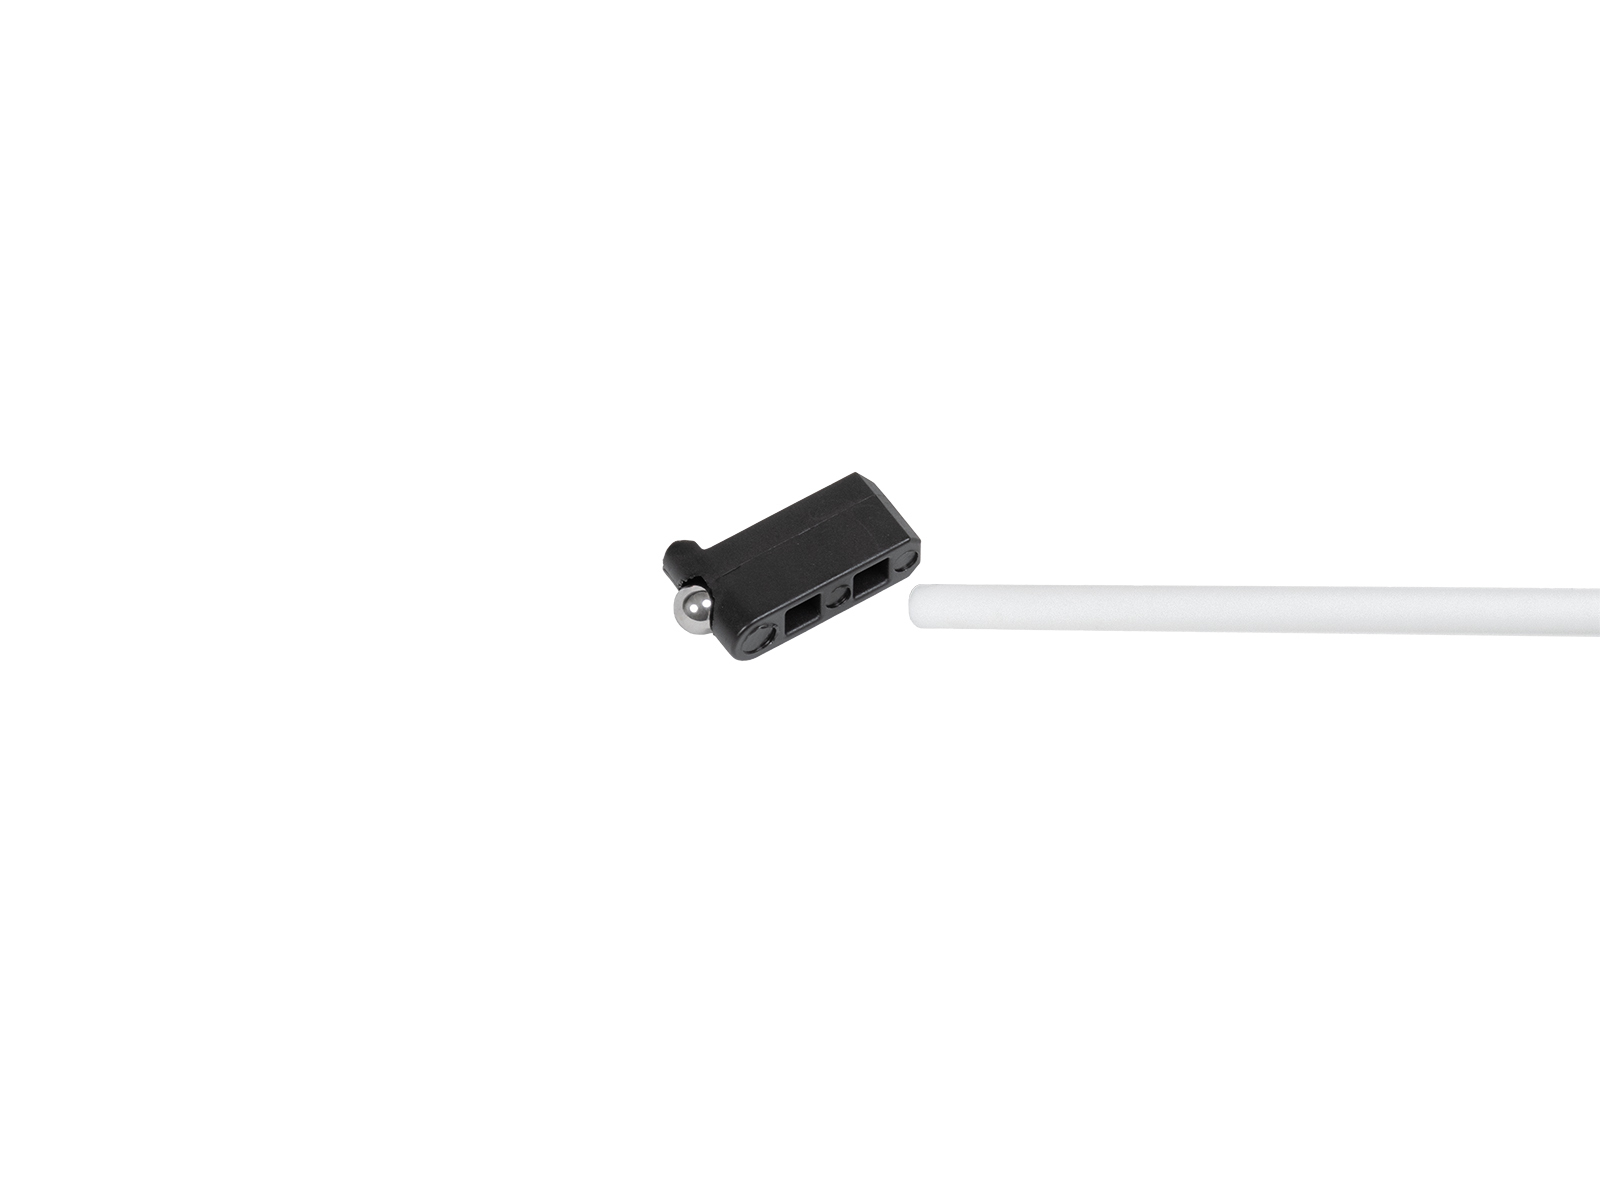 |  |
- Bauen Sie den Prusa-ball-holder in folgender Reihenfolge wieder zusammen: Stahlkugel, Magnet und Feder. Dann Setzen Sie den zusammengebauten Prusa-ball-holder in den Nextruder ein.
 |  |
- Bauen Sie den Block mit PG-Case, PG-Ring, Getriebe und Main-plate wieder zusammen.
- Führen Sie die Getriebeausrichtung durch und folgen Sie dabei dem Verfahren aus dem entsprechenden Getriebeausrichtung Artikel.
1 Kommentar
Der Link zur "Montageanleitung" im Schritt 6 ist ungültig.